
CL 06132 M - Fan Orbegozo - Free user manual and instructions
Find the device manual for free CL 06132 M Orbegozo in PDF.


| Product type | Pedestal fan |
| Brand | Orbegozo |
| Model | CL 06132 M |
| Adjustable height | Yes, maximum height 140 cm |
| Blade diameter | 40 cm |
| Number of speeds | 3 speeds |
| Oscillation | Yes, automatic oscillation |
| Power supply | 220-240 V ~ 50 Hz |
| Power | 45 W |
| Net weight | 3.5 kg |
| Package dimensions | 55 x 20 x 50 cm |
| Blade material | ABS plastic |
| Protection grille | Removable metal grille |
| Remote control | Yes, included |
| Timer | Yes, up to 120 minutes |
| Noise level | 55 dB (max) |
| Maintenance and cleaning | Unplug before cleaning, wipe with a damp cloth |
| Safety | Stable base, protection grille, thermal protection |
| Spare parts and repairability | Available through Orbegozo after-sales service |
Frequently Asked Questions - CL 06132 M Orbegozo
User questions about CL 06132 M Orbegozo
0 question about this device. Answer the ones you know or ask your own.
Ask a new question about this device
Download the instructions for your Fan in PDF format for free! Find your manual CL 06132 M - Orbegozo and take your electronic device back in hand. On this page are published all the documents necessary for the use of your device. CL 06132 M by Orbegozo.
USER MANUAL CL 06132 M Orbegozo
natural_image
Five-panel view of a metallic ceiling fan with four blades and a white spherical base (no text or symbols)CL 02105 M

natural_image
White overhead air conditioner fan with four blades (no text or symbols visible)CL 04105 B

natural_image
Modern double-decker air conditioner with four blades and a glass jar (no text or symbols visible)CL 06132 M
natural_image
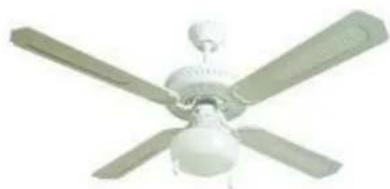
White overhead air conditioner fan with four blades (no text or symbols visible)CL 08132 B

natural_image
Modern double-decker air conditioner with four blades and a central hub (no text or symbols visible)CP 20132 M
natural_image
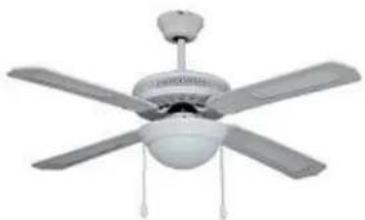
Modern office ceiling fan with four blades and a top-mounted head (no text or symbols visible)CP 25132 B
Sonifer, S.A.
Read this manual carefully before running this appliance and save it for reference in order to obtain the best results and ensure safe use.
flowchart
graph TD
    A["1: Screen with handles and indicator lights"] --> B["2: Top-down funnel with candle"]
    B --> C["3: Top-down lamp with candle and indicator lights"]
    C --> D["4: Top-down lamp with candle and indicator lights"]
    D --> E["5: Top-down lamp with candle and indicator lights"]
    E --> F["6: Top-down lamp with candle and indicator lights"]
    F --> G["7: Top-down lamp with candle and indicator lights"]
    G --> H["8: Top-down lamp with candle and indicator lights"]
    H --> I["9: Top-down lamp with candle and indicator lights"]
Dear Customer, If you follow the recommendations contained in this Instruction Manual, our appliance will give you constant high performance and will remain efficient for many years to come. Read the operating instructions carefully before putting the appliance into operation and keep the instructions including the warranty, the receipt and, if possible, the box with the internal packing. If you give this device to other people, please also pass on the operating instructions.
General Safety Instructions
- This appliance can be used by children aged from 8 years and above and persons with reduced physical, sensory or mental capabilities or lack of experience and knowledge if they have been given supervision or instruction concerning use of the appliance in a safe way and understand the hazards involved. Children must never play with the appliance. Cleaning and user maintenance must never be carried out by children without supervision.
- Children should be supervised to ensure that they do not play with the appliance.
-
Keep the appliance and the cable cord out of the reach of children less than 8 years old.
-
WARNING: In order to ensure your children's safety, please keep all packaging (plastic bags, boxes, polystyrene etc.) out of their reach.
- If the supply cord is damaged it must be repaired by the Authorized Service Agent to avoid a hazard.
- Never pull on the cord when unplugging.
- Do not use the unit with a damaged cord or plug, or if it is not working properly.
8.Do not handle the appliance with wet hands. - Never immerse the appliance in water or any other liquid.
- Make sure the appliance has been unplugged before cleaning.
- This appliance must be installed following the national regulations for electrical installations.
- This appliance is for household use only.
- In case that you need a copy of the instruction manual, you can ask for it writing an email to sonifer@sonifer.es
- WARNING: In case of misuse, there is a risk of possible injury.
Safety precautions
- The Ceiling Fan installation should be carried out by a qualified electrician.
- DO NOT use the fan close to a window. Rain may create an electrical hazard. Do not leave the fan operating adjacent to an area where water has been collected to avoid the potential of electrical hazard.
- Make sure that when the fan is fitted in the chosen position, there is no possibility of the rotating blades coming into contact with any object. Blades should be at least 2.30 m from floor when fan is hung.
• This apparatus must be earthed. - The method of disconnection from the mains supply must incorporate a switch or isolator with a minimum contact separation of 3 mm on all poles.
- If you are installing more than one ceiling fan make sure that you do not mix fan blade sets, even though they are from the same ceiling fan model.
-
Before beginning, disconnect power by removing fuse or turning off circuit breaker.
-
Once fan installation is completed make sure that all connections are secure to prevent fan from falling.
- Do not insert anything into the fan blades when ceiling fan is operating.
- Fan must be turned off and stopped before reversing fan direction.
- Check that the means of fitting the fan to the ceiling is capable of supporting the weight of the fan when in operation. (Minimum 50Kg.).
- This product is designed only for use in habitable zones (and not for sites constantly exposed to moisture).
- Do not install the ceiling fan in a bathroom or a site with high moisture content.
PARTS LIST
The pictures are for reference only. They may differ from those of the unit you purchased.
- Mounting bracket
- Down Rod
- Canopy
- Motor assembly
- Switch housing
- Bulb socket
- Glass
- Blade bracket
- Wooden blades
- Screws
- Chains

flowchart
graph TD
    A["Light Lamp"] --> B["Light Lamp with Candle"]
    B --> C["Light Lamp with Dish"]
    C --> D["Light Lamp with Blower"]
    D --> E["Light Lamp with Candle"]
    E --> F["Light Lamp with Light Bulb"]
    F --> G["Light Lamp with Candle"]
    G --> H["Light Lamp with Light Bulb"]
    H --> I["Light Lamp with Candle"]
    I --> J["Light Lamp with Light Bulb"]
    J --> K["Light Lamp with Light Bulb"]
Choose a suitable location to mount your fan. The place should be free from any obstruction and with, at least, 230 cm clearance from the trailing edge of blades to floor. The outlet box must be able to support a hanging weight of 50 kilo and must be secured firmly with wood screw to prevent coming loose to the building structure.
- Mounting Bracket assembly: Fasten mounting bracket to ceiling outlet box with screws. Be very careful not to damage wiring. Insert the down road and ball through the canopy's whole.
- Pass the motor wires through the down rod and tight it to the fan with the correspondent rivet.
- Make the wiring connections as shown in "Wiring instructions" section.
- Attach the mounting bracket to the outlet box using screws and washers.
- Install the blades:
a. Assemble blades into blade holders with screws and washers and nuts.
b. Fasten the assembled blades onto the motor with screws and lock washers provided.
c. Make sure the blades are firmly secured and your fan is ready in use.
- Install a bulb (E27 60W max, not included)
- Place the glass without applying much force (it could get broken)
- Install the chains.
- Check that the unit is completely installed.
WIRING INSTRUCTIONS
Make sure to shut off the power of the point where you are going to install the ceiling fan.
There are four colored wires coming from the top of motor head.
• Brown wire: Live (+) fan.
• Blue wire: Neutral (-)
• Green/Yellow wire: Earth wire
- Black wire: Light (+)
Note: When making connections, twist the stripped copper threads of wires tightly together and cap off with the wire connectors provided, again by twisting the connector firmly into the copper.
Connect the neutral wire from the fan (blue) to the neutral one in the electrical installation.
Connect the live wire from the fan (brown) together with the light wire (black) to the live one in the electrical installation.
Connect the earth wire from the fan (green and yellow) to the earth one in the electrical installation.
Make sure that the bare copper of the wires are fully encased by the wire connectors, to prevent electrical shock from occur.
OPERATION
- Pull the light chain in order to turn it on and off.
- Pull the fan pull-chain switch for sequence of high, medium, low, off in circles.
- Fan reverse: The slide switch controls the direction of the fan, push the slide switch down for forward, and up for reverse action of blades. (Normally, hot weather use forward and cold weather use reverse for upward the air).
Warning: Before pushing the reverse slide switch, it is necessary to stop the action of the blades by turning off the fan.
Important: The bulbs for this fan must be E27 / 60W max.
CLEANING
Clean with a soft, dry cloth. Never use scouring pads abrasive or chemical cleaners. Do not allow condensation to come in contact with the electrical components.
| Model | Motor power | Bulb |
| CL 02105 M | 50 W | E27 60W x 1 |
| CL 04105 B | 50 W | E27 60W x 1 |
| CL 06132 M | 60 W | E27 60W x 1 |
| CL 08132 B | 60 W | E27 60W x 1 |
| CP 20132 M | 60 W | E27 60W x 2 |
| CP 25132 M | 60 W | E27 60W x 2 |
Disposal of old electrical appliances.

The European directive 2002/96/EC on Waste Electrical and Electronic Equipment (WEEE), requires that old household electrical appliances must not be disposed of in the normal unsorted municipal waste stream. Old appliances must be collected separately in order to optimize the recovery and recycling of the materials they contain, and reduce the impact on human health and the environment. The crossed out "wheeled bin" symbol on the product reminds you of your obligation, that when you dispose of the appliance, it must be separately collected. Consumers should contact their local authority or retailer for information concerning the correct disposal of their old appliance.
DECLARATION OF CONFORMITY: This device complies with the requirements of the Low Voltage Directive 2006/95/EC and the requirements of the EMC directive 2004/108/EC.
FRENCH
CONSEILS DE SECURITE
flowchart
graph TD
    A["1: Screen with handles and indicator lights"] --> B["2: Top-down lamp with lid"]
    B --> C["3: Top-down lamp with candle and lamp"]
    C --> D["4: Top-down lamp with handle and tray"]
    D --> E["5: Top-down lamp with lamp and tray"]
    E --> F["6: Top-down lamp with candle and tray"]
    F --> G["7: Top-down lamp with handle and tray"]
    G --> H["8: Top-down lamp with candle and tray"]
    H --> I["9: Top-down lamp with fan blade and fan blade"]
Brand : Orbegozo
Model : CL 06132 M
Category : Fan