
Ripjaws MX780 - Mouse G.Skill - Free user manual and instructions
Find the device manual for free Ripjaws MX780 G.Skill in PDF.


| Product Type | Gaming Mouse |
| Model | Ripjaws MX780 |
| Brand | G.Skill |
| Connectivity | Wired USB 2.0 |
| Sensor | Avago 9800 Laser Sensor |
| DPI Range | 200 - 8200 DPI (adjustable in increments of 50) |
| Buttons | 8 programmable buttons |
| Lighting | RGB LED with customizable zones |
| Weight | Adjustable with included weights (up to 30g) |
| Dimensions (L x W x H) | 127 x 89 x 39 mm |
| Cable Length | 2.0 m braided cable |
| Polling Rate | 1000 Hz |
| Onboard Memory | 512 KB for profile storage |
| Software | G.Skill Ripjaws Software (customization, macros, lighting) |
| Adjustable Features | Palm rest height, weight system, button layout |
| Power Source | USB bus powered |
| Cleaning | Wipe with dry cloth; avoid liquids |
| Safety | CE, FCC certified |
| Spare Parts | Replacement mouse feet and weight kits available |
| Warranty | 2 years limited warranty |
Frequently Asked Questions - Ripjaws MX780 G.Skill
User questions about Ripjaws MX780 G.Skill
0 question about this device. Answer the ones you know or ask your own.
Ask a new question about this device
Download the instructions for your Mouse in PDF format for free! Find your manual Ripjaws MX780 - G.Skill and take your electronic device back in hand. On this page are published all the documents necessary for the use of your device. Ripjaws MX780 by G.Skill.
USER MANUAL Ripjaws MX780 G.Skill
natural_image
Technical line drawing of a mechanical component or assembly (no text or symbols)RIPJAWS MX780
User Manual
Table of Contents
4 Introduction
Layout Overview
6 Profiles
Introducing Profiles
Link Program to a Profile
Save Profile to Device
Create a Profile
Select a Profile
Delete a Profile
Copy a Profile
Export/Import a Profile
Apply Profile Setting
9 Keys
Introducing Programmable Keys
Customize a Programmable Key
11 Macros
Introducing Macros
12 Macros (Keystroke)
Create a Macro
Delete a Macro
Copy a Macro
Export/Import a Macro
Record a Macro
Edit a Macro
Insert Keystrokes in Macro
15 Macros (Text)
Create a Text Macro
Delete a Text Macro
Copy a Text Macro
Export/Import a Text Macro
16 Lighting Profiles
Introducing Lighting Profiles
Create a Lighting Profile
Add a Color
Change a Color
Table of Contents
19 Setting
Introducing Keyboard Settings
Polling Rate
DPI Stage
Double Click
Windows Pointer Speed
Mouse Wheel Scroll Speed
Liftoff Range
22 Lighting
Introducing Lighting
Background Lighting
Apply Color Lighting
Adjust Brightness
Effect Lighting
Lighting Sync With System
26 Additional Settings
Driver Settings
Reset to Default Setting

natural_image
Abstract geometric pattern of intersecting diagonal lines (no text or symbols)Introduction
The G.SKILL Unified Driver System is the software system that allows full control of macros, lighting effects, and various customizations for your RIPJAWS MX780 laser gaming mouse.
To help you through this manual, here are some useful key terms to keep in mind:
- Profile:
A full collection of key settings and lighting options.
- Key:
Refers to a mouse input, such as a button press or scroll wheel action. Each key may have its own default function, or it can be programmed to have a customized function through the software system.
- Macro:
A powerful function that allows you to execute a series of key presses with the press of a designated button.
To open the G.SKILL Unified Driver System, go to the system tray and double click on the G.SKILL icon.
You are now ready to begin.

natural_image
Abstract geometric pattern of intersecting diagonal lines (no text or symbols)Introduction
Layout Overview
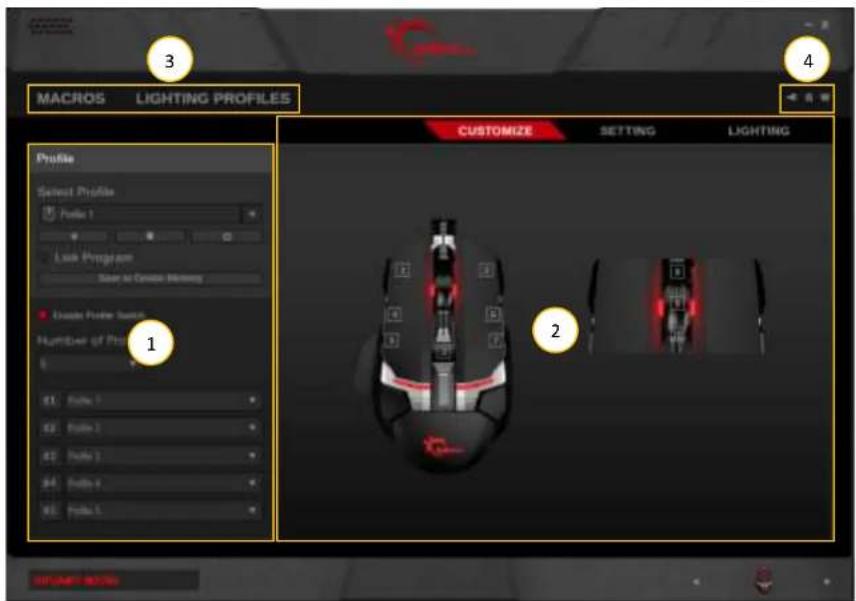
The G.SKILL Unified Driver System has four main sections:
- Profiles: Create and manage profiles. Activate and store profiles to the mouse.
- Profile Settings: Customizable settings for each profile.
- Macros & Lighting Profiles: Create and manage macros and lighting profiles.
- Additional Settings: Access to language setting, device information, firmware and software updates, and profile reset.
Profiles
Introducing Profiles
A profile is a collection of settings that can be saved into the on-board memory of your mouse, allowing the customization to follow the device, no matter which computer it's connected to.
This section will help you manage your profiles.

natural_image
Abstract geometric pattern of intersecting diagonal lines (no text or symbols)Profiles
Link Program to a Profile
You have the option to automatically load a profile when launching a certain program.
Check the box next to "Link Program" and select a *.exe file to link the selected profile to a program.
Save Profile to Device
Your Ripjaws MX780 mouse can store up to five profiles within the on-board memory. Click "Save to Device Memory" to save the currently listed profiles to your mouse.
Once the profiles are saved to the device, a small mouse icon will appear to the left of the profile name.

Profiles
Create a Profile
To create a new profile, click on the "+" button located under the profile name. A new profile will be automatically generated using default settings.
Select a Profile
Click the upside-down triangle to the right of the profile name for a drop-down list of available profiles. If only one profile is available, the drop-down list will be unavailable.
Delete a Profile
Click on the trash bin icon located below the profile name to delete a profile. A confirmation dialogue window will pop up to confirm the deletion. A profile cannot be deleted if there are no other selectable profiles or if the profile is currently in use by the device.
Copy a Profile
Click on the gear icon below the profile name, then choose "Copy" from the list to make an exact copy of the profile.
Export/Import a Profile
Click on the gear icon below the profile name, then choose "Export" (or "Import") from the list. A window will prompt you to choose a location and a file name to save (or load) your profile.
Apply Profile Setting
To apply the current profile settings, click "Save to Device Memory".

Keys
Introducing Programmable Keys
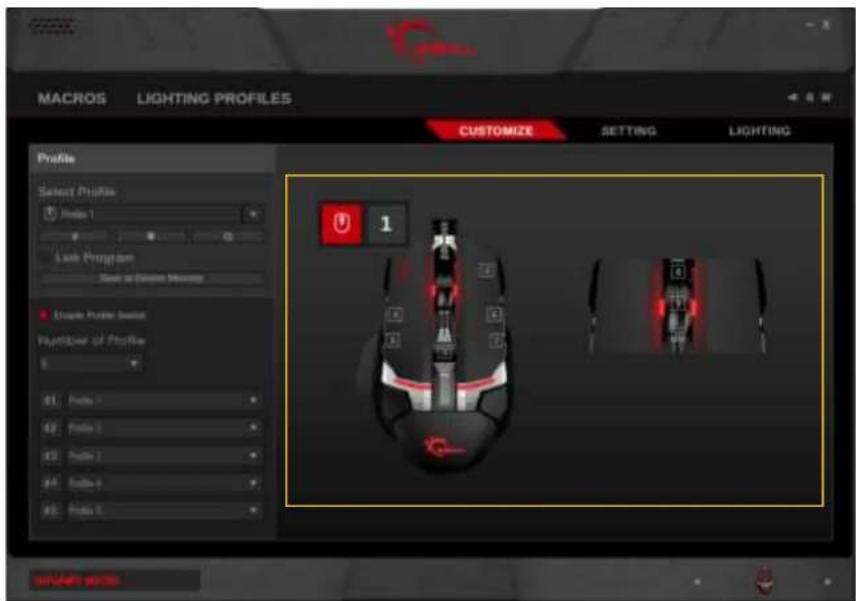
Under the "Customize" menu, you can customize the function of each key on the keyboard. When the mouse cursor hovers over a programmable key, the display will show the key and its current function.
Keys
Customize a Programmable Key
Click on the key you wish to customize, and a "Key Assignment" window will pop up. Choose from the drop-down list for the desired function. Once the desired function is selected, click "Save" to return to the "Customize" menu.
Once you have finished customizing the key functions, please click "Save to Device Memory" under the profile name to apply the settings.
Note: Make sure you the correct profile is selected before customizing the key function to prevent unwanted changes.
Macros
Introducing Macros
There are two kinds macros you can set: keystroke macro and text macro.
If you are looking to set delays or customize using keystrokes within the macro, then use the keystroke macro.
If you are looking to set text-only macro, then use the text macro.

Macros (Keystroke)
Create a Macro
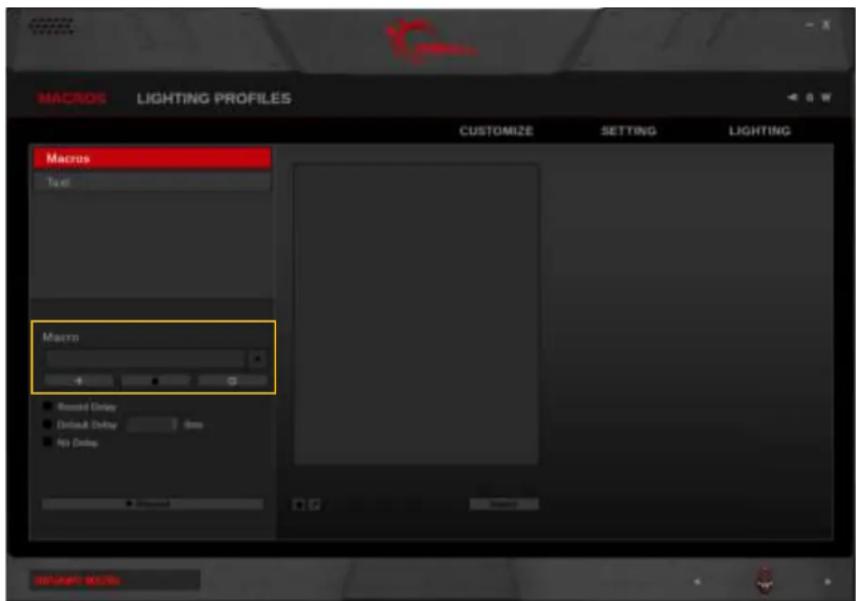
In the left column, click on the "+" button to create a new macro. Options for recording a macro will appear when a macro is created.
Delete a Macro
Click on the trash bin icon below the macro name to delete the current macro.
Copy a Macro
Click on the gear icon below the macro name and select "Copy" to make a duplicate of the current macro.
Export/Import a Macro
Click on the gear icon below the macro name and select "Export" (or "Import") from the list. A window will prompt you to choose a location and a file name to save (or load) the macro.
Macros (Keystroke)
Record a Macro
Click on the "Record" button on the bottom of the left column. Macro will begin recording automatically. The recorded macro will appear in the middle column.
Note: Before recording the macro, you may choose to record the delay, use a default delay, or no delays. Default delays can be changed in 10ms increments. Type "2" in the textbox for 20ms, and "20" for 200ms.
To end recording, click "Stop" on the bottom of the left column.

Macros (Keystroke)
Edit a Macro
You can delete or edit a specific macro command by clicking on the trash bin icon or the pencil icon, respectively, on the bottom of the middle column.
Insert Keystrokes in Macro
Click on the keystroke you wish to edit. Then click "Insert" on the bottom of the middle column. Options will appear in the right column to allow inserting before or after the currently selected keystroke. Then click on "Record" in the right column to record and insert additional keystrokes.
Click "Save" to save the changes.

Macros (Text)
Create a Text Macro
Click the "+" to create a new text macro. Then type the desired text in the textbox on the right. The changes will be automatically saved.
Delete a Text Macro
To delete the text macro, click on the trash bin icon below the text macro name. To clear the text for the text macro, click on "Clear" below the textbox.
Copy a Text Macro
Click on the gear icon below the text macro name, and select "Copy" to duplicate the text macro.
Export/Import a Text Macro
Click on the gear icon below the text macro name, and select "Export" (or "Import") to save (or load) the text macro to a file.

Lighting Profiles
Introducing Lighting Profiles
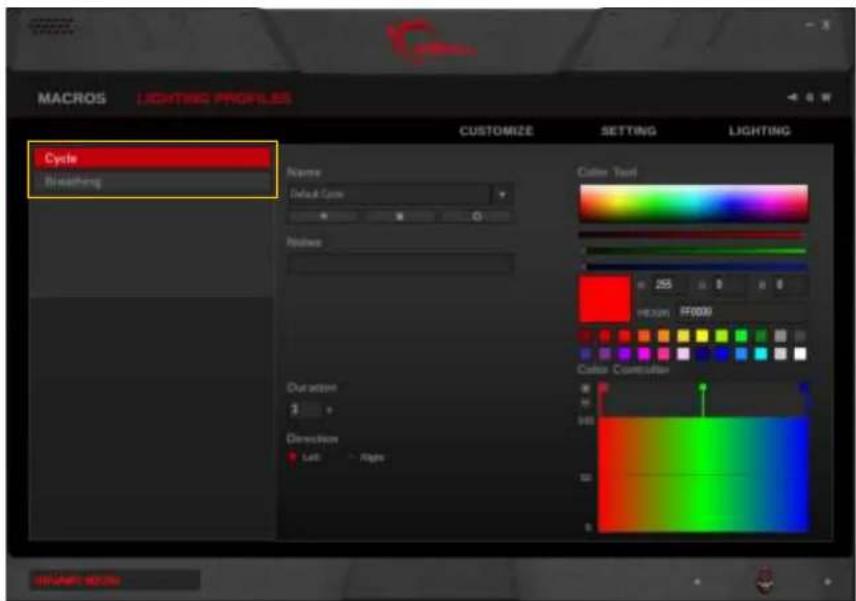
Lighting profiles are customizable lighting patterns that can be applied to your device.
Lighting profiles are available in the following categories: Cycle and Breathing.
- Cycle:
A continuous stream of colors, changing from one color to the next.
- Breathing:
Lighting will dim and brighten, while cycling through the set colors.
Lighting Profiles
Create a Lighting Profile
First, select a lighting category, then click on the "+" button under "Name" to create a lighting profile.
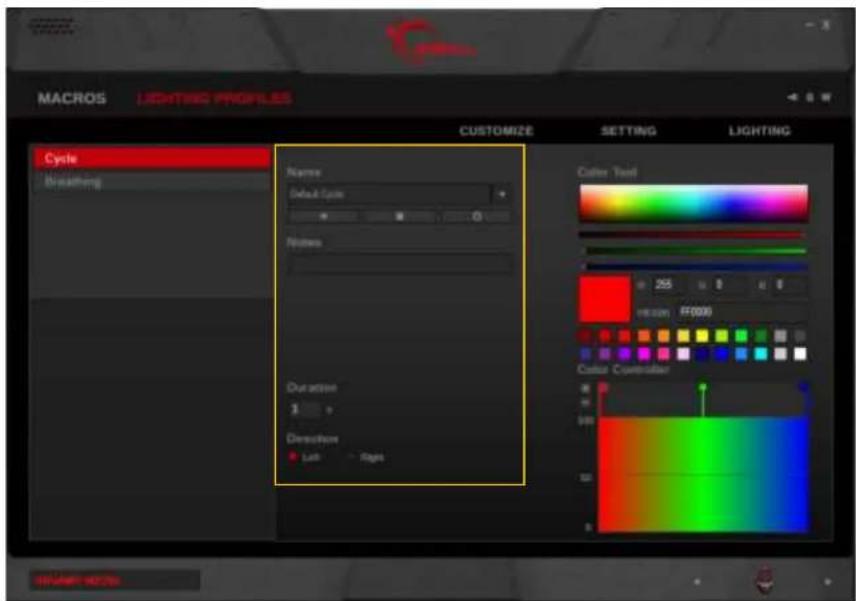
Once a lighting profile is created, associated options will be available for customizing.
Each lighting profile will be automatically saved. However, to apply the lighting pattern to the device, please go to the "Lighting" section and choose a lighting profile to apply.
Lighting Profiles
Add a Color
To increase a color point, click on the "+" under "Color Controller" in the right column. A new color point will be added.
Change a Color
Click the square of a color point under "Color Controller", and then change the color by doing one of the following:
- Click in the color selection rectangle
- Click and drag the RGB color slider
- Enter the RGB value
- Enter the HEX color code
- Select from the preset color palette

Setting
Introducing Keyboard Settings
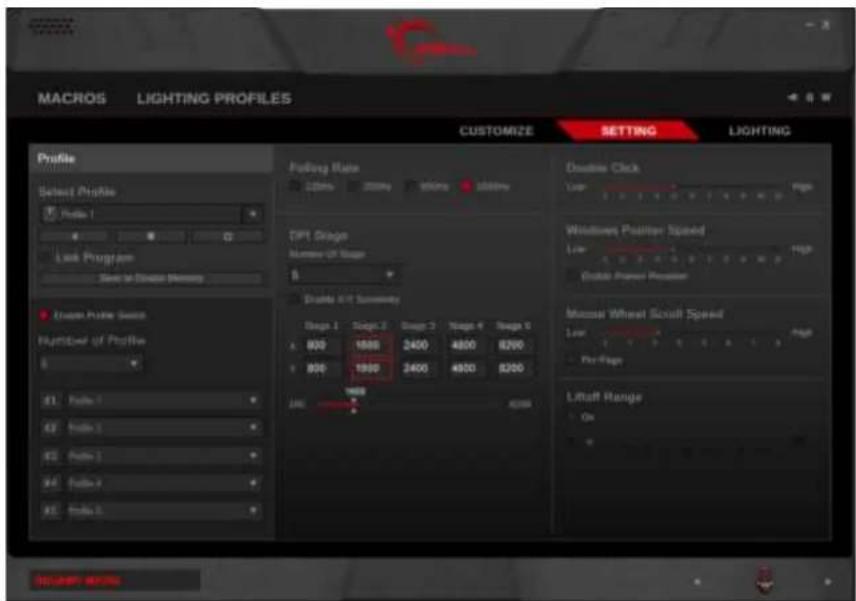
The "Setting" menu will allow you to set general settings for your device. After you have customized your settings, please click on "Save to Device Memory" to ensure the settings are correctly applied to your device.
Setting
Polling Rate
Click to select the desired polling rate of your device. A higher number indicates a faster polling rate.
DPI Stage
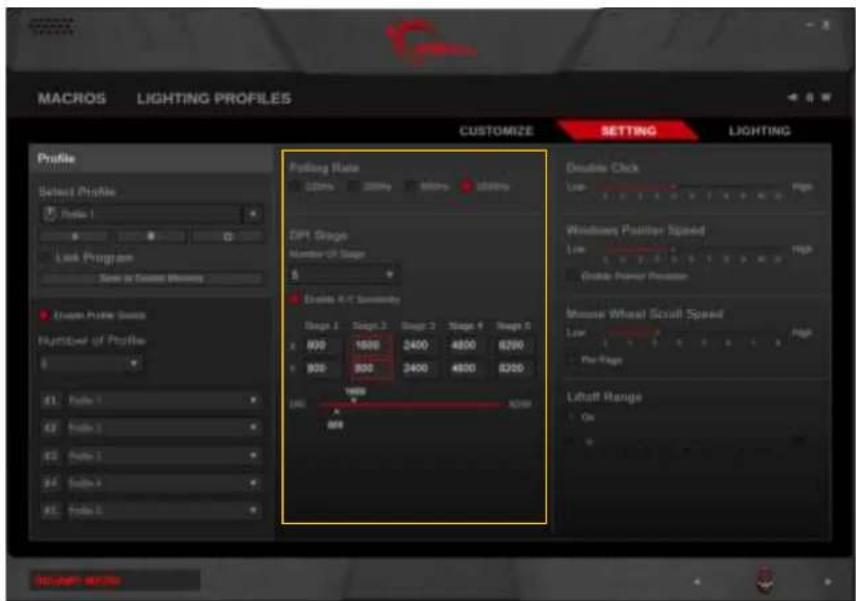
Set the number of DPI stages you would like to switch through in the selected profile. The mouse is capable of switching through up to 5 stages.
Select a stage and drag the slider to adjust the dpi.
The X-axis and Y-axis dpi values may be independent. To set independent X-axis and Y-axis dpi values, please check "Enable X-Y Sensitivity", then drag the top slider to adjust the X-axis and bottom slider to adjust the Y-axis dpi value.
Setting
Double Click
Drag the slider to adjust how fast a key will repeat itself when the key is held down.
Windows Pointer Speed
Drag the slider to adjust the speed of the mouse cursor.
Mouse Wheel Scroll Speed
Drag the slider to adjust the speed of the scroll wheel. Check "Per Page" to scroll at intervals of one page.
Liftoff Range
Enable this option to adjust the lift distance required for the mouse to stop registering. A low liftoff range means lower lift distance, and a high liftoff range means a higher lift distance.

Lighting
Introducing Lighting
Lighting may be customized and applied to your mouse. There are options to easily set a single overall color, individual lighting, or effect lighting from lighting profiles.
"Background Lighting", "Effect Lighting", and "Lighting Sync With System" are available lighting options.
Note: Please make sure to select the correct profile before making changes to lighting. Any changes to lighting will affect the currently selected profile. Please also make sure to "Save to Device Memory" to ensure lighting is correctly applied to the mouse.

Lighting
Background Lighting
Choosing this option enables static lighting on the mouse.
Apply Color Lighting
To apply a color lighting, click to select a desired color on the bottom, then click on the desired lighting region to apply that color.
Single clicks will enable and disable lighting to that particular light. So applying a new color will need two clicks to assign a new color.

Lighting
Adjust Brightness
Drag the slider to adjust the brightness of the lighting. Sliding all the way to the left will turn off the lighting.
Lighting can be disabled by checking the box next to "Disable Lighting". To enable or change any lighting functions, please make sure this checkbox is cleared.

Lighting
Effect Lighting
Under this option, clicking on a number will open a pop-up window. From here, you can select the desired lighting profile from the list. This will apply the lighting profile to the selected area of the device.
Lighting Sync With System
Checking this box will allow the mouse lights to turn off whenever the operating system is off. If this box is unchecked, then the mouse lights will be on whenever power is provided through the USB port, even if the operating system is off.
This option can be selected along with "Background Lighting" and "Effect Lighting".

Additional Settings
Driver Settings
Click on the wrench icon on the top right to access the driver settings. From here, you can change language, update firmware, update software, reset to default driver setting, and more.
Click the "G" button to visit the G.SKILL webpage.
Click the "W" button to view the warranty document.
Reset to Default Setting
Choosing to activate this option will delete and reset the currently selected profile to its default state.


- Table of Contents
- Introduction
- Profiles
- Keys
- Macros
- Macros (Keystroke)
- Macros (Text)
- Lighting Profiles
- Setting
- Lighting
- Additional Settings
- Introduction
- - Profile:
- - Key:
- - Macro:
- Layout Overview
- Profiles
- Introducing Profiles
- Link Program to a Profile
- Save Profile to Device
- Create a Profile
- Select a Profile
- Delete a Profile
- Copy a Profile
- Export/Import a Profile
- Apply Profile Setting
- Keys
- Introducing Programmable Keys
- Customize a Programmable Key
- Macros
- Introducing Macros
- Macros (Keystroke)
- Create a Macro
- Delete a Macro
- Copy a Macro
- Export/Import a Macro
- Record a Macro
- Edit a Macro
- Insert Keystrokes in Macro
- Macros (Text)
- Create a Text Macro
- Delete a Text Macro
- Copy a Text Macro
- Export/Import a Text Macro
- Lighting Profiles
- Introducing Lighting Profiles
- - Cycle:
- - Breathing:
- Create a Lighting Profile
- Add a Color
- Change a Color
- Setting
- Introducing Keyboard Settings
- Polling Rate
- DPI Stage
- Double Click
- Windows Pointer Speed
- Mouse Wheel Scroll Speed
- Liftoff Range
- Lighting
- Introducing Lighting
- Background Lighting
- Apply Color Lighting
- Adjust Brightness
- Effect Lighting
- Lighting Sync With System
- Additional Settings
- Driver Settings
- Reset to Default Setting
Brand : G.Skill
Model : Ripjaws MX780
Category : Mouse