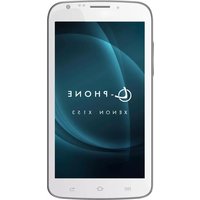
Xenon X153W - Smartphone Leotec - Free user manual and instructions
Find the device manual for free Xenon X153W Leotec in PDF.


| Product Type | Smartphone |
| Brand | Leotec |
| Model | Xenon X153W (L-Phone Xenon X153) |
| Dimensions (L×W×T) | 151.1 × 80.5 × 9.8 mm |
| Weight (with battery) | 200 g |
| Display | 5.3 inch QHD IPS capacitive touchscreen, 540×960 pixels |
| Processor | MT6589 Quad Core 1.2 GHz |
| Operating System | Android 4.2 (Flash support) |
| RAM | 1 GB DDR3 |
| Internal Storage | 4 GB (expandable via microSD up to 32 GB) |
| SIM Card | Dual SIM (3G WCDMA) |
| Network Bands | WCDMA 850/2100 MHz, GSM 850/900/1800/1900 MHz |
| Rear Camera | 8.0 MP with flash |
| Front Camera | 2.0 MP |
| Connectivity | WiFi 802.11 b/g/n, Bluetooth 4.0, GPS + A-GPS, USB 2.0 |
| Sensors | G-sensor, light sensor, proximity sensor |
| Battery | Li-Polymer 3200 mAh (removable) |
| Standby Time | 120-150 hours |
| Talk Time | >5 hours |
| Audio | 3.5 mm headphone jack, built-in speaker, omnidirectional microphone |
| Charging | DC 5V via micro USB |
| Included Accessories | AC adapter, USB cable, user manual |
| Warranty | 24 months for device, 6 months for battery |
| Cleaning | Use a soft, dry cloth; avoid alcohol, thinner, or benzene |
| Water Resistance | Not water resistant |
Frequently Asked Questions - Xenon X153W Leotec
User questions about Xenon X153W Leotec
0 question about this device. Answer the ones you know or ask your own.
Ask a new question about this device
Download the instructions for your Smartphone in PDF format for free! Find your manual Xenon X153W - Leotec and take your electronic device back in hand. On this page are published all the documents necessary for the use of your device. Xenon X153W by Leotec.
USER MANUAL Xenon X153W Leotec
e
e
L-PHONE XENON X153
MANUAL DE USUARIO / USER MANUAL
Versión 1.0
0
TABLA DE CONTENIDO
3.9 Ajustes
■ )larmas
4.11 Radio
4.12 Búsqueda
3.17 Mensajería
1.1 Overview ......38
1.2 Safety guide 38
1.3 Safety warnings and notices 38
1.3.1 General attention.... 31
1.3.2 Notices when using your phone 31
1.3.3 Notices when using the battery 32
1.3.4 Charging your phone 33
1.3.5 Cleaning and maintenance 34
9 Getting Started....35
2.1 Component name and explanation ...... 35
2.1.1 Technical parameters....35
2.1.2 Icons 35
9.9 Key explanations.... 36
2.3 Using the touchscreen 36
2.4 Connecting to the network.... 37
9.4.8 Inserting and removing the SIM card 37
9.4.9 Turning your phone on and off 37
2.4.3 Unlocking the SIM card 37
2.4.4 Unlocking your phone 38
2.4.5 Connecting to the network 38
2.4.6 Making a call 38
2.4.7 Making a domestic call 38
2.4.8 Making an international call 38
2.4.9 Making a call from the list 39
2.4.10 Making an emergency call 39
2.4.11 Call menu 39
3 Functional Menu 40
3.1 FILE MANAGEMENT 40
3.2 SENDING AN EMAIL 40
3.3 DIALING 40
3.4 3G VIDEO CALLS 48
3.5 CALCULATOR 48
3.6 BROWSER 48
3.7 VOICE RECORDER 48
3.8 CALENDAR 49
3.9 SETTINGS 49
3.10 CLOCK 43
3.11 RADIO 44
3.12 SEARCH 44
3.13 CONTACTS 44
3.14 GALLERY 45
3.15 WIRELESS KEYBOARD 45
3.16 CAMERA 45
3.17 MESSAGE 46
3.18 BLUETOOTH PROXIMITY SENSOR 46
3.19 NOTIFICATION MENU 47
3.20 DOWNLOAD CONTENT 47
3.21 MUSIC 47
3.22 CALL RECORDS 48
3.23 WIDGET 48
3.24 SELECT WALLPAPER SOURCE 48
- Text Input 48
5 SD Card Introduction 49
6 FAQs and Solutions 50
1 The Basics
1.1 Overview
Thank you for choosing the LEOTEC Xenon X853digital mobile phone. After reading this guide you will be able to fully master the use of your phone and appreciate its functions and ease of use.
Not only does the smartphone and network system provide you with basic calls functions and call records but also with practical many functions and services to improve the time you spend working and playing.
The color screen mobile phone complies with the GSM7G+RS7%CDMA technology and has been approved by certification authorities both at home and abroad.
The availability of some services and features described in this manual depends on the networks and your subscription. Therefore, some menu items may not be available in your phone. The shortcuts to menus and features may also vary from phone to phone.
Our company reserves the right to revise this manual content without prior notice.
All information in this manual is correct at the time of publication. Now, to be updating and improving our products, the appearance or your device's software may differ from that described in this manual. You can get updates through our website www.leotec.com.
This mobile phone uses the license free Android ™ 4.9 operating system and comes with some free applications already installed. Through 8mobile Market Market or any other you can download thousands of additional applications.
LEOTEC is not responsible for the operation of the operating system or any applications that may come already installed or have been installed afterwards. +lease note that any application can corrupt the operating system and cause malfunction of the phone. In any case you can recover the initial setup of the phone.
LEOTEC is not responsible for any data loss due to system failures or physical problems the phone. Always make backup of your information.
The company reserves the right to change product specifications and design change.
1.2 Safety guide
7 If your phone is lost or stolen, please contact telecommunications authorities or a sales agent immediately to have a hold on the phone and the SIM card. This will prevent you economic losses caused by unauthorized calls made from your mobile phone.
8 %hen you contact telecommunications or a sales agent, they need to the IMEI number of your mobile phone (remove battery to expose number located on the label on back your phone). +lease copy this number and keep in a safe place for future use.
9 In order to avoid the misuse of your mobile phone take the following preventative measures:
- Set the +IN number of your mobile phone's SIM card and change this number immediately if it becomes known to a third party.
■ +lease keep the phone out of sight when leaving it in a vehicle. It is better to carry the phone with you, or lock it in the trunk.
■ Set call barring.
1.4 Safety warnings and notices
Before using your mobile phone, read and understand the following notices carefully to ensure you will use it safely and properly.
1.4.1 General attention
■ Only the battery and battery charger specified by our company should be used in your mobile phone. Other product might result in battery leakage, overheating, explosion or fire.
■ To avoid your phone malfunctioning or catching fire, please do not violently impact, jolt or throw your phone.
■ +lease do not place the battery, phone or charger in a microwave oven or high-pressure equipment. Otherwise it could lead to unexpected accidents such as damage to circuit or fire hazard.
■ +lease do not use your phone near flammable or explosive gases, otherwise it could cause malfunction of your phone or fire hazard.
■ +lease do not subject your phone to high temperatures, high humidity or dusty places; otherwise this may lead to the malfunction of your phone.
- Keep your phone out of the reach of small children. Your phone is not a toy. Children could hurt themselves.
■ To avoid your phone falling and malfunctioning or being damaged, please do not place it on uneven or unstable surfaces.
1.4.2 notices when using your phone
3 Turn off your mobile phone where the phone is not allowed, such as on the airport or in hospitals. Using the mobile phone in those places may impact the normal operation of electronic devices and medical instruments. Follow relevant regulations when using your mobile phone in those places. Your mobile phone has the auto turn-on feature. Check your alarm clock settings to confirm that your mobile phone will not be turned on automatically during flight.
4 +lease do not use your mobile phone near the weak signal or high precision electronic devices. RF interference might cause malfunctioning of such electronic devices and other problems. Special tips must be paid near the following equipment: hearing aids, pace makers and other medical electronic devices, fire detectors, automatic doors and other automatic control
installations. To find out the effect of mobile phones on a pacemaker or other pieces of electronic medical equipment please contact the manufactures or local sales agents of the equipment.
5 +lease do not subject the LCD to impact or use the screen to strike things, as this will damage the LCD board and cause leakage of the liquid crystal. There is a risk of blindness if the liquid crystal substance gets into the eyes. If this occurs rinse eyes immediately with clear water (under no circumstances rub your eyes) and go immediately to a hospital for treatment.
6 Do not dissemble or modify your mobile phone, as it will lead to damage to the phone such as battery leakage or circuitry failure.
7 Under very rare circumstances using the mobile phone in certain model cars may negatively affect the internal electronic equipment. In order to assure your safety under such circumstances please do not use the mobile phone.
■ +lease do not use needles, pen tips or other sharp objects on the keypad as this may damage the mobile phone or cause it to malfunction.
In the event of antenna malfunction, do not use your phone as it could be harmful to human body.
■ Avoid letting the phone come into close contact with magnetic objects such as magnetic cards as the radiation waves of the mobile phone may erase the information stored on floppy disks, pay cards and credit cards.
■ +lease keep small metal objects, such as thumbtacks far away from the receiver. %hen the receiver is in use it becomes magnetic and may attract these small metal objects and thus these may cause injury or damage the mobile phone.
■ Avoid having the mobile phone come into contact with water or other liquids. If liquids enter the phone, this could cause a short circuit, battery leakage or other malfunction.
1.4.4 Notices when using battery
The battery has a limited service life. The remaining life gets shorter as the times of charging increase. If the battery becomes feeble even after the charging, this indicates the service life is over and you have to use a new specified battery.
Do not dispose of old batteries with everything domestic garbage. +lease dispose of old batteries at the directed places with specific rules for their disposal.
■ +lease do not throw batteries into a fire, as this will cause the battery to catch fire and explode.
■ %hen installing the battery, do not use force or pressure, as this will cause the battery to leak, overheat, crack and catch fire.
■ +lease do not use wires, needles or other metal objects to short-circuit the battery. Also, do not put the battery near necklaces or other metal objects as this will cause the battery to leak, overheat, crack and catch fire.
■ +lease do not solder the contact points of the battery, as this will cause the battery to leak, overheat, crack and catch fire.
If the liquid in the batteries goes into the eyes, there is a risk of blindness. It this occurs do not rub the eyes, but immediately rinse eyes with clear water and go to the hospital for treatment.
■ +lease do not disassemble or modify the battery, as this will cause the battery to leak, overheat, crack and catch fire.
■ +lease do not use or place the batteries near high temperature places such as near a fire or
heating vessel as this will cause the battery to leak, overheat, crack and catch fire.
If the battery overheats, changes color or becomes distorted during use, charging or storage, please stop using and replace it with a new battery.
If the liquid from the battery comes in contact with skin or clothing this could cause burning of the skin. Immediately use clear water to rinse and seek medical tips if necessary.
If the battery leaks or gives off a strange odor, please remove the battery from the vicinity of the open fire to avoid a fire or explosion.
■ +lease do not let the battery become wet as this will cause the battery to overheat, smoke and corrode.
■ +lease do not use or place batteries in places of high temperature such as in direct sunlight, as this will cause the battery to leak and overheat, lower performance and shorten the battery's life.
■ +lease do not continuously charge for more than 94 hours.
■
1.3.4 Charging your phone
Connect the connector of charge to the mobile phone. The battery level indicator flashes on the screen. Even if the phone has been turned off, the charging image still appears, indicating that the battery is being charged. If the phone is overused when the current is insufficient, it may take longer time for the charging indicator to appear on the screen after the charging begins.
%hen the battery level indicator does not flash and indicates the battery is full, this indicates the charging has been completed. If the phone is off during charging, the charging being completed image also appears on the screen. The charging process often takes 3 to 4 hours. During the charging, the battery, phone and charger gets warm, this is a normal phenomenon.
Upon the completion of charging, disconnect the charger from AC power socket, and from the mobile phone.
Notes:
During charging, the phone must be places in well-ventilated environment of +5°C \~ +40°C. Always use the charger supplied by your phone manufacturer. Using an unauthorized charger might cause danger and invalidate the authorization and warranty clauses for your phone.
The standby time and call duration provided by the manufacturer are based on ideal operating environment. In practice, the battery's operating time varies depending on network conditions, operating environment and usage methods.
■ Make sure the battery has been installed before charging. It is best not to remove the battery while charging.
Upon completion of charging, disconnect the charger from your phone and the power supply.
If you have not disconnected the charger from your phone and the power supply, the charger will continue to charge the battery after 5 to 8 hours when the batter level decreases substantially. %e advise you not to do like this, as it lowers your phone performance and shortens your phone life.
Notices when using your charger
■ +lease use AC 990 volts. The use of any other voltage will cause battery leakage, fire and cause damage to the mobile phone and charger.
It is forbidden to short circuit the charger, as this will cause electrical shock, smoking and damage
the charger.
■ +lease do not use the charger if the power cord is damaged, as this will cause fire or electrical shock.
■ +lease immediately clean any dust gathered on the electrical outlet.
■ +lease do not place vessels with water near the charger in order to avoid water splashing onto the charger and causing an electrical shortage, leakage or other malfunction.
- f the charger comes in contact with water or other liquid the power must immediately "e switched off to avoid an electrical short or shock, fire or malfunction of the charger.
■ +lease do not disassem"le or modify the charger, as it will lead to "odily harm, electrical shock, fire or damage to the charger.
■ +lease do not use the charger in the "athroom or other excessively moist areas, as this will cause electrical chock, fire or damage to the charger.
■ +lease do not touch the charger, power cord or power socket with wet hands, as this will cause electrical shock.
- Do not modify or place heavy o"jects on the power cord, as this will cause electrical shock or fire.
■ Before cleaning or carrying out maintenance please unplug the charger from the electrical outlet.
■ %hen unplugging charger, do not pull on the cord, "ut rather hold on to the "ody of the charger, as pulling on the cord will damage the cord and lead to electrical shock or fire.
1.3.5 Cleaning and maintenance
The mo"ile phone, "attery and charger are not water resistant. +lease do not use them in the "edroom or other excessively moist areas and likewise avoid allowing them to get wet in the rain.
- se a soft, dry cloth to clean the mo"ile phone, "attery and charger.
■ +lease do not use alcohol, thinner, "enzene or other solvents to wipe the mo"ile phone.
- ) dirty outlet will cause poor electrical contact, lose of power and even inability to recharge. +lease clean regularly.
2 Getting Started
2.1 Component name and explanation
2.1.1 Technical parameters
Handset
Model L-Phone Xenon X153
Dimension(L×W×T) 151,1 × 80,5 × 9,8 mm
Weight 200g (battery included)
Lithium-ion battery
Nominal voltage 3,7V
Maximum charge voltage 4,2V
Capacity 3200mAh
Standby duration 120-150 hours
Talk duration >5 hours
2.1.2 Icons
In the standby mode, the following icons may appear in standby screen.
| Icon Description | |
 | Indicate the intensity of network signals |
 | Show missed calls |
 | Location by satellite |
 | Receive a new message |
 | An application is being downloaded |
 | The downloading is over. |
 | The alarm clock has been set and activated |
 | A call is in progress |
 | The phone is playing a song |
 | The phone is being charged |
 | Enable USB |
 | The access is blocked. |
 | Get connected to the wireless network |
 | Turn on the Bluetooth |
 | No SIM card is installed in the phone |
 | G+RS data connection is on |
9.9 Key explanations
| Key Explanations | |
| Home key At any status, | press the key to return to the standby screen. |
| +ower key Hold down this key to turn your phone off and on. | |
| Side volume keys During | the conversation, press the two keys to adjust the volume.%hile playing an audio file, press the two keys to adjust the volume. |
| Menu key Show options of current menu. | |
| Return key | Return to the previous menu. |
Note: In this guide, the phrase “press the key” refers to pressing and thereafter releasing a key.
"Hold down a key" refers to pressing a key and keeping it depressed for 9 seconds or longer.
The descriptions and functions of keys depend on the model of your phone.
2.4 Using the touchscreen
Your phone provides many touch keys in the Main screen. To use these keys correctly, calibrate the touch screen in advance. Meanwhile please follow the instructions:
■ Do not touch the screen with wet hands.
■ Do not touch the screen with great forces.
■ Do not touch the screen with metallic or conductive objects.
2.4 Connecting to the network
2.4.1 Inserting and removing the SIM card
■ Turn off the phone; remove the battery and unplug other external power supplies. Insert the SIM card into the SIM holder as shown in the phone.
■ %hen you need to remove the SIM card, turn off the phone, remove the battery and then remove the SIM card from the holder.
%arning: Do turn off your phone before removing the SIM card. Never insert or remove the SIM card when an external power supply is connected, as this may cause damage to the SIM card.
2.4.2 Turning your phone on and off
To turn on your phone, hold down the power key on the top of the right side; to turn off the phone, hold down the power key.
If you have turned on your phone without inserting the SIM card, the phone will prompt you to install the SIM card. %ith the SIM card already inserted, your phone automatically verifies the availability of the SIM card.
Then, the screen shows the following in order:
Enter +IN1—if you have set the SIM card password.
Enter phone password—if you have set your phone password.
Search for network—the phone searches for the appropriate network.
Notices:
If when you turn on the mobile phone, an exclamation mark appears on the screen and does not disappear, this is possibly caused by operation failure, that is, you press the power key and the volume up key at the same time. Such operation failure activates the recovery mode, hence the occurrence of exclamation mark. If you just turn off the phone, next time when you turn it on, it will still come to the recovery mode.
Solution:
+ress the home key when the exclamation mark and robot appear, a menu will pop up. Use the menu key to select "robot system now" to restart the phone.
9.4.3 Unlocking the SIM card
The +IN 1 (personal identification number) secures your SIM card from being misused by others. If you have selected this function, you must enter the +IN1 code each time you turn on the phone so that you may unlock the SIM card and then make or answer calls. You can deactivate SIM card protection (see "Safety settings"). In this case, the misuse of your SIM card cannot be prevented.
■ +ress the Hang Up key to turn your phone;
Enter your +IN1 code. Clear the incorrect digits by using the right soft key and press OK for confirmation. e.g. if your +IN1 is 1934, please enter:
1934
If you enter incorrect numbers for three times in succession, your SIM card will be locked and your phone will ask you to enter +UK 1 number. If you do not know the +UK 1 code, do not try. Instead, contact your network service provider. See "Safety settings".
Note: your network service provider sets a standard +IN 1 code (4 to 8 digits) for your SIM card. You
should immediately change this number. See "Safety settings"
2.4.4 Unlocking your phone
To prevent unauthorized use, you can set phone protection. If you have selected this function, you must draw unlocking pattern each time you turn on your phone, to unlock the phone and then make or answer calls. You may clear the unlocking pattern (see Safety settings). In this cause, the unauthorized use of your phone cannot be protected.
If you forget your phone password, you must contact the retailer or local authorized service center to unlock the phone.
2.4.5 Connecting to the network
■ Once your SIM card is unlocked, your phone searches for available network automatically (the screen will show the network searching is underway). If your phone has found the available network, the name of network service provider appears at the center of screen.
Note: If “only for emergency calls” appears on the screen, it indicates that you are beyond the network coverage (service area), and that you can still make emergency calls depending on the signal intensity.
2.4.6 Making a call
When the logo of network service provider appears on the screen, you can make or answer a call. The bars at the upper left corner of screen indicate the intensity of network signal.
Conversation quality is significantly affected by obstacles, thus moving within a small area while making or answering a call can improve the conversation quality.
2.4.7 Making a domestic call
In the Dial screen, enter a number, and press the Dial key to make a call. To change the number, delete the digits you have entered. During dialing, the animation appears on the screen. After the call is picked up, the screen will show call status information. If the connection alert tone has been set, your phone will ring the alert tone (network dependent).
To end a call, press the Hang Up key.
Zone code Phone number Dial key
2.4.8 Making an international call
To make an international call, hold down the 0 key on the Dialing screen until the international prefix "+" for appears. This allows you to dial an international number without knowing its international fix (e.g. 00 for China).
Following the entry of international prefix, enter the country code and complete phone number. For the country codes, follow the general conventions, for example, 49 for Germany, 44 for UK, and 46
for Sweden.
Like making an international call via a fixed telephone, omit the "0" at the head of a city code.
For example, to call our hotline from another country, you can dial:
+86 21 114
+ Country code -complete phone number - Dial key
2.4.9 Making a call from the list
All calls dialed and received are stored within a list in your phone. Those dialed and received recently are exhibited at the top of the list (see "Call Register"). All the numbers are sorted by Dialed Calls, Received Calls and Missed Calls. Your phone also provides options for you to view all calls. When the call Register is full, the old numbers will be deleted automatically. To view the list, do the following:
4 To view the dialed calls, press the Dial key
■ You can dial any number from the list by pressing the Dial key.
When the call list appears, press OK to see details, or go to Options Save to place the number into your Phonebook.
2.4.10 Making an emergency call
If you are beyond the network coverage (see network-signal-intensity bars at the upper left corner of the screen), you can still make emergency calls. If your network service provider does not provide roaming service to the area, the screen will show “only for emergency calls”, alerting you that you can only make such calls. If you are within the network coverage, you can also make emergency calls even without the SIM card.
2.4.11 Call menu
The Call menu is only visible during an active call, and features such as Call Waiting, Call Diverting, and Multiple-party Call are network dependent. Contact your network service provider.
The call options include:
5 Mute
Do not send local voice.
■ Hands free
Switch on the loudspeaker to amplify the voice.
■ Hold
Put the current call on hold or retrieve the call on hold.
■ End a call.
End the current call.
■ New call
Make another new call
■ Click Menu key 66 start voice recording
Start voice recording.
4 Functional Menu
3*+art of the following features depend on specific models)
4.1 File Management
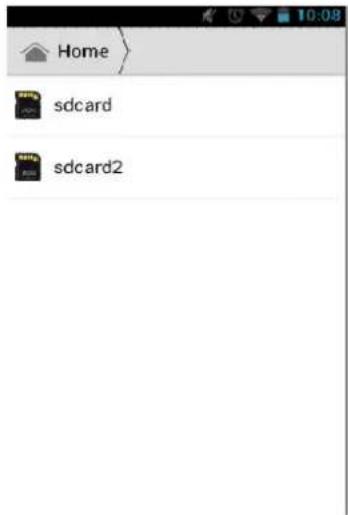
The file management is composed of sdcard and sdcard 9, while sdcard is the memory of the phone, sdcard 9 is the external SD card. In the file management, files can be searched rapid, deleted or edited in each card and new filescan be created.
4.2 Sending an Email
You can send an Email to anyone who has an Email address.
Entering the procedure and set an account, you can click the account so that you come into the account already created, you can also activate, compile and create an account and then delete the operating. The email can be sent and received just like in a computer. This procedure requires the network support.
4.4 Dialing
%hen dialing, you can have a quick access to the call records, contacts and digit dial keyboard3used for manual dialing) by the menu key on the screen.

3.4 3G video call
Click a number portrait in the phonebook, and you can do these things instantly: dial, send a message and make a video call. During the video call, you can select applications such as adjusting it to mute mode, switching to robot portrait, turning off the voice and intercepting photos to SD card.
3.5 Calculator
Your phone provides a calculator with 4 basic functions for the convenience of your calculating.
+ress this button, and you delete the input and output in bitwise.
Notice: this calculator is of limited accuracy and sometimes it causes error, please forgive us for the inconvenience.

3.6 Browser
The browser allows you to surf on the net and browse the page just like on the computer. You can create on the phone a bookmark and synchronize it with computer. You can have a quick access to your favorite sites on the main screen.
You could view web pages in longitudinal or transverse mode. The page rotates according to the rotation of the phone and automatically adjusts to fit the page.

3.7 Sound Recorder
The recorder could be used to record audio files.
To start voice recording: Tap

To end voice recording: Tap


To play "ack voice recording: Tap

The audio files are automatically stored on your phone. Click the Menu key, and you can operate and set the recorded voice. The file can "e in document management and various players can "e selected to play the voices.
3.8 Calendar
Calendar allows you to view your schedules and events at any time. You may view schedules one "y one or several ones at the same time.
Select to show calendar "y day, week or month. If ""y week 3or month)", the calendar will "e shown "y week 3or month). This application is convenient for you to view schedule or add events.

3.9 Settings
Reach the menu and customize your phone settings.
SIM card management: SIM card can "e managed and made settings.
%LAN: %LAN can "e turned on and off and made some settings.
Bluetooth: Bluetooth can "e turned on and off and settings are made.
The information flow usage: It makes you in full awareness of the usage of the information.
More: Click more and you will set up flight mode and V+N and more.
Audio profiles: General, silent, meeting and outdoor optional. In the meanwhile, customized setting6up of some scene modes are allowed

Select a mode and enter the customized setting6up, operational are vi"ration, volume, ring tones, notifications and key "eep, etc.
Display: Customized setting6up of the phone luminance, wallpaper, the screen and screen time6 out and font size is allowed.
Storage: The internal memory of the storage card and of the phone is shown.
Battery: The usage detail of the "attery is shown.
)applications: ·iew, manage and delete the applications on your phone.
)ccount and synchronization: Set the synchronization of your phone account with your phone.
Location service: Set the service during the locating.
Safety: Set unlocking pattern; lock the S-M card; set the SD card.
Language and keypad: Select a language and input method.
Backup and reset: Reset DRM and restore factory settings to clear all personal data on your phone.
Date and time: Set current time and date.
Schedule power on7off: set the time to turn on or off your phone.
)uxiliary function: Some auxiliary functions can "e set.
Developers' options: Set some options used "y developers.
)"out phone: -iew the model, service status, mo"ile software and hardware information, etc.
4.10 Clock
Clock
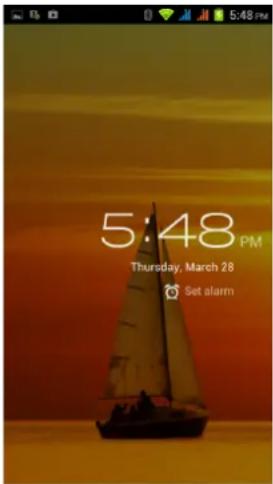
Enter the menu to display the current time.
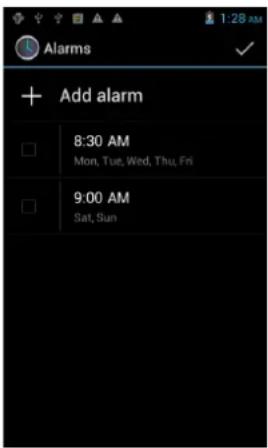
■ )larms
Your phone provides many groups of alarm clocks. Select one of them to edit and customize alarm clock.
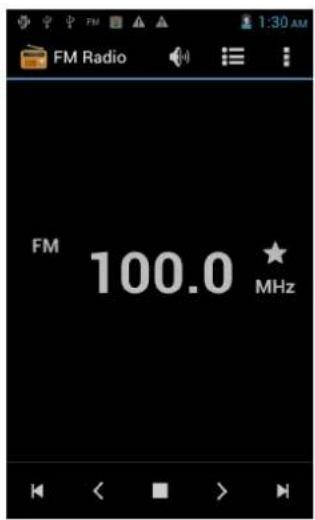
4.11 Radio
%ear your earpieces of radio before searching for channels.
Glossary8
Channel list: Display the list of FM radio channels. You can select to play one of them. 3the list can contain 90 channels maximum)
Search: Select this option to automatically search for channels and generate the list of channels.
Loudspeaker: +ress the button to use the radio loudspeaker.
- and : Tap to move to another channel.
▶ and Ⅱ : Tap to broadcast and pause.
4.12 Search
You can locally search for the information you need.

4.14 Contacts
The “contacts” lets you easily call your colleagues or friends, or send emails or short messages to them. You may add contacts directly from your phone, or synchronize “contacts” with any application on your computer. You may open “contacts” directly from the Main screen, or open it via the “Dialing” application.
Add a contact8
To add a contact, directly enter the name and phone number, or import the name and phone number from the SIM card. 3The number of contacts you can add is limited by the memory of your phone.)
Search for contacts:
To search for a contact, press the Search key in search screen, and a search "ox will pop up. In the search "ox, enter the key words, such as first name, second name and company name. %while you are entering the key word, the matching contacts immediately appear.
Edit a contact8
To edit details of a contact, select "Edit a contact".
Delete a contact8
To delete the current contact, select "Delete a contact".
From the menu, you can also synchronize with or share an account or import or export a contact.
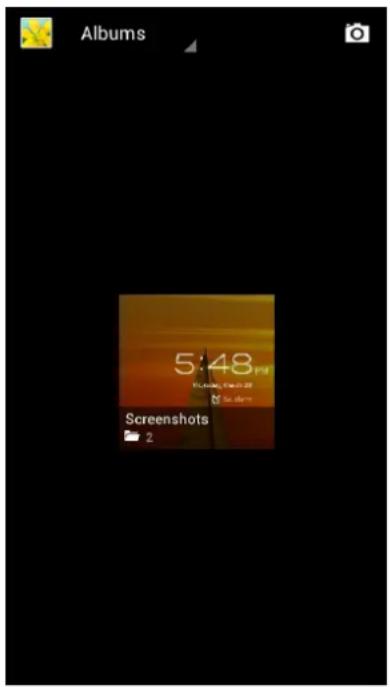
3.14 Gallery
Gallery is a picture manager that typically exi"its miniatures, supports the features of "save picture", "set pictures as desktop" and "share picture".
3.15 Wireless keyboard
3.16 Camera
Your phone provides the camera and video recorder features. %herever you go,
you can take high6resolution photos and videos. It also supports advanced camera features such as image sta"ilization, face em"ellishment, panorama shooting, high dynamic range and zero delay shutter, which can also "e customized.

3.17 Messaging
Messaging lets you send text and multimedia messages to any contact that has an SMS device. The multimedia messages include photos, video clips (for i+hone 3GS or other new style phones), contacts information, and voice memos. %hat's more, you can send messages to several contacts at the same time.

Note: +erhaps Messaging is not available in all countries and regions. +robably you need pay for using Messaging. For more information, consult your network operator.
As long as you are within the network, you can use "Messaging". As long as you can make a call, you can send messages. You probably have to pay for sending or receiving messages, depending on your network operator.
Send a message: Tap it, enter the number and name of the contact or select the contact from Contacts. Tap the text box above keypad, enter the information and then tap "Send".
After selecting the number, you can select such options as Call, Add subject, Attach, Insert facial expression, and more.
Tap Settings to set ringtone, Delivery reports, and maximum quantity of messages.
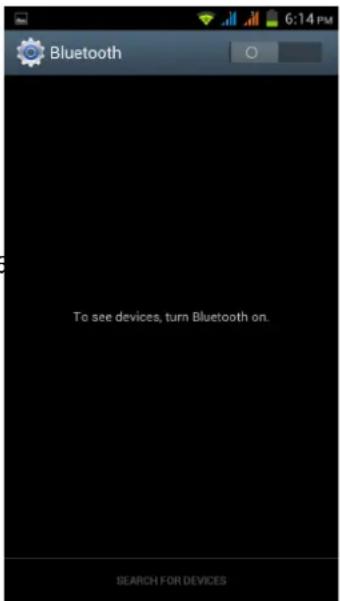
3.18 Bluetooth Proximity Sensor
Bluetooth proximity sensor mainly monitors and reports for the Bluetooth. By checking the signal intensity of two devices, the monitoring side judges whether the devices have been beyond the RF range and sounds the alarm tone.
The way of activating the reporting side: settings666wireless and network666Bluetooth settings666Bluetooth advanced settings6 Bluetooth proximity sensor, and then check in the box.
The reporting side can be opened in Main Menu: Main Menu—Bluetooth proximity sensor
3.19 Notification Menu
Slide and pull down menu on the main interface, you can see the message notice and choose whether to turn on or off %IFI, Bluetooth, G+S, off6line mode. In the data connection, the current SIM is available"le to make data connection of G+RS. Slide it around you can see the options of profile for your convenience.

3.20 Download Content
You can download through the "browser things and pictures you want and list them in the Download Content menu.
3.21 Music
Music is used for enjoying the stored audio files. Select Music, you can see the menus of "List of played songs", "Songs", "Specialists" and "()rtists".
To pause playing a song Tap II
To resume playing a song Tap ▶
To skip to the next song or reading material Return to the previous song or reading material


To move fast "ackward or forward To skip to any point in a song
Touch and hold for. The longer you hold, the more songs you skipped. Drag the progress "ar.
3.22 Call Records
Come into the call records, you can view missed calls, received calls and outgoing calls. The calling time is viewed in each record and features such as calling, sending messages and adding to new contacts can "e set. Deleting call records and setting up speed dial can "e done in the menu.
3.23 Widget
The widget is on the right of applications in Main Menu, holding down this widget, you can drag it anywhere you want in the main screen. -t is convenient for you to enter that procedure.

3.24 Selecting Wallpaper Source
Hold down the main screen, the options of selecting wallpaper source will appear, then you can set up wallpapers you like.


4 Text Input
Enter text via the keypad. Examples of text include
contact details, emails, short messages, and we"sites. The keypad provides the functions of spelling prediction, spelling correction and learning while using.
The smart keypad may give you prompts of correct spelling, depending on which application you are using.
Enter text:
8 Tap the text box 3memo, or new contact) to call the keypad.
9 Tap the keys on keypad.
At the initial stage, you can tap keys using either of your index fingers. Once you get familiar with the keypad, you can try tapping keys using both of your thumbs.
%while tapping a key, the corresponding letter will appear above your thumb or another finger. If you are tapping a wrong key, you may slide to the correct one. Only when your tapping finger leaves a key, can the corresponding letter be entered in the text box.
To delete a character
To enter an upper6 case letter

To enter a digit

To enter a symbol

Quickly enter a space
+ress the space key twice successively.
To toggle input methods

5 SD Card Introduction
Your mobile phone supports SD card to expand the memory. Install the SD card according to the indication.
As one of storages for your phone, SD card has been set as the default storage at factory. You can directly use it without making any settings.
:
Note: Your mobile phone supports the plug6in feature. %without turning off your phone, however, it does not support inserting or remove T card. Generally, it is not recommended to remove and install the SD card.

6 FAQs and Solutions
If you have any questions a"out the phone, please find the solutions from the ta"le "elow.
| F)*s Causes Solutions | ||
| +oor reception | %hen you use your phone at poor reception areas, for example, near high rise "uildings or "ase rooms, the radio wave cannot "e transmitted effectively. | )void this as far as you can. |
| %hen you use your phone at network traffic congestion, such as working time and off6duty time, the congestion can result in poor reception. | )void this as far as you can. | |
| This is related to the distance to "ase station in question. | You may ask the network service provider to provide service coverage map. | |
| Echoes or noises | The trunk line of network is in "ad condition. It is a regional pro"lem. | Hang off the call and dial again. Choose another "etter line. |
| In some areas, the call lines are in "ad condition. | ||
| Shorter stand"y time | The stand"y time is relevant to network settings. | In poor reception areas, turn off your phone temporarily. |
| Replace the "atteries Change with a new "attery. | ||
| %hen no signals are received, your phone will continue searching for "ase stations, thus consuming a large amount of "attery power and reducing stand"y time. | —se your phone at strong signal areas or Turn off the phone temporarily. | |
| Failed to turn on your phone | The "attery power is used up. Check the "attery power level or charge the "attery. | |
| SIM card error | The SIM card is damaged. Contact your network service provider. | |
| The SIM card is not properly installed. | Ensure the SIM card is properly installed. | |
| The metallic face of the SIM card is contaminated. | %ipe the face with a clean cloth. | |
| Failed to connect to the network | The SIM card is invalid. Contact your network service provider. | |
| Beyond the GSM coverage. Consult the network service provider for service areas. | ||
| The signal is fee"le. Retry at a stronger signal area. | ||
| Failed to make a call | The call "arring feature is used. Cancel the call "arring settings. | |
| The fixed dialing num"er feature is used. | Cancel the fixed dialing num"er settings. | |
| +I– code Enter incorrect +I– codes for three Contact your network | ||
| error times in succession. service provider. | ||
| Failed to charge the battery | The battery or the charger is damaged. | Change a new battery or charger. |
| Charge the battery when ambient temperature is lower than -10▶ or above 55▶. | Change the environment. | |
| Poor connection. Check whether the plug is properly connected. | ||
| Failed to add contacts to phonebook | The storage space of phonebook is used up. | Delete some contacts from the phonebook. |
| Failed to set up some features | Your network service provider does not provide the services, or you haven’t subscribed them. | Contact your network service provider. |
Specifications8
· QHD IPS 5.3" capacitive touchscreen
· MT6589-1.2GHz Quad core
- Android™ 4.2 (Flash support)
- 4GB memory - Micro SD slot (up to 32GB)
· 1GB RAM DDR3
· Resolution 540x960
· Dual Sim 3G (WCDMA)
· WCDMA 850/2100Mhz
· GSM 850/900/1800/1900MHz
· USB 2.0
· 3.5mm Earphones output, DC 5v input
· G-sensor
· IEEE 802.11b/g/n WiFi network
- Bluetooth 4.0
· GPS + A-GPS
- Built in speakers
· Dual cam 2.0 Mp / 80 Mp + flash
• Light sensor and proximity sensor
· Li Polymer rechargeable battery 3200mAh
- Omnidirectional microphone included
· AC adapter, USB cable and user manual included
- Installed applications: browser, mail manager, music, videos, photo player, office applications, etc.
- Allows you to install thousands of applications and games available for Android TM
Guarantee and responsibility
All LEOTEC products have a 24 month warranty from the invoice date to the end customer, except in the included accessories. The manufacturer guarantees the consumer that its products are free from defects in materials and workmanship at the time of purchase.
The batteries have 6 months warranty. Batteries whose maximum load capacity is equal to or less than 50% within that period are considered defective.
The warranty offered only covers defects in workmanship or materials that the product could have. Defects or failures caused by misuse, breakage, wear are excluded.
Manipulating of the product by anyone other LEOTEC technical service, software updates not provided by LEOTEC and all faults or defects caused by natural disasters will void the warranty.
The warranty is valid only when the user has the ticket or proof of purchase and it is within the deadline
Support and Technical Service
For any technical consultation you can go to the place of purchase or contact the technical service of LEOTEC.
Visit our website and stay always updated in the download section of your product
There is more available information in the website: www.leotec.com or by means of the e-mail: support@leotec.com
DECLARATION OF CONFORMITY
Brand: LEOTEC
Supplier name: World Driver S.A.
Address: Ctra de l'Hospitalet 66 - 68
We declare under our sole responsibility that the product:
L-PHONE XENON X153 LESPHONE01 / LESPHONE01W
Country of manufacture: China
Referred to this statement, with the standard (s) or other document (s) policy (s) in accordance with the provisions of Directive 93/68/EEC, the European Parliament and of the Council of 22 >uly 1993, transposed into Spanish law by Royal Decree 1950/1995, of December 1, 1995.

Reference symbol both in the product and its user manual, indicates that at the end of life electrical and / or electronic, they should be recycled separately from your household waste.
There are adequate means to collect this material for proper recycling. For more information, contact the local authority or your retailer where you purchased the product.
Note: The device LESPHONE01 / LESPHONE01W may contain links to web sites or pages operated by parties other than LEOTEC and / or World Driver SA. These links are included and are available for your information, LEOTEC and / or World Driver SA not responsible for their availability, content, adequacy or accuracy. These external sites may contain or reference trademarks, patents, proprietary information, technologies, products, processes, or other property rights belonging to others. All copyrights are property of their respective owners.



- L-PHONE XENON X153
- MANUAL DE USUARIO / USER MANUAL
- TABLA DE CONTENIDO
- Ajustes
- ■ )larmas
- Radio
- Búsqueda
- Mensajería
- Getting Started....35
- Functional Menu 40
- The Basics
- Overview
- Safety guide
- Safety warnings and notices
- General attention
- notices when using your phone
- Notices when using battery
- Charging your phone
- Notices when using your charger
- Cleaning and maintenance
- Getting Started
- Component name and explanation
- Technical parameters
- Icons
- Key explanations
- Using the touchscreen
- Connecting to the network
- Inserting and removing the SIM card
- Turning your phone on and off
- Notices:
- Solution:
- Unlocking the SIM card
- 1934
- Unlocking your phone
- Connecting to the network
- Making a call
- Making a domestic call
- Making an international call
- Making a call from the list
- Making an emergency call
- Call menu
- Functional Menu
- File Management
- Sending an Email
- Dialing
- 3G video call
- Calculator
- Browser
- Sound Recorder
- Calendar
- Settings
- Clock
- Clock
- ■ )larms
- Glossary8
- Search
- Contacts
- Add a contact8
- Edit a contact8
- Delete a contact8
- Gallery
- Wireless keyboard
- Camera
- Messaging
- Bluetooth Proximity Sensor
- Notification Menu
- Download Content
- Music
- Call Records
- Widget
- Selecting Wallpaper Source
- Text Input
- SD Card Introduction
- FAQs and Solutions
- Specifications8
- Guarantee and responsibility
- Support and Technical Service
Brand : Leotec
Model : Xenon X153W
Category : Smartphone