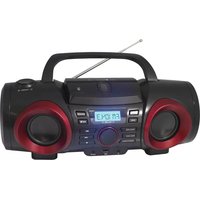
NPB-267 - CD Player Naxa - Free user manual and instructions
Find the device manual for free NPB-267 Naxa in PDF.


| Product Type | Portable CD Player |
| Brand | Naxa |
| Model | NPB-267 |
| Dimensions (Approx.) | 20.0 x 20.0 x 4.0 cm |
| Weight (Approx.) | 0.5 kg |
| Power Source | AC Adapter (DC 4.5V) or 3x AA Batteries |
| Supported Disc Formats | CD, CD-R, CD-RW |
| Playback Features | Skip, Repeat (1/All), Program, Random |
| Anti-Shock Protection | Yes (Electronic Skip Protection) |
| Headphone Jack | 3.5mm Stereo |
| Line Out | 3.5mm Stereo (for external speakers) |
| Display | LCD with Track/Time |
| Controls | Play/Pause, Stop, Skip Forward/Back, Volume, Mode |
| Battery Life (Approx.) | Up to 8 hours |
| Cleaning | Clean exterior with dry cloth; use lens cleaning disc for CD lens |
| Safety Warnings | Do not expose to moisture; keep away from heat sources; use only specified power adapter |
| Spare Parts Availability | Contact Naxa customer support for replacement parts |
| Manual Language | English (EN) |
Frequently Asked Questions - NPB-267 Naxa
User questions about NPB-267 Naxa
0 question about this device. Answer the ones you know or ask your own.
Ask a new question about this device
Download the instructions for your CD Player in PDF format for free! Find your manual NPB-267 - Naxa and take your electronic device back in hand. On this page are published all the documents necessary for the use of your device. NPB-267 by Naxa.
USER MANUAL NPB-267 Naxa
THE NEW GENERATION IN TECHNOLOGY
MP3/CD/USB Boombox with Bluetooth®
15073-CD329BTEN
P/N:227-00329N17-002LK
size:210*145mm黑白印刷
70G书纸,40版20页订装
NPB-267

natural_image
Black and red portable electronic device with a digital display and antenna (no visible text or symbols)Instruction Manual
Please read carefully before use and keep for future reference.
Table of Contents
Thank You 3
In the Box 3
Before You Start 4
At a Glance 5
Power Source ....7
AC Power....7
Battery Power 7
Basic Functions 8
Switching the Unit On/Off 8
Setting the Function Mode 8
Adjusting the Volume 8
Headphone Jack 9
Using the Radio 9
Tuning to Radio Stations 9
CD/MP3 Operation 9
About Compact Discs 9
Loading a Disc 10
Playing a Disc....10
Selecting a Desired Track/Passage 10
Programming Tracks 11
Repeat Play Modes ....12
Listening to USB 12
About USB Drives 12
USB Operation ....13
Bluetooth® Operation ....13
AUX-In Operation 14
Warnings and Precautions ....15
Specifications 19
Support 19
Thank You
We know you have many choices when it comes to technology; thank you for choosing us here at Naxa Electronics. Established in 2001 in Los Angeles, California, we are dedicated to delivering products that entertain and delight.
We trust that you will be happy with your purchase. Please read this manual carefully and save it for reference. You may also find the latest FAQ, documentation, and other product material at our website. Come visit us on the web at www.naxa.com and see all that we have to offer!
In the Box
Please take a moment to make sure that you have everything in the list below. Although we make every effort to ensure that each Naxa device is securely packed and sealed, we know a lot can happen in between us and you. If anything is missing, check back with your local retailer to get immediate assistance. If they cannot help you, please contact our Naxa Support team at www.naxa.com/naxa_support.
- NPB-267 boombox
- AC power cable
- User manual
Before You Start
Please take note of the following before you start.
- Do not block the ventilation openings or holes.
-
Avoid installing the unit in locations described below:
-
Places exposed to direct sunlight or close to heat radiating appliances (such as electric heaters, or on top of other stereo equipment that radiate heat).
- Places lacking ventilation or dusty places.
- Places subject to constant vibration.
- Places that are humid or moist.
- Operate turning controls and switches as instructed in manual.
- Before turning on the power for the first time, make sure that the power cord is properly installed.
- Store your tapes or CD in a cool area to avoid damage from heat.
CAUTION: TO REDUCE THE RISK OF ELECTRIC SHOCK, DO DOT REMOVE COVER (OR BACK). NO USER SERVICEABLE PART4 IN4IDE, REFER 4ERVICING TO QUALIFIED SERVICE PERSONNEL.
WARNING: Remove batteries if exhausted or if they will not be used again for a long period. The incorrect use of batteries can cause electrolyte leakage and will corrode the compartment or cause the batteries to burst, therefore:
- Do not mix battery types, e.g. alkaline with zinc carbonate.
- When inserting new batteries, replace all batteries at the same time.
At a Glance

1 DISPLAY. Displays player status information.
2 TUNING dial. Turn right to tune to a higher radio station; turn left to tune to a lower station.
3 STANDBY INDICATOR
4 BAND Band button
5 FUNCTION Function button
6 STANDBY Power/Standby button
7 / ▶Play/Pause/Pair button
8 FOLD./10+ FOLD./10- Folder Up/10+ and Folder Down/10- buttons
9 PROG./P-MODE Program/Play Mode button
10 ■ Stop button
11 Previous/Reverse and Next/ Forward butotns
12 Headphone jack. Connect headphones or earphones to this 3.5mm output to listen to audio privately.

13 USB PORT. Load USB memory sticks here. The USB port is designed for music playback from flash memory devices. It is not designed to charge high-power devices.
14 AUX IN JACK. Play audio from a device that is connected to this 3.5mm input jack.
15 VOLUME dial. Turn to adjust the volume level.
16 HANDLE. Raise the handle to transport the unit safely and easily.
17 SPEAKERS. Full-range drivers deliver powerful stereo sound.
18 CD DOOR. Open the door to load compact discs in the CD compartment. The label side of the disc should face up.
19 FM ANTENNA. Extend the antenna fully and adjust its position to optimize FM radio reception.
20 Battery door. Remove the door to the battery compartment to load 6 UM-2 "C" size batteries for portable power.
21 AC power socket
22 AC voltage selector
23 BLUETOOTH PAIR INDICATOR
Power Source
The unit can be powered by AC household power, or by batteries.
AC Power
This unit can operate on AC 110 V or 220 V power.
Before connecting the boombox to AC power, make sure that the voltage selector [22] found on the rear of the boombox is set to match the type of power provided in your area.
With the included AC power cable, connect the AC power socket [21] found on the rear of the unit to a wall power outlet that provides AC power.
Please contact your local power utility if you are unsure which type of power is supplied by your household outlet. Improperly setting the voltage selector is hazardous and could cause a fire, shock, or damage to the unit and your property!
Please be sure the power outlet you plug this unit into is working and receives constant (unswitched) power.
Battery operation will be automatically disabled when AC power is used.
Battery Power
Install 6 UM-2 "C" size batteries to enjoy music wherever you are.
1) Remove battery door [20] found on the bottom of the boombox.
2) Load six "C" size batteries, taking care to match the polarities marked on the inside of the compartment (+, -).
3) Replace the battery door [20].
Remove the batteries if they are exhausted or will not be used for a long time.
Batteries contain chemicals that may be regulated by your local government. Dis-
pose of them properly according to regulations.

The boombox will not use the batteries if the power cable is connected to the AC power socket. Disconnect the cable from the boombox when you want to use battery power.
Basic Functions
Switching the Unit On/Off
Press the ⓍSTANDBY button [6] to turn the boombox on or off.

To turn the boombox off completely, disconnect the power.
Setting the Function Mode
While the boombox is on, press the FUNCTION button [5] to change the active function mode. The available modes are:
• RADIO: Listen to AM or FM radio broadcasts.
- CD: Play compact discs (CD-audio or CD-MP3).
- USB: Play MP3s from USB memory sticks.
- AUX: Play audio from devices connected to the AUX input jack.
- BLUETOOTH: Stream audio from wireless players with Bluetooth®.
Adjusting the Volume
Rotate the VOLUME dial on the unit to adjust the volume level.
Headphone Jack
Lower the volume on the boombox before connecting headphones or earphones to the 3.5mm headphone jack [12]. Once connected, slowly adjust the volume to a comfortable level.

The speakers will be disabled when headphones are connected.
Using headphones for prolonged periods or at a high volume can damage your hearing permanently.
Using the Radio
Listen to FM or AM radio broadcasts.
1) Press the FUNCTION button [5] to select RADIO mode.
2) Press the BAND button [4] to select the AM or FM radio band.
Tuning to Radio Stations
- Tune to a station by rotating the TUNING dial [2]. The station frequency is shown on the display.
- To optimize reception when listening to stations on the FM band, fully extend the telescopic FM antenna [19] and adjust its orientation. To optimize reception for AM stations, gently reposition the boombox. AM reception will be best when the boombox is placed in an open space.
CD/MP3 Operation
Press the FUNCTION button [5] to select CD mode.
About Compact Discs
This player is compatible with all digital audio CDs, digital audio CD-Recordable discs (CD-R) and CD-Re-writable discs (CD-RW) that have been finalized, and CD-DA format digital audio CDs.
This player is also compatible with MP3–CDs. These are compact discs that contain MP3 audio files on them.

Only handle a CD by its edge. Avoid touching the label or the playable side with your hands or any other object.
Loading a Disc
-
Press PUSH TO OPEN on the CD door to open it.
-
Place an audio CD/MP3 DISC into the tray with the label side facing up (the reflective side should face down).
-
Close the CD door (make sure it clicks into place). The display will flash "CD ----", then playback will start from the first track.
-
To remove a disc, press the CD STOP button to stop playback. Make sure the disc stops spinning completely, then press PUSH TO OPEN to open the CD door. Grasp the disc by its edges and take it out carefully.

Make sure the disc has stopped spinning completely before opening the CD DOOR
To ensure good performance, wait until the system has completely read the disc before proceeding with other functions.
The display will show "NO DISC" if no disc is loaded or if the disc is unreadable.
Lower the handle [16] before opening the CD compartment. A raised handle will prevent the CD compartment door from opening completely.
Playing a Disc
- To start, pause, or resume playback, press the ▶II button [7].
- To stop playback, press the button [10].
Selecting a Desired Track/Passage
To select a desired track:
- Press the ◀ or ▶ buttons until the desired track appears on the display.
To search for a particular passage during playback:
- Press and hold the button to quickly scan through the current track. Release the button to return to playback at normal speed.
To select a track number above 10 (for MP3 discs only):
- Press the FOLDER/10+ button to skip 10 tracks forward; press the FOLDER/10− button to skip 10 tracks back. Press ◀◀ or ▶▶o skip back or forward a single track at a time.
To select a desired folder (for MP3 discs only):
- To change folders, press and hold the FOLDER/10 + button to skip to the next folder; press and hold FOLDER/10– to skip to the previous folder
Programming Tracks
Programming tracks of disc are possible when playback is stopped. Up to 20 tracks for CD disc and 99 tracks for MP3 disc can be programmed to play in any order.
1) While playback is stopped, press the PROG/P-MODE button [9] to enter program mode. The display will flash P01 and show the P icon.
2) While the display is flashing, press the▶ button to select a track.
3) Press the PROG./P-MODE button [9] to save the selected track as Program Track 01. The display will flash PO2 (indicating it is ready for Program Track 02).
4) Repeat steps 2 & 3 to store other desired tracks until all desired tracks have been programmed.
5) Press the ▶II /⊗button [7] to start playback from the first programmed track.
6) Press the button [10] to stop program playback.

To clear the program from memory, press the ■ button [10] when the disc is stopped or open the CD door.
Repeat Play Modes
Control the order in which tracks are played by changing the repeat play mode. Press the PROG/P-MODE button [9] during playback in order to cycle through the different modes; the repeat indicators shown below will appear on the display.
(€) (flashing) Repeat. Repeat the current track only.
(steady) Repeat all. Repeat all tracks.
FOLDER Repeat directory. Repeat all tracks in the current folder. (This mode is only available when playing MP3 file sources that have more than one folder.)
RAND Random. Play tracks in random order.
To cancel repeat play mode and return to normal play-back, press the PROG/P-MODE button [9] until all of the Repeat indicators disappear from the display.
Listening to USB
Connect a USB memory device to the USB port [13] found on the top of the unit, then press the FUNCTION button [5] to select "USB" mode. The display will show the total number of tracks detected and then playback will start automatically the first track.
Connect USB memory devices directly to the USB port of the boombox. Do not use a USB extension cable or hub as these may introduce interference that will result in abnormal performance.
About USB Drives
This player can play supported audio files from USB stick drives connected to the USB port [4]. For a list of supported audio files, please refer to the Specifications section of this manual.
The file system of the USB drive must be formatted as FAT or FATOther file systems are not supported. The unit will not work with computers connected to the USB port.
This USB port is not designed for devices that require a lot of power (e.g., USB hard drives or disc drives).

There are many different USB stick types and manufacturers. Although this player should support most of these memory devices, it is impossible to guarantee compatibility with ALL USB drives. If your USB device can be turned on, turn it on when using it with the player.
USB Operation
- To start, pause, or resume playback, press the ▶II/□button.
- To stop playback, press the ▶ button.
- Program playback and repeat playback modes work the same way during USB playback as during CD playback. Please refer to section "CD/MP3 OPERATION" to learn more about these modes.

Program playback and repeat playback modes work the same way during USB playback as during CD playback. Please
refer to section "CD/MP3 OPERATION" to learn more about these modes.
Bluetooth ^® Operation
Press the FUNCTION button to select "bt" (Bluetooth) mode. If the boombox does not detect a paired device, it will automatically switch to pairing mode (the display will flash "BT" and the blue "PAIR" indicator will flash.)
- Make sure Bluetooth® is enabled on the Bluetooth audio device. Use the device to scan/search for other Bluetooth devices.
- Select "NAXA NPB-267" from the scan/search results. Use the password "0000" if the device asks for one. The PAIR/STANDBY indicator will light blue when the connection is complete
- Press the ▶ ▶ ▶ button to start playback. You can also control playback with your device.
- Turn the VOLUME dial [15] to adjust the volume level.

Bluetooth works best within 10 meters.
If the connection fails, the PAIR indicator will keep flashing.
To disconnect an Bluetooth device from the boombox, press and hold the ▶11/□button until the PAIR indicator flashes blue.
To learn more about how to use the Bluetooth audio function of your device, please refer to the instructions provided by the device manufacturer.
AUX-In Operation
- Connect the audio source to the boombox. Use a 3.5mm audio patch cable (not included) to connect the 3.5mm output jack of the audio source to the 3.5mm AUX Input jack [14] found on the front of the boombox.
- Prepare the boombox. Press the FUNCTION button [5] to select "AUX" mode, then lower the volume level (turn the Volume dial [15] counter-clockwise).
- Prepare the audio source. Start playback on the device, then set the volume level of the device to approximately 80% of its maximum.
- Adjust the final volume on the boombox. Rotate the Volume dial [15] to set the volume to a comfortable level.

Use the audio source to control playback (e.g., stop, play, next). Use the boombox to control the volume.
Warnings and Precautions

CAUTION
WARNING: SHOCK HAZARD. DO NOT OPEN. AVIS: RISQUE DE CHOC ELECTRIQUE. NE PAS OUVRIR
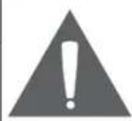
CAUTION: TO REDUCE THE RISK OF FIRE AND ELECTRIC SHOCK, DO NOT REMOVE THE COVER (OR BACK) OF THE UNIT. REFER SERVICING ONLY TO QUALIFIED SERVICE PERSONNEL.
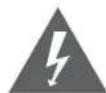
The lightning flash with arrowhead symbol within an equilateral triangle is intended to alert the user to the presence of uninsulated "dangerous voltage" within the product's enclosure that may be of significant magnitude to constitute risk of electric shock

The exclamation point within an equilateral triangle is intended to alert the user to the presence of important operation and servicing instructions in the literature accompanying the appliance.
CLASS 1 LASER PRODUCT
CLASS 1 LASER PRODUCT APPAREIL LASER DE CLASSE 1 PRODUCTO LASER DE CLASE 1
This product contains a low power laser device.
CAUTION
INVISIBLE LASER RADIATION WHEN OPEN AND INTERLOCKS DEFEATED. AVOID EXPOSURE TO BEAM

On Protection Against Laser Energy Exposure
- As the laser beam used in this product is harmful to the eyes, do not attempt to disassemble the casing.
- Stop operation immediately if any liquid or solid object should fall into the cabinet.
- Do not put anything in the safety slot. If you do, the laser diode will be ON when the disc compartment door is still open.
- If the unit is not to be used for a long period of time, make sure that all power sources are disconnected from the unit. Remove all batteries from the battery compartment, and unplug the AC-DC adapter from the wall outlet. Make it a practice to remove the AC-DC adapter by grasping the main body and not by pulling the cord.
- This unit employs a laser. The use of controls or adjustment or performance of procedures other than those specified here may result in exposure to hazardous radiation.
CAUTION
- Do not block the ventilation openings or holes.
- Do not place any naked flames (such as lighted candles) on the apparatus.
- When discarding batteries, follow all local rules and laws governing the disposal of batteries. Consider the environmental impact of your actions!
- Invisible laser radiation when open and interlock has failed or been defeated. Avoid direct exposure to beam.
- To prevent fire or shock hazard, do not expose this appliance to rain or moisture.
Important Safety Information
- Read Instructions: All the safety and operating instructions should be read before the product is operated.
- Retain Instructions: The safety and operating instruction should be retained for future reference.
- Heed Warnings: All warnings on the product and in the operating instructions should be adhered to.
- Follow Instructions: All operating and usage instructions should be followed.
- Cleaning: Unplug this product from the wall outlet before cleaning. Do not use liquid cleaners or aerosol cleaners. Use a damp cloth for cleaning.
- Attachments: Use only attachments recommended by the manufacturer. Use of other attachments may be hazardous.
- Water and Moisture: Do not use this product near water (e.g., near a bathtub, washbowl, kitchen sink, laundry tub, in wet basements, or near a swimming pool and the like).
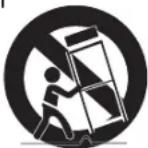
- Accessories: Do not place this product on an unstable cart, stand, tripod, bracket, or table. Use only with carts, stands, tripods, brackets, or tables recommended by the manufacturer or
sold with the product. Any mounting of the product should follow the manufacturer's instructions and should use a mounting accessory recommended by the manufacturer. A product and cart combination should be moved with care. Quick stops, excessive force, and uneven surfaces may cause the product and cart combination to overturn. - Ventilation: Slots and openings in the cabinet are provided for ventilation to ensure reliable operation of the product and to protect it from overheating. These openings should never be blocked by placing
the product on a bed, sofa, rug, or other similar surface. This product should not be placed in a built-in installation such as a bookcase or rack unless proper ventilation is provided or the manufacturer instructions have been adhered to.
- Power Sources: This product should be operated only from the type of power source indicated on the rating label. If you are not sure of the type of power supply to your home, consult your product dealer or local power company. For products intended to operate from battery power or other sources, refer to the operating instructions.
- Grounding or Polarization: This product may be equipped with a polarized alternating-current line plug that has one blade wider than the other. This plug will only fit into the power outlet in one direction. This is a safety feature. If you are unable to insert the plug fully into the outlet, try reversing the direction of the plug. If the plug should still fail to fit, contact an electrician to replace the obsolete outlet. Do not defeat the safety purpose of the polarized plug.
- Power-Cord Protection: Power supply cords should be routed so that they are not likely to be walked on or pinched by items placed upon or against them, paying particular attention to cords at plugs, convenience receptacles, and at the point which they exit from the product.
- Protective Attachment Plug: The product may be equipped with an attachment plug with overload protection. This is a safety feature. See the operating instructions for replacement or directions to reset the protective device. If replacement of the plug is required, be sure the service technician has used a replacement plug that has the same overload protection as the original plug as specified by the manufacturer.
- Outdoor Antenna Grounding: If an outside antenna is connected to the product, be sure the antenna system is grounded so as to provide some protection against voltage surges and built-up static charges. Article 810 of the National Electrical Code, ANS/NFPA 70 provides information with regard to proper grounding of the mast and support-
ing structure, grounding of the lead-in wire to an antenna-discharge unit, size of grounding conductors, location of antenna-discharge unit, connection to grounding electrodes, and requirements for the grounding electrode (see figure).

-
Lightning: For added protection for this product, unplug it from the wall outlet and disconnect the antenna or cable system during a lightning storm or when it is left unattended and unused for long periods of time. This will prevent damage to the product due to lightning or power-line surges.
-
Power Lines: An outside antenna system should not be located in the vicinity of overhead power lines or other electric light or power circuits, or where it can fall into such power lines or circuits. When installing an outside antenna system, extreme care should be taken to keep from touching such power lines or circuits, as contact with them might be fatal.
-
Overloading: Do not overload wall outlets, extension cords, or integral convenience receptacles as this can result in a risk of fire or electric shock.
-
Object and Liquid Entry: Never push objects of any kind into this product through openings as they may touch dangerous voltage points or short-out parts that could result in a fire or electric shock. Never spill liquid of any kind on the product.
-
Servicing: Do not attempt to service this product yourself as opening or removing covers may expose you to dangerous voltage or other hazards. Refer all servicing to qualified service personnel.
-
Damage Requiring Service: Unplug this product from the wall outlet and refer servicing to qualified service personnel under the following conditions: a) when the power-supply or plug is damaged; b) if liquid has been spilled or if objects have fallen into the product; c) if the product has been exposed to rain or water; d) if the product does not operate normally by following the operating instructions. Adjust only those controls that are covered by the operating instructions as improper adjustment of other controls may result in damage and will often require extensive work by a qualified technician to restore the product to its normal operation; e) if the product has been dropped or damaged in any way; f) when the product exhibits a distinct change in performance—this indicates a need for service.
-
Replacement Parts: When replacement parts are required, be sure that your service technician has used replacement parts specified by the manufacturer or have the same characteristics as the original part. Unauthorized substitutions may result in fire, electric shock, or other hazards.
-
Safety Check: Upon completion of any service or repairs to this product, ask the service technician to perform safety checks to ensure that the product is in proper operating condition.
-
Wall or Ceiling Mounting: The product should be mounted to a wall or ceiling only as recommended by the manufacturer.
- Heat: The product should be situated away from heat sources such as radiators, heat registers, stoves, or other products (including amplifiers) that produce heat.
FCC NOTICE
This device complies with Part 15 of the FCC Rules. Operation is subject to the following two conditions: (1) this device may not cause harmful interference, and (2) this device must accept any interference received, including interference that may cause undesired operation.
Note: This equipment has been tested and found to comply with the limits for a Class B digital device, pursuant to Part 15 of the FCC Rules. These limits are designed to provide reasonable protection against harmful interference in a residential installation. This equipment generates, uses and can radiate radio frequency energy and, if not installed and used in accordance with the instructions, may cause harmful interference to radio communications. However, there is no guarantee that interference will not occur in a particular installation. If this equipment does cause harmful interference to radio or television reception, which can be determined by turning the equipment off and on, the user is encouraged to try to correct the interference by one or more of the following measures:
- Reorient or relocate the receiving antenna.
- Increase the separation between the equipment and receiver.
- Connect the equipment into an outlet on a circuit different from that to which the receiver is connected.
- Consult the dealer or an experienced radio/TV technician for help.
CAUTION ON MODIFICATIONS
Any changes or modifications not expressly approved by the grantee of this device may void the authority granted by the FCC to operate the equipment.
WARNING
This product contains lead, a chemical known to the State of California to cause cancer and birth defects or other reproductive harm. Wash hands after handling.
CAUTION
This product is equipped with a polarized plug (one blade is wider than the other blade) as a safety feature to reduce the risk of electrical shock. This plug will fit into a polarized outlet only one way. This is a safety feature. If you are unable to insert the plug into the electrical outlet, try reversing the plug. If the plug still does not fit, contact a qualified electrician. Never use the plug with an extension cord unless the plug can be fully inserted into the extension cord. Do not alter the plug. Do not attempt to defeat the safety purpose of the polarized plug.
NEC NATIONAL ELECTRICAL CODE
Dot not apply oil or petroleum products to this product.
GRAPHIC SYMBOLS WITH SUPPLEMENTARY MARKINGS ARE LOCATED ON THE BOTTOM OF THE UNIT. USE OF ANY CONTROLS OR ADJUSTMENTS OR
PERFORMANCE OF PROCEDURES OTHER THAN THOSE HEREIN SPECIFIED MAY RESULT IN HAZARDOUS RADIATION EXPOSURE.
Specifications
| Power requirements AC 110/220 V ~60/50 HzDC 9 V (6 x UM-2 “C” batteries) | |
| Operating Temperature 5 – 35 °C | |
| Power (operating) 18 W | |
| Power (standby) 2 W | |
| Media Support CD, CD-R/RW, USB | |
| Media Formats CD-audio, MP3 | |
| Wireless Source Bluetooth | ® version 3.0 |
| Receiving Bands AM, FM | |
| Tuning Range AM 520 – 1710 KHzFM 87.5 – 108 MHz | |
| Input 3.5 mm AUX audio | |
| Output 3.5 mm headphone | |
Note: Product are improved continuously. We reserve the right to modify the product and specifications without prior notice.
Support
If you have problems with your device, please consult the instructions in this manual. Please also visit us on the web at www.naxa.com to get up to the minute news, alerts, and documentation for your device. For additional assistance, please contact Naxa Technical Support.
NAXA Technical Support
2320 East 49th St.
Vernon, CA 90058
http://www.naxa.com/naxa_support/



- MP3/CD/USB Boombox with Bluetooth®
- Instruction Manual
- Table of Contents
- Thank You
- In the Box
- Before You Start
- Power Source
- AC Power
- Battery Power
- Basic Functions
- Switching the Unit On/Off
- Setting the Function Mode
- Adjusting the Volume
- Headphone Jack
- Using the Radio
- Tuning to Radio Stations
- CD/MP3 Operation
- About Compact Discs
- Loading a Disc
- Playing a Disc
- Selecting a Desired Track/Passage
- Programming Tracks
- Repeat Play Modes
- Listening to USB
- About USB Drives
- USB Operation
- Bluetooth ® Operation
- AUX-In Operation
- Warnings and Precautions
- CAUTION
- CLASS 1 LASER PRODUCT
- On Protection Against Laser Energy Exposure
- Important Safety Information
- FCC NOTICE
- CAUTION ON MODIFICATIONS
- WARNING
- NEC NATIONAL ELECTRICAL CODE
- Support
- NAXA Technical Support
Brand : Naxa
Model : NPB-267
Category : CD Player