
M-OF7010 - Car radio Macrom - Free user manual and instructions
Find the device manual for free M-OF7010 Macrom in PDF.


| Product Type | Multifunction Oven |
| Brand | Macrom |
| Model | M-OF7010 |
| Dimensions (HxWxD) | 350 x 450 x 400 mm |
| Weight | 12 kg |
| Power Supply | 220-240V, 50Hz, 2000W |
| Functions | Bake, Grill, Defrost, Convection |
| Temperature Range | 50°C - 250°C |
| Timer | 0-120 minutes |
| Interior Capacity | 40 liters |
| Control Type | Rotary knobs and LCD display |
| Material | Stainless steel body, glass door |
| Safety Features | Child lock, automatic shut-off |
| Cleaning | Easy clean enamel interior |
| Warranty | 2 years |
| Accessories Included | Baking tray, wire rack, crumb tray |
| Energy Efficiency Class | A |
| Noise Level | <55 dB |
| Cord Length | 1.2 m |
Frequently Asked Questions - M-OF7010 Macrom
User questions about M-OF7010 Macrom
0 question about this device. Answer the ones you know or ask your own.
Ask a new question about this device
Download the instructions for your Car radio in PDF format for free! Find your manual M-OF7010 - Macrom and take your electronic device back in hand. On this page are published all the documents necessary for the use of your device. M-OF7010 by Macrom.
USER MANUAL M-OF7010 Macrom
Texts with this symbol draw your attention to potential sources of damage to your vehicle.

CAUTION
Short Press: press no more than 2 seconds
Long Press: press more than 2 seconds
Hard Key: buttons on the front panel
Soft Key: buttons on the touch screen.
QUICK GUIDE
Product Overview
This overview will help you to quickly know more about the control elements.

Img1 - Overview of the control elements
1. On/off switch and volume control
- Switching on and off: Switching on and off the system by pushing the knob. After the system turned off, all sound output are closed.
- Changing the volume: Clockwise turning the knob in to turn up the volume and anticlockwise turning to knob to turn down the volume. And during the turning, a column shows the current volume setting on display. At Volume
“0”, the unit volume is muted (display)
2. Function Buttons:
Short press the function button to get into the different function:
- RADIO : Switch back to radio mode or changes the waveband (FM/ MW / LW) during radio mode.
- MEDIA : Changes to media source played or selects media source (USB、SD).
- PHONE : Open the telephone function and mutes the other audio source.
- TONE: Open the tone and volume setting menu.
- NAV : Switch to navigation system.
- AUX: Switch to AUX 1 - AUX 2 - AUX 3 mode.
- DISC : Switch to MP3/CD/DVD mode.
- SETUP: Enter in to setup function.
3. ◀ and ▶
The forward and backward buttons affect in different audio source.
- Radio mode: Seek up and seek down automatically.
- Media mode: Short press to select the previous or the next track, long press to fast forward or fast backward.
-
DVD mode: Short press to select the previous or the next chapter, long press to fast forward or fast backward.
-
CD/DVD slot : Push the audio CD/DVD with the printed side facing up into the CD/DVD slot until it is automatically pulled in.
-
Touch Screen : Areas with a color border on the screen are currently "active" and are operated by touching the screen.
-
Eject Button: Short press to eject an inserted CD/DVD. If the CD/DVD is not taken within ten seconds, it is pulled back into the CD/DVD slot.
-
MUTE : In the media mode or DVD mode, pressing "MUTE" button to pause music or video playing.
8. Knob
Left knob
- Turning the left knob to adjust the volume.
- Press the left knob to turn off system.
Right knob
- Radio mode: turning the right knob to seek up or seek down.
- Media mode : turning the right knob to go to the previous or the next track.
- DVD mode : turning the right knob to go to the previous or the next track.
9. USB/AUX IN/ SD card slot

CAUTION
- Inserting a second CD/DVD while an inserted CD/DVD is being ejected can destroy the CD/DVD drive in the unit. Note that it takes a few seconds to eject the CD/DVD after pressing the Eject button . The protective barrier in front of the CD/DVD slot is opened while this is happening. You must wait until the CD/DVD is ejected before trying to insert a new CD/DVD.
- To avoid damage, do not press the knobs and buttons forcefully. Light pressure is sufficient to operate the unit. Note that the rotary/push knobs have breaking points to reduce the risk of injury in the event of an accident.
- Do not use pointed or sharp objects to operate the touch screen. Light pressure is sufficient to operate. A display on the screen which cannot be called up by touching it is not available at that time. Please note that a dirty or scratched.
Using touch screen
This product can be operated by touching the touch screen. Areas with a color border on the screen can be touch is name "soft key". Once you are touching this area, the background color of "soft key" will change and accompanies "beep" warn. (The "beep" warn can be open and close in tone setting).

Img2 – Using touch screen
Press "RADIO" button to get into the radio mode. You can search you wanted station by manually or automatically seeking. You can store the station, and then you can quick switch to the station by shortcut button.

Img3 – Radio main menu
All radio stations with strong reception are automatically stored in the station list. The station list is updated automatically on a regular basis.
Selecting radio stations
Opening RADIO main menu
Press the RADIO function selection button to open the RADIO main menu. The station you are currently listening to is shown at the top of the screen. With RDS compatible stations, the station name is displayed if reception is strong enough.
Band switching
Press the "RADIO" function selection button again to change the frequency range. Or, in the
“RADIO” main menu, touch the Band function key and then press FM MW LW in the pop up window which opens. The current frequency band is displayed in the top left corner of the screen.

Img4 – Radio main menu – Band switch
Changing radio stations
Short pressing the arrow keys or on the panel. Or pressing the arrow keys on the steering wheel. Or touching the arrow keys or on the screen of the "RADIO" main menu takes you to the previous or next station.
Setting radio stations manually
Turning the knob to set a radio station manually via its frequency. Each turn of knob in FM band, the frequency changes 0.1 Mhz. Each turn of knob in MW band, the frequency changes 9 Khz. Each turn of knob in LW band, the frequency changes 1 Khz.
Selecting radio stations from the station list
- Touch the Station list function key to view a list of all radio stations which can currently be received.
- Move the slider in the scroll bar down to see more stations.
- Touch the required station to select it. The station list view closes automatically after around 20 seconds of inactivity.
- Touch the button "Updating" to update the station list which can currently be received.
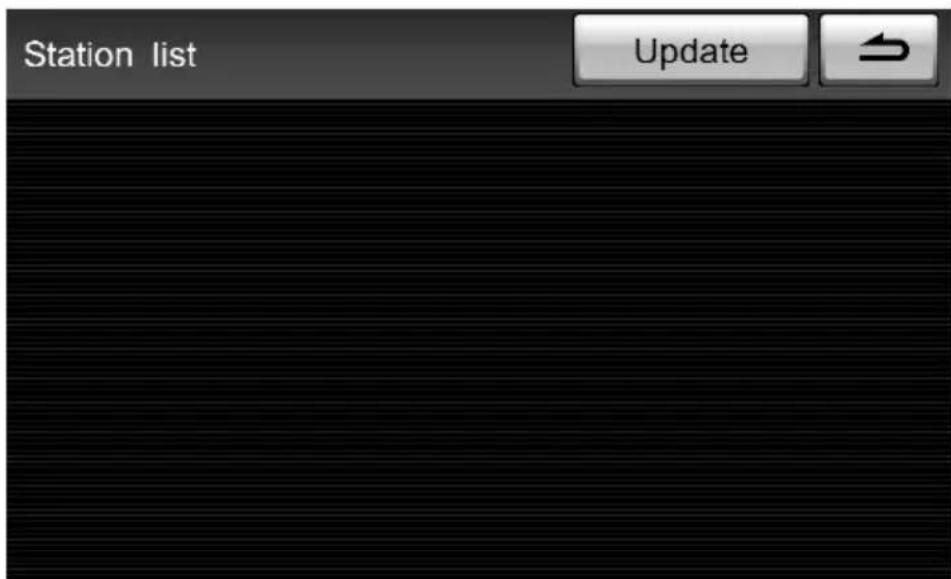
Img5 – Update station list
Storing radio stations
Radio stations can be stored directly on the displayed "station buttons" or in the memory list.
Storing radio stations on a displayed station button
Press and hold one of the six station buttons 1 to 6 displayed in the "RADIO" main menu until you hear a beep. The station currently playing is now stored on that station button. Ex: Store 89.4MHz in the button "2" ("Img6 – Storing a station").

Img6 – Storing a station
If you want to listen to this station next time, then you can press shortcut button. If a new station is stored at the same station button, the old frequency will be replaced.

Img7 - Memory list
Storing radio stations into memory list
Press the button to get into the memory list. Enter the button to store a new station into the memory list. Delete And press the button to delete a stored station.
EXTRA Function
In the FM band, you can use the RDS functions.

Img8 – Radio main menu - Extras function
A window pop up by pressing soft key, you can select more functions in
this pop up window.
Scan all receivable radio stations


Img9 – Radio main menu – scan
- Touch the settings knob at the bottom right of screen. A new window pops up with two items.
- Touch soft key Scan, the icon changes from to. Extras ▶ Scan All radio stations with strong reception are scanned for about 10 seconds each in the sequence in which they appear in the station list.
- While the scan function is running, the icon at the bottom right of screen is
- Touch the settings knob or the function key again to stop the scan of the station that is currently playing.

Open the radio text window

NOTICE
This function is only available in FM band.

Img10 – Radio main menu – scan
- Touch the settings knob at the bottom right of screen Extras. A new window pops up with three items.
- Touch soft key Text, the icon changes and the text window appears in the middle of the screen.
Alternative frequency (AF)

NOTICE
This function is only available in FM band.
Transmitters broadcast the same station in different countries, areas with different frequency. To ensure users always can listen to the best quality radio programme. If the quality of current frequency goes bad, radio will automatically switch to a new frequency in the same station which has better reception.
Traffic programme (TP) function

NOTICE
This function is only available in FM band.
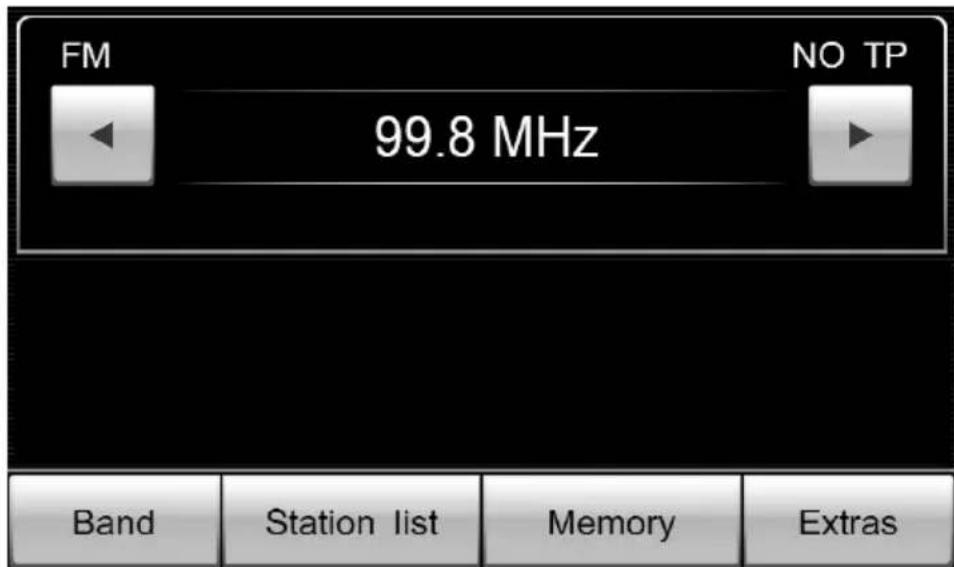
Press the right knob on the front panel to open the traffic programme (TP). If there is no station is received, the word "NO TP" will be displayed on the right top of screen.

Img11– Radio main menu – NO TP
If there is a RDS station received, the word "TP" will be displayed on the right top of screen.
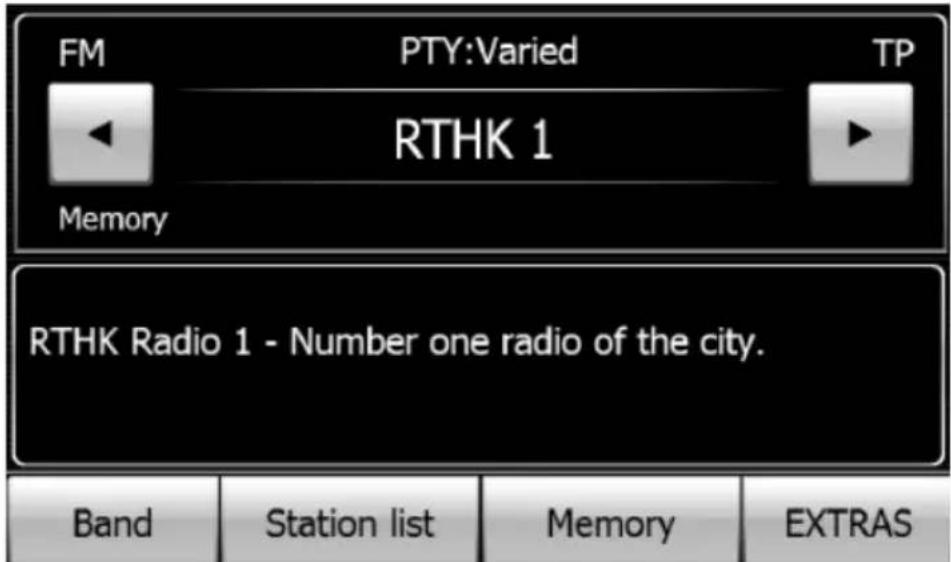
Img12- Radio main menu -TP
Incoming traffic announcement
If there is a traffic announcement come be received, a new window will pop up with traffic information.
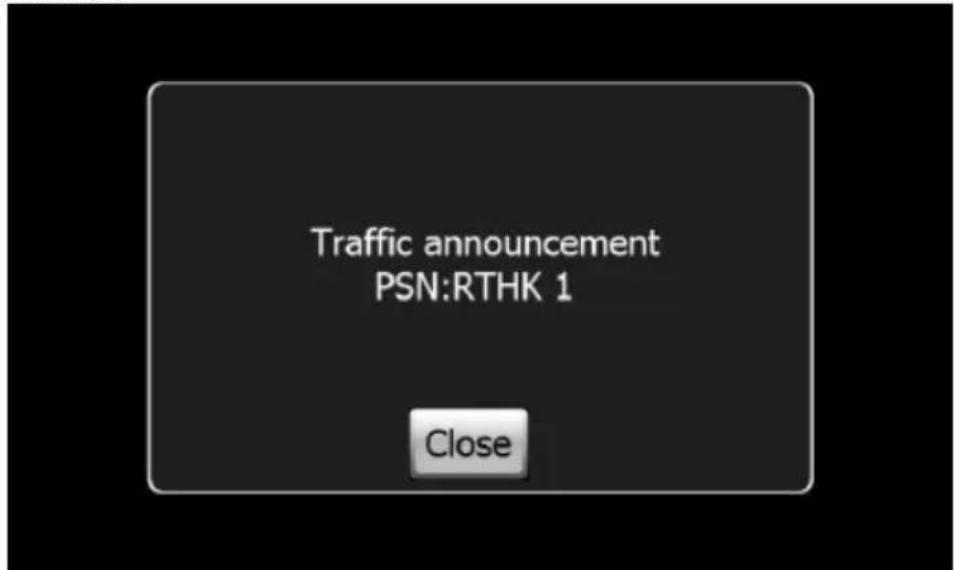
Img13– Traffic announcement
If you wish to interrupt the announcement, touch in the traffic announcement popup window.
The TP function remains in standby and the next traffic announcement will be made in the current audio mode. The unit will be switched to predefined settings for volume, balance and fader for the duration of the announcement. You can change these settings while the traffic announcement is being made.
Adjust the volume during a traffic announcement using the volume control. Press 【TONE】 function selection button to adjust the settings for balance during a traffic announcement.
In the volume presets you can also specify the volume with which traffic announcements are made.
Overview of the MEDIA main menu
Press "MEDIA" button to enter into the multimedia system.
In the media function, you can select the USB player mode, SD card player mode. You can switch back to the media mode from navigation mode or DVD mode at anytime.

Img14 – MEDIA main menu

CAUTION
- Ejecting the USB or SD device playing ,the system might be anomaly.
- Recommend USB device band: Kingston、Samsung、SanDisk
- Recommend SD device band: Kingston、Samsung、Panasonic

NOTICE
If there are no external devices inserted or the sources are not recognized by the system, the button status will be in disable. The background color of soft key is gray and no color border displayed.
USB Mode
Plug / Unplug USB
- Using the attach switch cable for USB connection.
- Ejecting the USB during using, the source mode will be switched to radio mode automatically.

Img15 – MEDIA main menu – USB
USB Music Mode
Press the soft key Music enter the music play window.
Playing control
- Pause: press the soft key to pause or play again the music.
- Track select: Short press the soft key or to select the previous or next track.
- Fast playback: Long press the soft key or button to fast forward or fast backward.

Img16 - MEDIA main menu - USB Music Mode
Track selecting
- Press the soft key Selection at the left bottom of screen to enter the folder selection menu.
- You can find all the music track and folders in the list. You can select the track and folder by touching the name on screen.
- The music track that is currently playing is highlighted.
- To view all of the tracks, move the slider at the right of the screen down.
- If the item in the list is a folder name, then after pressing the button you will get into the folder.
- Press the soft key to go back the main folder.

Img17 – MEDIA main menu – USB Music Folder
Repeat / Random / Scan
- Touching the soft key buttons at the bottom of screen to open and close the "Repeat", "Random", "Scan" function. After the function is opened, the status word will be displayed at the right top of the screen.
- Repeat: Select Repeat to repeat play current track or play current folder. The repeat status "Track repeat" and "Folder repeat" will be displayed at the right top of screen.
- Random: Select "Folder random" to play songs randomly in current folder. Select "Disc random" to play the USB randomly.
- Scan: Scan the whole USB and play each track 10 seconds.
USB Picture Viewer Mode
Press the soft key

Picture
enter the picture viewer window.

Img18 – MEDIA main menu – USB Picture Viewer
Playing control
- Picture Select: press the soft key or to select the previous or next picture.
- Picture Rotate: Press the soft key ↻ or to rotate counterclockwise or rotate clockwise the picture.
- Picture Zoom: Press the soft key ⏻ or ⏱ button to Zoom in or Zoom out the picture.
- Full screen: Press the soft key Full screen to view the picture full screen.
- Press the soft key to go back the picture list.

CAUTION
If the picture bigger than 2M, the system can't view. Some warning : "Can not view image bigger than 2M".

Img19 – MEDIA main menu – USB Picture Viewer warning
USB Text Read Mode
Press the soft key

enter the text read window.
You can read the text file.
SD Card Mode
Plug / Unplug SD card
- Insert the SD card in face side.
- Press the exposed part of the SD card lightly, then the SD card will be ejected.
- Ejecting the SD card during using, the source mode will be switched to radio mode automatically.
SD Card Music Mode

Img20 – MEDIA main menu – SD Card music mode
Playing control
- Pause: press the soft key to pause or play again the music.
- Track select: Short press the soft key or to select the previous or next track.
- Fast playback: Long press the soft key or to fast forward or fast backward.
Track selecting
- Press the soft key Selection at the left bottom of screen to enter the track selection menu.
- You can find all the tracks and folders in the list. You can select the track and folder by touching the name on screen.
- The track that is currently playing is highlighted.
- To view all of the tracks, move the slider at the right of the screen down.
- If the item in the list is a folder name, then after pressing the button you will get into the folder.
- Press the soft key to go back the main folder.

Img21 – MEDIA main menu – SD card Folder
Repeat / Random / Scan
Touching the soft key buttons at the "Repeat" Random Scan bottom of screen to open and close the "Repeat", "Random", "Scan" function. After the function is opened, the status word will be displayed at the right top of the screen.
- Repeat: Select Repeat to repeat play current track or play current folder. The repeat status "Track repeat" and "Folder repeat" will be displayed at the right top of screen.
- Random: Select "Folder random" to play songs randomly in current folder. Select "Disc random" to play the SD card randomly.
- Scan: Scan the whole SD card and play each track 10 seconds.
SD card might have a complicated folder structures, the control function is a little different with USB mode.
SD Card Video Mode
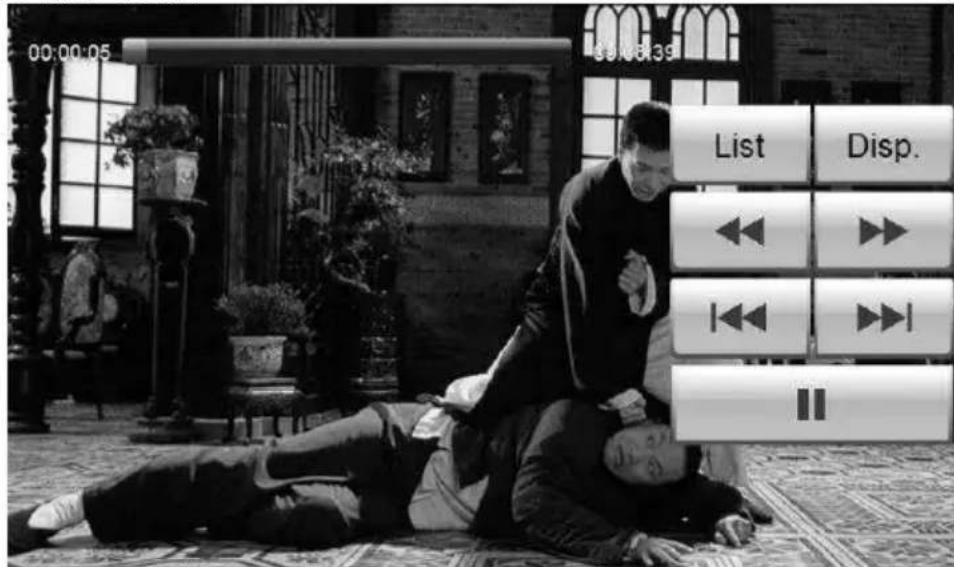
Img22 – MEDIA main menu – SD card video mode
Playing control
- Pause: Press the soft key Ⅱ to pause or play again the video.
- Fast playback: Touch the soft key ____ or to fast forward or fast backward.
- Video select : Touch the soft key ____ on to select the previous or next video.
- Touch the soft key List to go back the video folder.
- Touch the soft key Disp. to change display settings.

Img23 – MEDIA main menu – SD card video display settings
Connect an external audio source (MP3 or MP4 player, etc) to the head unit. Inputs available:
- AUX 1 audio input, jack on the front of unit.
- AUX 2 audio input, original jack on the vehicle (if equipped).
- AUX 3 audio-video input, RCA jacks on the back of unit.
Press soft key AUX to enter into Aux in mode. The head unit can not control the play back except volume adjustment.
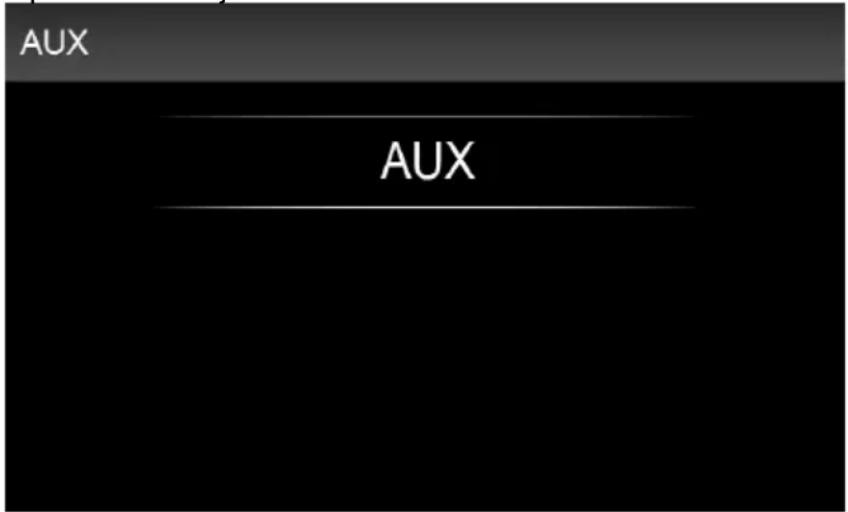
Img24 –Aux In
Disc
General information on Disc mode
Audio CDs (CD-A) and audio DVDs, MP3 CDs and MP3 DVDs, as well as video DVDs can be played in the internal CD/DVD drive.
CD/DVD cannot be read
If a CD/DVD is loaded which the player cannot read, the following messages appear briefly “CD error. Please check CD.” or “Incorrect data format. Unable to read file.”. The CD/DVD is ejected after a few seconds.
WARNING
- The CD player is a class 1 laser product. When the CD player is opened, there is a risk of injury caused by the invisible laser beams escaping from the unit.
- The CD player contains no parts which you can service or repair by yourself. You should therefore contact an authorised dealer if there is a mechanical fault or if a repair is required.

CAUTION
- Inserting a second CD/DVD while an inserted CD/DVD is being ejected can destroy the CD/DVD drive in the unit. Note that it takes a few seconds to eject
the CD/DVD after pressing the Eject button.
You must wait until the CD/DVD is ejected before trying to insert a new CD/DVD.
- If the CD/DVD drive has a mechanical fault or if a CD/DVD has been incorrectly or not fully loaded, the message “CD error. Please check CD.” and then “DVD drive error” appears on the screen. Check the CD/DVD and then insert it properly in the drive.
- You will be unable to insert any more CDs or DVDs if the temperature inside the unit is too high. The unit will switch on in the last used mode.
Play a DVD disc
General information
Video DVDs are usually subject to national and international copyright laws. In certain countries, they may not be copied even for private use without prior consent of the copyright holder.
Please find out about relevant copyright laws and observe them.
These restrictions do not apply to recordings for which you personally hold the copyright or for which you have been granted rights.

Img25 -Disc- DVD main menu

NOTICE
The video image on the screen of the radio navigation system is only displayed when the vehicle is stationary and handbrake operated. The screen is switched off while the vehicle is in motion, but the sound can still be heard.
The following message appears on the screen: “Video is disabled for your safety. Please engage parking brake to watch video”.
Inserting a video DVD
- Insert a video DVD with the printed side facing up into the CD/DVD slot to the
point where it is automatically pulled in.
- The DVD starts automatically. It can take a few seconds for the DVD to be read; the screen stays dark while this is happening, so please be patient.
The “Intro” stored on the video DVD (a short introductory sequence) is played. Wait until the Intro has finished and the film's menu options appear with the unit's own menu prompts.
- Depending on the inserted video DVD, you may have to open the unit's menu control system manually.
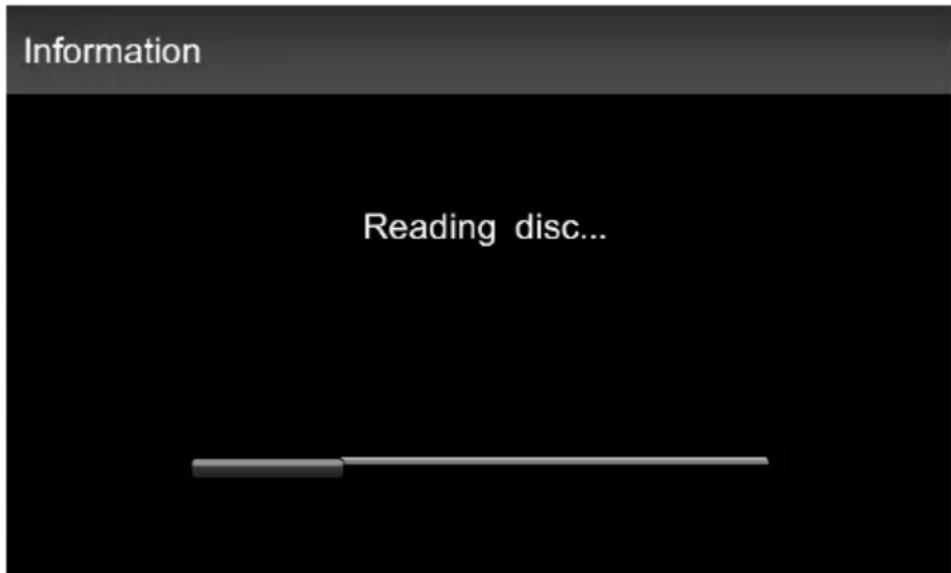
Img26 –Disc– Loading DVD disc
Opening and operating the menu control
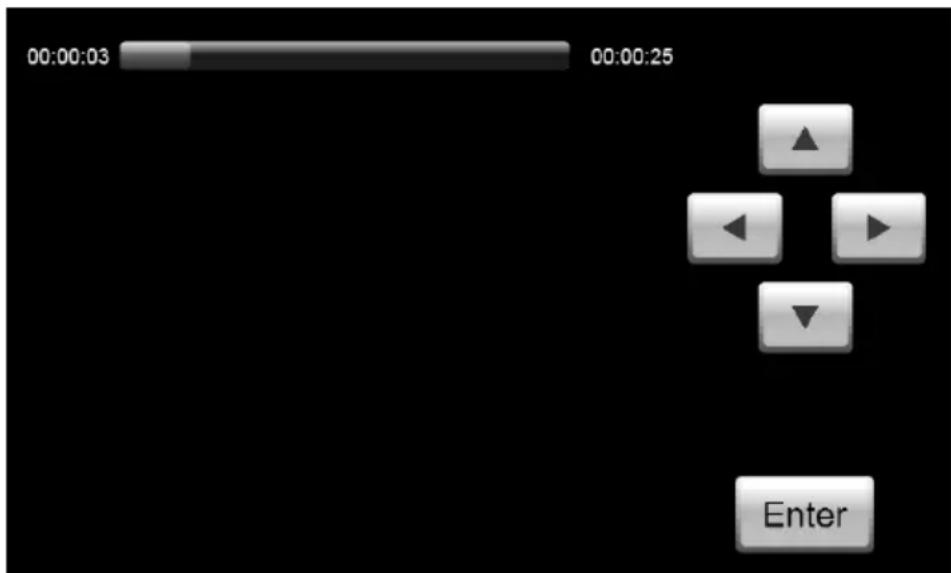
Img27 -Disc- DVD main menu
- Touch the screen to show the video DVD menu.
- Touch menu to open the unit's menu control system.
-
Now select one of the arrow keys on the right ▲ / ▼ / ▶ to move the pointer in the desired direction round the film's menu options.
-
Once you have highlighted the required option, select the Enter function key to activate it.
- Make all the desired settings available in the film's menu.
- Start the film by selecting the required option from the film's menu selection.
- The film starts and the unit switches to full-screen view.
Full-screen view
- In full-screen view, all buttons are hidden. Touch the screen to see the video DVD menu again.
- If you now touch inside the free area of the screen again, the video DVD menu will be hidden again. The video DVD menu is hidden automatically after 10 seconds of inactivity.
The video DVD menu
While a film is being played, you can change settings in the video DVD menu, and you can switch to another scene on the current video DVD or to a different audio or video source.
Opening the unit's own menu control
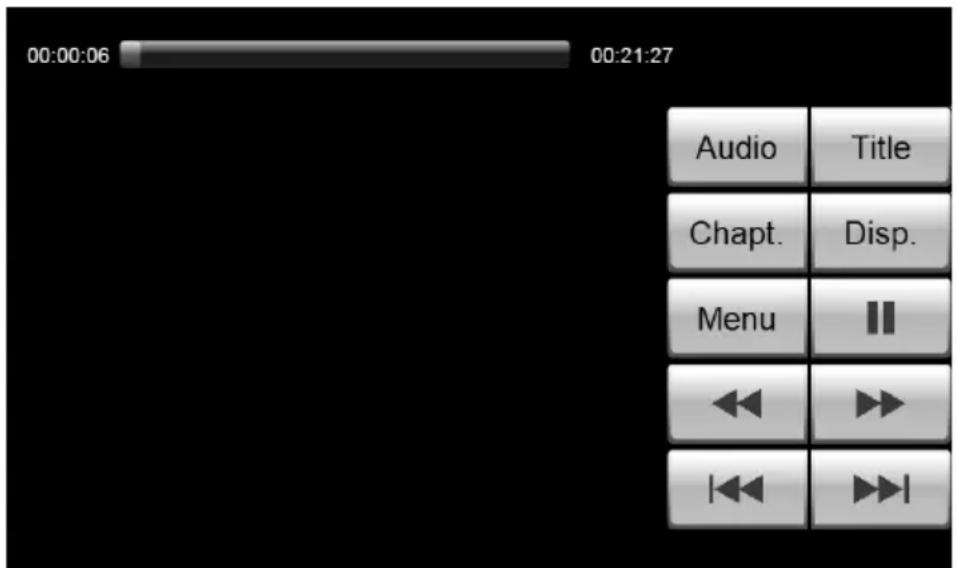
Img28 –Disc– DVD main menu
- In the video DVD menu, touch the Motion key to open the unit's own menu control.. A film that is running is switched back to its menu selection.
- Touch to close the unit's menu control system. The view changes back to full-screen mode. Depending on the file structure of the inserted DVD, the film will stop in its menu selection or playback will resume from the point where it stopped.
Function keys used to control the current audio or video source
- Pause: Press the soft key to pause or play again the video.
- Fast playback : Touch the soft key or to fast forward or fast backward.
- Video select : Touch the soft key 🏠 or 🏠 to select the previous or next video.

NOTICE
The buttons ◀ and ▶ on the front panel have the same function with soft key and .

Img29 –Disc–DVD Display setting
Changing display settings
- In the video DVD menu, touch the Display function key to adjust the brightness, contrast and chroma of the film displayed on the screen. A slide control is provided for each setting option.
- Alternatively, press the + or - key next to the slider to change the setting incrementally.
- These settings will not affect the display in any other menus.
Opening chapter selection

Img30 -Disc- DVD Chapter selection
- In the video DVD menu, touch the Chapt. function key while a film is running to view a list of chapters on the video DVD. The current chapter is at the top, with all the following chapters underneath.
- Touch the display of a chapter directly (e.g. Chapter 1). Film playback continues from the beginning of the selected chapter.
- Select to return to the film without selecting another chapter.
- Alternatively you can change the current chapter by touching the arrow keys on the unit or in the video DVD menu, or by turning the settings knob.
- To adjust the screen display for all functions, go to the main Setup menu and select Display.
Play a CD/MP3 disc
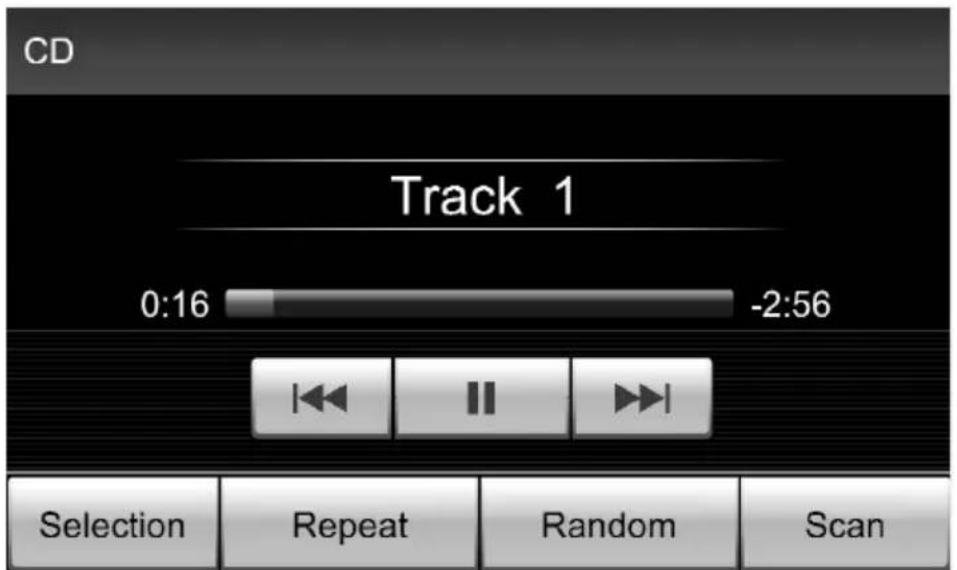
Img31- Disc - CD/MP3 mode
Inserting a CD/MP3 disc
- Insert a disc in to the disc slot, the screen displays "Reading disc...". If the disc is loaded successfully, the system will change to CD/MP3 menu and play the disc at the same time.
Ejecting a CD disc
- Press button - to eject the disc and the screen displays "Ejecting disc...". If the CD/MP3 is not removed from the tray within 10 seconds, it is retracted again to prevent damage.
Playing control
- Pause: press the soft key Ⅱ to pause or play again the music.
- Track select: Short press the soft key or to select the previous or next track.
- Fast playback : Long press the soft key or button to fast forward or fast backward.
Track selecting
- Press the soft key Selection at the right bottom of screen to enter the track selection menu.
- You can find all the tracks in the list and select the track by touching of the track name on screen.
- The track that is currently playing is highlighted.
- To view all of the tracks, move the slider at the right of the screen down.
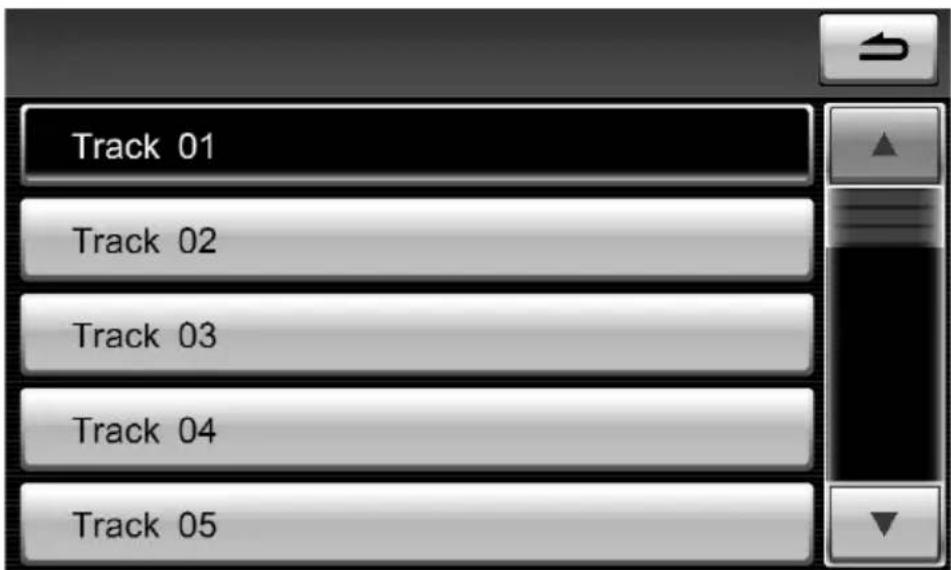
Img32 – Disc– Select a CD folder
Repeat / Random / Scan
- Touching the soft key buttons

bottom of screen to open and close the "Repeat", "Random", "Scan" function.
After the function is opened, the status word will be displayed at the right top of the screen.
- Repeat: repeat playback current track.
- Random: Random playback current CD/MP3 disc.
- Scan: Scan the whole CD/MP3 disc and play each track 10 seconds.

NOTICE
ID3 tag: ID3 is a metadata container most often used in conjunction with the MP3 audio file format. It allows information such as the title, artist, album, track number, and other information about the file to be stored in the file itself.
Play a Data disc
Inserting & Ejecting a Data disc
The step is similar with DVD or CD.
Data disc Music Mode

Img33 – Disc – Data disc music mode
Playing control
- Pause: press the soft key 11 to pause or play again the music.
- Track select: Short press the soft key or to select the previous or next track.
- Fast playback: Long press the soft key or to fast forward or fast backward.
Track selecting
- Press the soft key Selection at the left bottom of screen to enter the track selection menu.
- You can find all the tracks and folders in the list. You can select the track and folder by touching the name on screen.
- The track that is currently playing is highlighted.
- To view all of the tracks, move the slider at the right of the screen down.
- If the item in the list is a folder name, then after pressing the button you will get into the folder.
- Press the soft key to go back the main folder.
![Alizee.-.[L'alize].live.( Celine Dion - Immortality Dear U Every Time I Close My Eye MJPEG-1024_768](/content/2026/05/1073136/images/4c3ab02f5588334d12e0f38a43809fdbab840872922520c89caef0ee6c121817.jpg)
Img34 – Disc –Data disc Folder
Repeat / Random / Scan
- Touching the soft key buttons at the bottom of screen to open and close the "Repeat", "Random", "Scan" function. After the function is opened, the status word will be displayed at the right top of the screen.
- These functions are similar with USB.
Data disc Video Mode

Img35 – Disc – Data disc video mode
Playing control
- Pause: Press the soft key Ⅱ to pause or play again the video.
- -Fast playback : Touch the soft key or to fast forward or fast backward.
- Video select : Touch the soft key 🏠 or to select the previous or next video.
- Touch the soft key List to go back the video folder.
- Touch the soft key to change display settings..

Img36 – Disc – Data disc video display settings
Warning
Your attention must always be concentrated on road traffic as an absolute priority! The telephone should only be used if the road traffic situation allows. Accidents and injuries can occur if the driver is distracted.
- Please only use the telephone when the road, weather and traffic conditions are such that it is safe to do so.
- The different volume settings should be selected so that warning signals from outside the vehicle, e.g. a police or fire brigade siren, can be heard at all times.
- It will not be possible to make a telephone call in areas with no signal or with only a very weak mobile telephone network and in some cases, in tunnels, garages and subways. This also means that no emergency calls can be made.
Connect to the mobile phone
Press the【PHONE】to get into the bluetooth handsfree function.

Img37 – Bluetooth handsfree main menu
BT Setting Press the soft key to go to bluetooth setting.

Img38- Bluetooth setting
In the "BT setting" menu, all bounded mobile phone names are displayed in the list. You can press the button to remove the bounded mobile phone name from the list. Pressing the button to bound a new mobile phone, and the button change to until the connecting finished.

Img39 – Bluetooth setting – Matching a new mobile phone.
Turn on the bluetooth of mobile to match a new device.
A new device named "Blackberry 8320" was found. Enter the password "0000" on mobile phone to finish the matching.

Img40 – Bluetooth setting – Phone list
The Contact List download remind will jump out during the connection. Touch the bottom Yes to download the Contact List.
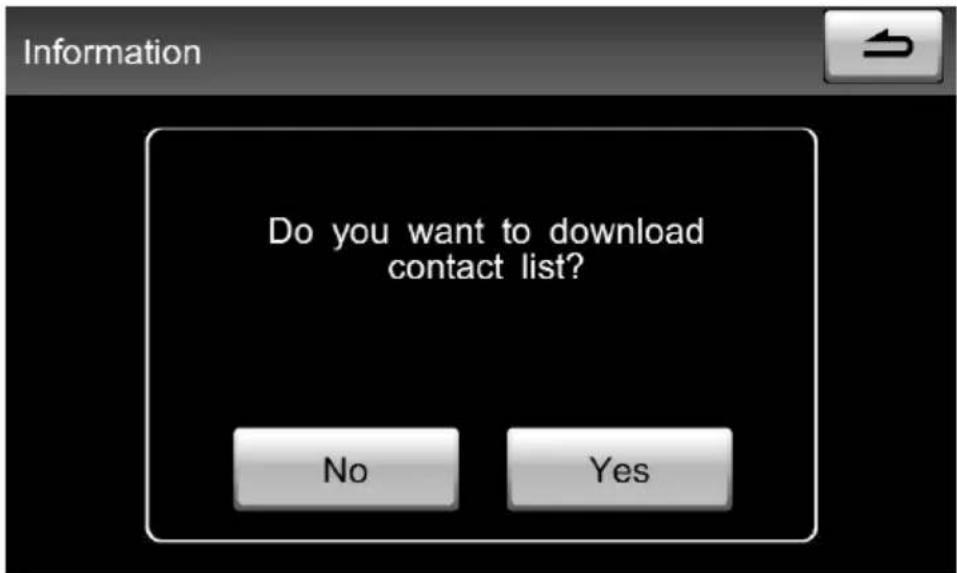
Img41 – Bluetooth setting – Contact list download

CAUTION
Few brand of mobiles don't support this function because of the compatibility.
After the mobile phone established the connection with Built-In Bluetooth, an icon with be displayed at the start of list item.
Press to return to phone main menu.
Make a phone call
You can dial a number via touching the keyboard and press the green button to call the number. System will record the dialed number in the memory.


Img42 – Dial a call
During a telephone call
- If you touch the mute function key during a telephone call, the current call is switched to "mute". This means that the call continues to be held while the sound is muted.
- When you touch the function key UnMute, the call can be continued.
- If you touch the function key during the call, the call to the current telephone number will be ended and the unit changes to the phone main menu.
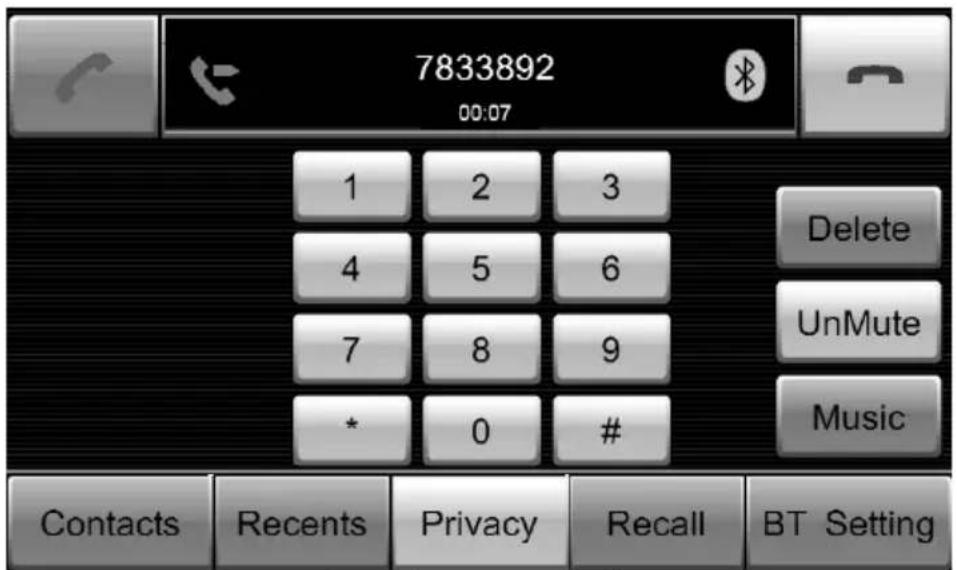
Img43- mute a call

CAUTION
Privacy
Few brand of mobiles will disconnected the bluetooth after pressing because of the compatibility.
- If you touch Privacy function key during a call, The voice will only be outputted from the ear phone and the voice will never be heard by others.
- Press the function key Speaker to resume the handsfree phone call.
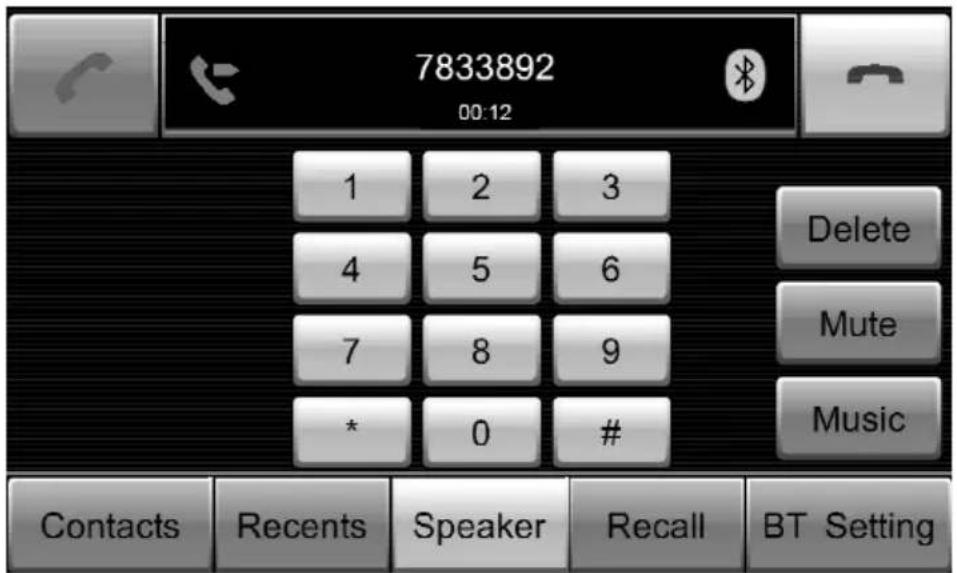
Img44 – Privacy mode in a call
- Touch soft key to end the call.
Incoming telephone calls
An incoming telephone call is shown on the screen as "Incoming call" along with the telephone number of the caller. If the number of the caller is saved in the telephone book, the name of the caller is shown instead of the telephone number.
- Touch the function key to accept the call.
- Touch the function key to refuse the call.

Img45 – Incoming a call

Img46 – Receive a call
During the call, you can turn the left knob to adjust the telephone volume.

Img47 – Adjust the volume during the call
You can adjust the sound character and the volume of different audio sources to suit your individual needs.

Img48 – Tone setup main menu
Treble - Bass
Press the soft key Treble-Bass to get into the "Treble-Bass" setting.
- Short press the soft key to enlarge the "Treble" or "Bass", the cursor moves to the right.
- Short press the soft key to reduce the "Treble" or "Bass", the cursor moves to the left.
- Press to go back the tone setup main menu.
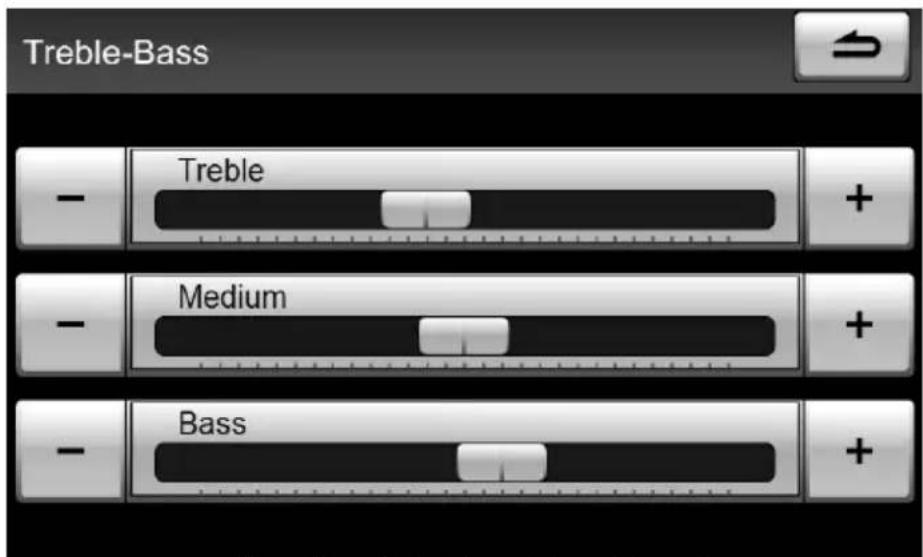
Img49 – “Treble – Bass” setting
Balance-Fader
- Press the soft key, to adjust the balance, the cursor moves.
- Press the soft key Front, Back to adjust the fader, the cursor moves.
- Press → to go back the tone setup main menu.

Img50 – “Balance – Fader” setting
Volume Settings
- Startup volume:
Default value of system startup. If actual volume is larger than startup volume in the last time, then system will use the default value as the volume setting after reboot. If actual volume is smaller that startup volume in the last time, then the startup volume has no effect.
– Navigation volume: Volume of navigation.
– TA volume: Volume of traffic announcement.
Short press the soft key + to enlarge the "Startup volume", "Navigation volume" or "TA Volume", the cursor moves to the right.
Short press the soft key — to reduce the “Startup volume”, “Navigation volume” or “TA Volume”, the cursor moves to the left.
Press to go back the tone setup main menu.

Img51 – Volume settings
Volume Settings
Press the soft key GALA to get into the "GALA" setting.
- Short press the soft key + to enlarge the "GALA", the cursor moves to the right.
- Short press the soft key to reduce the "GALA", the cursor moves to the left.
- Press → to go back the tone setup main menu.

Img52 – GALA settings
Acoustic feedback
Select the "On" or "Off" button to open and close the acoustic feedback.
- Select "On", the acoustic feedback is opened and the sound can be output via loudspeaker.
- Select "Off", the acoustic feedback is closed.
Press "SETUP" button to enter the setup main menu after system started up. You can set the system settings in the menu.
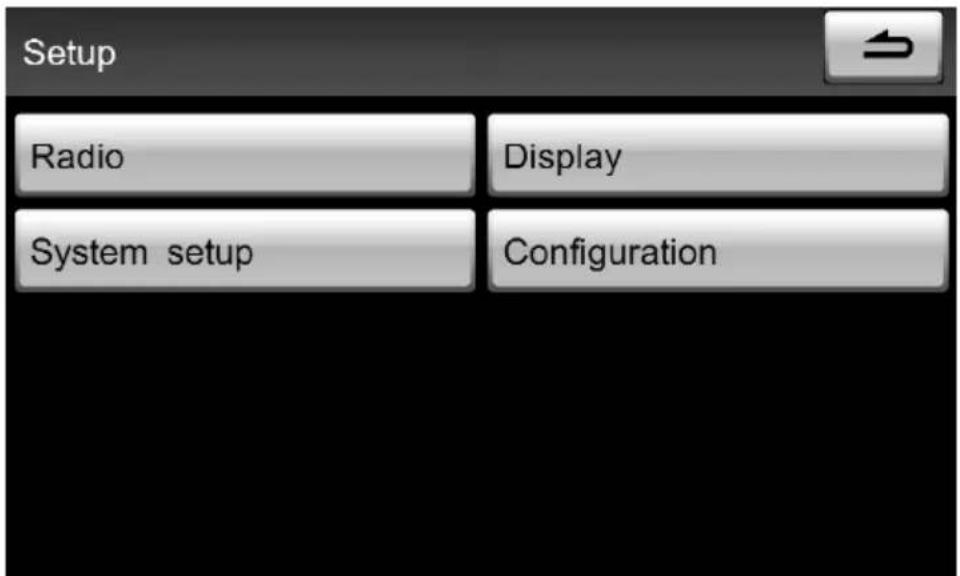
Img53 – Setup main menu
Radio Setup
Press soft key Radio to enter into radio setup main menu.

Img54 – Radio setup main menu
Select preset band
There are 30 presets reserved for FM, MW and LW bands. You can select different section of presets to store the radio station from the pull-down menu.
RDS Regional Mode
Press the soft key Automatic and select an item in the pull-down menu to change the RDS regional mode setting.
- Select "Automatic" to switch station automatically.
- Select "On" to activate the RDS regional mode.
- Select "Off" to deactivate the RDS regional.
Delete memory list
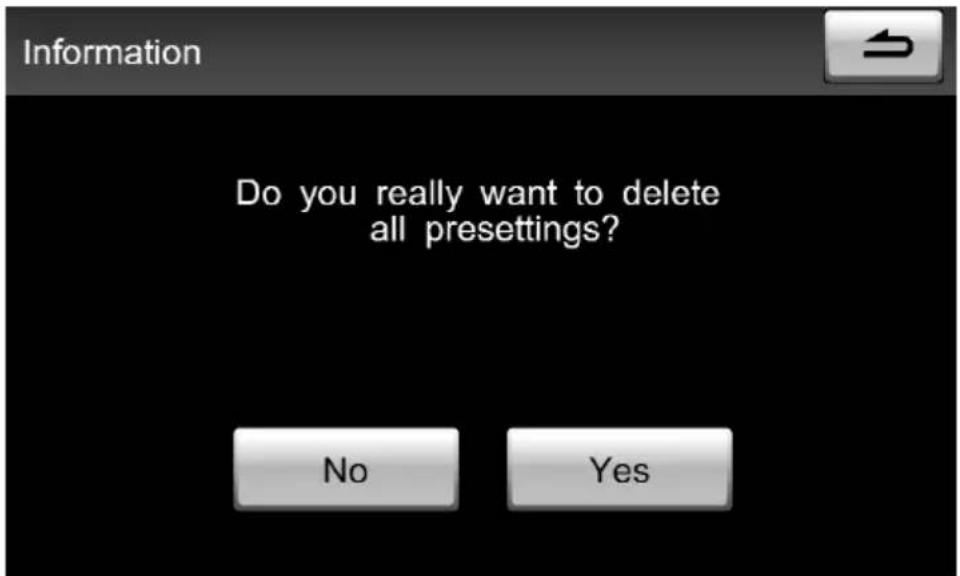
Img55 – delete all presets
Press the soft key to enter into warning window to confirm the delete action.
- Select "Yes" to delete all presets.
- Select "No" to cancel.
Display setup
Press soft key Display to enter into display setup main menu.
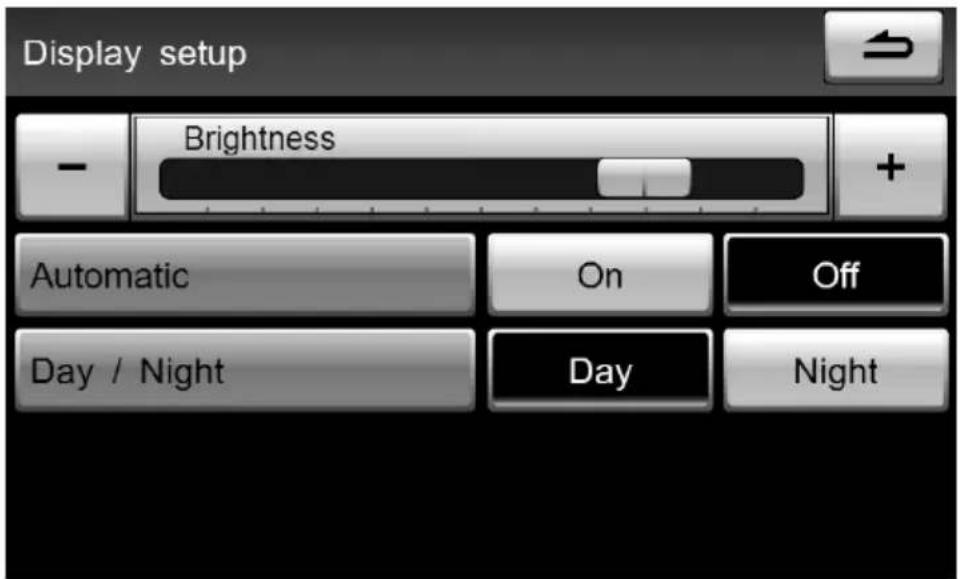
Img56- Display setup main menu
Set brightness
- Short press the soft key + to enlarge the "Brightness", the cursor moves to the right.
- Short press the soft key — to reduce the “Brightness”, the cursor moves to the left.
- Press → to go back the tone setup main menu.
Automatic brightness adjustment
- Select "On": the automatic brightness adjustment is opened and the brightness will be adjusted automatically according to the headlight on and off.
- Select "Off", the automatic brightness adjustment is closed.
- If the brightness is set "Off", you can set "Day" or "Night" as your need.
System Setup
Press soft key to enter into system setup main menu.
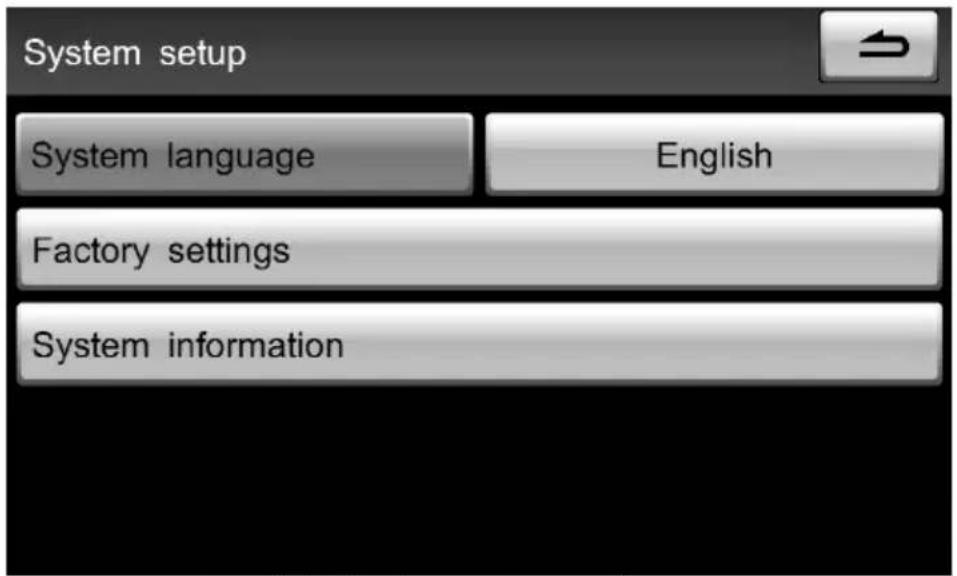
Img57 – System setup main menu
System language
Touch to choose the language from the pull-down menu. Such as English, Italian.
Factory settings
Press soft key Factory settings to enter into the factory setting main menu. In this menu, you can clear all the user's personal settings.
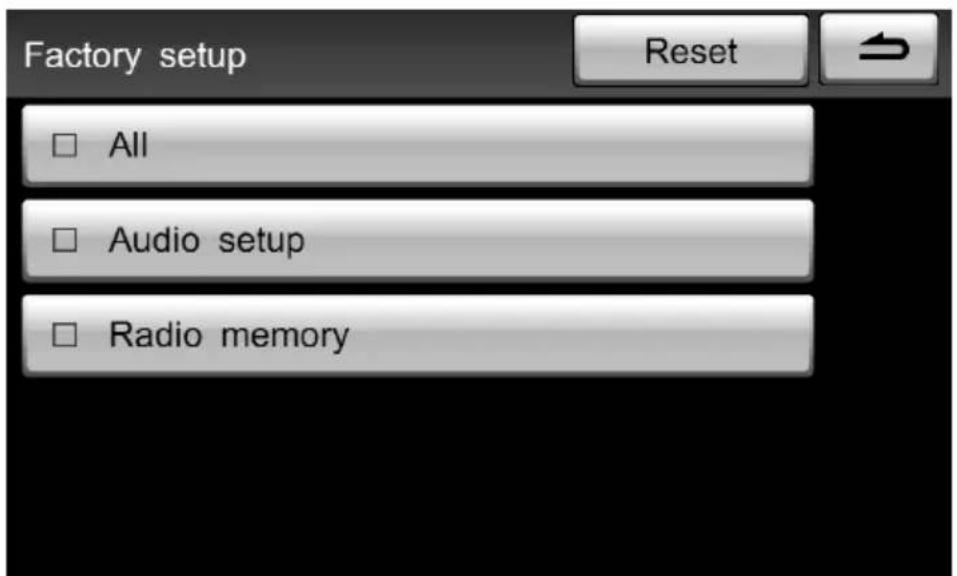
Img58 - Reset the factory settings
- In the Factory settings menu, activate the checkboxes in front of the entries by touching the appropriate function key. Touch the function key again to deactivate the checkbox.
- In this way, you can select settings you would like to reset.
- Touch the Reset function key and confirm the following security check to reset the selected settings to factory settings and delete the data stored there.
System information
Press soft key System information to enter into the system information.

Img59 – System information
Configuration
Press soft key to enter into the configuration menu.

Configuration menu include Reverse assistant、Assistant type and Car type for customer select.

Connections diagram

The BLUETOOTH® world mark and logos are registered trademarks owned by the Bluetooth SIG, Inc. and any use of such marks by ALDINET S.p.A. is under license.
The MACROM brand is a registered trade mark of MACROM SA and any use of such marks by ALDINET S.p.A. is under license.

Declaration of Conformity

ALDINET S.p.A.
Viale C. Colombo 8 - 20090 Trezzano s/N (Mi) - Italy
Tel. +39 02 48478.1
www.macrom.it


- CAUTION
- QUICK GUIDE
- Product Overview
- On/off switch and volume control
- Function Buttons:
- ◀ and ▶
- Knob
- USB/AUX IN/ SD card slot
- Using touch screen
- Selecting radio stations
- Opening RADIO main menu
- Band switching
- Changing radio stations
- Setting radio stations manually
- Selecting radio stations from the station list
- Storing radio stations
- Storing radio stations on a displayed station button
- Storing radio stations into memory list
- EXTRA Function
- Scan all receivable radio stations
- Open the radio text window
- NOTICE
- Alternative frequency (AF)
- Traffic programme (TP) function
- Incoming traffic announcement
- Overview of the MEDIA main menu
- USB Mode
- Plug / Unplug USB
- USB Music Mode
- Playing control
- Track selecting
- Repeat / Random / Scan
- USB Picture Viewer Mode
- USB Text Read Mode
- SD Card Mode
- Plug / Unplug SD card
- SD Card Music Mode
- SD Card Video Mode
- Disc
- General information on Disc mode
- CD/DVD cannot be read
- WARNING
- Play a DVD disc
- General information
- Inserting a video DVD
- Opening and operating the menu control
- Full-screen view
- The video DVD menu
- Function keys used to control the current audio or video source
- Changing display settings
- Opening chapter selection
- Play a CD/MP3 disc
- Inserting a CD/MP3 disc
- Ejecting a CD disc
- Play a Data disc
- Inserting & Ejecting a Data disc
- Data disc Music Mode
- Data disc Video Mode
- Connect to the mobile phone
- Make a phone call
- During a telephone call
- Incoming telephone calls
- Treble - Bass
- Balance-Fader
- Volume Settings
- Acoustic feedback
- Radio Setup
- Select preset band
- RDS Regional Mode
- Delete memory list
- Display setup
- Set brightness
- Automatic brightness adjustment
- System Setup
- System language
- Factory settings
- System information
- Configuration
- Connections diagram
Brand : Macrom
Model : M-OF7010
Category : Car radio