Sky Hero MDR002 - Drone Manta - Free user manual and instructions
Find the device manual for free Sky Hero MDR002 Manta in PDF.


| Product Type | Stunt Drone (Mini Quadcopter) |
| Model | Sky Hero MDR002 |
| Brand | Manta |
| Dimensions | Approximately 30 x 30 x 8 cm |
| Weight | Approximately 100 g (with battery) |
| Battery | Li-Po 3.7V 380mAh |
| Flight Time | 5-7 minutes |
| Charging Time | Approximately 40 minutes |
| Transmitter Battery | 2x 1.5V AA (not included) |
| Camera | Onboard video camera with Micro SD slot |
| Storage | Micro SD card up to 32GB (1GB included) |
| Video Format | AVI |
| Functions | Throttle, aileron, elevator, rudder, 360° roll, LED lights |
| Materials | Plastic shell, metal motors |
| Recommended Age | 14+ |
| Operating Environment | Indoor/outdoor (wind < 4 Bft), clear area |
| Trim Adjustments | Throttle, yaw, pitch, roll trims |
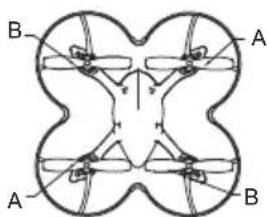
| Blades | 4x interchangeable (A/B pairs) |
| Spare Parts Available | Guard circle, blades, motors, battery, shell, LED lights, foot pads, receiver board |
| Charging Safety | Supervise charging; use only included USB charger |
| Battery Disposal | Follow local regulations for Li-Po batteries |
| Maintenance | Keep dry, store in cool place, clean with dry cloth |
| Manufacturer | Manta Europe |
Frequently Asked Questions - Sky Hero MDR002 Manta
User questions about Sky Hero MDR002 Manta
0 question about this device. Answer the ones you know or ask your own.
Ask a new question about this device
Download the instructions for your Drone in PDF format for free! Find your manual Sky Hero MDR002 - Manta and take your electronic device back in hand. On this page are published all the documents necessary for the use of your device. Sky Hero MDR002 by Manta.
USER MANUAL Sky Hero MDR002 Manta
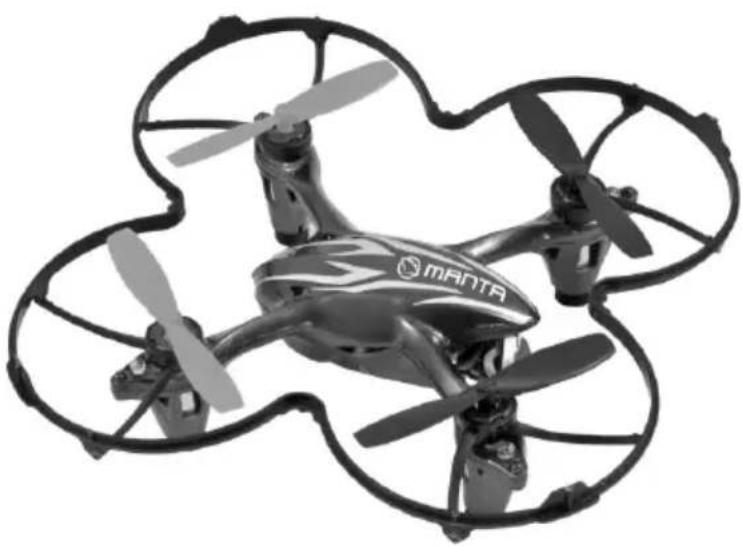
MANTA
SKY HERO DRONE
Model:
MDR002
Instrukcja Obsługi
User's Manual
1. PRZEDMOWA

Zabronione
ZAPOBIEGAĆ ZAWILGOCENIU


Zabronione
INFORMACJE O BEZPIECZEŃSTWIE DLA AKUMULATORÓW NI-MH

Zabronione
INFORMACJE O BEZPIECZEŃSTWIE DLA AKUMULATORÓW LI-PO

Uwaga
PRZECHOWYWAĆ Z DALEKA OD OGNIA
3. WYPOSAŻENIE STANDARDOWE

USB Ładowarka
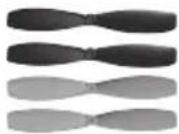
Łopatka x4
4. NAMES OF AIRCRAFT
Ostona śmigieł

Akumulator litowo-polimerowy 3.7V380mAh
Krok 1
Krok 3

UWAGA
WYMIANA LOPATEK WIRNIKA
Narrow the circle
KROK 5 ZMIANA KIERUNKU I UNOSZENIE SIĘ W MIEJSCU
REGULACJA KAZDEGO WYWAŻENIA
CZYTNIK KART

KARTA SD O POJEMNOŚCI 1GB
1. FOREWORD
Thank you for choosing Our products! This is a stunt aircraft suitable for indoor and outdoor flying, in order to bring more convenient and easy to use, please carefully reading this manual before operating this aircraft, you properly preserved this maunal, adjustment and maintenance for reference in the future.
WARNING LABEL MEANINGS

WARNING
Mishandling due to failure to follow these instructions may result in damage or injury.

CAUTION
Mishandling due to failure to follow these instructions may result in danger.

FORBIDDEN
Do not attempt under any circumstances
IMPORTANT NOTES
Helicopter is not a toy, miniature remote control four-axis aircraft, but there is still some risk of the matter with instructions to correctly use the model in accordance with the Security, the dismantling of any modification or improper use of the product are not familiar with may be dangerous to the risk of unexpected or accidental, please do not overlook.
Manufacturer and dealer assume no liability for accidental damages by abnormal wear fo parts, improper assembly, or operation in unsafe manners. This product is intended for use by age 14 years or older. Please ensure the product is operated under safe environment.
We recommend that you seek the assistance or an experienced pilot before attempting to fly our products for the first time. A local expert is the best way to properly assemble, setup, and fly your model for the first time. The requires a certain degree of skill to operate, and is an item subject to normal wear and tear. Any damage or dissatisfaction as a result of accidents or modifications are not covered by any warrantee and cannot be returned for repair or replacement. Please contact our distributors are not covered by any warrantee and cannot discounted rates when you experience problems during operation or maintenance.
2.PRECAUTIONS

CAUTION
Fly only in safe areas away from other people Do not operate stunt aircraft within the vicinity of crowds
or people. Stunt aircraft are prone to accidents, failures, and responsible for their actions and damage or injury occurred during pilot error, and radio interference, pilots are responsible for their actions and damage or injury occurred during the operation or as of a result of R/C aircraft models.

FORBIDDEN
Special despecial design for indoor & outdoor, please keep it away from obstacle
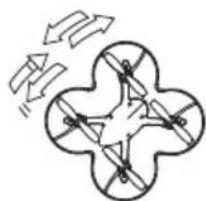
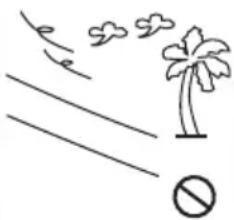
This product is suitable for indoor and outdoor(the wind grade should be no more than 4),please choose a place without obstacle,and keep distance from crowd and pets,don't play it under unsafty,for instance,heat source,wite or electronic power source,in order not to be damaged by collision landing,entanglement and lead to a fire,electric shock and cause losses of lives and property.

FORBIDDEN
PREVENT MOISTURE
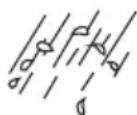
Aircraft internal is composed by a number of sophisticated electronic components, it must absolutely prevent moisture or water vapor, avoid use in bathroom or wet weather to prevent water vapor into the internal baody parts and electronic components caused by failure caused by unexpected accidents.


FORBIDDEN
PROPER OPERATION
Please do not remove or any reform at any processing, any of the modified or upgrade maintenance, please use the original product catalogue of parts, to ensure the safety of the structure. Please confirm the product boundary operation, do not overload use, and not used for safety, decrees, the other illegal purposes.


FORBIDDEN
SAFETY NOTE FOR NI-MH BATTERIES
Make sure the batteries are installed based on polarity indicated in the case and no not mix batteries of different chemistry/spec. Please take out the batteries if you are not going to use for a long time to avoid potential leakage which may damage the transmitter. Please dispose depleted batteries according to local laws and ordinances. Do not dispose improperly.


FORBIDDE
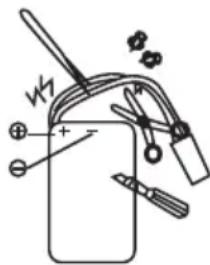
SAFETY NOTE ON LI-PO BATTERIES
Li-Po batteries poses higher operational risks compared to other battery chemistry, thus it is imperative to follow its usage instructions. Manufacturer and dealer assume no liability for accidental damages caused by improper usage. Do not use charger other than the factory supplied unit to avoid potential fire and explosion. Do not crush, disassemble, burn, and reverse polarity. Avoid metallic materials to come into contact with battery's polarity and cause it short and never puncture batteries to avoid fire hazards. Battery charging must be done under supervision at all times, and at location out of reach by children. Please stop the use or charge of the battery should there be an unusual increase in battery temperature after usa. Continue use of this battery may cause it to expand, deform, explode, or even result in fire hazards. Please dispose depleted batteries according to local laws and ordinances. Do not dispose improperly.


CAUTION
KEEP AWAY FROM HEAT 远离热源
R/C models are made of various forms or plastic. Plasticis very susceptible to damage or deformation due to extreme heat and cold climate. Make sure not to store the model near any source of heat such as an oven, or heater. It is best to store the model indoors. in a climate-controlled, room temperature environment.


FIRE


WARNING
2.1.3
OBTAIN THE ASSISTANCE OF AN EXPERIENCED PILOT
The products are suitable for more than 14 years old age, at the beginning it will have some certain difficulty in learning, suggestion guidance by experienced when playing.

3. STANDARD ACCESSORIES

USB Charger
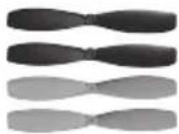
BladeX4
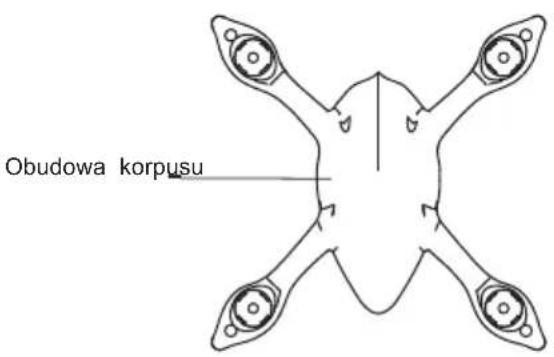
4. NAMES OF AIRCRAFT
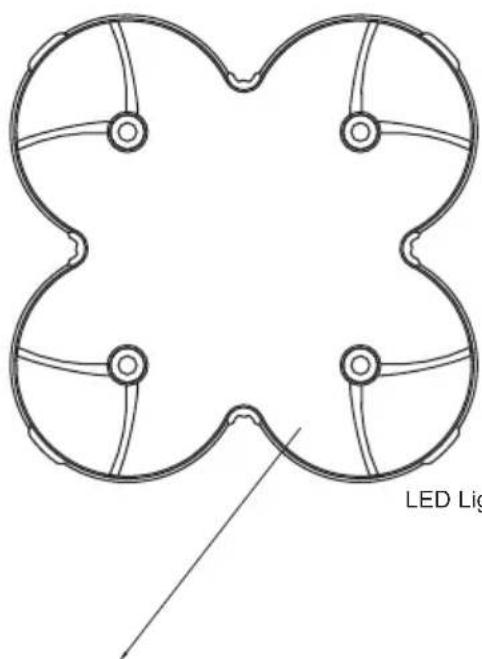
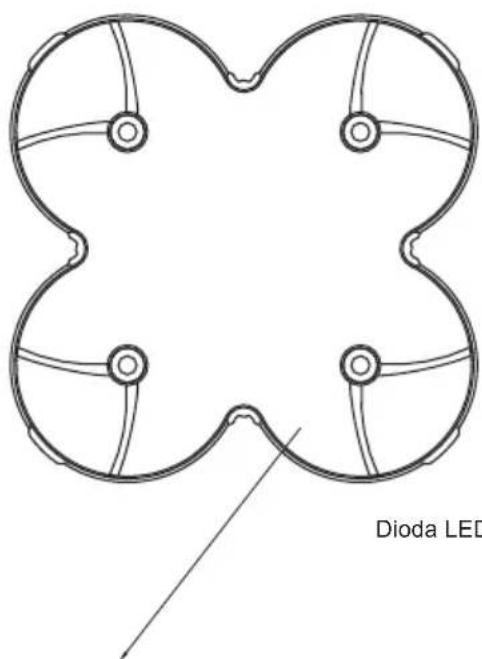
Guard circle
The surface of the shell
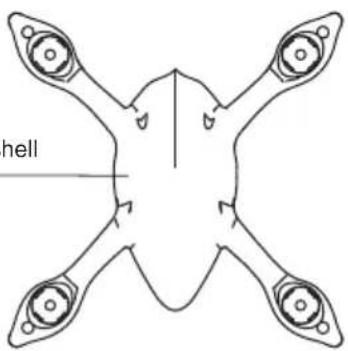
LED Light
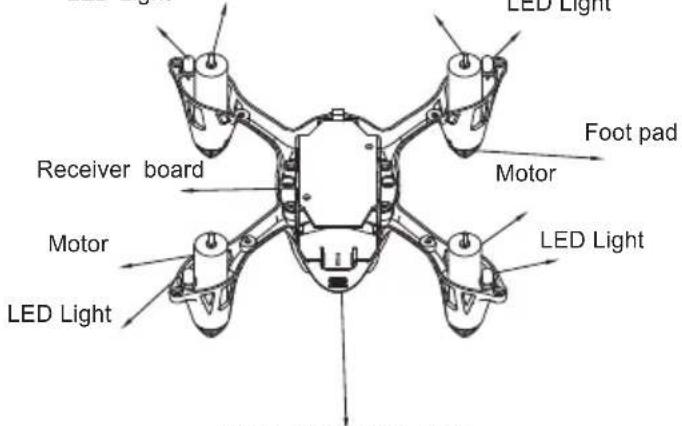
The bottom of the shell
- NAMES OF CONTROLLER
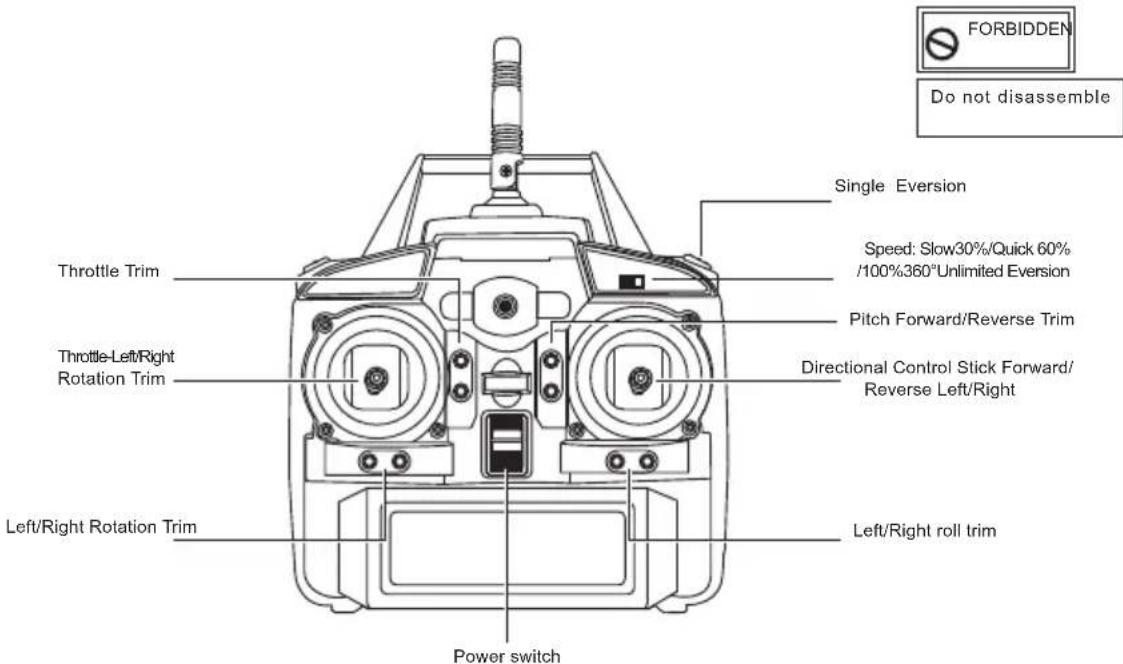
- CONTROLLER BATTERY INSTALLATION


Correct Disposal of this product. This marking indicates that this product should not be disposed with other household wastes throughout the EU. To prevent possible harm to the environment
or human health from uncontrolled waste disposal, recycle it responsibly to promote the sustainable reuse of material resources. To return your used device, please use the return and collection systems or contact the retailer where the product was purchased. They can take this product for environmental safe recycling.

CAUTION RISK OF EXPLOSION IF BATTERY IS REPLACED BY AN INCORRECT TYPE. DISPOSE OF USED BATTERIES ACCORDING TO THE INSTRUCTIONS
7. CHARGING
Use the charger to the vehicle battery charging

Charge of the factory and distribution of the flying saucer special charger. plane power switch to position OFF, the charger into a power outlet; The USB is red lighting when the USB connect the power source. After connect the battery, the red lighting will be goes out. When the battery charging is finish, the USB will be red lighting As shown.

WARNING
For safety concerns, battery charging must be done under supervision at all times.

CAUTION
LED Indicator LED Charger Specifications
| Red light The red-light out |  |
| Charge Completion Charging |
| Input Charging Current Full Voltage | |
| 110-240V 500MA 4.2 ± 0.03 V |
8. BATTERY AND CHARGER SPECIFICATION
Battery usage and charge duration reference
| Battery type | Battery Specification | Usage Duration Charge Time | |
| Li-Po battery Aircraft flight time, 5-7 minutes3.7V 380mAh | About 40 minutes | ||
| Carbon-Zinc(Non Rechargeable)() | 1.5V(GP 15G R6P) | Transmitter Operation Time 18 Hours | Non Rechargeable |
9. BINDING OF RADIO TRANSMITTER AND RECEIVER
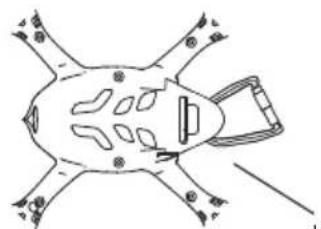
Li-Po Battery 3.7V380mAh
Step 1
Aircraft placed in a flat position, the batteries according to the diagram shown in Direction pushed into the electrical outlet to the positioning of the motherboard light is blinking. Do not Then move the body, so that the remote control on the frequency and gyroscope read the neutral point.
Step 2
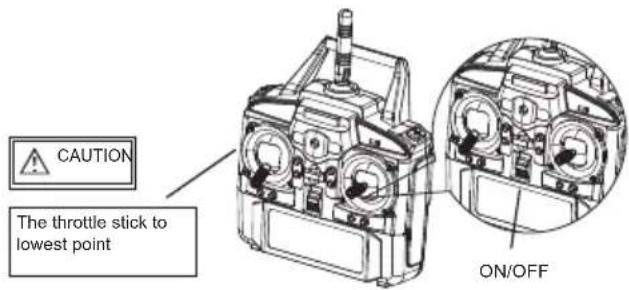
The throttle stick to the bottom, turn the remote control power.
The throttle stick to lowest point
Step 3
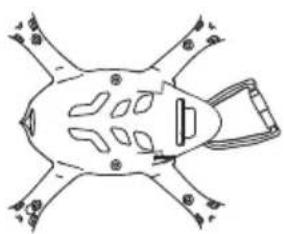
When the end of the flight, unplug power cord.

Warning: Battery plug is not pulled out, will cause the battery to excessive discharge, and even cause a risk of fire.

If transmitter is not to be used for a long duration, please remove the battery for storage.
Step 4
Power down the remote control. If transmitter is not to be used for a long duration, please remove the battery for storage.
Warning: If left connected in the flight vehicle for long duration, the battery may be damaged fire hazards.
10. FLIGHT ADJUSTMENT AND SETTING
Before you are familiar with the flight vehicle, pleasure don't set it fly, read the instruction carefully.
Get familiar with all kinds of direction control and keep repeating until you can play it as you perform your wishes
- Place the flight vehicle a clear open field and the tail of helicopter point to yourself.
- Practice to operate the throttle stick (as below illustration) and repeat practicing "Throttle high/low", "Aileron left/right" "Rudder left/right", and "Elevator up/down".
- The simulation flight practice is very important, please keep practicing until the fingers move naturally when you hear operation operation orders being call out.


| Mode Illustration | Illustration Mode | ||
Aileron | Move right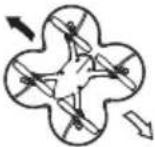 Move left Move left | Throttle | 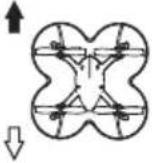 AscentDescent AscentDescent |
Elevator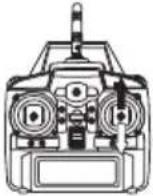 |  Fly forward Fly backward Fly forward Fly backward | Rudder | 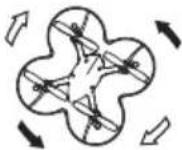 Turn leftTurn right Turn leftTurn right |
FLIGHT AD JUSTMENT AND NOTICE FOR BEGINNERS

CAUTION
Check if the screws are firmly tightened.
Check if the transmitter and receivers are fully charged.
When arriving at the flying field.


CAUTION
Make sure that no people or obstructions in the vicinity.
You must first practice hovering for flying safety. This is a basic flight action.
(Hovering means keeping the flight vehicle in mid air in a fixed position)
Please stand approximately 2 m diagonally behing the flight vehicle.
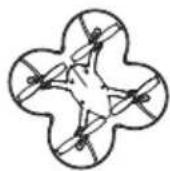

STEP 1 THROTTLE CONTROL PRACTICE


When the flight vehicle begins to lift-off the ground, slowly reduce the throttle to bring the flight vehicle back down. keep practicing this action until you control the throttle smoothly.
STEP 2 AILERON AND ELEVATOR CONTROL PRACTICE


- Raise the throttle stick slowly.
- Move the flight vehicle in any direction back, forward, left and right, slowly move the aileron and elevator sticks in the opposite direction to fly back to its original position.
CAUTION
If the nose of the flight vehicle moves, please lower the throttle stick and land the flight vehicle. Then move your position diagonally behind the flight vehicle 2m and continue practicing.
- If the flight vehicle flies too far away from you, please land the flight vehicle and move your position behind 2m and continue practicing.

STEP 3 RUDDER CONTROL PRACTICING
- Slowly raise the throttle stick.
- Move the nose of the flight vehicle to right or left, and then slowly move the rudder stick in the opposite direction to fly back to its original position.


HOW TO CHANGE THE AIRCRA OF THE BLADE
When you want to change the aircraft of the blade, you can see the picture as above. Please pay attention on the picture of the letter which consistent with the blade of the letter. This to avoid the aircraft can not fly.
STEP 4
After you are familiar with all actions from step 1 to 3, draw a circle on the ground and practice within the circle to increase your accuracy.

Narrow the circle
You can reduce the size of the circle as you become familiarized with the control reflexes.

STEP 5 DIRECTION CHANGE AND HOVERING PRACTICE
After you are familiar with Step 1 to 4, stand at side of the flight vehicle and continue practicing step 1 to 4. Ther repeat the step 1 to 4 by standing in front of the flight vehicle.

ADJUSTMENT OF EACH TRIM
Slowly raise the throttle stick and just as the helicopter lift-off the ground, you can use the trim to correct the action if the helicopter leans in a different direction.
- Rotation around Trim
just before the flight vehicle lift-off, the nose lean left/right...
When rotation right, adjust the trim to left rotation. When rotation left, adjust the trim to fight rotation.

- Adjustment of elevator trim
Just before the helicopter lift-off, the nose lean forward/backward...
When leans forward, adjust the trim to down. When leans backward, adjust the trim up.

- Adjustment of aileron trim
Just before the helicopter lift-off, the body left/right...
When leans right, adjust the trim to left side. When leans left, adjust the trim to right side.


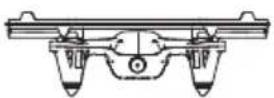
Stable, flexible, flight routes, Drift, 3D tp roll easily

You can play some exciting control if you were real familiar in all the base operation. Firstly, flying the UFO to 3 meter while pressing the button of rolling controller, then, release the button of rolling control meanwhile the UFO will be rolling by 360 angle. If you do real want to control your own UFO in any direction, push the button of speeding controller to 100 percent. Push any of the forward/back/left side/right side controller to the end and release all the controller, then the UFO will be rolling by 360 angle.
- RULE OUT TROUBLE DURING FLIGHT
| Situation | Cause Way to deal | ||
| 1 | The receiver light keeps flashing operation | Unable to bind to transmitter. Repeat the power up initializing process. | |
| 2 | The aircraft not any reaction | 1.Power to transmitter and receiver2.Check transmitter and receiver voltage.3.Poor contact on battery terminals. | 1.Turn on transmitter and ensure flight vehicle battery is inserted properly.2.Use fully charged batteries.3.Re-seat the battery and ensure good contact between battery contacts. |
| 3 | Motor does not respond to throttle stick, receiver LED flashes. | WHEN UFO li-po battery power not enough. | Fully charge the battery,or replace with a fully charged battery. |
| 4 | Main rotor spins but unable to takeoff. | 1.Deformed main blades.2.Flight vehicle battery depleted3.Not detected horizontal point. | 1.Replace main blades2.Charge or replace with fully charged battery.3.Placed on the flat ground,reboot |
| 5 | Strong vibration of flight vehicle | 1.Deformed main blades 1.Replace main blades | |
| 6 | Tail sill off trim after tab adjustment, or inconsistent speed during left/right pirouette. | 1.Danaged tail rotors2.Danaged tail drive motor3.Not detected horizontal point | 1.Replace main blades2.Replace the main motor3.Placed on the flat ground,reboot |
| 7 | Flight vehicle still wonders forward after trim adjustment during hovert. | 1.Gyroscope midpoint not | 1.The boot will lift fine-tune the normalized neutral point, reboot |
12. PARTS LIST

| NO | Name | Quantity |
| 1 | Guard circle | 1 |
| 2 | Receiver board | 1 |
| 3 | The bottom of the shell | 1 |
| 4 | Batery | 1 |
| 5 | Battery Box | 1 |
| 6 | Blade(A) | 2 |
| 7 | Blade(B) | 2 |
| 8 | The surface of the shell | 1 |
| 9 | Motor | 4 |
| 10 | Foot pad | 4 |
| 11 | Video board | 4 |
| 12 | LED Light | 4 |
NOTE!
Product design and Technical parameters may be change without notice. This mainly concerns parameters technical, software and user manual present. User's Manual is a general orientation on service product.
Manufacturer and distributor do not assume any responsibility as compensation for any inaccuracies errors in the descriptions appearing in this user manual.
USING THE ON-BOARD VIDEO CAMERA
- To make video recording press the Video Camera ON/OFF Button located on the left side the transmitter (See pic.3)
- A light under the video camera will glow green when in stand-by mode and the light will flash red when camera is recording video.(See pic.4)
- Light will flash red and green continuously when Micro SD Card memory is full. The video recordings (AVI files) must be removed in order to make room for new recordings.
- To view recording remove the MicroSD card from the rear of the video camera (See pic.4) by slightly depressing the MicroSD card and allowing it to then spring out enough to grab it and pull it out of the slot.
- MicroSD Card can now be used as a Thumb Drive.
- Go to "NO NAME" drive, go into the DCIM Folder, Go into the 100DSCIM Folder, AVI files can be played on several media players such as "Quicktime."
- HAVE FUN!!!
*If you have trouble playing the files with Quicktime try your other media players. You can also look online for recommended free downloadable AVI players.
• Video camera does not record sound.
• Micro SD Card should be placed with the little copper connections facing as show in Pic.5
*All fies on the Micro SD Card can be removed or erased without compromising the video camera. The video camera will regenerate the DCIM and 100DSCIM folders if necessary.


Fittings

CARD READER

1GB SD CARD

MANTA
INFOLINIA SERWISOWA
from Monday to Friday. 9.00-17.00
The manufacturer reserves the right to make changes to product specifications without notice.
Home: www.manta.com.pl
Home support: www.manta.info.pl


Made in P.R.C.
FOR MANTA EUROPE
- MANTA
- SKY HERO DRONE
- PRZEDMOWA
- WYPOSAŻENIE STANDARDOWE
- NAMES OF AIRCRAFT
- KROK 1
- KROK 3
- UWAGA
- WYMIANA LOPATEK WIRNIKA
- KROK 5 ZMIANA KIERUNKU I UNOSZENIE SIĘ W MIEJSCU
- REGULACJA KAZDEGO WYWAŻENIA
- FOREWORD
- WARNING LABEL MEANINGS
- IMPORTANT NOTES
- 2.PRECAUTIONS
- OBTAIN THE ASSISTANCE OF AN EXPERIENCED PILOT
- STANDARD ACCESSORIES
- CHARGING
- BATTERY AND CHARGER SPECIFICATION
- BINDING OF RADIO TRANSMITTER AND RECEIVER
- STEP 1
- STEP 2
- STEP 3
- STEP 4
- FLIGHT ADJUSTMENT AND SETTING
- FLIGHT AD JUSTMENT AND NOTICE FOR BEGINNERS
- CAUTION
- STEP 1 THROTTLE CONTROL PRACTICE
- STEP 2 AILERON AND ELEVATOR CONTROL PRACTICE
- STEP 3 RUDDER CONTROL PRACTICING
- HOW TO CHANGE THE AIRCRA OF THE BLADE
- STEP 5 DIRECTION CHANGE AND HOVERING PRACTICE
- ADJUSTMENT OF EACH TRIM
- PARTS LIST
- NOTE
- USING THE ON-BOARD VIDEO CAMERA
- INFOLINIA SERWISOWA
Brand : Manta
Model : Sky Hero MDR002
Category : Drone