Sky Stig MDR003 - Drone Manta - Free user manual and instructions
Find the device manual for free Sky Stig MDR003 Manta in PDF.


| Product Type | Quad-copter drone |
| Brand | Manta |
| Model | Sky Stig MDR003 |
| Fuselage Length | 230 mm |
| Overall Height | 50 mm |
| Main Rotor Diameter | 106 mm |
| Gross Weight | About 102 g |
| Battery Type | Li-polymer 3.7V |
| Charging Time | About 70 minutes |
| Flight Time | Up to 9 minutes |
| Motor Type | Coreless motor (4) |
| Control System | 6-Axis Gyro control system |
| Frequency | 2.4 GHz auto connection |
| Flight Modes | Beginner (low), Intermediate (medium), Advance (high) speed |
| Special Features | Headless mode, One Key Return, 3D flips & roll |
| Camera | Built-in camera #C4005 (FPV via smartphone app) |
| Remote Controller | 2.4 GHz with LCD display, requires 3 x AA batteries (not included) |
| Included Accessories | Quad-copter, 4 blades, screws, remote control, mobile phone holder, screwdriver, user manual, protecting frames, USB charger |
| Safety Warnings | Not for children under 14; adult supervision required; keep 1-2 m distance; do not modify or disassemble |
| Maintenance Tips | Replace blades if deformed; charge battery fully before storage; clean with dry cloth |
Frequently Asked Questions - Sky Stig MDR003 Manta
User questions about Sky Stig MDR003 Manta
0 question about this device. Answer the ones you know or ask your own.
Ask a new question about this device
Download the instructions for your Drone in PDF format for free! Find your manual Sky Stig MDR003 - Manta and take your electronic device back in hand. On this page are published all the documents necessary for the use of your device. Sky Stig MDR003 by Manta.
USER MANUAL Sky Stig MDR003 Manta
natural_image
Top-down view of a four-legged drone with propellers and control panels (no text or symbols visible)Instrukcja Obsługi
User's Manual
natural_image
Laptop connected to a cable with a connector, next to a black screen (no visible text or symbols)Rys.17
natural_image
Technical line drawing of a multi-rotor control device with no visible text or symbolsRys.19
Wskazówki:
natural_image
Front view line drawing of a multi-rotor control device with no visible text or symbolsnatural_image
Diagram of a mechanical or electrical component with directional arrows indicating flow or movement (no text or symbols)natural_image
Close-up of a hand using a screwdriver to mark a curved arrow on a document (no text or symbols visible)natural_image
Close-up of a hand holding a small electronic component, possibly a device or tool, with no visible text or symbols.natural_image
Close-up of hands performing a medical procedure with syringe (no visible text or symbols)natural_image
Close-up of hands holding a small metallic tool or wire, no visible text or symbolsnatural_image
Close-up of a mechanical component with a metallic connector (no visible text or symbols)natural_image
Close-up of a hand using a screwdriver to mark a small electronic component (no visible text or symbols)natural_image
Close-up of hands using a screwdriver to adjust a small electronic device (no visible text or symbols)Rys.29
natural_image
Close-up of a hand holding a black mechanical component with a metallic label (no visible text or symbols)Rys.30 Rys.31
natural_image
Close-up of a hand holding a small mechanical component, possibly a tool or clamp, with no visible text or symbols.natural_image
Close-up of hands holding a black mechanical component with an arrow indicating direction (no visible text or symbols)Rys.32
Fuselage Length:230mm
Overall height: 50mm
Main Rotor Diameter: 106mm
Gross Weight: about 102g
Battery: Li-polymer 3.7V
Charging Time: about 70 minutes
Motor: Coreless motor
Introduction
- Quad-rotor design insures more stable and powerful performance and make all kinds of 3D action more easier.
● Headless Mode and One Key Return are available. - New designed structure makes assembly and maintenance easier.
- Adopting 2.4G auto connection technology, scores of quad-copters can be played at the same time.
● Equipped with the newest 6-Axis Gyro control system, this quad-copter has the characteristics of stable flight and easy operation.
● Full charged battery can support 9 minutes steady flight.
Product/spare parts included in this packaging
| Description | QTY (pc) | Description | QTY (pc) | Description | QTY (pc) |
| Quad-copter Blades | 1 4 4 | Screw | |||
| Remote control | 1 | Holder of the mobile phone | 1 | Screwdriver | 1 |
| Manual | 1 | Protecting frames | 1 | USB charger | 1 |
Thank you for purchasing this product. Please read this manual carefully before use and retain it for future reference.
Safety guidelines
- This product is not a toy. It is not applicable for children who are under 14 years old.
- Please read this instruction manual carefully before playing and operate the product according to the manual.
- The users are in full charge of proper operating the quad-copter. The manufacturer and dealers disclaim all responsibility for the damage caused by misuse.
- Keep the small accessories away from the kids to avoid accident.
- Keep batteries away from fire or high temperature environment.
- When flying the quad-copter, keep it 1\~2 meters away from user or others to avoid injury due to collision.
- Not to decompose or modify the product which may cause malfunction or accident.
● Fly the quad-copter within your eye vision for easy and safety control. - Need adult supervision when this quad-copter is being played by children.
- Only batteries of the same or equivalent type as recommended are to be used.
- Insert batteries with correct polarity.
- Non rechargeable batteries are not to be charged; the transmitter need 3XAA batteries for work.
- Do not mix old and new batteries.
Main features of the remote controller
- Adopt microcomputer control remote controller system and 2.4G auto connection technology, scores of cotpers can be played at the same time without any interference.
- Control the function of upward, downward, forward, backward, leftward, rightward, turn left, turn right and 3D flips & roll of the copter.
- Throttle control stick can be freely switched according to player's habit.
Sketch and function switches of the remote controller
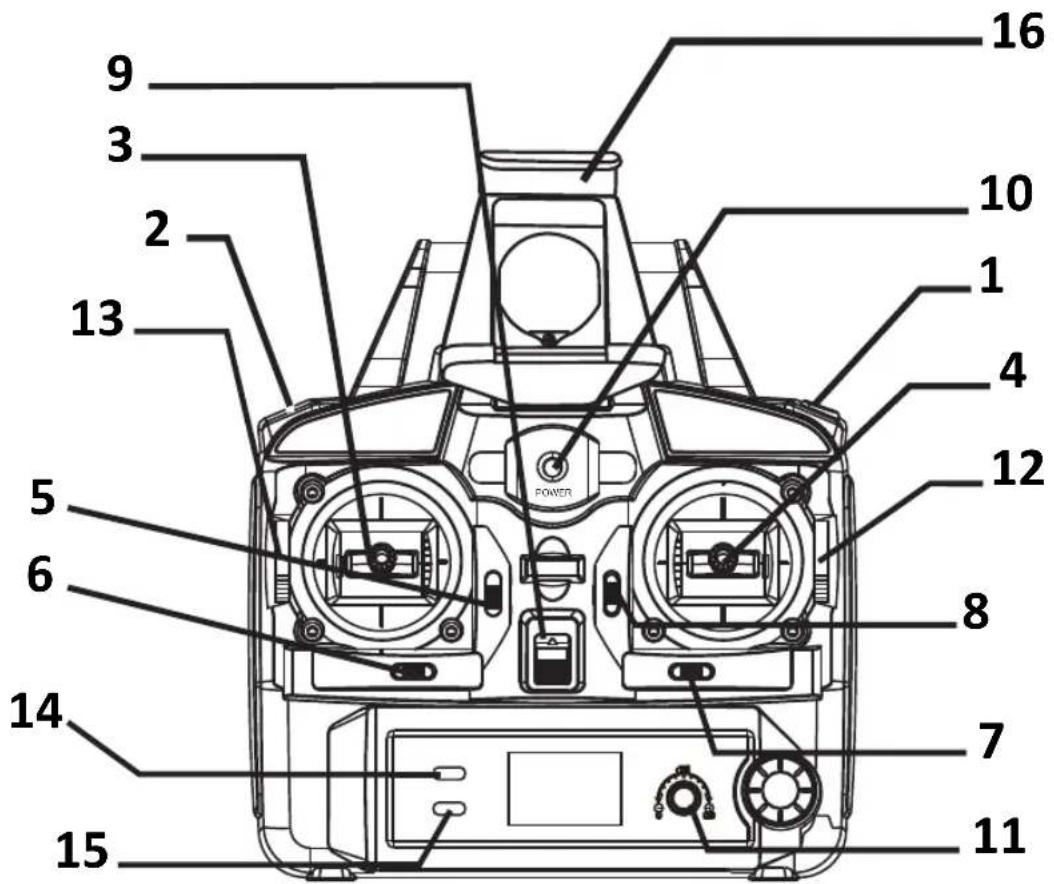
Remote Controller(Transmitter)
- Power switch
- Left stick
- One key return
- Throttle changing button (Left)
- Trimmer A
- Trimmer B
14.Beginner/Intermediate/Advance
15.Stick mode switch
16.Holder of the mobile phone
10. Power indicator
1. Function headless/Camera
4. Right stick
12. Throttle changing button (Right)
8. Trimmer D
7. Trimmer C
11.Throttle limit button
| No. | Function switch Function description | |
| 1 | Function/ Camera | One key roll button: When the quad-copter is flying, press this button, the quad-copter will roll forward once. Camera button: When the quad-copter is powered on and mounted with camera, this is the camera on-off button. Headless mode on-off button: Press this button for about 2 seconds, the remote control will send out 2 beep sounds and letters “stick mod” will be flashing on the LCD screen, the indicator light of the quad-copter turns from constant “on” to “flashing”, then, the quad-copter is in the headless mode. Press this button again for about 2 seconds, the remote control will send out 2 beep sounds and “stick mod” keeps constant “on”, indicator light of the quad-copter turns from flashing to constant “on”, then, the quad-copter exit headless mode. |
| 2 | One key return | When the quad-copter is flying in headless mode, press one key return button, the quad-copter will fly towards player. Press the one key return button again or operate the forward/backward control stick, the quad-copter will exit the one key return function. |
| 3 | Left stick | STICK MODE 2: upward/downward, turn left/turn right; STICK MODE 4: upward/downward, leftward/rightward. STICK MODE 1: forward/backward, turn left/turn right; STICK MODE 3: forward/backward, leftward/rightward. |
| 4 | Right stick | STICK MODE 1: upward/downward, leftward/rightward; STICK MODE 3: upward/downward, turn left/turn right; STICK MODE 2: forward/backward, leftward/rightward; STICK MODE 4: forward/backward, turn left/turn right. |
| 5 | Trimmer A | In stick Mode 2 and 4, this button is null. In stick Mode 1 and 3, it helps to tune the quad-copter's forward and backward flight. |
| 6 | Trimmer B | In stick Mode 3 and 4, it helps to tune the quad-copter's sideward flight. In stick Mode 1 and 2, it helps to tune the quad-copter's left and right direction turning speed. |
| 7 | Trimmer C | In stick Mode 3 and 4, it helps to tune the quad-copter's left and right direction turning speed. In stick Mode 1 and 2, it helps to tune the quad-copter's sideward flight. |
| 8 | Trimmer D | In stick Mode 1 and 3, this button is null. In stick Mode 2 and 4, it helps to tune the quad-copter's forward and backward flight. |
| 9 | Power switch | It controls the power source of the transmitter.Slide the power switch to the “ON” position, the transmitter is powered on; slide the power switch to the “OFF” position, the transmitter is powered off. |
| 10 | Power indicator | The indicator light keeps blinking slowly: the transmitter is not activated. The indicator light keeps flashing rapidly: the transmitter is sending out connectional signal to the quad-copter. The indicator light keeps on without blinking: the transmitter is ready for controlling the flight. |
| No. Function switch Function description | ||
| 11 | Throttle limit button | The throttle of the quad-copter can be adjusted by this button, player can use this button to increase or decrease the quad-copter's upward/downward speed. |
| 12/13 | Throttle changing button | Slide down or slide up the 2 buttons at the same time to select the throttle control stick. |
| 14 | Beginner/ Intermediate/ Advance | There are 3 flight modes of the quad-copter: low speed, medium speed and high speed. |
| 15 | aileron/rudder changing button | Also named Stick Mode changing button.Press this button to change the control stick mode. |
| 16 | Holder of the mobile phone | Being used to fasten the mobilephone to the remote control. |
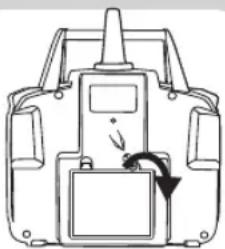
How to install the battery of remote controller
natural_image
Technical line drawing of a mechanical device with no visible text or symbolsPic.1 Pic.2 Pic.3

natural_image
Technical line drawing of a mechanical component with battery connections (no text or symbols)How to remove and insert batteries.

natural_image
Diagram of a device with a button and arrow indicating rotation (no text or symbols)- Unscrew counter clockwise to open the battery compartment cover.(Pic.1)
- Install 3 X AA batteries into the battery compartment according to the given polarity. (Pic. 2)
- Screw clockwise to close the battery compartment. (Pic. 3)
Select throttle control stick
There is 1 throttle button on either side of the remote controller.
1.Slide both of the 2 buttons to "R", the right stick is the throttle control stick.
2.Slide both of the 2 buttons to "L", the left stick is the throttle control stick.
3. Both of the 2 buttons should be either on the position of "R" or "L", otherwise, the remote controller can not be activated.
PiC.4 PiC.5

Stick mode selection
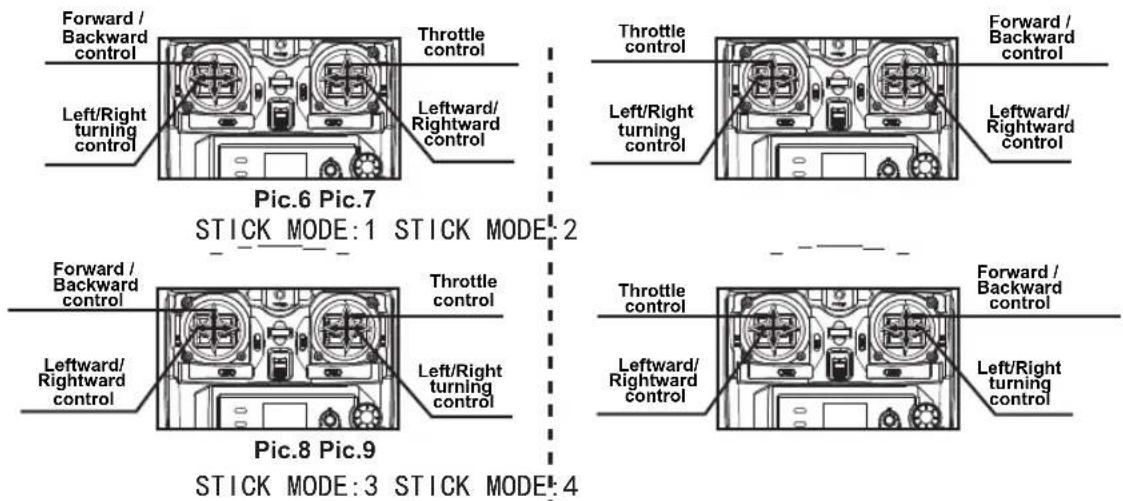
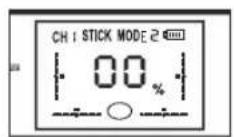
When the right stick controls the throttle, press the AILE/RUDD button to select the Mode( Mode 1 or Mode 3).
When the left stick controls the throttle, press the AILE/RUDD button to select the Mode( Mode 2 or Mode 4).
Flight mode selection
There are 3 flight modes available: low speed, medium speed and high speed. Player can select the flight speed by pressing the flight mode button.
Pic.10

Pic.11

Pic.12
The quad-copter
Major parts of the quad-copter

How to change new battery for the quad-copter
Pic.13 Pic.14 Pic.15 Pic.16

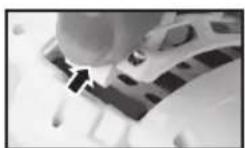
1.Open the battery compartment cover. (Pic.13)
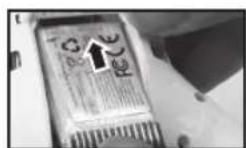
2. Unplug the battery wire from the power wire plug of the quad-copter and take out the battery. (Pic.14)
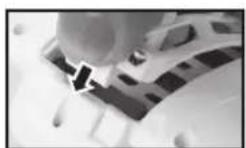
3. Plug the new battery wire into the power wire plug of the quad-copter and insert the battery into the battery compartment. (Pic.15)
4. Close the battery compartment cover. (Pic.16)
How to charge the quad-copter
Turn off the quad-copter, open the battery door ,unplug the battery cable from the power wire plug and take out the battery. Insert the USB charger into the USB interface of the computer or other USB outlet; connect the battery cable with the USB wire plug, and charging is proceeding with indicator light "off". Once the battery is full charged, the indicator light of the USB will turn red. Full charging takes about 70 minutes.

natural_image
Illustration of a laptop connected to a cable with a connector, labeled 'Pic.17' (no text on device or background)NOTE: Battery should be full charged before storing.
Preparation for flight
●Make sure that the battery (at the bottom of the quad-copter) is well installed and connected with power wire of quad-copter. The quad-copter is OFF.
- Turn on the quad-copter; the flash light will keep flashing quickly, the gyro of quad-copter will be in signal detecting condition. Set the quad-copter to flat surface, about 4 seconds later, the flash light will keep constant "ON". It means that signal connection is finished and the quad-copter is ready for flight.
●To ensure steady flight, please set the value of the Trimmer to the midpoint.
- Push up the throttle stick slowly and the quad-copter takes off.
- To avoid any misunderstanding, we have defined the orientation of the quad-copter as follows: The quad-copter is set to be copter nose right ahead and tail facing the player. The copter nose direction is named as "forward", the tail direction is named as "backward". The copter flies up to the sky is name as "upward"; the copter flies down to the ground is named as "downward". Player's left side is named as "left", player's right side is names as "right". All the directions we are talking about in this manual are subject to the definition above.

Pic.18
- When the quad-copter is on, checking the rotation direction of the rotor blades; the front-left and right-back rotor blades should be rotating in clockwise direction; the right-front and left-back rotor blades should be rotating in counter-clockwise direction.
- If the quad-copter keeps flying to one side, it can be corrected by adjusting the trimmer on the remote control.
Remarks:
- Signal connection between the quad-copter and the remote control is required for the first use.
- Set the connection one by one to avoid signal connection error.
- To better protect the battery, please unplug the battery cable from the power wire after the use.
Trimmer functions
If the quad-copter keeps moving forward/backward even there is no control signal given, users may adjust the elevator trim to keep the quad-copter balanced.
STICK MODE 1 or 3:
 | If the quad-copter keeps moving forward, push down Trimmer A until it gains balance. |
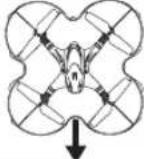 | If the quad-copter keeps moving backward, push up Trimmer A until it gains balance. |
STICK MODE 2 or 4:
 | If the quad-copter keeps moving backward, push up Trimmer D until it gains balance. |
 | If the quad-copter keeps moving forward, push down Trimmer D until it gains balance. |
- If the quad-copter keeps moving leftward/rightward even there is no control signal given, users may adjust the aileron trim to keep the quad-copter balanced.
STICK MODE 3 or 4:
 | If the quad-copter keeps moving leftward, turn right of Trimmer B until it gains balance. |
 | If the quad-copter keeps moving rightward, turn left of Trimmer B until it gains balance. |
STICK MODE 1 or 2:
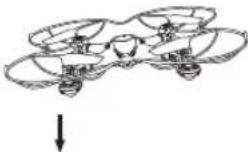 | If the quad-copter keeps moving leftward, turn right of Trimmer C until it gains balance. |
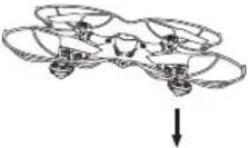 | If the quad-copter keeps moving rightward, turn left of Trimmer C until it gains balance. |
- If the quad-copter keeps spinning even there is no control signal given, users may adjust the rudder trim to keep the quad-copter balanced.
STICK MODE 1 or 2:
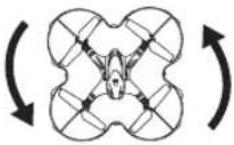 | If the quad-copter keeps spinning counterclockwise in the air, turn right of Trimmer B until it gains balance. |
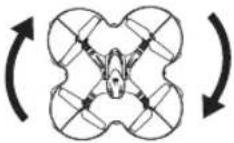 | If the quad-copter keeps spinning clockwise in the air, turn left of Trimmer B until it gains balance. |
STICK MODE 3 or 4:
 | If the quad-copter keeps spinning counterclockwise in the air,turn right of Trimmer C until it gains balance. |
 | If the quad-copter keeps spinning clockwise in the air,turn left of Trimmer C until it gains balance. |
Operating
| Upward |  | Push up the throttle control stick, the rotation speed of the mains rotors are increasing and the quad-copter ascends accordingly. |
| Downward | 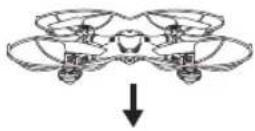 | Push down the throttle control stick, the rotation speed of the mains rotors are decreasing and the quad-copter descends accordingly. |
| Turn left |  | Turn the left/right turning control stick to the left,the quad-copter will turn left. |
| Turn right | 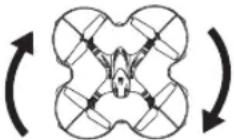 | Turn the left/right turning control stick to the right,the quad-copter will turn right. |
| Forward | 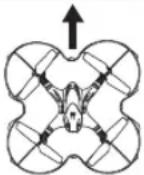 | When the quad-copter is flying, push up the forward/backward control stick, the quad-copter will move forward. |
| Backward | 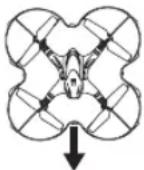 | When the quad-copter is flying, push down the forward/backward control stick, the quad-copter will move backward. |
| Leftward flight | 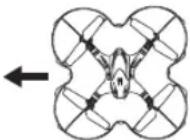 | Turn the sideward flight control stick to the left side,the quad-copter will fly leftward. |
| Rightward flight | 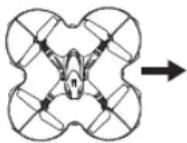 | Turn the sideward flight control stick to the right side,the quad-copter will fly rightward. |
3D Roll
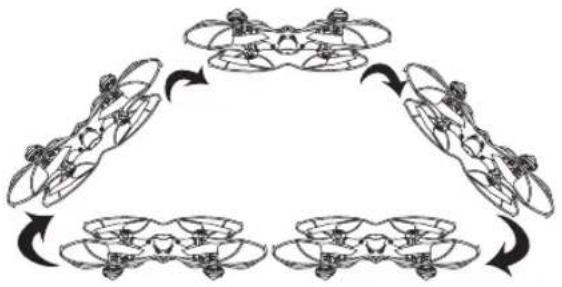
There are 3 channels of the remote control: low speed channel, medium speed channel and high speed channel. At any channel, press the roll button on top of the remote control, the quad-copter will roll forward or roll backward accordingly. When the remote control is at high speed channel, roll action can be done through controlling the forward/backward control stick and the leftward/rightward flight control stick.
Manual roll(at high speed channel):
When both of the left and right control stick travels are more than 95%, roll action will be performed once; when both of the left and right control stick travels are less than 95%, the quad-copter will perform the flight according to the received control signal.
One key roll (at any channel):
To easily enjoy the fun of rolling, player can press the one key roll button to perform roll action. Before rolling, make sure that the quad-copter is flying 3 meters above the ground; then, press the one key roll button, the quad-copter will roll forward or backward according to the given signal.
flowchart
graph TD
    A["Stage 1: Hand-drawn figure"] --> B["Stage 2: Hand-drawn figure"]
    B --> C["Stage 3: Hand-drawn figure"]
    C --> D["Stage 4: Hand-drawn figure"]
    D --> A

natural_image
Technical line drawing of a multi-rotor control device with no visible text or symbolsPic.19
TIPS:
- Beginners are recommended to play the quad-copter at low speed or medium speed channel.
- It is better to play the quad-copter at open and wide space.
Headless mode:
Enter into headless mode:
Once signal of the quad-copter and the remote control is successfully connected, press the function button located at top right of the remote control for 2 seconds, the remote control will send out two beep sounds and there will be letters of “stick mod” flashing on the LCD screen, the quad-copter’s indicator light turns from constant ‘ON’ to “flashing”. That means the quad-copter is in headless mode.
Exit headless mode:
When the quad-copter is in headless mode, press the function button at top right of the remote control of 2 seconds, the remote control will send out 2 beep sounds and the letter "Stick mod" is keeping constant "on"; the quad-copter's indicator light turns from flashing to constant "on". That means the quad-copter has exited the headless mode.

Pic.20
Check up on the direction of the quad-copter in headless mode:
When the quad-copter is in headless mode, flight direction proof is needed. Set the head of the quad-copter ahead of the player, turn both of two control sticks to the lower right corner for about 2 seconds, the quad-copter's indicator light will turn from slowly flashing to quick flashing and flight direction proof is finished.

Pic.21 Pic.22

natural_image
Top-down technical line drawing of a multi-rotor control device with no visible text or symbolsFlight direction control in headless mode:
- When checking up on the flight direction of the quad-copter, set the quad-copter nose right ahead and tail facing the player's, at this time, the quad-copter's nose is pointing forward; this direction will be constantly considered as "forward" when forward signal is given from the remote control, no matter where the quad-copter nose is pointing to. That is to say, the player's straight front side is defined as "forward"; the player's back side is defined as "backward", the player's left side is defined as left; the player's right side is defined as right.
- When the quad-copter is flying in headless mode, player should keep facing the forward direction. Otherwise, the quad-copter will be out of control. The quad-copter control is showed as below:
Push up the forward/backward control stick, the quad-copter will fly forward, away from player.
Push down the forward/backward control stick, the quad-copter will fly backward, towards player.
Turn left the sideward flight control stick; the quad-copter will fly to the left side of player.

natural_image
Diagram of a mechanical or fluid dynamics system with directional arrows indicating flow or movement (no text or symbols)Turn right the sideward flight control stick, the quad-copter will fly to the right side of the player.
Turn right the turning control stick; the quad-copter will turn to the left side of the player.
Turn left the turning control stick; the quad-copter will turn to the right side of the player.
One key return:
When the quad-copter is flying in headless mode, press one key return button, the quad-copter will fly towards player. Press the one key return button again or operate the forward /backward control stick, the quad-copter will exit the one key return function.
Remarks:
- Flight direction proof is needed when the quad-copter is going to fly in headless mode. When checking up on the flight direction, the quad-copter should be set right ahead and tail facing the player; the player should face the direction where the quad-copter nose is pointing to. Player should stand in the same direction when playing the quad-copter.
- When the quad-copter is flying in headless mode, if the flight direction is inconsistent with the player's operating direction or there's direction deviation, please stop playing and carry out the flight direction proof action again.
Schematic diagram of the connection of the motors and the PCB
It is important that the installation of the PCB and the wire connection of the motor to the PCB should be connected properly according to the diagram shown as below.

flowchart
graph LR
    A["Motor 1"] --> B["Receiver Board"]
    C["Motor 2"] --> B
    D["Motor 3"] --> B
    E["Motor 4"] --> B
    B --> F["Camera Interface"]
    G["+ -"] --> F
    H["+"] --> F
    I["+"] --> F
    J["+"] --> F
    K["+"] --> F
    L["+"] --> F
    M["+"] --> F
    N["+"] --> F
    O["+"] --> F
    P["+"] --> F
    Q["+"] --> F
    R["+"] --> F
    S["+"] --> F
    T["+"] --> F
    U["+"] --> F
    V["+"] --> F
    W["+"] --> F
    X["+"] --> F
    Y["+"] --> F
    Z["+"] --> F
    AA["+"] --> F
    AB["+"] --> F
    AC["+"] --> F
    AD["+"] --> F
    AE["+"] --> F
    AF["+"] --> F
    AG["+"] --> F
    AH["+"] --> F
    AI["+"] --> F
    AJ["+"] --> F
    AK["+"] --> F
    AL["+"] --> F
    AM["+"] --> F
    AN["+"] --> F
    AO["+"] --> F
    AP["+"] --> F
    AQ["+"] --> F
    AR["+"] --> F
    AS["+"] --> F
    AT["+"] --> F
    AU["+"] --> F
    AV["+"] --> F
    AW["+"] --> F
    AX["+"] --> F
    AY["+ -"] --> AX
    BZ["+"] --> AX
    CA["+"] --> AX
    CE["+"] --> AX
    CF["+"] --> AX
    CG["+"] --> AX
    CH["+"] --> AX
    CI["+"] --> AX
    CJ["+"] --> AX
    CK["+"] --> AX
    CL["+"] --> AX
    CM["+"] --> AX
    CN["+"] --> AX
    CO["+"] --> AX
    CP["+"] --> AX
    CEI["+"] --> AX
    CEJ["+"] --> AX
    CEK["+"] --> AX
    CEL["+"] --> AX
    CEM["+"] --> AX
    CEN["+"] --> AX
    CEO["+"] --> AX
    CEP["+"] --> AX
    CEQ["+"] --> AX
    CER["+"] --> AX
- Motor 1 should be connected with interface 1.
- Motor 2 should be connected with interface 2.
- Motor 3 should be connected with interface 3.
- Motor 4 should be connected with interface 4.
How to change the foot stand

natural_image
Close-up of a hand using a dropper to mark a curved arrow, with no visible text or symbols.Pic.23 Pic.24 Pic.25
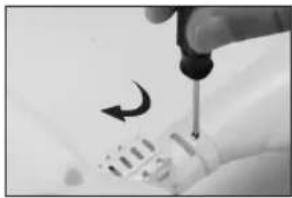
- Take out the screws with a screwdriver by turning counter clockwise.(Pic.23)

natural_image
Close-up of a hand holding a white object with a metallic tool, possibly a tool or device (no visible text or symbols)2.Pull out the foot stand.(Pic.24)

natural_image
Close-up of hands assembling or adjusting a small electronic component (no visible text or symbols)- Unplug the motor wire from the power wire plug. (Pic.25)

natural_image
Close-up of hands holding a small object with a metallic rod, no visible text or symbolsPic.26 Pic.27 Pic.28
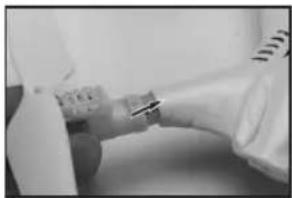
- Connect the motor wire of the new foot stand to the power wire plug.(Pic.26)
natural_image
Close-up of a white electronic device with a metallic connector and a small component, no visible text or symbols.- Install the foot stand to the main body of the quad-copter.(Pic.27)
natural_image
Close-up of a hand using a dropper to mark a curved arrow on a cylindrical object (no text or symbols visible)- Lock the foot stand with screws.(Pic.28)
Install the holder of the mobile phone

natural_image
Close-up of hands using a screwdriver to adjust a mechanical component (no visible text or symbols)Pic.29
- Connect the stand bar to the mobile phone fixing component.(Pic.29)

natural_image
Close-up of hands holding a black mechanical component with a metallic label (no visible text or symbols)Pic.30 Pic.31
- Adjust the fixing component upward or downward according to the size of the mobile phone.(Pic.30)

natural_image
Close-up of a hand holding a small black object with a circular hole, next to a black mechanical component (no visible text or symbols)- Set the mobile phone holder to the top of the remote control. (Pic.31)
Remark:
natural_image
Close-up of hands holding a black mechanical component with a white arrow indicating a force or adjustment (no text or symbols visible)Pic.32
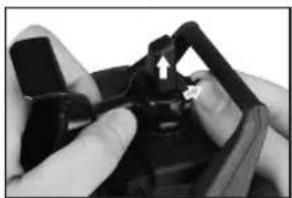
- Pull back the lock center of the stand bar and slowly push up the holder, the mobilephone holder would be taken down.(Pic.32)
FPV software download and installation
Install software
- The quad-copter is with build-in camera #C4005, install the “MJX C4005 FPV” software to smart phone, the photos and videos that taking by the quad-copter can be seen alive when the quad-copter is flying.
- For Android system, please visit our website www.manta.com.pl to download the software "MJX C4005 FPV".
- For Apple IOS system, please go to the APP store to download the software "MJX C4005 FPV".
Instructions
Power on the quad-copter, the FPV indicator light (at the bottom of the quad-copter) is on. Enter into settings of the smart phone, open WIFI, search "MJX C4005 FPV *****" and connect it. After successful connection, exit settings. Open "MJX C4005 FPV" software at the smart phone; click "MONITOR" to enter into the control interface to watch the real-time video.

Pic.33 Pic.34 Pic.35
- Open the software "MJX C4005 FPV".
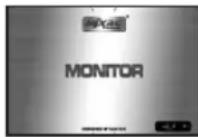
- Click the MONITOR button.

- Image is showing on the screen.
Trouble shooting
| phenomenon reason solution | |||
| 1 | The lights are flashing quickly. | Gyro of the quad-copter is under signal detecting condition. | Set the quad-copter to any flat surface. |
| 2 | The lights are flashing on twice and flashing off once. | The quad-copter is not received the signal from the remote control or signal connection is interrupted. | For abesence of signal, activate the remote control for the signal connection.For signal interruption,turn off the remote control and turn it on again. |
| 3 | The lights are flashing on and off. | The quad-copter is underpowered. | Charge the battery or change another full charged battery. |
| 4 | The quad-copter is shaking fiercely. | The rotor blade is out of shape. | Change the rotor blades. |

natural_image
Abstract black-and-white circular logo design with interlocking curved shapes (no text or symbols)MANTA
INFOLINIA SERWISOWA
from Monday to Friday. 9.00-17.00
The manufacturer reserves the right to make changes to product specifications without notice.
Home: www.manta.com.pl
Home support: www.manta.info.pl



Made in P.R.C.
FOR MANTA EUROPE
- Wskazówki:
- Introduction
- Product/spare parts included in this packaging
- Safety guidelines
- Main features of the remote controller
- Sketch and function switches of the remote controller
- How to install the battery of remote controller
- Select throttle control stick
- Stick mode selection
- Flight mode selection
- The quad-copter
- How to change new battery for the quad-copter
- How to charge the quad-copter
- Preparation for flight
- Remarks:
- Trimmer functions
- 3D Roll
- Manual roll(at high speed channel):
- One key roll (at any channel):
- TIPS:
- Headless mode:
- Enter into headless mode:
- Exit headless mode:
- Flight direction control in headless mode:
- One key return:
- Schematic diagram of the connection of the motors and the PCB
- How to change the foot stand
- Install the holder of the mobile phone
- Remark:
- FPV software download and installation
- Install software
- Instructions
- MANTA
- INFOLINIA SERWISOWA
Brand : Manta
Model : Sky Stig MDR003
Category : Drone