
XR150 - Organ KAWAI - Free user manual and instructions
Find the device manual for free XR150 KAWAI in PDF.


| Product Type | Electronic Organ |
| Brand | Kawai |
| Model | XR150 |
| Dimensions (W x D x H) | 1200 mm x 600 mm x 900 mm (approximate) |
| Weight | 45 kg (approximate) |
| Power Supply | AC 220-240V, 50/60Hz |
| Polyphony | 64 notes |
| Number of Voices | 30+ voices including organ, piano, strings, brass, and more |
| Rhythm Styles | 100+ built-in rhythms |
| Keyboard | 49 keys (standard organ keyboard) with touch sensitivity |
| Pedalboard | 13-note pedalboard (optional or built-in depending on variant) |
| Display | LCD backlit display |
| Recording | Built-in sequencer for recording and playback |
| Connectivity | MIDI In/Out, headphone jack, audio out, USB (if available) |
| Maintenance | Wipe with a soft, dry cloth. Avoid liquids and direct sunlight. |
| Safety | Use only the specified power adapter. Keep away from moisture. |
| Spare Parts & Repairability | Contact Kawai authorized service center for parts and repairs. |
| General Information | Professional electronic organ suitable for practice and performance. |
Frequently Asked Questions - XR150 KAWAI
User questions about XR150 KAWAI
0 question about this device. Answer the ones you know or ask your own.
Ask a new question about this device
Download the instructions for your Organ in PDF format for free! Find your manual XR150 - KAWAI and take your electronic device back in hand. On this page are published all the documents necessary for the use of your device. XR150 by KAWAI.
USER MANUAL XR150 KAWAI
XR150 Electronic Organ
Owner's Manual
Thank you for your purchase of the Kawai XR Series Electronic Organ.
Note :
This equipment has been tested and found to comply with the limits for a Class B digital device, pursuant to Part 15 of the FCC Rules. These limits are designed to provide reasonable protection against harmful interference in a residential installation. This equipment generates, uses and can radiate radio frequency energy and, if not installed and used in accordance with the instructions, may cause harmful interference to radio communications. However, there is no guarantee that interference will not occur in a particular installation.
If this equipment does cause harmful interference to radio or television reception, which can be determined by turning the equipment off and on, the user is encouraged to try to correct the interference by one or more of the following measures:
- Reorient or relocate the receiving antenna.
- Increase the separation between the equipment and receiver.
- Connect the equipment into an outlet on a circuit different from that to which the receiver is connected.
- Consult the dealer or an experienced radio / TV technician for help.
This instrument has been certified to comply with the limits for a class B digital apparatus, pursuant to the Radio Interference Regulations, C.R.C., c. 1374.
This digital piano for household use and is not intended for commercial use.
Safety Instructions
Read this section carefully before using this product. It contains important safety warnings and cautions, which must be followed.
The following symbols are used on the product and their meanings are given below.

CAUTION
Risk of electric shock. Do not open.


CAUTION: To prevent fire and electric shock, do not expose the product to rain or moisture.

Alerts the user to the risk of electric shock.
Alerts the user to the presence of general cautions and warnings in the instruction manual accompanying the product.

WARNING
Indicates a potential hazard that could result in death or serious injury if the product is handled incorrectly.

CAUTION
Indicates a potential hazard that could result in injury or damage to the product or other property if the product is handled incorrectly.
Examples of Picture Symbols

denotes that care should be taken. The example instructs the user to take care not to allow fingers to be trapped.

denotes a prohibited operation. The example instructs that disassembly of the product is prohibited.

denotes an operation that should be carried out. The example instructs the user to remove the power cord plug from the AC outlet.

WARNING
Do not insert or disconnect the power cord plug with wet hands.

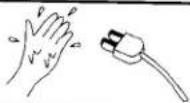
Doing so may cause electric shock.
Take care not to drop the product.


Please note that the product is heavy and must be carried by more than two persons. Dropping the product may result in breakdown.
The chair must be used properly(it must be used only when playing the product).
- Do not play with it or stand on it.
- Only one personal is allowed to sit on it.
- Do not sit on it during height adjustment.
- Do not sit on it when opening the lid.

Doing so may cause the chair fall over or your fingers to be trapped, resulting in injury.
When using the headphones, do not listen for long periods of time at high volume levels.

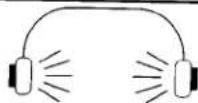
Doing so may result in hearing problems.
Do not disassemble, repair or modify the product.


Doing so may result in product breakdown.electric shock or short-circuit.
When disconnecting the AC power cord's plug, always hold the plug and pull it to remove it.

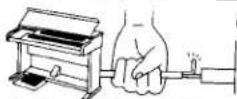
● Pulling the AC power cord itself may damage the cord, causing a fire, electric shock or short-circuit.
If the product will not be used for a long time, unplug the AC power cord from the AC outlet.

● Failure to do so may cause fire in case of lightning.
● Failure to do so may over-heat the product, resulting in fire.

CAUTION
Do not use the product in the following areas.
● Areas, such as those near windows, where the product is exposed to direct sunlight
● Extremely hot areas, such as near a heater
● Extremely cold areas, such as outside
● Extremely humid areas
● Areas where a large amount of sand or dust is present
● Areas where the product is exposed to excessive vibrations
Using the product in such areas may result in product breakdown.

Before connecting cords, make sure that the power to this product and other devices is turned OFF.


Take care not to allow any foreign matter to enter the product.


Failure to do so may cause breakdown of this product and other devices.
Do not lean against the keyboard.


Entry of water, needles or hair pins may result in breakdown or short-circuit.
Do not place the product near electrical appliances such as TVs and radios.


● Doing so may cause the product to generate noise.
- If the product generates noise, move the product sufficiently away from the electrical appliance or connect it to another AC outlet.
When connecting the AC power cord and other cords, take care not to get them tangled.


Failure to do so may damage them, resulting in fire, electric shock or short-circuit.
Do not wipe the product with benzene or thinner.


● Doing so may result in discoloration or deformation of the product.
- When cleaning the product, put a soft cloth in lukewarm water, squeeze it well, then wipe the product.
Do not stand on the product or exert excessive force.

Doing so may cause the product to become deformed or fall over, resulting in breakdown or injury.
Notes on Repair
Notes on Repair Should an abnormality occur in the product, immediately turn the power OFF, disconnect the power cord plug, and then contact the shop from which the product was purchased.
Table of Contents
NAME OF PARTS 3
CONTROL PANEL 4
Getting Ready to Play 5
Chapter1 BASIC OPERATION OVERVIEW 6
TRANSPOSE 7
TUNE CONTROL 7
EFFECTS 8
ORGAN TREMOLO 9
HAND PERCUSSION 9
Chapter2 AUTO PLAY ORCHESTRA RHYTHM CONTROL 10 SELECTING A PART 12
Chapter3 REGISTRATION 14
Chapter4 MIDI 15
XR150 DRUM ASSIGNMENT 17
TROUBLE SHOOTING 18
SPECIFICATIONS 19
MIDI IMPLEMENTATION CHART 20
■ NAME OF PARTS

■ CONNECTORS (the back)
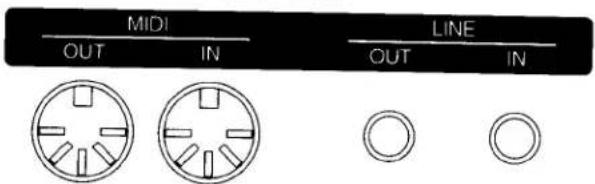
MIDI (see the Chapter 4 " MIDI " section of this manual.)
LINE IN
Receives the signals from your cassette tape decks or other audio equipments.
LINE OUT
Connect these jacks to your cassette tape decks or other audio equipments.
■ CONTROL PANEL



AUTO PLAY ORCHESTRA


① TOTAL VOLUME switches (refer to P. 5)
② PEDAL control block (refer to P. 6)
③ LOWEW MANUAL control block (refer to P. 6)
④ UPPER MANUAL control block (refer to P. 6)
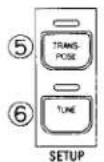
⑤ TRANSPOSE button (refer to P. 7)
⑥ TUNE ( tuning ) button ( refer to P. 7 )
⑦ EFFECTS buttons (refer to P. 8)
REVERB
PEDAL SUSTAIN
UPPER SUSTAIN
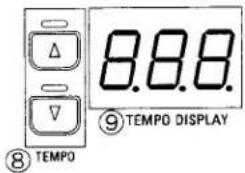
⑧ TEMPO buttons (refer to P. 11)
⑨ TEMPO DISPLAY (refer to P. 11)
⑩ ORGAN TREMOLO button (refer to P. 9)
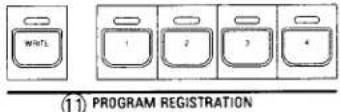
⑪ PROGRAM REGISTRATION (refer to P. 14)
⑫ RHYTHM select buttons (refer to P. 10)
⑬ MEMORY button (refer to P. 13)
⑭ ONE FINGER button (refer to P. 13)
⑮ ACCOMPANIMENT button (refer to P. 12)
⑯ ONE TWO PLAY button (refer to P. 14)
⑰ HAND PERCUSSION button (refer to P. 9)
⑱ FILL IN buttons (refer to P. 11)
⑲ INTRODUCTION / ENDING button (refer to P. 11)
⑳ RHYTHM button (refer to P. 10)
■ Getting Ready to Play
/

2


3

TOTAL VOLUME

4

Louder


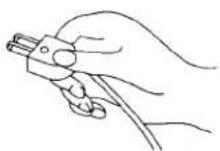
- Insert the plug end of the AC power cord into the wall outlet.
- Press the POWER switch to turn the unit on. The LED will light.
- Set the TOTAL VOLUME switches at mid range of volume.
Note: All volume controls on your XR150 feature a convenient set of tiny instantaneously acting electronic switches, placed vertically on each volume control. The switch at the bottom of the control will turn off that block.
As you press the switch higher up on the control, the volume will increase. When two adjacent switches are pressed at the same time, the volume is set to the mid point between the levels by the two switches.
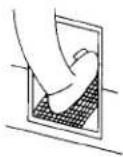
- Depress the EXPRESSION PEDAL halfway.
This pedal controls the volume of the organ's overall volume.
During a performance, using the pedal gives music strong and weak expressions.
Note: About the unit's internal memory
The XR150 is equipped with a back-up battery to main tain data in memory even when the power is turned off. This battery has a lifetime of 6-10 years although this can depend somewhat on operating conditions.
When the back-up battery begins to run down, the WRITE button in the REGISTRATION MEMORY section blinks several times when you turn the power on.
You cannot back up the internal memory once the back-up battery has run out of power. For a replacement back-up battery, ask at the store where you made your purchase or any authorized KAWAI dealer.
: Resetting of internal memory
The contents of the internal memory (such as Registration, Effects) are reset by turning on the POWER while holding down the E, F, A, B and C keys within the highest octave of the UPPER KEYBOARD.
Chapter1 BASIC OPERATION

OVERVIEW
I

II
![graph TD A["FULL FLOWER"] --> B["STRING"] B --> C["BRASS"] C --> D["DATA"] D --> E["OPEN FORM"] E --> F["TRANSFORM"] F --> G["RANGE"] G --> H["CURRENT"] H --> I["OUTPUT"] I --> J["VOLUME"] J --> K["SOL0"] style A fill:#f9f,stroke:#333 style K fill:#ccf,stroke:#333](/content/2026/05/1070910/images/2bf4f013af07d49c217bd1749c13ebbcb024ce40c1eadf3d5a3ab77c998e5afe.jpg)

III

I. SELECTING SOUNDS
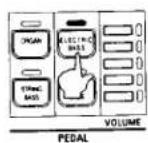
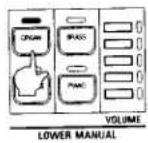
To select sounds for any of the UPPER, LOWER and PEDAL KEYBOARD sections, press the desired tab lighting a red light directly above the tab. For example pressing the PIANO tab produces a PIANO sound. Pressing the VIBRAPHONE tab when the PIANO sound is selected cancels the PIANO in favor of the VIBRAPHONE.
Note: All sounds on the LOWER KEYBOARD and PEDAL KEYBOARD sections may be deactivated by pressing any lighted button.
Sounds on each keyboard are played on their respective keyboard. UPPER KEYBOARD sounds are played from the UPPER KEYBOARD. LOWER KEYBOARD sounds are played from the LOWER KEYBOARD PEDAL sounds are played from the PEDAL KEYBOARD.
Note: Pedal sounds can be played from the lower keyboard when using the ONE FINGER chord button with or without rhythm. Refer to page 13.
II AUDITION SOUNDS
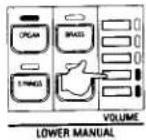
To listen to the various instrument sounds on any KEYBOARD section, press a key on the corresponding KEYBOARD while pressing the various tabs. Volumes for each division may be adjusted through the use of illuminated VOLUME switches located to the right of each section. To increase volume from the off (bottom) position to its maximum volume level, press desired switch.
III. MIXING SOUNDS / DUAL MODE
Two instruments in the UPPER KEYBOARD section may be mixed.
SOLO instrument sounds (FLUTE, OBOE, CLARINET and VIOLIN), cannot be mixed by themselves but may be added to other instruments in the UPPER KEYBOARD section.
When a chord is played while in dual mode the SOLO instrument will contribute the top (the last note on the right) while all notes in the chord will contain the second instrument sound.
-
To mix two sounds, press VIOLIN and FULL ORGAN tabs simultaneously. The red light above each corresponding tab will illuminate to confirm the selections.
-
To cancel dual mode and select another sound, press any UPPER KEYBOARD tab.
Note: SOLO instrument sounds are monophonic (only one note at a time).

TRANSPOSE
1


2
To match a vocalist, tape recorder or another instrument, the XR150 includes a transposition feature. This feature enables the player to play in one key while the sound is heard in another. When the XR150 is turned on, the key is automatically set to "C". Transposition is possible with a range of 6 keys up or down. Adjustment is made in increments of half steps (semitones).
- Pressing the TRANSPOSE button will illuminate the red light above indicating that the feature is activated. The TEMPO display window will show the current key.
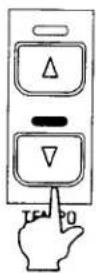
- Press the TEMPO button to change the value in the display window. Press the up or down arrow buttons to raise or lower the pitch one half step (semitone) respectively. If a button is not pressed for several seconds, the display window will automatically revert to displaying the TEMPO in the window display.
- To cancel TRANSPOSE mode, press the TRANSPOSE button again. A flashing red light above the button will indicate that the key is set to something other than C. No flashing light indicates that the key is set to C.


TUNE CONTROL
1

2

This function allows regulate the organ's pitch to match precisely that of a tape recorder, CD player, or other instruments in ensemble. Upon power-up the tuning value is automatically set to 0 =440 Hz. Total adjustable tuning range is -63 to +63 with value 1 being equivalent to approximately 1.56 cents (100 cents = semitone).
- Press the TUNE button located in the SET UP section. The red light above will illuminate indicating that tuning is activated. The TEMPO display window will reveal the current tuning value.
- Use the TEMPO up or down buttons to increase or decrease tuning values respectively. Holding down the up or down arrow buttons will more quickly change values by increments of 10. If none of the above mentioned buttons are press within several seconds, the organ will return to the normal operation mode.
- To cancel TUNE mode press the TUNE button again. If the red light is flashing, this means that the value is set to something other than 0.
Note: If the value is set to 0, the red light is off.
EFFECTS
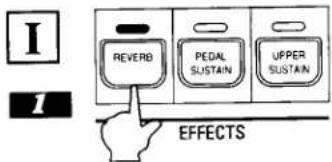


I. REVERB
Reverberation adds concert hall realism to your performance.
- Press the REVERB button. The red light will illuminate and the TEMPO display window will show the current value.
- Press the up or down arrow buttons to increase or decrease by a value of 1 respectively. Holding the up or down arrow buttons will quickly change reverb values by increments of 10. Reverb is adjustable within a range from 0 to 100. If none of the above buttons is pressed within several seconds, the display window will automatically return to display the TEMPO in the display window.
- To cancel the REVERB mode, press the button REVERB button once again.
Note: Reverberation will not effect PEDAL notes.
ILUPPER SUSTAIN
This effect lingers notes after a key is released.
- Press the UPPER SUSTAIN button. The red light above the button will illuminate and the display window will show the current sustain value.
- Use the TEMPO buttons to adjust the sustain duration within a range of 0 to 100. As the value is increased, the sustain duration becomes longer; as the value is reduced, the duration becomes shorter. If nothing is press within several seconds, the display will automatically return to the normal operation mode.
- Press the UPPER SUSTAIN button again. This turns off the red light and cancels the effect.
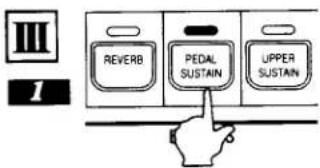
III. PEDAL SUSTAIN
This effect lingers the tone after the key has been released.
- Press the PEDAL SUSTAIN button. The light above the PEDAL SUSTAIN button will light up and the TEMPO display window will indicate the current sustain value.
- Adjust the duration of sustain in the same manner as UPPER SUSTAIN.
- To cancel, press the PEDAL SUSTAIN button again. This turns off the red light and deactivates the effect. Holding the up or down arrow buttons will quickly change sustain values in increments of 10. If no button is pressed, the system will revert to indicating TEMPO in the display window.
Note: When using automatic playing features pedal sustain is pre-set.
ORGAN TREMOLO
1
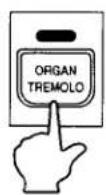
This electronic feature creates the illusion of a mechanical spinning speaker producing a warm ambience when applied to FULL ORGAN and JAZZ ORGAN sounds located in the UPPER KEYBOARD section and the ORGAN sound in the LOWER KEYBOARD section of the XR150.
-
Press the ORGAN TREMOLO button. The red light above the ORGAN TREMOLO button will light up and a gradual increase in speed will lead to a constant fast tremolo speed.
-
To turn off the effect, press the ORGAN TREMOLO button again. The red light will turn off and the speed will slow down.
HAND PERCUSSION


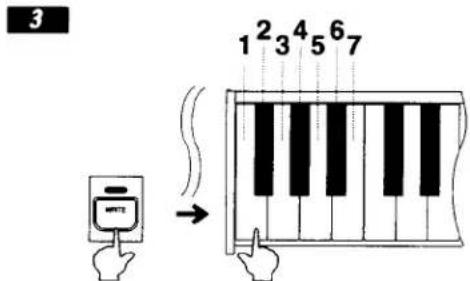


The XR Series organ not only provides pre-recorded rhythm styles, but also 128 solo percussion instruments which can be played manually using the first 7 keys on left side of the LOWER KEYBOARD.
I. ASSIGNING PERCUSSION TONES
Percussion instruments can be selected and assigned to any of the 7 keys on the left side of the LOWER KEYBOARD See page 17 for the drum sounds assignments.
- While holding down the WRITE button, press the HAND PERCUS button and the red light above the HAND PERCUS button will flash.
- Press the TEMPO button to select a percussion instrument to be assigned. Each time a button is pressed, a number will be displayed in the window and the corresponding percussion sound will be recalled.
- While holding down the WRITE button, press one of the 7 keys to which you want to assign the selected instrument.
- To assign percussion sounds to the remaining 6 keys, repeat steps 2 and 3.
- Press the HAND PERCUS button again to exit the assignment mode. (The red light will be turned off.)
Note: Assigning percussion instruments will cancel previous data.
II. HAND PERCUSSION PLAY
- Press the HAND PERCUS button and the red light above the button will illuminate.
- Pressing any of the 7 keys on the left will produce the default or customized percussion sounds of your choosing.
- Use the RHYTHM VOLUME control to adjust the volume of percussion sounds.
Chapter2 AUTO PLAY ORCHESTRA
The AUTO PLAY ORCHESTRA section of your XR150 provides 16 styles of automatic accompaniment.
RHYTHM CONTROL

![graph TD A["PARADISE"] --> B["BIG BAND SWING"] B --> C["CONTEMPORARY"] C --> D["SHOW BEAT"] D --> E["DANCE"] E --> F["BRAZL"] F --> G["GOSPEL"] G --> H["ROOGIE"] H --> I["RHYTHM"] I --> J["REDACTED"]](/content/2026/05/1070910/images/7350eb4e4ce0f7c10d45d33be9de2a5f11383fad2030bb746ec6fa7d4a38e826.jpg)
AUTO PLAY ORCHESTRA
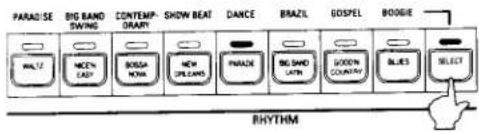


I. Selecting a Rhythm Pattern
PROCEDURE
(Ex. Selecting a button rhythm) - WALTZ
Press the WALTZ button. The light above the tab will illuminate indicating selected style. (If the red light above the SELECT button lights up, turn it off by pressing it.)
(Ex. Selecting a panel rhythm) - PARADISE / SELECT button.
Since the PARADISE rhythm shares the same button as the WALTZ it will be necessary to press the SELECT button located to the right of the AUTO PLAY ORCHESTRA buttons in addition to the WALTZ button to activate the PARADISE style. The red light above each button will indicate that a panel listing has been selected. Press the SELECT button to turn on the button lamp. To return to the WALTZ, press the SELECT button once again.
II. Starting the selected Rhythm Pattern
-
Press the RHYTHM button. The light above the button will illuminate.
-
Press a key on the LOWER or PEDAL KEYBOARD to start the rhythm accompaniment.
While the rhythm is being played, advancing measures will be counted and displayed in the display window.
- Use the RHYTHM VOLUME level switches to adjust the rhythm volume.
Note: If the red light above the HAND PERCUS button is lighted, the first seven keys on the left-hand side of the LOWER KEYBOARD cannot be used to start the rhythm.
- To stop the RHYTHM press the RHYTHM button. The red light above the RHYTHM button will turn off and the rhythm will stop. Rhythm can also be stopped using the FOOT SWITCH on the left side of the foot volume pedal.


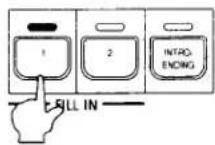

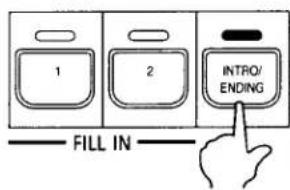





III. FILL IN, INTRO and ENDING
FILL IN I and II produces a automatic musical interlude. INTRO/ENDING produces an automatic introduction or ending.
FILL IN
- After the RHYTHM button is pressed the rhythm unit is on standby.
- Activate the rhythm accompaniment by pressing a key on the LOWER KEYBOARD or PEDAL KEYBOARD.
- When your performance requires a fill-in, press the FILL-IN I or II button. The fill-in will start and the red light above the button will illuminate for as long as it takes for the fill-in to complete. When the fill-in has ended, the rhythm will return to its main pattern.
Note: fill-ins cannot be activated unless the rhythm is on.
INTRO and ENDING
- Press INTRO/ENDING button. The red light above the button will illuminate indicating a stand by mode.
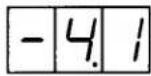
- To activate the style, after the Rhythm button is pressed press a key on the LOWER KEYBOARD or PEDAL KEYBOARD. The introduction will begin while the display window will count down the remaining number of measures in the introduction with a minus prefix. The light above the INTRO/ENDING button will remain on for the duration of the introduction after which the main style pattern will begin. The red light will go off and you may begin your performance.
- To end your performance with an automatic ending, press the INTRO/ENDING button. The light above the INTRO/ENDING will stay illuminated for the duration of the automatic ending. When complete, the light will go out and the rhythm accompaniment will stop.
Note: A fill-in cannot be activated while an introduction or ending is being played.
IV. TEMPO CONTROL
- The tempo (speed) is shown in the TEMPO display window.
- Press up or down button to increase or decrease the speed. Tempo is adjustable within a range of (50 - 300). Holding down up or down button will accelerate changing values by increments of 10.

SELECTING A PART

1
AUTO PLAY ORCHESTRA

2

3

I. ACCOMPANIMENT
Automatic style accompaniment is made up of various orchestra instruments in addition to drums.
-
Select a rhythm by pressing one of the AUTO PLAY ORCHESTRA style buttons.
-
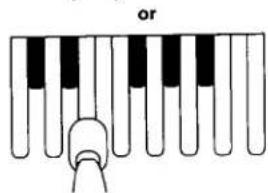
Press the ACCOMP button to activate the accompaniment/melody channels.
-
Pressing a key on the LOWER or PEDAL KEYBOARD will start the bass and accompaniment/ melody channels.
(Ex. Playing the rhythm and accompaniment/melody)
(1) Select a rhythm by pressing one of the AUTO PLAY ORCHESTRA buttons.
(2) Press the RHYTHM button, and then the ACCOMP button.
(3) Press a key on the LOWER KEYBOARD. Rhythm, bass and accompaniment/melody will now be heard.
Note: The accompaniment will stop when the key on the LOWER KEYBOARD is released. However, if the light above the MEMORY button is on, the accompaniment will not stop when the key is released.








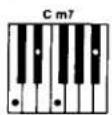


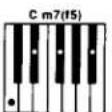


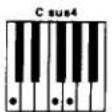


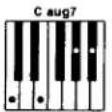



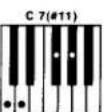


II. ONE FINGER (CHORD DETECTION)
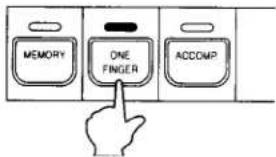
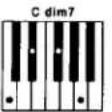
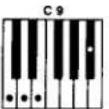
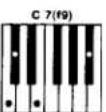
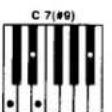
This function allows the player to play a complete major chord (three notes plus a bass note) with one finger. Other types of chords (seventh, minor, minor seventh) may also be played with a minimum effort by adding one or two keys to any major (root) chord.
- Pressing the ONE FINGER button illuminates the red light above the button indicating that it's on.
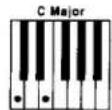
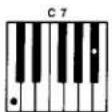
- Pressing a key on the LOWER KEYBOARD will produce a major chord. The illustration provided on the left shows the variety of possible chords formed by using "C". This chart can be easily transposed into other keys by following the same basic format as show below.
Note: The root note (note that names the chord) is always on the bottom. The root note will be played with pedal sound.
(Ex. Playing A minor chord)
Play "A" and "C" on the LOWER KEYBOARD.
(Ex. Playing D7 chord)
Play "D" and "C" on the LOWER KEYBOARD.
(Ex. Playing Gm7 chord)
Play "G", "B" and "F" on the LOWER KEYBOARD
III. MEMORY
Press the MEMORY button.
The sound of key(s) pressed on the LOWER KEYBOARD will be sustained after release.
When the light above the ONE FINGER button is turned on, a note or chord played on the LOWER KEYBORAD will be sustained after release. To turn off this feature, press the MEMORY button again. The red light will be turned off and the sound will stop when a key is released.
Chapter3 REGISTRATION
REGISTRATION (Sound Set-up)


ONE TWO PLAY

I. Registration Memory
The XR150 comes pre-programmed with four registrations that can be over-written. Each one is set for one finger chord playing. If manual chord playing is desired, turn off the ONE FINGER button. The registration memory section allows storage of up to four of custom registrations.
Note: To recall the factory defaults, reset the organ according directions on page 5.
1. Storing a Registration
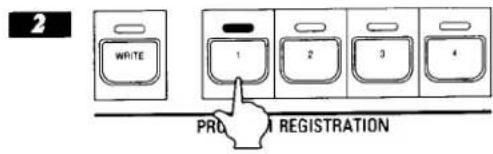
While holding down the WRITE button (red light will illuminate), press a button (1 through 4) to store the registration. When complete, the red light above the WRITE button will turn off and the light above the selected button will light up indicating that the new registration is now stored. Any previously stored registration data will be erased.
2. Recalling a Registration
Press the appropriate numbered button. The red light above it will illuminate.
Note: The following types of data cannot be stored in REGISTRATION memory. TOTAL VOLUME, EXPRESSION PEDAL, FOOT SWITCH, ONE TWO PLAY, TUNE, INTRO/ENDING.
II. ONE TWO PLAY
The ONE TWO PLAY function automatically selects the appropriate instruments and effects necessary for the various styles of music.
Press the ONE TWO PLAY button. Panel settings (instruments and effects) will automatically change to appropriate ones for use with selected AUTO PLAY ORCHESTRA styles.
To Begin your performance, press the INTRO/ENDING button and the first note or chord of the song.
Note: Pressing the ONE TWO PLAY button while a PROGRAM REGISTRATION button is lighted will cancel that registration. ONE TWO PLAY illuminates the need to set up tempo, accompaniment, memory.
Chapter4 MIDI
MIDI is an acronym for the Musical Instrument Digital Interface, an industry standard enabling synthesizers, drum machines and other electronic musical instruments to communicate. Through MIDI, the organist can play various instruments from a single keyboard. (The type of data that may be controlled vary with the instruments connected and the depth of MIDI implementation of the manufacturer.)
Connectors
To transmit MIDI data from your XR150 to another MIDI instrument, use an optional cable to connect the MIDI OUT jack of your XR150 to the MIDI IN jack of the other instrument. Make sure that the MIDI "transmit" channels on your XR150 match the MIDI "receive" channels of the other instrument.
To receive MIDI data from another MIDI instrument to your XR150, use a MIDI cable to connect the MIDI OUT jack of the other instrument to the MIDI IN jack of your XR150. Make sure that the MIDI "receive" channels on your XR150 match the MIDI "transmit" channels of the other instrument. MIDI cables should not exceed 15' in length and can be obtained from your local authorized Kawai organ dealer.
Channels
Data cannot be exchanged if the MIDI channels of a transmitting instrument do not match those of a receiving counterpart. The MIDI channels of the XR150 are predefined. When transmitting and receiving MIDI data, the organ always assigns the MIDI channels to the keyboards as follows:
Channel 1: UPPER KEYBOARD
Channel 2: LOWER KEYBOARD
Channel 3: PEDAL KEYBOARD
Channel 10: HAND PERCUSSION
Channel 16: SYSTEM CONTROL CHANGE
The note number that appears when the data of HAND PERCUSSION is exchanged becomes smaller by 1 than the numbers on the table (DRUM ASSIGNMENT) provided on page 17.

Clock can be changed.
In this context, clock means a reference tempo. While holding down the WRITE button, press the down button to toggle the clock mode between Internal and External. When you are connected to an external instrument, select Internal to play to the tempo created by this unit; select External to play to the tempo created by an external MIDI instrument. When you set to External, three dots will appear in the display. While the unit plays rhythm to an external clock, the number of a bar and the time is displayed.
When you set to Internal, starting the rhythm on the unit will send out the MIDI start signal; stopping the rhythm on the unit will send out the MIDI stop signal.
![graph TD A["Synthesizer"] --> B["MIDI IN"] A --> C["MIDI OUT"] A --> D["LINE OUT"] A --> E["LINE IN"] F["XR150"] --> G["..."]](/content/2026/05/1070910/images/9cc38c403a5e1851081644337ba581f6e478f58ff85c923dd2f8211a120f00b4.jpg)
![graph TD A["Sequencer"] --> B["MIDI IN"] A --> C["MIDI OUT"] A --> D["MIDI OUT"] A --> E["MIDI IN"] F["XR150"] --> G["..."]](/content/2026/05/1070910/images/87fee64a9d1611983dee12817c9d81da88759284811ac1d44cf9b082ad674fc1.jpg)

Connection Examples
(Ex. Playing a synthesizer from a keyboard of the organ)
(1) Using a MIDI cable, connect the MIDI OUT terminal on the organ to the MIDI IN on a synthesizer. Then using audio cables, connect the LINE OUT jacks on the synthesizer to the LINE IN jacks on XR150.
(2)Play a note on a keyboard. As long as the synthesizer is configured to receive signals on Channel 1, both the XR150 and the synthesizer will play. This means that both tone colors (XR150 and the synthesizer) will play.
(Ex. Playing XR150 using an external sequencer)
(1) Using a MIDI cable, connect the MIDI IN terminal on the organ to the MIDI OUT terminal on a sequencer so that the sequencer can control the organ.
(2) Make sure that the MIDI "receive" channels on XR150 match MIDI "transmit" channels on the sequencer (Ex. Channel 10 for percussion sounds).
(3)Activate the sequencer. XR150 will start playing as well.
Note: Some data cannot be recognized by XR150. See the MIDI implementation chart at the end of this manual for information on the data that the XR150 can recognize.
Turning off the power or disconnecting the interface cable while sound is being played may cause the receiving instruments to sound continuously. Cut the power to silence the instrument.
(Ex. Playing a drum machine from the organ)
If your MIDI device has the ability to receive clock signals, rhythm tempo of the MIDI device can be played synchronously with the AUTO PLAY ORCHESTRA of the XR 150. A start/stop signal is output from XR150 when you start or stop a rhythm or automatic accompaniment. The tempo is controlled on XR150.
The unit can exchange the PROGRAM REGISTRATION data with an external device.
While holding down the WRITE button, press the up button to transmit the data. "-S-" will appear in the display and the transmission will start.
When the unit detects PROGRAM REGISTRATION data from an external device, it will start receiving the data and "-L-" will flash in the display.
| No. | TONE COLOR | No. | TONE COLOR | No. | TONE COLOR | |||
| 1 | C-2 | Bob BD2 | 49 | C2 | Std1 Hi Tom2 | 97 | C6 | ReverseCymball |
| 2 | C#-2 | Bob Rim | 50 | C#2 | Std1 Crash1 | 98 | C#6 | Brush Tap |
| 3 | D-2 | Bob SD1 | 51 | D2 | Std Hi Tom1 | 99 | D6 | Brush Slap |
| 4 | D#-2 | Bob Low Tom2 | 52 | D#2 | Std1 Ride 1 | 100 | D#6 | Brush Swirl |
| 5 | E-2 | Bob HHC | 53 | E2 | China | 101 | E6 | jazz BD2 |
| 6 | F-2 | Bob Low Tom1 | 54 | F2 | Cup | 102 | F6 | Orch BD1 |
| 7 | F#-2 | Bob Mid Tom2 | 55 | F#2 | Tambourlne | 103 | F#6 | Orch BD2 |
| 8 | G-2 | Bob HHO | 56 | G2 | Splash | 104 | G6 | Orch SD1 |
| 9 | G#-2 | Bob Mid Tom1 | 57 | G#2 | Cowbell | 105 | G#6 | Timpani F |
| 10 | A-2 | Bob Hi Tom1 | 58 | A2 | Crash2 | 106 | A6 | Timpani F# |
| 11 | A#-2 | Bob Crash1 | 59 | A#2 | Vibra slap | 107 | A#6 | Timpani G |
| 12 | B-2 | Bob Hi Tom1 | 60 | B2 | Ride2 | 108 | B6 | Timpani G# |
| 13 | C-1 | Bob Cowbell | 61 | C3 | Hi Bongo | 109 | C7 | Timpani A |
| 14 | C#-2 | Bob Hi Conga | 62 | C#3 | Low Bongo | 110 | C#7 | Timpani A# |
| 15 | D-1 | Bob Mid Conga | 63 | D3 | Mute Hi Conga | 111 | D7 | Timpani B |
| 16 | D#-1 | Bob Low Conga | 64 | D#3 | Hi Conga | 112 | D#7 | Timpani c |
| 17 | E-1 | Bob Maracas | 65 | E3 | Low Conga | 113 | E7 | Timpani c# |
| 18 | F-1 | Bob Claves | 66 | F3 | Hi Timbale | 114 | F7 | Timpani d |
| 19 | F#-1 | Power BD2 | 67 | F#3 | Low Timbale | 115 | F#7 | Timpani d# |
| 20 | G-1 | Elect SD1 | 68 | G3 | Hi Agogo | 116 | G7 | Timpani e |
| 21 | G#-1 | Power Low Tom2 | 69 | G#3 | Low Agogo | 117 | G#7 | Timpani f |
| 22 | A-1 | Power Low Tom1 | 70 | A3 | Cabasa | 118 | A7 | Orch Cymbal2 |
| 23 | A#-1 | Power Mid Tom2 | 71 | A#3 | Maracas | 119 | A#7 | Orch Cymbal1 |
| 24 | B-1 | Power Mid Tom1 | 72 | B3 | Short Whistle | 120 | B7 | Applause |
| 25 | C0 | Power Hi Tom2 | 73 | C4 | Long Whistle | 121 | C8 | RoomLowTom2 |
| 26 | C#0 | Power Hi Tom1 | 74 | C#4 | Short Guiro | 122 | C#8 | RoomLowTom1 |
| 27 | D0 | Power Crash | 75 | D4 | Long Guiro | 123 | D8 | RoomMidTom2 |
| 28 | D#0 | High Q | 76 | D#4 | Claves | 124 | D#8 | RoomMidTom1 |
| 29 | E0 | Slap | 77 | E4 | Hi Wood Blk | 125 | E8 | RoomHiTom2 |
| 30 | F0 | Scratch Push | 78 | F4 | Low Wood Blk | 126 | F8 | RoomHiTom1 |
| 31 | F#0 | Scratch Pull | 79 | F#4 | Mute Cuica | 127 | F#8 | Gun Shot |
| 32 | G0 | Sticks | 80 | G4 | Open Cuica | 128 | G8 | (mute) |
| 33 | G#0 | Square Click | 81 | G#4 | Mute Triangle | |||
| 34 | A0 | Metronome Click | 82 | A4 | Open Triangle | |||
| 35 | A#0 | Metronome Bell | 83 | A#4 | Shaker | |||
| 36 | B0 | Std1 BD1 | 84 | B4 | Jingle Bell | |||
| 37 | C1 | Std1 BD2 | 85 | C5 | Bell Tree | |||
| 38 | C#1 | Rim | 86 | C#5 | Castanets | |||
| 39 | D1 | Std1 SD1 | 87 | D5 | Mute Surdo | |||
| 40 | D#1 | Hand Clap | 88 | D#5 | Open Surdo | |||
| 41 | E1 | Std1 SD2 | 89 | E5 | Elect BD2 | |||
| 42 | F1 | Std1 Low Tom2 | 90 | F5 | Elect SD1 | |||
| 43 | F#1 | Std1 HHC | 91 | F#5 | Elect Low Tom2 | |||
| 44 | G1 | Std1 Low Tom1 | 92 | G5 | Elect Low Tom1 | |||
| 45 | G#1 | Std1 HHP | 93 | G#5 | Elect Mid Tom2 | |||
| 46 | A1 | Std1 Mid Tom2 | 94 | A5 | Elect Mid Tom1 | |||
| 47 | A#1 | Std1 HHO | 95 | A#5 | Elect Hi Tom2 | |||
| 48 | B1 | Std1 Mid Tom1 | 96 | B5 | Elect Hi Tom1 | |||

TROUBLE SHOOTING
| Symptom | Check the following |
| 1. The keyboard makes no sound. | When all the lamps on the LOWER/PEDAL CONTROL BLOCK are turned off, the LOWER/PEDAL keyboards makes no sounds.When the VOLUME switches are at their minimum level, the all keyboards make no sound. Set the appropriate volume using the VOLUME switches. |
| 2. The product generates noise. | Motors, neon, or other equipment can be a source of electrical interference creating noise in the sound output. Try changing locations and plug into an outlet that is not being used by devices that draws a lot of current. |
| 3. You can hear the TV or radio sound. | This may happen when there is a broadcasting station near the organ.Consult your KAWAI dealer. |
| 4. The AUTO PLAY ORCHESTRA does not play. | Turn the lamps of the RHYTHM and ACCOMP buttons on to play AUTO PLAY ORCHESTRA. |

SPECIFICATIONS
| KEYBOARDS | Upper:44 / Lower:44 / Pedal:13 |
| TONE COLORS | |
| UPPER | FULL ORGAN, JAZZ ORGAN, STRINGS I, STRINGS II, BRASS, PIANO, GUITAR, MARIMBA, VIBRAPHONE, COSMIC, TRUMPET, TROMBONE, FLUTE, CLARINET, OBOE, VIOLIN |
| LOWER | ORGAN, STRINGS, BRASS, PIANO |
| PEDAL | ORGAN, STRINGS BASS, ELECTRIC BASS, ENSEMBLE BASS |
| EFFECTS | REVERB, PEDAL SUSTAIN, UPPER SUSTAIN, ORGAN TREMOLO |
| PERCUSSION | 128 Percussion Instruments |
| AUTO PLAY ORCHESTRA RHYTHM PATTERN | WALTZ, NICE'N EASY, BOSSANOVA, NEW ORLEANS, PARADE, BIG BAND LATIN, GOOD'N COUNTRY, BLUES, PARADISE, BIG BAND SWING, CONTEMPORARY, SHOW BEAT, DANCE, BRAZIL, GOSPEL, BOOGIE |
| REGISTRATION MEMORY | 4 |
| DISPLAY | LED ( 3 letters ) |
| CONTROL | Increment button, One Two Play, Tuning, Transpose, Expression pedal, Foot switch |
| JACK | Headphone, LINE IN ( MONO ), LINE OUT ( MONO ), MIDI ( IN, OUT ) |
| SPEAKER | 20cm×1, 5cm×1, 5×9cm×2 |
| DIMENSIONS ( W ×D ×H ) | 1,130×454×910 ( mm ) |
| WEIGHT | 47.5kg |
Specifications subject to change without notice

MIDI IMPLEMENTATION CHART
Date: July 1998
Version: 1.0
| Function | TRANSMITTED | RECEIVE | REMARKS | |
| Basic Channel(Default)(Changed) | 1,2,3,10,16,*1× | 1,2,3,10,16,*1× | *1 1: UPPER2: LOWER3: PEDAL10: DRUMS16: CONTROLCHANGE | |
| Mode (Default)(Changed)(Altered) | 3×× | 3×× | ||
| Note Number(True Voice) | 36 - 96 *2 | 36 - 96 | *2 UPPER:53 - 96LOWER:41 - 84PEDAL:36 - 48 | |
| Velocity (Note ON)(Note OFF) | ×× | × *3× | *3 channel 10 is 0 | |
| After Touch (per Key)(per Channel) | ×× | ×× | ||
| Pitch Bend | × | × | ||
| Control Change 711 | ○ *4○ *4 | ○ *4○ *4 | Total VolumeExpression*4 Channel 16 only | |
| Program Change | × | × | ||
| Exclusive | ○ | ○ | ||
| System: Common(Song Position)(Song Select)(Tuning) | ××× | ××× | ||
| System: Real Time(Clock)(Commands) | ○○ | ○○ | (FA, FC) | |
| Others(Local ON / OFF)(All Notes OFF)(Active Sense)(Reset) | ××○× | ×○○× | (123) | |
Mode 1: OMNI ON, POLY
Mode 3: OMNI OFF, POLY
Mode 2: OMNI ON, MONO
Mode 2: OMNI OFF, MONO
○:YES
×:NO
KAWAI
Kawai Musical Instruments Manufacturing Co., Ltd. 200 Terajima-cho, Hamamatsu, Japan
- XR150 ELECTRONIC ORGAN
- OWNER'S MANUAL
- NOTE
- SAFETY INSTRUCTIONS
- CAUTION
- WARNING
- TABLE OF CONTENTS
- NAME OF PARTS
- LINE IN
- LINE OUT
- CONTROL PANEL
- GETTING READY TO PLAY
- NOTE: ABOUT THE UNIT'S INTERNAL MEMORY
- RESETTING OF INTERNAL MEMORY
- CHAPTER1 BASIC OPERATION
- OVERVIEW
- SELECTING SOUNDS
- II AUDITION SOUNDS
- MIXING SOUNDS / DUAL MODE
- TRANSPOSE
- TUNE CONTROL
- EFFECTS
- REVERB
- ILUPPER SUSTAIN
- PEDAL SUSTAIN
- ORGAN TREMOLO
- HAND PERCUSSION
- ASSIGNING PERCUSSION TONES
- HAND PERCUSSION PLAY
- CHAPTER2 AUTO PLAY ORCHESTRA
- RHYTHM CONTROL
- SELECTING A RHYTHM PATTERN
- PROCEDURE
- STARTING THE SELECTED RHYTHM PATTERN
- FILL IN, INTRO AND ENDING
- FILL IN
- INTRO AND ENDING
- TEMPO CONTROL
- SELECTING A PART
- ACCOMPANIMENT
- ONE FINGER (CHORD DETECTION)
- MEMORY
- CHAPTER3 REGISTRATION
- REGISTRATION (SOUND SET-UP)
- ONE TWO PLAY
- REGISTRATION MEMORY
- STORING A REGISTRATION
- RECALLING A REGISTRATION
- CHAPTER4 MIDI
- CONNECTORS
- CHANNELS
- CLOCK CAN BE CHANGED
- CONNECTION EXAMPLES
- KAWAI
Brand : KAWAI
Model : XR150
Category : Organ