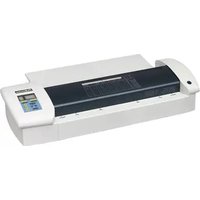
SPL 125 - Laminator FELLOWES - Free user manual and instructions
Find the device manual for free SPL 125 FELLOWES in PDF.


| Product Type | Laminator |
| Brand | Fellowes |
| Model | SPL 125 |
| Maximum Document Size | A4 (8.3" x 11.7") |
| Lamination Speed | Approx. 12 inches/minute (30 cm/min) |
| Warm-up Time | Approx. 3 minutes |
| Lamination Method | Hot lamination with pouch film |
| Pouch Thickness | Up to 125 microns (2 x 125 microns) |
| Dimensions (WxDxH) | Approx. 13.5 x 4.5 x 2.5 inches (34 x 11.5 x 6.5 cm) |
| Weight | Approx. 2.5 lbs (1.1 kg) |
| Power Supply | 120V AC, 60 Hz (North American version) |
| Power Consumption | 200 W |
| Main Functions | Hot lamination, ready indicator, auto shut-off after 30 minutes |
| Maintenance | Clean rollers with damp cloth after use; avoid using abrasive cleaners |
| Cleaning | Use a soft cloth or cleaning sheet; do not immerse in water |
| Safety Features | Auto shut-off, thermal fuse, no exposed hot surfaces |
| Spare Parts | Cleaning sheets, replacement rollers (contact support) |
| Repairability | User-serviceable: roller cleaning; other repairs by qualified technician |
| General Information | Designed for home or small office; comes with starter pouch set |
Frequently Asked Questions - SPL 125 FELLOWES
User questions about SPL 125 FELLOWES
0 question about this device. Answer the ones you know or ask your own.
Ask a new question about this device
Download the instructions for your Laminator in PDF format for free! Find your manual SPL 125 - FELLOWES and take your electronic device back in hand. On this page are published all the documents necessary for the use of your device. SPL 125 by FELLOWES.
USER MANUAL SPL 125 FELLOWES
| Paper | |||||||||||||||
| 70 g - 19 lbs | 80 g - 20 lbs | 90 g - 24 lbs | Paper / Photo | 160 g - 48 lbs | 240 g - 83 lbs | Fell | Mounting board2.5 mm - 1/10" | ||||||||
| SPL 96 | SPL 125 | SPL 95 | SPL 125 | SPL 95 | SPL 125 | SPL 95 | SPL 125 | SPL 95 | SPL 125 | SPL 95 | SPL 125 | SPL 95 SPL 125 | |||
| 140 °C | |||||||||||||||
| 250 μ-10 mil | 125 °C | 4 | 3 | 3 | 2 | 3 | 2 | 3 | 1 | 2 | 1 | 135°/1 | |||
| 200 μ-8 mil | 120 °C | 4 | 3 | 3 | 2 | 3 | 2 | 3 | 1 | 2 | 1 | 5 | |||
| 175 μ-7 mil | 115 °C | 4 | 3 | 3 | 2 | 3 | 2 | 3 | 2 | 2 | 1 | ||||
| 150 μ-6 mil | 110 °C | 5 | 4 | 5 | 4 | 4 | 3 | 3 | 2 | 4 | 2 | ||||
| 125 μ-5 mil | 105 °C | 5 | 4 | 5 | 4 | 4 | 3 | 4 | 3 | 4 | 2 | ||||
| 100 μ-4 mil | 100 °C | 5 | 4 | 5 | 4 | 4 | 3 | 4 | 3 | 4 | 3 | ||||
| 80 μ-3 mil | 100 °C | 5 | 4 | 5 | 4 | 4 | 3 | 4 | 3 | 4 | 3 | ||||


Fellowes.
Dear Customer,
Thank you for buying a Fellowes SPL laminator, a product dedicated to the needs of high-volume users. Thanks to advanced heating-roller technology and new user-friendly design, SPL laminators will enable you to process work in record time and with consistently professional results. We know of no laminators on the market today that offer you more value in this product category.
If you have any questions or wish to comment on this product, we welcome your call, email or letter.
Sincerely,
James Fellowes Chairman & CEO
Contents
Product Profile 3
Safety Instructions 3
Set-up 4
Operation 4
Maintenance 5
Troubleshooting 5
Customer Service 6
Limited Warranty 6
Product Profile
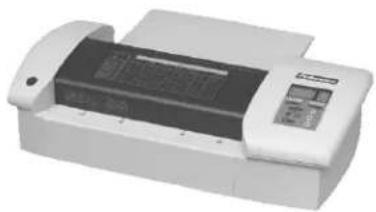
The SPL 95, and the SPL 125 are heavy-duty laminators designed for daily office or commercial use. In addition to processing standard pouches of every thickness, SPL laminators take standard mounting boards for durable point-of-sale displays. To give professional users the precision they need, all SPL
natural_image
Exterior view of a white and gray electronic device with a control panel (no visible text or symbols)models also offer degree-by-degree temperature adjustment and nine speed options on easy-to-read digital displays.
Here is an overview of SPL laminator capacity, capabilities and special features:
OVERVIEWSPL 95 SPL 125
| Capacity | ||
| -Pouch width: Max. | ||
| DIN size A4 A3 | ||
| centimeters (document) 26 33 inches 10-3/16 13 | ||
| -Pouch thickness: Min.-Max. | ||
| microns 80-250 80-250 mils 3-10 3-10 | ||
| -Paper thickness: Max. | ||
| gr | 300 | 300 |
| Ibs | 80 80 | |
| -Entry width | ||
| millimeters | 3.5 | 3.5 |
| inches | 3/16 | 3/16 |
| Warm-up time in minutes : | ||
| 90°C / 194°F (lowest) | 3 | 3 |
| 140°C / 284°F (highest) | 8 | 8 |
| Processing speed in cm/inch per min. | ||
| Speed 1 (lowest) | 29/11 | 29/11 |
| Speed 9 (highest) | 90/35 | 90/35 |
| Reverse mode | √ | √ |
| Automatic shut off | √ | √ |
Because SPL laminators are designed to take mounting board, the entry is wide enough to accommodate pouches containing paper much thicker than the 300 gram (80 lbs) maximum recommended above. While filling the pouch to the limits of the entry will not damage your machine, you may not be satisfied with the quality of the results.
IMPORTANT SAFETY INSTRUCTIONS
READ ALL INSTRUCTIONS BEFORE USING
As with any electrical equipment:
- Keep it away from heat or water sources
- Plug it in near an easily accessible outlet
- Do not use it if damaged in any way
- Do not attempt to open or otherwise repair it
- Turn it off after each use, and
- Unplug it when not in use for an extended period.
Set-up
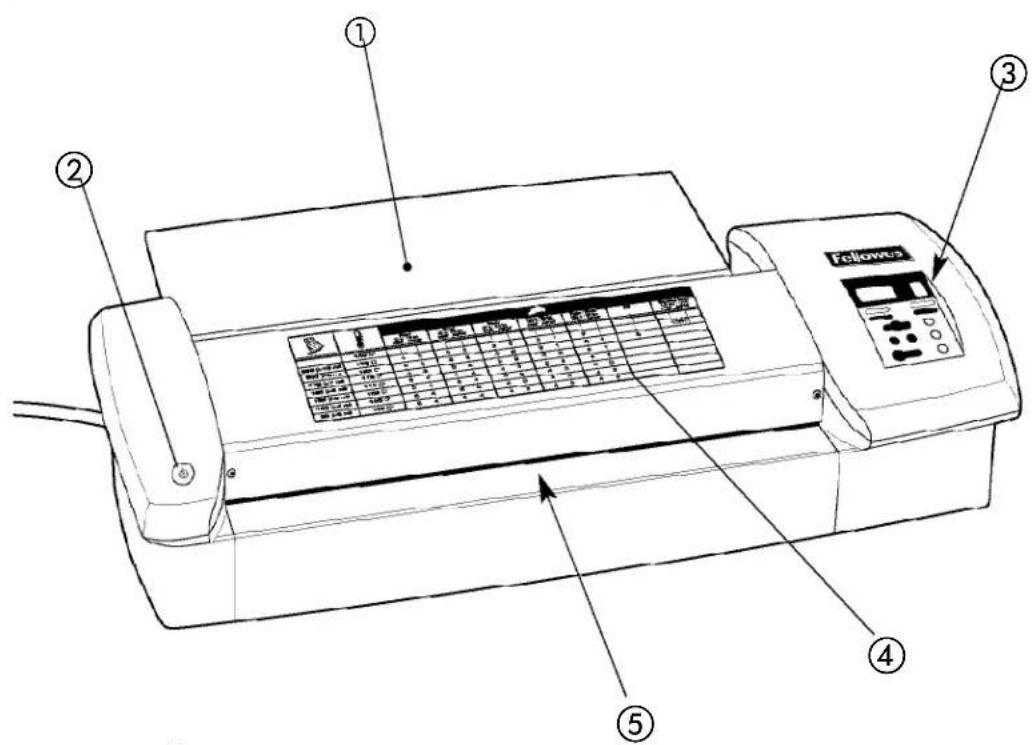
Using the illustration on the inside of the manual cover as a reference, attach the support tray ① to the back of the machine with the two screws included in the package
Operation
To begin laminating, plug in the machine and press the power button ②. On the control panel ③, then press start which will cause the orange standby light to go on.
Hot Lamination
Using the guidelines ④ printed on the top of the machine:
- Set temperature by pressing switch will cause the temperature light to go on. The digital temperature display Ⓐ will show 110°C if this is the first use, but otherwise will show the last temperature used. Press plus + or minus - until you see the temperature you want. Note: Because even standard paper may vary in weight and some inks are heat sensitive, you may have to use a somewhat higher or lower temperature - roughly 5° more or less - to get optimum results.
- Set speed by pressing a second time, which will cause the speed light to go on. The digital speed display Ⓗ will show "4" if this is the first use, but otherwise will show the last speed used. Press plus br minus until you see the speed you want.
Then press forward▲to start the rollers turning. Although the laminator will warm up without the rollers in motion, this ensures that the heat will be evenly distributed. As soon as the selected temperature has been reached, the green ready light ⑥ will go on. Allowing for a free margin of at least 3 mm (1/8 inch), on the unsealed edges, insert the sealed edge of the pouch or mounting board into the entry ⑤, as shown at the right.
If you see the material is not going in straight and might get damaged, use the reverse mode Press stop ■, then press and hold reverse ▼ until you have backed the material out of the entry completely. Realign and press forward ▲ to begin again.

natural_image
Line drawing of a printer with a sun icon on the cover (no text or symbols)Remove your material from the support tray after it has cleared the exit ⑥. If you are finished with the job, but plan to use the laminator again soon, press start ① put it into the standby mode. If you forget, it will switch itself into this mode after one hour of inactivity. Press start ⑪ again to resume work, or press the power button ② to turn off the machine.
Cold Lamination
Using the same temperature and speed selection procedure as with hot lamination, lower the temperature until the digital display is blank. The cold mode light * will go on at this point to confirm the change in mode. Then select a speed of 5 or 6, depending on the contents and pouch thickness.
Press forward▲ to start the rollers turning. (If the laminator is hot, you can accelerate the cooling process by passing through the cleaning sheet included in the package and/or turning up the roller speed to 7, 8 or 9.) When the green ready light © goes on, turn the speed back to 5 or 6 if necessary, then:
- Lay contents face upon the transparent, non-adhesive side of a specially designed cold lamination pouch, but do not close the pouch
- Insert full length of sealed pouch edge into the entry, as shown, while bending the protective sheet backwards over the machine and grasping its free edge
- Continue holding the protective sheet, which will peel away as the pouch is drawn through the machine.
If you see the pouch is not going in straight and might get damaged, use the reverse mode, as described under Hot Lamination.

natural_image
Simple line drawing of a printer with a sun icon and paper, no text or symbols presentMaintenance
To keep your laminator free of adhesives that could hurt the quality of your work, clean the rollers regularly:
- Select temperature 140^ if it is not already on this setting
- Wait for the readiness light and signal, if necessary
- Insert the cleaning sheet included in the package, repeating one or two times
- Insert a plain white sheet of paper to test for remaining traces, and
- Reinsert the cleaning sheet, if necessary, and retest.
To clean the exterior of your machine, wipe with a soft cloth dampened with plain water.
Troubleshooting
If you are not getting the quality you should be, you can probably solve the problem quickly. If, for example, your end product is:
- Cloudy - Reduce the speed and pass it through again. If the sheet is still not completely transparent, increase the temperature in increments of 5^ .
- Wavy - For the next pouch, increase the speed and/or reduce the temperature in increments of 5^ . Passing through the cleaning sheet or turning up the speed will help cool down the rollers. The green ready light © will reappear as soon as the lower temperature has been reached.
- Spotted - Follow the cleaning procedure described under Maintenance to remove traces of adhesive.
- Open on edges- Next time make sure the contents are at least 3 mm (1/8 inch), from the unsealed edges of the pouch.
If the pouch or mounting board is not going in straightor gets stuck in the rollers use the reverse mode, as described under Hot Lamination.
If you have questions or problems with your laminator that you cannot solve, please contact us through one of the many channels listed under Customer Service. For your safety do not attempt to open or otherwise repair your machine.
Customer Service
We offer a toll-free help line for customers living in the United States, Canada, Mexico and Australia. If you live outside these regions or are otherwise unable to use our help line, please call the Fellowes location nearest you, send a letter or email, or contact your local dealer. All of our customer service phone numbers and other points of contact are listed on the back of this manual.
Limited Warranty
Fellowes, Inc. warrants all parts of the machine to be free of defects in material and workmanship for 1 year from the date of purchase by the original consumer. If any part is found to be defective during the warranty period, your sole and exclusive remedy will be repair or replacement, at Fellowes' option and expense, of the defective part.
This warranty does not apply in cases of abuse, mishandling or unauthorized repair. ANY IMPLIED WARRANTY, INCLUDING THAT OF MERCHANTABILITY OR FITNESS FOR A PARTICULAR PURPOSE, IS HEREBY LIMITED IN DURATION TO THE APPROPRIATE WARRANTY PERIOD SET FORTH ABOVE. IN NO EVENT SHALL FELLOWES BE LIABLE FOR ANY CONSEQUENTIAL OR INCIDENTAL DAMAGES ATTRIBUTABLE TO THIS PRODUCT.
This warranty gives you specific legal rights. You may have other legal rights that vary from this warranty. The duration, terms and conditions of this warranty are valid worldwide, except where different limitations, restrictions or conditions may be imposed by local law.
For service under this warranty, please contact us (see back cover) or your dealer.
Help Line
Australia + 1-800-33-11-77
Canada + 1-800-665-4339



Brand : FELLOWES
Model : SPL 125
Category : Laminator