
G-Power 2 Pro - Computer Cooling Component GIGABYTE - Free user manual and instructions
Find the device manual for free G-Power 2 Pro GIGABYTE in PDF.


| Product Type | CPU Cooler |
| Model | G-Power 2 Pro |
| Brand | GIGABYTE |
| Compatible Socket | Intel LGA 1200/1151/1150/1155, AMD AM4/AM3+/FM2+ |
| Dimensions (with fan) | 130 x 76 x 155 mm |
| Weight | 720 g |
| Material | Aluminum fins, copper heat pipes, copper base |
| Number of Heat Pipes | 4 |
| Fan Size | 120 mm |
| Fan Speed | 800 – 1800 RPM (PWM) |
| Airflow | 54.6 – 72.1 CFM |
| Noise Level | 17 – 28 dBA |
| Power Connector | 4-pin PWM |
| Max TDP | 150 W |
| LED Lighting | None |
| Installation Type | Bracket and backplate included for easy mounting |
| Maintenance | Clean dust from fins and fan blades with compressed air or soft brush |
| Safety | Ensure proper clearance from RAM and VRM heatsinks; use thermal paste |
| Warranty | 2 years limited warranty |
Frequently Asked Questions - G-Power 2 Pro GIGABYTE
User questions about G-Power 2 Pro GIGABYTE
0 question about this device. Answer the ones you know or ask your own.
Ask a new question about this device
Download the instructions for your Computer Cooling Component in PDF format for free! Find your manual G-Power 2 Pro - GIGABYTE and take your electronic device back in hand. On this page are published all the documents necessary for the use of your device. G-Power 2 Pro by GIGABYTE.
USER MANUAL G-Power 2 Pro GIGABYTE
G-Power2 PROCoder GH-PSUZZLB Installation Guide
The following are not covered by the warranty:
purpose.
2. Nonobservance of the proper operation provided.
3. Malfunction due to interference from other devices
4. Unapproved modification of the product.
5. Consequential damage to other objects due to the product's fault.
6. Malfunction arising from natural hazards E.g. earthquake, lightning,
fire, and floods.
- Using the product incorrectly or in a manner other than the designed 7. The product's warranty label has been removed or damaged

ONLY COMPATIBLE WITH 200mm (or larger) WIDTH CHASSIS. Recommendations: 3D Aurora Series, 3D Mars Series, iSolo Series.
Features
- Fully compatible design, supports Intel LGA775 & AMD K8 / AM2 CPU platforms
- Curvious design combines CPU and MOSFET cooling
- High and Low RPM mode, provide acoustic and performance all together.
- One12cm large fan, high air flow volume with low RPM for efficient heat dissipation.
- 8mm, highly heat conducting heat pipes for enhanced cooling performance.
- Pure copper base with aluminum fins, extra large heat dissipation area to dispose excess heat more efficiently.
- Delicate design with blue light LED
Specification
Dimension: 121x126x162 mm
Fan size: 120x120x25 mm
Number of heat pipes: 5
Base material: copper
Cooling fin material: aluminum
Rated Voltage: 5V/12V
Rated Current: 0.2A
Fan speed: 700 RPM/1,500 RPM
Noise: 16/23 dBA
Bearing Type: Enter Bearing
Fan Life Expectancy: 30,000hr
Accessories
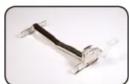
AMD K8/AM2 Clip

K8 Bracket x2

Intel LGA775 Bracket x2

Intel LGA775 Back Plate

Voltage-Regulated
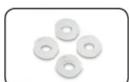
Washers x4

Screw x4

Screw Nut x4
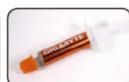
Thermal Grease

Dust Remover Cloth

Intel LGA 775 Platform Installation
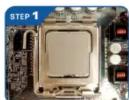
Apply a thin layer of thermal grease to the surface of the CPU.

Before the installation, please turn off the power and unplug the power cord. Remove the "CAUTION" sticker on the bottom of the G-Power 2 Pro.

Secure the Intel LGA775 brackets to the screw holes at the bottom of G-Power 2 Pro.
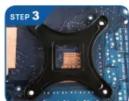
Remove the twin adhesive cover on the Intel LGA775 back plate, stick on the back of motherboard

Make sure the screw holes are aligned correctly with the motherboard before applying the Intel LGA775 back plate. If the Intel LGA775 back plate cannot be applied, secure the G-Power 2Pro with washers directly and skip step 6.
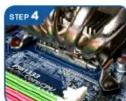
Place the G-Power 2 Pro onto the CPU, screws on the Intel LGA775 brackets need to pass through the screw holes on the motherboard.

Secure the screw nuts on to the Intel LGA775 bracket.

Connect the 3-pin connector of the fan into the corresponding CPU fan socket on the motherboard.
AMD K8/AM2 Platform Installation

Apply a thin layer of thermal grease to the surface of the CPU.

Before the installation, please turn off the power and unplug the power cord. Remove the "CAUTION" sticker on the bottom of the G-Power 2 Pro.

Secure the AMD K8/AM2 brackets to the screw holes at the bottom of G-Power 2 Pro.

Place the AMD K8/AM2 clip across the tray above cooler base.
Lock the other side of the AMD K8/AM2 clip on the raised points of CPU retention module and fasten the latch to secure the G-Power 2 Pro to the CPU.

Place the G-Power 2 Pro onto the CPU, lock one side of the AMD K8/AM2 clip on the raised points of CPU retention module.

Lock the other side of the AMD K8/AM2 clip on the raised points of CPU retention module and fasten the latch to secure the G-Power 2 Pro to the CPU.

Connect the 3-pin connector of the fan into the corresponding CPU fan socket on the motherboard.
Voltage Regulated Fan Splitter Cable Installation

Connect the 4-pin power connector with the power supply's corresponding 4-pin power connector.

Connect the 3-pin connector of the fan with the 3-pin connector of the voltage regulated fan splitter cable.




- G-Power2 PROCoder GH-PSUZZLB Installation Guide
- The following are not covered by the warranty:
- ONLY COMPATIBLE WITH 200mm (or larger) WIDTH CHASSIS. Recommendations: 3D Aurora Series, 3D Mars Series, iSolo Series.
- Features
- Specification
- Accessories
- Intel LGA 775 Platform Installation
- AMD K8/AM2 Platform Installation
- Voltage Regulated Fan Splitter Cable Installation
Brand : GIGABYTE
Model : G-Power 2 Pro
Category : Computer Cooling Component