HL1659 - Food processor PHILIPS - Free user manual and instructions
Find the device manual for free HL1659 PHILIPS in PDF.

| Product Type | Food Processor |
| Brand | Philips |
| Model | HL1659 |
| Dimensions (H x W x D) | 40 x 25 x 25 cm |
| Weight | 4.5 kg |
| Power Consumption | 800 W |
| Bowl Capacity | 2.0 L |
| Main Functions | Chopping, slicing, shredding, kneading, blending |
| Speed Settings | 2 speeds + pulse |
| Included Accessories | S-blade, slicing disc, shredding disc, dough tool |
| Safety Features | Locking lid, non-slip feet, overload protection |
| Cleaning | Removable parts are dishwasher safe |
| Material | BPA-free plastic bowl, stainless steel blades |
| Cord Length | 1.2 m |
| Warranty | 2 years |
Frequently Asked Questions - HL1659 PHILIPS
User questions about HL1659 PHILIPS
0 question about this device. Answer the ones you know or ask your own.
Ask a new question about this device
Download the instructions for your Food processor in PDF format for free! Find your manual HL1659 - PHILIPS and take your electronic device back in hand. On this page are published all the documents necessary for the use of your device. HL1659 by PHILIPS.
USER MANUAL HL1659 PHILIPS
natural_image
Product photo of a white KFC blender with various kitchen appliances (no visible text or labels)HL 1650
HL1651
HL 1654
HL 1659
www.philips.com
In case of complaint contact: Service Manager
Tel. No. 1860-180-1111, 011-6600-1111
For Home Demo contact: 1860-180-1111, 011-6600-1111
ENG Intelligent mixer grinder, juicer mixer grinder & food processor
Philips Electronics India Limited.
- Justice Chandra Madhab Road, Kolkata - 700 020
In case of complaint contact: Service Manager
Address: As above (Tel. No. 1860-180-1111, 011-6600-1111)
For Home Demo contact: 1860-180-1111, 011-6600-1111
www.philips.com

100% recycled paper
PHILIPS
Table of contents
1.0 Introduction 2
1.1 Important 3
2.0 General description 5
3.0 Product features 6
4.0 Before first use 7
5.0 Preparing for use 7
6.0 Using the appliance 7
6.1 Mixer grinder without timer (HL 1650) 7
6.2 Mixer grinder with timer (HL 1651) 9
6.3 Juicer mixer grinder without timer (HL 1654) 10
6.4 Food processor (HL 1659) 12
7.0 Tips 14
8.0 Cleaning 18
natural_image
Line drawing of a blender with handle and control panel (no text or symbols)1.0 Introduction
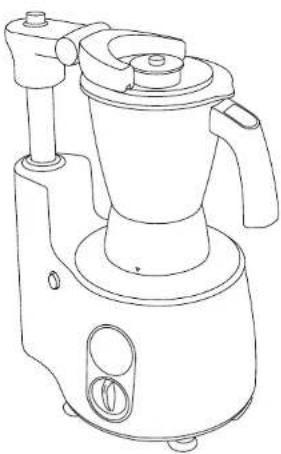
1.1 Philips brings to you, yet another unique collection of products called Philips Intelligent Mixer Grinder (HL 1650), Philips Intelligent Mixer Grinder with timer (HL 1651), Juicer Mixer Grinder (HL 1654) and Philips Intelligent Food Processor (HL 1659), which showcase exemplary features that make your life more convenient and contemporary.
1.2 They come with an Intelii Arm that completely assures the locking mechanism of the jar's Id. An Intelii Control that sets the time for the machine and gives a lock feedback and auto shutoff feature, which ensures that the machine shuts off automatically once the set time is over. These distinct features give you total freedom, to leave the machine and do your work at ease.
I.I Important
We strongly recommend that you read the following instructions carefully, before using the appliance and save them for future reference:
- Check if the voltage indicated on the base of the appliance, corresponds to the local electrical mains voltage, before you connect the appliance
• Always use a properly earthed electrical connection
- Do not use the appliance when the mains cord, the plug or other components are damaged
- If the mains cord is damaged, do not use the appliance and contact the nearest Philips service centre
- This appliance is strictly for household use - Keep the appliance out of children's reach
- Never use accessories or parts that are not recommended by Philips or made by other manufacturers
- Your guarantee will become invalid, if you use such parts or accessories
- Check sieve, fruit filter and blades every time you want to use the appliance. If you detect any cracks or damage, do not use the appliance and contact the nearest Philips service centre
• Make sure all parts are correctly mounted before you switch on the appliance
- Only use the appliance when jar and arm are locked
- Do not remove the pulp container when the appliance is in operation (HL 1654)
- Do not touch the small cutting blades in the base of filter (HL 1654)
- For application times, see the table on instructions for use manual
- Thoroughly clean the parts that will come in contact with food before you use the appliance for the first time
- Do not exceed quantities and preparation times indicated in the table
- Switch off the appliance and disconnect for
supply before detaching any accessory or approaching parts that move in use
• Always switch off the appliance by turning the speed knob to zero position
• Always unplug the appliance after use
- Never immerse the motor unit in water or any other liquid. Do not rinse it either
- Never lift the product holding the arm or its guide
- Never forcefully lift the appliance without releasing the vacuum using the lever (Fig.58, HL 1659)
• Do not use the jars as storage containers
- During food processing/jicing operation, never use your fingers or an object (E.g. spatula) to push ingredients down the feed tube while the appliance is running. Only the pusher is to be used for this purpose (HL 1654, HL 1659)
• Always unplug the appliance before reaching into any jar including juice collector
- Always ensure that the speed selector knob is at '0' position, before fixing accessories for liquidizing/blending, use speed I only
- Keep Mixer away from hot gas burner or electric hot plate or similar appliances
- Do not use Mixer on wet surface
- Use Mixer on smooth surface without any gaps for effective vacuum grip
- For non-timer versions, do not use Arm or accessories as switch, to start/stop the appliance
- Never try to remove accessories without pressing the 'button to unlock accessories'
2.0 General description
- Speed selector knob
- Intelli Control L1651, HL 659)
- Intelli Am
- Button to unlock the jar
- Button to unlock and move the arm
- Guide for jar lock
- Anti slip rubber feel
- Motor unit
- Overload protector at the bottom
- Lever to release the vacuum (HLI659)
- Super Vacuugrip (HII 1659)
- 1 steel jar (Wet grinding) (HL1650, HL 651, HL1659)
13 2 steel jars (Dry grinding and chutney) - Food Processor bowl (HL 659)
- Blender jar with fruit filter (HL1654, HL1659)
- a) Lid with feeding tube b) Juice collector
- Gear unit-To reduce the speed(HI 1659)
- Feeding tube (HI 1659)
- Pusher (H 1659)
- Tool holder to fix food processor blades (HI 1559)
- Adjustable slicing disc - 7 level slicing blade (HI 1689)
- Chopping or mincing blade with protective cover (HI 1659)
- Kneading blade (HI 1659)
- 2 size grating inserts - Fine and medium (HL) 659
- Pusher (HL 651)
- Feeding tube (HL165)
- Sieve (HL1654)
- Pulp container (HL1654)
3.0 Product features
Intelli Control: (HL1651, HL1659) This Intelli Control/Timer comes with an Intelli Lock feedback that provides safety for the entire appliance. Intelli Shutoff ensures that once you set the timer, it will complete the operation and automatically close down, even in your absence.
This function also enables you to select the Auto or Manual mode. (Fig. 1)

natural_image
Line drawing of a digital kitchen control panel with two buttons and a central knob (no text or symbols)Intelli Arm: The Intelli Arm with Intelli Lock gives you the freedom to move, while your appliance is still working. It also acts like a safety mechanism and avoids spillage of ingredients. (Fig. 2)
natural_image
Line drawing of a blender with handle and spout (no text or symbols)While an appliance is not in use, you can fold down the arm. This arm can also be rotated anticlockwise only for ease of fixing accessories.
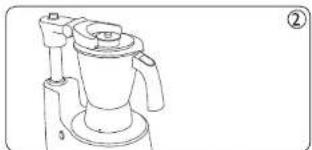
Big chute: (HL1654) This juicer has an extra large feeding tube, which means that you do not have to pre cut or chop the fruit or vegetables before hand. (Fig. 3)
natural_image
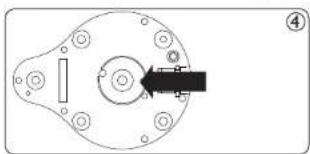
Technical line drawing of a mechanical component with cylindrical and flanged features (no text or symbols)Super Vacuugrip: This unique grip ensures that the appliance stays fixed in its position, while it is being used. It provides you complete peace of mind and liberty to do other tasks. (Fig. 4)
natural_image
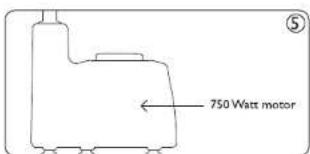
Mechanical component diagram showing a circular housing with bolt holes and a black arrow pointing to a specific section (no text or symbols)Super Silent 750W motor: It comes with a Super Silent Motor, with 750W and ensures that everything gets well grounded, with minimal noise. (Fig. 5)
Super Grind: It has reverse Quadra Flow jars along with lift and grind blades that ensure that grinding is done, just the way you want it. (Fig. 6)

natural_image
Simple line drawing of a cylindrical container with lid and side ports, no text or symbols present4.0 Before first use
We suggest that you thoroughly clean the parts that come in contact with food, before using the appliance for the first time. (Fig. 7)
natural_image
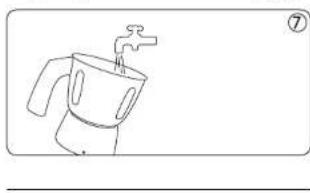
Simple line drawing of a cooking pot with a faucet (no text or symbols)5.0 Preparing for use
- Let the hot ingredients cool down, before putting them in the jars (Fig. 8)

natural_image
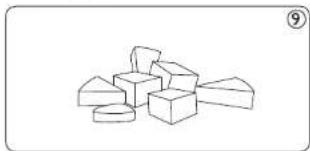
Simple line drawing of a steaming dish with food items on a surface (no text or symbols)- Cut large ingredients into pieces of approximately 2 cm, before processing them (Fig. 9)
natural_image
Simple line drawing of a pile of 3D geometric blocks (no text or symbols)- Assemble the appliance properly, before putting the plug into the socket
6.0 Using the appliance
6.1 Mixer grinder without timer (HL 1650) Follow these simple steps to use the appliance easily:
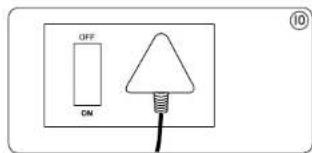
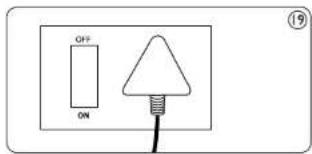
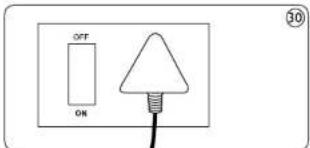
- Connect the main plug to the wall socket (Fig. 10)
- Fix the jar on the motor unit, with the help of arrow on the jar collar and motor unit (Fig. 11)

natural_image
Pure technical line drawing of a mechanical component without any text, numbers, or symbols- Switch on the main supply (Fig. 12)
- A neon lamp will light up to indicate the power supply is on (Fig. 13)

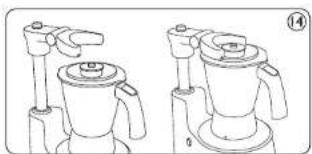
- While fixing the arm on the jar, ensure that the groove in arm, matches with the circular ring on lid (Fig. 14)
natural_image
Line drawing of two identical mechanical devices with handles and a central top component (no text or symbols)- Turn the speed selector to the required position. Select the speed to suit the recipe (Fig. 15)

- After operation, turn selector knob to 'OT' position (Fig. 16)

- For pulse, turn speed selector knob anticlockwise from '0' position gently
- Pull the arm in upward direction. Press the button to move the arm upwards (Fig. 17)

natural_image
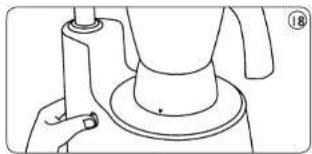
Line drawing of a hand using a tool to lift a coffee maker (no text or symbols)- Finally press the button to unlock the jar (Fig 18)
natural_image
Line drawing of a hand holding a cylindrical object with a base, no text or symbols present6.2 Mixer grinder with timer (HL 1651)
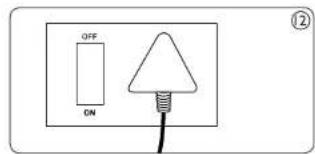
- Connect the main plug to the wall socket (Fig. 19)
- Switch on the main supply
- LED display will show ____ indicating the power supply is on (Fig. 20)

- Fix the jar on the motor unit, with the help of the arrow on the jar collar and motor unit. The LED display will change to 00L (Fig. 21)

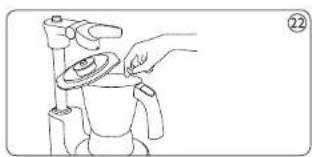
- Fill the jar with the ingredients and put the lid (Fig. 22)
natural_image
Line drawing of a hand holding a small object over a cup, with no visible text or symbols- Fix the arm on the jar. The LED display will change to 00:00. This indicates that the appliance is ready to use (Fig. 23)

natural_image
Illustration of two kitchen fans with a digital scale showing 0:00 (no text or symbols on the fans or scale)- Default mode of the operation is 'Auto.' To go on to the Manual mode, press the mode button. The LED display will now change (Fig. 24)

- Set the time using Up and Down arrows. Maximum time that can be set is 30 minutes (Fig. 25)

Note: The appliance will auto shutoff after 5 minutes (Auto mode) and 3.5 minutes (Manual mode) of continuous operations, to avoid any unforeseen situation. In case, the appliance doesn't start within 5 minutes after setting the time OR stops in between, and is not restarted within 5 minutes, the display will reset to 00:00. 9. Turn the speed selector knob to the required position. Select the speed to suit the recipe (Fig. 26)
8

natural_image
Line drawing of a blender with control panel and digital display (no text or symbols)- After operation, the appliance will stop on its own
11 Turn speed selector knob to 'Off' position (Fig. 27)

natural_image
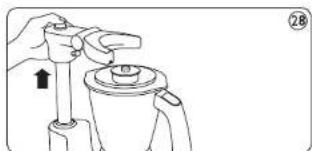
Line drawing of a blender with control panel and digital display (no text or symbols)- Press the button above the arm, to pull it in upward direction (Fig. 28)
natural_image
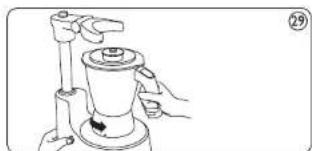
Line drawing of a hand holding a mechanical component with an arrow indicating direction (no text or symbols)- Press the button to unlock the jar (Fig. 29)
natural_image
Line drawing of a hand operating a mechanical device with a handle and base (no text or symbols)6.3 Juicer Mixer Grinder (HL 1654)
- Connect the mains plug to the mains socket (Fig. 30)
-
Switch on the mains supply
-
A neon lamp will light up to indicate the power supply is on (Fig. 31)

- Fix the juice collector into the appliance and then turn it clockwise until you hear a click sound (Fig. 32)
natural_image
Simple line drawing of a circular object with internal markings and no text or symbols- Place the pulp container into the appliance by tilting it forward slightly. Insert the top end first and then push the bottom end. While you are preparing the juice, you can empty the pulp container by switching the appliance off and carefully removing the pulp container.
Note: Reassemble the empty pulp container before you continue juicing
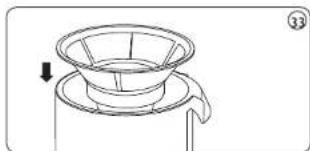
- Put the filter in the juice collection. Make sure the filter is fitted securely onto the driving shaft
Always check the sieve before use. If you detect any cracks or damage do not use the appliance and contact the nearest Philips service centre or take the appliance to your dealer (Fig. 33)
natural_image
Line drawing of a funnel-shaped object with an arrow indicating direction (no text or symbols)-
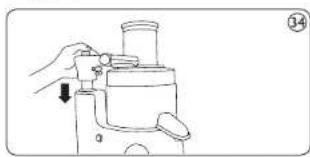
Hold the lid over sieve and lower it into position
-
Fix the arm on the lid till you near a click (Fig. 34)
natural_image
Line drawing of a hand using a manual pump device to handle a cylindrical object (no text or symbols)- Turn speed knob to position 1 or 2 (Fig. 35)
Note: While juicing, appliance will not work in speed knob position 3
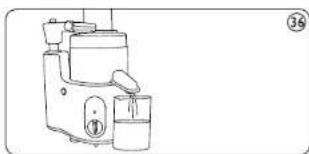
- Place the container under the spout (Fig.36)
natural_image
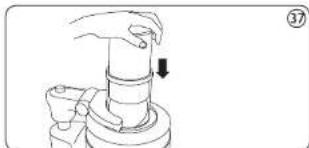
Line drawing of a kitchen blender with a side dish and handle (no text or symbols)- Put the fruit in the feeding tube and gently slide the pusher into the feeding tube by aligning the groove in the pusher with the small protrusion on the inside of the feeding tube (fig. 37)
natural_image
Line drawing of a hand pressing down on a cylindrical mechanical component (no text or symbols)Do not exert too much pressure on the pusher, as this could affect the quality of the end result and could even cause the filter to come to a halt. Never insert your fingers or an object into the feeding tube
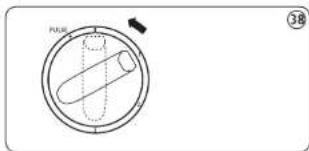
- Turn speed selector knob to 'Off' position and wait until the filter has stopped rotating. Remove the pusher (Fig. 38)
- Press the button above the arm, to pull it in upward direction
6.4 Food processor (HL 1659)
- Connect the main plug to the wall socket
- Switch on the main supply (Fig.39)

- LED display will show ____ indicating the power supply is on (Fig. 40)

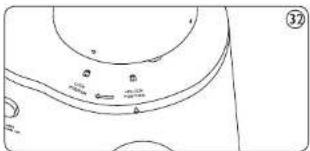
- Fix the gear box of the food processor and then turn it clockwise until you hear a click. The LED display will change to 00: (Fig.41)

- Put the bowl, followed by tool holder along with the required food processor blade and then place the lid on the bowl. Then fit the arm on the lid until you hear a click. The LED display will change to 30:00. This is an indication that the appliance is ready to use (Fig.42)
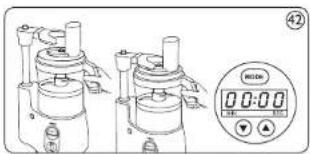
natural_image
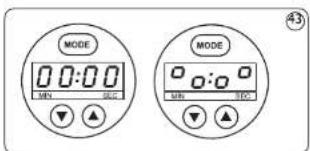
Technical line drawing of two identical mechanical devices with a digital display showing time and control buttons (no text or symbols on the devices themselves)6 Default mode of the operation is 'Auto.' To go on to the Manual mode, press the mode button. The LED display will now change (Fig. 43)
- Set the time using Up and Down arrows. Maximum time that can be set is 30 minutes (Fig. 14)

Note: The appliance will auto shutoff after 5 minutes (Auto mode) and 3.5 minutes (Manual mode) of continuous operations, to avoid any unforeseen situation. In case, the appliance doesn't start within 5 minutes after setting the time OR stops in between, and is not restarted within 5 minutes, the display will reset to 00:00. 8. Turn the speed selector knob to the required position. Select speed 1 for food processing application (Fig. 45)

natural_image
Line drawing of a mechanical device with a digital display showing time and duration (no text or symbols)- After operation, appliance will stop on its own
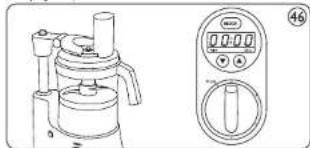
- Turn speed selector knob to 'Off' position (Fig. 46)
natural_image
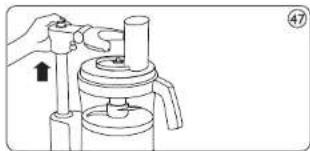
Line drawing of a vacuum cleaner with control panel and digital display (no text or symbols)- Press the button above the arm, to pull it in upward direction (Fig. 47)
natural_image
Line drawing of a hand operating a cylindrical device with a handle, showing mechanical components and a pointer (no text or symbols)- To use the metal blade, remove the protective covering from the blade (Fig. 48)

natural_image
Diagram of a mechanical component with an upward arrow indicating force or direction (no text or symbols)Note: The cutting edges of the blade are very sharp. Avoid touching them.
- Use the feed tube to add liquid and/or solid ingredients. Pre-cut large pieces of food into pieces of approximately 3x3x3 cms. (Fig. 49)

natural_image
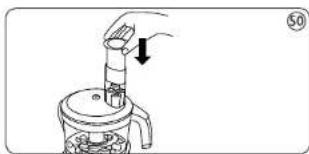
Line drawing of a hand pouring liquid into a container with granular contents (no text or symbols)- Use the pusher to push solid ingredients through the feed tube. Fill the feed tube evenly for best results (Fig. 50)
natural_image
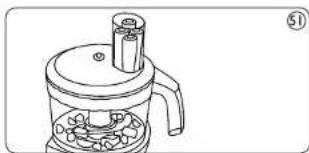
Line drawing of a hand pouring liquid into a container with an arrow indicating direction (no text or symbols)- You can also use the pusher to close the feed tube in order to prevent ingredients from escaping through the feed tube (Fig.51)
natural_image
Line drawing of a mechanical device with a cylindrical component and base plate (no text or symbols)-
Never process hard ingredients like ice cubes with the inserts
-
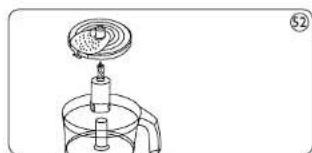
To use the grating insert, put the selected insert in the insert holder before you place it onto the tool holder. Put the insert holder onto the tool holder that stands in the bowl (Fig. 52)
natural_image
Simple line drawing of a laboratory apparatus with a funnel and beaker (no text or symbols)-
To remove the inserts from the insert holder, take the insert holder in your hands with its back pointing towards you. Push the edges of the insert with your thumbs to make the insert fall out of the holder. Cutting edges are sharp. Avoid touching them
-
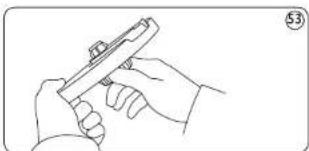
The adjustable slicing disc allows you to cut ingredients to any thickness you like. Twist the holder on the base of the disc to get the required thickness. Be careful, as the cutting edges of blade are very sharp
(Fig. 53)
natural_image
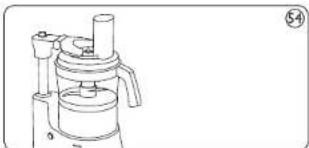
Line drawing of a hand holding a small object, possibly a tool or device, with no visible text or symbols.Built in safety lock:
- The appliance is provided with safety system. It ensures that the appliance will not start until any accessory is properly fixed, i.e., the lid is placed and the arm is holding the lid properly (Fig. 54)
natural_image
Line drawing of a mechanical device with no visible text or symbols- While the motor is running, if the arm is lifted or an accessory is unlocked, the appliance will stop working automatically
7.0 Tips
Handy tips for effective use:
• The lid of the wet and blender jar has a cap. By opening this cap, you can check the content to add water etc. Hence there is no need to open the lid (Fig. 55)

natural_image
Technical line drawing of a mechanical component with no visible text or symbols- Don't remove the arm while the application is still on, as this will result in Auto shut off. The LED will show (Time remaining) 02:AF (Fig. 56)

natural_image
Line drawing of a blender with a digital display showing '02-RE' and a bag (no text or symbols on the device itself)- Don't unlock the jar while the application is still on, as this will result in Auto shut off. The LED will show JE: 02 (Time remaining) (Fig. 57)

natural_image
Line drawing of a blender with control panel and digital display (no text or symbols)- If both, arm and jar are removed during the operation, the LED will show JE:AE (Fig. 58)

natural_image
Line drawing of a blender with control panel and digital display (no text or symbols)- After the arm is placed again and/or jar is locked again, remaining time is displayed. To restart the operation, bring back speed selector knob to '0' position and then turn it clockwise to the required speed position (Fig. 59)

- In order to avoid motor burning due to overloading, this appliance is fitted with power shut off mechanism. So, if it sometimes stops due to overloading, the red knob at the bottom will come out by itself. This function warns you about the overloading of your appliance. Simply switch off the appliance in such a case. Remove the excess load from the jar. Now wait for 2-3 minutes. Then press the red knob at the bottom of the appliance and start the appliance. The appliance will start working again (Fig. 60)

natural_image
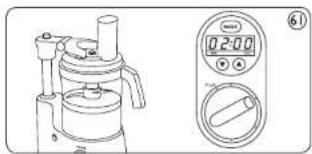
Technical line drawing of a mechanical component with circular features and a control panel (no text or symbols)- All applications carried out in the food processing bowl, should be done at 'Speed I' (Fig. 61)
natural_image
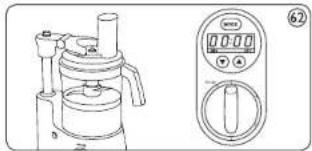
Technical line drawing of a mechanical device and its corresponding digital display (no text or symbols present)- During the operations, if the appliance is switched off, the remaining set time will stay in the memory of the appliance (Not more than 5 minutes). This ensures that the operation is completed by the set time only (Fig. 62)
natural_image
Line drawing of a kitchen appliance with a digital control panel (no text or symbols)- If there is a power failure, the appliance will come to default setup
- In between the operation, if the set time needs to be cancelled, bring the speed selector switch to '0' position and then press the mode button twice. (Pressing mode button only once will bring the appliance to manual mode) follow the steps to set the new timings (Fig. 63)
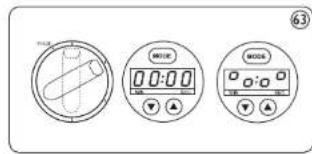
- In between the operation, if set time needs to be changed, bring the speed selector switch to '0' position and press Up and Down arrows (Fig. 64)

- If you want to chop onions, stop the appliance after four pulses to prevent them from becoming too finely chopped
- Do not let the appliance run too long, when you are chopping (I lard) cheese. The cheese will become too hot, will start to melt and will then turn lumpy
- Do not use the blade to chop very hard ingredients like coffee beans, turmeric, nutmeg and ice cubes, as this may cause the blade to get blunt (Fig. 65)
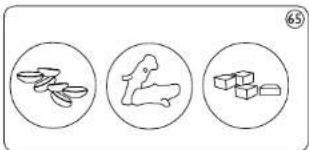
natural_image
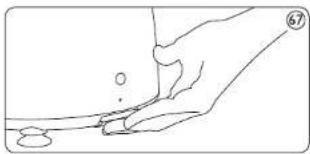
Three circular diagrams showing different types of objects: a bird, a dog, and a box (no text or symbols)• Always use speed 1 for food processing If food sticks to the blade or to the inside of the bowl : (Fig. 66)

- Remove the lid from the bowl - Remove the ingredients from the blade or from the wall of the bowl with a spatula - For effectiveness of vacuum pad: Before every use, pull 'lever to release vacuum' and then push the appliance down. In this position, release the lever (Fig. 67)
natural_image
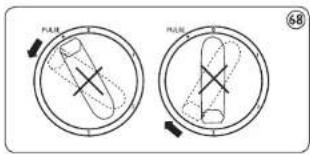
Line drawing of a hand pressing down on a surface with a small circular object nearby (no text or symbols)- Never try to turn the speed selector knob forcefully and clockwise after pulse position and clockwise, after '3' position. This will damage the knob (Fig. 68)
- Use fresh fruits and vegetables as they contain more juice. Pineapples, beetroots, celery stalks, apples, cucumbers, carrots, spinach, melons, tomatoes, pomegranates, oranges and grapes are particularly suitable for processing in the juicer extractor (Fig. 69)

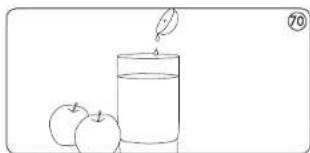
natural_image
Line drawing of a fruit arrangement with apples, grapes, and stems (no text or symbols)- You don't have to remove thin peels or skins. Only thick peels, e.g. those of oranges, pineapples and uncooked beetroot's need to be removed. Also remove the white pith and seeds of citrus fruits because it has a bitter taste - When preparing apple juice, remember that the thickness of juice depends on the kind of apple you are using. The juicer the apple, thinner the juice. Choose a kind of apple that produces type of juice you prefer - Apple juice turns brown very quickly. You can slow down this process by adding a few drops of lemon juice (Fig. 70)
natural_image
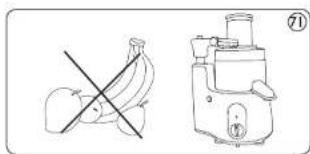
Simple line drawing of a glass of juice with two apples beside it (no text or symbols)- Fruits that contain starch such as bananas, papaya, avacados, figs, guava and mangoes are not suitable for processing in the juice extractor. Use a food processor, blender or bar blender to process these fruits (Fig. 71).
natural_image
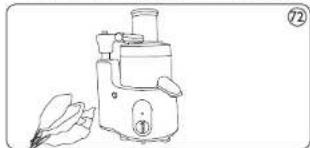
Illustration of a banana and a blender with a crossed-out banana (no text or symbols)• Leaves and leaf stalks of e.g. lettuce can also be processed in the juice extractor (Fig. 72)
natural_image
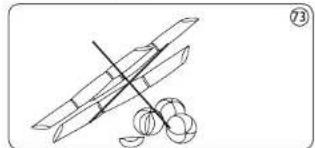
Line drawing of a small manual blender with a leafy ear emerging from the side (no text or symbols)- Drink the juice immediately after you have extracted it. If it is exposed to air for some time, the juice will lose its taste and nutritional value - To extract the maximum amount of juice, always press the pusher down slowly - The juicer is not suitable for processing very hard and/or fibrous/starchy fruits or vegetables such as sugarcane, amla (Empica off cinalis) (Fig. 73)
natural_image
Simple line drawing of a crossed rocket launcher with two flares nearby (no text or symbols)8.0 Cleaning
• Always unplug the appliance before you remove the accessories or clean the motor unit
• The appliance is easier to clean immediately after use (Fig. 74)

natural_image
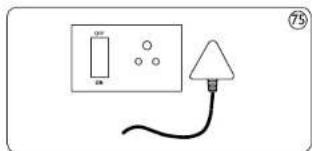
Line drawing of a kettle with a handle and water drop (no text or symbols)- Remove the main plug from the wall socket (Fig. 75)
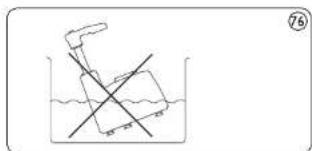
- Do not immerse the motor unit in water (Fig. 76)
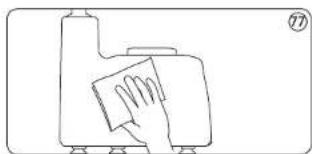
- Clean the basic unit with damp cloth only (Fig. 77)
natural_image
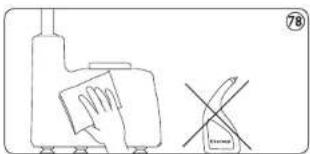
Simple line drawing of a hand cleaning a surface with a cloth (no text or symbols)- Do not use abrasive cleaning agents, scourers, acetone, alcohol etc. to clean the appliance (Fig. 78)
natural_image
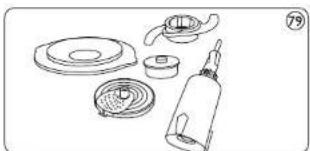
Simple line drawing of a hand cleaning a surface with a tool, next to a crossed-out mark (no text or symbols)• Disassemble the other parts after each use and wash them in soapy water (Fig. 79)
natural_image
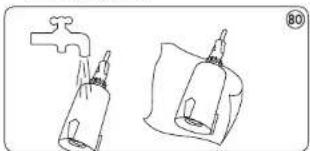
Line drawing of various kitchen utensils including a lid, bulb, and bottle (no text or symbols)- Then rinse with clean water and dry thoroughly (Fig. 80)
natural_image
Line drawing of two containers with drops, one with a handle and the other with a bottle (no text or symbols)- The bowl, the lid of the bowl, the pusher and the accessories (Except for the blender jar) can also be cleaned in a dishwasher
- Clean the metal blade, the blade unit of the blender and the inserts very carefully. Their cutting edges are very sharp!
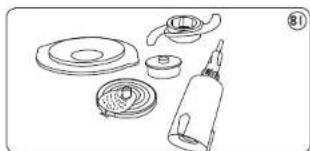
• Make sure that the cutting edges of the blades and the inserts do not come into contact with hard objects. This could cause them to become blunt - Remove the used parts from the motor unit. Disassemble the appliance in the following order: Remove pulp container,
remove pusher, remove the arm and remove the Id (Fig. 81)
natural_image
Line drawing of various kitchen utensils including a lid, bulb, and spray bottle (no text or symbols)- Remove the juice collector together with the sieve
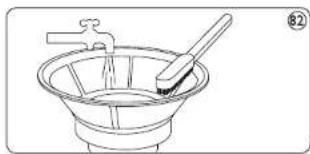
- Clean sieve with the cleaning brush in warm water with some washing-up liquid and rinse them under the tap (Fig. 82)
natural_image
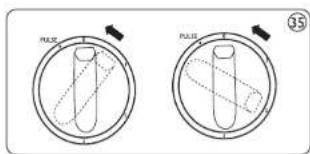
Line drawing of a funnel with a handle and water, no text or symbols present- You can quickly and easily preclean jars and Food Processor bowl using PULSE position Simply acid water and washing up liquid to the dirty bowl or jar and secure lid followed by Arm. Then turn speed knob to PULSE Position and hold it until jar or bowl is clean. When you preclean bowl or jar this way, make sure the blade or kneading accessory is assembled
Model : HL1650/HL1651/HL1654/HL1659
Voltage : 230V 50Hz
Wattage : 750W
Normal load: Refer standard Recipes
Standard Recipes: (Quantity and Time Schedule)
| S. No | Recipe | Quantity | Time | Load | Speed |
| 1 | Urad dal | 200gms + 450ml water soaked for 8~10hours.Add 50ml water | 90secs. | 675W | High |
| 2 | Rice | 250gms + 250ml water-soaked for 8~10hours.Add 50ml water | 120secs. | 500W | High |
| 3 | Haldi | 150gms roasted, cooled and pounded in to 1" pcs. | 120secs. | 450W | High |
| 4 | Wer masala | 250gms onion + 75gms tomato+green chill (3 nos.) | 60secs. | 350W | High |
| 5 | Milk shake | 400ml milk + 50gms ice cream(Optional) + 40gms strawberry crush (Sugar as per taste) | 60secs. | 350W | Low |
| 6 | Sambar masala | 105gms coriander seeds + 20gms chana dal + 20gmsmethi seeds + 5gms red chilles. Roasted and cooled | 60secs. | 500W | High |
| 7 | Garami masala | 75gms clove + 75gms cinnamon + 75gms blackpepper + 10gms masala cardamom, lightly roastedand cooled | 90secs. | 625W | High |
| AccessoryFunction | Application | Application time | Speed | |
| Chopping, mincing | 10 - 60secs. | Low | ||
| Shredding, grating | 10 - 60secs. | Low | ||
| Slicing | 10 - 60secs. | Low | ||
| Kneading, mixing | 60 - 180secs. | Low |
Important:
• For Liquidizing/Blending/Juicing/Food processing use speed I only
- For wet/dry/chutney grinding, use speed 1 and speed 2 for 10\~15 seconds only. Thereafter use speed 3 till you finish grinding
- Recommended quantity for juicing. Maximum quantities of fruit that can be juiced in juicer at one go is 2Kg. Then clear the pulp chamber. Between juicing different fruits it is advisable to pour 100ml water through sieve. This cleans the sieve and removes the taste of the previous juice
- Note - For obtaining maximum juice output and stable operation of juicer, the above listed quantity of fruit can be juiced without in-between cleaning of the appliance
- Note - Juicing can be continued after cleaning the juice collector, pulp container and filter for obtaining highest efficiency of the appliance