
SIC4750 - Webcam PHILIPS - Free user manual and instructions
Find the device manual for free SIC4750 PHILIPS in PDF.


| Product Type | Webcam |
| Model | SIC4750 |
| Brand | Philips |
| Resolution | Full HD 1080p (1920 x 1080) |
| Frame Rate | 30 fps |
| Field of View | 90 degrees |
| Autofocus | Yes |
| Built-in Microphone | Yes, stereo |
| Connection Type | USB 2.0 |
| Cable Length | 1.5 m (4.9 ft) |
| Mounting | Clip-on or tripod compatible |
| Dimensions (without clip) | 95 x 55 x 55 mm (3.74 x 2.17 x 2.17 in) |
| Weight | 150 g (0.33 lb) |
| Power Supply | Via USB (5V, 500 mA) |
| Operating System Compatibility | Windows, macOS, Chrome OS |
| Software Included | Philips Camera Suite (optional) |
| Privacy Shutter | Yes, physical cover |
| Low-Light Performance | Built-in light correction |
| Cleaning | Wipe lens with dry microfiber cloth; keep away from liquids |
| Safety | Use only with provided USB cable; avoid direct sunlight on lens |
| Spare Parts and Reparability | Not user-repairable; contact Philips support for issues |
| Package Contents | Webcam, USB cable, user manual |
Frequently Asked Questions - SIC4750 PHILIPS
User questions about SIC4750 PHILIPS
0 question about this device. Answer the ones you know or ask your own.
Ask a new question about this device
Download the instructions for your Webcam in PDF format for free! Find your manual SIC4750 - PHILIPS and take your electronic device back in hand. On this page are published all the documents necessary for the use of your device. SIC4750 by PHILIPS.
USER MANUAL SIC4750 PHILIPS
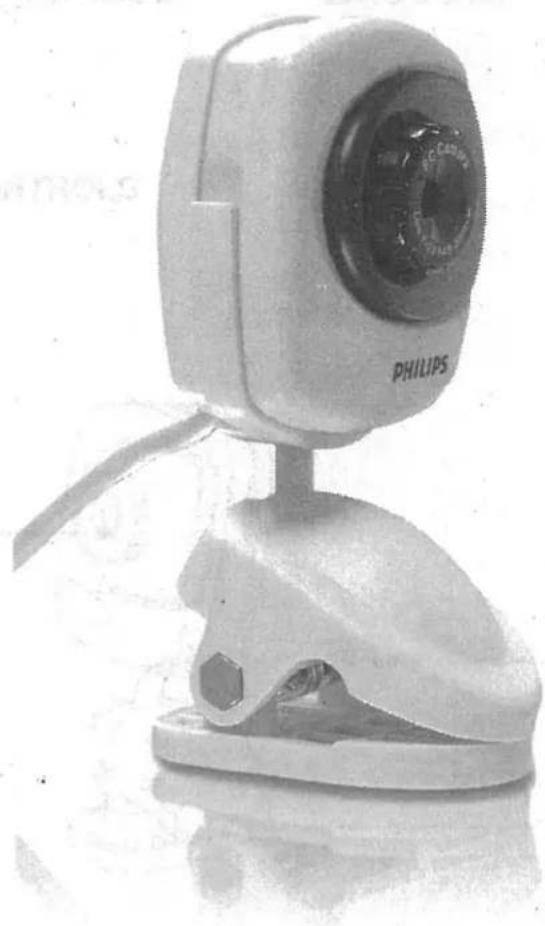
PC camera User's Manual
natural_image
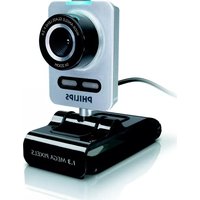
White Philips webcam device with a small clip and head mount (no visible text or symbols on the device body)PHILIPS
1.0 PACKAGE CONTENTS
The package comes with the following items:
PC Camera

Software CD

User's Manual

Microphone
2.0 LOCATION OF CONTROLS
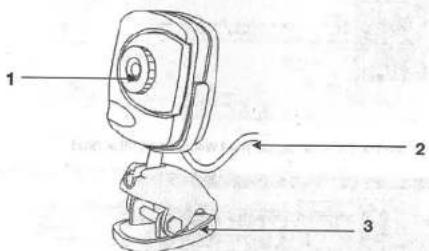
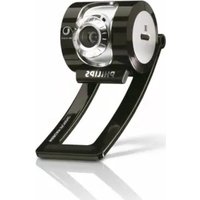
- Focus Ring - Manual Focus
- USB Cable
- Swivel Mounting Clamp
3.0 GETTING STARTED
IMPORTANT:
To avoid installation problems, please install the PC camera software before connecting the PC camera to your PC or running the Installation CD.
TO INSTALL THE SOFTWARE
- Insert the CD into your CD-ROM drive. The installation window automatically appears. Ensure the camera is not connected to your computer.
Close out of all programs and disable any background applications such as Anti-Virus software. - If the installation window does not appear, click the Start button on the desktop and choose Run. When the Run dialog box appears, click the Browse button and navigate to your CD-ROM drive directory. Double-click the Setup.exe icon to begin the installation process.
- The AvailaSoft Welcome screen will appear. Click next to proceed to the next step.
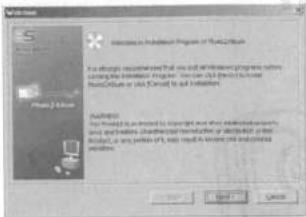
- Choose "I accept" on the License agreement wizard and click next.

- The program will be saved to a default path at C:\Program Files\AvailaSoft\Photo2Album. If you would like to save at a different location, click browse to change the path. Click next and start the software installation.
V-1.0
2
![Start Installation This will have been ready to install the installation. Press [Send] to account for the installation.](/content/2026/05/1066799/images/55443b6a666feb5f69d9321a67f353ebeeac71b224ada55ea5153a6796870d13.jpg)
- After the AvailaSoft installation is completed, click "FINISH".
- The Phillips PC Camera Setup wizard will appear, then click Next:

- Follow the instructions on the screen and click Next to continue:
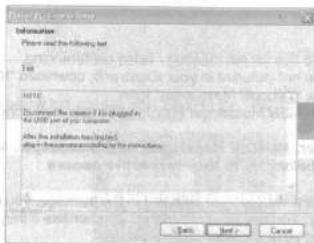
- The screen below will appear if installation is successful. Click Finish to close the setup wizard.
3
V-1.0

4.0 CONNECTING YOUR PC CAMERA
- After the software installation is complete, you can connect the PC camera to your computer. The computer will detect the camera device named [ICatch (VI) PC camera] and a New Hardware Found Message will appear.

- The Philips PC Camera software will be located on the [Start] menu → [Programs]→ [Philips PC camera].
5.0 VIDEO CONFERENCING
- The PC camera is now ready to use for net meeting / video conferencing.
- If the net meeting programs are not included in your Explorer®, download "NetMeeting" from http://www.microsoft.com or "Yahoo® Messenger" from http://messenger.yahoo.com or MSN Messenger http://messenger.msn.com
Remark: Windows Messenger, YAHOO! Messenger, MSN Messenger, Microsoft NetMeeting are trademarks belonging to their respective owners.
- Connect your PC camera and the microphone supplied in the package, you can then start the net meeting programs. You can see your friends and families if they are on the same net meeting program and have the web camera set up.
Remark: Please check your PC to determine possible availability of a microphone jack. If the jack is not available, then a USB microphone is also an option. If USB ports are all in use, then a hub will allow expansion of available USB ports.
V-1.0
4
6.0 Using AvailaSoft Software to Recording Video/ Capturing Image and Create you own Photo Album
- Double click the "Photo2Album for PC Camera" icon on your desktop, (or from Windows Taskbar Start->Programs->Philips PC Camera->Photo2Album for PC Camera, the Cover Page of the Photo Album will appear:

natural_image
Grayscale abstract texture with a dark circular spot, no visible text or symbols- Click the "PC Camera" and the live video will appear. You can start recording video or capturing image.
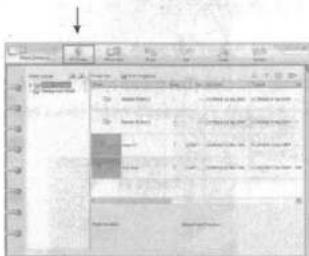
- The screen below will appear after clicking the "PC Camera".
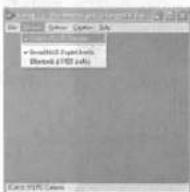
5
V-1.0
*Make sure the [Preview] option is selected.
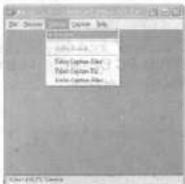
- Remember to click the correct frequency (50 Hz or 60Hz). Flickering occurs if wrong frequency is applied. To adjust the frequency, go to "Option" from "AMCAP". Click Video capture filter and choose "50Hz" or "60Hz" under Auto Exposure.

Remark: 60Hz is recommended to use in North America.
- To set frame rate, go to [Capture] and click [Set frame rate].

7.0 VIDEO RECORDING
- Please set up the directory to which the file will be saved. Go to [File] → select [Set Capture File]. Then select a directory and name a new file to save the video. Click [Open] to save the link.

V-1.0
6
- You can set the maximum recording file size by selecting [Allocate File Size] under the [File] menu.

- To set the recording time of the video, go to [Capture] → [Set Time Limit].

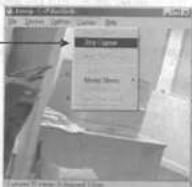
- Go to [Capture] menu and select [Start Capture] → click [OK]. It will then start the video capturing.

- Press [Esc] on the computer keyboard whenever you want to stop, or go to [Capture] menu and select [Stop Capture].
7
V-1.0
Click Stop
Capture or Press
Esc button
- Go back to the directory you set and double-click the saved video file to launch the media player for viewing video.
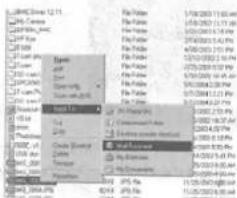
- You can email the captured video to your friends / family by selecting the file you want to send, then right click your mouse, select [send to] → go to [Mail Recipient]. It will launch your email application and attached your selected file to your email accordingly.
8.0 IMAGE CAPTURING
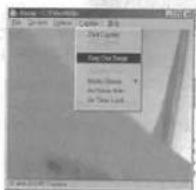
To capture an image from Live video, go to [Capture] → [Snap one image] → [Save].
V-1.0
8
9.0 RECORDING AUDIO
- If your laptop has a built in microphone, or if you had installed a microphone on your home PC, you are able to capture the audio while recording the video. The voice will be attached in the same Captured video file.
- Go to [Capture] menu → select [Capture Audio]. Then click [Start Capture] to start recording video. You can then record your voice at the same time.

10.0 HELPFUL HINTS AND CAMERA MAINTENANCE
Troubleshooting:
- The camera does not work: *Make sure you have connected the camera correctly into an available USB port or hub.
- "No capture device found" message appears: *Make sure the camera is connected properly to the computer. *Select [My Computer] → right click your mouse → select [Properties] → [Device] → [Device Manager] → [Image Device]. Check to see if the PC camera device name [iCatch (VI) PC camera] is listed. If not, try reconnecting the camera to the computer.
If there is a [?] appears on the name [ICatch (VI) PC camera], it means the USB device is not installed properly. Select the [ICatch (VI) PC camera] device and remove it. Unplug the camera and uninstall the camera driver by selecting the [Philips PC camera] on the Programs menu, then choose [Uninstall] in the sub-menu.
- "Camera not connected" message appears: *Try removing the driver and reinstalling the software.
9
V-1.0
The following hints will help you achieve the best results with your camera:
Camera Placement:
- Position the camera so that the subject is at the centre.
- Place the camera on a steady surface lighting.
- Use sufficient lighting.
- Place the light source behind the camera and facing the subject.
- Maintain a consistent lighting environment. Do not mix fluorescent and other light types.
- Do not aim the camera directly at the light source.
• Focus for a sharper image.
Camera Maintenance:
Maintaining your camera will ensure longer life and will minimize the chances of causing damage to your camera and computer.
- Keep the camera away from moisture and extreme temperature.
- Clean the outside of the camera with a clean, dry cloth.
- Never use harsh or abrasive cleaners or organic solvents on camera or on any of its parts.
- Never disassemble or touch the inside of the camera.
To Clean Your Camera Lens:
- Blow gently on the lens to remove any dust and/or dirt.
- Moisten the lens by breathing lightly on it.
- Wipe the lens gently with a soft lint-free cloth
- Do not use a cleaning solution unless it is designed specifically for camera lenses.
- Do not wipe camera lens with chemically treated eyeglass lens tissues. This may scratch
lens.
• Service and repair may only be done by qualified technician.
11.0 SPECIFICATIONS
• Image sensor: 100K Pixels
- CMOS sensor
• Video Conferencing mode
- USB interface
- Lens: 1/2.8
• Frame rate: 24/5 @352 x 288
- Unit size: 1.85" x 1.95" x 4"(W x D x H)
• Weight about 80g
V-1.0
10
12.0 SYSTEM REQUIREMENTS
• Available Universal Serial bus (USB port of hub)
• Desktop or notebook PC with a Pentium 200MHz or higher
• Windows 98SE / ME / 2000 / XP operating system
• 50MB available hard disk space
• 64MB RAM recommended
- CD Rom drive
Specifications are subject to change without notice.
For technical support, please call toll free number 866-892-4765.
Limited One-Year Warranty
Philips warrants that this product shall be free from defects in material, workmanship and assembly, under normal use, in accordance with the specifications and warnings, for one year from the date of your purchase of this product. This warranty extends only to the original purchaser of the product, and is not transferable. To exercise your rights under this warranty, you must provide proof of purchase in the form of an original sales receipt that shows the product name and the date of purchase. For customer support or to obtain warranty service, please call 919-573-7803. THERE ARE NO OTHER EXPRESS OR IMPLIED WARRANTIES. Philips' liability is limited to repair or, at its sole option, replacement of the product. Incidental, special and consequential damages are disclaimed where permitted by law. This warranty gives you specific legal rights. You may also have other rights that vary from state to state.
11
V-1.0
FCC compliance
This device complies with Part 15 of the FCC Rules. Operation is subject to the following two conditions:
- This device may not cause harmful interference, and
- This device must accept any interference received, including interference that may cause undesired operation.
Note!
This equipment has been tested and found to comply with the limits for a Class B digital device, pursuant to Part 15 of the FCC Rules. These limits are designed to provide reasonable protection against harmful interference in a residential installation. This equipment generates, uses and can radiate radio frequency energy and, if not installed and used in accordance with the instructions, may cause harmful interference to radio communications. However, there is no guarantee that interference will not occur in a particular installation. If this equipment does cause harmful interference to radio or television reception, which can be determined by turning the equipment off and on, the user is encouraged to try to correct the interference by one or more of the following measures:
• Reorient or relocate the receiving antenna.
- Increase the separation between the equipment and receiver.
- Connect the equipment to an outlet on a circuit different from that to which the receiver is connected.
- Consult the dealer or an experienced radio/TV technician for help.
Any unauthorized modification to this equipment could result in the revocation of the authorization to operate the equipment.
V-1.0
12


- PC camera User's Manual
- PACKAGE CONTENTS
- LOCATION OF CONTROLS
- GETTING STARTED
- IMPORTANT:
- TO INSTALL THE SOFTWARE
- CONNECTING YOUR PC CAMERA
- VIDEO CONFERENCING
- VIDEO RECORDING
- IMAGE CAPTURING
- RECORDING AUDIO
- HELPFUL HINTS AND CAMERA MAINTENANCE
- Troubleshooting:
- Camera Placement:
- Camera Maintenance:
- To Clean Your Camera Lens:
- SPECIFICATIONS
- SYSTEM REQUIREMENTS
- Limited One-Year Warranty
- FCC compliance
- Note!
Brand : PHILIPS
Model : SIC4750
Category : Webcam