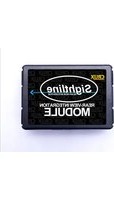
RVCCH-75E - Car accessory CRUX - Free user manual and instructions
Find the device manual for free RVCCH-75E CRUX in PDF.


| Product Type | Video Interface Module for Uconnect Touchscreen Radio |
| Compatible Radios | 8.4" Screen with separate CD slot (two piece radio) |
| Vehicle Compatibility | 2011-2015 Chrysler 300, 2011-2014 Dodge Charger, 2011-2016 Dodge Journey (except 2015 300 without CD slot) |
| Included Components | RVCCH-75E module, RVCCH-75E T-harness, CUB-01 bullet camera, 20 ft. coax cable, drill saw, mounting hardware |
| Input Voltage | 12V DC (vehicle electrical system) |
| Camera Power Output | +12V, 250mA (white wire) |
| Video Input | Composite video via RCA (yellow) |
| Video Output | Factory Uconnect display |
| Key Features | Video in motion (VIM), rear-view camera activation, forced reverse camera view, parking guide lines (ON/OFF) |
| Installation Type | Plug & Play using T-harness (no wire cutting) |
| DIP Switch Settings | DIP1: VIM ON/OFF; DIP2: Rear Cam ON/OFF; DIP3: Not Used; DIP4: Forced RVC ON/OFF; DIP5&6: Turn-on adjustment |
| Camera Mounting | Universal bullet camera, typically mounted on third brake light |
| Parking Guide Lines | Default ON; can be turned OFF by cutting white wire on camera cable |
| Forced Reverse Camera View Activation | Press and hold middle button on left side steering wheel control for 2-3 seconds |
| Auto Power-Off for Forced View | Camera defaults to power off after 10 seconds |
| Manual Transmission Note | Reverse trigger not supplied via white wire; camera power must connect to factory reverse light wire |
| Exclusions | Not compatible with vehicles with heated seats or heated steering wheel |
| Part Number | RVCCH-75E |
Frequently Asked Questions - RVCCH-75E CRUX
User questions about RVCCH-75E CRUX
0 question about this device. Answer the ones you know or ask your own.
Ask a new question about this device
Download the instructions for your Car accessory in PDF format for free! Find your manual RVCCH-75E - CRUX and take your electronic device back in hand. On this page are published all the documents necessary for the use of your device. RVCCH-75E by CRUX.
USER MANUAL RVCCH-75E CRUX
- Activates Uconnect Touchscreen Radio for enabling Video features
• Aftermarket Rear-view Camera included - Automatically switches to Rear-view when car is in Reverse mode
- Forced reverse camera view feature
- VIM function
- Plug & Play Installation
PARTS INCLUDED:

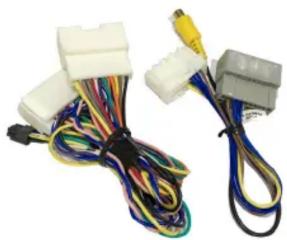
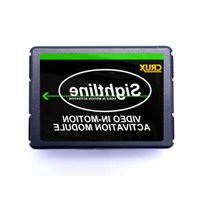
RVCCH-75E Module RVCCH-75E Harness
INSTALLATION DIAGRAM:
![graph TD A["TO RADIO"] --> B["Gray 22-PIN (MALE)"] A --> C["WHITE 22-PIN (MALE)"] A --> D["Gray 22-PIN (FEMALE)"] A --> E["WHITE 22-PIN (FEMALE)"] A --> F["TO FACTORY HARNESS"] F --> G["8-Pin Molex"] G --> H["ON SWITCH"] G --> I["DIP"] G --> J["LED*"] G --> K["*LED RED = Power ON Status\nLED BLUE =…](/content/2026/05/1064152/images/db4f0fc95457e4174256353ffb19f0caf089db70ce9e0044fcb6831ded151563.jpg)
DIP SWITCH SETTINGS:
DIP SWITCH FUNCTIONS:
DIP 1 = Video in Motion Activation ON / OFF
DIP 2 = Rear View Camera ON / OFF
DIP 3 = Not Used
DIP 4 = Forced RVC ON / OFF
DIP 5 = Camera/ParkAssist Coding (see page 5)
DIP 6 = Varies - Defaulted to both OFF*
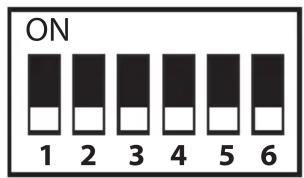
*DIP 5 & 6
If the radio is having turn-on issues, please try the following:
Attempt 1: Set 5 & 6 to ON
Attempt 2: Set 5 to ON and 6 to OFF
Attempt 3: Set 5 to OFF and 6 to ON
INSTALLATION INSTRUCTIONS:
INSTALLING THE BULLET CAMERA AND CABLE
The kit includes a universal bullet camera that can be mounted in different ways. On way is to mount it on the third brake light. Please see page 3 for installation instructions. Once the camera has been installed, route the camera cable towards the radio.
INSTALLING THE RVCCH-75E MODULE
Remove the radio to gain access to the connectors. Unplug the factory WHITE and GRAY connectors and plug them into the WHITE and GRAY connectors of the RVCCH-75E T-harness. Mate the YELLOW male and female video RCAs of the RVCCH-75E T-harness and the camera cable. Use the thin RED wire on the camera cable to power the camera. Connect the thin RED wire to the WHITE wire on the RVCCH-75E harness. The RED wire near the camera is not used and needs to be insulated with tape. Connect the BLACK ground wire near the camera to chassis ground. See diagram on page 1. Test the system for functionality before reinstalling the radio.
FORCED VIEW OF REVERSE CAMERA
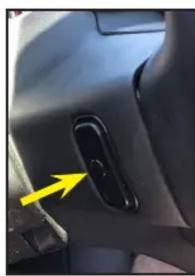
The RVCCH-75E has a feature that allows the user to view the reverse camera while driving. To activate this feature, set DIP#4 to ON. Press and hold the middle button on the left side SWC behind the steering wheel for 2-3 seconds. Press it again to deactivate this feature. The camera is defaulted to power off after 10 seconds.

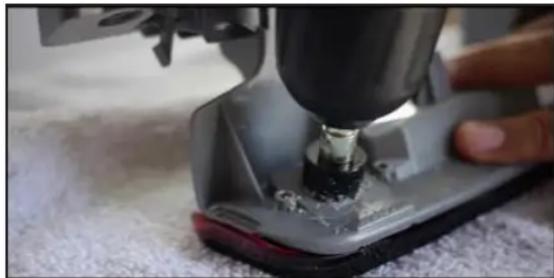
- Remove the third brake light assembly. Use the supplied drill saw and drill a hole on the back side of the third brake light housing.

- Continue drilling until the pilot drill bit is visible on the front side of the third brake light.

- Turn over the third brake light assembly start drilling from the front side. Carefully drill thru the red plastic lens.

- Insert the camera cable and the camera thru the hole but DO NOT FULLY INSERT. This will allow you to rotate the camera to the right position. Turn the ignition key to ON but do not start the engine. Put the gear in reverse and check the camera view. Adjust as necessary.

-
Route the camera cable towards the radio/RVCCH-75E location.
-
The CUB-01 bullet camera has parking guide lines that can be turned ON or OFF. The parking guide line is defaulted to ON from the factory. To turn OFF the parking guide lines, cut the thin WHITE wire on the camera cable around 4 feet away from the camera. Insulate with tape. Unplug the 4-pin barrel connector near the thin WHITE wire. Align the arrows on the 4 pin barrel connector and plug them together. Make sure that the connectors are plugged in all the way.
VEHICLE APPLICATIONS:
CHRYSLER
2011 - 2015 300 (see note below)
DODGE
2011 - 2014 Charger
2011 - 2016 Journey
NOTES:
1) On 2015 Chrysler 300 without a separate CD slot (one piece radio), use part# RVCCH-75C instead.
2) Not compatible on vehicles with heated seats or heated steering wheel.
COMPATIBLE RADIOS:
8.4" Screen with separate CD slot (two piece radio).

Separate CD slot
For radios without a separate CD slot (one piece radio) use part# RVCCH-75C.
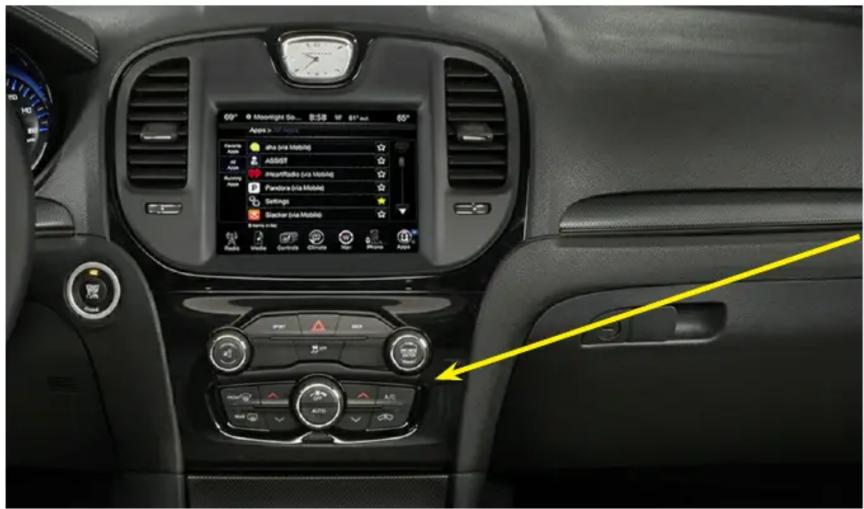
No CD slot
Brand : CRUX
Model : RVCCH-75E
Category : Car accessory