KAPRLS01PEA - Video projector Kogan - Free user manual and instructions
Find the device manual for free KAPRLS01PEA Kogan in PDF.


| Product Type | Video Projector |
| Brand | Kogan |
| Model | KAPRLS01PEA |
| Native Resolution | 1920 x 1080 (Full HD) |
| Brightness | 2500 ANSI Lumens |
| Contrast Ratio | 2000:1 |
| Projection Size | 50 - 200 inches |
| Lamp Life | 30,000 hours (LED) |
| Keystone Correction | ±15° Vertical |
| Throw Ratio | 1.5:1 |
| Input Ports | HDMI x2, USB x2, VGA, AV, Audio 3.5mm |
| Output Ports | Audio Out 3.5mm |
| Built-in Speakers | 2 x 5W |
| Power Consumption | 95W |
| Noise Level | <30dB |
| Weight | 2.5 kg |
| Dimensions (W x D x H) | 30 x 22 x 10 cm |
| Features | Built-in media player, zoom function, screen mirroring, focus adjustment |
| Maintenance | Clean lens with soft cloth; ensure ventilation holes are dust-free |
| Safety | Do not look directly at lens; keep away from water; unplug when not in use |
| Spare Parts & Repairability | Replaceable LED light source; user-accessible filter; contact Kogan support for parts |
Frequently Asked Questions - KAPRLS01PEA Kogan
User questions about KAPRLS01PEA Kogan
0 question about this device. Answer the ones you know or ask your own.
Ask a new question about this device
Download the instructions for your Video projector in PDF format for free! Find your manual KAPRLS01PEA - Kogan and take your electronic device back in hand. On this page are published all the documents necessary for the use of your device. KAPRLS01PEA by Kogan.
USER MANUAL KAPRLS01PEA Kogan
natural_image
White and black portable projector with a blue lens, perforated grille (no text or symbols visible)KOGAN HD SMART PROJECTOR
KAPRLS01PEA
SAFETY & WARNINGS
- Read this user guide carefully before using this product.
- To ensure a stable power supply, ensure the electrical outlet used has the appropriate protection measures, such as grounding.
- Do not repair this product yourself. If the product or its power supply experiences any malfunction or damage, cease use immediately and contact help.Kogan.com for support.
- This product does not contain any user serviceable parts. Do not disassemble or modify this product in any way.
- To avoid eye injuries, do not look directly into the light from the projector.
- Do not place this product on any items that may block the ventilation openings (cloth, blankets, etc.).
- This product is not waterproof. To prevent electric shock, do not expose the device to rain or water.
- If this product will not be used for an extended period, disconnect the power cord.
- To avoid damage when transporting this product, place it back in its original packaging.
- Only use this product in an environment of 5-35°C.
COMPONENTS LIST
• Kogan HD Smart Projector
- Remote control
- Power adapter
- User guide
OVERVIEW
Back View
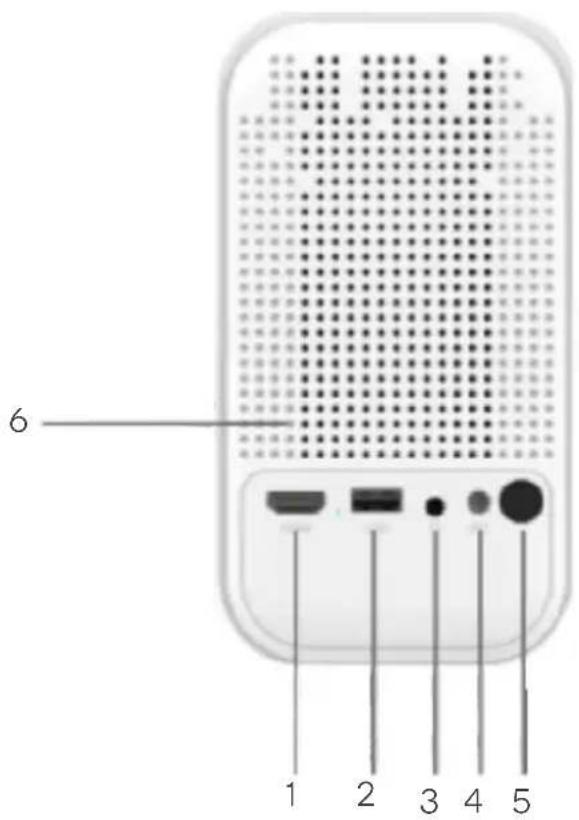
1 HDMI port
2 USB port
3 3.5mm audio port
4 Charging port
5 Audio/AV in
6 Infrared receiver
Front View
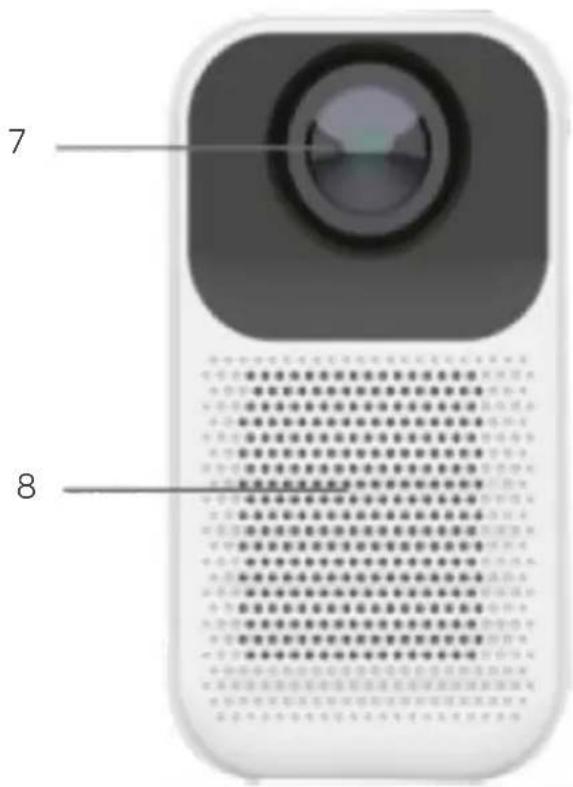
7 Lens
8 Outlet
Top View
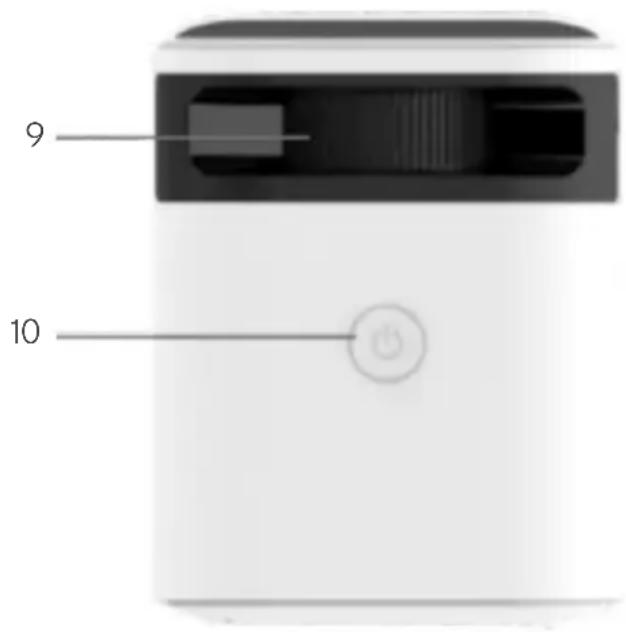
9 Lens focusing ring
10 Power button
Bottom View
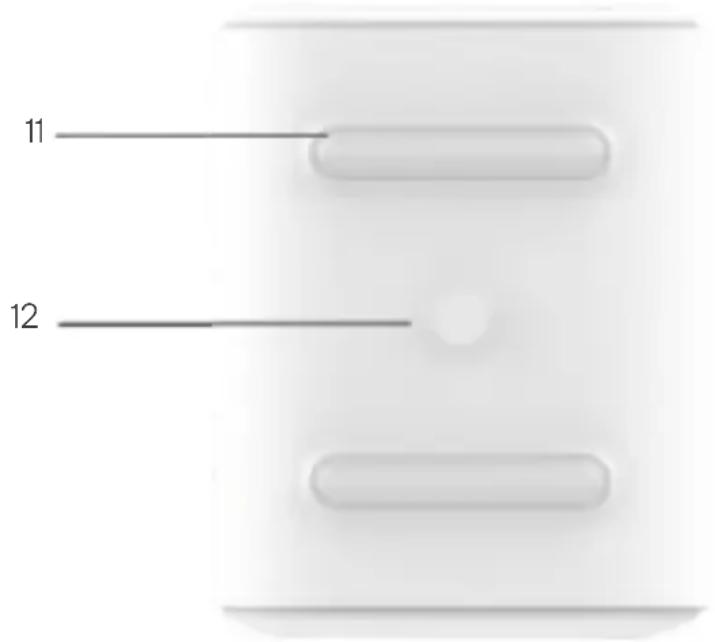
11 Foot pad
12 Support screw hole
Remote Control
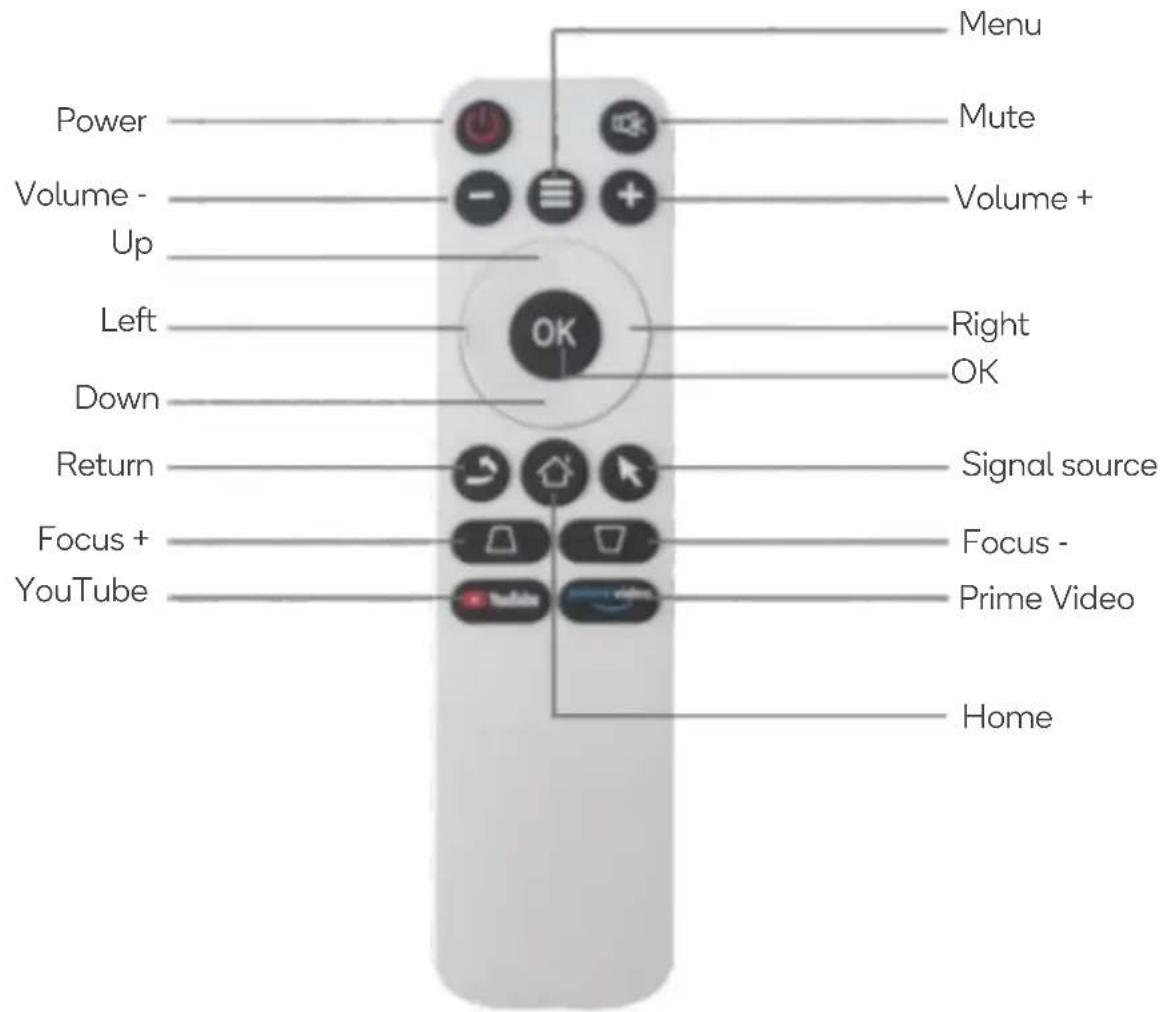
OPERATION
Power On/Off
- Plug one end of the adapter into the projector and the other end into an electrical outlet.
- Press the power button on the projector or the remote to turn the projector on and off.
- The indicator will illuminate red when the projector is on and stop illuminating when the projector is off.
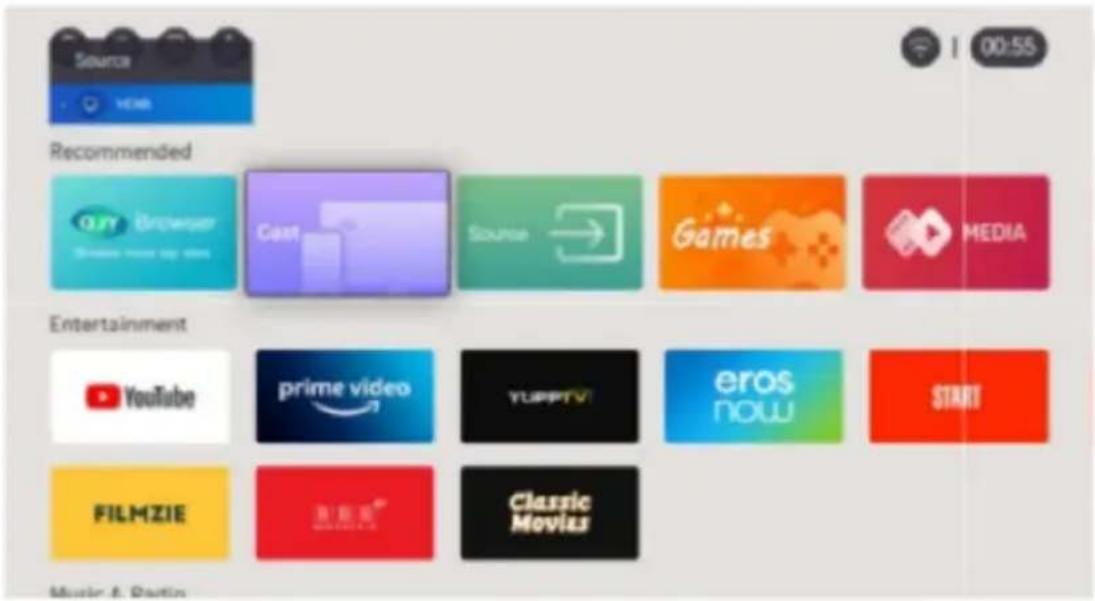
Image Focusing
Adjust the lens focusing ring until the projected picture is clear.
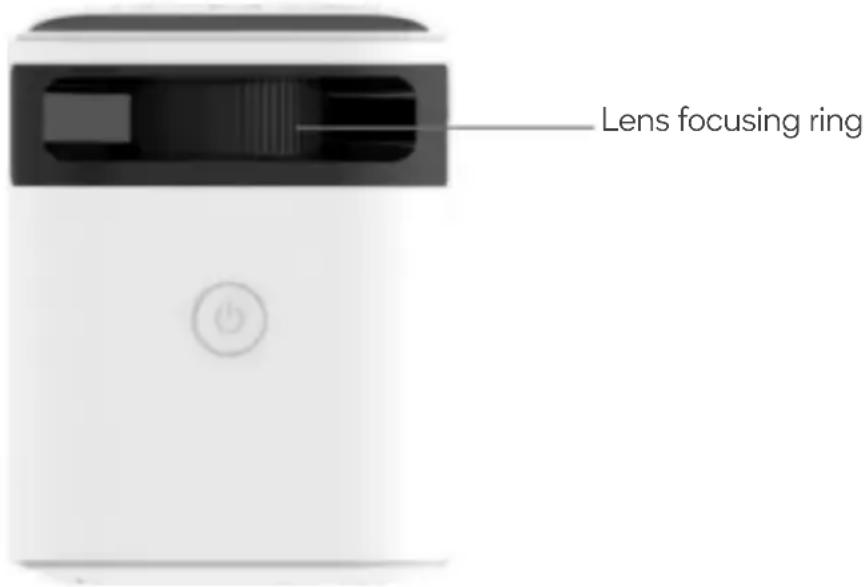
Connect to Wi-Fi
- Use the remote control to enter the Settings menu.
- Go to 'Network Settings'.
- Select the Wi-Fi network you want to connect to.
- Enter the password and press the 'OK' button on the remote control to connect to the network.
Input Source
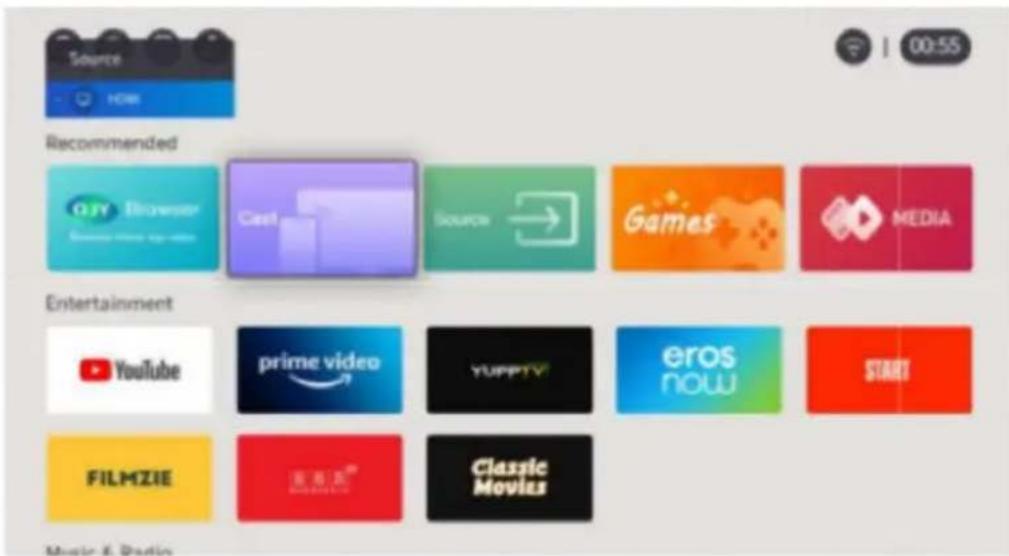
HDMI:
- Connect the projector and the device (such as computer, DVD player, etc.) using an HDMI cable (not provided).
- Press the signal source button on the remote control or select 'Source' on the main menu.
- Change the signal source to HDMI.
Audio:
- Plug the device (speaker, earphones, etc.) into the audio port on the projector.
- Press the signal source button on the remote control or select 'Source' on the main menu.
- Change the signal source to Audio.
Android Device Screen Mirroring
- Ensure the projector and the device are connected to the same Wi-Fi network.
- Select 'Cast' on the main menu.
- Select 'Android screen projection software'.
- Go to Bluetooth settings on your Android device and select 'Smart_FB2C'.
iOS Device Screen Mirroring
- Ensure the projector and the device are connected to the same Wi-Fi network.
- Select 'Cast' on the main menu.
- On the iOS device, swipe down from the top right corner to enter the Control Centre menu and select Screen Mirroring.
- Select 'Smart_FB2C'.
Local Play Back
- Insert a USB into the USB port on the projector.
- Select 'MEDIA' on the main menu.
- Select 'Local Disk' to view the USB files (videos, pictures, songs, etc.).
- Select the file and press 'OK' on the remote to play.
The local play back function supports the following formats:
• Audio files: MP3, ASF.
• Picture files: JPEG, BMP, PNG, JPG.
• Video files: MPG, MPEG, MP4, MKV, AVI, ASF, FLV.
Bluetooth
- Use the remote control or the to enter the Settings menu.
- Go to 'Bluetooth Settings'.
- Select the device to pair it with the projector.
Note:
The projector can be connected to external speakers via Bluetooth only. It can also connect to a smartphone or tablet for music streaming via Bluetooth. In Bluetooth mode, the projector can be used as a Bluetooth speaker.
OSD Menu
- Ensure the projector is connected to a device.
- Press the menu button on the projector to open the OSD menu.
- Press the ◀ or ▶ buttons to select a sub-menu and press 'OK' to enter.
- Press the ▲ or ▼ buttons to select a setting and press 'OK' to enter.
- Press the ◀ or ▶ buttons to adjust the setting and press the return button to save changes.
Projection Settings
| Setting | Description |
| Horizontal/Vertical Correction | Press up and down on the remote to adjust the vertical trapezoidal value.Press left and right on the remote to adjust the horizontal trapezoidal value. |
| Four Corners Correction | Keystone correction in all directions of the four corners. |
| Screen Zoom | Adjust the zooming of the screen. |
| Projection Mode | Switch between formal projection, formal rear projection, hoisting forward projection and hoisting rear projection. |
Image Settings
- Use the remote control to enter the Settings menu.
- Select 'Image Settings'.
- Select 'Image Mode' and adjust the screen colour.
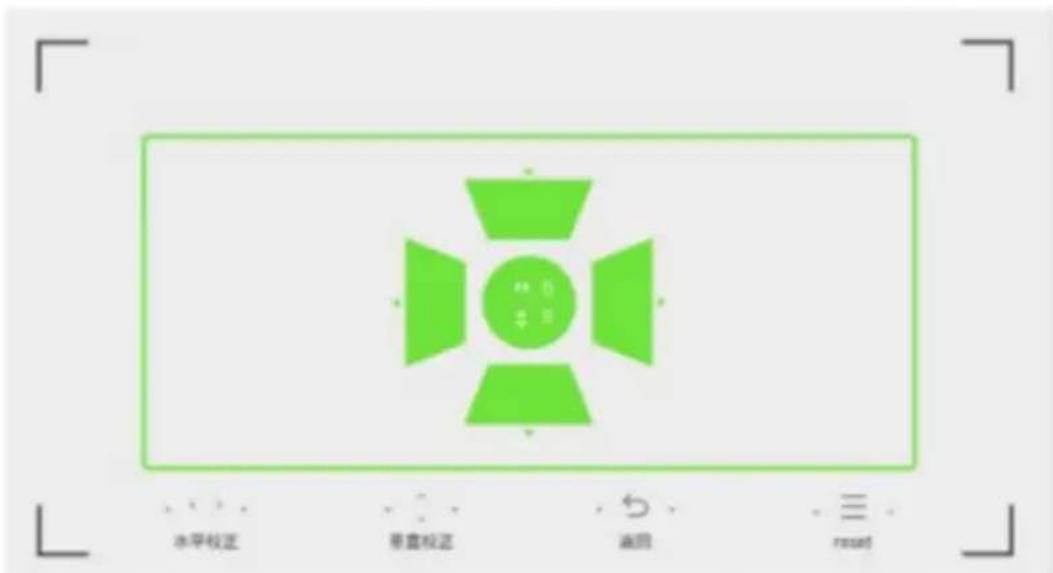
Manual Trapezoidal Correction
Horizontal and vertical keystone correction: When the projected image is not rectangular, it can be adjusted using 4-point keystone correction.
- Use the remote control to enter the Settings menu.
- Select 'Projection'.
-
Select 'Horizontal/Vertical Correction'.
-
Press the direction buttons on the remote control to adjust the projected image.
Four-point Trapezoid Correction
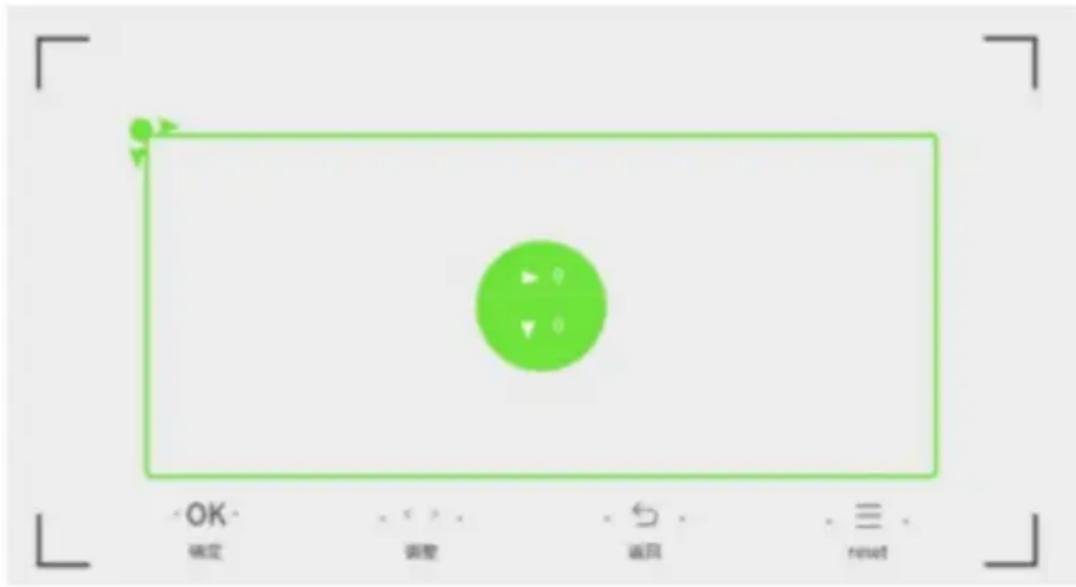
- Use the remote control to enter the Settings menu.
- Select 'Projection'.
- Select 'Four-point Trapezoid Correction' and press 'OK' to select a corner to adjust.
- Press the direction buttons on the remote control to adjust the selected corner. Press the menu button on the remote control to reset if needed.
- Press 'OK' to switch to the next corner.
- Repeat steps 3-5 to adjust each corner until the projected image is rectangular.
Projection Size Distance Table
| Projection size (inch) | Screen length (CM) | Screen width (CM) | Lens-screen distance (CM) |
| 40 | 88.5 | 50 | 130 |
| 50 | 112 | 63 | 163 |
| 60 | 132 | 74 | 193 |
| 70 | 157 | 88 | 227 |
| 80 | 177 | 99.5 | 256 |
| 90 | 201 | 113 | 290 |
| 100 | 224 | 126 | 322 |
Note:
The OSD interface and images in this user guide are subject to change.
Other Settings
| Setting | Description |
| Image mode | Set image display mode (Standard, Bright, Energy Saving, Video, Sports, Games, Custom). |
| Colour temperature | Adjust image display colour temperature (Cool, Warm, Standard, Custom). |
| Sound mode | Adjust the sound (Standard, Music, Video, Sports, Custom). |
| Aspect ratio | Adjust the aspect ratio (only scan, video, 4:3/16:9) [it is recommended to change the software to automatic, 4:3, 16:9]. |
NOTES
Need more information?
We hope that this user guide has given you the assistance needed for a simple set-up.
For the most up-to-date guide for your product, as well as any additional assistance you may require, head online to help.kogan.com
kogan.com
- KOGAN HD SMART PROJECTOR
- SAFETY & WARNINGS
- COMPONENTS LIST
- OVERVIEW
- Back View
- Front View
- Top View
- Bottom View
- Remote Control
- OPERATION
- Power On/Off
- Image Focusing
- Connect to Wi-Fi
- Input Source
- HDMI:
- Audio:
- Android Device Screen Mirroring
- iOS Device Screen Mirroring
- Local Play Back
- Bluetooth
- Note:
- OSD Menu
- Image Settings
- Manual Trapezoidal Correction
- Four-point Trapezoid Correction
- NOTES
- Need more information?
Brand : Kogan
Model : KAPRLS01PEA
Category : Video projector