KAMLIF8PRRA - Video projector Kogan - Free user manual and instructions
Find the device manual for free KAMLIF8PRRA Kogan in PDF.


| Product Type | Full HD Smart Mini Projector |
| Dimensions | 150 x 170 x 210 mm |
| Net Weight | 1.54 kg |
| Power Supply | AC 100-240V, 50/60Hz |
| Display Technology | LCD |
| Native Resolution | 1920 x 1080 (Supports 4K Input) |
| Aspect Ratio | 16:9 |
| Focusing Method | Electronic focusing |
| Throw Distance | 1 - 5 m |
| Screen Zoom | 70% - 100% |
| Light Source | LED |
| Interfaces | AV, HDMI, USB (5V 1A output) |
| Remote Control Distance | 5 m |
| Wi-Fi Support | Yes (2.4GHz/5GHz) |
| Bluetooth Support | Yes (for speaker pairing) |
| Supported Video Formats | MP4, RMVB, MJPEG, MOV, MKV, AVI |
| Supported Audio Formats | MP3, MP4 |
| Supported Image Formats | JPEG, BMP, PNG |
| Supported Document Formats | TXT |
| System Language | Multi-language |
| Optimal Projection Distance | 1.0 - 3.5 m |
| Tiltable Angle | Vertical ±30° |
| Safety Features | Auto power off when idle, overheating protection |
| Maintenance | Keep vents clear; wipe lens with soft cloth; store in original packaging |
| Spare Parts / Repairability | No user-serviceable parts; contact help.Kogan.com for support |
Frequently Asked Questions - KAMLIF8PRRA Kogan
User questions about KAMLIF8PRRA Kogan
0 question about this device. Answer the ones you know or ask your own.
Ask a new question about this device
Download the instructions for your Video projector in PDF format for free! Find your manual KAMLIF8PRRA - Kogan and take your electronic device back in hand. On this page are published all the documents necessary for the use of your device. KAMLIF8PRRA by Kogan.
USER MANUAL KAMLIF8PRRA Kogan
natural_image
Line drawing of a portable projector with a circular vent and side panel (no text or symbols)FULL HD SMART MINI PROJECTOR
KAMLIF8PRRA
Safety & Warnings 3
Components 5
Overview 6
Installation 8
Operation 15
Specifications 19
Troubleshooting 20
Notes 21
SAFETY & WARNINGS
- Read this user guide fully and carefully before using the product.
- To avoid eyes injury, do not look directly into the light from the projector.
- A direct burst of intense light can harm your eyes and cause severe damage to the eyes of infants.
- Do not attempt to repair this product yourself. If the product or its power supply experiences any malfunction or damage, cease use immediately and contact help.Kogan.com for support.
- Ensure the projector is a safe distance from any heat-emitting devices or the service life of the projector may be shortened.
- To ensure a stable power supply, ensure the electrical outlet used has the appropriate protection measures, such as grounding.
- Do not use any power cord other than the one supplied with this product.
- This product does not contain any user serviceable parts. Do not disassemble or modify this product in any way.
- Do not place this product on any items that may block the ventilation openings (cloth, blankets, etc.).
- This product is not waterproof, to prevent electric shock, do not expose the device to rain or water.
- Do not place any items containing liquids near the device.
- Do not use or operate this product in a damp, humid environment.
- If this product will not be used for an extended period, disconnect the power cord.
- To avoid damage, when transporting this product, place it back in its original packaging.
- Use the power cable with caution to avoid unduly bending. A damaged power cable may cause electric shock.
- Always use the projector with caution to avoid dropping, which may damage the internal components.
- Ensure the electrical outlet used matches the power voltage as marked on the projector.
- For optimum performance, use the projector in a dark room.
- Do not disassemble or modify the projector in anyway.
- Turn off and unplug from the power supply if not using the projector for a long time.
- Don't install the projector in sites with poor ventilation.
-
Don't install the projector in hot and humid environments.
-
Don't install the projector near temperature sensors or smoke detectors. It may cause a sensor failure.
- Don't install the projector in locations exposed to warm and cool airflow (heater vents, air conditioner etc.).
- Don't install the projector in dusty or smoky environments.
- Never look directly into the lens when the projector is operating. Doing so may damage your eyes.
- Keep the projector away from water or any other liquids.
FCC Warning Statement
Changes or modifications not expressly approved by the party responsible for compliance could void the user's authority to operate the equipment. This equipment has been tested and found to comply with the limits for a Class B digital device, pursuant to Part 15 of the FCC Rules. These limits are designed to provide reasonable protection against harmful interference in a residential installation. This equipment generates uses and can radiate radio frequency energy and, if not installed and used in accordance with the instructions, may cause harmful interference to radio communications. However, there is no guarantee that interference will not occur in a particular installation. If this equipment does cause harmful interference to radio or television reception, which can be determined by turning the equipment off and on, the user is encouraged to try to correct the interference by one or more of the following measures:
- Reorient or relocate the receiving antenna.
- Increase the separation between the equipment and receiver.
- Connect the equipment into an outlet on a circuit different from that to which the receiver is connected.
-
Consult the dealer or an experienced radio/TV technician for help. This device complies with par 15 of the FCC Rules, Operation is subject to the following two conditions:
-
This device may not cause harmful interference and
-
This device must accept any interference received, including interference that may cause undesired operation.
RF Exposure Statement
To maintain compliance with FCC RF Exposure guidelines. This equipment should be installed and operated with minimum distance of 20cm the radiator your body. This device and its antenna(s) must not be co-located or operation in conjunction with any other antenna of transmitter.
COMPONENTS
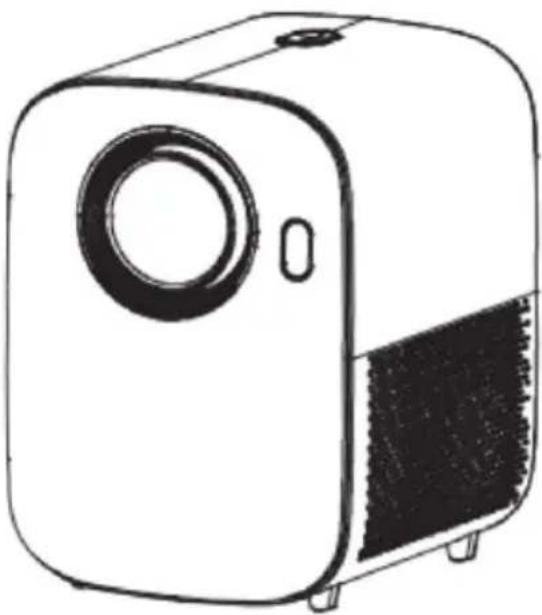
natural_image
Line drawing of a portable electronic device with a circular top and side panel (no text or symbols)Projector
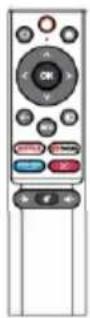
Remote
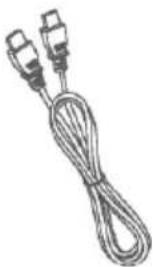
natural_image
Illustration of two USB cable with two connectors (no text or symbols)HDMI Cable
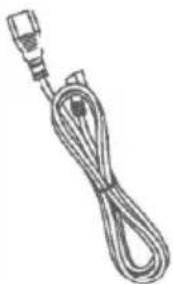
natural_image
Line drawing of a cable with a connector (no text or symbols)Power Cable
natural_image
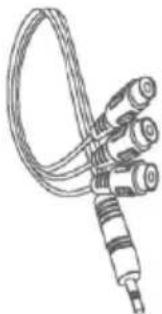
Line drawing of a medical or laboratory device with coiled tubing and three connectors (no text or symbols)AV Cable
User Guide
OVERVIEW
Remote Control
- Install batteries into the remote before using it. Note: Do not mix old and new batteries.
- When using the remote controller, ensure that the signal transmitter of the remote controller aims at the infrared signal receiver of the projector.
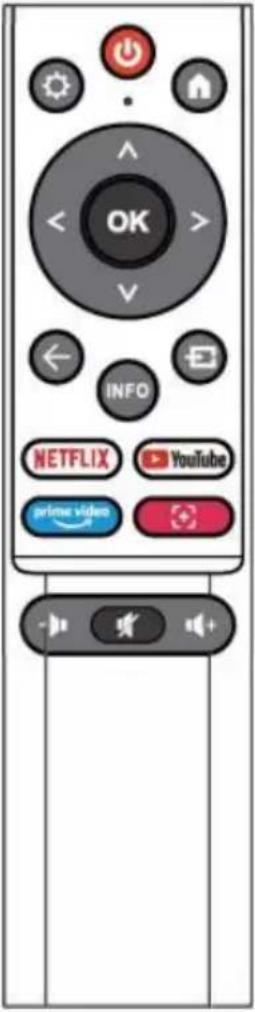 | [KASG] | Turns the projector On/Off |
 | Menu: Displays the OSD (On Screen Display) menu | |
 | HOME: Displays the home screen. | |
 | Navigation buttons: Cursor UP/LEFT/RIGHT/DOWN/OK. | |
 | Call up information related to reading files | |
 | Back: Press to move back through menus | |
 | Inputs: Select signal source | |
 | Connects to You Tube (internet connection required) | |
 | Connects to NETFLIX (internet connection required) | |
 | Connects to Prime video (internet connection required). | |
 | Focus button: Press this button to enter the focus mode and use UP and DOWN key to focus in/out. Press this button again to exit focus mode. | |
 | Mute or restore sound. | |
 | Decrease volume. | |
 | Increase volume. |
INSTALLATION
Projection Distance and Size
Please follow the data in chart below, to adjust the image size and the distance.
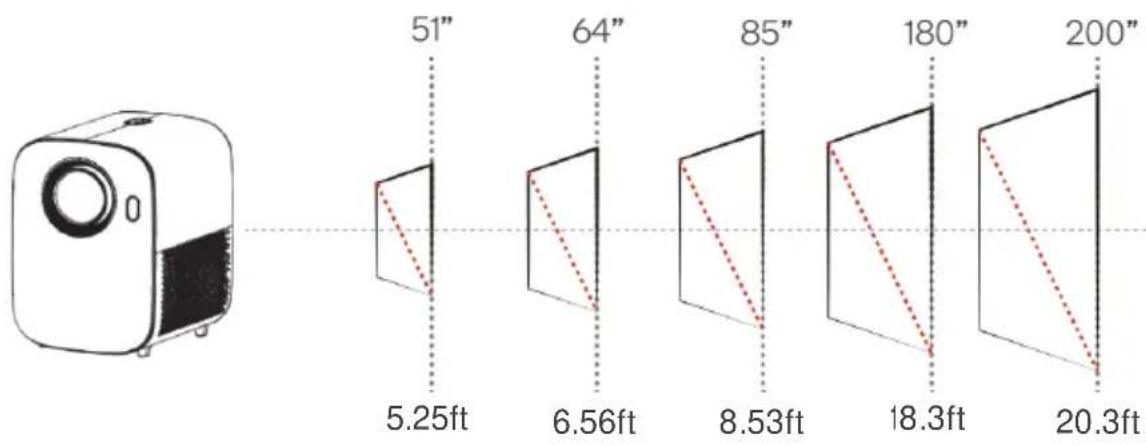
| Aspect Ratio: 16:9/ 4:3/ Default | |
| Distance | Projection size |
| 5.25 ft | 51" |
| 6.56ft | 64" |
| 8.20ft | 80" |
| 8.53ft | 85" |
| 10.50ft | 100" |
| 12.47ft | 120" |
| 16.4ft | 160" |
| 18.3ft | 180" |
| 20.3ft | 200" |
| 22.6ft | 220" |
Note:
- The best image quality would be achieved with a projection distance of 1-3m. A larger screen size would affect the image quality in a certain degree.
- The image size depends on the distance between projector and screen, there may be 3% deviation among above listed data. Different settings cause various distances.
Setup
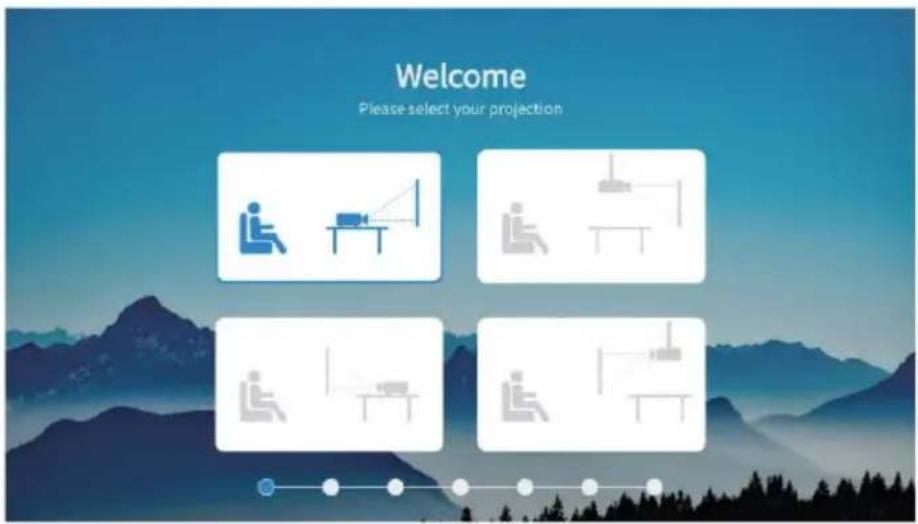
- The following menu is displayed when you turn on the projector for first time. Press ▲/▼/◀/▶ to select the orientation of the projector.
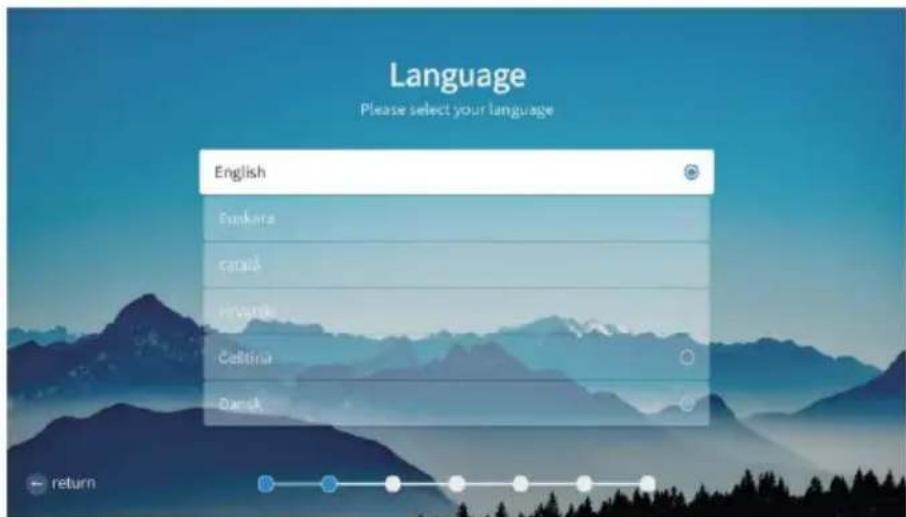
- Select your language. Press ▲/▼ to switch the OSD Language menu language. After selecting the desired language, press OK button to enter the next page.
- Press the ▲/▼ button on the remote control to select your region and press OK to confirm the selection and go to the next setting page.
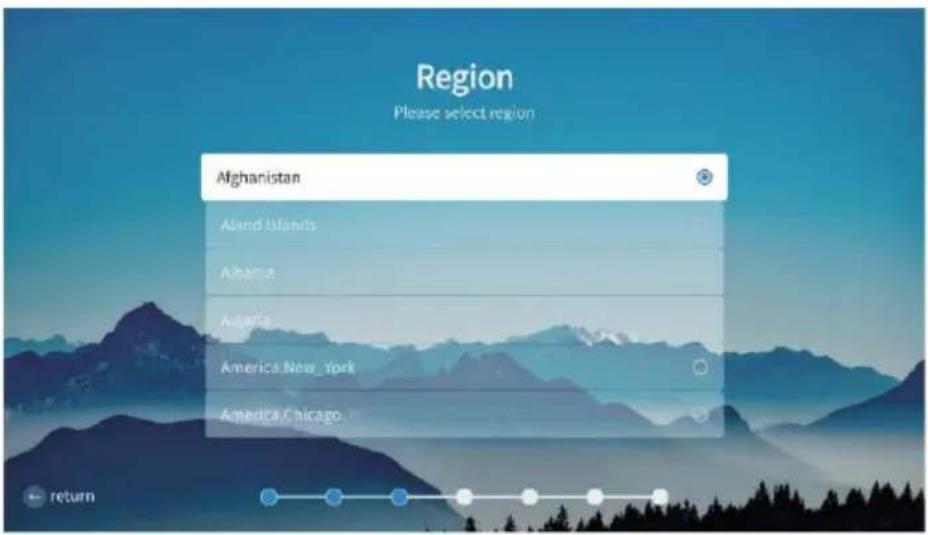
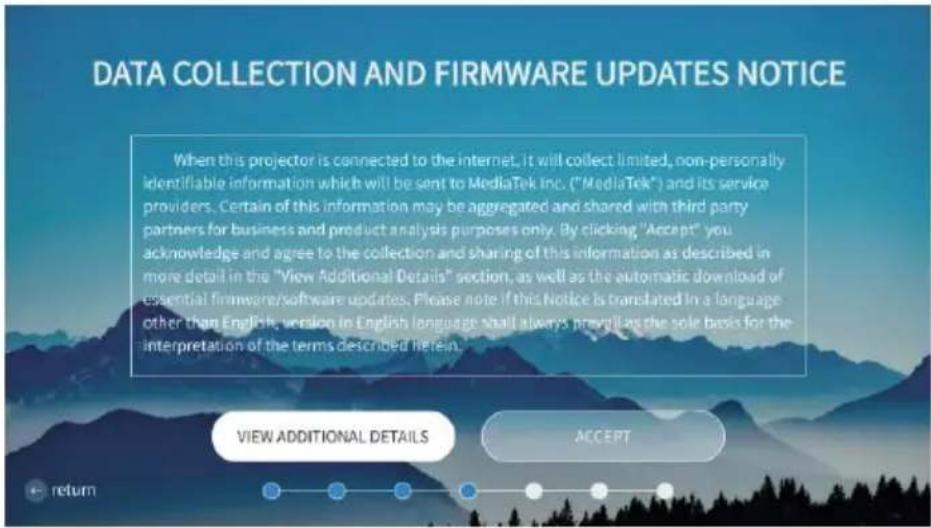
- Select ACCEPT " and press OK to confirm.
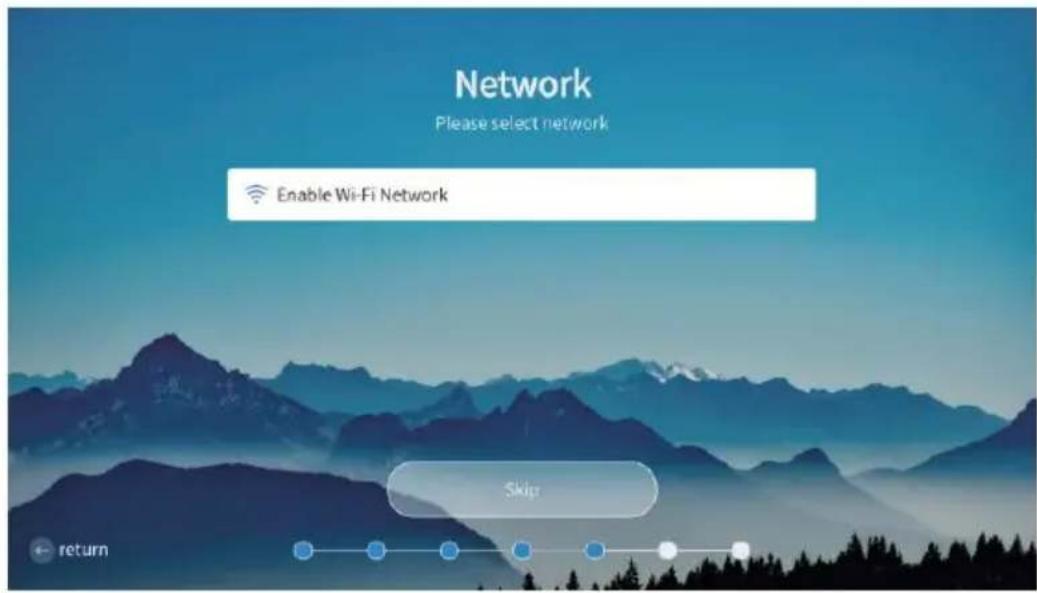
- Press OK to setup to Enable Wi-Fi network skip this step.
- Select "Set Up network" to select your wireless network or select "SKIP" to skip this step.
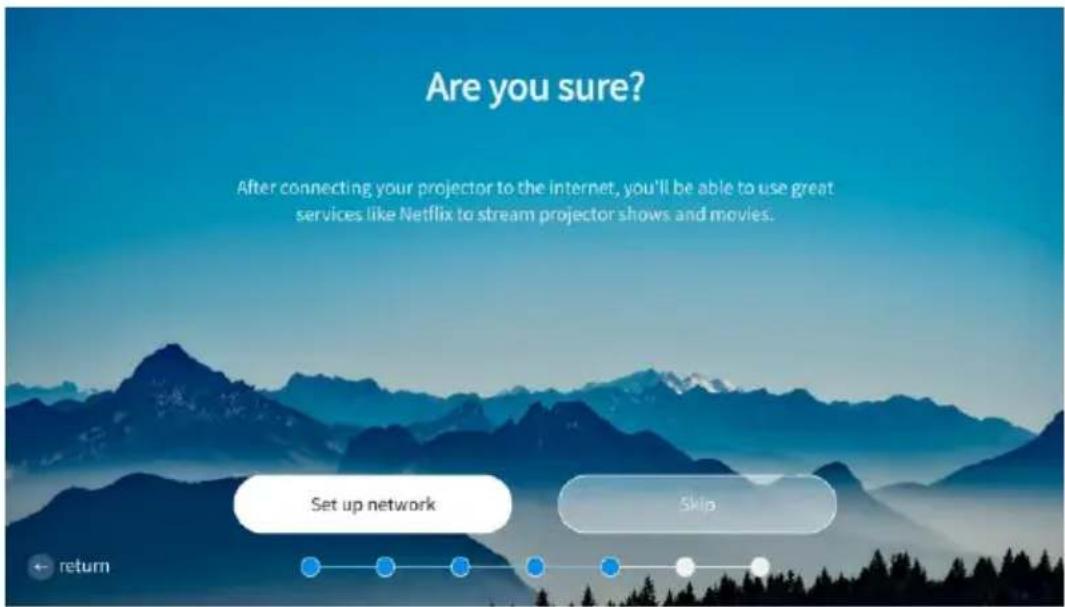
- Start Netflix to sign into your Netflix account step.
or select "SKIP" to skip this
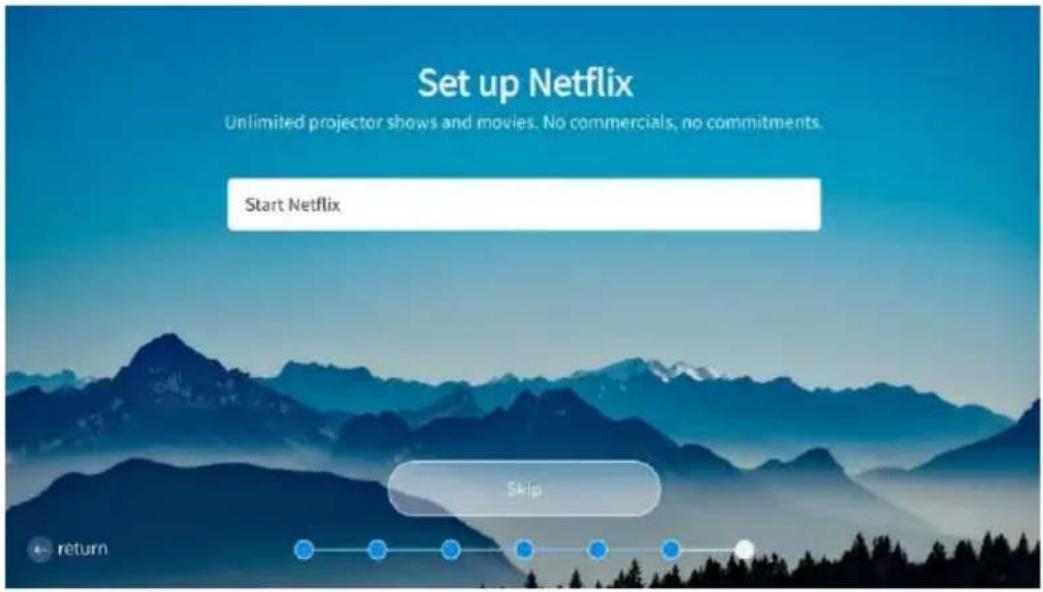
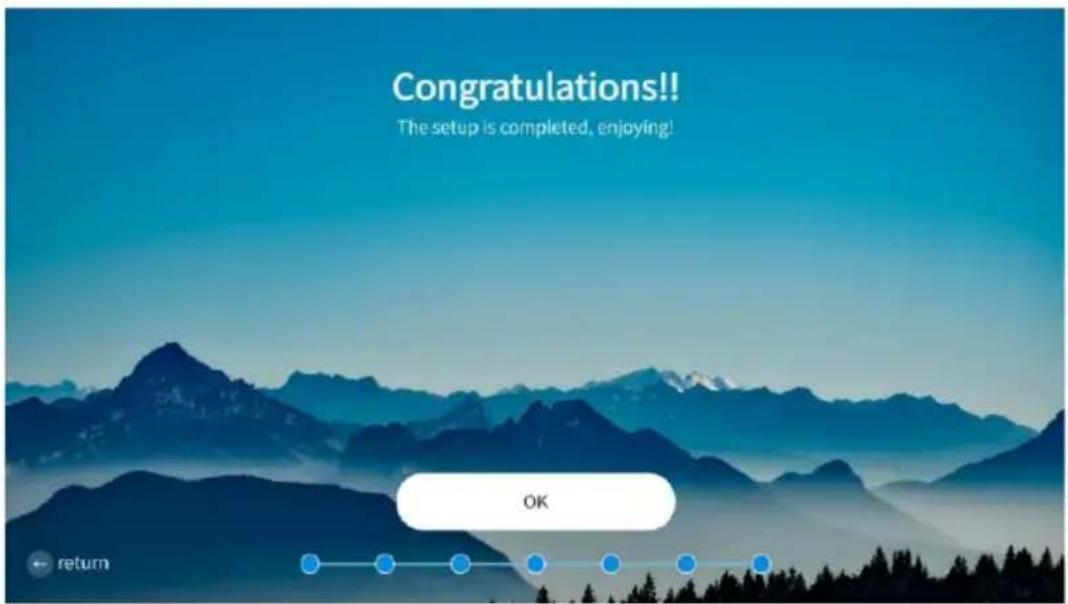
When the initial setup is completed, Press OK to continue to the home screen. Note: This screen will automatically close after 5 seconds.
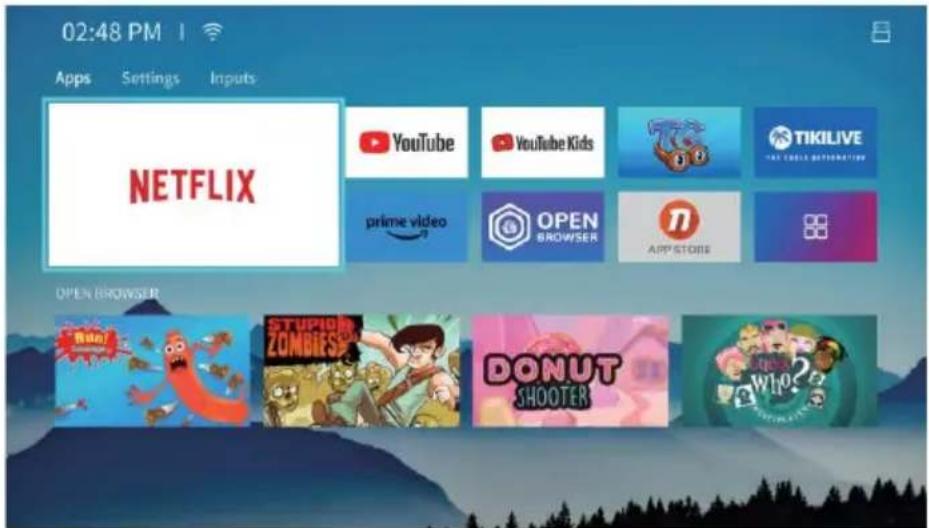
Home Menu
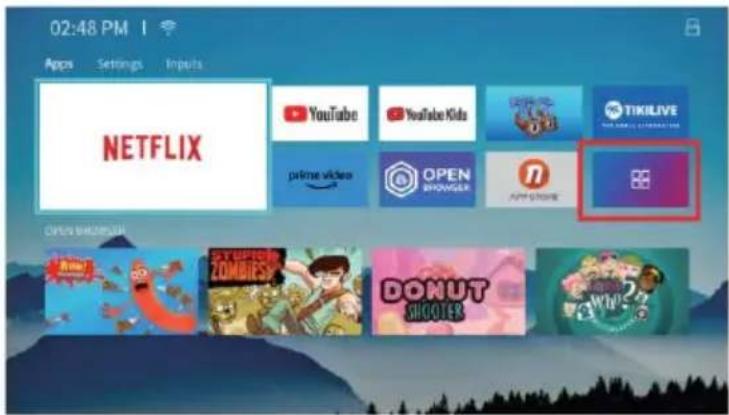
- Press 🔗 to display the home menu, use the directional buttons to select desired app and press OK to open the highlighted App.
- Press key to select either the "minus" or "Input"
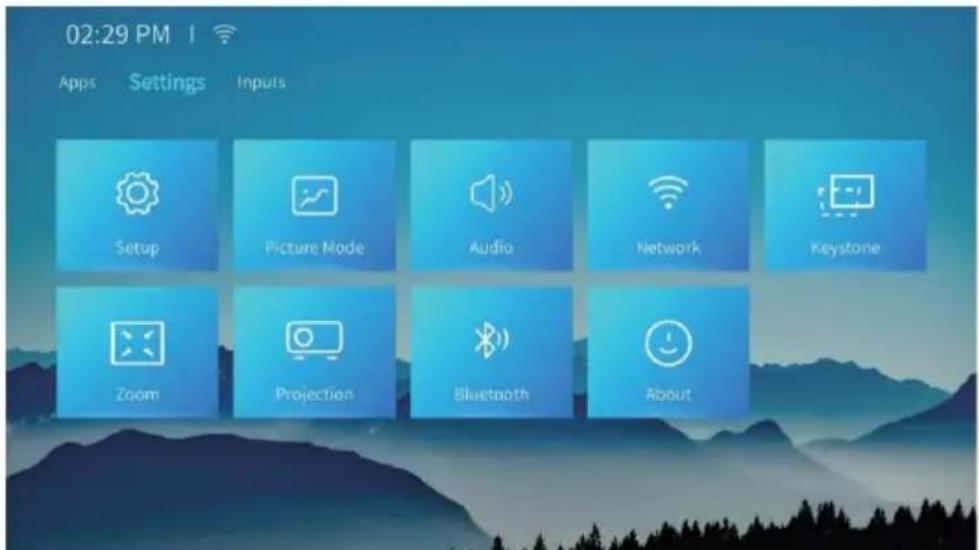
Setting Menu
Use the navigation buttons to select the desired sub menu (Picture Mode, Audio, Network, Keystone, Projection, Bluetooth, about) and press OK to confirm.
Projector Image Setting
Focus:
To adjust the focus, press the Focus "button". When the focus icon appears in the picture use the buttons on the remote control to adjust the focus until the picture is clear.
Press the focus button again to exit focus mode. Note: The focus icon will disappear after a few seconds without user input.
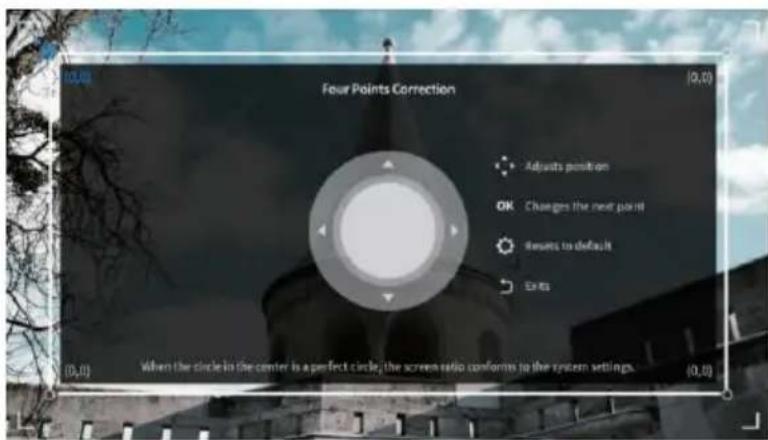
Fout Point Keystone Correction:
From the Home screen enter Settings → Keystone to enter the Four Point Keystone Correction page. Press the navigation buttons to adjust the 4 corners of the picture and press OK button to confirm and adjust the next corner.
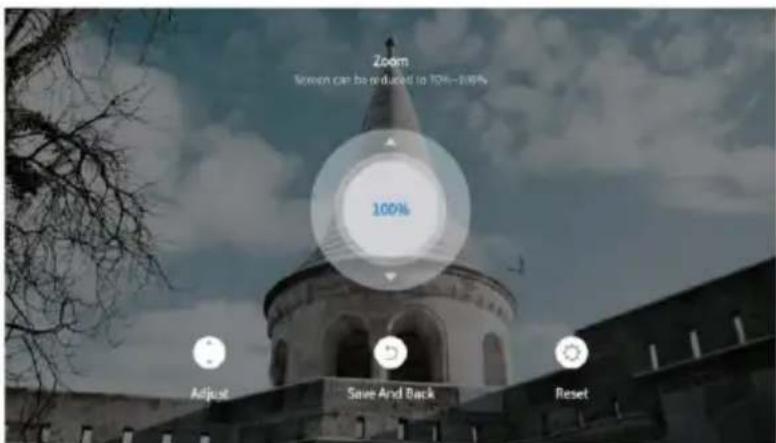
Zoom
From the Home screen enter Settings → Zoom, Press "OK" button to go to the Zoom page, use the UP and DOWN buttons on the remote control to zoom in or out from 70-100%.
OPERATION
Screen Mirroring
- Ensure both the projector and mobile device is connected to the same wireless network.
- Go to Home - Select [Wi-Fi] Setting menu - Select [Network Settings]
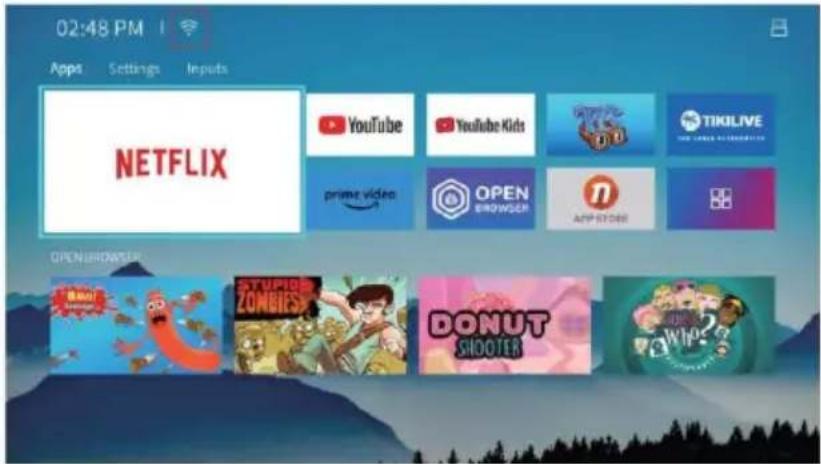
- Select your home Wi-Fi network from the list and enter the password. he projector to your home Wi-Fi.
- When your projector is successfully connected to your home network the Wi-Fi symbol will appear on the top left.
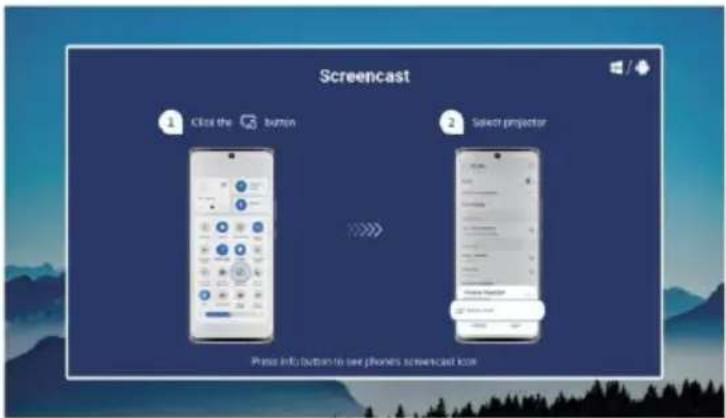
Android:
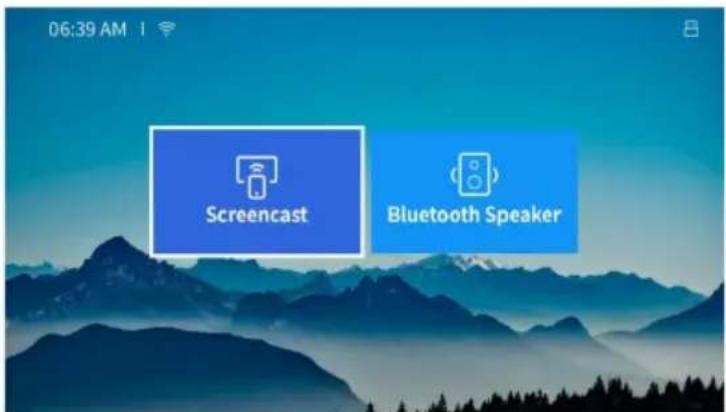
- Select 📁 on the home page, select [Screencast] and enter the interface.
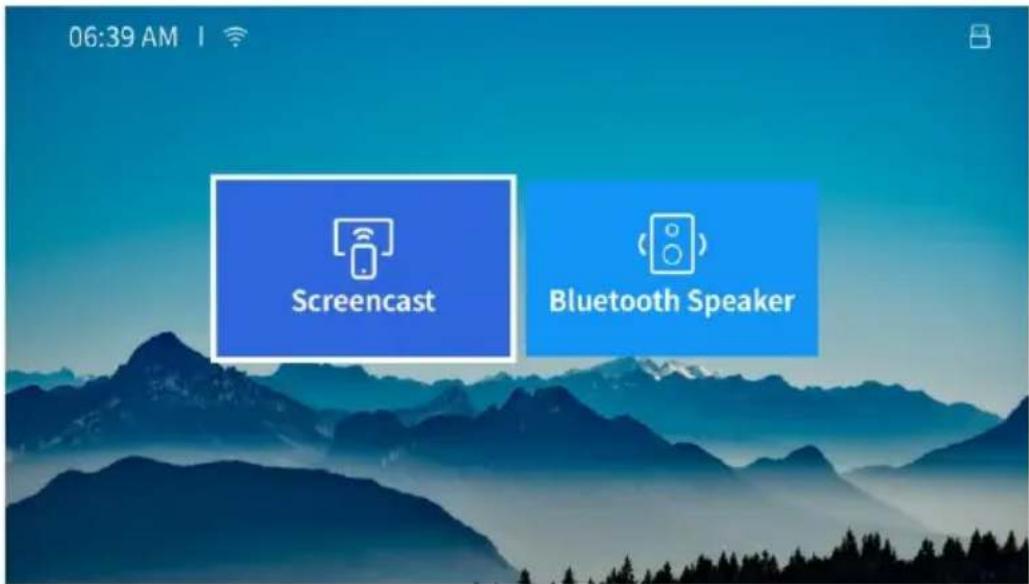
- On your cell phone, go to the screen mirroring page and search Projector to connect.
Bluetooth Connection
From the home page, select "to the spent the Bluetooth Speaker" setting page.
Connecting the Projector to a Bluetooth Speaker
On the BT Setting page, Press OK button to turn on the BT and scan for available devices. Choose the desired Bluetooth speaker and press OK button to pair.
Use the Projector as a Bluetooth Speaker
-
Open the Bluetooth function on your mobile phone, search available devices and choose [projector] to pair.
-
After successful connection, open the music player on your phone, the projector will serve as a speaker.
Input Source
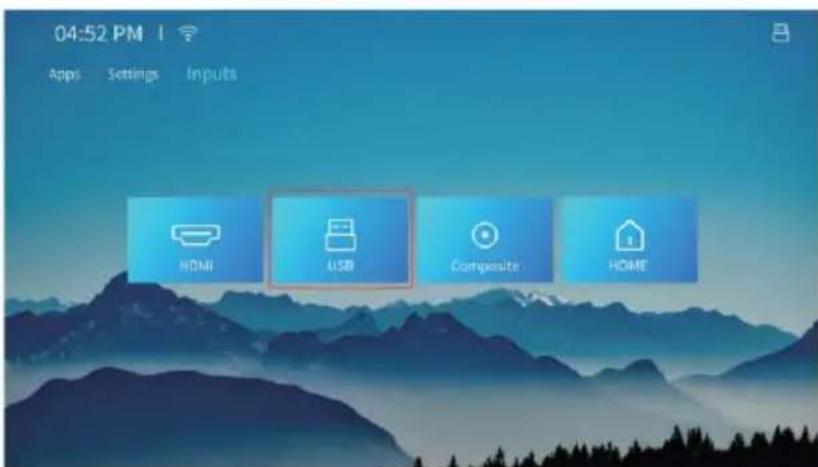
Press the button to display the Input source menu. Press to select the desired source then press OK to confirm.
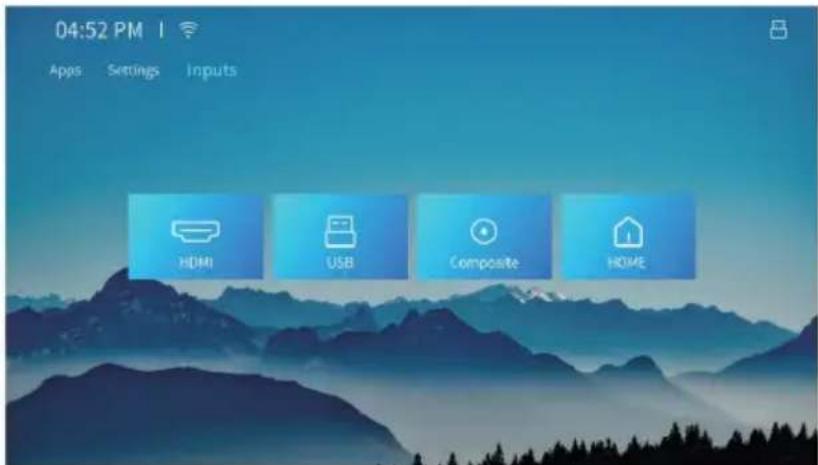
USB
- Insert the USB flash drive, press OK in the USB option of the Source menu to enter the Media menu.
- Press ◀/▶ buttons to select Photo, Music and Video options, then press OK to enter the file directory.
HDMI Connection
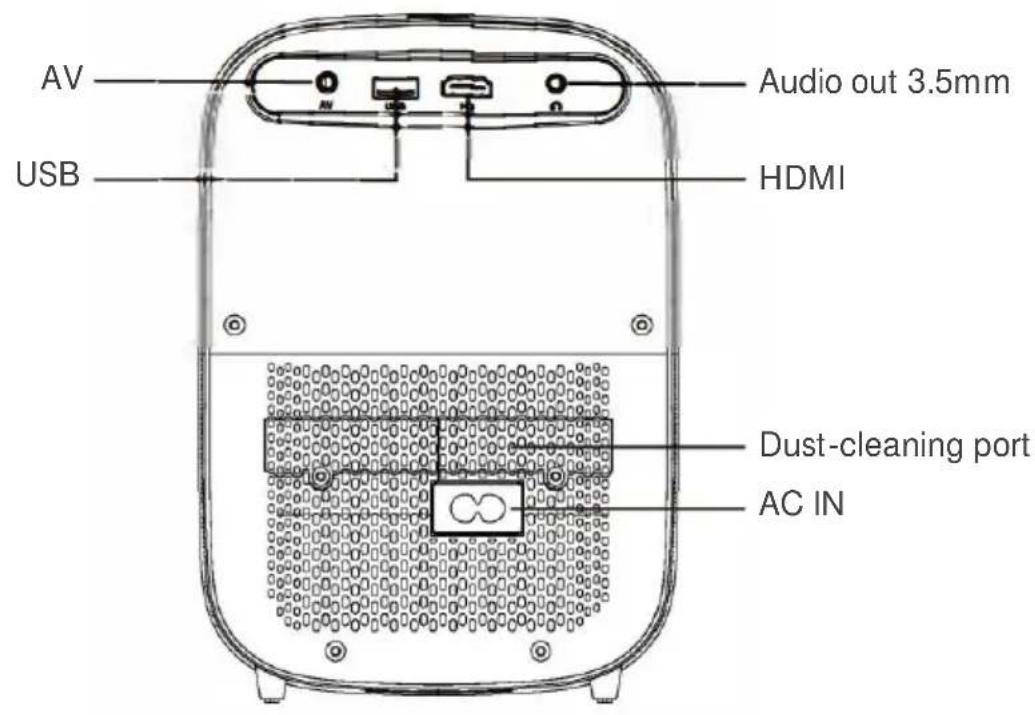
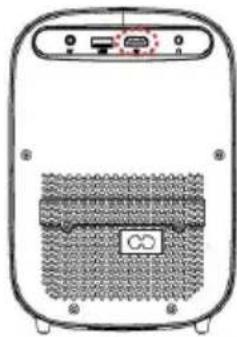
Use the supplied HDMI cable to connect a device (Blu-ray player, game console, laptop etc.) to the HDMI port on the rear of the projector.
natural_image
Front view of a portable electronic device with a textured surface and control panel (no visible text or symbols)Speaker Connection
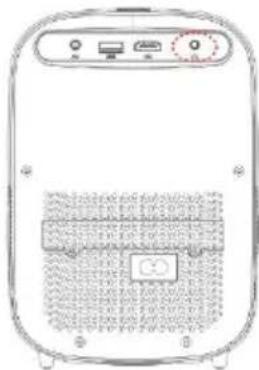
Use a 3.5mm cable (not supplied) to connect an external speaker or headphones to the 3.5m audio output port on the rear of the projector.
natural_image
Front view of a portable electronic device with control buttons and a grid-patterned panel (no visible text or symbols)AV Connection (composite)
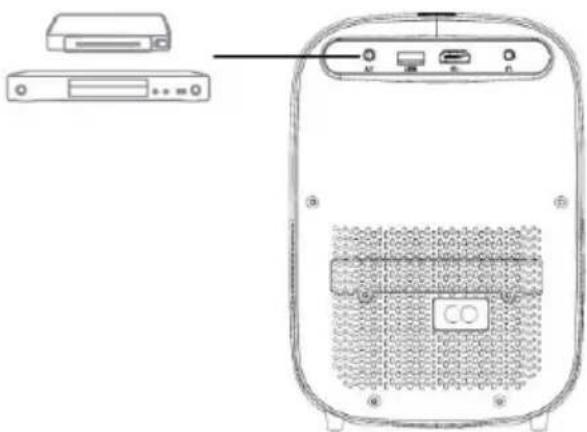
Use the supplied AV cable to connect a media device (DVD player, game console etc.) s to the AV port on the rear of the projector.
natural_image
Technical line drawing of a device rear panel with ports and a separate monitor (no text or symbols)SPECIFICATIONS
| Dimensions | 150 x 170 x 210mm |
| Net Weight | 1.54KG |
| Projection Parameters | |
| Display technique | LCD |
| Native resolution | 1920 x 1080 (Support 4K) |
| Aspect ratio | 16:9 |
| Focusing method | Electronic focusing |
| Throw Distance | 1-5m |
| Screen zoom | 70%-100% |
| Main interface | AV/HDMI/USB |
| Remote distance | 5m |
| Light source | LED |
| Wi-Fi support | Yes |
| Bluetooth support | Yes |
| Support for video format | MP4 RMVB MJPEG MOV MKV AVI |
| Audio format support | MP3 MP4 |
| Supports image format | JPEG BMP PNG |
| Supported document formats | TXT |
| System language | Multi-language |
| Input voltage | AC 100-240V |
| USB output power | 5V 1A |
| Optimal Projection Distance | 1.0m-3.5m |
| Tillable Angle | V: +-30° |
TROUBLESHOOTING
Bluetooth
If Bluetooth pairing fails, try the following methods.
- Exit the Bluetooth interface and try reconnecting again.
- Turn off the projector and restart it, then reconnect the Bluetooth speaker.
- Restore the factory settings and then reconnect the Bluetooth speakers.
Audio Delay
If you experience audio delay when a Bluetooth speaker is connected to the projector and playing media from a device (phone, tablet, laptop), we recommend pairing your Bluetooth speaker directly with your device (phone, tablet, laptop, etc.) first and then connecting your device to the projector.
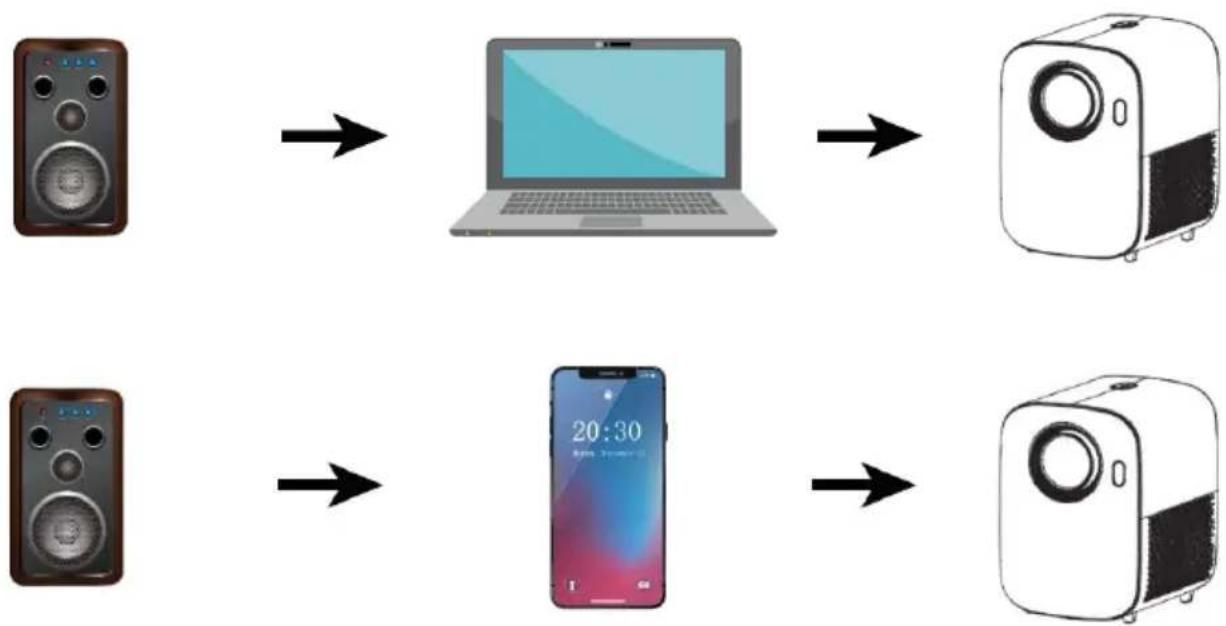
flowchart
graph LR
    A["Speaker"] --> B["Laptop"]
    C["Speaker"] --> D["Smartphone 20:30"]
    B --> E["Protractor"]
    D --> F["Protractor"]
NOTES
Need more information?
We hope that this user guide has given you the assistance needed for a simple set-up.
For the most up-to-date guide for your product, as well as any additional assistance you may require, head online to help.kogan.com
kogan.com
- FULL HD SMART MINI PROJECTOR
- SAFETY & WARNINGS
- FCC Warning Statement
- RF Exposure Statement
- COMPONENTS
- OVERVIEW
- Remote Control
- INSTALLATION
- Projection Distance and Size
- Note:
- Setup
- Home Menu
- Setting Menu
- Projector Image Setting
- Focus:
- Fout Point Keystone Correction:
- Zoom
- OPERATION
- Screen Mirroring
- Android:
- Bluetooth Connection
- Connecting the Projector to a Bluetooth Speaker
- Use the Projector as a Bluetooth Speaker
- Input Source
- USB
- HDMI Connection
- Speaker Connection
- AV Connection (composite)
- SPECIFICATIONS
- TROUBLESHOOTING
- Bluetooth
- Audio Delay
- NOTES
- Need more information?
Brand : Kogan
Model : KAMLIF8PRRA
Category : Video projector