KAPRLS03PEA - Video projector Kogan - Free user manual and instructions
Find the device manual for free KAPRLS03PEA Kogan in PDF.


| Product Type | Smart Projector |
| Model | KAPRLS03PEA |
| Brand | Kogan |
| Resolution | Full HD (1920x1080) |
| Display Technology | DLP |
| Light Source | LED |
| Inputs | HDMI, USB |
| Outputs | 3.5mm Audio |
| Wireless Connectivity | Wi-Fi (802.11 b/g/n), Bluetooth |
| Keystone Correction | Auto and Manual (Four Points) |
| Autofocus | Yes |
| Zoom | Digital Zoom |
| Screen Mirroring | Supports Screencast (Windows 11 and later) |
| Operating System | Smart OS with Netflix Support |
| Remote Control | Bluetooth Remote (requires pairing) |
| Power Supply | DC Input via included adapter, 100-240V AC |
| Operating Temperature | 5°C to 35°C |
| Maximum Altitude | 2000m |
| Safety Features | Automatic shutdown on overheat, ventilation slots, do not expose to liquids |
| Components Included | Projector, Remote Control, Power Cord, Power Adapter, User Guide |
| Firmware Update | Via USB or Internet |
Frequently Asked Questions - KAPRLS03PEA Kogan
User questions about KAPRLS03PEA Kogan
0 question about this device. Answer the ones you know or ask your own.
Ask a new question about this device
Download the instructions for your Video projector in PDF format for free! Find your manual KAPRLS03PEA - Kogan and take your electronic device back in hand. On this page are published all the documents necessary for the use of your device. KAPRLS03PEA by Kogan.
USER MANUAL KAPRLS03PEA Kogan
natural_image
White rectangular electronic device with a circular lens and perforated grille (no visible text or symbols)S3 FULL HD SMART PROJECTOR
KAPRLS03PEA
SAFETY WARNINGS
Read this user guide fully and carefully before using the product.
- To avoid eyes injury, do not look directly into the light from the projector.
- A direct burst of intense light can harm your eyes and cause severe damage to the eyes of infants.
- Do not attempt to repair this product yourself. If the product or its power supply experiences any malfunction or damage, cease use immediately and contact help.Kogan.com for support.
- Ensure the projector is a safe distance from any heat-emitting devices or the service life of the projector may be shortened.
- To ensure a stable power supply, ensure the electrical outlet used has the appropriate protection measures, such as grounding.
- Do not use any power cord other than the one supplied with this product.
- This product does not contain any user serviceable parts. Do not disassemble or modify this product in any way.
- Do not place this product on any items that may block the ventilation openings (cloth, blankets, etc.).
- This product is not waterproof, to prevent electric shock, do not expose the device to rain or water.
- Do not place any items containing liquids near the device.
- Do not use or operate this product in a damp, humid environment.
- If this product will not be used for an extended period, disconnect the power cord.
- To avoid damage, when transporting this product, place it back in its original packaging.
- Use the product in the environment with temperature in the range of 5\~35° and do not use it in a place below 2,000 meters above sea level.
- The camera on the device will collect projection screen information when performing autofocus and auto keystone function, and the information will be released afterwards. Information will not be saved or uploaded.
This product contains technology subject to certain intellectual property rights of Microsoft. Use or distribution of this technology outside of this product is prohibited without the appropriate license(s) from Microsoft.
Content owners use Microsoft PlayReady™ content access technology to protect their intellectual property, including copyrighted content. This device uses PlayReady™ technology to access PlayReady™ protected content and/or WMDRM-protected content. If the device fails to properly enforce restrictions on content usage, content owners may require Microsoft to revoke the device's ability to consume PlayReady™ protected content. Revocation should not affect unprotected content or content protected by other content access technologies. Content owners may require you to upgrade PlayReady™ to access their content. If you decline an upgrade, you will not be able to access content that requires the upgrade.

HIGH-DEFINITION MULTIMEDIA INTERFACE
The terms HDMI and HDMI High-Definition Multimedia Interface, and the HDMI Logo are trademarks or registered trademarks of HDMI Licensing LLC in the United States and other countries.

Manufactured under license from Dolby Laboratories. Dolby, Dolby Audio, and the double-D symbol are trademarks of Dolby Laboratories Licensing Corporation.
COMPONENTS
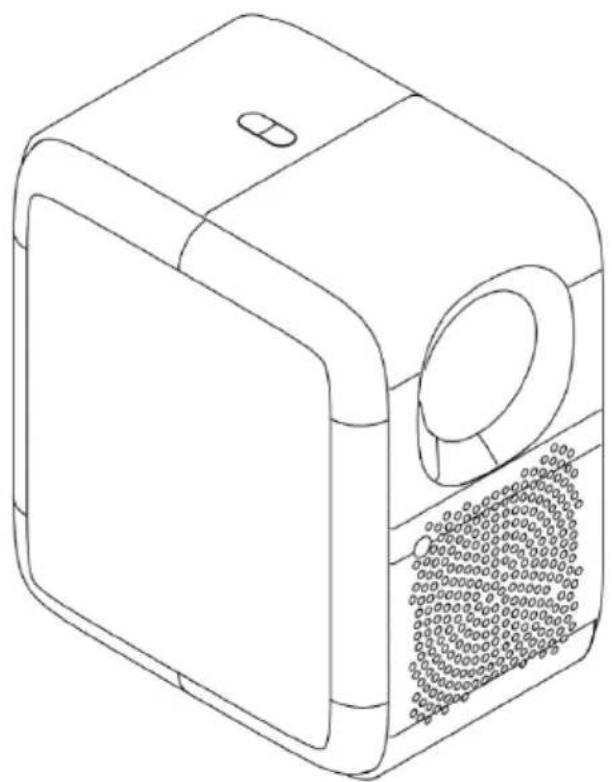
natural_image
Line drawing of a rectangular electronic device with a circular lens and perforated base (no text or symbols)Projector
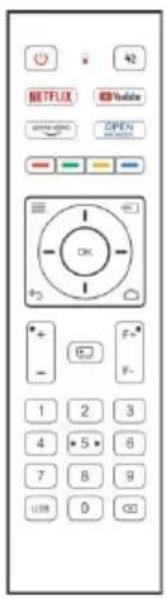
Remote Control
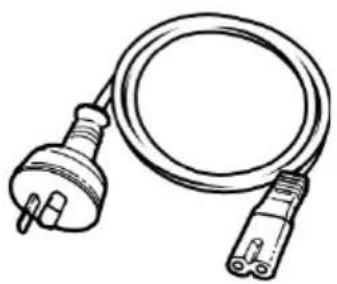
natural_image
Line drawing of a cord with two terminal plugs, no text or symbols presentPower Cord
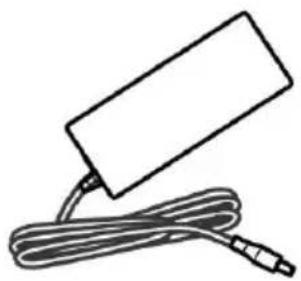
natural_image
Simple line drawing of a rectangular device connected to a coiled cable (no text or symbols)Power Adapter
User Guide
OVERVIEW
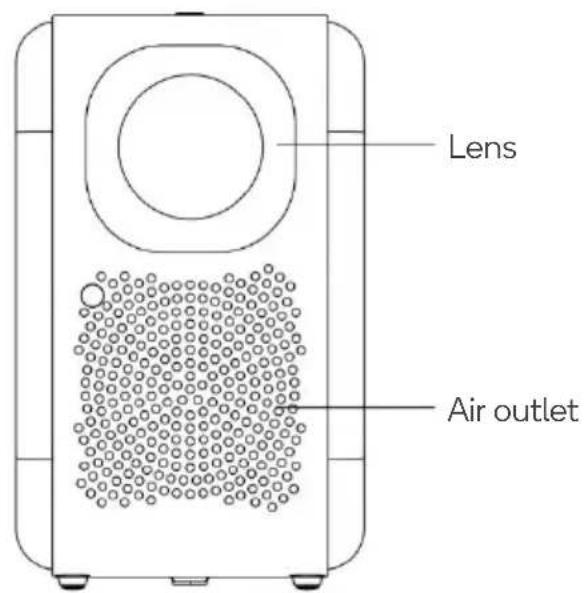
Front
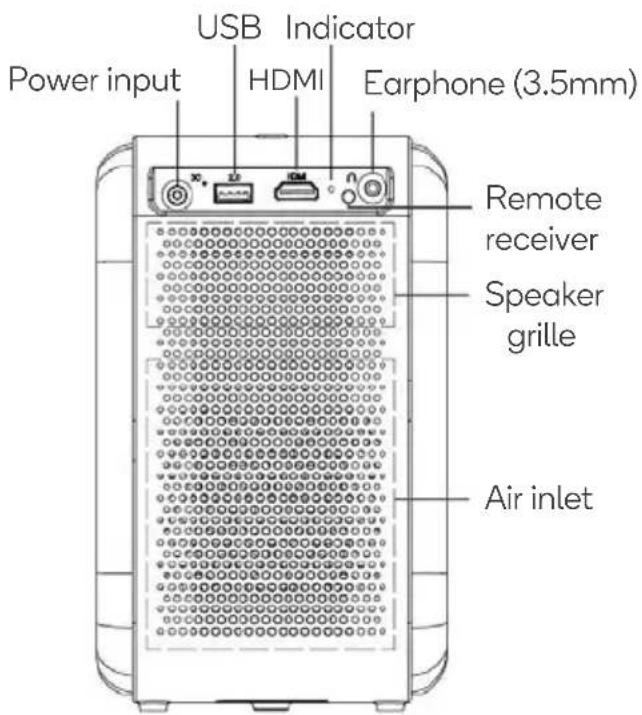
Rear
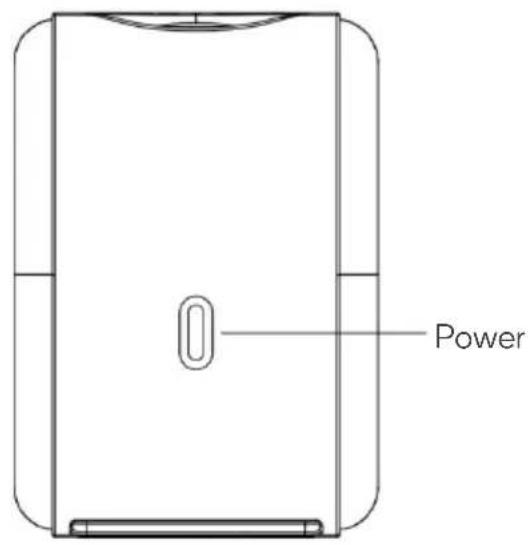
Top
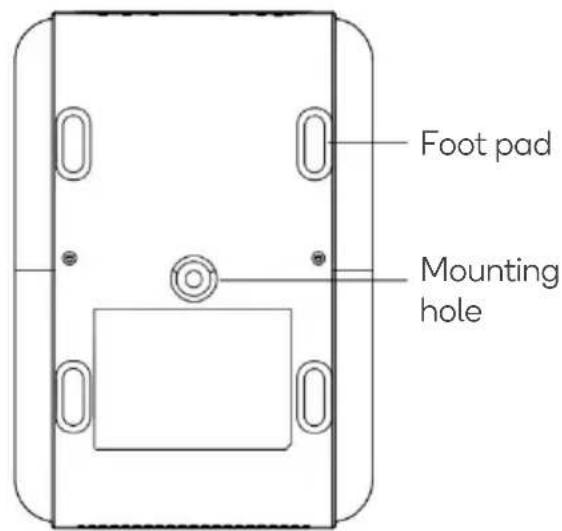
Bottom
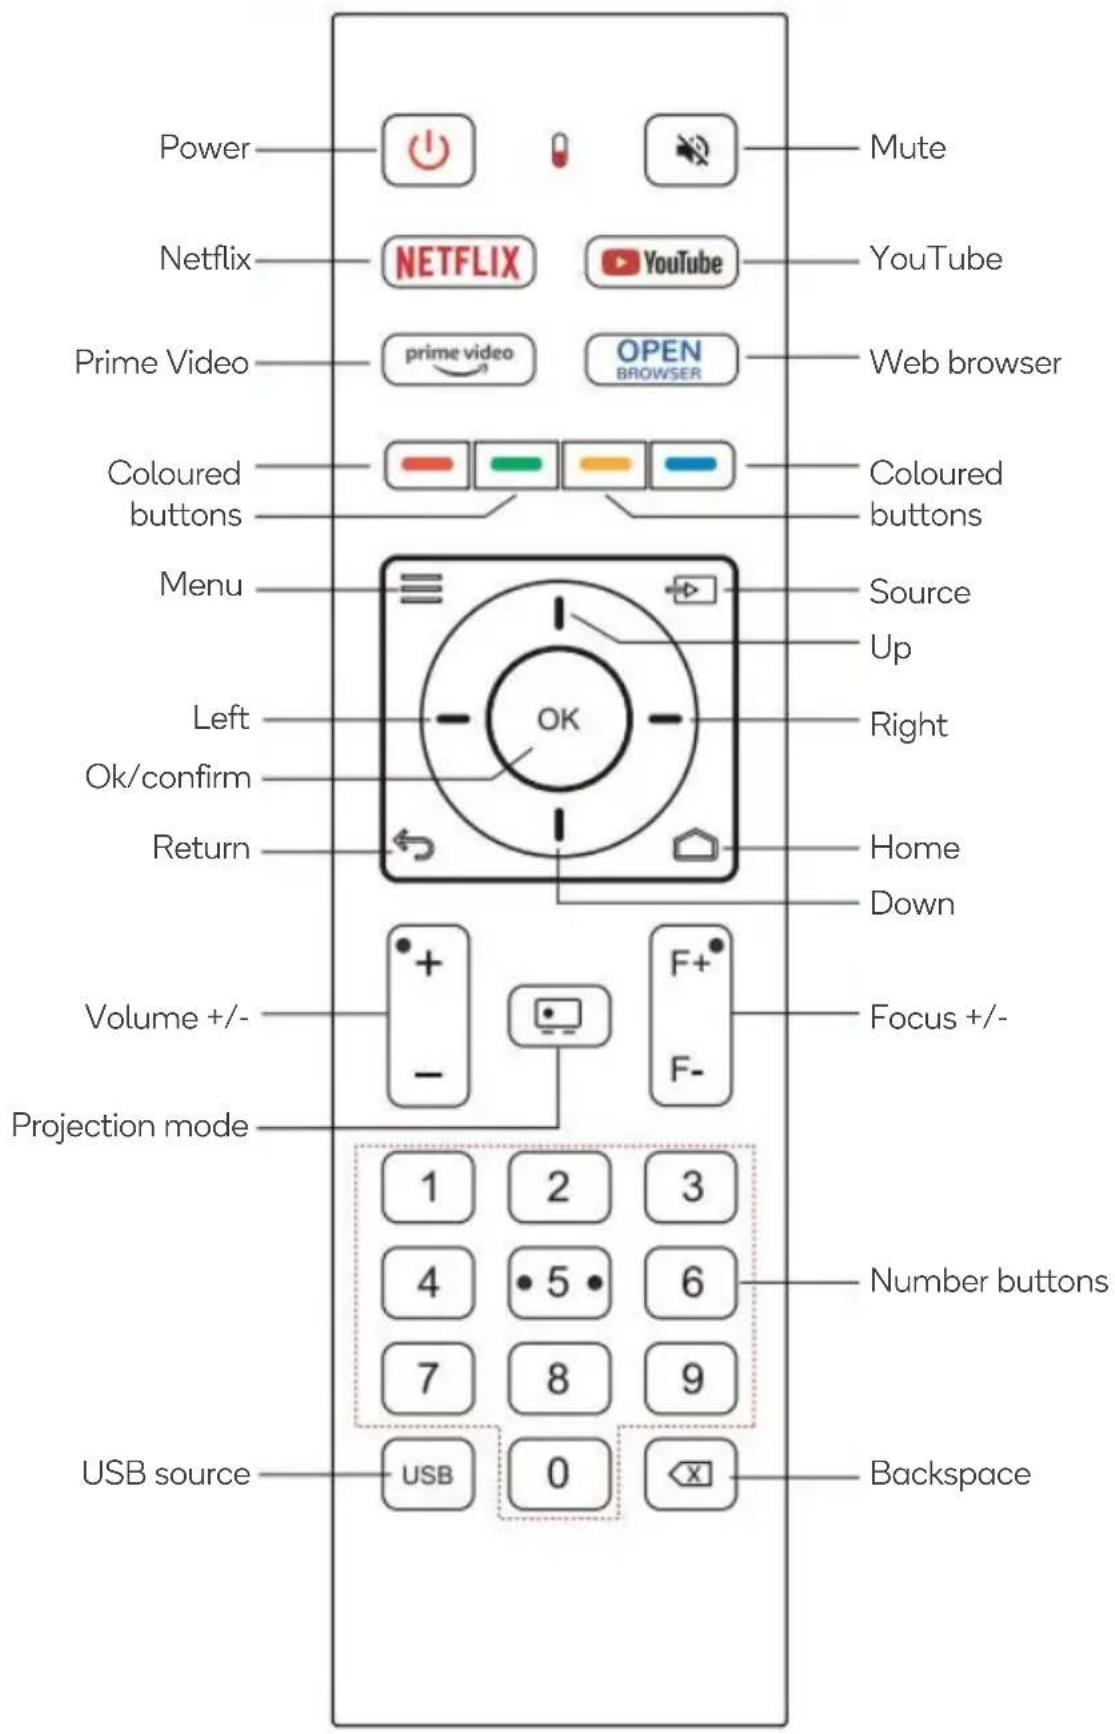
Remote Control
INSTALLATION
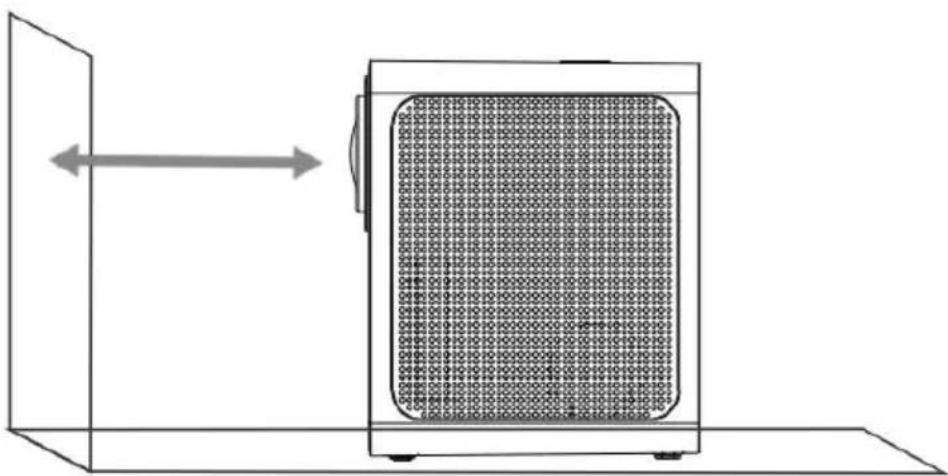
Place the projector on a flat, stable surface and adjust the height to project onto the desired screen or wall.
natural_image
Diagram of a device with a grid-patterned panel inside a container, showing directional flow (no text or symbols)Mounting the Projector:
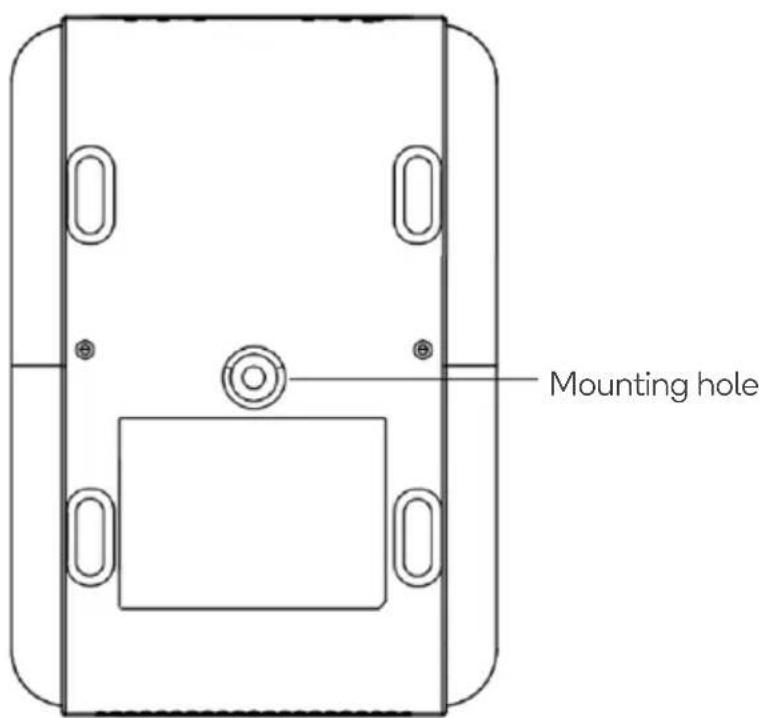
This projector can be mounted onto a bracket or a tripod using the hole on the bottom of the projector. Note: Bracket and tripod are not supplied.
OPERATION
Getting started
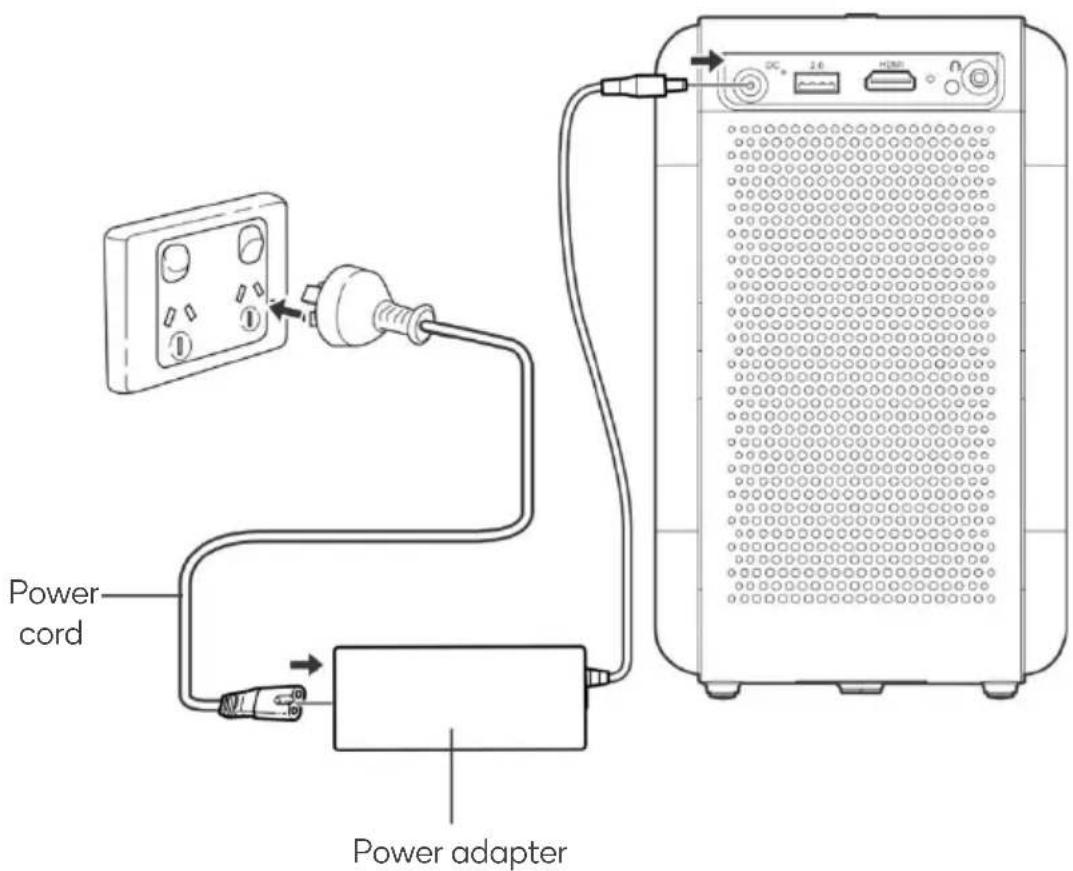
- Connect the power adapter to the power input on the rear of the projector.
- Connect the power cord to the power adapter and plug it into a power outlet.
- Press the power button on the projector.
- The boot screen appears.
Setup
1. Pairing the Remote Control
Place the remote control within 20cm of the projector and press the "OK" and "Volume -" simultaneously. The indicator light flashes quickly to indicate the remote is pairing.
Note: If pairing fails, repeat the above step, or restart the projector
![Welcome Please pair the Bluetooth remote control first Place the remote control close to the projector, press the [OK] and + [VOL-] button together VOL←→OK](/content/2026/05/1063920/images/21a985af5abe6216ee416a3b1e8ee20ba339825cf61c4a59105d55eaf1b436c9.jpg)
2. Projector Orientation
Select from one of the four projection modes depending on the orientation of your projector.
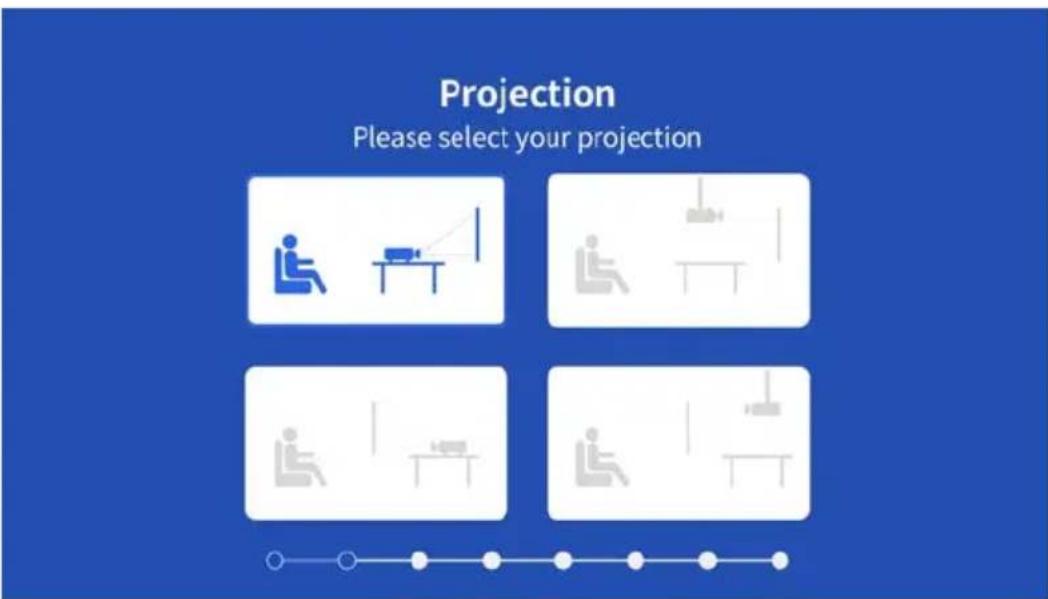
3. Select Language and Region
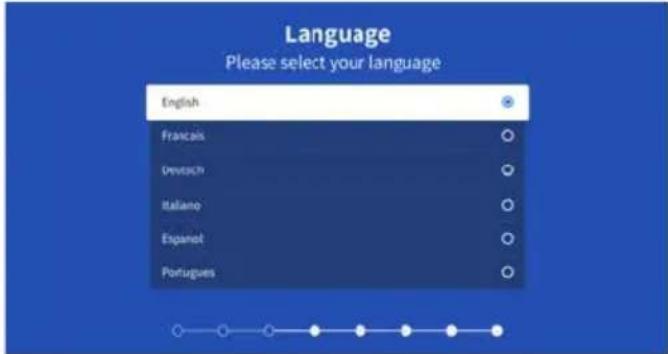
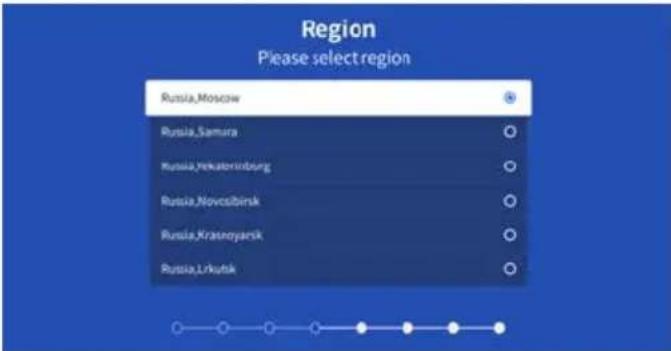
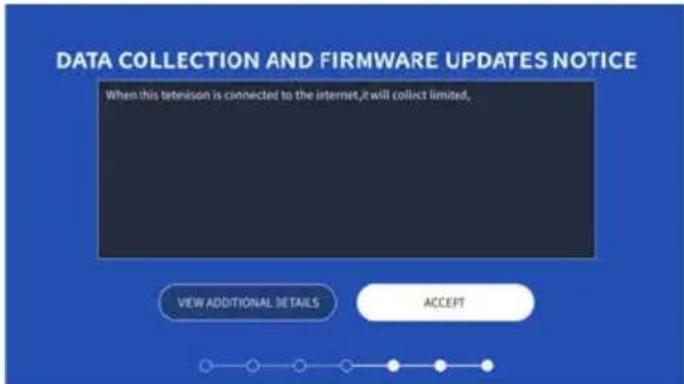
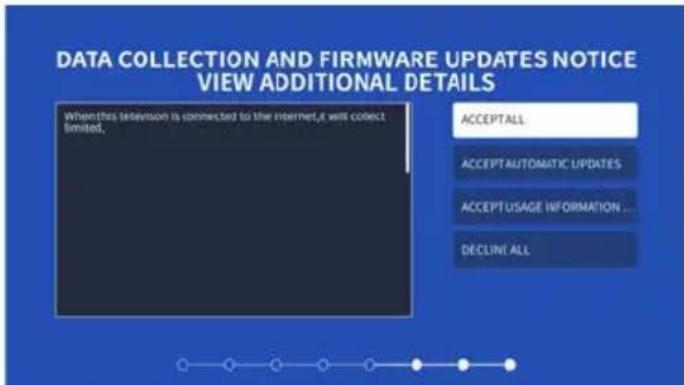
4. Data Collection and Auto Updating
- Click "Accept" to enable data collection and automatic firmware updated.
- If you wish to disable one or both options, click "View additional details" then select other of the following options, "Accept all, Accept Automatic updates, Accept usage information... or Decline all".
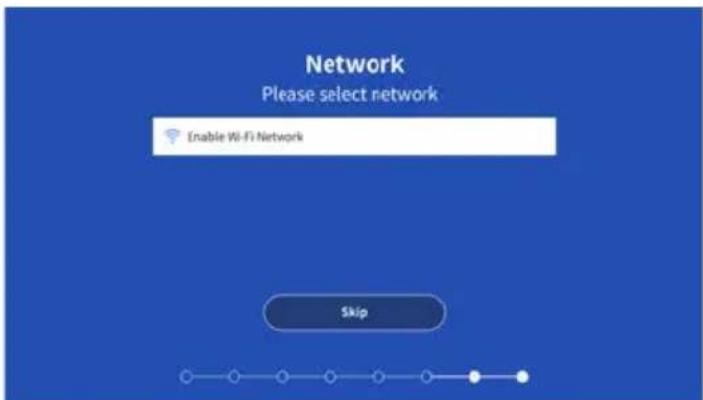
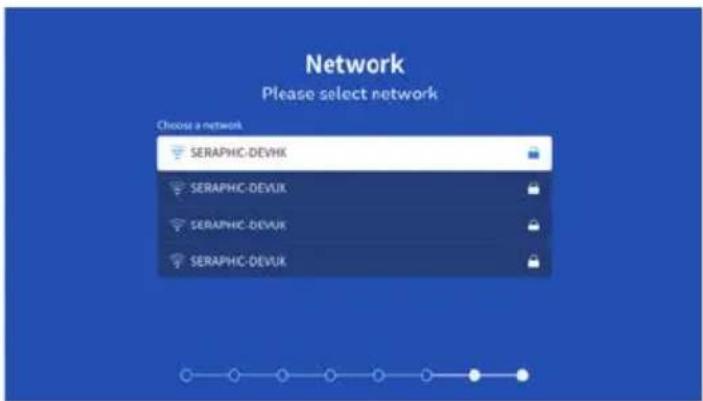
5. Connect to Wi-Fi Network (optional)
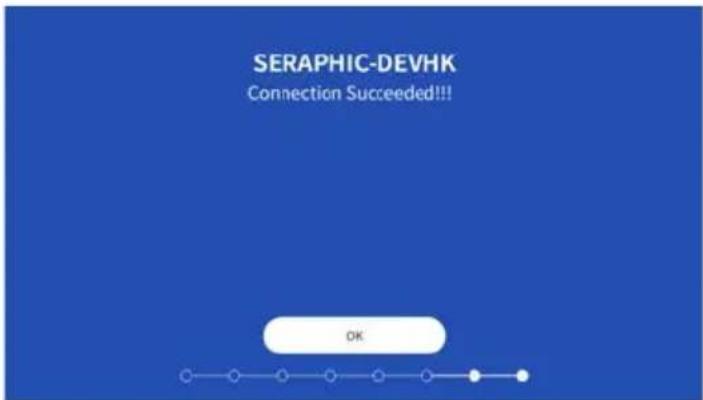
- Select the Wi-Fi network you wish to connect to or click "Skip" to skip this step.
- Enter your password and click "OK".
- Once successfully connected click "OK".

6. Setup Netflix (optional)
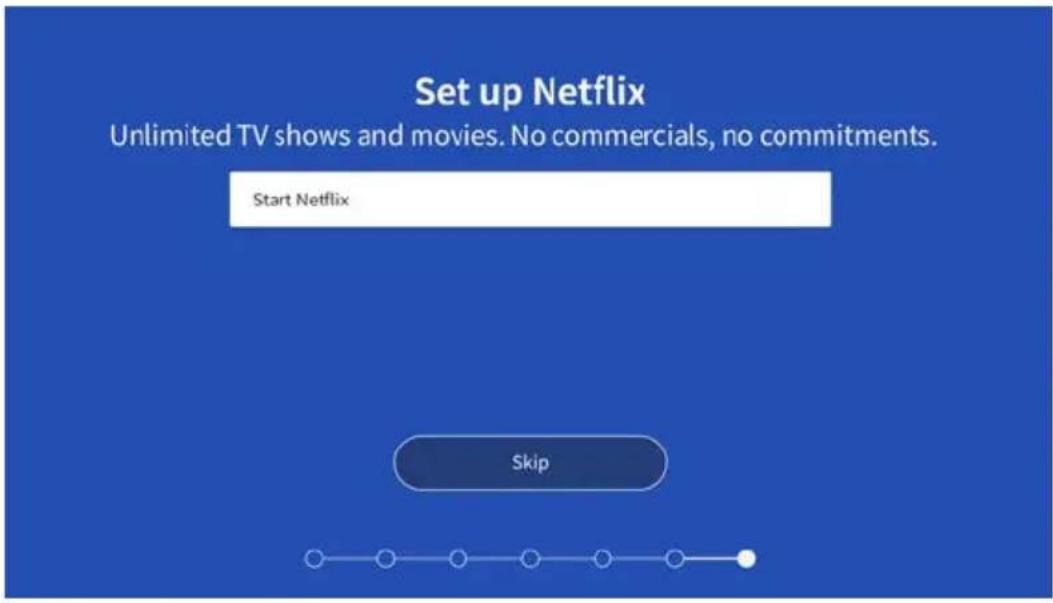
- Click "Start Netflix" to add your Netflix account to the projector or click "Skip" to skip this step.
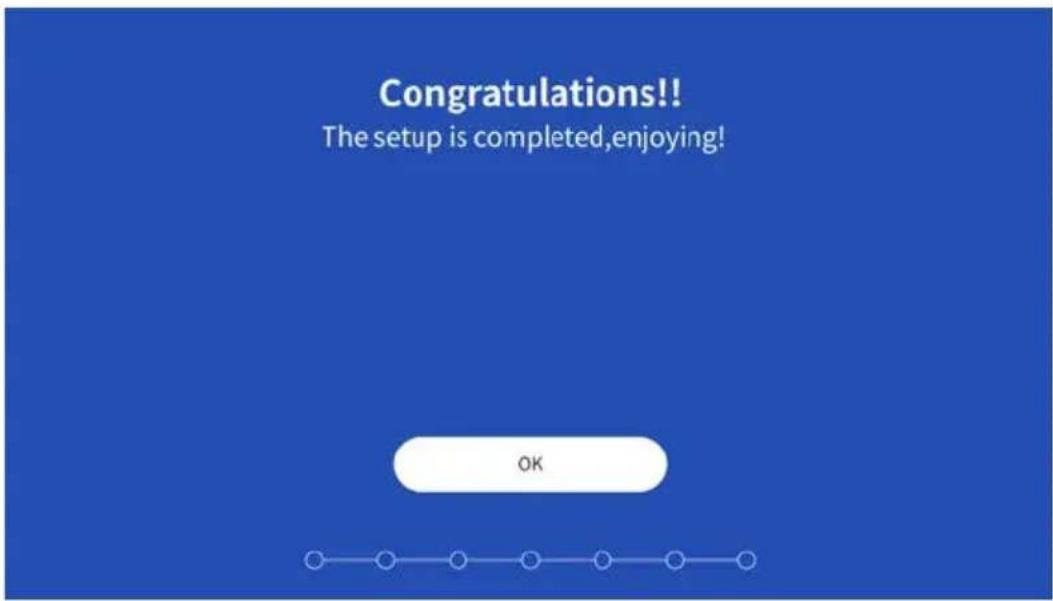
- Once successfully logged into your Netflix account, click "OK".
Focus
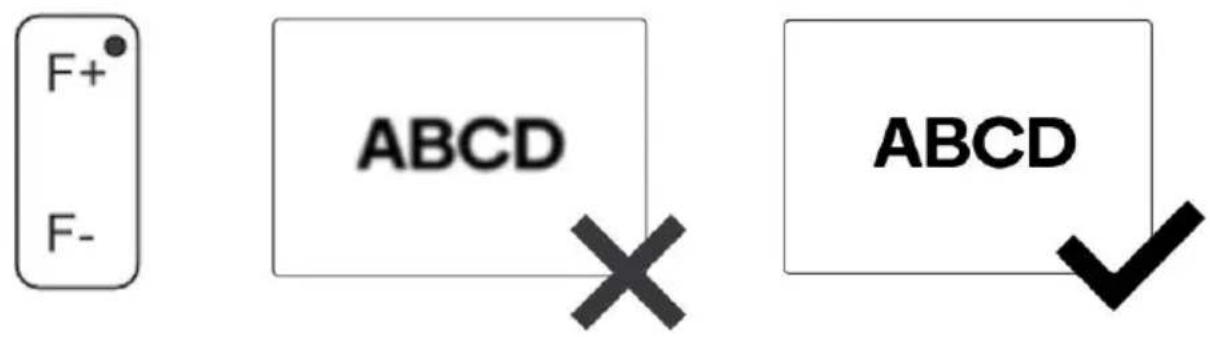
Press the focus adjust buttons on the remote control to adjust the focus until the picture is sharp.
Connect Input Devices
• Use the source button to select the desired input source: USB, HDMI.
- On the remote control: Press “☐” and use the navigational buttons to select the source then press “OK” to confirm.
USB:
- Insert a USB storage device into the USB port on the projector. You can change the source to USB in the following ways:
- Press the "USB" button on the remote.
- Press “☐” and use the navigational buttons to select USB then press “OK” to confirm.
- Select "Inputs" on the main menu, then select "USB".
• Select the file you want to play.
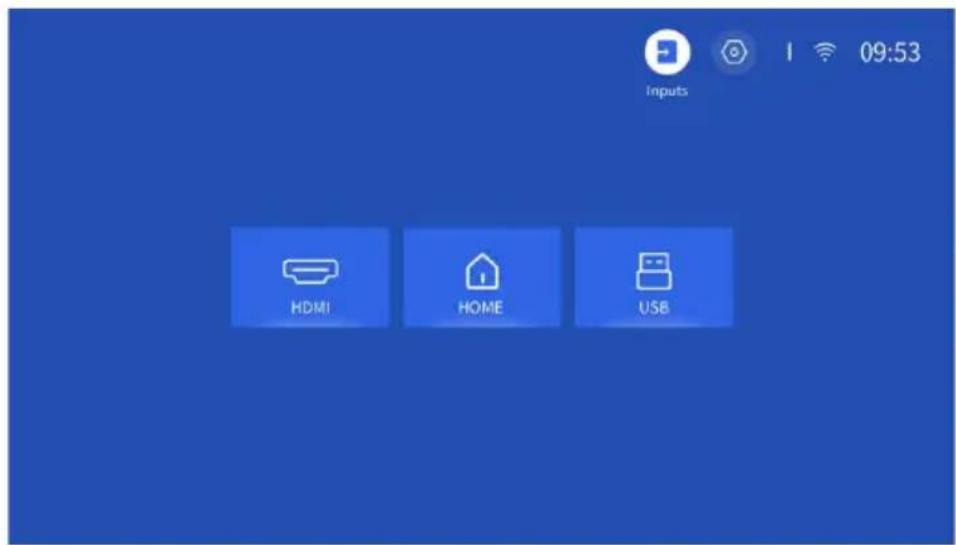
HDMI:
- Connect your device (game console, media player, computer) into the HDMI port on the projector. You can change the source to HDMI in the following ways:
- Press “☐” and use the navigational buttons to select HDMI then press “OK” to confirm.
- Select "Inputs" on the main menu, then select "HDMI".
Headphones/Speakers:
- Connect your headphones or speakers to the 3.5mm audio output on the projector.
• The projector will output all audio to the connected device.
Settings Menu
- Press the menu button to open the main menu.
- Select "Setting" in the upper right corner, press "OK" to confirm.
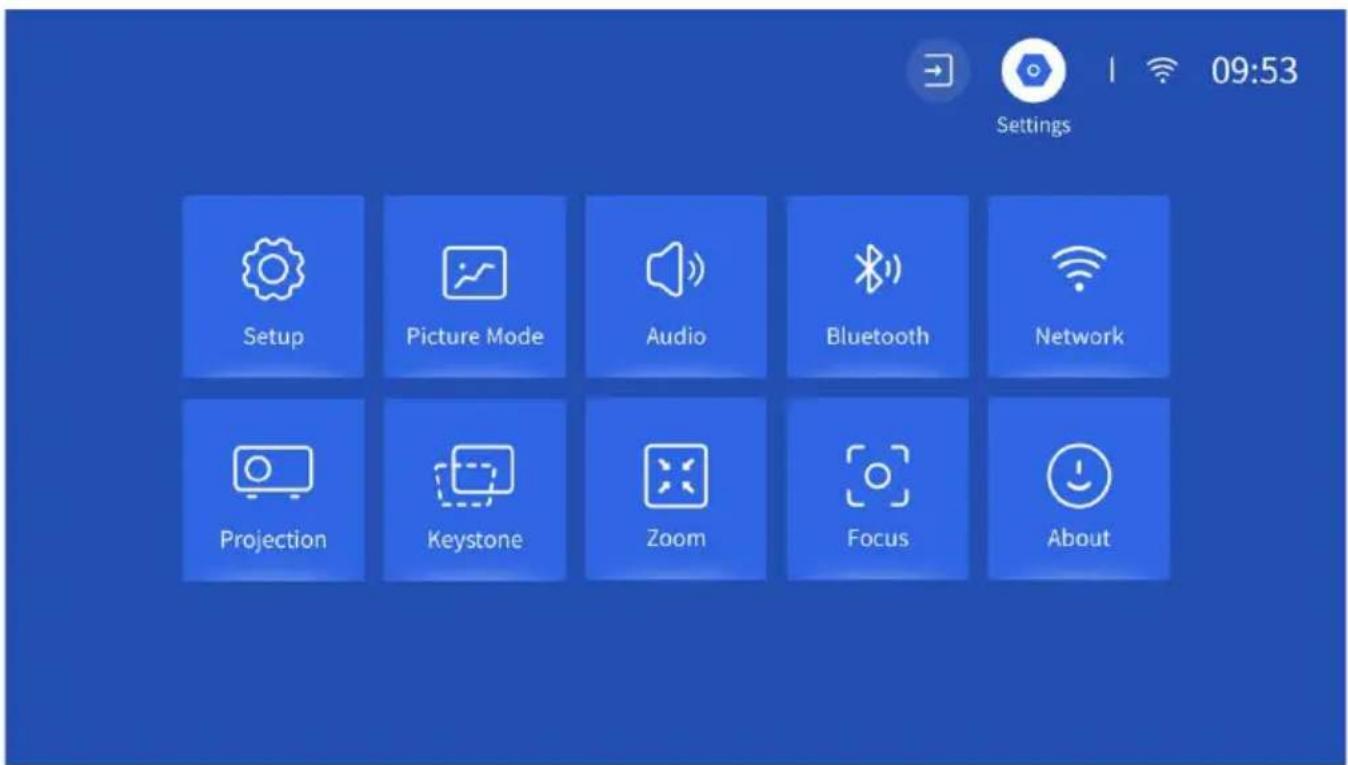
1. Setup: Opens the Setup menu.
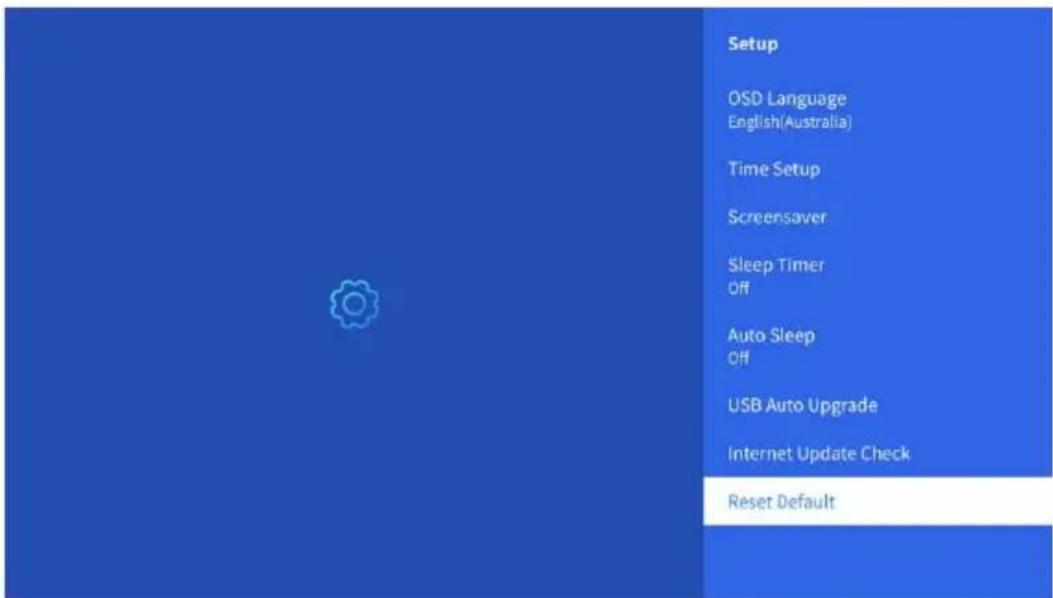
- OSD Language: Select the language for the on-screen display.
• Time Setup: Adjust the time settings.
• Screensaver: Adjust the screensaver settings.
• Sleep Time: Adjust the sleep timer.
• Auto Sleep: Enable/disable Auto sleep.
• USB Auto Upgrade: Upgrade the firmware via USB. - Internet Update Check: Check is there is an update available for the projector.
- Reset Default: Reset the projector back to factory settings.
2. Picture Mode: Adjust the picture settings
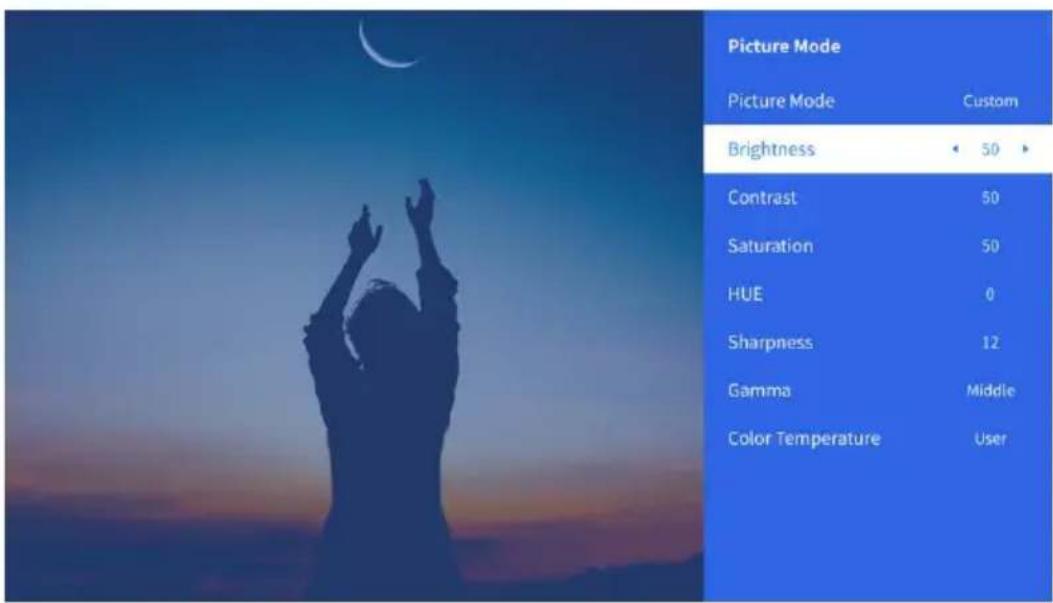
- Audio: Adjust the audio settings
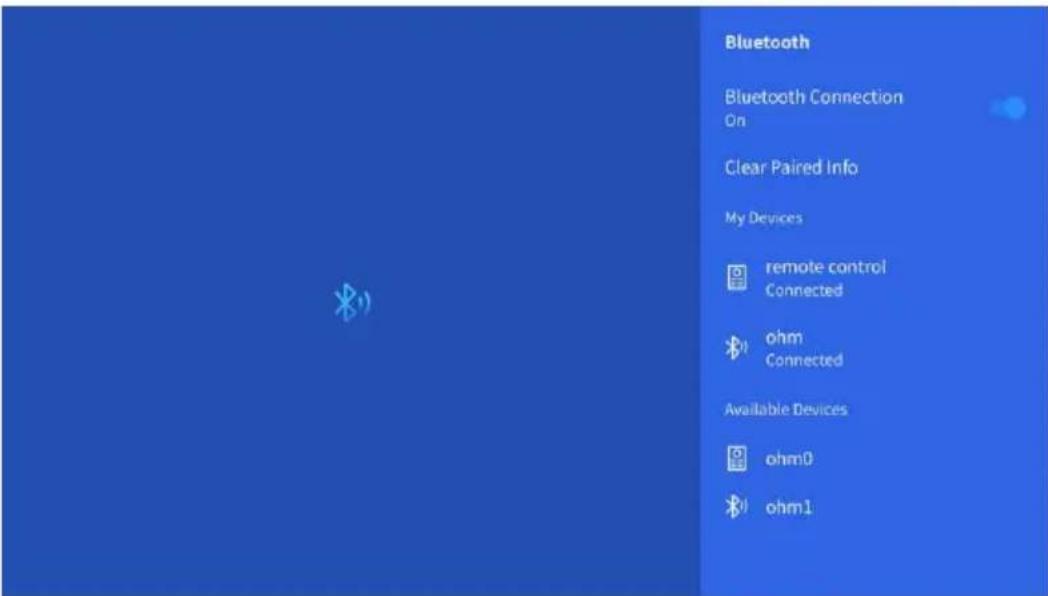
- Bluetooth: Opens the Bluetooth settings
-
Bluetooth Connection: Turns Bluetooth ON/OFF.
• Clear Paired Info: Removes connected devices.
• My Devices: Lists currently connected devices.
• Available Devices: Lists available Bluetooth devices. -
Network: Opens the network settings.
-
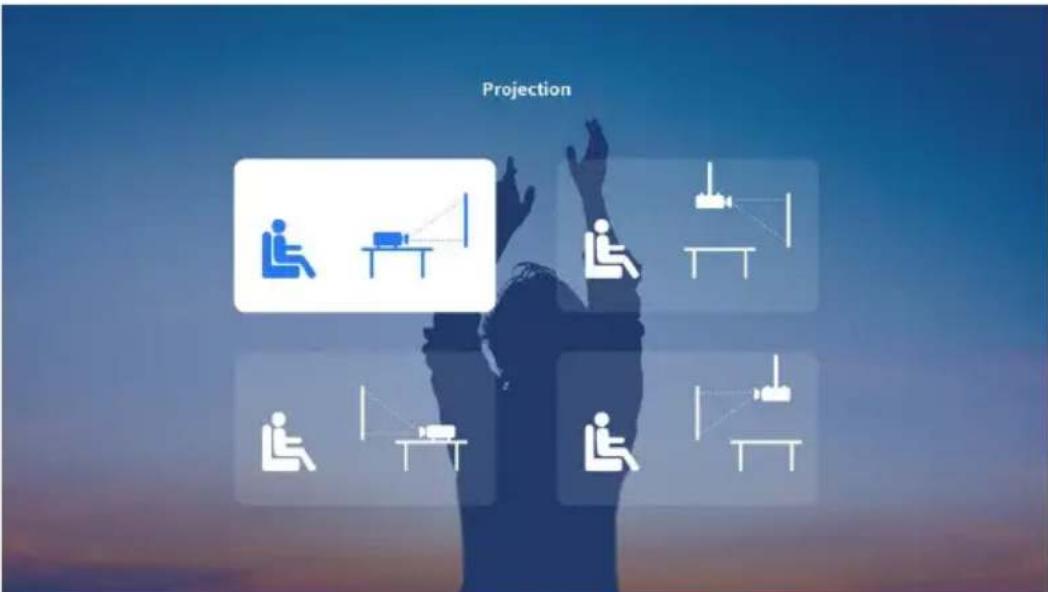
Projection: Adjust the projector orientation
- Select from one of the four projection modes depending on the orientation of your projector.
- Keystone: Adjust the keystone of the projector.
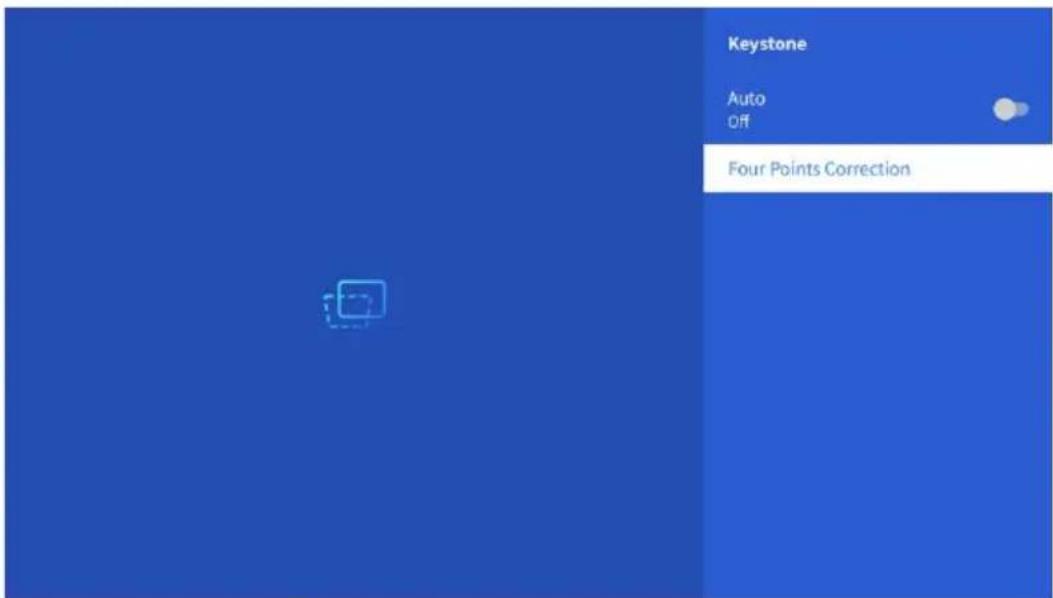
• Auto: Turns Auto keystone ON/OFF.
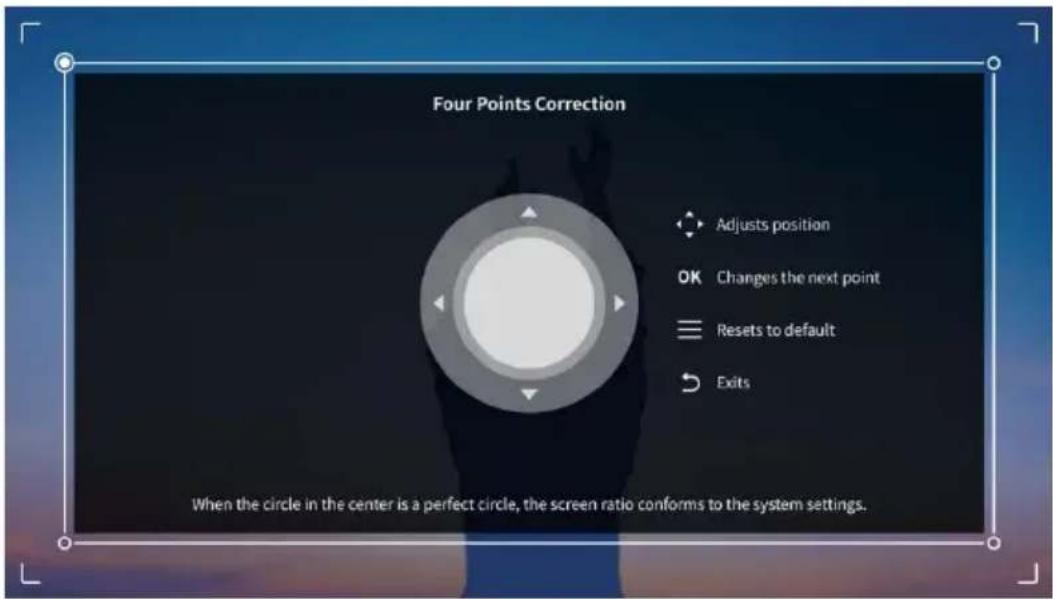
• Four Points Correction: Manually adjusts the keystone.
- Zoom: Adjust the zoom of the projector.
- Use the "Up" and "Down" navigational buttons on the remote to manually adjusts the zoom.
- Press the “←” button to save you current selection.
- Press the “≡” button to reset.
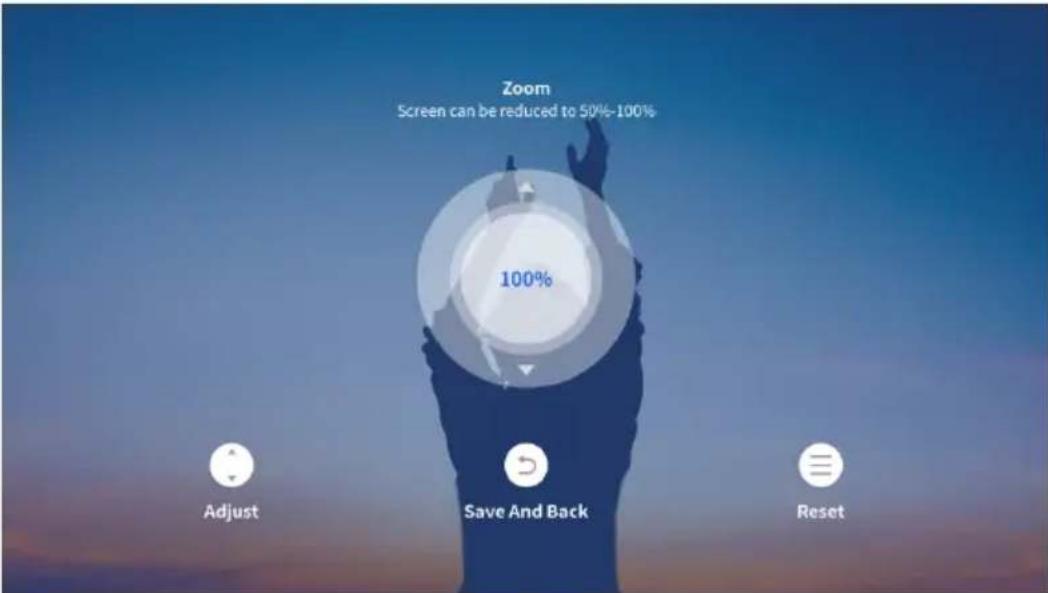
- About: Displays information about the projector.
Cast your PC screen
- From the home screen, click the "☐" icon.
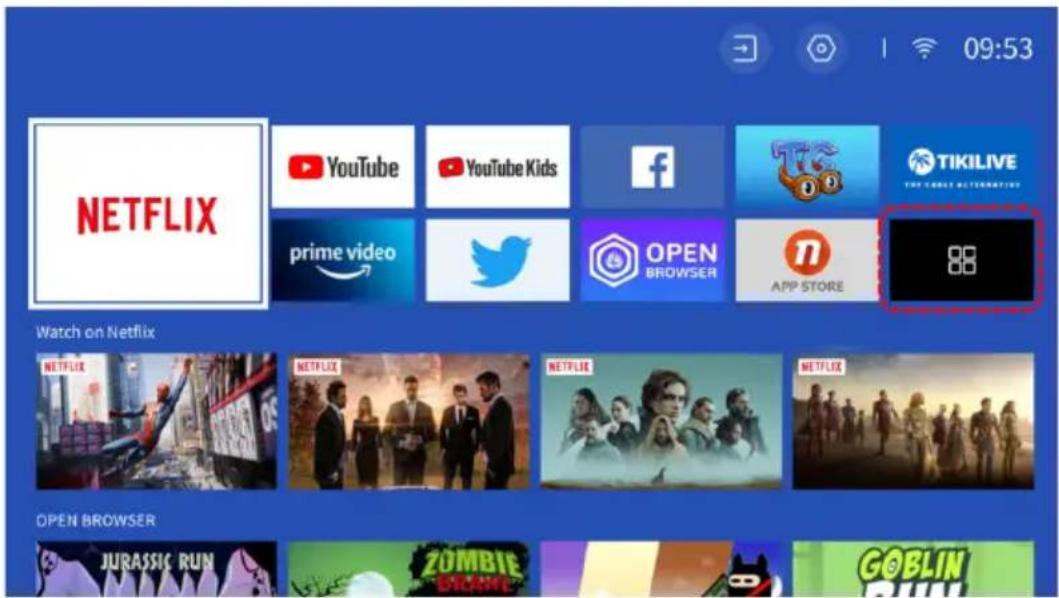
- Select "Screencast".
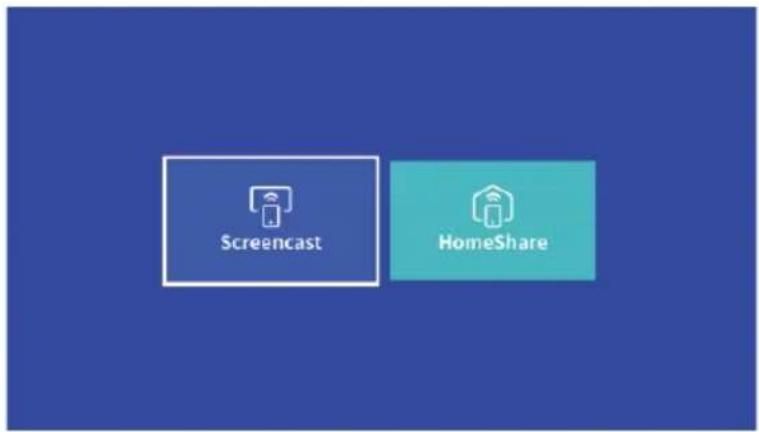
-
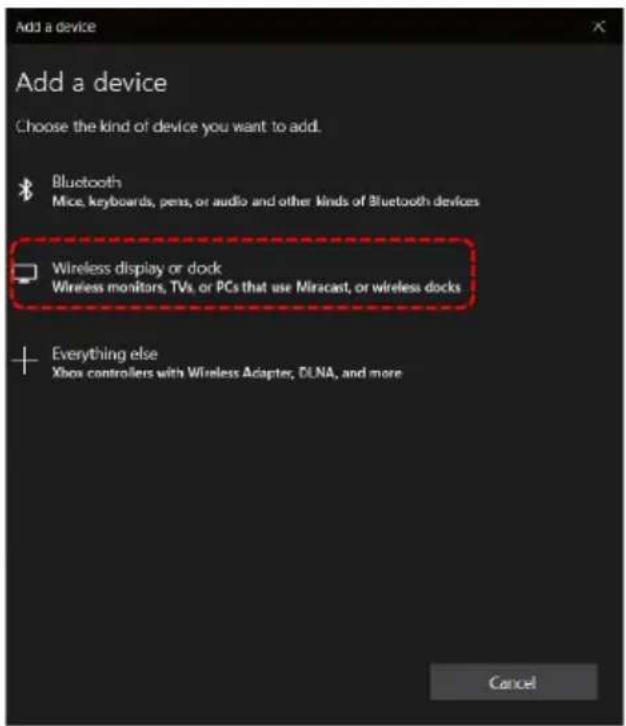
On your computer, open "Windows → Settings".
-
Select "Devices" then select "Add Bluetooth or other device".
-
Select "Wireless display or dock" and connect to "Smart Projector"
Notes:
- Ensure the projector and computer are both on the same Wi-Fi network.
- Screencast is only available for Windows 11 and later. Not applicable for MacOS and Linux systems.
NOTES
Need more information?
We hope that this user guide has given you the assistance needed for a simple set-up.
For the most up-to-date guide for your product, as well as any additional assistance you may require, head online to help.kogan.com
kogan.com
- S3 FULL HD SMART PROJECTOR
- SAFETY WARNINGS
- COMPONENTS
- OVERVIEW
- Remote Control
- INSTALLATION
- Mounting the Projector:
- OPERATION
- Getting started
- Setup
- Pairing the Remote Control
- Projector Orientation
- Select Language and Region
- Data Collection and Auto Updating
- Connect to Wi-Fi Network (optional)
- Setup Netflix (optional)
- Focus
- Connect Input Devices
- USB:
- HDMI:
- Headphones/Speakers:
- Settings Menu
- Setup: Opens the Setup menu.
- Picture Mode: Adjust the picture settings
- Cast your PC screen
- Notes:
- NOTES
- Need more information?
Brand : Kogan
Model : KAPRLS03PEA
Category : Video projector