
KADCFAN3N1A - Household Fan Kogan - Free user manual and instructions
Find the device manual for free KADCFAN3N1A Kogan in PDF.


| Brand | Kogan |
| Model | KADCFAN3N1A |
| Product Type | 3-in-1 DC Motor Pedestal Fan |
| Fan Speeds | 12 speeds |
| Timer | 0.5–12 hours (on/off timer) |
| Oscillation | Yes, automatic left/right oscillation |
| Remote Control | Yes, included (requires 2 AAA batteries, not supplied) |
| Control Panel | On-unit control panel with display |
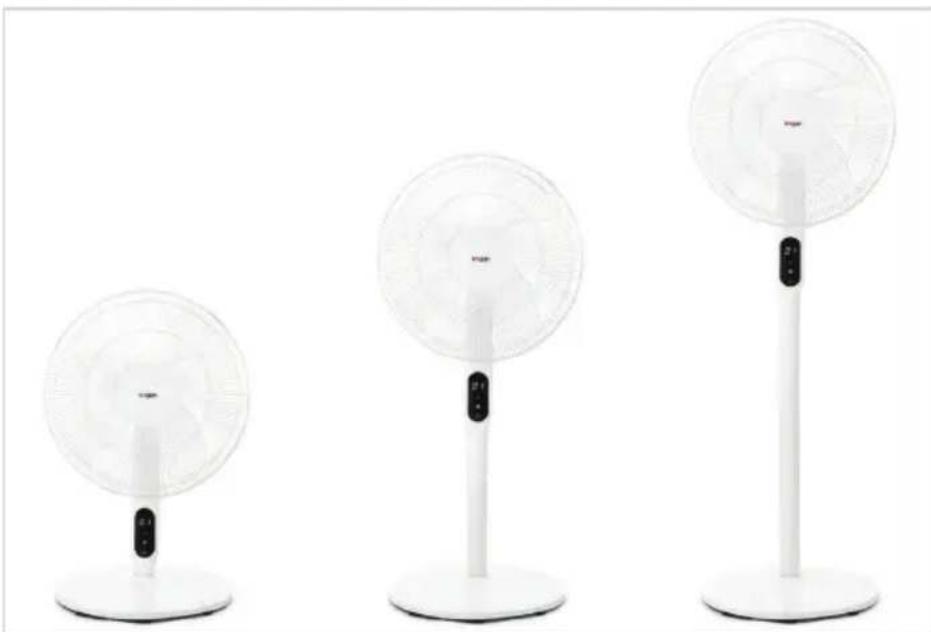
| Height Adjustment | Yes, three configurations by removing pole sections |
| Angle Adjustment | Manual tilt adjustment (fan must be off and unplugged) |
| Components | Base, pole assemblies (x2), fan body, fan blade, front grille, rear grille, screw, remote control, user guide |
| Power Supply | AC mains (plug into socket) |
| Safety Certification | Designed for household use; do not operate near water |
| Cleaning | Wipe exterior with soft damp cloth and mild detergent; do not disassemble |
| Usage Recommendations | For children aged 8+ with supervision; keep vents clear |
| Disposal | Recycle per local regulations (WEEE) |
Frequently Asked Questions - KADCFAN3N1A Kogan
User questions about KADCFAN3N1A Kogan
0 question about this device. Answer the ones you know or ask your own.
Ask a new question about this device
Download the instructions for your Household Fan in PDF format for free! Find your manual KADCFAN3N1A - Kogan and take your electronic device back in hand. On this page are published all the documents necessary for the use of your device. KADCFAN3N1A by Kogan.
USER MANUAL KADCFAN3N1A Kogan
natural_image
White Kogan air conditioner fan with five blades and a stand (no text or symbols visible on the fan body)3-IN-1 DC MOTOR PEDESTAL FAN
KADCFAN3N1A
SAFETY & WARNINGS
Ensure to read this user guide prior to first use. Retain this user guide for future reference.
- This fan can be used by children aged 8 years and above and by persons with reduced physical, sensory, or mental capabilities, or lack of experience and knowledge if they have been given supervision or instruction concerning the use of the fan in a safe way and understand the hazards involved.
- Adult supervision is required when the fan is operating around children.
- Do not allow children to play with the fan.
- Cleaning and maintenance shall not be performed by children without supervision.
- Do not allow the fan and remote control to be operated in or around water or any other liquid.
- Do not submerge the fan or remote into water or any other liquid.
- Do not touch the blades when the fan is in operation.
• Always disconnect the power cord before cleaning. - If the power cord is damaged, stop use immediately and contact help.Kogan.com for assistance.
- Do not attempt to repair the fan yourself.
- Once the fan is assembled, do not remove the grilles.
COMPONENTS

natural_image
Simple line drawing of a circular object with a central protrusion and four base supports (no text or symbols)A Base (x1)

B Pole assembly (x2)

natural_image
Line drawing of a handheld electric shaver or power supply device (no text or symbols)C Fan body (x1)

natural_image
Line drawing of a four-bladed propeller (no text or symbols)D Fan blade (x1)

natural_image
Abstract 3D wireframe shape resembling a torus or annular structure with radial lines (no text or symbols)E Front grille (x1)

natural_image
Diagram of a circular structure with radial lines and central hole, resembling a biological or geological cross-section (no text or symbols)F Rear grille (x1)

G Screw (x1)

natural_image
Simple line drawing of a remote control with four buttons (power, refresh, smile) and a battery top (no text or symbols)H Remote control (x1)

I User guide (x1)
OVERVIEW
Fan
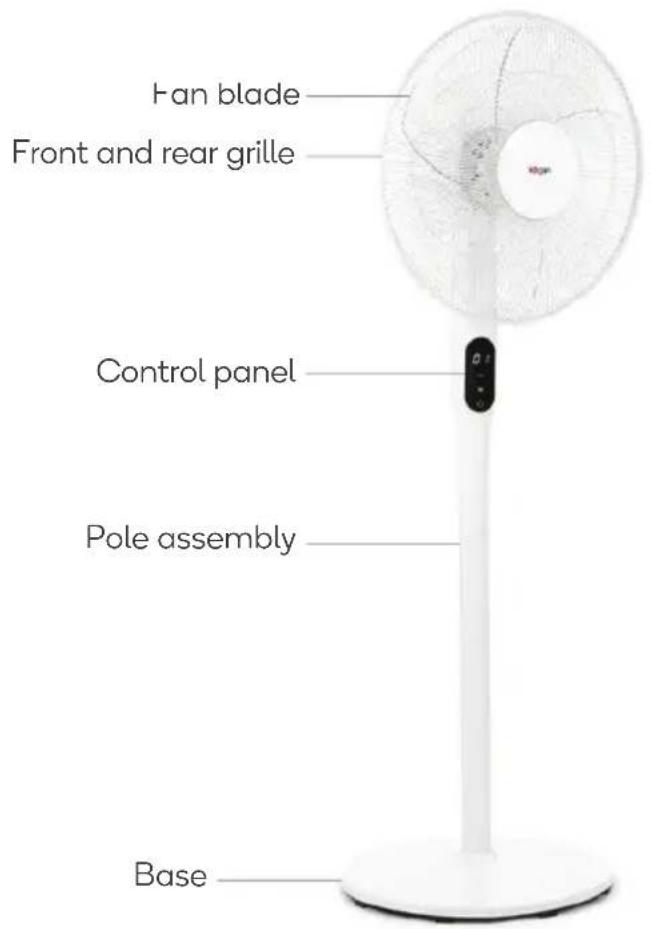
Control panel

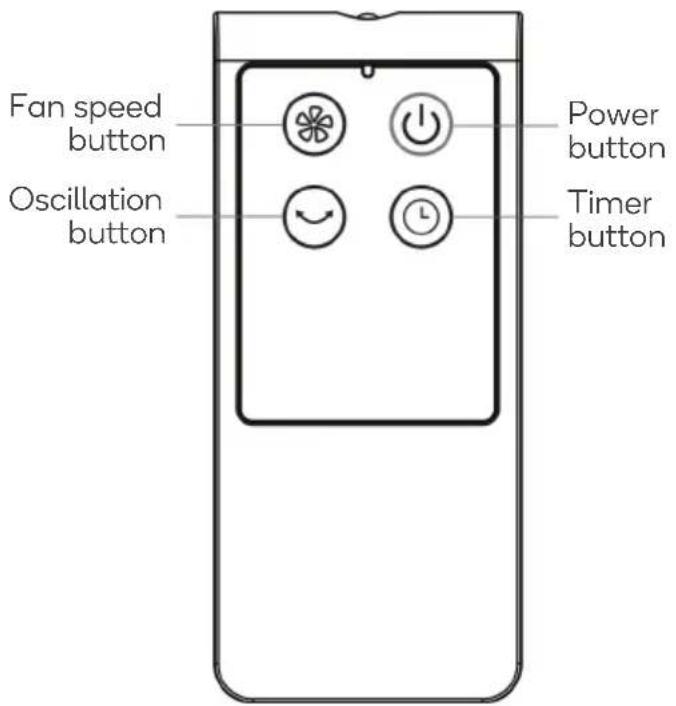
Remote control
ASSEMBLY
- Loosen and remove the lock nuts for the rear grille and fan blade from the fan body.

- Secure the pole assemblies to the base by rotating clockwise.

- Attach the fan body onto the pole assembly, then attach the rear grille onto the fan body.

- Secure the rear grille lock nut clockwise onto the rear grille. Secure the fan blade, then place and turn the fan blade lock nut anti-clockwise.
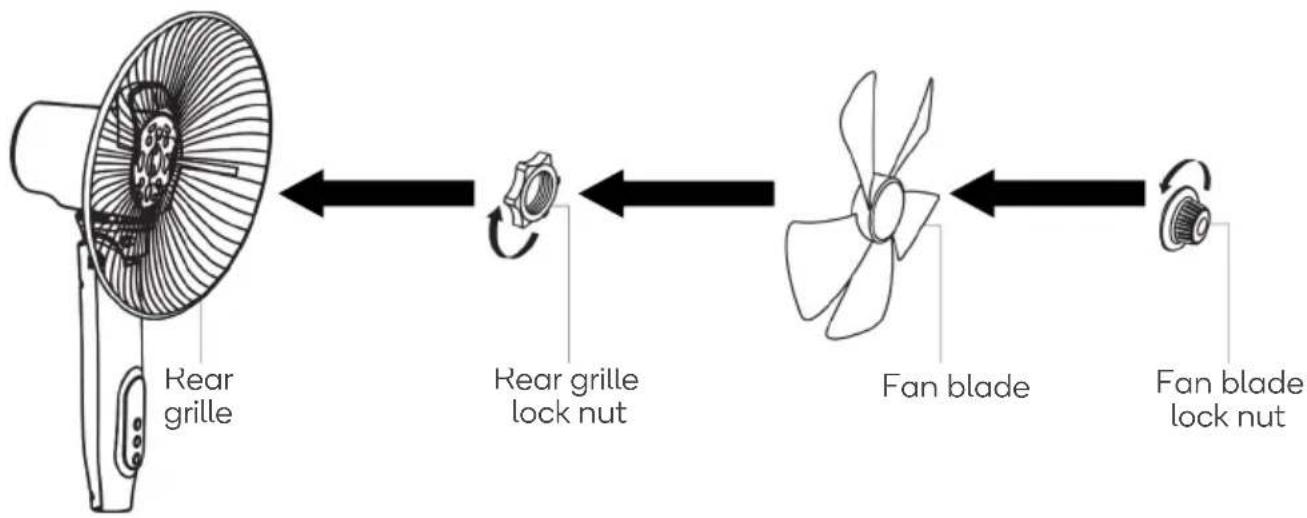
flowchart
graph LR
    A["Rear grille"] --> B["Rear grille lock nut"]
    B --> C["Fan blade"]
    C --> D["Fan blade lock nut"]
- Align the top clip of the front grille with the rear grille, then press the front and rear grilles together.


natural_image
Line drawing of two hands holding a circular fan or wheel, with no text or symbols present.- Using a screwdriver (not supplied), secure the locking clip connected to the front grille with the provided screw. This will secure the front grille in place.

BEFORE FIRST USE
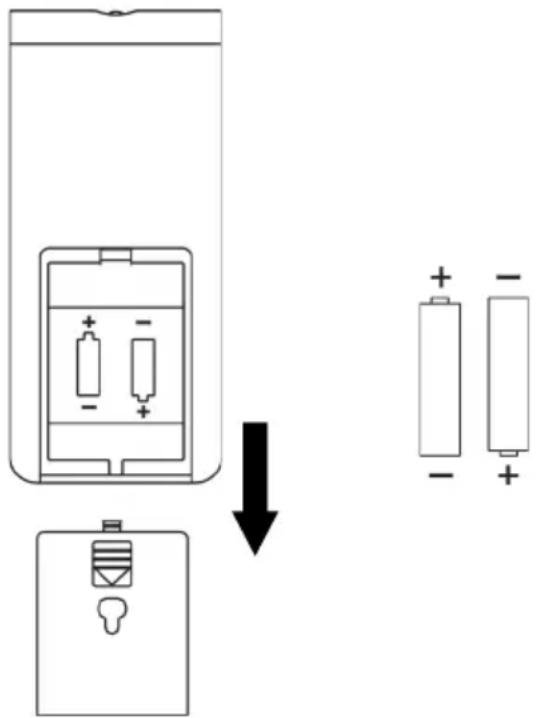
Batteries for the remote control
- Slide the back cover off the remote control.
- Noting the polarity markings ‘+/-’, insert two AAA batteries (not supplied) into the remote control. Slide the back cover on.
OPERATION
Powering on/off
- Plug the power cord into a socket, then turn the socket on.
- Press the Power button on the remote control or control panel to turn on the fan.
- Press the button again to turn off the fan.
Note:
To ensure adequate air circulation to the motor, keep vents at the rear of the motor free of dust.
Timer
The timer can be set to either turn the fan on or off after a specified period between 0.5–12 hours.
Setting the timer to turn on the fan
There are two methods. Applicable to both methods, ensure the fan is in standby when setting this timer.
• Using the control panel:
- Press and hold the oscillation/timer button for two seconds.
- Repeatedly press the oscillation/timer button to adjust how long you wish the timer to last. This will be reflected on the display (0.5–12). Once adjusted, do not touch the control panel. Wait for six seconds.
- Press the fan speed button to adjust the speed at which the fan will operate when it turns on (1–12).
- Once adjusted, do not touch the control panel. Wait for three seconds. The display will flash twice and beep to confirm the timer has been set.
Notes:
- If you wish to reset the timer, press and hold the oscillation/timer button.
- Pressing the Power button will cancel the timer and turn on the fan.
• Using the remote control:
- Press the timer button to enter the timer settings.
- Repeatedly press the timer button to set the timer to the desired number of hours. Each press will increase the timer by one hour. This will be reflected on the display.
Setting the timer to turn off the fan
There are two methods. Applicable to both methods, ensure the fan is turned on when setting this timer.
• Using the control panel:
- Press and hold the oscillation/timer button for two seconds.
- Repeatedly press the oscillation/timer button to adjust how long you wish the timer to last. This will be reflected on the display (0.5–12).
- Once adjusted, do not touch the control panel. Wait for six seconds. The display will flash twice and beep to confirm the timer has been set.
Notes:
- To check how much time is left on the timer, press and hold the oscillation/timer button. The time left will be shown on the display. If you would like to adjust the timer, immediately press the oscillation/timer button and adjust accordingly.
- If nothing is pressed for six seconds, the current timer will remain set.
• Using the remote control:
-
Press the timer button to enter the timer settings.
-
Repeatedly press the timer button to set the timer to the desired number of hours. Each press will increase the timer by one hour. This will be reflected on the display.
Oscillation
When the oscillation function is turned on, the fan will automatically rotate left and right.
Press the oscillation button on the remote control or the oscillation/timer button on the control panel to start/stop oscillating.
Changing the fan speed
This fan features twelve fan speeds.
Press the fan speed button on the remote control or control panel to change the fan speed. The selected fan speed will be reflected on the display (1-12).
Press and hold the fan speed button to quickly cycle through the fan speeds.
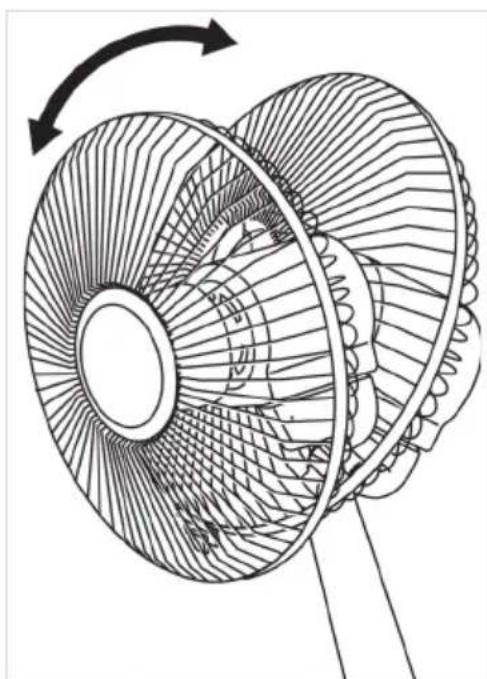
Changing the angle of the fan
The angle/tilt of the fan can be changed manually. Ensure the fan is turned off and unplugged before adjusting accordingly.
natural_image
Technical line drawing of a fan or turbine with internal blades and a rotating arrow (no text or symbols)Adjusting the height
The pole assemblies can be removed to create different heights for the fan. This results in three different configurations.
natural_image
Three white electric fan stand holders in a row, no visible text or symbols on the fan or background.To change the configuration:
-
Remove the fan body.
-
Rotate the pole assembly/assemblies anti-clockwise then remove.

natural_image
Illustration of hands holding a cylindrical device with an upward arrow indicating motion (no text or symbols)- Resecure the fan body onto the remaining pole assembly/base.
CLEANING & CARE
Ensure the fan is turned off and unplugged before cleaning.
- Wipe the exterior with a soft cloth dampened with a mild detergent.
- Remove any soapy residue with a dry cloth.
Notes:
- Do not disassemble the fan to remove dust.
- Do not use any abrasive detergents or solvents during cleaning to avoid scratching or damaging the surface of the fan.
- Do not use gasoline or thinner for cleaning.
Disposal
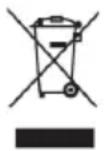
This marking indicates that this product should not be disposed with other household wastes. To prevent possible harm to the environment or human health from uncontrolled waste disposal, recycle it.
NOTES
Need more information?
We hope that this user guide has given you the assistance needed for a simple set-up. For the most up-to-date guide for your product, as well as any additional assistance you may require, head online to help.kogan.com
kogan.com


- 3-IN-1 DC MOTOR PEDESTAL FAN
- SAFETY & WARNINGS
- COMPONENTS
- OVERVIEW
- ASSEMBLY
- BEFORE FIRST USE
- Batteries for the remote control
- OPERATION
- Powering on/off
- Note:
- Timer
- Setting the timer to turn on the fan
- • Using the control panel:
- Notes:
- • Using the remote control:
- Setting the timer to turn off the fan
- Oscillation
- Changing the fan speed
- Changing the angle of the fan
- Adjusting the height
- CLEANING & CARE
- Disposal
- NOTES
- Need more information?
Brand : Kogan
Model : KADCFAN3N1A
Category : Household Fan