
NR-BW465V - Fridge PANASONIC - Free user manual and instructions
Find the device manual for free NR-BW465V PANASONIC in PDF.

User questions about NR-BW465V PANASONIC
0 question about this device. Answer the ones you know or ask your own.
Ask a new question about this device
Download the instructions for your Fridge in PDF format for free! Find your manual NR-BW465V - PANASONIC and take your electronic device back in hand. On this page are published all the documents necessary for the use of your device. NR-BW465V by PANASONIC.
USER MANUAL NR-BW465V PANASONIC
Operating Instructions Refrigerator
For Household Use
Model No: NR-BW415V, NR-BW465V
NR-BW415X, NR-BW465X
natural_image
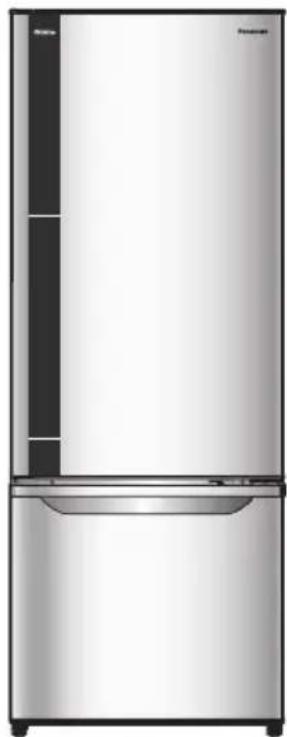
Front view of a stainless steel multi-door refrigerator with no visible text or symbols on the body (excluding 'Pancorch' branding)NR-BW415V
natural_image
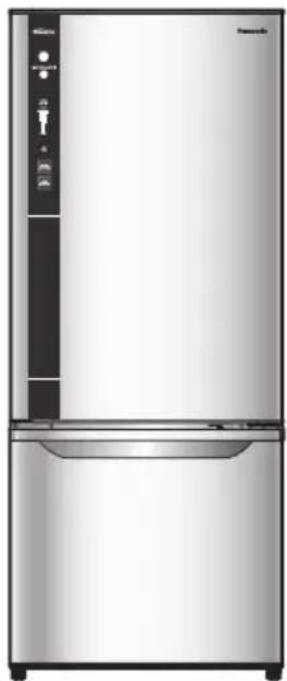
Front view of a modern stainless steel refrigerator with control panel and display stand (no visible text or symbols)NR-BW415X
natural_image
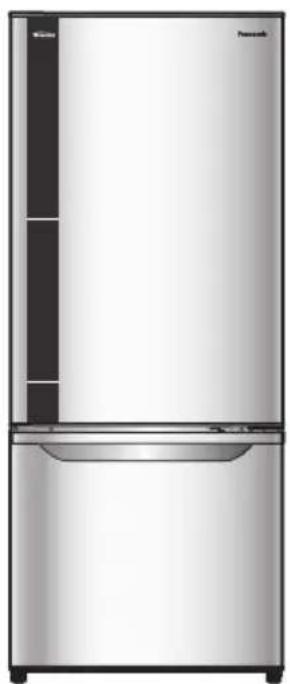
Front view of a modern stainless steel refrigerator with a side panel and frontrest (no visible text or symbols)NR-BW465V
natural_image
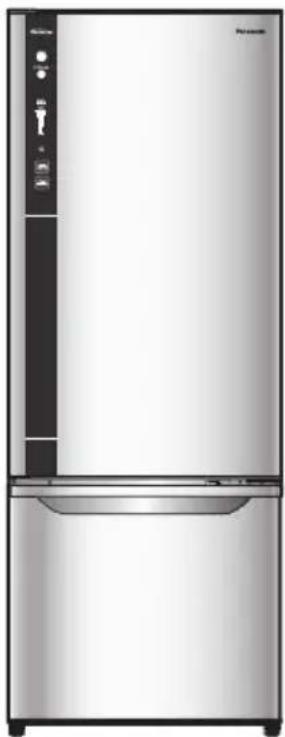
Exterior view of a modern stainless steel refrigerator with control panel and door (no visible text or symbols)NR-BW465X
Contents
- Safety precautions .... 2
- Required action....4
- Installation....5
- Parts identification ....6
- Food storage in the freezer compartment....7
Temperature control(Model: NR-BW465V, NR-BW415V) 7
Temperature control(Model: NR-BW465X, NR-BW415X) 8
- Quick freezing....9
• ECONAVI operation....9 - How to clean the refrigerator 10
- Troubleshooting .... 11
- Specifications......Back page
Thank you for purchasing the Panasonic product.
Please read these instructions carefully and follow safety precautions page 2-3 before using this product.
Please make sure the date and name of store of purchase are stamped in warranty card and keep it with this operating instructions. AK-15653
AK-156531
T0112-1052
Printed in Thailand
Safety precautions
Please be sure to follow these instructions.
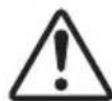
WARNING
This sign means
[It may lead a serious injury or death.]

CAUTION
This sign means
[It may result in injury or property damage.]


These signs mean prohibited action.
This sign means required action.
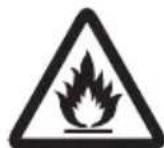
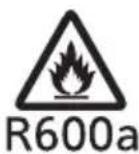
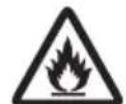
R600a
iso-butane
Otherwise it may cause a fi re, injury, explosion, electrical shock.

WARNING
Do not • use electrical appliances such as a deodorizer in the refrigerator. (If the refrigerant leaks, then it may catch fire due to sparks on the contacts.)
Do not • store explosive substances such as aerosol cans with a fl ammable propellant and chemicals or scientific specimens in this appliance.
Maintenance work can only be carried out by • authorised service agents.
- Servicing personal in Queensland are hereby advised that Queensland installation/servicing requirements must be followed, including the need for a Gas Work Authorisation (hydrocarbon refrigerants), if the gas system of this appliance is opened or charged. (Australia only)
- This appliance contains a small quantity of R600a refrigerant which is environmentally friendly, but fl ammable. It does not damage the ozone layer, nor does it increase the greenhouse effect.
- During transportation and installation, ensure that the tubing of the refrigerant circuit is not damaged.
Leaking refrigerant can ignite and may damage the eyes.
- In the event any damage does occur, avoid exposure to open fi res and any device which creates a spark. Disconnect the appliance from the mains power.
- Thoroughly ventilate the room in which the appliance is located for several minutes.
In case of emergency...In case of emerge
◆Notify Panasonic NZ Customer Care on 0800 726 222 for necessary action and advice.
R600a The room for installing the iso-butaneiso-butane appliance must be at least 1 cubic metre per 8 grams of refrigerant.
The refrigerant quantity contained in this appliance is noted on the Rating Plate of the appliance.

Stop • using the refrigerator immediately if there is an abnormality or failure.
(Otherwise it may cause smoke, a fire or electrical shock.)
Abnormality and failure examples.
- Power cord or plug is abnormally hot.
- Power cord is deeply cut or deformed.
- There is a burning smell.
- You can feel tingling electricity.
- A flammable refrigerant is used. If you have damaged the cooling circuit (piping), open the windows to ventilate the room and contact your dealer. (Otherwise it may cause an electrical shock, ignition or explosion.)
Do not • disassemble, repair or modify the refrigerator by yourself. If repairs are required, please consult your dealer or authorised service center.
Do not • use mechanical devices or other means to accelerate the defrosting process, other than those recommended by the manufacturer.
Otherwise it may cause a fire, injury, explosion, electrical shock.
WARNING
When recycling the product... For power plug and cord...

Before taking the refrigerator to be ● recycled, please remove all doors to prevent locking a child in it.
The warning labels mentioned above • should be kept throughout the life of the refrigerator.
The user manual should be handed over to any person who would use or handle the refrigerator whenever the refrigerator would be transferred to another location and delivered to a recycling plant.
Cyclo-Pentane is used for insulation of this refrigerator and fl ammable gas is used for refrigerant. When disposing of this unit, please discard it by the proper method and do not dispose of the unit by burning.

Do not plug or unplug with wet hands.
Do not let the cord or plug be damaged. If the power supply cord is damaged, it must be replaced by an authorised service agent.

●Disconnect the power plug when cleaning.
Plug into a wall outlet of the correct rated voltage on its own and ensure the plug is fully inserted.
Reserve one plug for the refrigerator only. Avoid connecting many appliances to the same plug.
Remove dust periodically from the power plug.
- if you detect a gas leak, do not touch the power plug and ventilate the kitchen.
- you detect a burning smell, disconnect the power plug and ventilate the room.
Otherwise it may cause burn injury, accidents.
When using...
Do not • damage the cooling circuit (piping on the back). The fl ammable refrigerant may catch fi re and lead to an explosion.
Do not • touch compressor or pipe, this area is high temperature.
Do not • let any children hang off the refrigerator door, it may overturn onto the child.
Children should be supervised to ensure that they do not play with the refrigerator.
Do not • place any water containers on the top of the refrigerator.
- Do not fill the gaps around the refrigerator. (If the refrigerant leaks, then it may catch fire.)

This appliance is not intended to use by ● persons (including children) with reduced physical, sensory or mental capabilities or lack of experience and knowledge, unless they have been supervised by responsible person for their safety.
CAUTION
When opening/closing the doors...

While opening the refrigerator, be careful not to pinch other one's hand holding the door.
Mind the gap • between the doors. They may nip your hand while closing
When storing food...
Do not cause a high impact to the glass trays. Doing so may result in breakage or injury.
Do not freeze glass bottles. (If the liquid in a glass bottle is frozen, then the bottle may break and the liquid may leak out.)
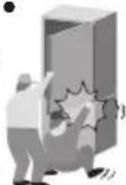
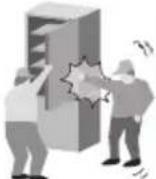
When moving the refrigerator...

Hold the refrigerator tightly when transporting.
Apply protective covering, etc. with a fragile surface.
Ensure the refrigerator is transported the correct way up (see page 5).

Required action
When opening/closing the doors...
Do not • refrigerate items bigger than the tray or shelves as the door will not close completely causing the leakage of cool air and high energy consumption.
Do not • open the refrigerator frequently or leave it open for long periods of time. This is to prevent water dripping inside and the waste of electricity.
Frequently check the doors are closed correctly and that the door seals are not leaking.
When cleaning...
Do not • clean the refrigerator with any chemical substances or liquids.
This will cause damage and corrosion to the surface of the unit.

- Clean the water evaporator pan located over the compressor at the back of the refrigerator every three months to prevent any odors generated from humidity.
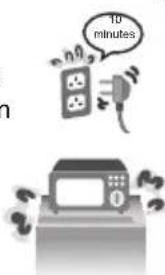
When the plug is disconnected, leave • the unit for 10 minutes before plugging in again.
Do not • put anything on top of the refrigerator. Otherwise, it may fall due to vibration.
Adjust the temperature according to the actual operating condition for energy saving.
- If you will not be at home for several days and there are nothing refrigerated in the refrigerator, the plug should be disconnected for energy saving.
When storing food...When using...
Do not • place warm/hot foodstuffs in the refrigerator. Store warm food and drinks after they have cooled.
Do not • overload the refrigerator. A gap must be provided between foodstuffs to maintain the cooling effect.

Store fruits and vegetables in the utility box. Trapped moisture in the utility box will help to preserve food quality for longer time periods.

Drinking water and beverage bottles should be sealed to prevent odours.
Foodstuffs such as vegetables, fruits and fresh foods should be wrapped or packed correctly before freezing or refrigerating.
- Place foods such as meat or fish in the freezer if you wish to store them for an extended period.
Foodstuffs with a high moisture content should be placed in a sealed container to prevent dew or frost forming.
If possible, use the utility box to store fruit or vegetables separately to extend the storage time of fruits and vegetables.
Utility box
Installation
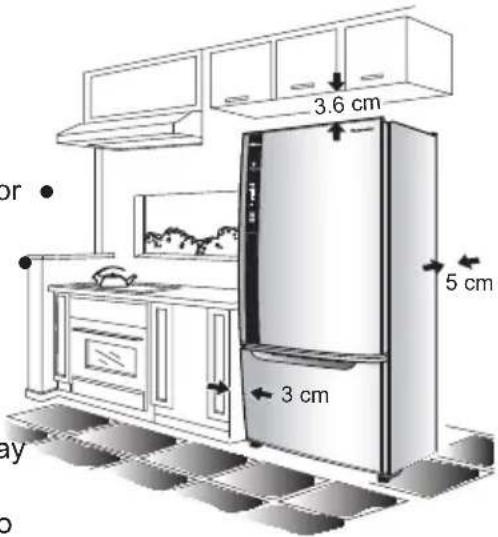
Ventilation Requirements
Ensure that the below air gaps are followed
The clearance between the top of the refrigerator and the ceiling is at least 3.6 cm.
The clearance between the wall and the rear of the refrigerator is at least 5 cm.
The clearance from the side of the refrigerator and the wall is at least 3 cm.
Area Around the Installed Unit
Do not • locate the refrigerator in a humid place as rust may form and may cause electrical leakage.
Do not • locate the refrigerator in an area that exposes it to direct sunlight.
Do not • locate the refrigerator near any heat generating source such as a cook top, dishwasher or oven.
The refrigerator must be located in a place that ensures there is good air circulation around the refrigerator.
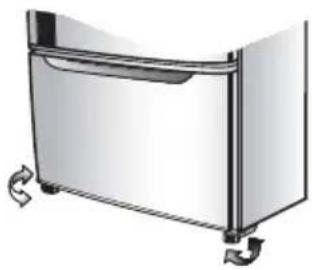
If the refrigerator is placed on an uneven surface, use the ● adjustable feet to ensure the refrigerator stands level.
natural_image
Illustration of a stainless steel refrigerator with scroll arrows indicating side legs (no text or symbols)Moving or shifting
- When moving or shifting the refrigerator, remove the ice twister, top freezer case, water evaporator pan etc. and check to be sure there is no water in the refrigerator.
- When the refrigerator has been moved to the location, turn the adjustable front feet to ensure that the refrigerator is stable.
- If the unit cannot be transported upright, please contact the customer care center for further guidance. Transporting the unit on the incorrect side may cause damage to the refrigerator.
Power Cord
- To extract the power cord from the unit for use, remove the water evaporator pan, extract the power cord and reinsert the water evaporator pan.
LED lamp and Grounding
- The refrigerator LED lamp is designed specifically for this product. If replacement is required, please contact your dealer or authorised service agent.
This appliance must be properly grounded.
Parts identifi cation
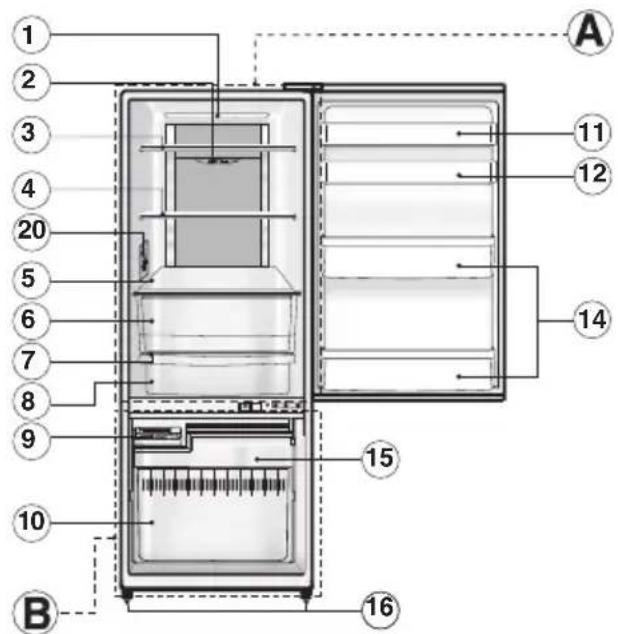
NR-BW465V, NR-BW415V NR-BW465X, NR-BW415X
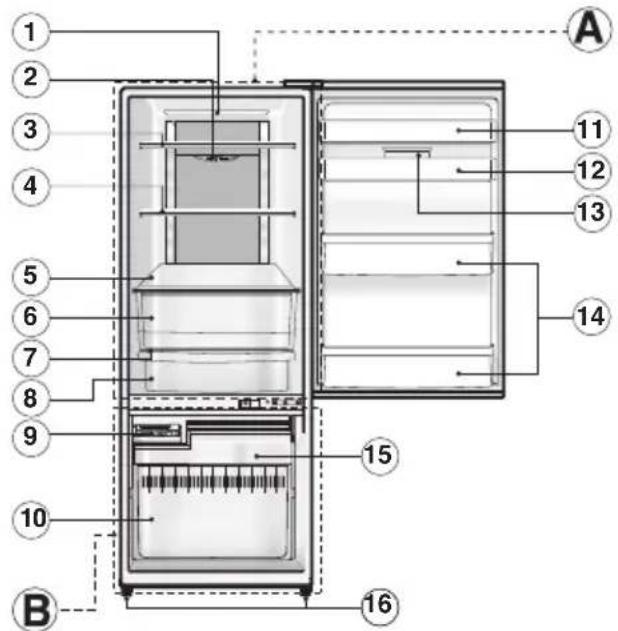
ⒶREFRIGERATOR COMPARTMENT
BFREEZER COMPARTMENT
① LED lamp
② Refrigerator temperature control
③ Small tempered glass tray
④ Large tempered glass tray
⑤ Tempered glass tray crisper
⑥ Vegetable crisper
⑦ Tray chilled top
⑧ Chiller case
⑨ Ice twister
⑩ Bottom freezer case
⑪ Egg shelf (model NR-BW465V, NR-BW465X)
⑫ Egg shelf with egg tray
⑬ Utility box
(model NR-BW415X, NR-BW465X)
⑭ Bottle shelf
⑮ Top freezer case
⑯ Adjustable feet
⑰ Freezer control and quick freezing mode (model NR-BW415X, NR-BW465X)
⑱ Water evaporator pan
⑲ Compressor
⑳ Freezer room temperature control (model NR-BW415V, NR-BW465V)
For only model.
NR-BW415X •
NR-BW465X
button
For only model.
NR-BW415V
NR-BW465V
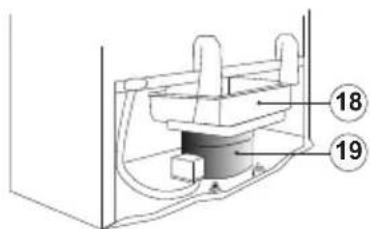
Product view from behind.
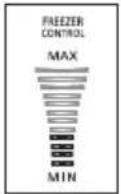
Freezer control and Quick freezing mode
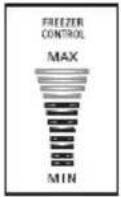
FREEZER CONTROL

QUICK FREEZING button

These controls are located on the front of the refrigerator.
Freezing control
20
SPECIAL FEATURE
1) NON-FREON
This unit uses totally NON-FREON MATERIALS both for refrigerant (iso-butane (R600a)) and for insulation (Cyclo-Pentane). These materials do not damage the earths ozone layer and has almost no effect on global warming.
2) INVERTER
As the temperature inside the refrigerator changes, the motor will run at different speeds. When the temperature inside the refrigerator is stable, the motor will run at a lower speed to save energy and lower noise. When powerful cooling is required, the motor will run at a higher speed.
Food storage in the freezer compartment
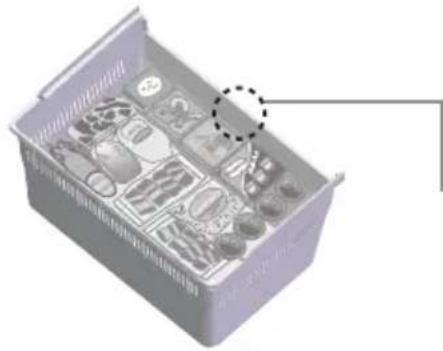
natural_image
3D diagram of a storage tray with multiple compartments and a highlighted section (no text or symbols)Bottom Freezer Case
Maximum Storage
If the stored food exceeds the edge of the container, the freezer door may not close completely and the compartment may become frosted and may also result in higher energy consumption.
How to make ice cubes
- Pull out the ice twister.
- Fill the ice twister with water until the water reaches the water level line. Then place tray back into the ice making compartment.
- To remove ice cubes
1) Ensure that the top freezer case has been placed in the Quick Ice Making compartment.
2) Twist the ice twister clockwise.
(The ice cubes will drop into the top freezer case.)
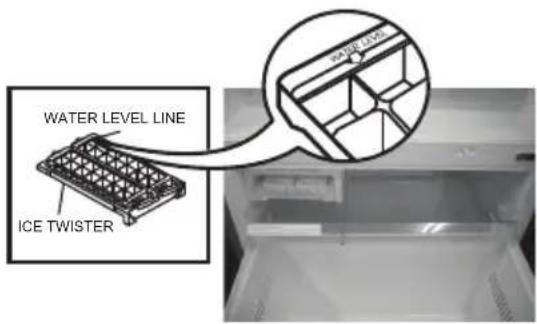
Remark
- If the ice twister is twisted while the top freezer case is not located in the Quick Ice Making compartment, ice and water will fall inside the unit or onto the floor.
Please ensure that the top freezer case has been installed to receive the falling ice.
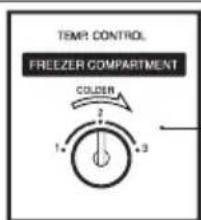
Temperature control (Model: NR-BW465V, NR-BW415V)
Refrigerator compartment temperature control
| The temperature can be adjusted for MIN, MED and MAX levels. | “MIN” Approx. 5°C ~ 10°C |
| “MED” Approx. 2°C ~ 7°C | |
| “MAX” Approx. -1°C ~ 4°C | |
| The temperature can be adjusted for 1-3 levels. | Number “1” Approx. -13°C ~ -18°C |
| Number “2” Approx. -17°C ~ -22°C | |
| Number “3” Approx. -19°C ~ -24°C |
Remark
When Operating The Refrigerator for the First Time
After connecting the mains plug, ensure that the temperature controls for both the refrigerator compartment and freezer compartment are set to the “MED” position and is left in the “MED” position for 24 hours for effective cooling operation. After this initial 24 hour period, the temperature can be set to individual preference.
Temperature control (Model: NR-BW465X, NR-BW415X)
This refrigerator is specially designed with adjustable temperature levels using 9 different temperature levels as explained below:
How to operate the "9 levels" mode
- Set the LED display to the "MIN" position by pressing the "FREEZER CONTROL" button.
- Press and hold the "FREEZER CONTROL" button for 10 seconds until the LED display is at the "MIN" position and blinking.
- Use the "FREEZER CONTROL" button to set the required temperature mode, where one is the minimum cooling mode and nine is the maximum cooling mode.
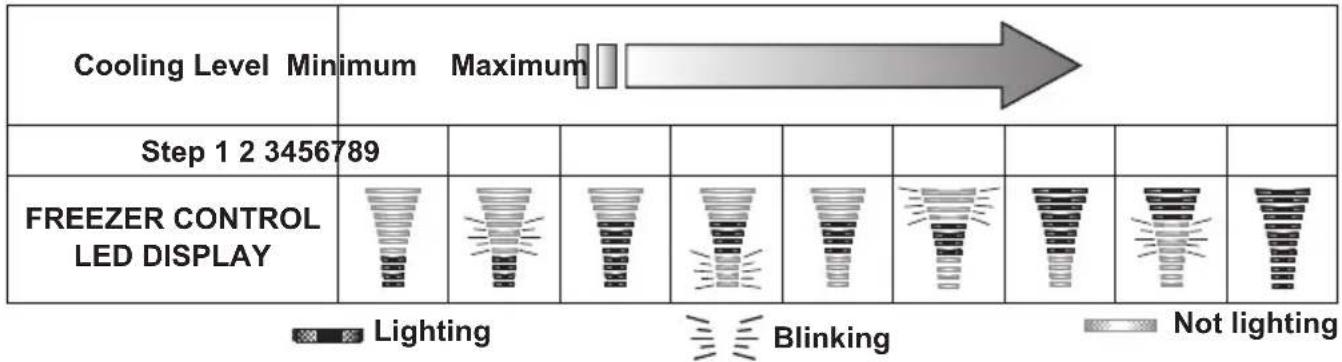
LED Display table
To reset the setting "9 levels" mode
Repeat steps 1 and 2 to return the unit to normal operation mode.
NOTE:
The temperature control can vary depending on the environment and quantity of foodstuffs stored in the refrigerator.
Refrigerator compartment temperature control
| The temperature can be adjusted for MIN, MED and MAX levels. | “MIN” Approx. 5°C ~ 10°C |
| “MED” Approx. 2°C ~ 7°C | |
| “MAX” Approx. -1°C ~ 4°C |
Freezer compartment temperature control
 The temperature can be adjusted for MIN - MAX levels. The temperature can be adjusted for MIN - MAX levels. | 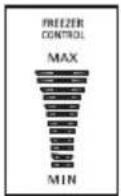 | “MAX” Approx. -19°C ~ -24°C |
 | “MED” Approx. -17°C ~ -22°C | |
 | “MIN” Approx. -13°C ~ -18°C |
Quick freezing
Model : NR-BW415X, NR-BW465X
How to operate the "QUICK FREEZING" mode
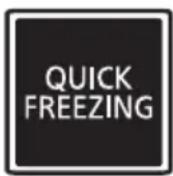
- Press the "QUICK FREEZING" button, the Blue light LED - turns on to denote 150 min. "QUICK FREEZING" mode.
- The “QUICK FREEZING” operation will automatically stop after 150 min. and return to normal mode. The Blue light LED - will turn off to denote the end of the “QUICK FREEZING” process.
Notes :
- To stop the "QUICK FREEZING" operation, press the "QUICK FREEZING" button.
- A flashing Blue light LED - indicates the defrosting system is active. The "QUICK FREEZING" operation will start once the defrost cycle has finished.
- The Freezer temperature control will not operate during “QUICK FREEZING” mode as the compressor is already at maximum operating levels for the “QUICK FREEZING” mode.
ECONAVI operation
Model : NR-BW415X, NR-BW465X
The refrigerator detects the opening and closing of the refrigerator door and the brightness around the refrigerator to automatically control operation to ensure maximum energy saving ^1 .
ECONAVI lamp is on during ECONAVI operation
ECONAVI mode: The refrigerator learns the lifestyle patterns of your family from door opening and time periods of infrequent use to maximise energy efficiency.
ECONAVI lamp

NOTE :
The refrigerator learns your lifestyle patterns from the previous 3 weeks of use and uses that data from the 4^th week onwards. Therefore the ECONAVI lamp "ON/OFF" pattern may change from the 4^th week onwards.
Light intensity sensor
- The refrigerator performs the ECONAVI energy saving operation when it becomes dark ^2 around the refrigerator such as overnight when you are asleep.
- The brightness of the ECONAVI lamp is lowered approximately 5 minutes after it is lit.
Settings for enabling ECONAVI operation
- ECONAVI operation is automatically enabled when the temperature control for the freezer compartment is set to "MED".
- ECONAVI mode does not operate if the “QUICK FREEZING” mode is in operation. It is not possible to force the start of the ECONAVI mode.
Remark :
^1 The efficiency of the ECONAVI mode is dependant on the ambient temperature, ambient brightness and the number of times the refrigerator door is opened and closed and the state in which food is stored.
^2 Darkness is detected by the light intensity sensor at approximately 3 lx to 10 lx or less
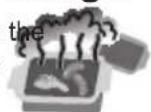
How to clean the refrigerator
1 Interior cleaning
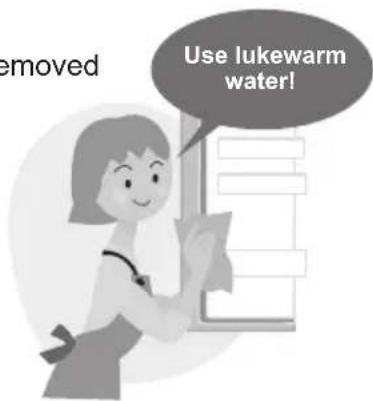
Clean stains with warm water and a soft cloth. If the stain cannot be removed easily, use warm water and a mild detergent. Use a soft cloth to remove any excess detergent.
2 Exterior cleaning
Clean by using a soft cloth with warm water and mild detergent. Ensure that any detergent left behind is wiped off.
Door Seal Cleaning
Clean by wiping with a soft damp cloth. Petroleum gel has been applied to the door seal on the hinge side of the unit, be careful not to wipe this off.
- The door seal is replaceable by an authorised service agent. If the door seal comes off while cleaning, it can be pushed back into the groove.
Note: Do not use the following items. (Otherwise, the surface will be scratched.)

Kitchen detergents (They crack plastic!)
Cleanser or soap powder
Benzine, thinner,
alcohol, acid, petroleum
Scrubber Hot Water

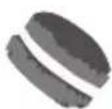
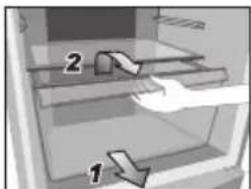
Removing trays for cleaning.
Removing •
- Unhook from the protrusion at the rear of the tray by lifting the tray upward and pulling the tray forward until it comes free.
natural_image
Illustration of two hands holding a tray with a handle, no text or symbols presentAttaching •
- Push the tray back into place until it locks into place.
Notes:
When removing the tray above the vegetable crisper, please remove the vegetable crisper first before removing the tray.
the tray is not locking into place, ensure that you are attaching the correct tray.
Removing egg shelf, bottle shelf and left/right provision compartment shelf for cleaning.
Removing •
- Lift it upward, alternating between the right and left side.
Attaching •
- Place on both supports and then press in until it reaches the end of supports.
Removing the vegetable crisper and chiller case for cleaning.
Removing •
- Pull the vegetable crisper or chiller case forward until it reaches the end of the stopper.
- Lift the front of the vegetable crisper or chiller case slightly and remove completely.
Attaching •
- Insert the vegetable crisper or chiller case into the supports.
- Raise the vegetable crisper or chiller case up slightly and push forward until the end is reached.

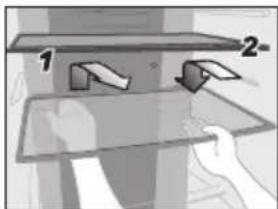
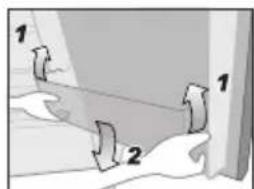
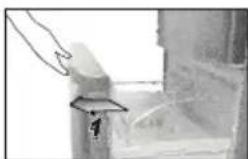
Removing the top and bottom freezer case for cleaning.
- Pull the freezer draw out towards yourself, raise the front of freezer draw up slightly and then pull it until the end of stopper.
- Pull the top freezer case out towards yourself, Lift it up slightly and then move upward to remove.
- Lift both sides of the bottom freezer case and move upward to remove.
natural_image
Hand placing a rectangular object with an arrow labeled '1' to its left, against a blurred background (no text or symbols)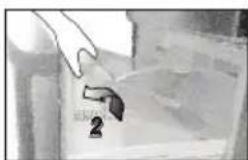
natural_image
Hand holding a tool near a small object, possibly a device or tool, in a kitchen setting (no visible text or symbols)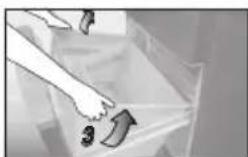
Troubleshooting
The refrigerator does not operate.
Check that the plug and wall socket are in good condition. ●
Check if there is any problem with the mains fuse or house wiring. ●
Check by unplugging for 10 minutes and plugging back in. ●
The refrigerator does not cool enough.
Check to be sure that the temperature control button or lever is at the proper position.
Check to ensure that the refrigerator is not overloaded with foodstuffs or that hot foodstuffs have been placed in the refrigerator. Is the refrigerator exposed to direct sunlight or a heat source?
Is the refrigerator door completely closed? ●
Is the refrigerator door opened frequently? ●
Vapor generated inside and outside the cabinet / surface of door.
●condensation may appear on the surface of the cabinet when humidity is high or air circulation around the unit is poor.
If there is condensation inside, check if the door is completely closed. Is the refrigerator frequently opened or left open for a long time?
Have any hot foodstuffs been placed inside the refrigerator?
The refrigerator generates noise.
Check if the refrigerator is located on a stable, level floor and is installed correctly. Use the adjustable feet if required to level the refrigerator.
Check if there is any object in contact with the refrigerator. ●
Food becomes frozen
Was the food placed near the cold air duct? ●
If the temperature control has been set to "MAX" try adjusting the ● temperature control to the "MIN" setting.
Has the food been placed in the chiller case? ●
ECONAVI does not operate.
(the ECONAVI lamp does not light)
ECONAVI operation is rarely performed.
ECONAVI operation is stopped part way though.
ECONAVI operation is performed too often (the ECONAVI lamp rarely turns off).
- Has the "QUICK FREEZING" mode been activated?
- Is the temperature setting of the freezer compartment set to something other than "MED"?
- Has the door been opened frequently or has hot food been placed in the refrigerator?
- The learning function may automatically disable ECONAVI operation during times of frequent use.
Is there a power failure?
If a power failure occurs, the learning function data collected up until the point of power failure will be lost. The ECONAVI operation will rarely be performed until the learning function has collected data again (see page 9).
- If the auto defrost function is turned on during ECONAVI operation, the normal cooling operation will need to be performed after defrost. Therefore the ECONAVI operation may be stopped during this defrost/cooling process.
- The learning function may sometimes restart the normal cooling operation.
Is the light intensity sensor hidden?
- Are there dirt or scratches on the control panel where the light intensity sensor is located?
■CONAVI operation may be performed while the refrigerator is being used depending on the conditions of use, but the cooling performance is maintained.

natural_image
Illustration of a person with arms crossed, appearing confused or tired (no text or symbols present)Specifications
| Model No. | NR-BW415VNR-BW415X | NR-BW465VNR-BW465X | |
| Freezer Star Rating | |||
| Capacity (L)(ISO 15502 gross) | Total 421 465 | ||
| Freezer 127 | |||
| Refrigerator 294 | 338 | ||
| Outside DimensionsWidth x Depth x Height (mm) | 675 x 708 x 1,624 675 x | 708 x 1,764 | |
| Net Weight (kg/lb) | 64 / 142 66 / 145 | ||
| Refrigerant Type R600a | |||
| Rated Voltage (V)Rated Frequency (Hz) | Refer to the rating label attached inside the cabinet | ||
Memo
- Operating Instructions Refrigerator
- Contents
- Safety precautions
- WARNING
- CAUTION
- In case of emergency...In case of emerge
- When recycling the product... For power plug and cord...
- Otherwise it may cause burn injury, accidents.
- When using...
- When opening/closing the doors...
- When storing food...
- When moving the refrigerator...
- Required action
- When cleaning...
- When storing food...When using...
- Installation
- Ventilation Requirements
- Ensure that the below air gaps are followed
- Area Around the Installed Unit
- Moving or shifting
- Power Cord
- LED lamp and Grounding
- Parts identifi cation
- Freezer control and Quick freezing mode
- Freezing control
- SPECIAL FEATURE
- 1) NON-FREON
- 2) INVERTER
- Food storage in the freezer compartment
- Bottom Freezer Case
- Maximum Storage
- How to make ice cubes
- Remark
- Temperature control (Model: NR-BW465V, NR-BW415V)
- When Operating The Refrigerator for the First Time
- Temperature control (Model: NR-BW465X, NR-BW415X)
- How to operate the "9 levels" mode
- To reset the setting "9 levels" mode
- NOTE:
- Refrigerator compartment temperature control
- Freezer compartment temperature control
- Quick freezing
- Model : NR-BW415X, NR-BW465X
- How to operate the "QUICK FREEZING" mode
- Notes :
- ECONAVI operation
- ECONAVI lamp is on during ECONAVI operation
- NOTE :
- Settings for enabling ECONAVI operation
- Remark :
- How to clean the refrigerator
- Interior cleaning
- Exterior cleaning
- Door Seal Cleaning
- Removing trays for cleaning.
- Removing •
- Attaching •
- Notes:
- Removing egg shelf, bottle shelf and left/right provision compartment shelf for cleaning.
- Removing the vegetable crisper and chiller case for cleaning.
- Removing the top and bottom freezer case for cleaning.
- Troubleshooting
- Memo
Brand : PANASONIC
Model : NR-BW465V
Category : Fridge