Maxxum 600Si PD - Photocopier KONICA MINOLTA - Free user manual and instructions
Find the device manual for free Maxxum 600Si PD KONICA MINOLTA in PDF.

User questions about Maxxum 600Si PD KONICA MINOLTA
0 question about this device. Answer the ones you know or ask your own.
Ask a new question about this device
Download the instructions for your Photocopier in PDF format for free! Find your manual Maxxum 600Si PD - KONICA MINOLTA and take your electronic device back in hand. On this page are published all the documents necessary for the use of your device. Maxxum 600Si PD by KONICA MINOLTA.
USER MANUAL Maxxum 600Si PD KONICA MINOLTA
natural_image
Circular abstract pattern with horizontal black stripes on dark background (no text or symbols)MINOLTA
APPENDIX


Thank you for purchasing a Minolta camera and welcome to the wonderful world of SLR photography. This camera is equipped with functions which will suit your every photographic need. Before using your new camera, please take the time to read through this instruction manual for it contains important information on the use and care of your camera.
This manual contains information regarding products introduced before Jan., 1995. To obtain compatibility information for products introduced after this date, contact the authorized Minolta Service Facility nearest you.
TABLE OF CONTENTS
NAMES OF PARTS 2
Standard Accessories 9
Inserting the Battery 10
Checking the Battery Power 11
Attaching the Lens 12
Removing the Lens 13
Loading the Film....14
Rewinding the Film....16
Setting the Film Speed Manually....17
Camera Handling 18
In-Line Auto 19
Taking Pictures....20
FOCUS 22
Autofocus Modes 23
Autofocus Areas....26
Focus Signals....28
Focus Lock 29
Special Focusing Situations....31
Manual Focus....32
Autofocus Illuminator....33
EXPOSURE 34
Exposure Modes 35
Programmed Autoexposure Mode 37
Aperture-Priority Mode 38
Shutter-Priority Mode 40
Manual Exposure 42
Bulb 44
Metering Modes 45
Exposure Compensation....48
AE Lock 49
Multiple Exposure....52
Exposure Bracketing....54
FLASH 55
Using the Built-in Flash 56
Flash Signals 59
Using Flash in PROGRAM mode 60
Using Flash in A, S, and M Modes 61
Fill Flash 62
Slow-Shutter Sync....64
Flash Compensation 65
Flash Bracketing....66
Wireless/Remote Off-Camera Flash Control....68
ADDITIONAL FEATURES....73
For Owner's of the Quartz Data Model....74
Panorama Adapter 76
Self-Timer 78
Film-Drive Modes 79
Metering Index 80
Depth-of-Field Preview....82
Diopter Adjustment....83
APPENDIX 84
Accessory Information....85
Trouble Shooting 86
Technical Details 88
Care and Storage....90
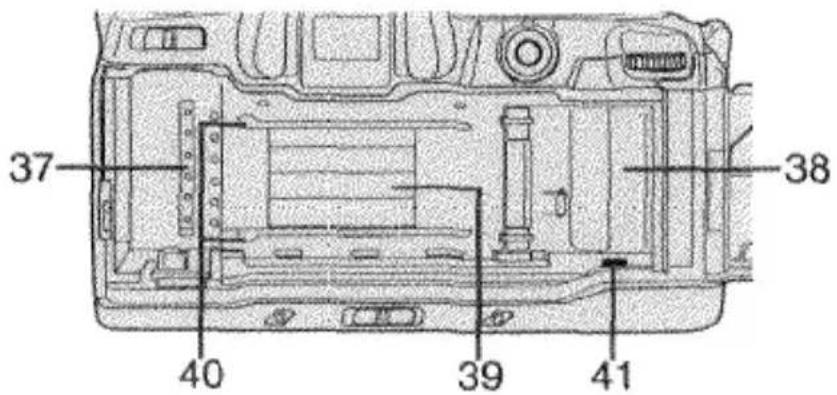
NAMES OF PARTS
CAMERA BODY
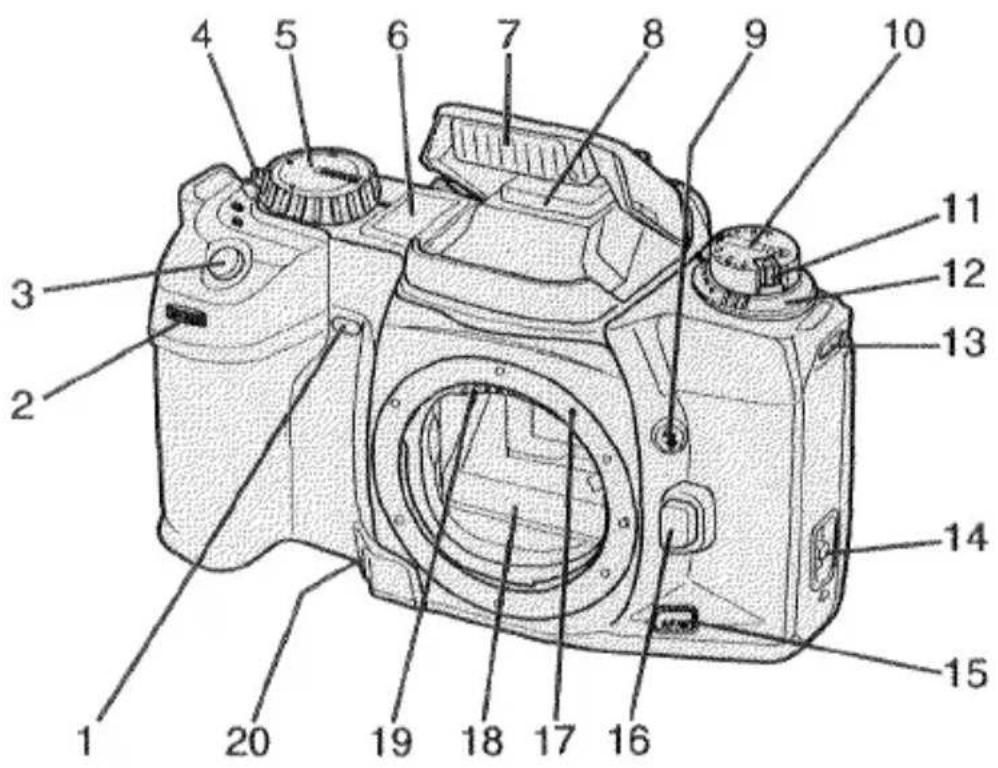
- Self-timer lamp
- Front control dial
3.Shutter-release button - Drive-mode selector
- Exposure-mode dial
- Body data panel
- Built-in flash
- Accessory shoe
- Flash-control button
- Exposure-compensation dial
-
Exposure-compensation lock release
-
Flash-compensation dial
-
Strap eyelet
-
Back-cover release
-
AF/M focus-mode button
-
Lens release
-
Mounting index
-
Mirror*
-
Lens contacts*
-
Depth-of-field-preview button
*Do not touch
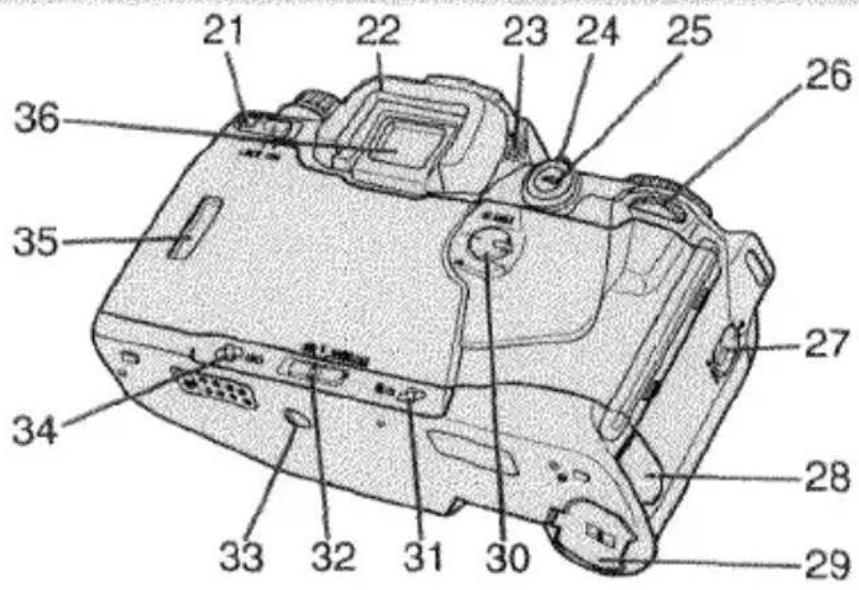
- Main switch
- Eyepiece cup
- Diopter-adjustment dial
- Metering-mode selector
- AE-lock button
- Rear control dial
- AF-mode selector
- Remote-control terminal
- Battery cover
- AF-area selector
-
Rewind button
-
Flash-mode selector
- Tripod socket
- ISO button
- Film window
- Eyepiece*
- DX contact*
- Film chamber
- Shutter*
- Film guide rails
- Film-leader index
NAMES OF PARTS
BODY DATA PANEL
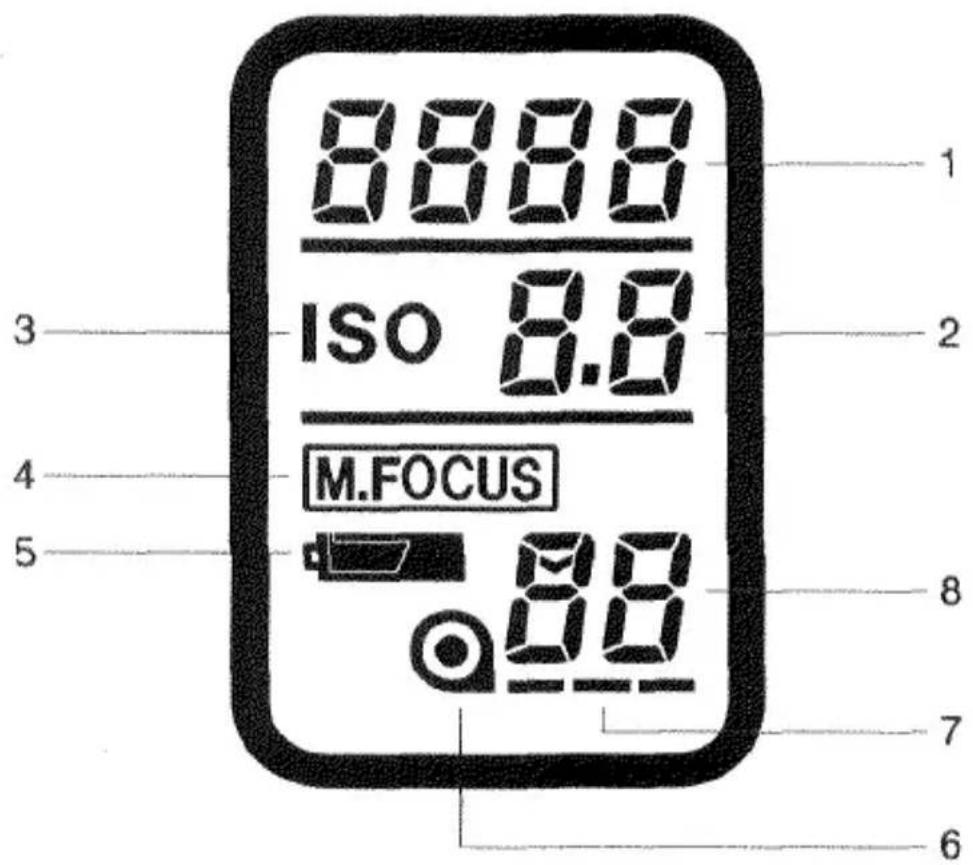
- Shutter-speed/film-speed display
- Aperture display
- Film-speed mark
-
Manual-focus indicator
-
Battery-condition indicator
- Film-cartridge mark
- Film-transport signals
- Frame counter
VIEWFINDER

- Spot focus area
- Wide focus area
- Spot-metering circle
- Flash-on indicator
- HSS indicator
-
Flash signals
-
Focus signals
- Shutter-speed/film-speed display
- AE-lock indicator
- Aperture display
- Metering index
Note: In this manual, glowing and blinking displays or indicators are identified as follows:

Glowing
Blinking
QUICK OPERATION
natural_image
Technical line drawing of a mechanical device with internal components and directional arrows (no text or symbols)1. Insert battery
Insert one 6V 2CR5 lithium battery into the chamber as indicated by the + and - marks inside the battery chamber cover.
natural_image
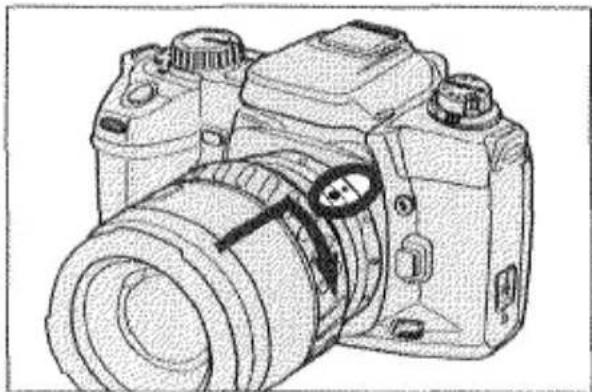
Line drawing of a DSLR camera with lens and control knobs (no text or symbols)2. Attach lens
Align the red mounting index on the lens with the one on the camera. Gently insert the lens into the mount and turn it clockwise until it clicks.
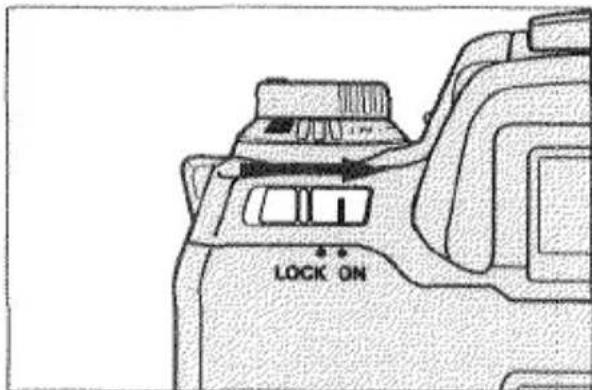
3. Turn on power
Slide the main switch to ON. Make sure the camera is set for full-automatic operation. See page 19.
natural_image
Technical line drawing of a DSLR camera showing internal components and casing (no text or symbols)4. Load film
Insert the film and extend the film tip to the red film-leader index. Make sure the film is laying flat between the guide rails and close the back cover.
natural_image
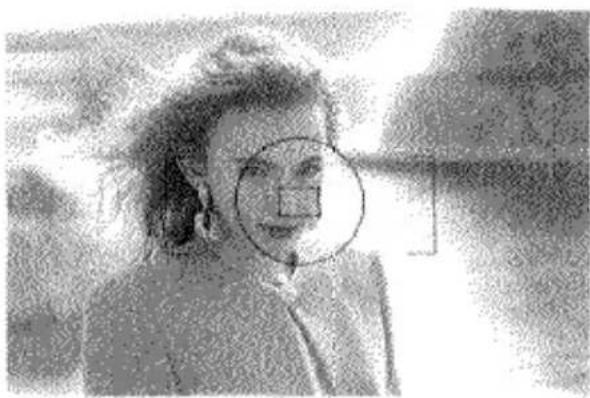
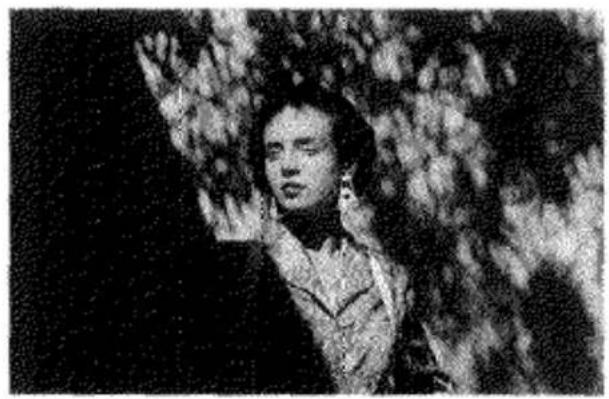
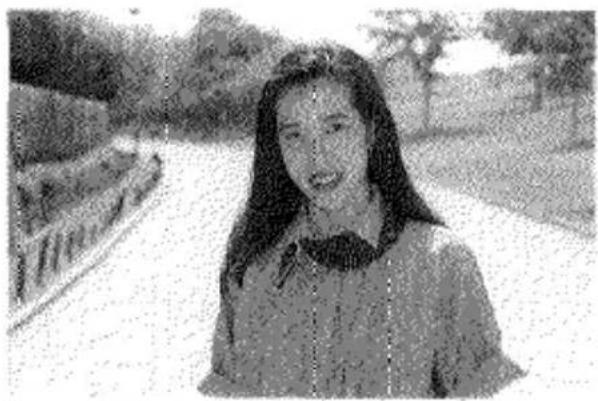
Black-and-white photo of a person wearing earrings and a jacket, with a circular overlay highlighting a specific area (no visible text or symbols)5. Focus on subject
Align your subject within the focus area and press the shutter-release button partway down to activate autofocus.
natural_image
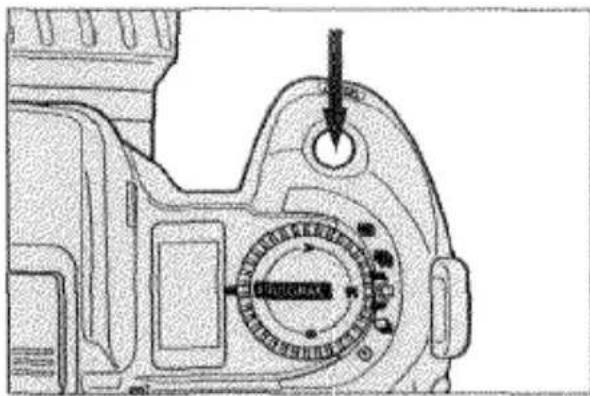
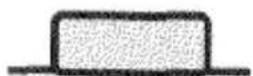
Technical line drawing of a mechanical component with a dial indicator and arrow (no readable text or symbols)6. Take the picture
Gently press the shutter-release button all the way down to take the picture.
BASIC
OPERATION
STANDARD ACCESSORIES
ATTACHING THE CAMERA STRAP
natural_image
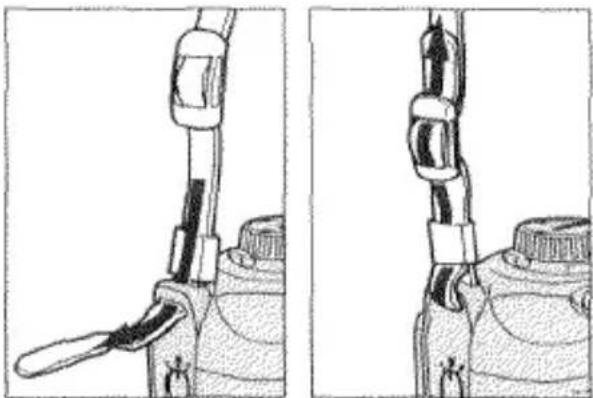
Technical line drawing of a mechanical device with two views (top and side), showing internal components without any text or symbols.- Undo the camera-strap buckle and loop the strap through the camera's strap eyelet.
- Redo the camera-strap buckle.
- Repeat for the other side.
ATTACHING THE EYEPIECE CUP

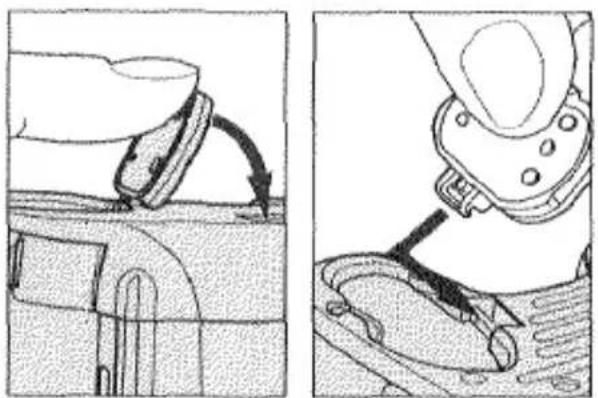
- Align the eyepiece cup with the guide rails on the camera's eyepiece.
- Push the eyepiece cup down until it clicks.
ATTACHING THE EYEPIECE CAP
When using the self-timer, bulb, or remote control, cover the eyepiece with the eyepiece cap which is attached to the camera's strap. This prevents stray light from entering the eyepiece and affecting the exposure.
natural_image
Diagram showing two car interior views with directional arrows indicating movement or force (no text or symbols present)- Remove the eyepiece cup.
- Slide the eyepiece cap down over the camera's eyepiece.
INSERTING THE BATTERY
Your camera uses one 6-volt 2CR5 lithium battery which supplies power for all camera operations. Please read and follow all warnings in the Care and Storage section of this manual as well as warnings supplied by the battery manufacturer.
natural_image
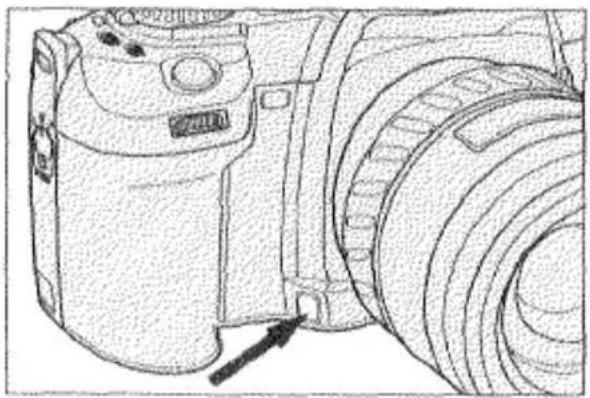
Technical line drawing of a mechanical component with no visible text or symbols- Open the battery chamber cover by pushing the battery-cover release in the direction of the arrow.

natural_image
Technical line drawing of a mechanical component with internal channels and arrows indicating motion (no text or symbols)- Insert the battery into the chamber as indicated by the + and - marks on the inside of the battery chamber cover and close the battery cover until it locks with a click.
natural_image
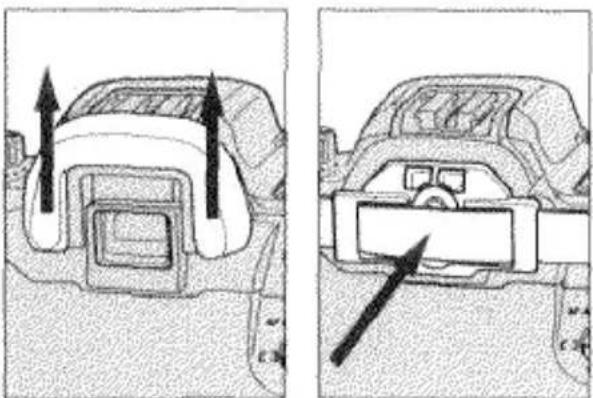
Technical illustration showing a mechanical component being inserted into a housing, with no visible text or symbols.To attach the Vertical Control Grip VC-600 to your camera, you first have to remove the battery and battery cover. Open the battery cover and gently push it in the same direction until it detaches.
To reattach the battery cover, align the battery-cover hinge with the rod in battery chamber and gently push until it snaps on.
CHECKING THE BATTERY POWER
Your camera automatically checks battery power each time you slide the main switch to ON. One of the symbols below will appear in the body data panel indicating the power status of the battery. We recommend that you always carry a spare battery in your camera bag.
 | Full-battery symbol — power is sufficient for all camera operations. |
 | Low-battery symbol — power is sufficient for all camera operations, but is getting low. Keep a new battery handy. |
 | Blinking low-battery symbol — power is extremely low, but all functions are operational. Flash recycling time may be slow. Battery will have to be replaced very soon. |
 | Blinking low-battery symbol appears alone and the shutter is locked — power is insufficient for camera operation. Replace the battery immediately. |
- If no data appears in the data panel, replace the battery or check that it is inserted correctly.
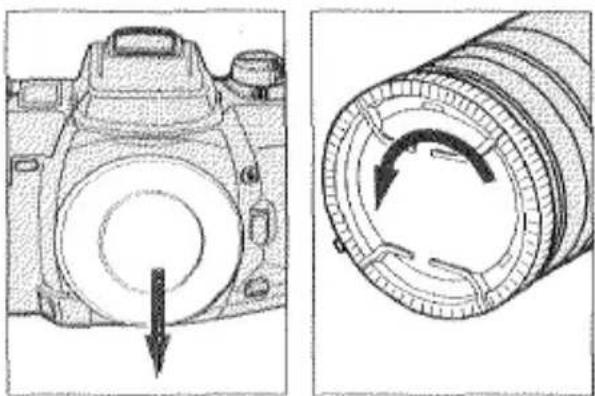
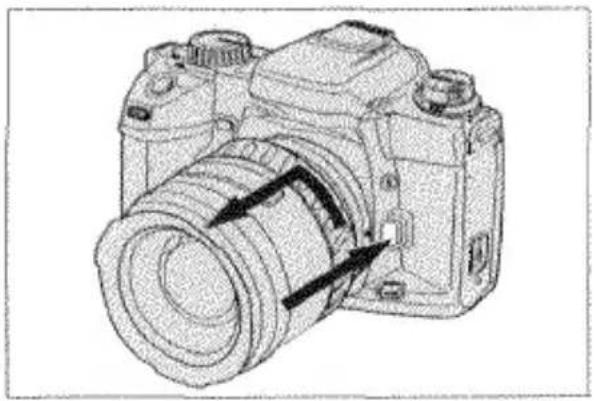
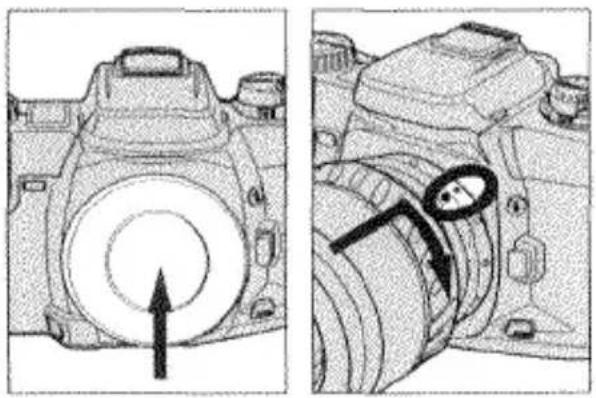
ATTACHING THE LENS
natural_image
Technical line drawing of a camera with a circular dial and arrow indicating rotation (no text or symbols)- Remove the camera body cap and rear lens cap as shown.
natural_image
Line drawing of a DSLR camera with lens and adjustment knobs (no text or symbols)- Align the red mounting index on the lens barrel with the one on the camera.
- Gently insert the lens into the mount and turn it clockwise until it clicks into the locked position.
CAUTION
- Do not force the lens if it does not turn smoothly.
- Do not touch the inside of the camera, especially the lens contacts and mirror.
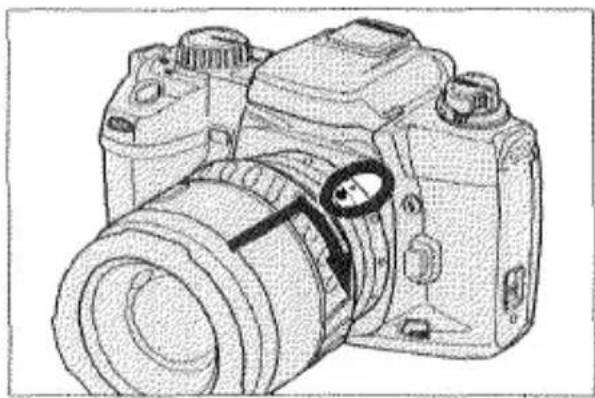
REMOVING THE LENS
natural_image
Line drawing of a DSLR camera with no visible text or symbols- Press the lens release and hold it while turning the lens counter-clockwise until it stops.
- Gently remove the lens from the mount.
natural_image
Technical line drawing of a DSLR camera showing front and side views with no text or symbols- Replace the camera body cap or immediately attach another lens.
LOADING THE FILM
This camera is equipped with an automatic film transport system which automatically loads the film and advances the film after each exposure.
Before you open the back cover, check the film window to make sure there is no film in the camera. Always load and unload the film in subdued light. We recommend that you use film between ISO 25 and 1000 for flash exposures.
natural_image
Technical line drawing of a mechanical component with no visible text or symbols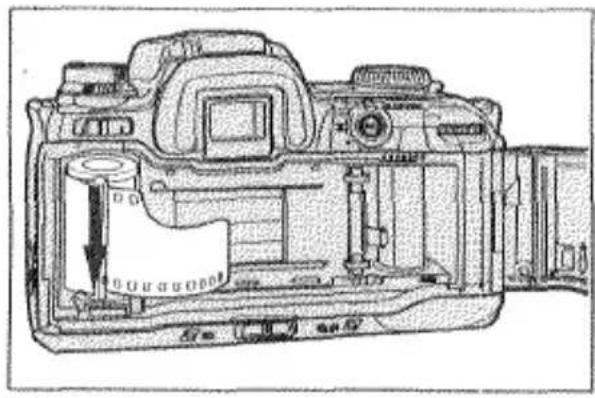
natural_image
Technical line drawing of a DSLR camera showing internal components and casing (no text or symbols)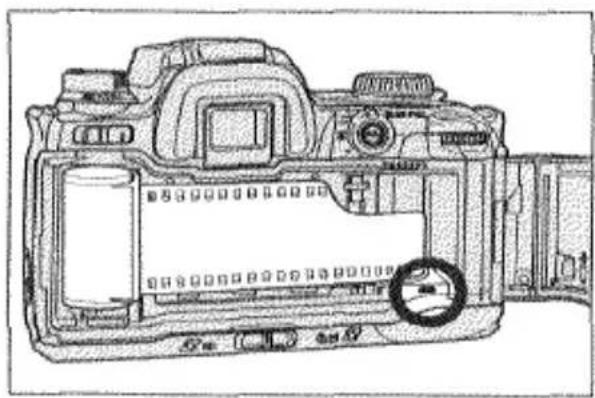
natural_image
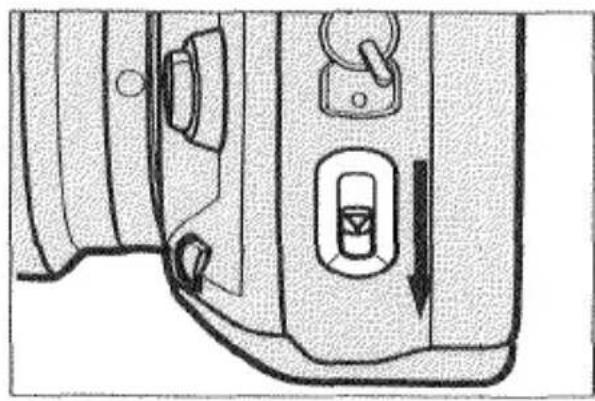
Technical line drawing of a DSLR camera showing internal components and casing (no text or symbols)- Slide the back-cover release down and open the back cover.
• The slight mechanical sound you hear is normal camera operation.
-
Place the film cartridge in the film chamber making sure that it is seated properly.
-
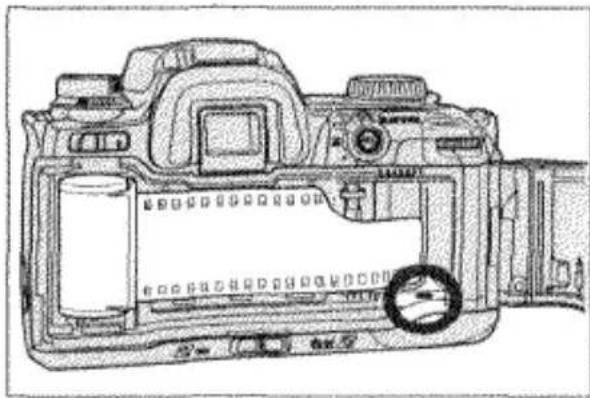
Extend the film tip to the red film-leader index making sure that it lays flat between the film guide rails.

natural_image
Two schematic diagrams of electronic components with labeled pins (6 and X), no readable text or symbols present.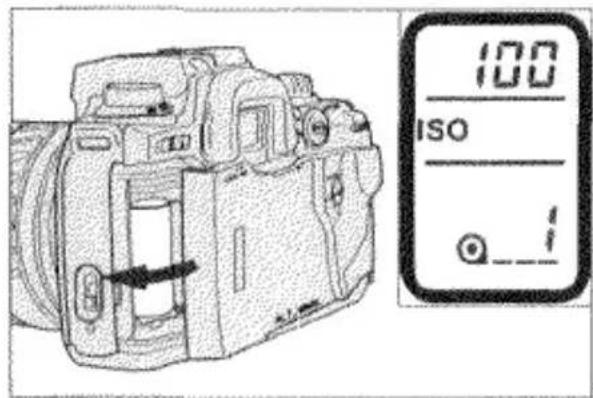
- Close the back cover and slide the main switch to ON.
The film will automatically advance to the first frame and 1 will appear in the frame counter..
If you are using DX-coded film, the camera will automatically set the correct film speed and display it in the body data panel.
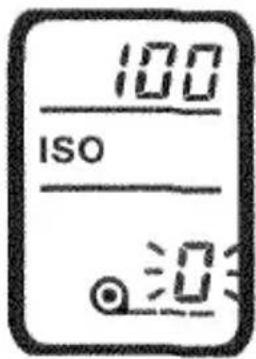
If the film has been loaded improperly, 0 will blink in the frame counter and the shutter will remain locked. Open the back cover and repeat the loading procedure.
natural_image
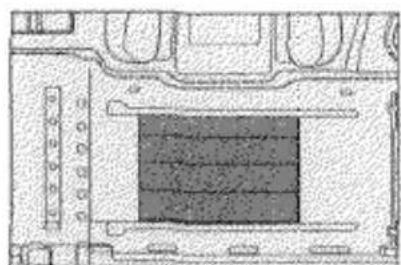
Architectural floor plan showing room layout and structural elements (no text or labels)NEVER TOUCH THE SHUTTER CURTAIN WITH YOUR FINGERS OR FILM TIP. Its precision design makes it extremely sensitive to pressure.
Note:
- Do not use Polaroid instant 35mm films. Winding problems may occur.
• Non-DX-coded film will be set to the previous ISO setting. - The camera will assume non-DX-coded film to be a 36 exposure roll.
Therefore, film rewind will begin automatically at the end of the roll or when the frame counter reaches 36.
REWINDING THE FILM
This camera will automatically rewind the film after the last frame has been exposed. If rewinding stops before the film has been completely rewound, DO NOT OPEN THE BACK COVER, insert a fresh battery and wait for rewinding
to finish.
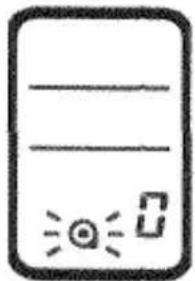
- 0 will appear in the frame counter and the film-cartridge mark will blink when the film is completely rewound.
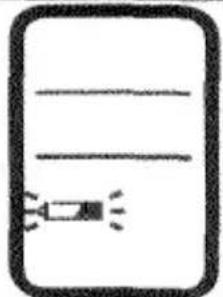
natural_image
Simple line drawing of a rectangular object with horizontal lines and a small icon, no text or symbols present.REMOVING THE FILM
natural_image
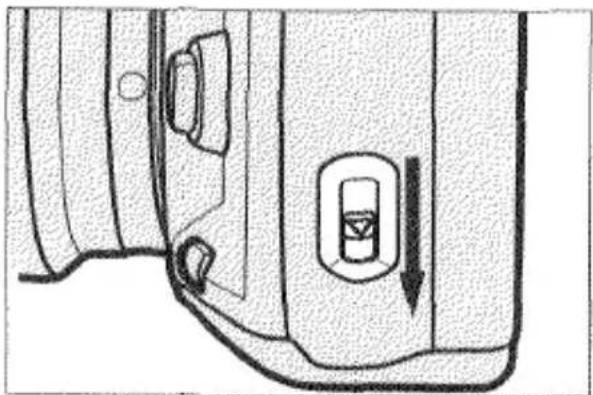
Technical line drawing of a door handle and vent, showing internal components and a downward arrow (no text or symbols)-
Wait for the film to rewind completely.
-
Open the back cover and remove the film.
MANUALLY STARTING FILM REWIND

-
Slide the main switch to ON.
-
Gently press the rewind button.
Rewinding the Film at High-Speed
You can rewind the film faster by pressing the rewind button during film rewind, but the rewind sound will be slightly louder.
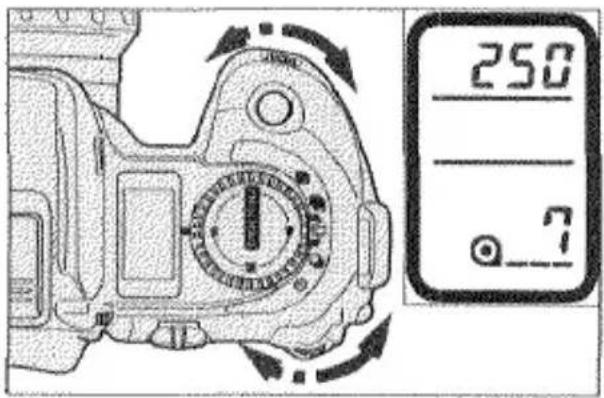
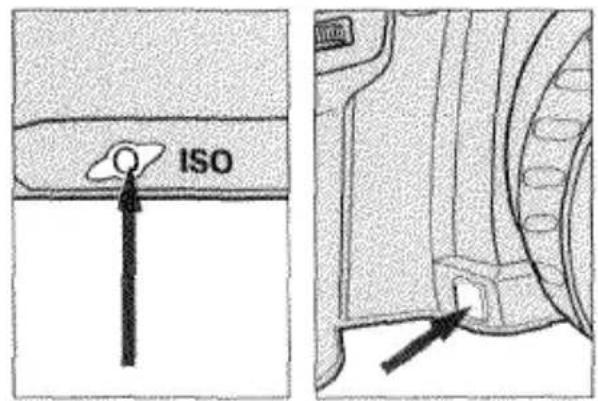
SETTING THE FILM SPEED MANUALLY
You can manually set the film speed when you are using non-DX-coded film or when you want to override the camera's automatic setting. Film speeds can be set manually from ISO 6 to 6400 in 1/3 EV increments.
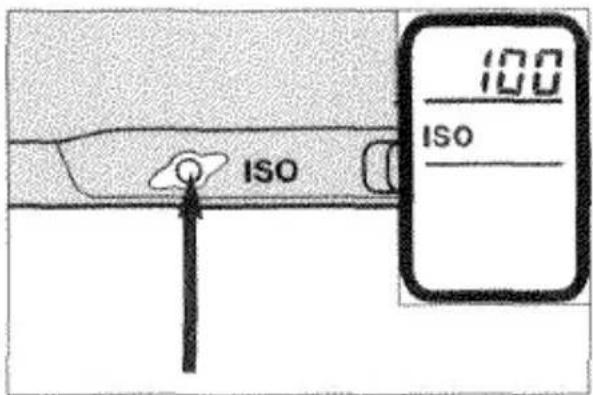
- Press the ISO button.
The film-speed setting appears in the body data panel.
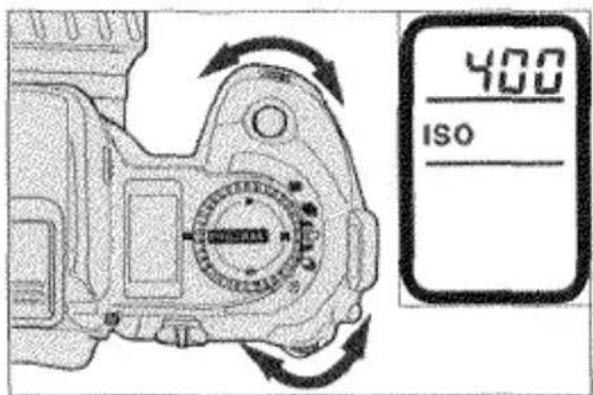
- Turn either control dial to set the desired film speed.
- Press the shutter-release button partway down to enter your selection.
CAMERA HANDLING
HOLDING THE CAMERA

natural_image
Illustration of a person taking a photo with a camera (no text or symbols)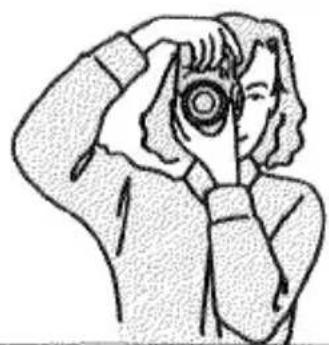
natural_image
Illustration of a person holding a camera lens, no text or symbols presentHold the camera grip firmly with your right hand while supporting the camera or lens with your left hand. Make sure that your fingers are not blocking any of the camera's features; they should fit securely around the grip. To help keep the camera steady, stand with your legs slightly apart and keep your elbows at your side for support.
*Always keep the camera strap around your neck or wrist in the event that you accidentally drop it.
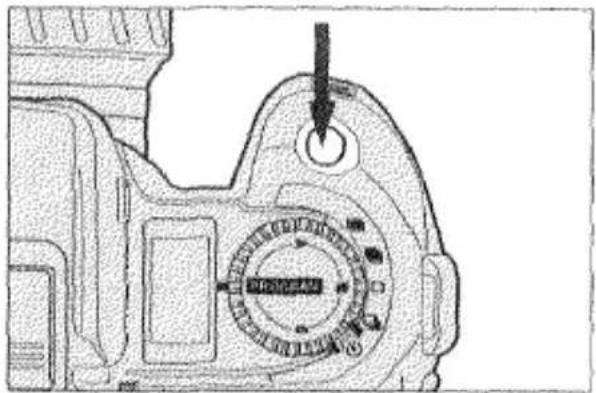
PRESSING THE SHUTTER-RELEASE BUTTON
The shutter-release button has three positions. To activate the camera's autofocus and autoexposure systems, press the shutter release button partway down. To take the picture, gently (never with a quick jab) press the shutter-release button all the way down.

natural_image
Simple line drawing of a hand pressing down on a rectangular block (no text or symbols)
natural_image
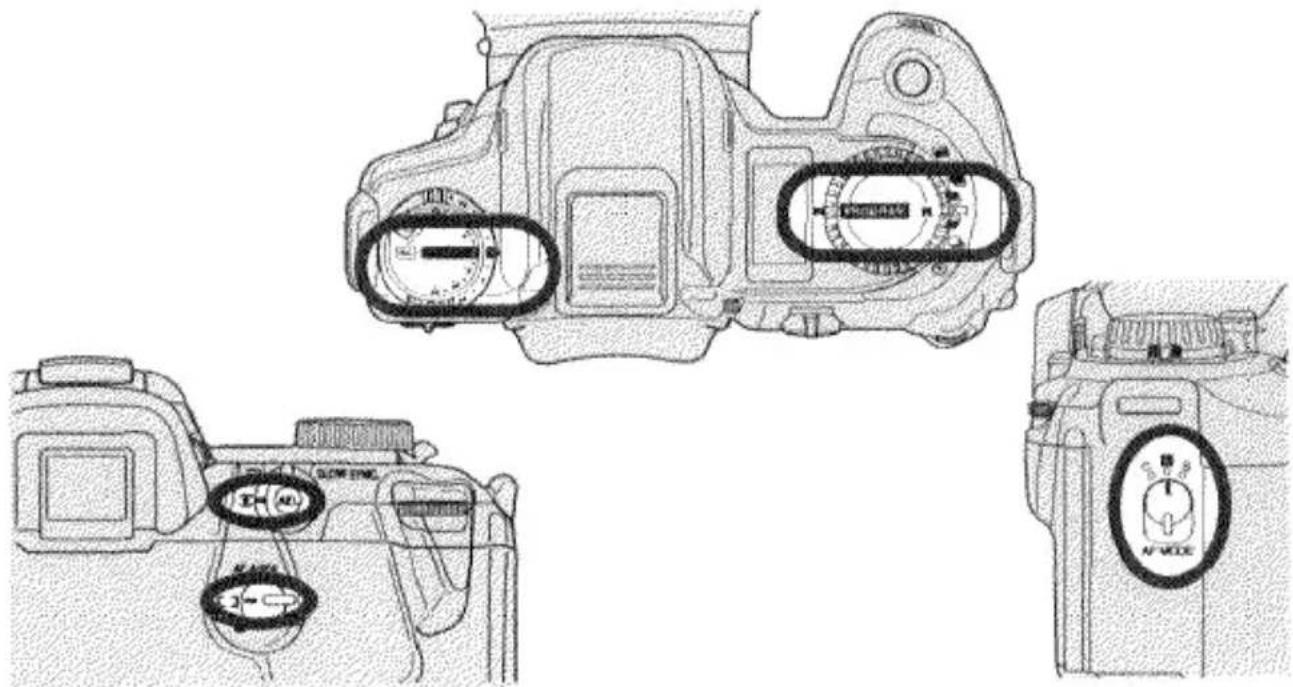
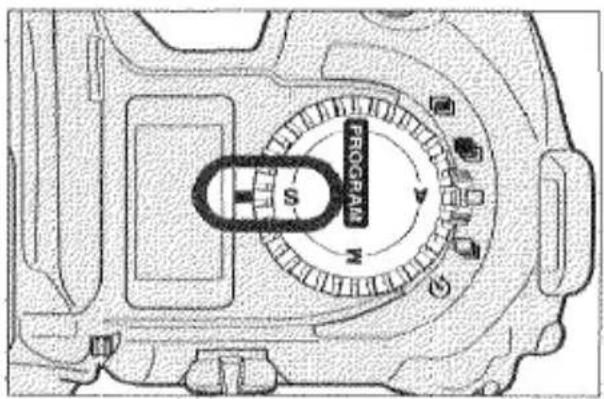
Simple line drawing of a hand pressing down on a block (no text or symbols)IN-LINE AUTO
In-Line Auto enables you to set the camera to full automatic operation. Position the controls on the top and side of the camera so that their indexes form a straight line. Position the controls on the back of the camera so that their indexes are aligned horizontally.
| FUNCTION | IN-LINE AUTO SETTING |
| Exposure Compensation | 0 |
| Flash Compensation | 0 |
| Exposure Mode | PROGRAM |
| Drive Mode | :Single-frame advance |
| AF Mode | A: Automatic AF-Mode Selection |
| Metering Mode | :14-Segment Honeycomb |
| AF Area | [ ] :Wide |
Note: For full-automatic operation, autofocus mode must be set. If M. Focus appears in the data panel, press the AF/M focus-mode button so that it disappears.
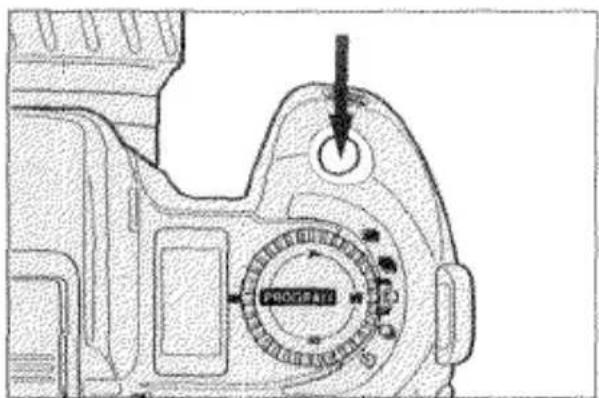
TAKING PICTURES IN FULL-AUTO MODE
natural_image
Technical line drawing of a mechanical component with no visible text or symbols- Set all camera functions to their automatic settings with In-Line Auto as described on the previous page and slide the main switch to ON.
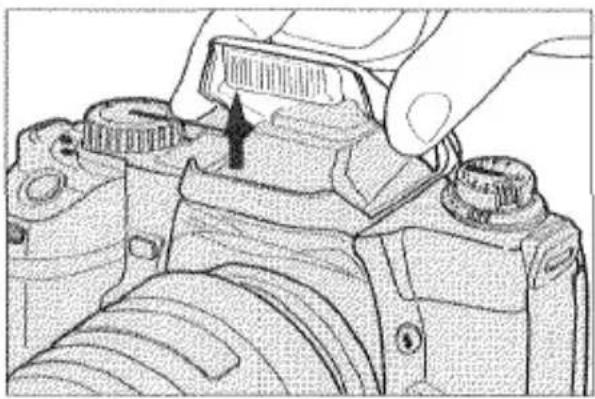
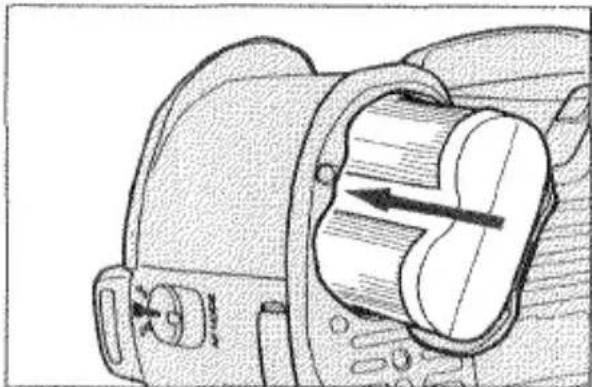
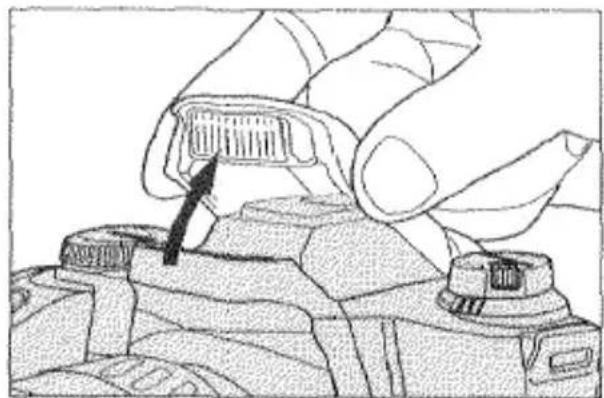
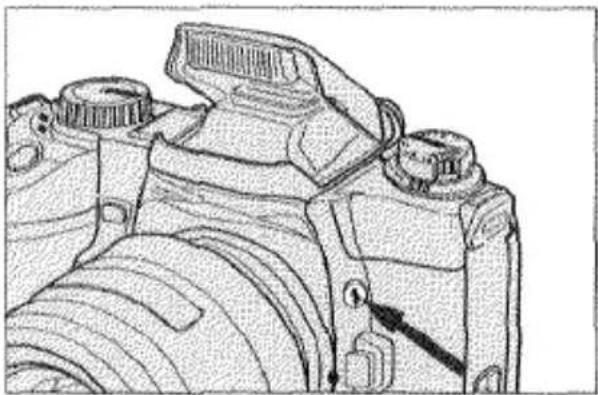
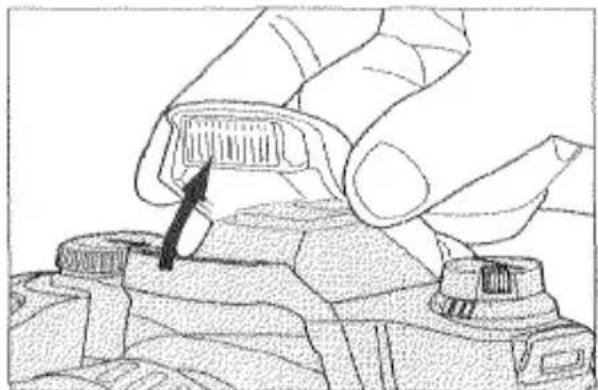
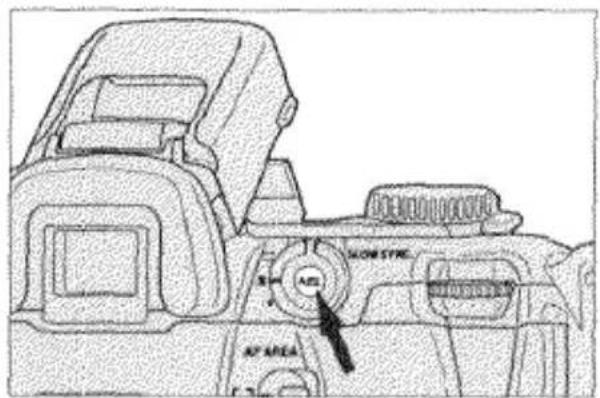
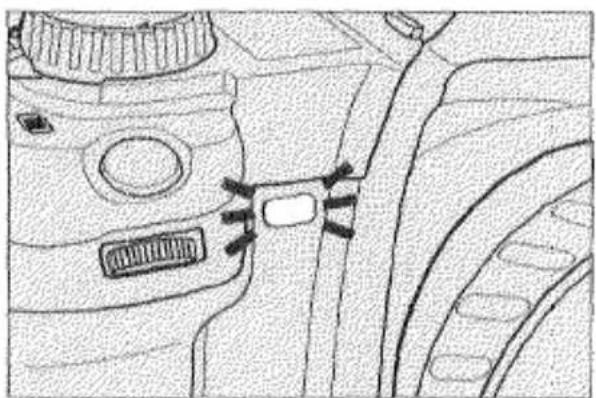
natural_image
Close-up of a hand adjusting a camera top component, showing mechanical parts and a black arrow indicating the adjustment (no text or symbols present)- Grip the built-in flash on both sides and gently lift. The flash will automatically fire when necessary.
- Make sure the flash-mode button is set to 4 or ⑥.
natural_image
Technical line drawing of a mechanical component with internal helical grooves and a central directional arrow (no text or symbols)- Rotate the zooming ring until your subject is framed as desired.
- If you are using an AF Zoom xi or AF Power Zoom lens, slide the lens' AZ/MZ switch to AZ.
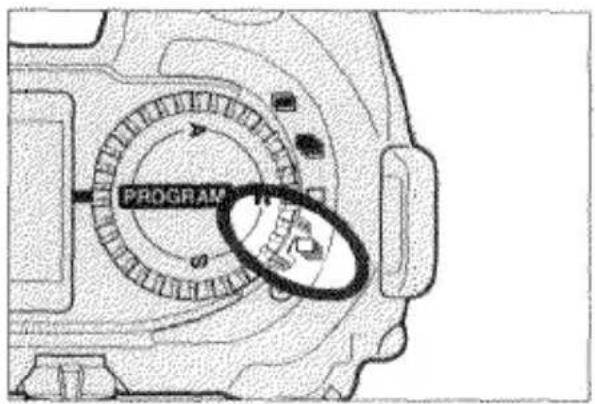
natural_image
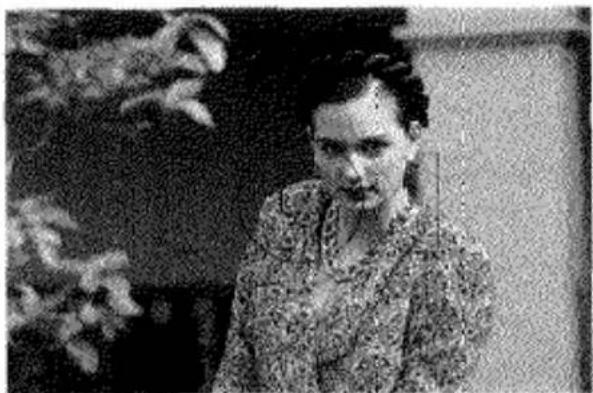
Black-and-white photo of a person in patterned clothing, seated outdoors with blurred foliage in the background (no visible text or symbols)- Align the subject within the focus area and press the shutter-release button partway down to activate autofocus.

- Gently press the shutter-release button all the way down to take the picture. The film automatically advances to the next frame and the frame counter increases by one.
FOCUS
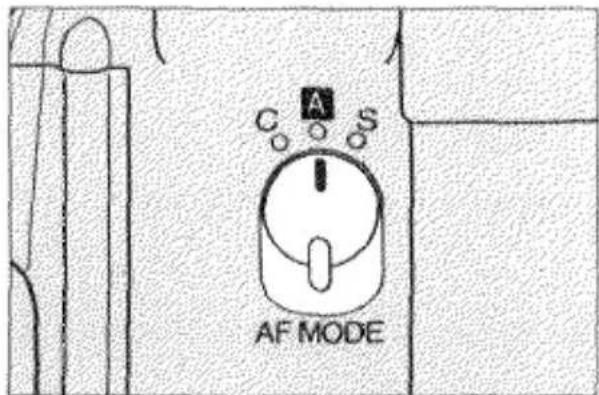
AUTOFOCUS MODES
This camera provides three autofocus modes: Automatic Autofocus-Mode Selection (A), Continuous Autofocus(C), and Single-Shot Autofocus (S).
AUTOMATIC AUTOFOCUS-MODE SELECTION (A)

natural_image
Black-and-white photo of an adult and a child sitting together, no visible text or symbolsWhen you activate autofocus by pressing the shutter-release button partway down, the camera will continue focusing when the subject is moving and lock focus when it is still. Automatic Autofocus-Mode Selection works well in any situation, but is especially useful for subjects which move and stop suddenly.
AUTOFOCUS MODES
CONTINUOUS AUTOFOCUS (C)
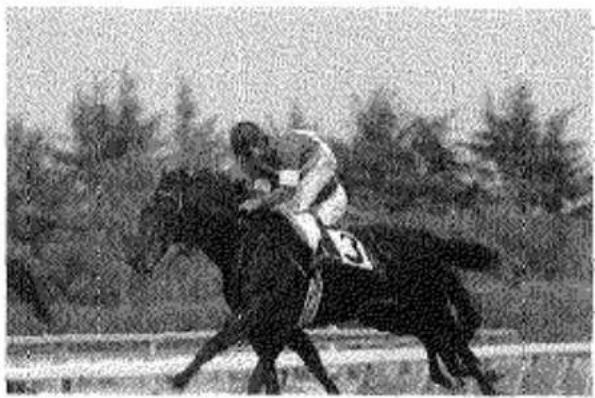
natural_image
Black-and-white photo of a person riding a horse in an outdoor race, with trees in the background (no visible text or symbols)The camera continues focusing as long as the shutter-release button is pressed partway down. The shutter-release button can be pressed all the way down to take the picture when the subject is in focus. Continuous Autofocus should be used when photographing sporting events or other occasions when you know the subject will be continuously moving.
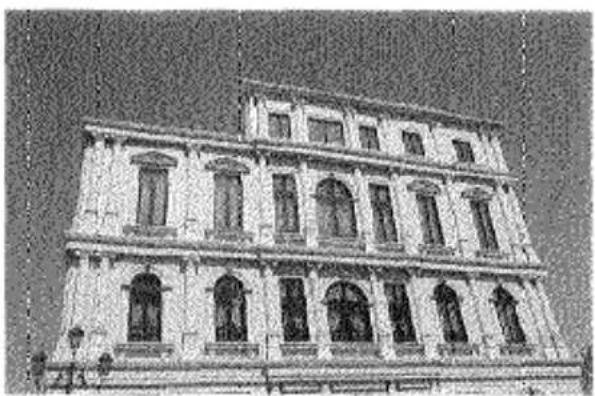
SINGLE-SHOT AUTOFOCUS (S)
natural_image
Exterior view of a historic building with symmetrical windows and arched doorways (no signage or text visible)When you press the shutter-release button partway down in Single-Shot Autofocus mode the camera focuses until sharp focus is confirmed and then locks focus. Focus will remain locked as long as the shutter-release button is held partway down and the picture can be taken at any time. Single-Shot Autofocus should be used when you know your subject will remain still or when photographing subjects outside the focus area. See the Focus Lock section on page 29 for more information on photographing subjects outside the focus area.
SELECTING THE AUTOFOCUS MODE
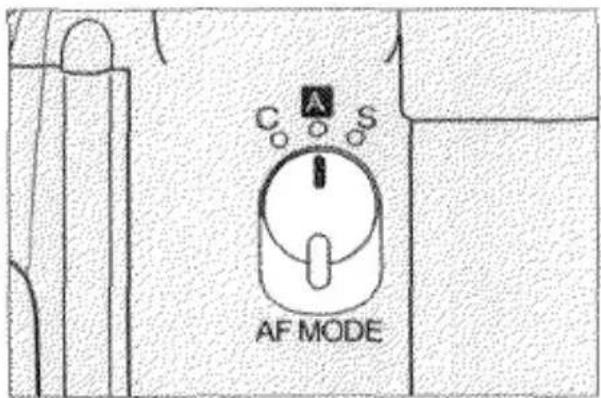
- Set the AF mode selector to A, C, or S.
• Make sure the camera is set to autofocus mode; if M.FOCUS appears in the data panel, press the AF/M focus-mode button so that it disappears.
AUTOFOCUS AREAS
This camera has a wide focus area and a spot focus area. You can select either one and the camera will focus within that area.
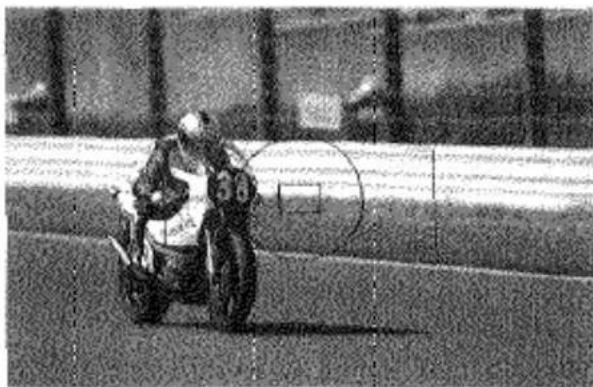
WIDE FOCUS AREA
natural_image
Black-and-white photo of a motorcyclist on a track, no visible text or symbolsThe camera uses all three of its autofocus sensors to focus. It can determine which sensor is focusing on the main subject even when there is more than one object within the focus area. Wide Focus Area provides flexibility in framing and makes it easier for the camera to focus on moving subjects.
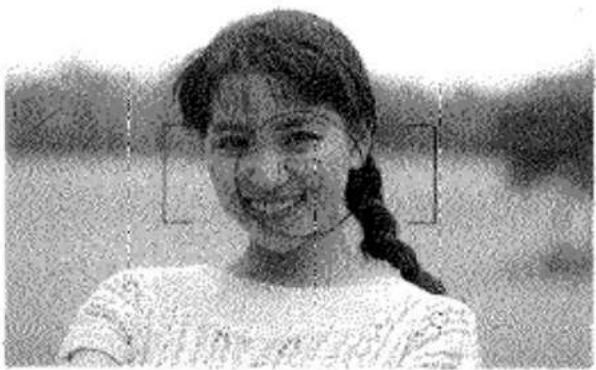
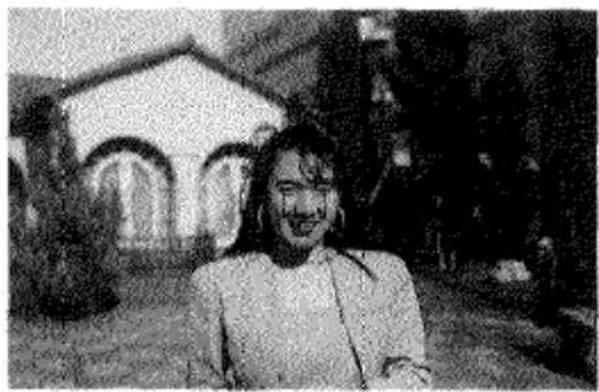
SPOT FOCUS AREA
natural_image
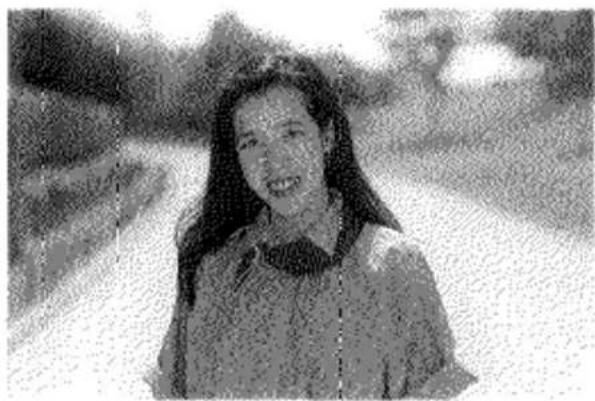
Black-and-white portrait of a smiling girl with braided hair, wearing a light-colored top (no text or symbols visible)The camera uses only the center autofocus sensor to focus. Spot Focus Area is useful when you want to ensure focus on a specific area of the scene or subject.
SELECTING THE AUTOFOCUS AREA
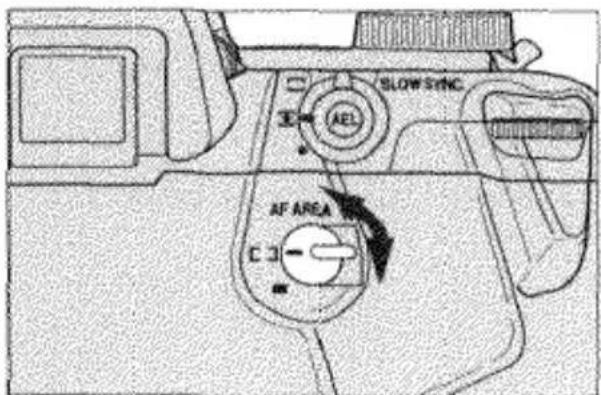
- Set the AF-area selector to either [ ] (Wide focus area) or (Spot focus area).
FOCUS SIGNALS
(●) 250 5.6
Continuous focusing; focus confirmed
250 5.6
Focus is confirmed and locked
( ) 125 8
Focusing in autofocus mode; shutter locked
500 4
Focus cannot be confirmed; shutter locked; subject too close or in one of the special focusing situations listed on page 31.
FOCUS LOCK
When your subject is located outside the focus area or in situations where autofocus is difficult to confirm, you can lock focus on your subject. If your subject is small or far away from the camera, we recommend that you select the Spot Focus Area (p.27).
- Set the AF-mode selector to A or S.
natural_image
Black-and-white photo of a person standing outdoors with a building in the background (no visible text or symbols)- Align your subject within the focus area.
- Press the shutter-release button partway down until the focus signal glows.

FOCUS LOCK
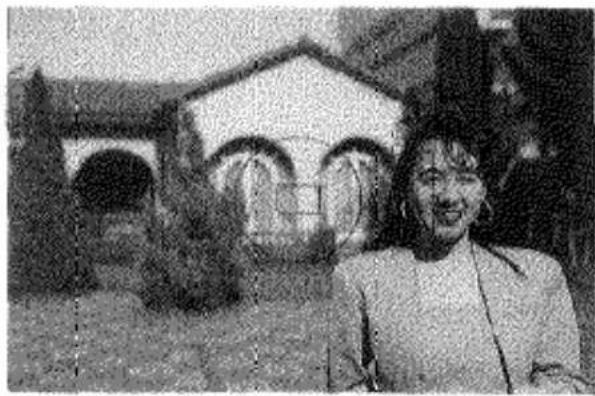
natural_image
Black-and-white photo of a person standing in front of a building with arched windows (no visible text or symbols)250 5.6
-
Continue to hold the shutter-release button partway down while you recompose the picture as desired.
-
Press the shutter-release button all the way down to take the picture.
-
Focus cannot be locked if the camera is in Continuous Autofocus Mode or if the subject is moving.
• To ensure proper exposure of your off-center subject, as well as sharp focus, exposure will also be locked when the shutter-release button is pressed partway down.
Alternate Focus Lock Methods:
• If you are using an AF Zoom xi or AF Power Zoom lens, you can lock focus by pulling the lens control ring towards you.
- If you are using a manual zoom lens which has a focus-hold button, you can lock focus by pressing the focus-hold button.
SPECIAL FOCUSING SITUATIONS
In the situations described below or similar situations, it may be difficult or impossible for the camera to focus accurately. In such situations, you should use focus lock (p.30) or manual focus (p.32).

natural_image
Cartoon illustration of two bears behind vertical bars, no text or symbols presentIf two subjects at different distances overlap within the focus area.
natural_image
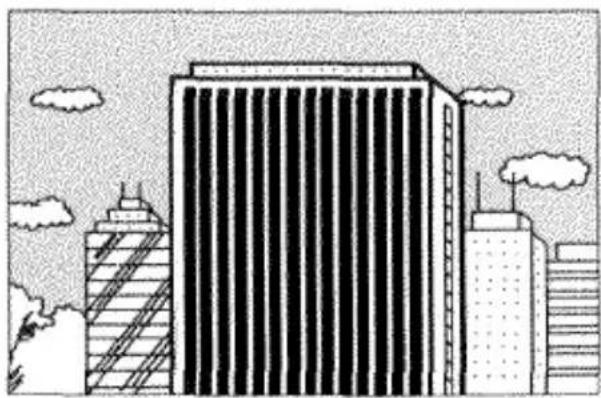
Illustration of a modern high-rise building with cloud-like clouds in the sky (no text or symbols)If a subject composed of alternately light and dark lines completely fills the focus area.
natural_image
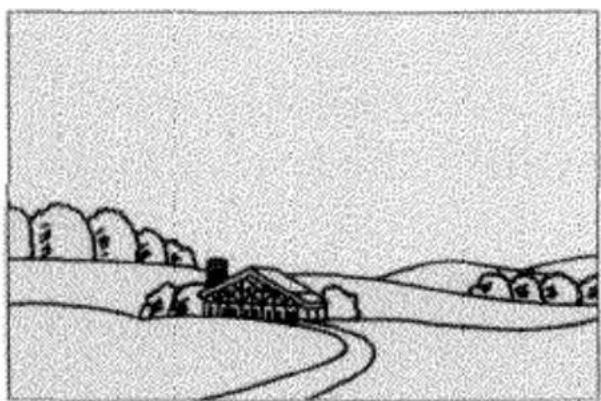
Simple line drawing of a rural landscape with houses, trees, and a winding road (no text or symbols)If the subject within the focus area is very bright or low-contrast.
MANUAL FOCUS
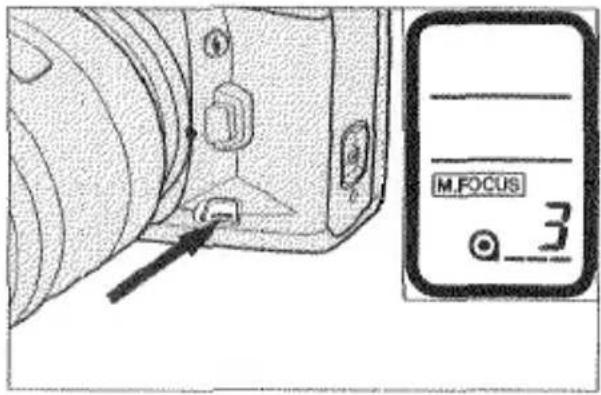
- Press the AF/M focus-mode button so that M.FOCUS appears in the body data panel.
natural_image
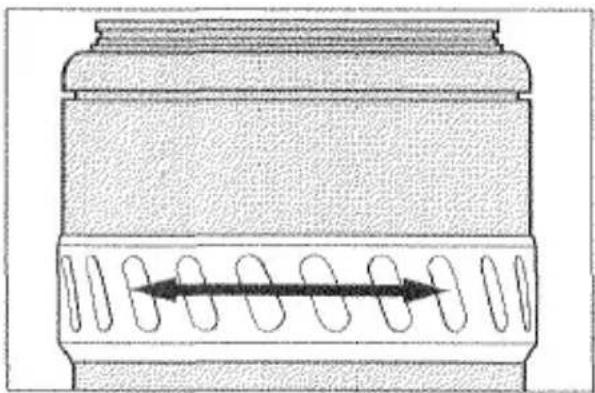
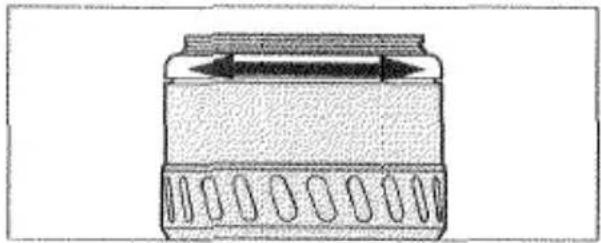
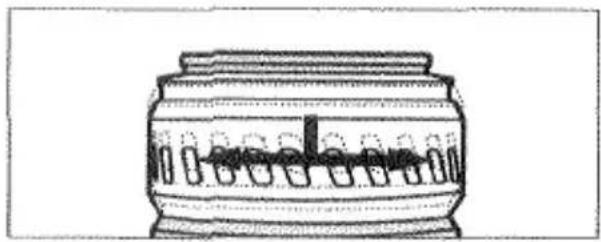
Simple line drawing of a container with internal components and an arrow indicating direction (no text or symbols)- Look through the viewfinder and turn the lens focusing ring until your subject appears clear and sharp.
natural_image
Line drawing of a cylindrical container with internal compartments and a central slot (no text or symbols)- If you are using an AF Zoom xi or AF Power Zoom lens, pull the control ring towards you and turn it either direction to focus.
.3. Confirm focus by pressing the shutter-release button partway down. The focus signal ● glows when the subject is in focus.
• The selected autofocus area will be used to monitor focus.
- Manual-focus mode will remain selected until you press the AF/M focus-mode button to return to autofocus mode.
- When manual-focus mode is selected, Honeycomb-Pattern Metering operates similar to center-weighted average metering. Therefore, the picture may not be exposed for your subject.
AUTOFOCUS ILLUMINATOR
If the subject or scene is too dark for the camera to focus accurately, lift the built-in flash. The flash will automatically fire a few short bursts before and after the lens focuses to provide the light necessary for the camera to detect and focus on a subject even in complete darkness.
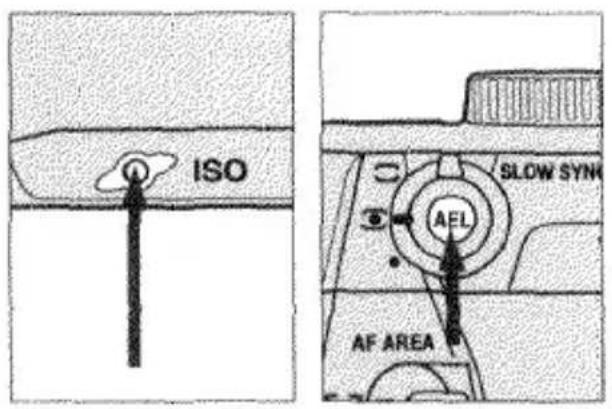
TO TURN THE AF ILLUMINATOR OFF:
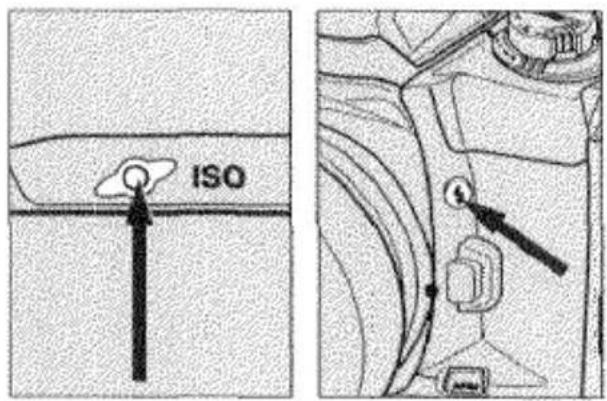
- Press and hold the ISO button.
- Then press the flash-control button.
"ON AL" appears in the data panel.
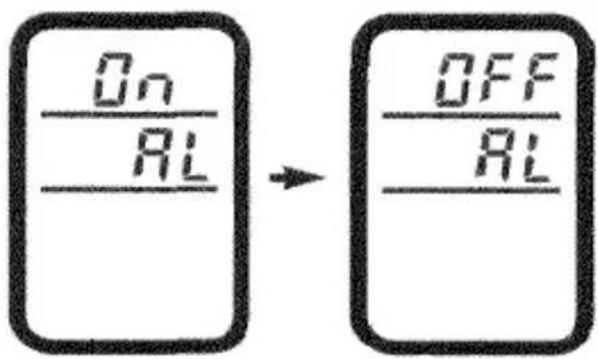
3: Press the ISO button once so that "OFF AL" appears.
-
Press the shutter-release button partway down to store the setting.
-
To turn the AF illuminator on again, repeat the procedure so that "ON AL" appears in the data panel.
•The autofocus illuminator will not operate when continuous autofocus mode is selected.
EXPOSURE
EXPOSURE MODES
This camera has four exposure modes: Program Autoexposure (PROGRAM), Aperture-Priority Autoexposure (A), Shutter-Speed-Priority Autoexposure (S), and Manual Exposure (M).
PROGRAMMED AUTOEXPOSURE (PROGRAM) MODE (P.37)
PROGRAM mode is ideal when you want to take pictures quickly in the simplest way possible.
APERTURE-PRIORITY (A) MODE (P.38)
In A mode, you select the aperture and the camera automatically sets the shutter speed required for proper exposure.
SHUTTER-SPEED-PRIORITY (S) MODE (P.40)
S mode lets you select the shutter speed and the camera automatically sets the aperture for the best exposure.
MANUAL (M) MODE (P.42)
In M mode, you have full control of exposure and the camera will show you how your settings relate to the camera's TTL meter.
EXPOSURE MODES
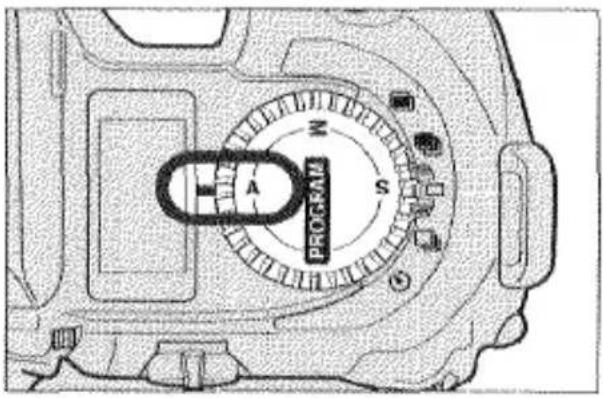
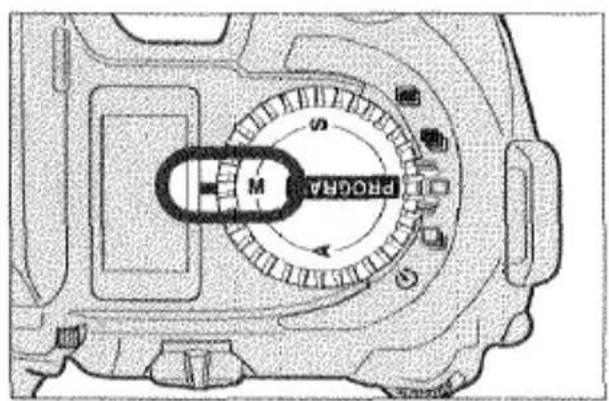
SELECTING THE EXPOSURE MODE
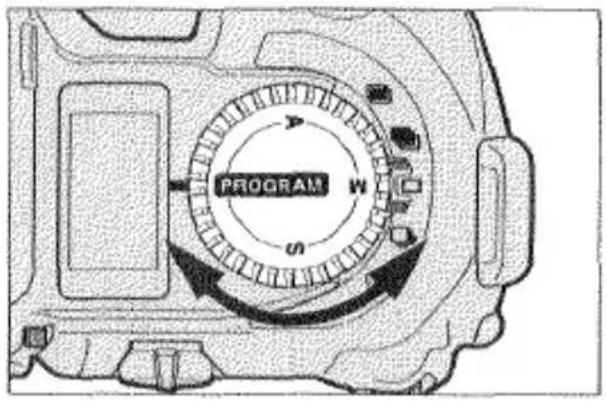
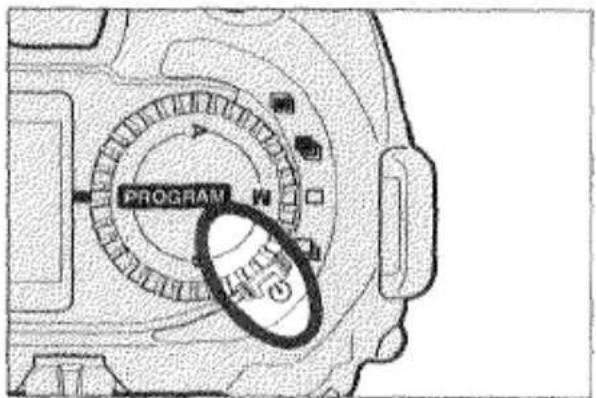
- Set the exposure-mode selector to PROGRAM, A, S, or M.
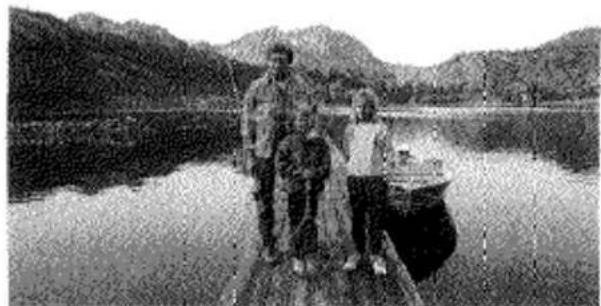
PROGRAMMED AUTOEXPOSURE MODE
natural_image
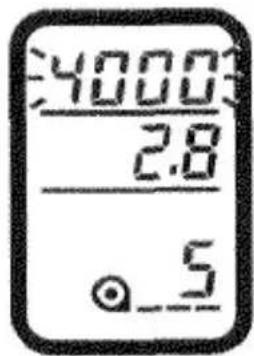
Black-and-white photo of three people standing on a wooden dock beside a lake with mountains in the background (no visible text or symbols)PROGRAM mode is ideal when you want to take pictures quickly in the simplest way possible. This mode is suited for almost any situation and is very reliable. Program mode features Expert Program Selection which automatically analyzes subject motion and magnification, as well as lens focal length and sets the shutter speed and aperture accordingly.
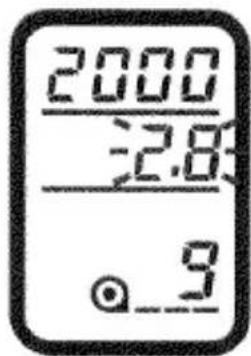
The following indicators may blink in the viewfinder. Refer to the Trouble Shooting section on page 86 for more information.
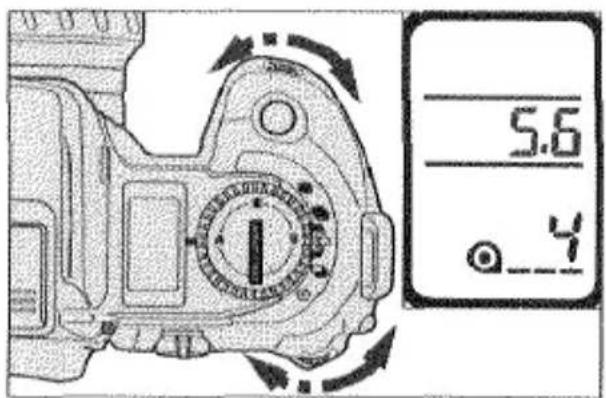
4000 2.8
Scene or subject brightness is beyond the camera's metering range.
(●)24000: 32:
If both exposure settings blink, the light level is beyond the range of available shutter speeds and apertures.
APERTURE-PRIORITY MODE

natural_image
Black-and-white photo of a smiling woman with long hair and earrings, outdoors with blurred background (no text or symbols visible)In A mode, you select the aperture and the camera automatically sets the shutter speed required for proper exposure. This mode should be used when you want to control the range of sharpness (i.e., depth of field) in a photograph. Large apertures (small numbers) provide a short depth of field which is ideal for portraits.
- Set the exposure-mode selector to A.
- Turn either control dial to select the aperture.
• → Larger aperture settings
• Smaller aperture settings
- Compose your photograph and take the picture.
The following indicators may blink in the viewfinder. Refer to the Trouble Shooting section on page 86 for more information.
(●)24000: 2.8
Overexposure; select a smaller aperture (larger number) until the display stops blinking.
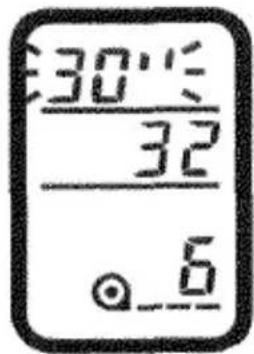
(●)30'': 32
Underexposure; select a larger aperture (smaller number) until the display stops blinking or use flash.

Scene or subject brightness is beyond the camera's metering range.
- Slow shutter speeds may not permit sharp hand-held pictures. Before taking the picture, confirm the shutter-speed setting. If it is slow, select a larger aperture (smaller number), place your camera on a tripod or use flash.
SHUTTER-PRIORITY MODE
natural_image
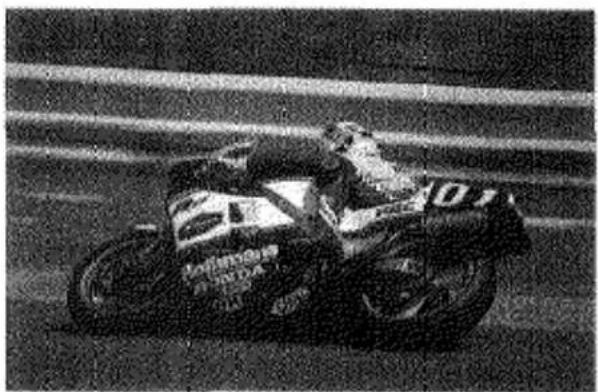
Black-and-white photo of a Honda motorcycle on a track, no visible text or symbolsS mode lets you select the shutter speed and the camera automatically sets the aperture for the best exposure. This mode is very useful for photographing moving subjects when you want to control subject blur. Faster shutter speeds can freeze the subject.
- Set the exposure-mode selector to S.
- Turn either control dial to select the shutter speed.
Faster shutter speeds
Slower shutter speeds
- Compose your photograph and take the picture.
The following indicators may blink in the viewfinder. Refer to the Trouble Shooting section on page 86 for more information.


Overexposure; select a faster shutter speed until the display stops blinking.

Underexposure; select a slower shutter speed until the display stops blinking or use flash.

Scene or subject brightness is beyond the camera's metering range.
MANUAL EXPOSURE
In M mode, you have full control of exposure. In this mode, the metering index appears in the viewfinder so you can see how your settings relate to the camera's TTL meter.
- Set the exposure-mode selector to M.
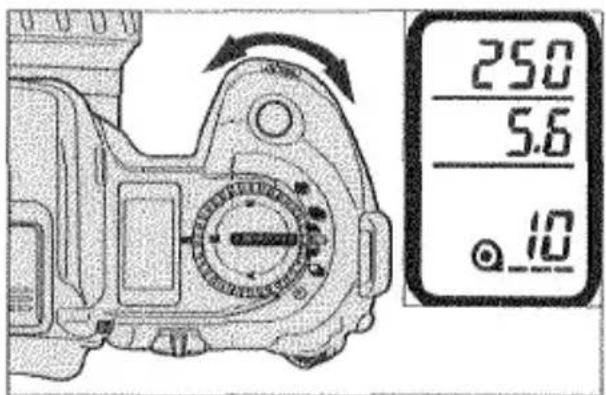
- Turn the front control dial to select the shutter speed.
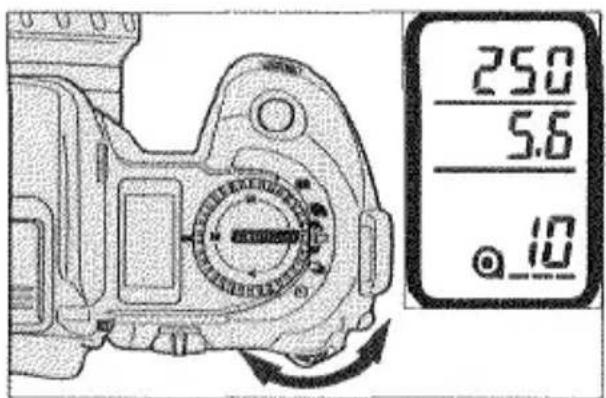
-
Turn the rear control dial to select the aperture.
-
Compose your photograph and take the picture.
In M mode, the metering index will appear to show you how the exposure value (EV) of your shutter speed and aperture compares to the exposure value determined by the camera's metering system.
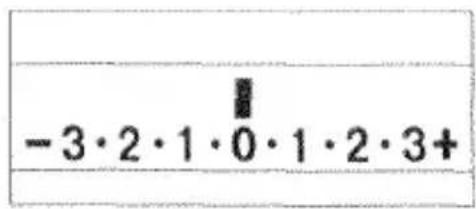
Correct exposure
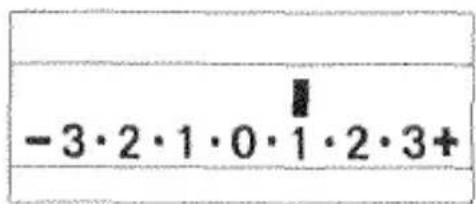
Overexposure by 1 EV
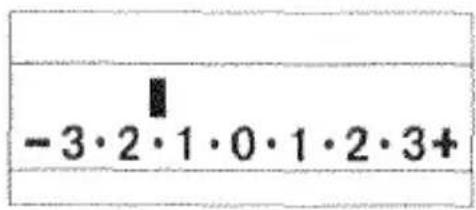
Underexposure by 1.5 EV
- If your exposure settings exceed the camera's suggested exposure value by more than ± 3 EV, one of the arrows on the metering index will blink.
BULB
Bulb can only be used in M mode. When set, the shutter will remain open as long as you press the shutter-release button. To avoid blurry pictures, mount the camera on a tripod and use the optional Remote Cord RC-1000 S or L to release the shutter.
- Set the exposure-mode selector to M.
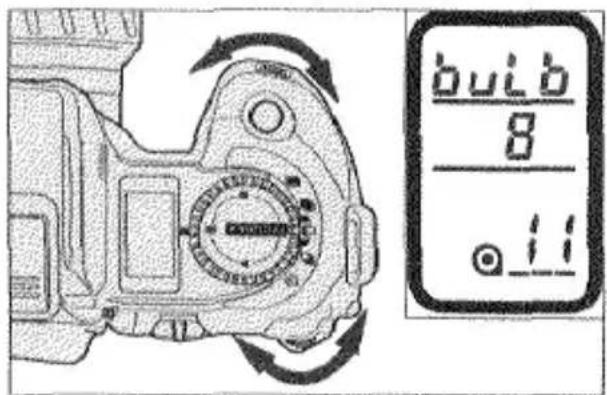
-
Turn the front control dial towards the slower shutter speeds to select bulb. Tum the rear control dial to set the aperture.
-
Press and hold the shutter-release button to take the picture. The shutter will remain open as long as you hold the shutter-release button down.
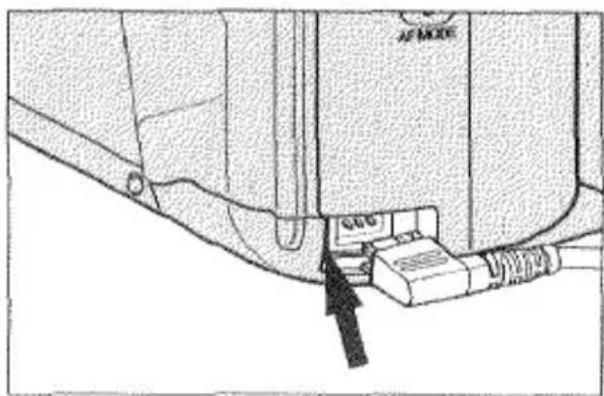
To Attach the Remote Cord:
- Remove the remote-control terminal cover.
- Then insert the remote cord's plug into the terminal.
• We recommend that you attach the eyepiece cap to prevent stray light from entering the eyepiece and affecting exposure (See page 9).
METERING MODES
This camera offers three metering methods: Fourteen-Segment Honeycomb-Pattern Metering, Center-Weighted Average Metering, and Spot Metering.
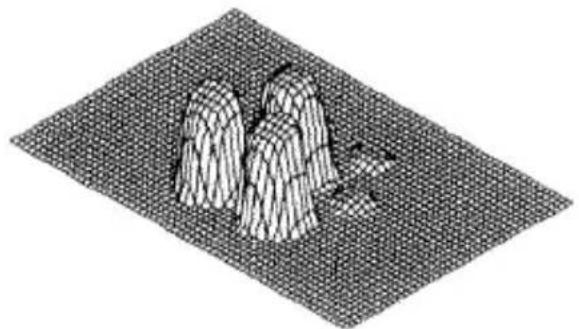
14-SEGMENT HONEYCOMB-PATTERN METERING


natural_image
Black-and-white photo of a person outdoors, wearing a jacket and earphones (no visible text or symbols)This metering mode is ideally suited for almost any lighting situation providing the correct exposure for the main subject. The camera uses information from the autofocus system to set the metering pattern according to the position of the main subject in the viewfinder. Each segment is then evaluated independently to determine the degree of back-lighting or spot-lighting.
natural_image
3D wireframe model of three mountain-like structures on a grid-patterned surface (no text or symbols)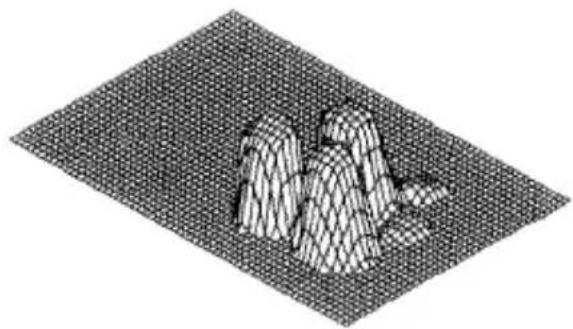
natural_image
3D wireframe model of a mountainous terrain on a grid-patterned surface (no text or symbols)METERING MODES
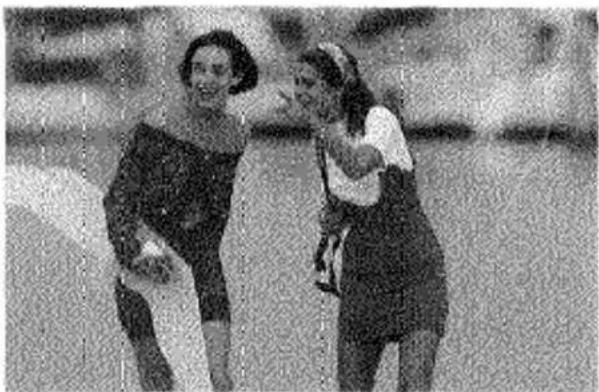
CENTER-WEIGHTED AVERAGE METERING
In this metering mode, the camera sets the exposure based on an average of the readings made by each segment with an emphasis on the center segments. When photographing subjects that are back-lit, spot-lit, or outside the focus area, you should use exposure compensation (p. 48) or AE lock (p. 49) if you want the main subject to be correctly exposed. Use this mode when you want to base the exposure on a centrally located subject.
natural_image
Two people in motion, one holding a child, standing together (no visible text or symbols)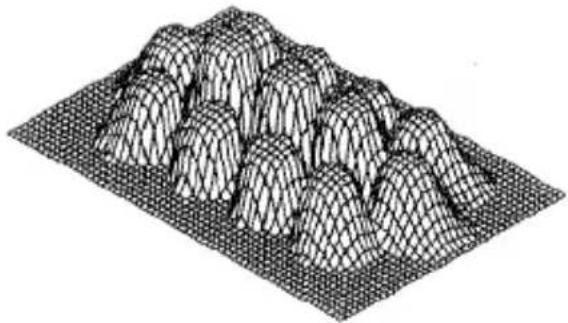
natural_image
3D wireframe model of a mountainous terrain with layered peaks (no text or symbols)SPOT METERING •
Spot metering should be used when you want to meter a very small section of the scene. The camera sets the exposure according the brightness of the area inside the 5.5mm-diameter spot circle in the center of the viewfinder.
natural_image
Black-and-white photo of a person gesturing with one hand raised, surrounded by foliage (no visible text or symbols)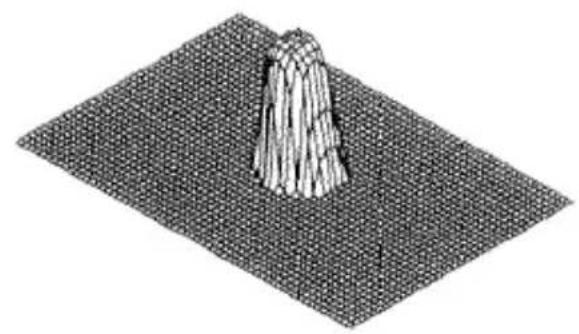
natural_image
3D rendered geometric structure resembling a conical pyramid on a grid plane (no text or symbols)SELECTING THE METERING MODE

- Set the metering-mode selector to ☐, □, or ●.
EXPOSURE COMPENSATION
This function enables you to compensate exposure up to ± 3 EV in 1/2 EV increments in situations where the camera's metering system may not be able to determine accurate exposure. Increased exposure is recommended for scenes which are very bright, such as snow or beach scenes; similarly decreased exposure is recommended when the scene is composed of mostly darker tones like a shadow scene.
natural_image
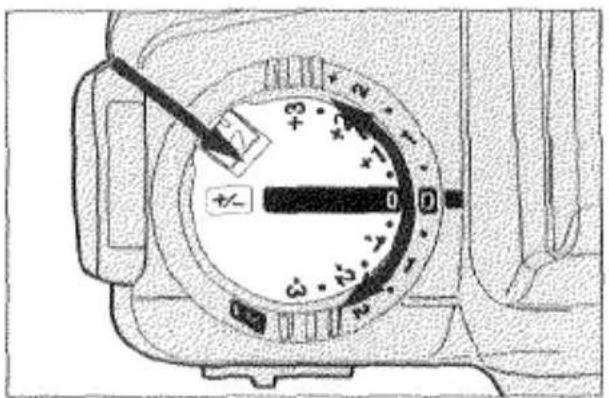
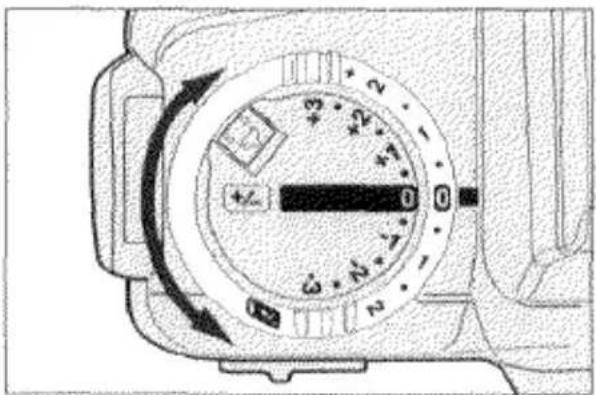
Close-up of a mechanical dial with a pointer and scale markings (no readable text or symbols)While pressing the lock release, rotate the exposure-compensation dial to set the compensation value. It can be set in increments of 0.5 EV from -3 EV to +3 EV.
• To cancel exposure compensation, set the dial to ±0.0.
- You can add a pointer to the metering index to indicate the amount of compensation. See page 81 for instructions.
AE LOCK
This control is used in Program, A, or S autoexposure modes to lock the exposure settings in any metering pattern. AE lock can be used, for example, when center-weighted average metering is selected and the main subject is not in the center of the viewfinder or when the subject is back-lit or spot-lit. It is also useful with spot metering when you want to set the exposure according to a small section of the scene/subject inside the viewfinder.

natural_image
Black-and-white photo of a man and a woman smiling, with ornate metal window background (no text or symbols)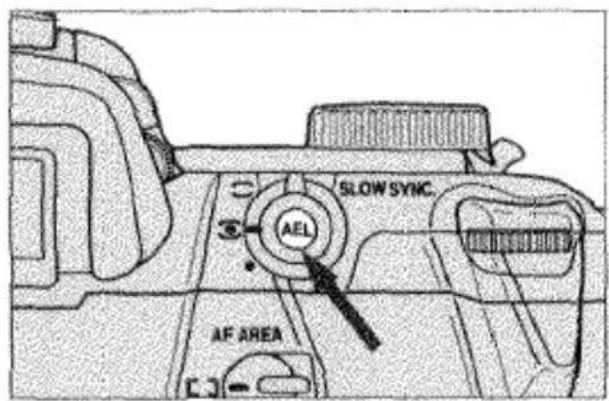
250 AEL 5.6 -3.2.1.0.1.2.3+
-
Center your subject inside the viewfinder.
-
Press the AE-lock button. While the exposure is locked, "AEL" appears in the viewfinder.
- The metering index appears when the AE-lock button is pressed to show the difference between the locked exposure value (0) and the exposure value of the area inside the spot circle (pointer). See page 80 for details.
AE LOCK

natural_image
Black-and-white photo of two women in a formal setting with ornate metal railing (no visible text or symbols)250 AEL 5.6 -3·2·1·0·1·2·3+
- Continue to hold the AE-lock button down while you recompose the picture.
- The pointer on the metering index will move to show the difference between the exposure value of the area now inside the spot circle (pointer) and the locked exposure value (0).
- Press the shutter-release button all the way down to take the picture.
- If the flash-on indicator appears in the viewfinder, slow-shutter sync will operate. See page 64.
ALTERNATE AE LOCK METHOD
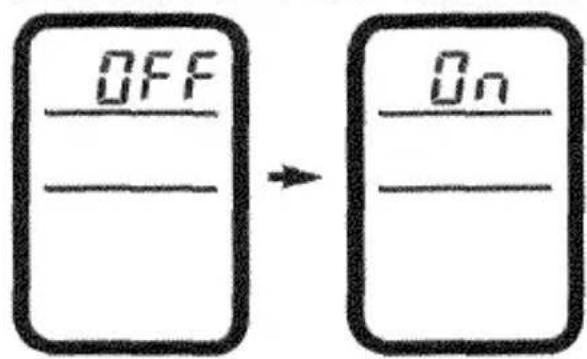
You can change the function of the AE-lock button so that the exposure is locked and held by pressing the button once and unlocked by pressing it again.
- Press and hold the ISO button.
- Then press the AE-lock button. "OFF" appears in the body data panel.
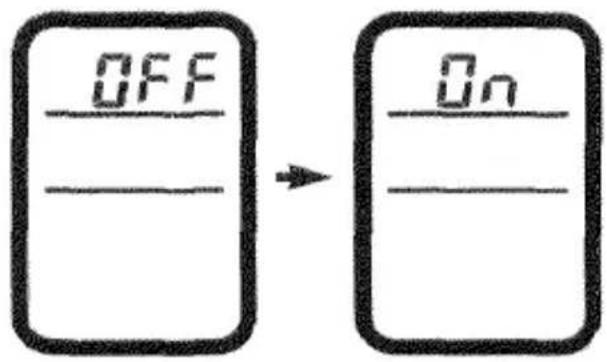
- Press the ISO button once so that "ON" appears.
-
Press the shutter-release button partway down to enter your selection.
-
To return to the standard AE lock method, repeat the procedure so that "OFF" appears.
- AE lock is cancelled if the metering mode is changed.
MULTIPLE EXPOSURE
In multiple-exposure mode, up to nine exposures can be overlapped on the same frame.
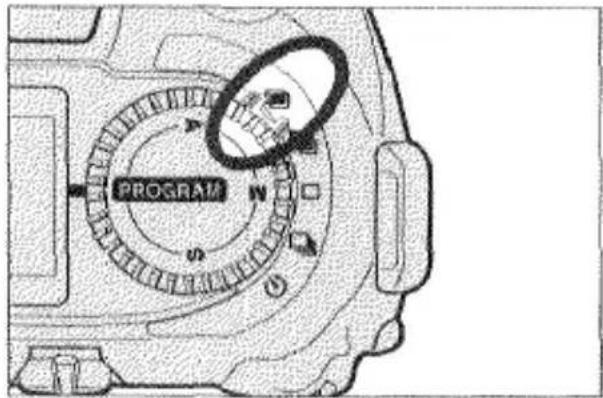
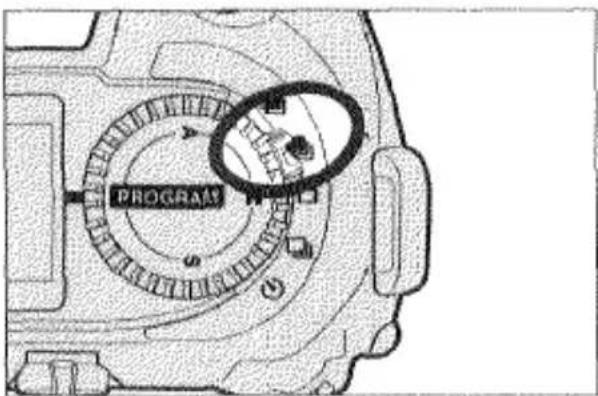
- Set the drive-mode selector to 📄. • This position is only for setting multiple-exposure mode and the shutter is locked.
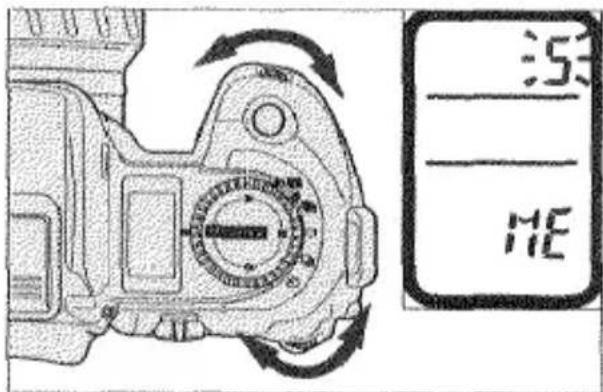
- Turn either control dial to select the number of exposures.
• The number appears in the body data panel.
natural_image
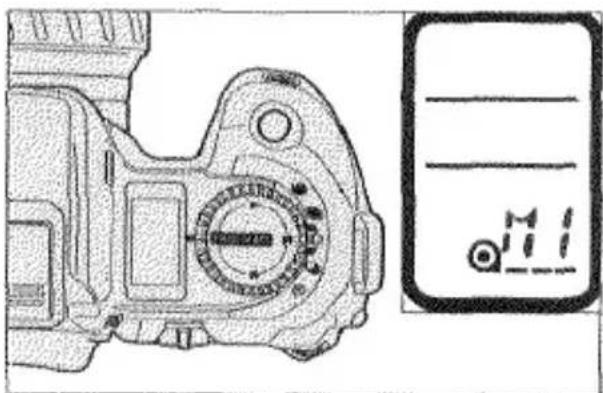
Technical line drawing of a mechanical component with no visible text or symbols- Move the drive-mode selector to □, □, ⏻.
• M1 will appear in the frame counter to indicate the camera is ready to take the first exposure of the series.

- Compose your picture and press the shutter-release button all the way down to take the picture.
- The frame counter changes to M2 and will continue to increase until after the last picture is taken.
- Repeat step 4 until all the exposures are made. After the last exposure, the film will automatically advance to the next frame and the regular frame counter will resume.
- Multiple-exposure mode is canceled after all the exposures are made.
TO CANCEL BEFORE ALL EXPOSURES ARE MADE:
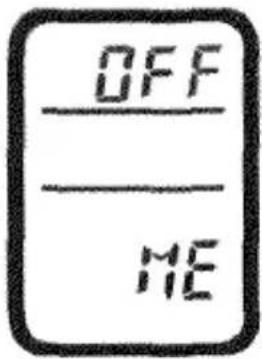
- Set the drive-mode selector to 📄.
- Turn either control dial until "OFF" appears in the body data panel.
- Set the drive-mode selector to □, □, ⏻.
- The film will automatically advance to the next frame and the regular frame counter will resume.
Note:
- If the battery is removed before all exposures are made, multiple-exposure mode will be canceled, but the film will not advance.
EXPOSURE BRACKETING
Exposure bracketing allows you to expose a series of 3 frames with 0.5 EV change between exposures in the order of normal, under, over. The camera brackets the exposure by adjusting shutter speed and/or aperture settings. If flash is used, the camera will bracket flash output rather than exposure settings (see page 66).
-
Set the drive-mode selector to 📄.
-
Press and hold the shutter-release button down until all three frames have been exposed. The series will be canceled if you lift your finger from the button before all three exposures are made.
FLASH
USING THE BUILT-IN FLASH
The built-in flash provides coverage for lens focal lengths as short as 28mm. The flash output is controlled automatically by the camera's TTL (through-the-lens) flash metering system.
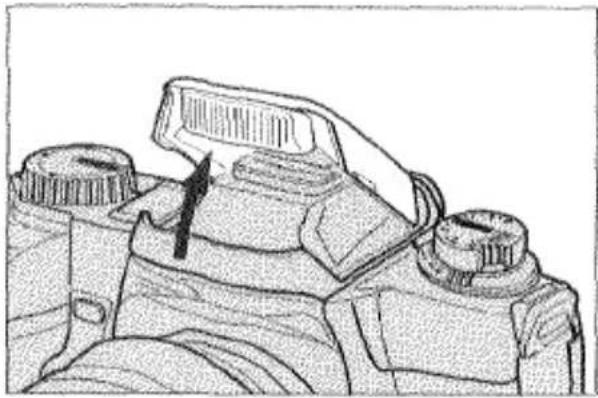
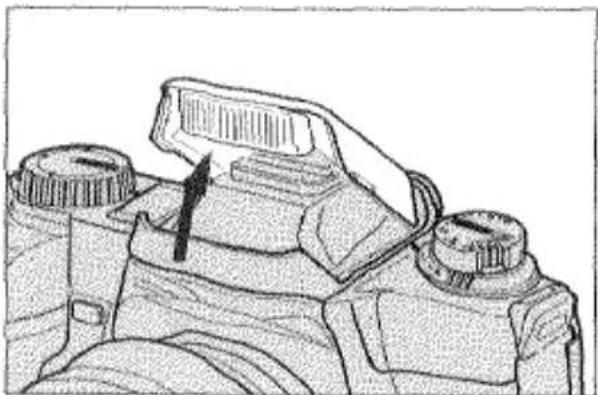
natural_image
Illustration of a hand inserting a component into a camera lens (no text or symbols visible)- Grip both sides of the flash and gently lift it. If the flash will fire with the next shutter release, ☐ appears in the viewfinder.
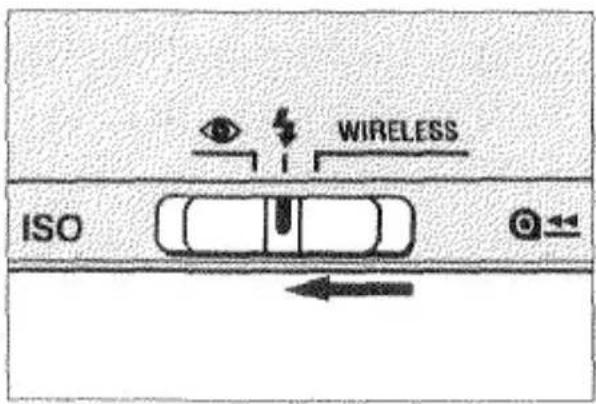
-
Set the flash-mode selector to ↓ or Ⓞ.
-
When the flash is fully charged, will appear. Press the shutter-release button all the way down to take the picture.

- After you have finished using flash, push it back down.
RED-EYE REDUCTION
When photographing people or animals at night or in low-light situations, the effect called "red-eye" may occur due to the flash reflecting off the inside of the subject's eyes. To reduce this effect and produce more natural and beautiful pictures, use red-eye reduction.

Set the flash-mode selector to Ⓞ.
Wam the person you are photographing that the flash will fire several short flash bursts just before the picture is taken.
BUILT-IN FLASH PRECAUTIONS
FLASH RANGE
The range of the built-in flash depends on the film speed and aperture setting you are using. To ensure proper exposure, make sure your subject is positioned within the range listed below.
| Aperture | ISO 100 | ISO 400 |
| f/2.8 | 1 - 4.2m (3.3 - 13.8 ft.) | 1 - 8.4m (3.3 - 27.5 ft.) |
| f/4 | 1 - 3m (3.3 - 10 ft.) | 1 - 6m (3.3 - 20 ft.) |
| f/5.6 | 1 - 2.1m (3.3 - 6.9 ft.) | 1 - 4.2m (3.3 - 13.8 ft.) |
If you want to take flash photographs closer than 1m (3.3 ft.) we recommend that you use Minolta's Close-Up Diffuser CD-1000. Otherwise lens shadowing may occur in the bottom of your picture. This accessory provides softer lighting for more pleasing close-up photographs.
CAUTION: LENS SHADOWING MAY OCCUR
Shadowing may occur in the bottom of your picture if you use the built-in flash with the lenses listed below. Contact your nearest Minolta Service Facility for their conditions of use. When using the built-in flash, never use a lens wider than 28mm or use a lens hood.
AF 28-85mm f/3.5-4.5
AF 28-135mm f/4/4.5
AF 28-70mm f/2.8 G
The built-in flash cannot be used with the following lenses:
AF 300mm f/2.8 APO
AF 600mm f/4 APO
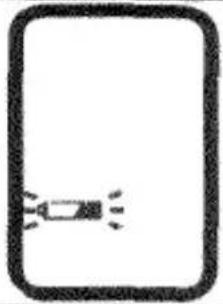
FLASH SIGNALS
natural_image
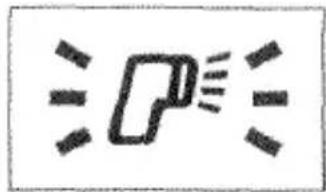
Simple line drawing of a megaphone emitting sound waves (no text or symbols)Lighting conditions require flash. Raise the built-in flash or attach an accessory flash.
This signal will appear when your subject is backlit and the built-in flash is down, or an attached accessory flash is off, when the camera is set to P(Program) mode.
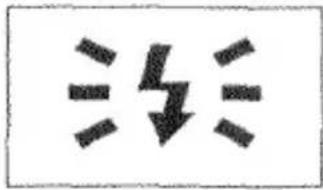
natural_image
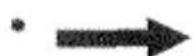
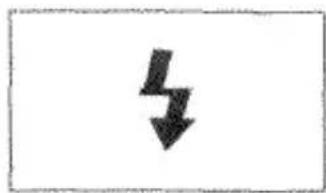
Simple black downward arrow symbol on white background (no text or labels)Flash is charged and will fire when the shutter-release button is pressed.
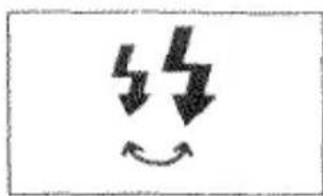
natural_image
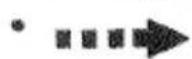
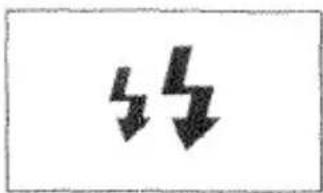
Two black downward arrows on a white background, no text or symbols presentFlash with red-eye reduction is selected. Flash will fire when the shutter-release button is pressed.
(After picture is taken, blinks rapidly) Flash output was sufficient to provide a correct exposure.
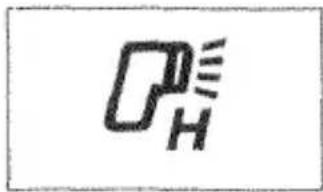
High-Speed Sync Flash. Only available with 5400HS flash unit. See the flash owner's manual for details.
natural_image
Simple line drawing of a car silhouette with no text or symbolsWireless/Remote Flash is selected. See page 68 for more information.
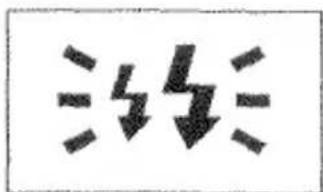
natural_image
Simple black-and-white diagram of a smiling face with lightning bolts and curved arrows, no text or symbols present.USING FLASH IN PROGRAM MODE
When the built-in flash is up or an attached accessory flash is on, it will automatically fire in low-light or back-lit situations. The camera will select the most appropriate shutter speed and aperture settings.
In PROGRAM mode, you can manually fire the built-in flash or accessory flash.
natural_image
Technical line drawing of a DSLR camera with adjustment knobs and lens (no text or symbols)While pressing the flash-control button, press the shutter-release button to take the picture.
When the built-in flash is down or an attached accessory flash is off, it will not fire.
• In many situations where the lighting is dim, canceling the flash will add a particular mood to your photographs. Instead of flash, use film with a higher film speed and/or place your camera on a tripod.
FLASH SIGNALS

natural_image
Simple line drawing of a megaphone emitting sound waves (no text or symbols)Lighting conditions require flash. Raise the built-in flash or attach an accessory flash.
This signal will appear when your subject is backlit and the built-in flash is down, or an attached accessory flash is off, when the camera is set to P(Program) mode.

natural_image
Simple black downward arrow symbol on white background (no text or labels)Flash is charged and will fire when the shutter-release button is pressed.

natural_image
Two black downward arrows on a white background, no text or symbols presentFlash with red-eye reduction is selected. Flash will fire when the shutter-release button is pressed.

(After picture is taken, blinks rapidly) Flash output was sufficient to provide a correct exposure.

High-Speed Sync Flash. Only available with 5400HS flash unit. See the flash owner's manual for details.

natural_image
Simple line drawing of a car silhouette with no text or symbolsWireless/Remote Flash is selected. See page 68 for more information.

natural_image
Simple black-and-white diagram of a smiling face with lightning bolts and curved arrows, no text or symbols present.USING FLASH IN PROGRAM MODE
When the built-in flash is up or an attached accessory flash is on, it will automatically fire in low-light or back-lit situations. The camera will select the most appropriate shutter speed and aperture settings.
In PROGRAM mode, you can manually fire the built-in flash or accessory flash.

natural_image
Technical line drawing of a DSLR camera with adjustment knobs and lens (no text or symbols)While pressing the flash-control button, press the shutter-release button to take the picture.
When the built-in flash is down or an attached accessory flash is off, it will not fire.
• In many situations where the lighting is dim, canceling the flash will add a particular mood to your photographs. Instead of flash, use film with a higher film speed and/or place your camera on a tripod.
USING FLASH IN A, S, OR M MODES
When the built-in flash is up or an attached accessory flash is on, it will automatically fire each time you take a picture. When the built-in flash is down or an attached accessory flash is off, it will not fire.
A MODE FLASH
Operation is the same as when flash is not used. You select the aperture setting and the camera automatically sets the shutter speed.
S MODE FLASH
Operation is almost the same as when flash is not used, except that you cannot select shutter speeds faster than the camera's flash sync speed, 1/200 second. In S Mode, the camera automatically sets the aperture.
M MODE FLASH
Operation is almost the same as when flash is not used except that you cannot select shutter speeds faster than the camera's flash sync speed, 1/200 second. You can select any aperture setting.
For Owner's of the 5400HS Flash Unit
With 5400HS flash unit, High-Speed Sync Flash is available which enables you to use any shutter speed with flash. See page 63 for more information.
- HSS is not effective under fluorescent lighting or if the light level exceeds the camera's metering range. Under these conditions, we recommend that you do not select shutter speeds faster than 1/200 second or apertures which require shutter speeds faster than 1/200 second.
FILL-FLASH
When you are taking portraits outdoors in daylight, we recommend that you use flash to reduce harsh, unflattering shadows on your subject's face. Flash should also be used when your subject has back lighting.
PROGRAM MODE
natural_image
Technical line drawing of a mechanical component with no visible text or symbolsIn PROGRAM mode, raise the built-in flash or turn on an attached accessory flash. Since the overall light level is bright, it will be necessary to fire the flash manually by pressing and holding the flash-control button while taking the picture.
A, S, AND M MODE
natural_image
Technical line drawing of a mechanical component with no visible text or symbolsIn A, S, and M mode, raise the built-in flash or turn on an attached accessory flash. The flash will automatically fire each time you take a picture.
HIGH-SPEED-SYNC FLASH
natural_image
Black-and-white photo of a smiling woman outdoors, no visible text or symbolsWithout HSS
natural_image
Black-and-white photo of a smiling woman with long hair, outdoors with blurred background (no text or symbols visible)With HSS
If you attach the Program Flash 5400HS to your camera, High-Speed-Sync (HSS) Flash is available. It enables you to synchronize the flash at shutter speeds of 1/200 second or faster in any exposure mode. HSS is particularly useful when you are photographing portraits outdoors in daylight. With it, you can use a larger aperture to limit the range of sharpness (depth of field) and separate your subject from the background.
In PROGRAM and A modes, the camera will automatically select HSS whenever the shutter speeds reach or exceed 1/200 second. In S and M modes, the camera will select HSS when the flash is on and you set a shutter speed of 1/200 second or faster.
- If the camera is set to manual-focus mode, HSS will not operate.
- The shutter cannot be released if the depth-of-field button is pressed in HSS mode.
See the Program Flash 5400HS owner's manual for more instructions.
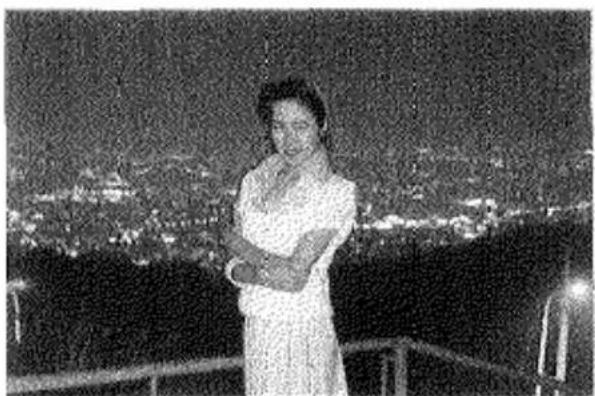
SLOW-SHUTTER SYNC
natural_image
Black-and-white photo of a person standing on a balcony at night, with city lights in the background (no visible text or symbols)Slow-shutter sync should be used when photographing people at night, sunrise, or sunset. In PROGRAM and A modes, the camera will automatically balance the flash exposure of either the built-in flash or attached accessory flash with existing light so both the main subject and the background are beautifully exposed. We recommend placing your camera on a tripod since shutter speeds may be too slow to allow sharp, hand-held pictures.
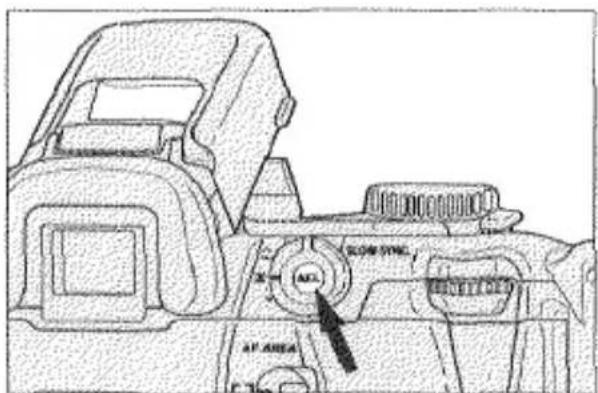
While pressing the AE-lock button, press the shutter-release button to take the picture.
Note: With the Alternate AE Lock Method, slow-shutter sync will operate as long as "AEL" appears in the viewfinder.
FLASH COMPENSATION
This function enables you to increase or decrease the flash exposure of the built-in flash or an attached accessory flash up to ±2 EV in 1/2 EV increments. Flash compensation can be used to alter the exposure ratio between the foreground, which is exposed by flash, and the background.
Rotate the flash-compensation dial to set the compensation value. It can be set in increments of 0.5 EV from -2 EV to +2 EV.
• To cancel flash compensation, set the dial to ±0.0.
- Flash compensation only alters the flash output, it does not affect the ambient light exposure.
- You can adjust both the flash and ambient light exposure using exposure compensation (p.48).
FLASH BRACKETING
Flash bracketing allows you to expose a series of 3 frames with 0.5 EV change between exposures in the order of normal, under-, and over-exposure. The camera brackets the exposure by varying only the flash output of the built-in flash or an attached accessory flash.
natural_image
Illustration of a hand using a tool to adjust or install a component on a device (no text or symbols visible)- Raise the built-in flash or turn on an attached accessory flash.
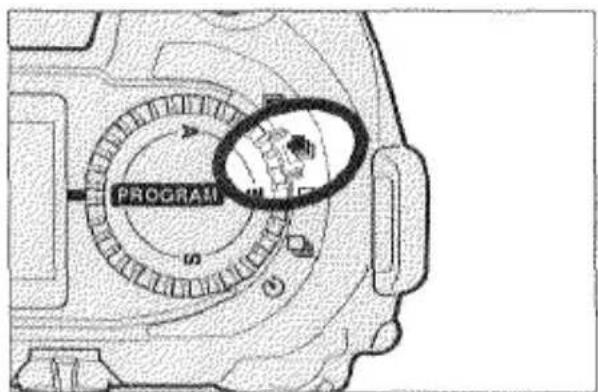
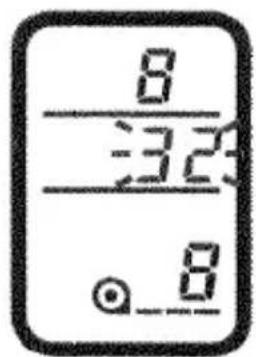
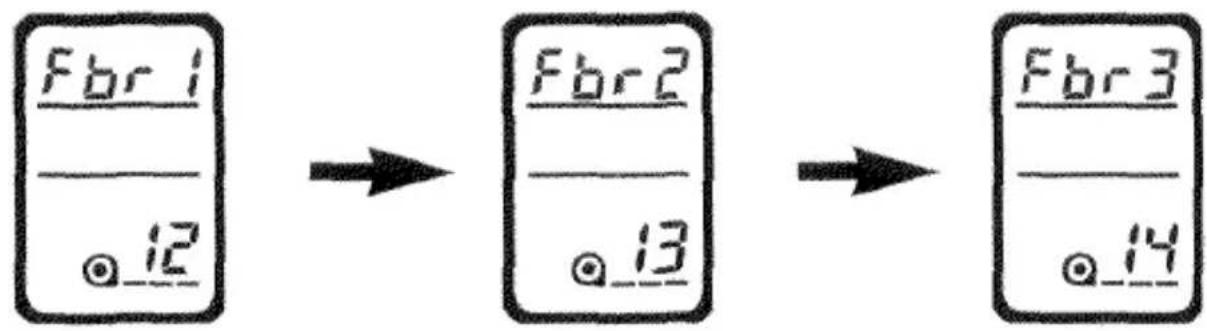
- Set the drive-mode selector to Fbr1 appears in the data panels when the shutter-release button is pressed partway down once to indicate the camera is set to flash bracketing.

-
Wait for the flash-ready signal 4 to appear in the viewfinder.
-
Press the shutter-release button all the way down to take the picture.
- Repeat step 3 and 4 until the series is complete.
- The data panel display will change as follows to indicate the frame number in the bracketing series.
- To cancel the flash bracketing series before it is complete, move the drive-mode selector, slide the main switch to OFF, or push down the built-in flash.
- Do not turn off or remove the accessory flash before the series is complete. The remaining shots will be exposed at the flash sync speed causing the pictures to be underexposed.
- If the built-in flash is down or attached accessory flash is off, the camera will bracket exposure settings rather than flash (see page 54).
- Flash bracketing will not operate if an accessory flash is attached to the Vertical Control Grip's PC terminal via a sync cord.
- In Programmed Autoexposure Mode, the built-in flash or attached accessory flash will fire with each shutter release.
WIRELESS/REMOTE OFF-CAMERA FLASH CONTROL

natural_image
Portrait of a woman with long hair, wearing a patterned blazer, seated against a plain background (no text or symbols visible)Normal Flash
Wireless/Remote Off-Camera Flash Control is available with the Minolta accessory flashes: 5400HS, 5400xi, or 3500xi. Wireless/Remote flash allows you to experiment with creative lighting techniques using off-camera accessory flashes without a tangle of accessory cords and connectors. In wireless/remote flash mode, the off-camera flash is triggered by a coded signal from the camera's built-in flash when you press the shutter-release button. Another signal stops it once the camera's TTL flash meter detects the proper exposure has been received.

natural_image
Black-and-white photo of a smiling woman with long hair, holding an object (no visible text or symbols)Wireless/Remote Flash

natural_image
Portrait of a smiling woman with long hair, wearing a blazer over a collared shirt (no visible text or symbols)Wireless/Remote Ratio Flash
SETTING WIRELESS/REMOTE FLASH MODE
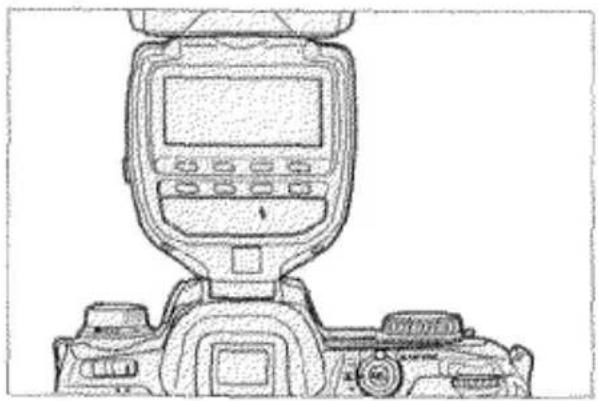
natural_image
Line drawing of a DSLR camera with front-mounted screen and control panel (no text or symbols)- Attach an accessory flash (5400HS, 5400xi, or 3500xi) to the camera and turn both the camera and flash on.
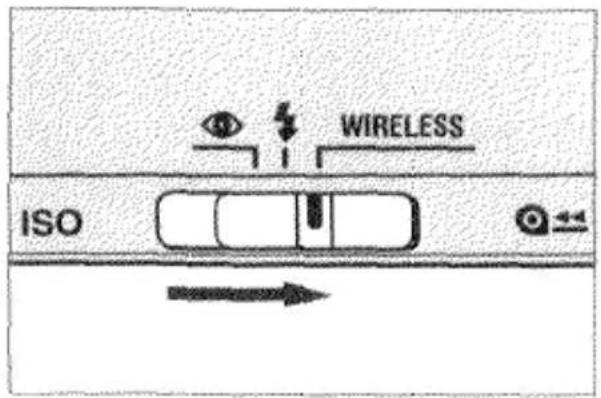
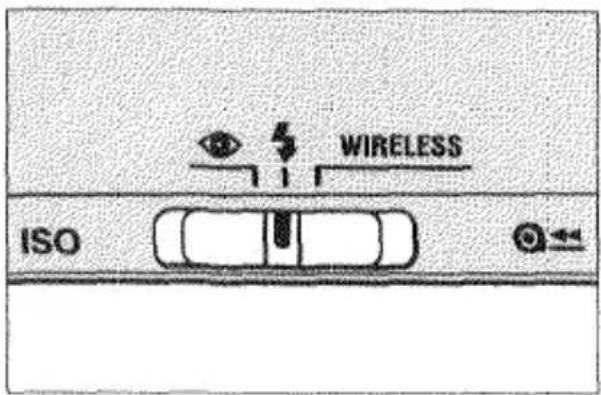
- Set the flash-mode selector to WIRELESS.
natural_image
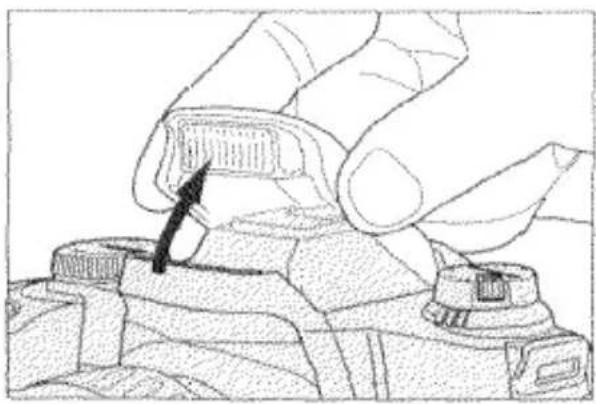
Hand holding a small electronic component with a black arrow pointing to it (no text or symbols visible)- Remove the accessory flash and raise the camera's built-in flash. The accessory flash is now ready to be positioned.
- In wireless/remote flash mode, the shutter speed is automatically set to 1/60 second or slower.
WIRELESS/REMOTE OFF-CAMERA FLASH CONTROL
TAKING PICTURES IN WIRELESS/REMOTE FLASH MODE
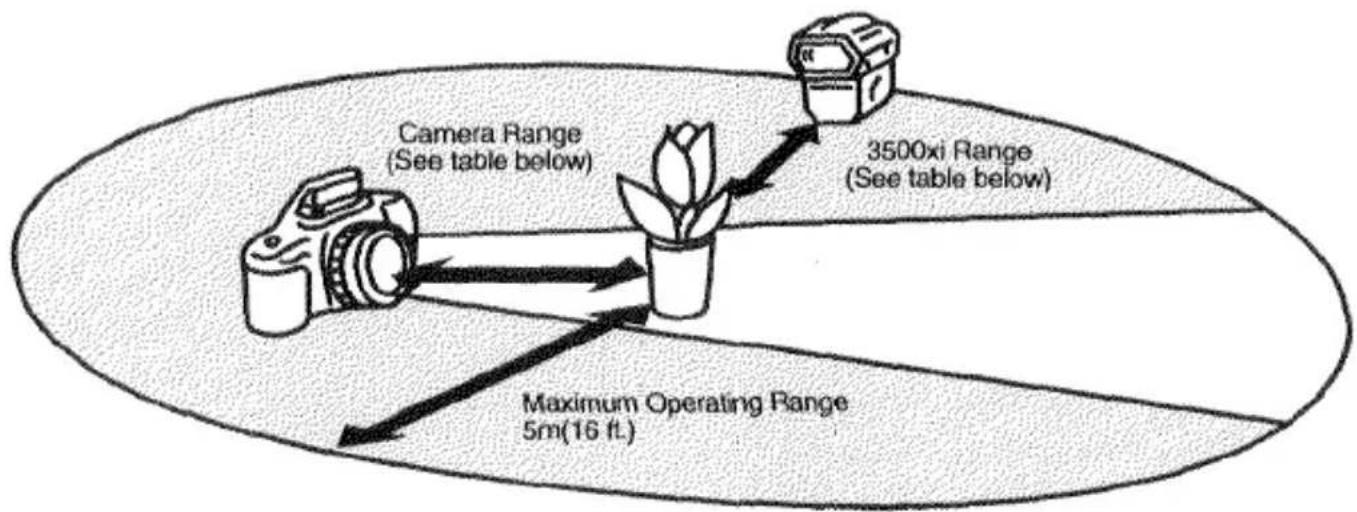
- Position your camera and 3500xi flash unit using the information on this page. If you are using a flash unit other than the 3500xi off-camera, refer to that flash instruction manual.
flowchart
graph TD
    A["Camera"] -->|Maximum Operating Range 5m(16 ft.)| B["Pot"]
    C["3500xi Range (See table below)"] -->|Maximum Operating Range 5m(16 ft.)| B
    D["Camera Range (See table below)"] -->|Maximum Operating Range 5m(16 ft.)| B
| Camera-Subject Distance | 3500xi-Subject Distance | |||
| Aperture | ISO 100 | ISO 400 | ISO 100 | ISO 400 |
| 1/2 | 2-5m/6.6-16.4 ft. | 4-5m/13.2-16.4 ft. | 1.4-5m/4.6-16.4 ft. | 2.8-5m/9.2-16.4 ft. |
| 1/2.8 | 1.4-5m/4.6-16.4 ft. | 2.8-5m/9.2-16.4 ft. | 1-5m/3.3-16.4 ft. | 2-5m/6.6-16.4 ft. |
| 1/4 | 1-5m/3.3-16.4 ft. | 2-5m/6.6-16.4 ft. | 0.7-4.5m/2.3-14.7 ft. | 1.4-5m/4.6-16.4 ft. |
| 1/5.6 | 1-5m/3.3-16.4 ft. | 2-5m/6.6-16.4 ft. | 0.5-3.2m/1.6-10.5 ft. | 1-5m/3.3-16.4 ft. |
| 1/8 | 1-5m/3.3-16.4 ft. | 1-5m/3.3-16.4 ft. | 0.35-2.25m/1.1-7.4ft | 0.7-4.5m/2.3-14.7 ft. |
| 1/11 | 1-5m (2.7m) 3.3-16.4 ft. (8.8 ft.)* | 1-5m/3.3-16.4 ft. | 0.25-1.6m/0.8-5.2 ft. | 0.5-3.3m/1.6-10.8 ft. |
* Values in parentheses for wireless/remote ratio control.
- The off-camera flash may not detect the control signals if it is placed behind the subject.
natural_image
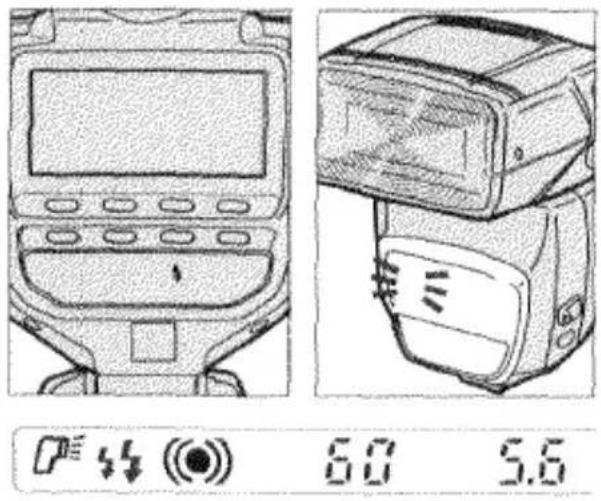
Technical line drawing of a mobile phone control panel with display and rear-mounted camera (no text or symbols)- When the built-in flash is charged, will blink alternately in the camera's viewfinder. When the off-camera flash is charged, its AF illuminator will blink.
- Press the AE-lock button to test-fire the off-camera flash and wait again until both flashes are fully charged.
- Press the shutter-release button all the way down to take the picture.
Note: With the Alternate AE Lock Method, pressing the AE-lock button to test-fire the off-camera flash will also lock the exposure. Pressing the AE-lock button to unlock exposure will test-fire the flash again.
WIRELESS/REMOTE RATIO CONTROL
In wireless/remote mode when ratio control is selected, the output of the off-camera flash and built-in flash combine to provide a 2:1 lighting ratio. To use ratio control, press and hold the flash-control button, then press the shutter-release button all the way down to take the picture.
WIRELESS/REMOTE OFF-CAMERA FLASH CONTROL
CANCELING WIRELESS/REMOTE OFF-CAMERA FLASH
- Reattach the accessory flash to camera.
- Set the flash-mode selector to ↓ or Ⓞ.
• To cancel wireless/remote flash mode on the 3500xi separately from the camera, first turn the flash off. Then, press the ON/OFF button to turn the flash on and hold the button until the wireless lamp turns off.
- To cancel wireless/remote flash mode on other flash units, refer to your flash owner's manual.
WIRELESS/REMOTE RATIO CONTROL WITH MULTIPLE FLASH UNITS
When the Wireless Remote Flash Controller is attached to this camera, a 2:1 or 1:2 lighting ratio is available between two off-camera flash units. If you are using one 3500xi or one 5400HS or 5400xi, the only ratio possible is 3500xi [2]:[1] 5400HS/5400xi. Refer to the Wireless Remote Flash Controller, 5400xi, or 5400HS owner's manuals for details.
ADDITIONAL FEATURES
FOR OWNERS OF THE QUARTZ DATA MODEL
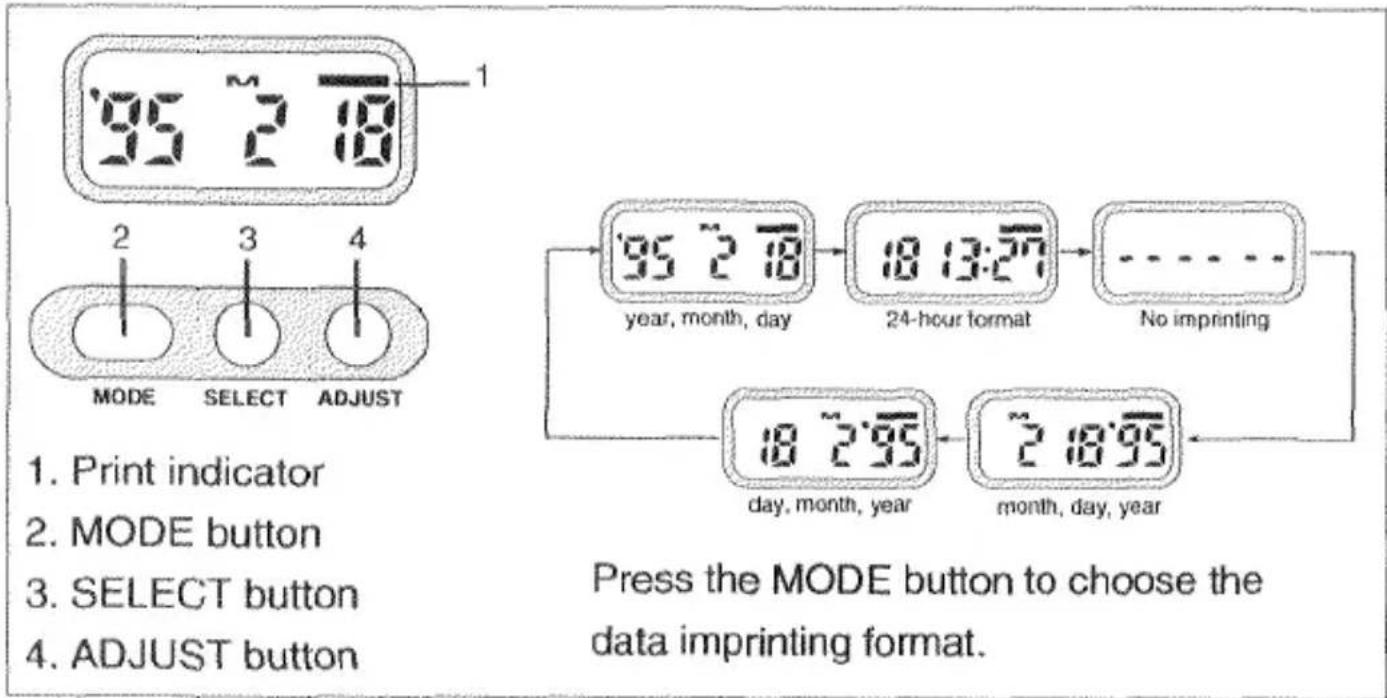
This feature enables you to record the date or time onto the lower-right portion of the picture. The print indicator will flash for 2 seconds after the picture is taken to indicate that the data was imprinted It has an automatic calendar through the year 2019.
SETTING THE TIME AND DATE
- Press the MODE button to select either Date or Time mode. M appear above the month.
- Use the SELECT button to move between different parts of the displayed data. The selected part will blink indicating that it is the data to be changed.
- Press the ADJUST button to change the data to the correct value. Data continues changing as long as you hold down the button.
- In time mode, pressing the ADJUST button while the colon is blinking, resets the second counter to 00.
- When all data is correct, press the SELECT button until the data stops blinking.
REPLACING THE QUARTZ DATA BACK BATTERY
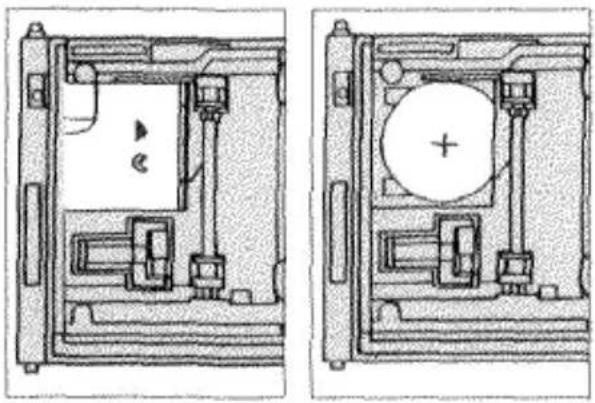
The quartz data back uses a CR2024 lithium battery to maintain memory while the camera batteries are being changed. Replace the battery if the display changes or becomes dim while the camera batteries are removed. Before opening the back cover to change the battery, check the film window to make sure there is no film in the camera.
natural_image
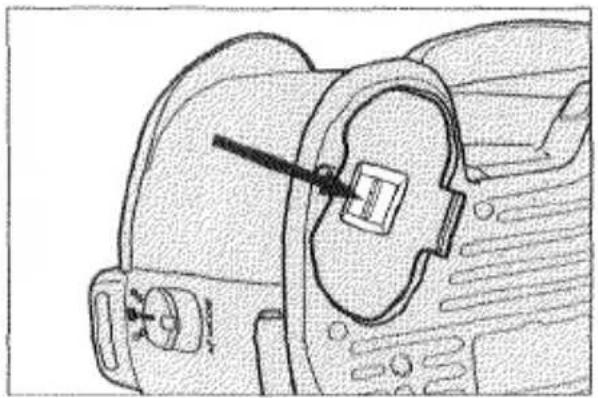
Technical line drawing of a mechanical assembly with two views (top and side), no visible text or symbols- Open the battery cover by pushing it in the direction of ▶.
-
Remove the old battery and replace it with a new one with the + side facing upward.
-
Replace the battery cover. The time and date will have to be reset.
CAUTION
- Imprinted data may be difficult to read if the area over which it is superimposed is bright or non-uniform.
- Imprinting position and size may differ according to printing conditions.
- Do not touch any other parts inside the camera other than the data back battery cover.
- Do not use the data back when temperatures exceed the operating temperature range of 0^ to 50^ (32° to 122°F).
PANORAMA ADAPTER
You can enjoy taking panorama photographs with your camera using the optional accessory, Panorama Adapter Holder Set 1.
- Attach the panorama adapter according to the instructions in the panorama adapter holder set 1 owner's manual.
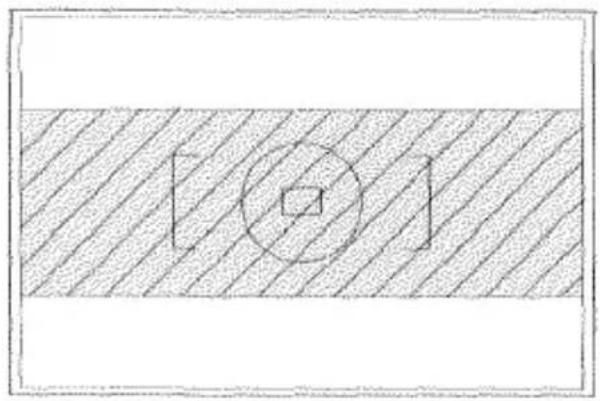
natural_image
Simple geometric diagram with diagonal hatching, a central circle, and a square (no text or symbols)-
Frame your subject within the center of the viewfinder as shown.
-
Take the picture. Except for framing, taking panorama pictures is the same as taking standard-format pictures.

natural_image
Simple diagram of two rectangular blocks with four corner holes, no text or symbols present.Panorama Adapter

Panorama Sticker
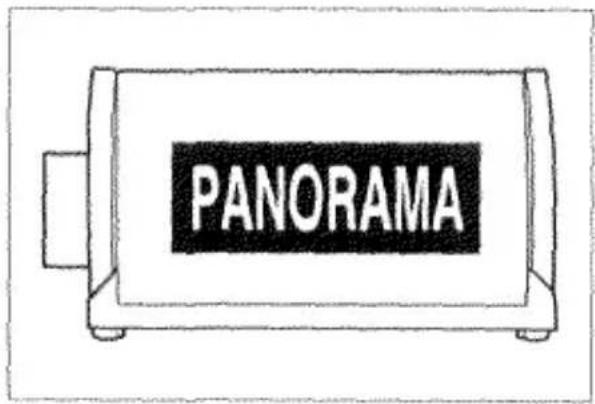
- After you have finished taking an entire roll of panorama pictures, remove the film and attach the panorama sticker exactly as shown.
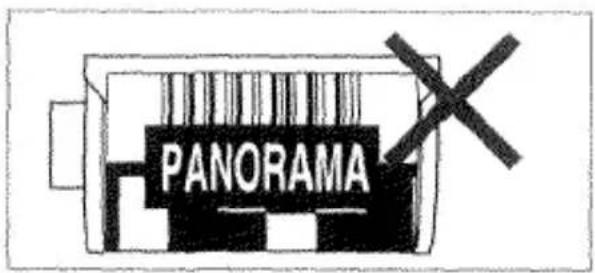
Note: Do not cover the bar code or DX code with the panorama sticker.
PRECAUTIONS
• After you have loaded the film and begun taking pictures with the panorama adapter attached, you cannot remove the adapter until you have finished the roll of film.
- The top and bottom part of the film is not exposed in panorama photographs. This results in an image of 13mm × 36mm . This does not alter the number of exposures on a roll of film.
- Before you turn in your film for processing, make sure the panorama sticker is attached to the film cartridge and make sure the lab is equipped to make panorama-format prints. Otherwise, regular-size prints with a black band across the top and bottom of the print may be returned.
- You can obtain more panorama stickers by contacting your nearest Minolta Service Facility.
SELF-TIMER
The electronic self-timer will delay release of the shutter for approximately 10 seconds after you press the shutter-release button.
TAKING PICTURES WITH SELF-TIMER (©)
- Set the drive-mode selector to ⏻.
- Align your subject within the focus area and press the shutter-release button all the way down to start the timer.
natural_image
Line drawing of a car interior showing dashboard, seatbelt, and camera (no text or symbols)The self-timer lamp on the front of the camera will blink to indicate operation. Just before the shutter release, the self-timer lamp will blink quickly and then glow.
• To stop self-timer operation before the shutter releases, change the drive mode or slide the main switch to OFF.
FILM-DRIVE MODES
This camera has two film-drive modes: Single-Frame Advance and Continuous Frame Advance.
CONTINUOUS ADVANCE (☐)
The camera continuously makes exposures and advances the film up to 2 frames per second while you are pressing the shutter-release button.
The camera makes one exposure and advances the film one frame each time you press the shutter-release button.
SELECTING THE FILM DRIVE MODE
- Set the drive-mode selector to □ or □.
METERING INDEX
The metering index appears whenever the AE-lock button is pressed in P, A, and S modes. It shows the difference between the locked exposure settings (0) and the exposure calculated by the camera for the area currently inside the spot circle (pointer).
| 1. AE-lock button pressed. | • Pointer shows that the locked exposure settings will correctly expose the area inside the spot circle. | |
| -3·2·1·0·1·2·3+ | ||
| 2. Picture recomposed so the spot circle covers a brighter area. | • Pointer shows that the area inside the spot circle will be two stops overexposed with the locked exposure settings. | |
| -3·2·1·0·1·2·3+ | ||
| 3. Picture recomposed so the spot circle covers a darker area. | • Pointer shows that the area inside the spot circle will be one and a half stops underexposed with the locked exposure settings. | |
| -3·2·1·0·1·2·3+ | ||
When exposure compensation is set, the position of the pointer will adjust to include the amount of compensation (Exposure compensation: +1.0 EV).

- In manual exposure mode, the metering index will allow you to see how your settings compare to the exposure the camera would set. See the Manual Exposure section for more information (p.42).
ADDING A POINTER FOR EXPOSURE COMPENSATION
You can add a pointer to the metering index to indicate the exposure compensation value.

- Press and hold the ISO button.
- Then press the depth-of-field-preview button. "OFF" appears in the data panel.
- Press the ISO button once so "ON" appears.
- Press the shutter-release button partway down to store the setting.
- To remove the exposure compensation pointer, repeat the procedure so that "OFF" appears in the body data panel.
DEPTH-OF-FIELD PREVIEW
When the lens is focused on a subject, there is a certain range behind and in front of the subject that appears sharp. This range is called depth of field, one way to control it is to adjust the aperture. You can increase depth of field in the following ways:
- Use smaller apertures (larger numbers).
- Use shorter focal length (wide angle) lenses.
- Move farther away from your subject.
natural_image
Line drawing of a DSLR camera with lens and frame (no text or symbols)You can check the depth of field by pressing the depth-of-field-preview button.
- The exposure settings cannot be changed while the button is pressed.
- The shutter can only be released if focus is locked when you press the depth-of-field-preview button.
Large apertures (small numbers) result in a shallow depth of field. Small apertures (large numbers) result in a wide depth of field.

DIOPTER ADJUSTMENT
If you are near- or far-sighted, you can use this control to adjust the eyepiece for your eyesight. The diopter adjustment range is from -2.5 to +0.5 diopters.
TO ADJUST:
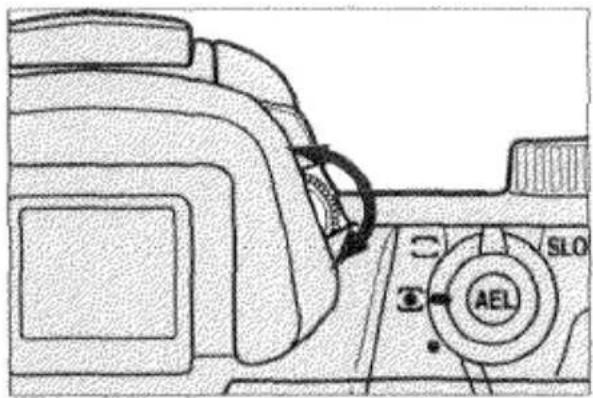
Look through the viewfinder and turn the diopter-adjustment dial until the focus area appears the sharpest.
- If you need additional correction, a Minolta Eyepiece Corrector can be attached to the camera's eyepiece.
APPENDIX
ACCESSORY INFORMATION
This camera is designed to work specifically with lenses, flash units, and other accessories manufactured and distributed by Minolta. We therefore caution that using incompatible products with this camera may result in unsatisfactory performance or damage to the camera or accessories.
LENS
- All Minolta AF lenses can be used with this camera. Manual focus lenses (MD or MC) cannot be used.
FLASH
- All Minolta i, xi, and HS series flash units can be used with this camera.
- To use an AF series flash unit, Flash Shoe Adapter FS-1100 must be attached to the camera. When the flash is on, the flash will fire each time you take a picture. At no time will the flash's AF illuminator activate.
• X series flash units cannot be used.
OTHERS
The following accessories are not compatible with your camera:
• Control Grip CG-1000, Data Receiver DR-1000, Creative Expansion Cards, Vertical Control Grip VC-700.
TROUBLESHOOTING
When the shutter speed and/or aperture display or both metering index arrows blink, refer to this table to determine the possible cause.
| Mode | Display | Cause | Action |
| P/A/S/M | 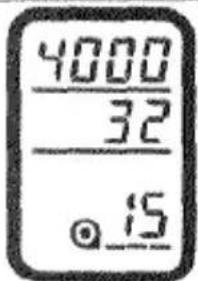 | Scene or subject brightness is beyond the camera's metering range. | In bright light, attach a neutral density (ND) filter, use film with a lower film speed, or reduce the overall brightness of your surroundings.In low light, select M mode and use a hand-held meter, use film with a higher film speed, or increase the brightness of your surroundings (i.e., use flash). |
| P | 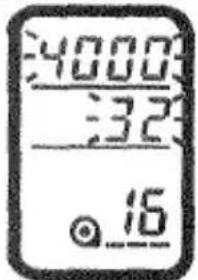 | Light level is beyond the range of available shutter speeds and apertures. | |
| A | 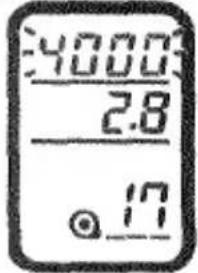 | Required shutter speed is beyond the range of the camera. | Select a larger/smaller aperture until the display stops blinking. |
| S |  | Required aperture is beyond the range of the lens. | Select a faster/slower shutter speed until the display stops blinking. |
Refer to this page to determine the cause of a problem you are experiencing with your camera. If the information does not cover the problem which you are experiencing or the condition continues, contact a Minolta Service Facility.
HELP displayed in body data panel or camera does not function at all.
Remove and reinstall battery. If normal camera operation does not resume, contact a Minolta Service Facility.
No display in data panel when main switch is set to ON.
Install a new battery.
“—” appears in the body data panel when the shutter-release button is pressed partway down.
Make sure that the lens is compatible and attached properly. If the camera is attached to a telescope, contact a Minolta Service Facility. If the lens is compatible and “--” still appears, clean the contacts of the camera and lens with a clean, dry cloth.
Autofocus does not operate when the shutter-release button pressed partway down.
Make sure the AF/M focus-mode button is set to autofocus mode. Make sure the subject is no closer than the lens' minimum focus distance. If autofocus still does not operate, the subject may be in one of the special focusing situations listed on page 31; in which case focus manually or use focus lock.
Flash fires when shutter-release button pressed partway down.
This is the camera's autofocus illuminator which is necessary for focus in low light and low contrast situations.
TECHNICAL DETAILS
Camera Type: 35mm single-lens-reflex (SLR) camera with microcomputer control of built-in flash, AE, and AF
Lens Mount: Minolta A-type bayonet mount
Autofocus: Minolta's through-the-lens (TTL) phase-detection system with three CCD sensors; Focus modes: AF-S: Single Shot, AF-C: Continuous autofocus with predictive focus control, AF-A: Automatically selects AF-S or AF-C according to the subject, Manual focus; Autofocus speed: 2 frames-per-second AF sequence; Sensitivity range: EV -1 to 19 (ISO 100)
AF Illuminator: Built-in-flash type; automatically activated in low-light/low-contrast conditions
Metering: Through-the-lens (TTL) metering; 14-segment honeycomb-pattern silicon photocell (SPC) with fuzzy logic control; Second SPC for TTL flash metering of dedicated flash unit; Metering range: EV 0 to 20; Spot metering range: EV 3 to 20 (ISO 100, f/1.4); Spot metering dimensions: 2.7% of viewfinder (5.5mm diameter)
Shutter: Electronically-controlled, vertical-traverse, focal-plane shutter; Range: 1/4000 to 30 seconds, bulb; Flash sync: 1/200 sec. or slower; High-speed flash sync: up to 1/4000 sec. with 5400HS; Wireless/remote flash sync: 1/60 sec (Ratio control: 1/45 sec.)
Built-In Flash: Built-in, retractable with TTL control; Guide number: 12 in meters at ISO 100; Coverage for 28mm focal length; Recycling time: approx. 2 sec.; Red-eye reduction pre-flash available; Wireless/Remote off-camera flash control available with some flash units
Viewfinder: Eye-level fixed penta-prism; Field of view: 92% (V) x 94% (H); Magnification: 0.75X (with 50mm lens at infinity); Diopter adjustment: -1 diopter with continuous adjustment from -2.5 to +0.5 diopters; Eye-relief: 18.4mm from eyepiece frame
Focusing Screen: Acute-matte (G)
Film Transport: Automatic advance to first frame; Single-frame advance; Continuous advance up to 2 frames/sec.; Automatic rewind; Manual start of automatic rewind possible; Rewind speed: approx.15 sec. for 24 exp. roll and approx. 23 sec. for 36 exp. roll.
Film-Speed Setting: Automatic setting for DX-coded films ISO 25 to 5000.
Manual setting from ISO 6 to 6400 in 1/3-stop increments
Self-Timer: Electronic with 10-sec. delay
Battery: One 6V 2CR5 lithium battery pack; Automatic battery check when camera is turned on; Battery condition indicated by four-stage indicator in body data panel
Battery Performance:
| Flash Use | +20°C (68°F) | -20°C (-4°F) |
| 0% | 60 rolls | 20 rolls |
| 50% | 25 rolls | 10 rolls |
| 100% | 15 rolls | 5 rolls |
- Based on the following test conditions: 24 exposure roll of film; fresh battery; AF 24-85mm f/3.5-4.5 lens; autofocus infinity to minimum focus distance and back 3 times; shutter-release button held partway down for 10 seconds before shutter release.
- Battery performance with a 36 exposure roll is reduced by approximately 1/3.
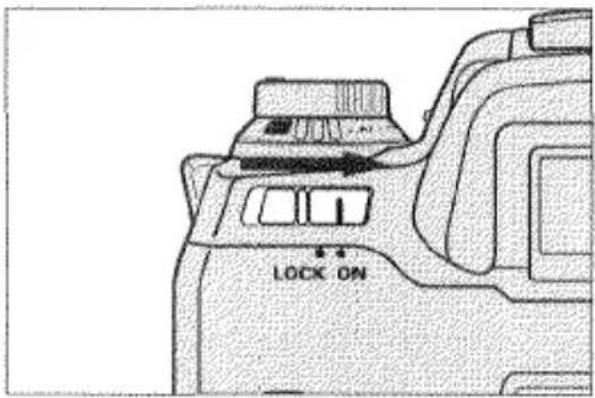
- If more operations are performed during use, battery performance will be slightly lower. To maximize battery performance, slide the main switch to LOCK when you are not using the camera.
Dimensions: 156(W) x 98(H) x 73.5(D)mm /6-1/8 x 3-7/8 x 2-7/8 in.
Weight: 565g /19-15/16 oz. (without batteries)
Specifications are based on the latest information available at the time of printing and are subject to change.
CARE AND STORAGE
OPERATING TEMPERATURE AND CONDITIONS
- This camera is designed for use from -20^ to 50^ ( -4^ to 122^ ).
- Never leave your camera where it may be subjected to extreme temperatures, such as the glove compartment of a car.
- At colder temperatures, the data panel response time will be slow; at higher temperatures, the display will temporarily darken and will restore when the temperature normalizes.
- Never subject your camera to extreme humidity.
• To prevent condensation from forming, place the camera in a sealed plastic bag when bringing it from the cold exterior to a warm building.
Allow it to come to room temperature before removing it from the bag.
BATTERY CAUTIONS
- Read and follow all warnings and instructions supplied with the batteries.
- Keep batteries away from children.
- Do not subject the battery to high temperatures or fire; or attempt to disassemble, recharge or short-circuit it; the battery may explode causing severe burns.
- When photographing in cold weather, we recommend that you keep the camera and spare batteries inside your coat to keep them warm when you are not shooting. Cold batteries will regain some of their charge when they warm up.
• The low-battery symbol may appear even with a fresh battery depending on the storage conditions. To restore camera power, repeat turning the camera on and off.
HANDLING CARE
- Do not touch or cover the flash tube and be sure to leave sufficient space around it during operation; it may become hot when the flash fires.
- Never subject the camera to shock, especially when transporting.
- This camera is not waterproof, dust-proof, or sand-proof; take care when using it at the beach or near water--costly or irreparable damage to the camera may occur.
- This camera contains high-voltage circuits; do not attempt to disassemble or repair it.
CLEANING
- If the camera body or lens barrel is dirty, wipe it gently with a soft, clean, dry cloth. If it comes in contact with sand, gently blow away loose particles--wiping may scratch the surface.
• To clean the lens surface, first brush away any dust or sand with a lens brush and if necessary moisten a lens tissue with lens cleaning fluid and gently wipe the lens in a circular fashion from the center. - Never place lens-fluid directly on a glass surface.
- Never touch the interior of the camera, especially the shutter and mirror. Doing so may impair their alignment and movement. Dust on the mirror will not affect picture quality.
- Never use compressed air to clean the camera; it may cause damage to sensitive interior parts.
- Never use organic solvents to clean the camera.
- Never touch the lens surface with your fingers.
CARE AND STORAGE
STORAGE
When storing your camera for extended periods of time, please follow these guidelines:
• Always attach the protective caps.
- Store in a cool, dry and well-ventilated area away from dust and chemicals such as moth balls. For very long periods, place the camera and lens in an airtight container with silica gel drying agent.
- Periodically release the camera's shutter to keep it operating properly.
- Before using after prolonged storage always check the camera's operation to make sure that it is functioning properly.
BEFORE IMPORTANT EVENTS
• Always check camera operation carefully or take test photographs.
- Minolta is not responsible for damages incurred by equipment malfunction.
QUESTIONS AND SERVICE
• If you have questions about your camera, contact your local camera dealer or write to the Minolta distributor in your area.
- Before shipping your camera for repair, please contact an authorized Minolta Service Facility for details.
FCC AND DOC COMPLIANCE
STATEMENT OF FCC COMPLIANCE
This device complies with Part 15 of the FCC Rules. Operation is subject to the following two conditions: (1) This device may not cause harmful interference, and (2) this device must accept any interference received, including interference that may cause undesired operation. Changes or modifications not approved by the party responsible for compliance could void the user's authority to operate the equipment. This equipment has been tested and found to comply with the limits for a Class B digital device, pursuant to Part 15 of the FCC Rules. These limits are designed to provide reasonable protection against harmful interference in a residential installation. This equipment generates, uses and can radiate radio frequency energy and, if not installed and used in accordance with the instructions, may cause harmful interference to radio communications. However, there is no guarantee that interference will not occur in a particular installation. If this equipment does cause harmful interference to radio or television reception, which can be determined by turning the equipment off and on, the user is encouraged to try to correct the interference by one or more of the following measures:
- Reorient or relocate the receiving antenna.
- Increase the separation between the equipment and the receiver.
- Connect the equipment to an outlet on a circuit different from that to which the receiver is connected.
- Consult the dealer or an experienced radio/TV technician for help.
STATEMENT OF DOC COMPLIANCE
This Class B digital apparatus meets all requirements of the Canadian Interference-Causing Equipment Regulations.
natural_image
Circular abstract pattern with horizontal white stripes on dark textured background (no text or symbols)MINOLTA
Minolta Co., Ltd.
3-13, 2-Chome, Azuchi-Machi, Chuo-Ku, Osaka 541-8556, Japan
Minolta GmbH
Kurt-Fischer-Strasse 50, D-22923 Ahrensburg, Germany
Minolta France S.A.
365 Route de Saint-Germain, F-78420 Carrières-Sur-Seine, France
Minolta (UK) Limited
Rooksley Park, Precedent Drive, Rooksley, Milton Keynes, MK13 8HF, England
Minolta Austria Ges. m.b.H.
Amalienstrasse 59-61, A-1131 Wien, Austria
Minolta Camera Benelux B.V.
Zonnebaan 39, P.O. Box 6000, NL-3600 HA Maarssen, The Netherlands
Belgium Branch
Kontichsesteenweg 38, B-2630 Aartselaar, Belgium
101 Williams Drive, Ramsey, New Jersey 07446, U.S.A.
Los Angeles Branch
11150 Hope Street Cypress, CA 90630, U.S.A.
Minolta Canada Inc.
Head Office
369 Britannia Road East, Mississauga, Ontario L4Z 2H5, Canada
Vancouver Branch
230-3771 Jacombs Road, Richmond, B.C. V6V 2L9, Canada
Minolta Hong Kong Limited
Room 208, 2/F, Eastern Center, 1065 King's Road, Quarry Bay, Hong Kong, China
Minolta Singapore (Pte) Ltd.
- Teban Gardens Crescent, Singapore 608923
Shanghai Minolta Optical
Products Co., Ltd.
368 Minolta Road, Songjiang, Shanghai, China
© 1995 Minolta Co., Ltd. under the Berne
Convention and Universal Copyright Convention