DV7713P - Alarm Clock Mitsai - Free user manual and instructions
Find the device manual for free DV7713P Mitsai in PDF.


| Product Type | Alarm clock radio |
| Brand | Mitsai |
| Model | DV7713P |
| Dimensions (approx.) | 20 x 15 x 10 cm |
| Weight (approx.) | 0.5 kg |
| Power Supply | AC 100-240V, 50/60Hz; Battery backup (e.g., 2x AAA) |
| Display Type | LED/LCD with adjustable brightness |
| Radio Bands | FM/AM with digital tuning |
| Alarm Functions | Dual alarms with snooze and HWS (Humane Wake System) |
| Additional Features | USB charging port, sleep timer, dimmer, calendar display |
| Cleaning Instructions | Wipe with a soft, dry cloth; avoid liquids |
| Safety Precautions | Do not expose to water or extreme temperatures; unplug during storms |
| Spare Parts Availability | Contact manufacturer or authorized service centers |
| Repairability | Designed for service by qualified technicians; no user-serviceable parts inside |
| Manual Format | PDF download available on official website |
Frequently Asked Questions - DV7713P Mitsai
User questions about DV7713P Mitsai
0 question about this device. Answer the ones you know or ask your own.
Ask a new question about this device
Download the instructions for your Alarm Clock in PDF format for free! Find your manual DV7713P - Mitsai and take your electronic device back in hand. On this page are published all the documents necessary for the use of your device. DV7713P by Mitsai.
USER MANUAL DV7713P Mitsai
natural_image
Close-up of a black remote control with buttons and dials (no visible text or symbols)
MANUAL DE INSTRUÇÕES
INSTRUCTIONS MANUAL
INSTRUCTIONS MANUAL
Dear customer,
Thank you for your purchase.
This unit has undergone a series of laboratory tests to certify its quality. Attached are detailed instructions to facilitate its quick and safe use.
Please be sure to carefully read the safety measures and instructions in this manual.
We hope you enjoy using your new unit.
DeCLARATION Of CONfORMITY

Nós:
We:
Nosotros:
Mitsai
Declare that the Product:
Car Radio, Brand Mitsai, model DV-7713P
Is in conformity with the following EEC Directives, including amendments to the current date:
Directive 1999/5/EC for RTTE
Directiva 89/336 EEC para EMC
Directive 89/336 EEC for EMC
INDEX
- Safety Instructions 3
1.1. Power Supply 4
1.2. Humidity and Water 4
1.3. Cleaning 4
1.4. General Precautions 4
- Use and Operation 6
2.1. Product description 6
-
After-sale Service 29
-
Environmental Conservation 31
1. SAFETY INSTRUCTIONS

WARNING RISK OF ELECTRIC SHOCK. DO NOT OPEN.

WARNING: TO AVOID THE RISK OF ELECTRIC SHOCK, DO NOT REMOVE THE COVER. THERE ARE NO USER SERVICEABLE PARTS INSIDE. SEEK ASSISTANCE FROM QUALIFIED PROFESSIONALS.
Important Warnings
Before using your appliance, read carefully this instructions' manual and keep it in a safe place, as you may need it for future consultations.
Before you start your appliance, and to ensure a correct use, do not use it if:
- It felt on the ground;
- You notice any evidence of damage;
- Any anomaly occurs during its operation;
To avoid hazards and deterioration of your appliance by an incorrect use, it is advisable to read the instructions carefully and attentively.
Your appliance must not be used to other ends than the ones foreseen in the instructions manual. Your safety is only guaranteed in a household use and not for commercial use. The incorrect use will not be covered and automatically cancels the right to warranty.
Assistance
Be sure that, in case of malfunction, you deliver your appliance for assistance to a qualified technician.
Important
Before using the unit, please read this instruction manual carefully and keep it in a safe place for future reference.
To ensure proper use, do not begin using the unit:
If it has been dropped;
If you see any signs of damage;
If any anomalies occur while it is operating.
To avoid hazards and the deterioration of the unit due to improper use, please read the instructions carefully.
The unit should not be used for other purposes beyond those described in the instruction manual. Its safety is limited to domestic use only, and not commercial use. Improper use will not be covered, and automatically voids the warranty.
Assistance
If you experience any problems with the unit, please consult a qualified technician for assistance.
DO NOT ALLOW CHILDREN TO USE ELECTRICAL DEVICES WITHOUT SUPERVISION. DO NOT ALLOW CHILDREN OR ADULTS WITH IMPAIRED PHYSICAL, SENSORY OR MENTAL ABILITIES, OR INEXPERIENCED/UNACQUAINTED INDIVIDUALS, TO USE ELECTRICAL DEVICES WITHOUT SUPERVISION.
1.1. Power Supply
- Check that the electrical voltage matches the voltage shown on the unit (this unit should be connected to a 12V DC negative ground battery system). If it does not, please contact the dealer or customer service department.
1.2. Humidity and Water
Do not use the unit in humid areas. Do not let the unit get wet in any way, since this can be dangerous. TO AVOID THE RISK OF FIRE OR ELECTRICAL SHOCK, DO NOT EXPOSE THE UNIT TO WATER OR MOISTURE. Do not put the unit underwater (e.g. to wash).
1.3. Cleaning
Before cleaning, unplug the unit, wait a few moments and then clean it with a soft, dry cloth.
1.4. General Precautions
- When parking your car in direct sunlight, its interior can overheat; be sure to cool down your
vehicle's interior before connecting the unit.
- Avoid inserting foreign objects into the unit's slot, since this can cause damage due to the unit's mechanism.
- Do not attempt to dismantle the unit, open its cover or adjust its accuracy, since none of the unit's parts can be repaired by users.
- Install the unit in a horizontal position, with its front at a convenient angle not exceeding 30^ .
- When driving, keep the unit's volume low enough to remain attentive to road and traffic conditions.
- This unit is a class I laser product. However, it uses a visible/invisible laser, which may cause hazardous radiation exposure in the event of direct contact. Be sure to use this unit properly; the use of controls or adjustments in ways differing from the specifications of this manual may result in hazardous radiation exposure.
- Use only recommended accessories.
- This unit has been designed to respond to the Region Management Information recorded in a DVD. If the DVD's region number does not match this unit's region number, the DVD cannot be played.
- Scratched, dirty or dusty discs will cause poor operation.
- Do not put stickers on discs.
- Always keep discs in their packages.
- Avoid exposing discs to direct sunlight on seats or dashboards, near car heaters or in dirty or dusty areas.
- Use a soft cloth to clean the surfaces of discs. If they are very dirty, use a soft cloth lightly soaked in alcohol. Never use solvents such as benzene, thinner or conventional disc-cleaning products, as these can cause scratches.
- The use of discs can also depend on how they are handled. Discs should be placed in the reader with the printed side facing upward. Do not touch the bottom side of the disc or bend it. Clean from the center outward.
- Use a pencil or pen to fix discs with rough edges, by pressing them against the sides, as shown in the diagram.


natural_image
Simple line drawing of a fish with a crossed-out arrow and droplets, no text or symbols present.
natural_image
Simple line drawing of a human face with a cross mark, no text or symbols present
natural_image
Two abstract diagrams showing circular and cross-shaped elements with directional arrows, no text or symbols present.External rough edge

Pencial or pen
External rough edge
2. USE AND OPERATION
2.1. Product description

Light on when a disc is inside; Light off when no disc is inside.
- Repeat mode indicator
Light on when repeat mode is on; Light off when repeat mode is off.
- Main display area
Displays characters, playback time, tuning frequency, clock and other text information.
- Radio status indicators
Stereo indicator lights up when the radio broadcast is a stereo one; Local indicator lights up when the local seeking function is activated.
- Loudness mode indicator
Light on when loudness mode is on; Light off when loudness mode is off.
Note:
-
Most information can be displayed on this LCD only when the TFT monitor is closed.
-
Only English font support on this LCD.
-
SRC] Key: Select play source
-
[EJECT] Key: Eject disc
-
[AUDIO] Key: Select DVD dialogue language
-
[VOL+/-] Key: Adjust volume
-
[ZOOM] Key: Image zoom in/out
-
[BAND/▶] Key: Select radio band / Slow Playback
-
[WIDE] Key: Change display mode
-
[◀] Key: Auto search / Previous / Move cursor to the left
-
[PRESET] Key: Select preset radio station or TV channel
-
[EQ] Key: Open EQ setting menu
11 .[GOTO/ ] Key: GOTO search /Call
-
[OPEN/CLOSE] Key: Open or close the TFT monitor
-
[TILT] Key: Adjusting the TFT monitor tilting angle
-
[RPT A-B] Key: A-B repeat
-
[RPT] Key: Repeat playback
-
[INT] Key: Intro playback
-
[RDM] Key: Random playback
-
[0\~9] Key: Numeric keys
-
[ɪə] Key: Stop playback/ Hangup
-
[DISP/CLEAR] Key: Display information/Clear information
-
[◀] Key: Fast reverse/Move cursor down
-
[PIC] Key: Image setting
-
[▶] Key: Auto search / Next / Move cursor to the right

EN
MULTIMEDIA CAR RADIO 1DIN 7"
- [▶■] Key: Play / Pause / Enter
- [SETUP] Key: Setup menu
- [▶] Key: Fast forward / Move cursor up
- [TITLE] Key: DVD TITLE
- [MENU] Key: DVD MENU / PBC
- [ANGLE] Key: Select view angle
- [SUBTITLE] key: Select DVD subtitle language
- [POWER] key: Unit Power
- [MUTE] Key: Mute audio outputs
Notes on remote control use
1) Aim the remote control at the remote sensor on the unit.
2) Remove the battery from the remote control or insert a battery insulator if the battery has not been used for a month or longer.
3) Do not store the remote control under direct sunlight or in high temperature environments, or it may not function properly.
4) The battery can work for 6 months under normal conditions. If the remote control does not work, please change the battery.
5) Use lithium battery CR2025 (3V) only.
6) Do not recharge, disassemble, heat or expose the battery to fire.
7) Insert the battery in the right direction according to the (+) and (-) poles.
8) Store the battery out of the reach of children to avoid the risk of accident.
Uninstall Battery
Slide out the battery compartment tray at the bottom on the back of the remote control.

Install Battery
Use a lithium battery CR2025 (3V) only.
Insert the battery in the battery tray in the
right direction according to the (+) and (-) poles.

natural_image
Pure electrical circuit lines without any symbolsPULL OUT
Installation and uninstall
Notes on installation
1) Before installation, please make sure proper connections have been made, and that the unit operates normally. Improper connection may result in damage to the unit.
2) Use only accessories designed and manufactured for this unit; other unauthorized accessories may result in damage to the unit.
3) Before installation, please fasten all power cables.
4) Do not install the unit near heat to prevent damage to electrical components such as the laser head.
5) Install the unit horizontally. Installing the unit more than 30 degrees vertically may result in poor performance.
6) To prevent electric spark, connect the positive pole first and then the negative pole.
7) Do not block the cooling fan exit to ensure sufficient heat dissipation of this unit, or it may result in damage to this unit.
Unit Installation
Method A
(1) Insert mounting bracket into dash board, choose appropriate mounting tab according to the gap width, bending the mounting tab outwards with a screwdriver to fix the mounting bracket in place.
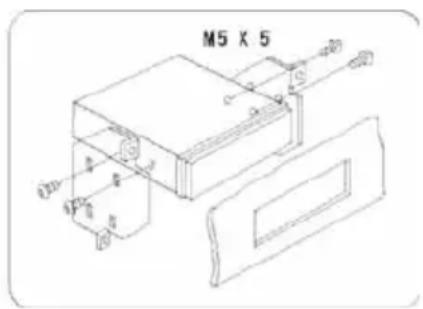
(2) Use 2 M5X5 cone shaped screws to fix two assembly bars on both sides of the unit (see picture 1)

(Picture 1)
(3) Screw in 1 M5X24 to the hole of the unit back, and put a rubber sheath over the screw. (see picture 2)
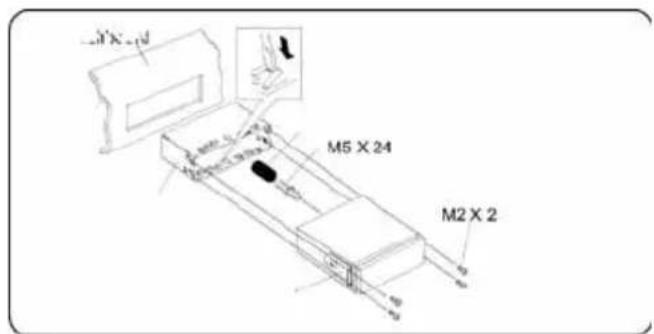
(Picture 2)
(4)Insert the unit into the bracket, fasten the M4X6 screw to the fireproofing board at the back of the dashboard, and use 4 M2X2 screws to lock the assembly bars and the mounting bracket in position.
Note:
According to the depth of the opening, adjust the length of assembly bar accordingly. If the opening is too shallow, the monitor may be extended out 10 mm from the dashboard
Method B


(1) Insert this unit directly to the opening of the dashboard.
(2) Place M4X3, M5X5 cylindrical screws or M5X5 cone shaped screws through the holes of the mounting frame located inside the opening to holes of the unit and fasten the screws to the left & right.
Trim Ring installation
Attach the trim ring around the front panel with two indentations on one side facing upwards
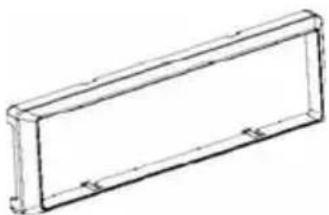
natural_image
Simple line drawing of a rectangular frame with rounded corners and mounting holes (no text or symbols)Uninstall
Disassemble trim ring
(2) Push the trim ring downward and pull out the lower part.
(1) Push the trim ring upward and pull out the upper part.

natural_image
Line drawing of a rectangular metal enclosure with mounting holes (no text or symbols)
natural_image
Simple line drawing of a rectangular frame with mounting holes and a small triangular symbol on top (no text or labels)Disassemble the unit
(1) Unscrew the M2*2 screws.
(2) Use a screwdriver to straighten the bent mounting tab and tip the unit out from the mounting bracket.
Remove the rubber sheath

(3) Pull the unit out from the mounting bracket with both hands.
Unit connections
Notes on connection
This unit is designed to be used in a vehicle with a 12-volt battery and negative grounding. Before installing this unit to a recreational vehicle, a bus, or a truck, make sure the battery voltage is appropriate for this unit to be used; otherwise, a professional technician should install a transformer to convert the output voltage to 12V.
To avoid short circuits in the electrical system, ensure that the negative battery cable is disconnected before installation.
To prevent short circuits in the wiring and damage to this unit, secure all wirings with cable clamps or adhesive tape. Route the wirings in a secure place away from heat without touching any moving parts such as the gear shift, handbrake or seat rails to prevent the wiring insulation from being melted / wearing off.
Never pass the yellow power cord through the installation hole into the engine compartment and connect to the car battery. Otherwise, there will be a high risk of serious short circuiting in the electrical system.
Replace a new fuse with 10A rating when the old one is broken; using no fuse or fuses with improper ratings may cause damage to this unit or even fires. If a proper fuse is installed and electrical problems still occur, please contact a professional car repair shop.
Do not connect other equipment to the car battery to avoid battery overheating.
Please make sure all the wiring connections and cables of the speakers are well-insulated. Otherwise, this unit may be damaged by short circuit.
If there is no ACC available, please connect the ACC lead to the power supply with a switch.
If an external power amplifier is connected, please do not connect the P.CONT lead to the power lead of the external power amplifier; otherwise, electric sparks or other damage may result.
Never ground the speaker output to prevent the damage to the built-in power amplifier.
The minimum rating of the speakers connected to this unit is 50W with 4 to 8Q impedance.
Control Cables
Auto Brightness Control
To avoid the display being too bright at night time, if the headlight cable is connected to IL-LUMI, turning on the headlight will dim the backlight of the TFT LCD and vice versa.
Telephone Mute
If the MUTE cable is connected to a car phone, other audio outputs mute when a call is received by the car phone.
Reverse Driving
If a rear view camera is connected to the unit, the play source switches to CAMERA automatically when you start driving in reverse.
When the reverse driving is done, the play source switches to the previous.
Parking Brake
1) If the "PRK SW" cable is connected to the hand brake switch, the video display on the TFT monitor will be controlled by this function.
The parking cable function ceases when the play source is CAMERA.
2) The monitor displays a blue screen with warning information to prevent the driver from watching video content while driving, although passengers in the rear seat can watch video
content normally.
Parking Brake Cable Connections


Reverse Driving Cable Connections

flowchart
graph LR
    A["Car Frame"] --> B["'Reverse Driving Signal Light"]
    B --> C["Pink Cable"]
    C --> D["Reverse Driving Cable"]
    D --> E["Car Battery"]
    E --> F["Car Frame"]
    G["Pink Cable"] --> D
    H["Car Battery"] --> E
    I["Car Frame"] --> F

flowchart
graph TD
    A["AT&T"] --> B["RAM"]
    B --> C["RAM控制器"]
    C --> D["RAM控制器1"]
    C --> E["RAM控制器2"]
    C --> F["RAM控制器3"]
    C --> G["RAM控制器4"]
    C --> H["RAM控制器5"]
    C --> I["RAM控制器6"]
    C --> J["RAM控制器7"]
    C --> K["RAM控制器8"]
    C --> L["RAM控制器9"]
    C --> M["RAM控制器10"]
    C --> N["RAM控制器11"]
    C --> O["RAM控制器12"]
    C --> P["RAM控制器13"]
    C --> Q["RAM控制器14"]
    C --> R["RAM控制器15"]
    C --> S["RAM控制器16"]
    C --> T["RAM控制器17"]
    C --> U["RAM控制器18"]
    C --> V["RAM控制器19"]
    C --> W["RAM控制器20"]
    C --> X["RAM控制器21"]
    C --> Y["RAM控制器22"]
    C --> Z["RAM控制器23"]
    C --> AA["RAM控制器24"]
    C --> AB["RAM控制器25"]
    C --> AC["RAM控制器26"]
    C --> AD["RAM控制器27"]
    C --> AE["RAM控制器28"]
    C --> AF["RAM控制器29"]
    C --> AG["RAM控制器30"]
    C --> AH["RAM控制器31"]
    C --> AI["RAM控制器32"]
    C --> AJ["RAM控制器33"]
    C --> AK["RAM控制器34"]
    C --> AL["RAM控制器35"]
    C --> AM["RAM控制器36"]
    C --> AN["RAM控制器37"]
    C --> AO["RAM控制器38"]
    C --> AP["RAM控制器39"]
    C --> AQ["RAM控制器40"]
    C --> AR["RAM控制器41"]
    C --> AS["RAM控制器42"]
    C --> AT["RAM控制器43"]
    C --> AU["RAM控制器44"]
    C --> AV["RAM控制器45"]
    C --> AW["RAM控制器46"]
    C --> AX["RAM控制器47"]
    C --> AY["RAM控制器48"]
    C --> AZ["RAM控制器49"]
    C --> BA["RAM控制器50"]
    C --> BB["RAM控制器51"]
    C --> BC["RAM控制器52"]
    C --> BD["RAM控制器53"]
    C --> BE["RAM控制器54"]
    C --> BF["RAM控制器55"]
    C --> BG["RAM控制器56"]
    C --> BH["RAM控制器57"]
    C --> BI["RAM控制器58"]
    C --> BJ["RAM控制器59"]
    C --> BK["RAM控制器60"]
    C --> BL["RAM控制器61"]
    C --> BM["RAM控制器62"]
    C --> BN["RAM控制器63"]
    C --> BO["RAM控制器64"]
    C --> BP["RAM控制器65"]
    C --> BQ["RAM控制器66"]
    C --> BR["RAM控制器67"]
    C --> BS["RAM控制器68"]
    C --> BT["RAM控制器69"]
    C --> BU["RAM控制器70"]
    C --> BV["RAM控制器71"]
    C --> BW["RAM控制器72"]
    C --> BX["RAM控制器73"]
    C --> BY["RAM控制器74"]
    C --> BZ["RAM控制器75"]
    C --> CA["RAM控制器76"]
    C --> CB["RAM控制器77"]
    C --> CC["RAM控制器78"]
    C --> CD["RAM控制器79"]
    C --> CE["RAM控制器80"]
Basic Operation
Power on / off
Press any key on the front panel or the [POWER] key on the remote control to turn on the power in standby mode. The unit goes back to the last status after being turned on.
Press and hold the [SRC] key on the front panel or press the [POWER] key on the remote control to turn off the power in work mode.
Mute
Press the [MUTE] key on the front panel or remote control to mute the volume from the unit. Notes:
-
Repeating the above operation or adjusting the volume will release muting.
-
Mute icon winks on the TFT during muting.
Volume adjustment
Turn the volume knob on the front panel or press the [VOL] key on the remote control. The volume adjustment range is from 0 to 40.
Open SOURCE MENU
Press the [SRC] key on the front panel or remote control, or touch the top left corner of the screen, to open the SOURCE MENU.
Repeat the above operation to return to the original source.
Play source selection
Open the SOURCE MENU, and then touch the desired source or select a source by moving the cursor, then confirm.
Notes:
-
Play source selection means selecting work mode, such as DVD mode, Radio mode, Camera mode, etc.
-
When devices are not ready, they cannot be selected.
Display system time
Press and hold the [DISP] key on the front panel to switch the display information between system time and play source when the TFT monitor is closed.
Using the TFT Monitor
Open / Close monitor
Press the [OPEN/CLOSE] key on the front panel or remote control to push the display panel out or in.
Change the monitor tilt angle
Due to the inherent nature of LCD, you will get different viewing impressions when you watch it from different angles.
The display angle of this unit can be changed; hence, you can select the best angle where you can get the best viewing impression.
Press the [TILT] key on the display panel or the remote control to adjust the tilt angle one step at a time.
Press and hold the [TILT] key on the display panel or the remote control to adjust the tilt angle continuously.
Change aspect ratio
Press the [WIDE] key on the display panel or remote control to adjust the aspect ratio.
Image setting
(1) Enter image setting mode
Press the [PIC] key on the remote control.
(2) Select an item to adjust
Press the [▶]/[◀] keys on the remote control.
(3) Adjust the value
Press the [▶]/[◀]keys on the remote control.
(4) Exit image setting mode
To exit image setting mode, repeat the first step, or stop the operation for several seconds.
Reset the unit
If the unit does not work properly, reset it by pressing the [RESET] button on the front panel.
Radio Mode
Select radio as play source
Open the SOURCE MENU and then touch RADIO.
Select one radio band
Press the [BAND] key on the display panel or remote control, or touch the [BAND] icon on the user interface, to select one radio band from FM1, FM2, FM3, AM1 and AM2.
Auto tuning
Press the [▶]/[◀] key on the display panel or remote control, or touch the [▶/] icon on the user interface, to search for a higher / lower station.
To stop searching, repeat the operation above or press other keys with radio functions.
Note:
When a station is received, searching stops and the station is played.
If the unit receives a stereo broadcast, the indicator light of stereo 'ST' on the TFT or LCD display will be lit.
Manual tuning
During manual tuning, the frequency will be changed in steps.
Press the [▶]/[◀] key on the remote control, or touch the [ ]/[ ] icon on the user interface, to tune in a higher / lower station.
Touch the numeric keypad icon ( ) and then touch the numeric buttons to input the radio station frequency numbers.
Auto save
Only stations with sufficient signal strength will be detected and stored in the memory.
When the monitor is closed, press and hold the [AS] key on the front panel.
When the monitor is open, touch the [AS] icon on the user interface.
To stop auto save, press other keys with radio functions.
Notes:
- After auto save, the previous saved stations will be overwritten.
- The unit has 5 bands, such as FM1, FM2, FM3, AM1, AM2, and each band can store 6 stations; hence the unit can store 30 stations in all.
Manual save
When one expected radio station has been detected
(1) Press the [MEM] icon on the user interface and the preset menu will be opened.
(2) Press one preset button from P1\~P6.
(3) If you want to abort, press the [Exit] button.
Preview scan
In preview scan searching, the searching pauses when a station is received and then played for 5\~10 seconds. After being played, the unit continues the process until the whole band is detected.
When the monitor is closed, press the [AS] key on the display panel.
When the monitor is opened, touch the [PS] icon on the user interface.
To stop the process, press other keys with radio functions.
Recall stored stations
Press a numeric key from 1 to 6 on the remote control, or touch an onscreen station button, to select the corresponding stored station.
Local seeking
When LOCAL seeking is on, only those radio stations with strong radio signal can be received.
To open or close the LOCAL function, press and hold the volume knob on the front panel.
Notes:
-
When the local radio station searching is on, the indicator light 'LOG' lights up; whereas the light goes off.
-
The number of radio stations that can be received will decrease after the local seeking mode is on.
Disc Mode
Insert a disc
Upon inserting a disc, the unit will switch to disc mode automatically.
Notes:
-
Be sure there is no disc in the unit before inserting another one.
-
Some recorded discs, such as CD-R, CD-RW, DVD-R, DVD+R, DVD-RW and DVD+RW cannot be played back because of different recording statuses. Otherwise, the discs could not be played back without being closed.
-
Please refer to the appendix for precautions on disc use.
Eject the disc
Press the [A] key on the front panel or remote control to eject the disc.
Touch screen controls
The touch key areas for DVD playback are outlined below

| Disc type Icon MP3/WMA CD VCD DVD MPEG Picture | ||||||
| Numeric keypad | Numeric keypad | Numeric keypad | Numeric keypad | Numeric keypad | Numeric keypad | |
| Setup menu Setup menu Setup menu Setup menu Setup menu | ||||||
| /Fast forward Fast forward Fast forward Fast forward | ||||||
| /Fast rewind Fast rewind Fast rewind Fast rewind | ||||||
| Previous Previous Previous Previous Previous Previous | ||||||
| Next Next Next Next Next | Next | |||||
| Play/Pause Play/Pause Play/Pause Play/Pause Play/Pause | ||||||
| Stop | Stop | Stop | Stop | Stop | Stop | |
| 1/2 2/2 | / | / | A second menu | A second menu | A second menu | / |
| Repeat | Repeat | Repeat | Repeat | Repeat | Repeat | |
| Random Random Random Random | / | |||||
| / | / | / | / | / | Rotate | |
| / | / | Zoom | / | / | Zoom | |
| EQ setup | EQ setup | EQ setup | EQ setup | EQ setup | EQ setup | |
| PBC | / | / | PBC | / | / | / |
| A-B | / | / | A-B repeat | A-B repeat | / | / |
| Back | / | / | Exit menu | Exit menu | Exit menu | Exit menu |
| AUDIO / | / | Channel switching | Dialog Language | Dialog Language | / | |
| SUBTITLE / | / | / | Subtitle Language | Subtitle Language | / | |
| DISP | / | / | Display information | Display information | Display information | Display information |
| MENU | / | / | / | DVD MENU | / | / |
| TITLE | / | / | / | DVD TITLE | / | / |
| DIR+ | Next folder | / | / | / | / | Next folder |
| DIR- | Previous folder | / | / | / | / | Previous folder |
A - Return the last menu
B - Display playback information
C - Display onscreen control menu
Suspend playback
Press the [▶/■] key on the front panel or remote control, or open the onscreen control buttons menu and then touch the[ ] button. To resume normal play, repeat the above operation.
Stop playback
To stop playback, press the [■] key on the remote control or open the onscreen control buttons menu and then touch the[■] button.
When the above operation is executed for the first time, the current playback is paused, the break point is memorized and the playback will resume when you start playback again or switch back from other play sources. The current playback will cancel if the above operation is executed twice, and the playback will start over when you start playback again.
Display file list
To display the file list of one recorded disc, stop the current playback.
Fast playback
Press the [▶]/[◀] key on the remote control repeatedly, or open the onscreen control buttons menu and then touch the [▶]/[◀] button repeatedly, to change the rate of fast forward/fast reverse.
Previous / next
Press the [▶]/[◀]key on the display panel or remote control, or open the onscreen control buttons menu and then touch the [▶]/[◀]button to play the next or previous file.
Change folder
Press the [DIR+]/[DIR-] icon on the user interface (you should stop playback first if a video or picture file is played back) to change the folder during the playback of a recorded disc containing more than one folder.
Repeat playback
Press the [RPT] key on the remote control repeatedly, or open the onscreen control buttons menu and then touch the [] button repeatedly, to alter the repeat mode according to the following table.
Repeat playback
Press the [RPT] key on the remote control repeatedly, or open the onscreen control buttons menu and then touch the [ ] button repeatedly, to alter the repeat mode according to the following table.
| Disc type | Repeat mode |
| DVD | Repeat Chapter — Repeat Title — Repeat Off |
| VCD(PBC off) | Repeat Single — Repeat All — Repeat Off |
| CD | Repeat Single — Repeat Folder — Repeat All—Repeat Off |
| MP3/WMA | Repeat Single — Repeat Folder — Repeat All—Repeat Off |
| MPEG | Repeat Single — Repeat Folder — Repeat All—Repeat Off |
| Picture | Repeat Single — Repeat Folder — Repeat All—Repeat Off |
Notes:
- When a VCD is played back, this function is prohibited if the PBC is on.
- Turning off the power or switching the play source to other modes and back will cancel this function.
Repeat A-B
When a DVD, VCD or CD disc is played back, you can play back the content between the time points from A to B repeatedly.
Press the [RPT A-B] key on the remote control, or open the onscreen control buttons menu and then touch the [RPT A-B] button, to set the start point (A) of the repeated section.
Do the above operation again to set the end point of the repeated section.
The selected portion will repeat continuously.
Do the above operation for the third time to cancel this function.
Random playback
When this function is on, the content in the disc will be played back randomly.
Press the [RDM] key on the remote control repeatedly, or open the onscreen control buttons menu and then touch the [×] button repeatedly, to alter random playback mode between 'Random on', 'Random off'.
Intro playback
When this function is on, the unit will play back the first 10 seconds of each track of a VCD or CD disc. You can search the desired file using this function.
Press the [SCN] key on the remote control to activate this function.
Repeat the above operation to cancel this function.
Direct search
When a DVD, VCD or CD disc is played back, you can search for a particular chapter / track by pressing the numeric keys of the remote control. For example, to select the 15th track, press numerical keys [1] and [5].
GOTO search
(1) Enter GOTO search mode
Press the [GOTO] key on the remote control to open the search menu.
For a DVD, you can search according to title, chapter and time.
For a VCD, if the PBC function is off, you can search according to time; if the PBC function is on, you can search according to track, time and disc time.
For a CD, you can search according to track.
For MPEG files, you can search according to track and time.
For record discs containing MP3 and/or JPG files, you can search according to track (file number).
(2) Enter search information
Select items by pressing the direction keys on the remote control, and enter search information by pressing the numeric keys such as title, chapter and time.
(3) Confirm
Press the [Enter] key on the remote control to confirm.
(4) Exit GOTO search mode
Repeat the above operation until the search menu disappears, or touch the [Exit] button on
the menu.
MENU and TITLE
This function is only available for DVD discs with "MENU / TITLE".
Press the [MENU] key on the remote control, or open the onscreen control buttons menu and then touch the [MENU] button to open DVD MENU.
You can select audio language, subtitle language and so on for playback.
Press the [TITLE] key on the remote control, or open the onscreen control buttons menu and then touch the [TITLE] button to open DVD TITLE.
You can select a different title for playback.
Select subtitle language
Press the [SUBTITLE] key on the remote control repeatedly, or open the onscreen control buttons menu and then touch the [SUBTITLE] button repeatedly, to choose a subtitle language.
Select multi-angle views
Press the [ANGLE] key on the remote control repeatedly to choose a shooting angle during the playback of a DVD disc or video file containing multi-angle views.
Select audio channel
For DVDs containing multi-language audio files, press the [AUDIO] key on the remote control repeatedly, or open the onscreen control buttons menu and then touch the [AUDIO] button repeatedly, to change the dialogue language.
For VCDs and CDs, press the [AUDIO] key on the remote control repeatedly, or open the onscreen control buttons menu and then touch the [AUDIO] button repeatedly, to alter audio channel modes among Left vocal, Right vocal, Mono left, Mono right, Stereo.
Note:
The left channel and right channel cannot work properly if the audio files are not recorded correctly.
PBC function
This function is available for VCD discs with the PBC function (Ver. 2.0 or higher).
Press the [MENU] key on the remote control to activate this function.
Press again to cancel.
Notes:
-
When PBC is on, playback goes back to the track list and starts from the first track.
-
When PBC is on, fast motion playback, slow motion playback and skip search are available, but repeat playback and searching for a particular chapter or track are prohibited.
-
If you do random playback, scan playback or searching playback when PBC is on, PBC will turn off automatically.
Zoom in/out
To zoom in/out for the image being played, press the [ZOOM] key on the remote control, or open the onscreen control buttons and then touch the [ 🔒 ] icon.
Rotate picture
When a picture file is played back, you can rotate the picture to get the proper view angle by pressing the
[ C ] icon on the onscreen control buttons
Playback information
Touch the top center area of the TFT LCD when playing back DVD and VCD discs, and the playback information will be displayed on the top area of the TFT.
For DVDs


(1) Disc type.
(2) Elapsed time of the current title.
(3) DVD Title information. “5/8” indicates that this DVD has 8 titles and the title being played is the fifth title.
(4) DVD Chapter information. "2/16" indicates that current title has 16 chapters and the chapter being played is the second chapter.
(5) Indicates that subtitles for this DVD have been recorded in 6 languages, and the language displayed now is the second (English).
(6) Touch the [SUBTITLE] button repeatedly to choose a subtitle language.
(7) Multi angle.
(8) Bitrate.
For VCDs
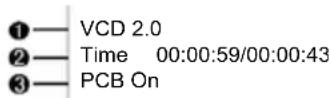
(1) Disc type.
(2) Elapsed time of the current track.
(3) PBC function indicator. "PBC On" indicates that PBC function has been activated.
USB Mode
Select USB as the play source
Method 1:

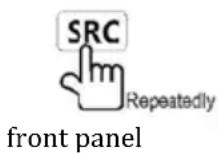
Method 2:
Open the 'SOURCE MENU' and then select 'USB'.
Notes:
- The unit will switch to USB mode after a USB device has been inserted
- The unit supports hot swap.
Using the touch screen controls
The operation is the same as DVD mode.
Onscreen control buttons
Onscreen control buttons under USB mode are the same as disc mode.
MULTIMEDIA CAR RADIO 1DIN 7"
EN
Stop playback temporarily
The operation is the same as disc mode.
Stop playback entirely
The operation is the same as disc mode.
Display file list
The operation is the same as disc mode.
Fast forward/Fast reverse
The operation is the same as disc mode.
Play the next or previous file
The operation is the same as disc mode.
Repeat playback
The operation is the same as disc mode.
Random playback
The operation is the same as disc mode.
Intro playback
The operation is the same as disc mode.
Search for a particular file
The operation is the same as disc mode.
GOTO search
The operation is the same as disc mode.
Zoom in/out
The operation is the same as disc mode.
Rotate picture
The operation is the same as disc mode.
Select picture slide mode
The operation is the same as disc mode.
Playback information display
The operation is the same as disc mode.
Bluetooth mode
Bluetooth is a wireless transmission method for short distance operating at 2.4 GHz. The Bluetooth module can connect with Bluetooth enabled mobile phones. After connecting, you can control your mobile phone through the unit.
Since different mobile phones provide different Bluetooth functions, not all of the functions mentioned below are available for different phones. Please first read the operating manual for the mobile phone in use.
Select Bluetooth as play source
Open the SOURCE MENU and then touch BT.
function icons
The function icons of BT are outlined below.
| Icon | Function | Icon | Function | Icon | Function |
 | Pairing |  | Disconnect |  | Dial panel |
 | Setup |  | Voice transfer |  | Mute |
| [CGDB] | Menu |  | Ans./Dial |  | Hangup |
 | Play/Pause | [DG42] | Stop |  | Next |
| Previous | Phone mode | Music mode |


Bluetooth module work modes
The Bluetooth module has two work modes: phone mode and music mode. Touch the mode switch icon to switch to its corresponding mode. Under phone mode, hands-free, call and other phone functions are available. Under music mode, you can enjoy the music played back by your mobile phone through the speakers in your car, and you can control the play-back.
Phone mode
Pairing
Use this function to establish a connection between the Bluetooth module and your mobile phone.
- Switch the work mode of the Bluetooth module to phone mode, open the SETUP menu, select the Bluetooth sub-menu and then set the 'Bluetooth' option to 'On'.
- Turn on the Bluetooth function of your mobile phone and begin searching Bluetooth devices.
-
When the name of the Bluetooth module appears on the pairing list on your mobile phone, select it. At this time, a pairing code is required. The Bluetooth module will exit pairing mode if there is no pairing instruction from your mobile phone during the pairing time (90 s), and 'Phone Pairing Fail' is displayed on the screen.
-
Enter the pairing code (1234 by default) to initiate the pairing process.
The paired mobile phone name will display on the screen.
Browse call numbers
The Bluetooth module will download phone book and call records from your mobile phone after pairing.
Touch the [MENU] icon to display the Menu list. There are several options on the menu list, including missed calls, received calls, dialed calls and phone book. When you press one of them, the Bluetooth module will get its corresponding information from your mobile phone.
Make an outgoing call
- Browse through the Phone book or call records, touch the number you want to dial and then touch the dial icon to make an outgoing call.
- Touch the Dial Panel icon to open the dial panel and then touch the numeric buttons to input phone numbers. Touch the [Clear] icon to clear the last digit. Touch the hang-up icon to clear all numbers or end the conversation. Touch the Answer icon to make an outgoing call.
Answer an incoming call
The Bluetooth module will switch to phone mode automatically when there is an incoming call, and the incoming call number will be displayed on the screen.
If the 'Auto Answer' option of the 'Bluetooth' sub-menu under the SETUP MENU is set to 'On', the unit will answer incoming calls automatically; otherwise you should answer them manually. The call duration will be displayed on the screen after the incoming call has been put through.
Hang-up
While talking, press the hang-up key on your mobile phone, or touch the hang-up icon on the screen, to end the conversation.
Voice transfer
While talking, touch the 'Voice transfer' icon on the screen to transfer audio from the unit to your mobile phone, and touch it again to transfer audio from your mobile phone to the unit. Note: Some mobile phones will transfer audio from the unit to themselves once the incoming call is answered.
Microphone mute
While talking, press the microphone mute icon on the screen to mute the unit's built-in microphone. Under this condition, the one talking on the telephone with you cannot hear what you are saying. Touch the mute icon again to resume microphone functionality.
Music mode
Pairing
Before pairing, switch the work mode of the Bluetooth module to music mode. The procedure of pairing in music mode is the same as phone mode.
A2DP
A2DP is short for Advanced Audio Distribution Profile. Mobile phones supporting this function can transmit stereo audio, whereas those that do not can transmit mono audio only. After pairing, open the audio player of your mobile phone and set the transmit mode to Bluetooth. At this time, the speakers of your mobile phone will close automatically.
To learn how to set the transmit mode of mobile phones to Bluetooth, please refer to the user manual or help document of the mobile phone being used or audio player software, since the audio players of different mobile phones vary greatly.
AVRCP
AVRCP is short for Audio/Video Remote Control Profile. Mobile phones supporting this function can control the playback of a Bluetooth audio player.
After pairing, touch the corresponding icon to control the current playback, such as Play, Pause, Stop, Previous, Next
Other modes
AUX
External peripheral devices with RCA audio and video outputs can be connected to the unit. To enter AUX IN mode, open the SOURCE MENU and then touch AUX IN.
Camera
This player is “camera ready”. Before accessing any camera features, you must purchase and install a rear video camera. Once the rear camera is connected and operating properly, the CAMERA source mode will become active. While the camera is not installed, the CAMERA option appears gray, indicating that the function is not available.
The play source will change to 'CAMERA' mode automatically when you reverse your car.
Setup
Setup procedures
(1) Enter setup mode
Press the [SETUP] key on the remote control or touch the setup icon [ ] on the user interface. The following menu appears after entering the setup mode.
The GENERAL sub-menu is highlighted by default.

(2) Select a sub-menu
Press the direction keys on the remote control.
(3) Select an item
Press the [ ]/[ ] key on the remote control to select an item, and then press the [ ] key to confirm.
(4) Select a value
Press the [ ]/[ ] key on the remote control to select a suitable value, and then press the [ ] key to confirm.
Note: All following settings can be done by touching the option directly.
General
Clock mode
12Hr: the clock uses a 12-hour display, e.g. 11:18 AM.
24Hr: the clock uses a 24-hour display, e.g. 20:18.
Clock
Adjust the clock displayed on the top right corner of the TFT screen.
Tuner Region
The unit provides several radio systems; you can select the correct radio system according to your country.
Beep
On: Background sound of key-press is on.
Off: Background sound of key-press is off.
Language
OSD
Select one language of system menu display.
DVD Audio
Select one dialogue language of DVD disc.
Note:
If the DVD disc does not contain the selected language, the dialogues you hear will be in the default language.
DVD Subtitle
Select a subtitle language of the DVD disc.
Note:
If the DVD disc does not contain the selected language, the subtitle will be displayed in the default language.
Disc Menu
Select a language from the DVD MENU display.
Note:
If the DVD disc does not contain the selected language, the DVD MENU will be displayed in the default language.
Audio
DRC
Set the dynamic range of Dolby digital DVD discs.
On: Playback more dynamic audio with Bass.
Off: Normal output.
Loudness
On: Loud mode is on.
Off: Loud mode is off.
Bluetooth
Bluetooth
On: Turn on the power of the Bluetooth module.
Off: Turn off the power of the Bluetooth module.
Auto Answer
On: Answer incoming calls automatically.
Off: Answer incoming calls manually.
Connect
Auto: Bluetooth module connects with the Bluetooth device automatically after disconnecting.
Manual: Bluetooth module connects with the Bluetooth device manually after disconnecting.
Pairing code
You should enter the pairing code when the Bluetooth module is pairing with another Bluetooth device. The original pairing code is 1234; you can change the pairing code when the Bluetooth module is on.
Rating
Some DVD discs have built-in parental locks to prevent children from seeing certain scenes (e.g. violence or sexual content).
Set Password
The original password of the unit is null.
You should set a new password ASAP.
How to change the password:
(1) Open the parental lock
Touch the 'Password' option directly to open the keypad, touch the numeric buttons to enter
your old password (initial password for the first time) and then confirm by touching the [ENT] button.
(2) Change the password
Repeat the above operation to enter a 6-digit password (old or new), and then confirm. The new password becomes effective and the parental lock is closed.
- Rating
The unit has the following ratings:
(1) Kid safe: A movie rating that is appropriate for children.
(2) G: A movie rating that allows admission to people of all ages.
(3) PG: A movie rating that allows admission to people of all ages, but suggests parental guidance in the case of children.
(4) PG-13: A movie rating that allows admission to people of all ages, but suggests parental guidance in the case of children under the age of 13.
(5) PG-R: PG-related.
(6) R: A movie rating that allows admission only to people of a certain age, usually 17, unless accompanied by a parent or guardian.
(7) NC-17: A movie rating that allows admission to no one under the age of 17.
(8) Adult: A movie rating that is appropriate for adults only.
Procedures of changing the rating:
(1) Open the parental lock
Use the same method mentioned in the first step (password change).
(2) Change the rating
Select an appropriate rating from the ‘rating’ list.
(3) Close the parental lock
Repeat the operation of the first step to enter a 6-digit password (old or new), and then confirm. The parental lock is closed.
Load Factory
To restore the default DVD playback settings (e.g.: DVD Audio, DVD Subtitle), press the [RESET] option only.
P.VOL
P.VOL means Programmable Volume.
You can balance the volume between different audio sources using this function.
Source
Select a play source to set the relative volume.
Level
You can set relative volume level from -6 to 6.
TS CAL
When the touch function is not sensitive or valid, you should calibrate the touch screen using this function.
Calibrate the touch screen just following the screen introduction after entering the TS CAL mode.
Hardware
Camera In
Normal: Actual scenes shot by the camera display on the TFT monitor while reverse driving (exactly as you are seeing).
Mirror: The mirror images of actual scenes display on the TFT monitor while reverse driving
(just like looking at the rearview mirror).
TFT Auto Open
Auto: The TFT panel automatically opens when the unit is turned on.
Manual: When the ignition is turned off, the TFT panel remains open if it was opened previously.
Off: The TFT panel opens only by pressing OPEN button when the unit is turned on.
Video input
NTSC: Set the color system of the TFT screen to NTSC.
PAL: Set the color system of the TFT screen to PAL.
AUTO: Set the color system of the TFT screen automatically by the unit according to the input video formats.
Parking
On: Image displays only after your car has been parked.
Off: Image displays at all times.
EQ Mode
Audio control allows you to easily adjust the audio system to get the best possible sound effect.
(1) Enter the EQ setup mode
Press the [SEL] key on the remote control or touch the EQ icon in the user

interface, and the following interface will display on the screen.
(2) Select EQ mode
Touch the EQ selection bar repeatedly and the EQ mode will change.
(3) Adjust EQ parameters
To adjust EQ parameters, touch and drag the EQ parameters adjustment bar.
(4) Adjust Front/Rear/Left/Right fader and balance
You can adjust the front/back/left/right balance of the speakers to achieve the desired listening effect according to the surroundings and your interest.
To adjust Front/Rear/Left/Right fader and balance, touch and drag the small white point in the Fader/Balance adjustment area.
Notes:
- The unit offers several EQ modes: User, Rock, Hip Hop, Dance, Latin, Rave, Urban and Acoustic.
Different EQs result in different Bass, Treble and Middle levels.
-
The parameter of the EQ modes has been preset, and cannot be changed from 'User'.
-
The EQ mode will change to 'User' automatically when you adjust the value of BASS, TREB
or MID under modes other than 'User'.
- The value of SUB is separate from the EQ mode, and can be adjusted individually.
General
Reference Supply Voltage 12V(DC)
Operating Voltage Range 10.5\~15.8V(DC)
Max Operating Current 15A
Grounding System Car Battery Negative Pole
Installation Dimension(WxHxD) 178 mm x 50 mm x(165+25) mm
Installation Angle 0°\~30°
Net Weight 2.3 kg
fM
Signal Noise Ratio 55dB
Residual Noise Sensitivity (S/N=30dB) 20dB uV
Frequency Range 87.5-108.0MHz
Station Seeking Level 20\~30dBu V
Distortion 1.5%
Stereo Separation(1KHz) 20dB
Antenna Impedance 75 Q
AM
Frequency Range 522-1620KHz
Residual Noise Sensitivity (S/N=20dB) 40dBuV
Selectivity (±9KHz) 50dB
DVD Player
Signal / Noise Ratio 90dB
Dynamic Range 90dB
Distortion(line out) 0.1%
Frequency Response(±3dB) 20Hz\~20KHz
Max Output Power 4x50W
Load Impedance 4Q
AUX IN
Distortion 0.5%
Frequency Response(±3dB) 20Hz\~20KHz
Audio Input Level 0.4Vrms
Audio
Audio Output Impedance 200Q
Audio Output Level 2Vrms(Max)
(Under normal audio input level and maximum volume)
Video
Normal Video Input Level(CVBS) 1.0 ± 0.2V
Video Input Impedance 750.
Video Output Impedance 750
Video Output Level 1.0±0.2V
(Under normal video input level)
TFT Monitor
Diagonal Screen 7 inches
Usable Display Area 154.1(W) * 87.0 (H)
Resolution 1440 (W) * 234 (H)
Brightness 400cd/m2
(Measure the center brightness after 30 minutes)
Contrast 300( TYP. )
Response Time
Rise 12ms
Fall 18ms
Viewing Angle
From Top 40°
From Bottom 65°
Horizontally ±65^
Environment
Operating Temperature -10°C\~ + 60°C
Storing Temperature -200 + 70C
Operating Humidity 45%\~80%RH
Storing Humidity 30%\~90%RH
Specifications are subject to possible modifications for improvement without further notice.
Region Code
According to DVD sale regions, the whole world is divided into six regions. A DVD disc can be played back only when its region code matches that of the player in use.
Region 1: USA, Canada, East Pacific Ocean Islands;
Region 2: Japan, Western Europe, Northern Europe, Egypt, South Africa, Middle East;
Region 3: Taiwan of China, Hong Kong of China, South Korea, Thailand, Indonesia, Southeast Asia;
Region 4: Australia, New Zealand, Central and South America, South Pacific Ocean Islands/Oceania;
Region 5: Russia, Mongolia, India, Central Asia, Eastern Europe, North Korea, Northern Africa, Northwest Asia;
Region 6: Chinese Mainland.
3. AFTER-SALE SERVICE
Mitsai has designed this device to ensure maximum reliability. However, you can troubleshoot any problems using the procedures in this chapter.
Do not open the device (risk of electrical shock).
If you cannot solve the problem, contact the dealer or manufacturer.
All users should become familiar with this chapter. Knowing what can go wrong can help you to avoid problems.
NOTE: any attempt to fix the device without contacting the manufacturer will void the warranty.
| Problem Cause | Corrective action | |
| General | ||
| Unit cannot power on El disco no entra o no sale | Unit fuse blown. Install new fuse with correct rating. | |
| Car battery fuse blown. Install new fuse with correct rating. | ||
| Illegal operation Reset the unit. | ||
| Remote control does not work | Battery depleted. Change the battery. | |
| Battery installed incorrectly. Install the battery correctly. | ||
| No/low audio output | Improper audio output connection. Check wiring and correct. | |
| Volume set too low. Increase volume level. | ||
| Speakers damaged. Replace speakers. | ||
| Heavily biased volume balance. | Adjust the channel balance to center position. | |
| Speaker wiring is in contact with metal part of car. Insulate all speaker wiring connections. | ||
| Poor sound quality or distortion | Pirate disc is in use. Use original disc | |
| Speaker power rating does not match unit. Replace speakers. | ||
| Wrong connections. Check wiring and correct. | ||
| Speaker is shorted. | Check wiring and correct. | |
| Tel-Mute malfunction | MUTE wire is grounded. | Check the 'MUTE' wiring and correct. |
| Unit resets itself when engine is off | Incorrect connection between ACC and BATT. | Check wiring and correct. |
| TFT monitor | ||
| Monitor does not open automatically | TFT Auto Open is turned off. | Turn TFT Auto Open on. |
| Warning information is shown at all times | Parking brake wiring is not correct. | Check wiring and correct. |
| Flashing image or interference appears on screen | The color system of the DVD disc does not match the monitor. | Adjust the color system of the DVD disc playing back or the monitor in use |
| Pirate disc is in use. Use original disc | ||
| Video cable damaged. | Replace cables. | |
| Improper video signal connections. Check wiring and correct. | ||
If the problem persists, take the device to the service counter of any Worten, Modelo or Continente store for assistance.
Worten Equipamentos para o Lar offers a 2-year warranty from the date of purchase against all manufacturing defects. This warranty assumes proper use and maintenance of the device according to the instructions in this manual. Otherwise, defects will not be covered by the warranty.
Electrical devices should only be repaired by specialized technicians to avoid future complications.
To avoid unnecessary hazards, if you experience problems with any of the wires or other components, repairs should be done at specialized technical assistance outlets with the appropriate tools.
4. eNVIRONMeNTAL CONSeRVATION
To protect the environment, we use the smallest amount of packaging possible, limited to three easy-to-separate materials: cardboard, paper and plastic.
The device is made of recyclable material (when dismantled by a specialized company).
It complies with local legislation on the recycling of all materials.

MANUAL De INSTRUCCIONeS
Declare that the Product:
Directive 1999/5/EC for RTTE
Directiva 89/336 EEC para EMC
Directive 89/336 EEC for EMC
ÍNDICE
natural_image
Simple line drawing of a fish with a crossed X mark and droplets, no text or symbols present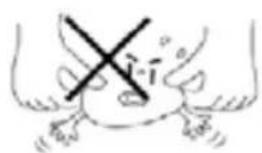

natural_image
Two abstract diagrams showing circular and cross-shaped elements with directional arrows, no text or symbols present.borde áspero exterior

Bolígrafo o lápiz
borde áspero interior
natural_image
Pure electrical circuit lines without any symbolsPULL OUT
(Imagen 1)
natural_image
Simple line drawing of a rectangular frame with rounded corners and mounting holes (no text or symbols)Desinstalación
Retire el marco embellecedor
natural_image
Technical line drawing of a rectangular frame with mounting holes (no text or symbols)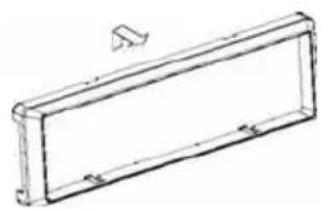
natural_image
Simple line drawing of a rectangular frame with mounting holes and a small protrusion on top (no text or symbols)Desmonte la unidad
Mando a distancia

panel frontal
Método 2:
| SETUP MENU | ||||
| General | Language | Audio | Back | |
| Bluetooth | Clock Mode | 12Hr | ▶ | |
| Rating | Clock | 11:18 AM | ||
| Hardware | Tuner Region | S.Amer2 | ▶ | |
| P.VOL | Beep | Off | ▶ | |
| TS CAL | ||||
Declare that the Product:
Is in conformity with the following EEC Directives, including amendments to the current date:
Directive 1999/5/EC for RTTE
Directiva 89/336 EEC para EMC
Directive 89/336 EEC for EMC
ÍNDICE
natural_image
Simple line drawing of a fish with a crossed-out arrow and droplets, no text or symbols present.

natural_image
Two abstract diagrams showing circular and cross-shaped elements with directional arrows, no text or symbols present.natural_image
Pure electrical circuit lines without any symbolsPUSH IN
Instalar a pilha
natural_image
Pure electrical circuit lines without any symbolsPULL OUT
(Figura 1)
natural_image
Simple line drawing of a rectangular frame with rounded corners and two small holes at the bottom (no text or symbols)Remover
Desmonte o friso de acabamento
natural_image
Simple line drawing of a rectangular frame with mounting holes (no text or symbols)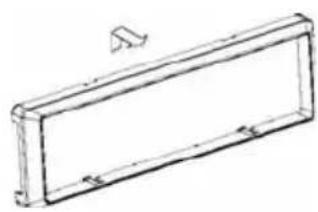
natural_image
Simple line drawing of a rectangular frame with a small protrusion on top (no text or symbols)Desmonte a unidade

Método 2:
Fader / Balance área de ajuste
bar
| Category | Value | |---|---| | Top Left | 100 | | Top Right | 95 | | Bottom Left | 85 | | Bottom Right | 75 | | Bottom Center | 65 | | Bottom Left | 55 | | Bottom Right | 45 | | Bottom Center | 35 | | Bottom Left | 25 | | Bottom Right | 15 | | Bottom Center | 5 | | Bottom Left | 0 | | Bottom Right | 0 | | Bottom Center | 0 | | Bottom Center | 0 | | Bottom Left | 0 | | Bottom Right | 0 | | Bottom Center | 0 | | Bottom Center | 0 | | Bottom Left | 0 | | Bottom Right | 0 | | Bottom Center | 0 | | Bottom Center | 0 | | Bottom Left | 0 | | Bottom Right | 0 | | Bottom Center | 0 | | Bottom Center | 0 | | Bottom Left | 0 | | Bottom Right | 0 | | | Bottom Center | 0 | | Bottom Center | 0 | | Bottom Left | 0 | | Bottom Right | 0 | | | Bottom Center | 0 | | Bottom Center | 0 | | Bottom Left | 0 | | Bottom Right | 0 | | | Bottom Center | 0 | | Bottom Center | 0 | | Bottom Left | 0 | | Bottom Right | 0 | | | Bottom Center | 0 | | Bottom Center | 15 | | Bottom Left | 15 | | Bottom Right | 15 | | | Bottom Center | 15 | | Bottom Center | 15 | | Bottom Left | 15 | | Bottom Right | 15 | | | Bottom Center | 15 | | Bottom Center | 15 | | Bottom Left | 15 | | Bottom Right | 15 | | | Bottom Center | 15 | | Bottom Center | 15 | | Bottom Left | 15 | | Bottom Right | 15 | | | Bottom Center | 15 |Imported, Produced and Distributed by:
- INSTRUCTIONS MANUAL
- DeCLARATION Of CONfORMITY
- INDEX
- SAFETY INSTRUCTIONS
- WARNING RISK OF ELECTRIC SHOCK. DO NOT OPEN.
- Important Warnings
- Assistance
- Important
- Power Supply
- Humidity and Water
- Cleaning
- General Precautions
- USE AND OPERATION
- Product description
- Note:
- EN
- MULTIMEDIA CAR RADIO 1DIN 7"
- Notes on remote control use
- Uninstall Battery
- Install Battery
- Installation and uninstall
- Notes on installation
- Unit Installation
- Method A
- Method B
- Trim Ring installation
- Uninstall
- Disassemble the unit
- Remove the rubber sheath
- Unit connections
- Notes on connection
- Control Cables
- Auto Brightness Control
- Telephone Mute
- Reverse Driving
- Parking Brake
- Basic Operation
- Mute
- Volume adjustment
- Open SOURCE MENU
- Play source selection
- Display system time
- Using the TFT Monitor
- Change the monitor tilt angle
- Change aspect ratio
- Image setting
- Reset the unit
- Radio Mode
- Select one radio band
- Auto tuning
- Manual tuning
- Auto save
- Manual save
- Preview scan
- Recall stored stations
- Local seeking
- Notes:
- Disc Mode
- Insert a disc
- Eject the disc
- Touch screen controls
- Suspend playback
- Stop playback
- Display file list
- Fast playback
- Previous / next
- Change folder
- Repeat playback
- Repeat A-B
- Random playback
- Intro playback
- Direct search
- GOTO search
- MENU and TITLE
- Select subtitle language
- Select multi-angle views
- Select audio channel
- PBC function
- Zoom in/out
- Rotate picture
- Playback information
- For DVDs
- For VCDs
- USB Mode
- Select USB as the play source
- Using the touch screen controls
- Onscreen control buttons
- Stop playback temporarily
- Stop playback entirely
- Fast forward/Fast reverse
- Play the next or previous file
- Search for a particular file
- Select picture slide mode
- Playback information display
- Bluetooth mode
- Select Bluetooth as play source
- function icons
- Bluetooth module work modes
- Phone mode
- Pairing
- Browse call numbers
- Make an outgoing call
- Answer an incoming call
- Hang-up
- Voice transfer
- Microphone mute
- Music mode
- A2DP
- AVRCP
- Other modes
- AUX
- Camera
- Setup
- General
- Language
- Audio
- Bluetooth
- Rating
- How to change the password:
- Procedures of changing the rating:
- P.VOL
- Hardware
- EQ Mode
- fM
- AM
- DVD Player
- AUX IN
- Video
- TFT Monitor
- Viewing Angle
- Environment
- Region Code
- AFTER-SALE SERVICE
- eNVIRONMeNTAL CONSeRVATION
- MANUAL De INSTRUCCIONeS
- ÍNDICE
- Desinstalación
- Retire el marco embellecedor
- Desmonte la unidad
- Instalar a pilha
- Remover
- Desmonte a unidade
Brand : Mitsai
Model : DV7713P
Category : Alarm Clock