KASGSHT24BA - Heating Kogan - Free user manual and instructions
Find the device manual for free KASGSHT24BA Kogan in PDF.


| Brand | Kogan |
| Model | KASGSHT24BA |
| Product Type | Glass Panel Heater |
| Power Consumption | 1200-2400W |
| Voltage | 220-240V~50-60Hz |
| Temperature Setting Range | 5°C to 45°C |
| Timer | Yes (0-24 hours) |
| Heat Modes | High (100% power), Low (50% power), ECO |
| Smart Control | Kogan SmarterHome app, Google Home, Amazon Alexa |
| WiFi Connectivity | 2.4GHz only |
| Display | LED digital with temperature, mode, timer indicators |
| Installation Options | Freestanding with legs or wall mount |
| Child Lock | Yes (press and hold Up/Down for 3 seconds) |
| Open Window Detection | Yes (auto shut-off if temperature drops 3°C in 2 minutes) |
| Safety Features | Overheat protection (do not cover), tip-over switch not specified |
| Color | Black (model KASGSHT24BA) |
| Material | Glass panel, metal body |
| Components Included | Heater, 2 legs, 8 M4 8mm screws, 2 wall anchors, 2 self-tapping screws, user guide |
Frequently Asked Questions - KASGSHT24BA Kogan
User questions about KASGSHT24BA Kogan
0 question about this device. Answer the ones you know or ask your own.
Ask a new question about this device
Download the instructions for your Heating in PDF format for free! Find your manual KASGSHT24BA - Kogan and take your electronic device back in hand. On this page are published all the documents necessary for the use of your device. KASGSHT24BA by Kogan.
USER MANUAL KASGSHT24BA Kogan
natural_image
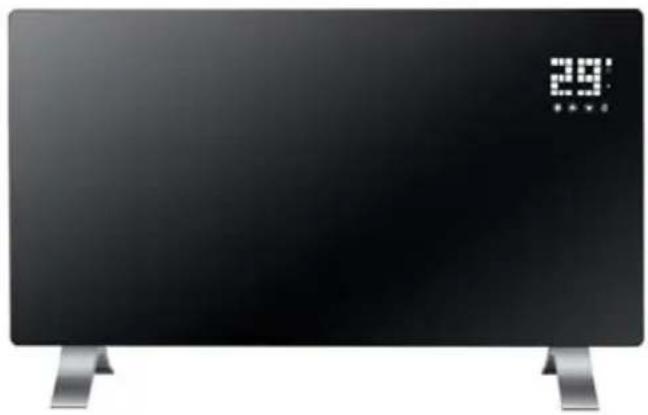
Front view of a black rectangular electronic device with a digital display showing 2.9 seconds (no text or symbols on the device itself)KOGAN SMARTERHOME™ 2400W GLASS PANEL HEATER
KASGSHT24BA, KASGSHT24WA
Safety & Warnings 3
Components 5
Overview 6
Installation 7
Connect to SmarterHome™ App 9
Operation 14
Google Home Control 16
Amazon Alexa Control 19
Notes 22
SAFETY & WARNINGS
- Read all instructions fully before using the product for the first time and retain for reference. If passing this product on to a new owner, include a copy of this guide.
• Power Input : 220-240V\~50-60Hz
• Power Consumption: 1200-2400W
- Do not leave this unit unattended while it is in use.
- Some parts of this product can become very hot and cause burns. Particular attention must be given when children and vulnerable people are present. Keep children and pets at a safe distance from the unit.
- This appliance is not intended for use by persons (including children) with reduced physical, sensory or mental capabilities, or lack of experience and knowledge, unless they have been given supervision or instruction concerning use of the appliance by a person responsible for their safety.
- Children shall not play with the appliance. Cleaning and user maintenance shall not be made by children without supervision.
- This heater is not equipped with a device to control the room temperature. Do not use this heater in small rooms when occupied by persons not capable of leaving a room on their own, unless constant supervision is provided.
- In order to avoid overheating and potential fire hazard, ensure the heater is not covered. In particular, do not use it for drying clothes.
- Do not attempt to repair this product yourself. If the product or its power supply experiences any malfunction or damage, stop using it immediately and contact Kogan.com to arrange a repair.
- If the power cable shows any signs of damage, cease use immediately and contact help.Kogan.com for support.
- Do not handle the element with bare hands. If it is inadvertently touched, remove finger marks with a soft cloth and methylated spirits or alcohol: otherwise, the marks will burn into the element causing premature heater failure.
- This product is suitable for indoor use only.
- Do not use this heater in the immediate surroundings of a bath, shower or swimming pool.
- Do not touch the plug with wet or damp hands.
- Do not run the power cable under carpeting. Do not cover the power cable with rugs, runners, or similar coverings. Arrange the power cable away from foot traffic and where it will not be tripped over.
- Do not wind the power cable around the unit.
- Do not insert or allow foreign objects to enter any ventilation or opening on the heater, as this may result in electric shock, fire or damage to the heater.
- Where possible, avoid the use of an extension cable as this may overheat and cause a fire. However, if you have to use an extension cable, ensure it is suitable for the purpose, has been tested for outdoor use and preferably has an RCD device fitted or attached.
• Always ensure that the heater is plugged into a suitable socket.
- Do not position directly above or below an electrical socket.
• Always use on a dry, suitably strong, stable, flat and level surface.
- Always unplug the unit and ensure that the unit has cooled completely before moving, cleaning or storing.
- This heater is intended for domestic use only and should not be used commercially for contract purposes. Any alternative use, not recommended by Kogan.com, may result in fire, electric shock or injury to persons.
- Check exterior walls for areas of damage before installing the heater.
- Check exterior walls for communication and electrical cables and pipelines. Should any service lines be present in the immediate vicinity do not install your heater, find an alternative location to install this product.
- Do not remove any of the warning stickers or signs from the product.
- This appliance is not intended for use by persons (including children) with reduced physical, sensory or mental capabilities, or lack of experience and knowledge, unless they have been given supervision or instruction concerning use of the appliance by a person responsible for their safety.
- Children should be supervised to ensure that they do not play with the appliance.
- When the appliance is not in use and before cleaning, unplug the appliance from the outlet firstly.
- WARNING: In order to avoid overheating, do not cover the heater.
- The heater must not be located immediately below a socket outlet.
- Do not use this heater if it has been dropped.
- Do not use if there are visible signs of damage to the heater.
- Use this heater on a horizontal and stable surface, or attach it to the wall.
- WARNING: Do not use this heater in small rooms when they are occupied by persons not capable of leaving the room on their own, unless constant supervision is provided.
- WARNING: To reduce the risk of fire, keep textiles, curtains, or any other flammable material a minimum distance of 1 metre from the air outlet.
- The heater is to be installed so that switches and other controls cannot be touched by a person in the bath or shower.
COMPONENTS
natural_image
Front view of a black rectangular electronic device with silver base and digital display showing '29' (no text or symbols on device)A Glass panel heater (x1)
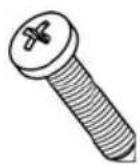
B 35mm self-tapping screws (x2)
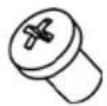
C M4 8mm screws (x8)
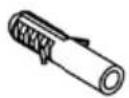
D Wall anchors (x2)
E User guide (x1)
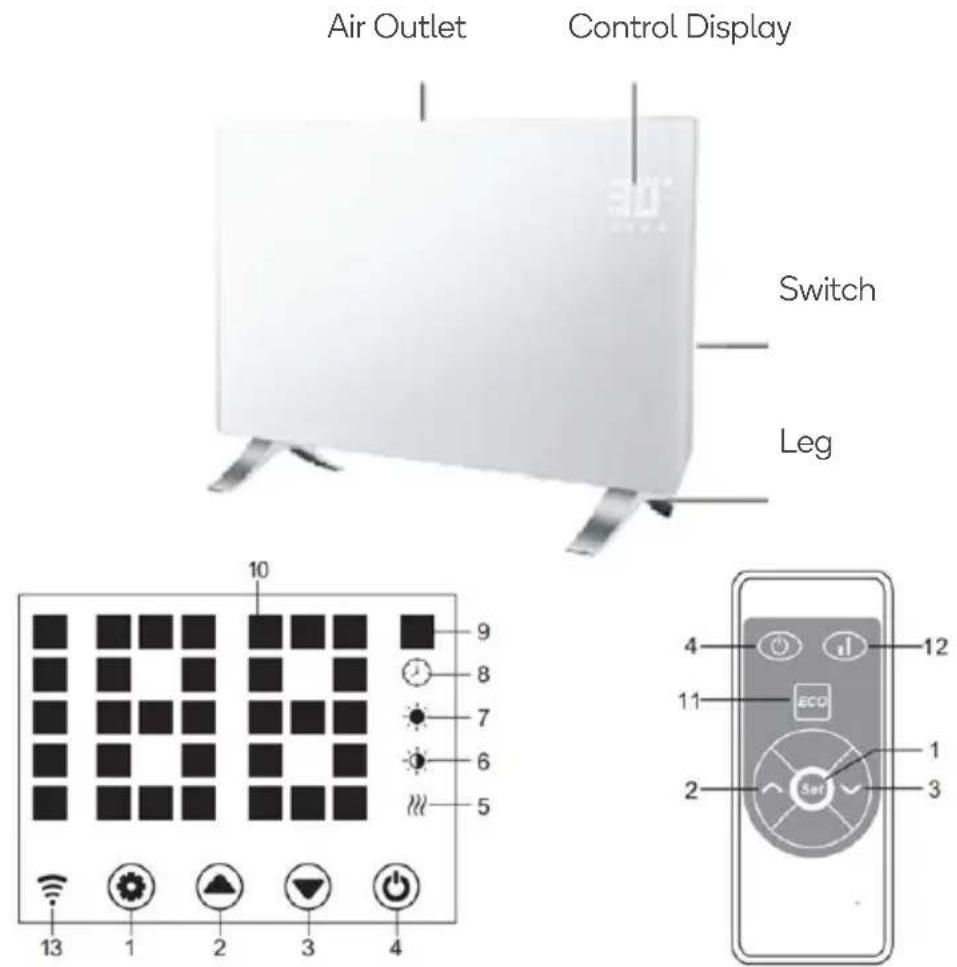
1 Setting button
2 Up button
3 Down button
4 Power button
5 Heating element working indicator
6 Low indicator (50% power)
7 High indicator (100% power)
8 Timer indicator
9 Temperature (°C)
10 LED number display
11 ECO mode
12 Low/High heating mode
13 Wi-Fi Indicator (solid when connected; otherwise, flashing)
INSTALLATION
Leg Installation
Remove the heater and all accessories from the packaging.
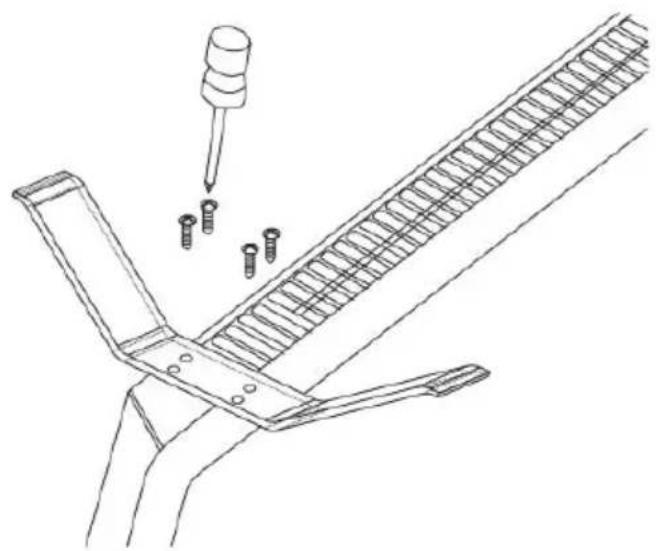
- Place the heater on a flat, dry, and clean surface. Secure the legs in place using the M4 8mm screws, as shown below.
natural_image
Technical line drawing of a mechanical assembly with a pipette inserted into a spring-loaded component (no text or symbols)- Turn the heater right-side up and ensure it sits firmly on its legs.
Notes:
• Make sure there is no breakage or crack on the power cord before its first use.
- Ensure the rating power of the heater is the same with your local power, and that the socket has safety grounding equipment. If the socket is not equipped with safety grounding equipment, replace the socket.
Wall Mount Installation
Note:
The heater MUST be installed with a minimum distance of 100mm from all four sides of the heater.
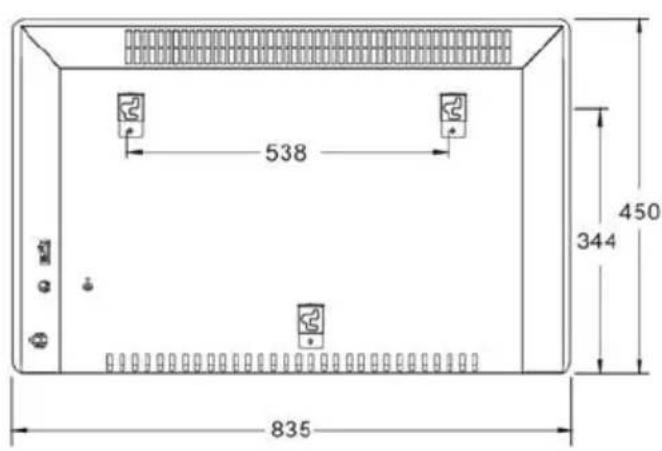
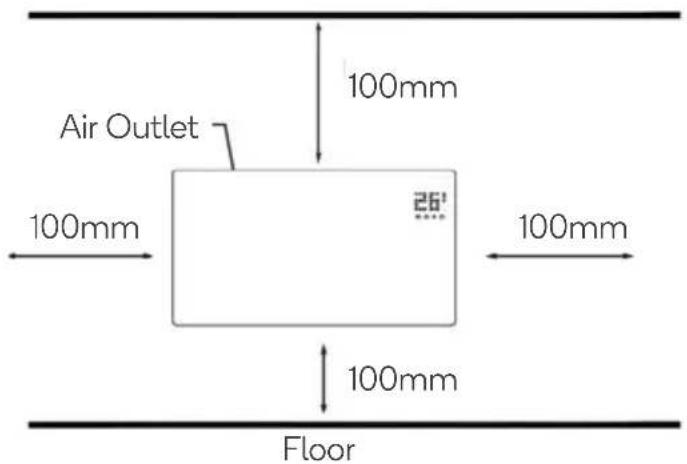
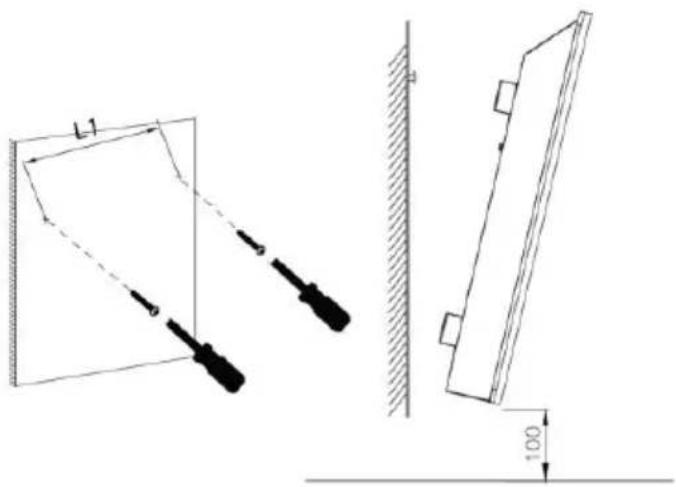
- Drill two holes 538mm apart, ensuring they are straight using a spirit level, then insert the wall anchors.
- Ensuring the holes are aligned, attach the heater to the wall with 35mm self-tapping screws.
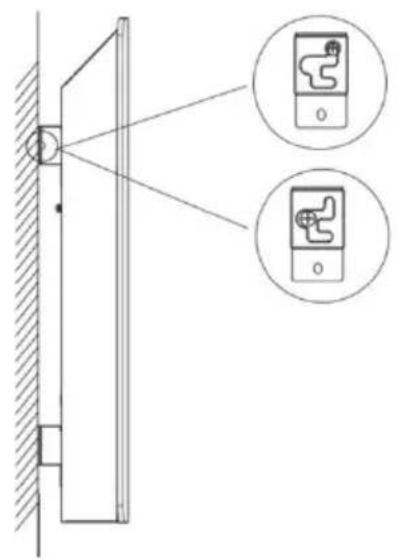
Removing the Heater
To remove the heater from the wall, pull the heater 5mm outward and then move it 10mm to the left.
CONNECT TO SMARTERHOME™ APP
Install App
Download the "Kogan SmarterHome" app from the Play Store (Android) or App Store (iOS).
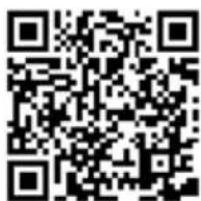
App Store (iOS)

To register:
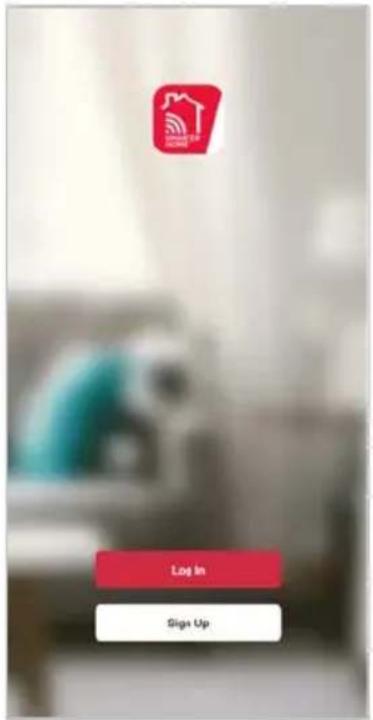
- If you already have a SmarterHome account, select 'Log In'. To register a new account, select 'Sign Up'.
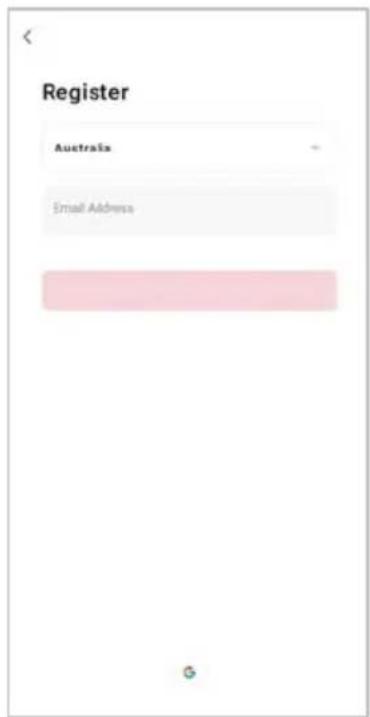
- The system will automatically recognise your country. If needed, you can manually select your country from the drop-down box. Enter your email address and tap 'Get Verification Code' to continue.
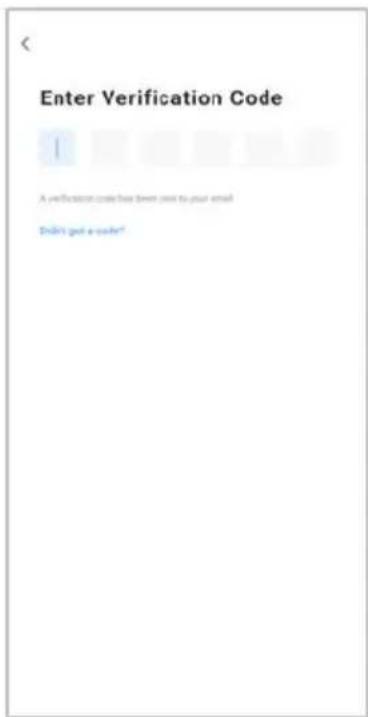
- A 6-digit code will be sent to the submitted email address. Enter this code before the one-minute timer expires.
- Continue to the next page and complete your SmarterHome profile.
Set device in pairing mode
When the device is first turned on, it may automatically enter pairing mode (Wi-Fi indicator will be flashing rapidly).
If not automatically in pairing mode when powered on, you can manually set the device in pairing mode by press and holding the setting button for five seconds until Wi-Fi indicator is flashing rapidly.
Add device through network
- Once registered, tap "Add Device" on the app's home page, or the "+" in the upper right corner, to add a new device through the network.
- Select the product type from the list of options in the app (Heating & Cooling > Heaters).
- Enter your Wi-Fi details. It is important that your SmarterHome™ device and the app are connected to the same Wi-Fi network during setup.
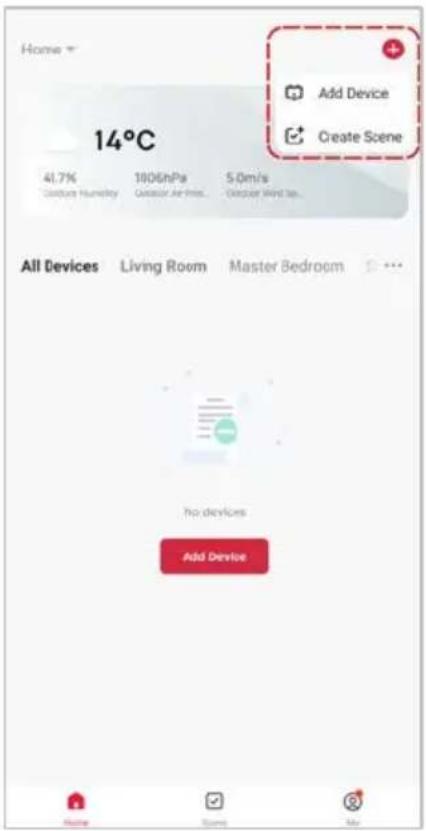
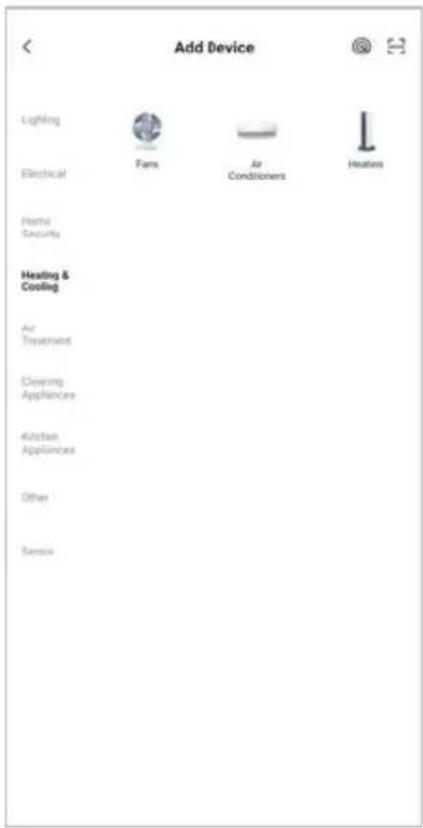
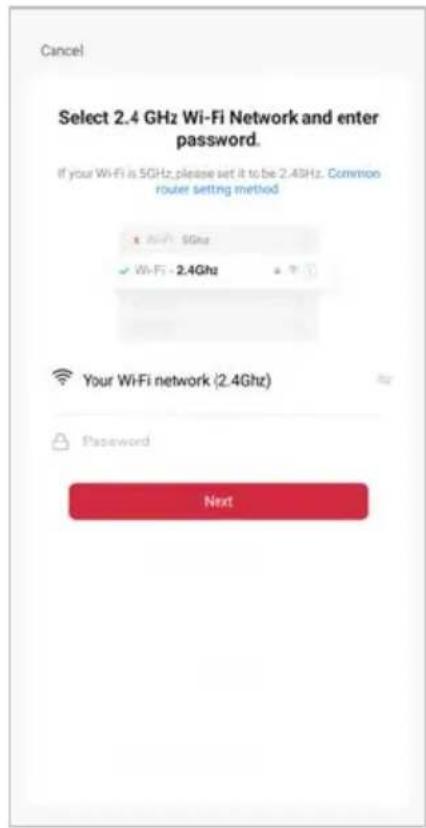
Notes:
• The device and the app have to use the same Wi-Fi network.
• The device is only compatible with 2.4Ghz networks.
- Ensure that the device is in pairing mode, with the Wi-Fi indicator rapidly flashing, and tap "Next".
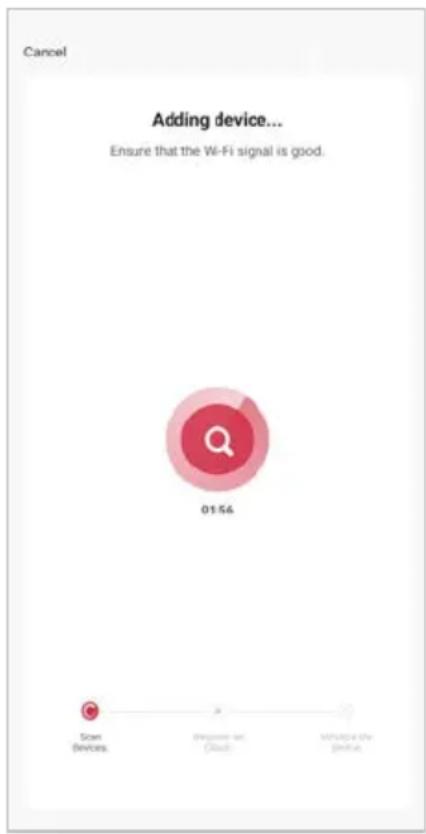
- The device will commence the pairing process and connect to the app. Ensure your Wi-Fi router, mobile phone, and the SmarterHome™ device are kept close until connection is complete.
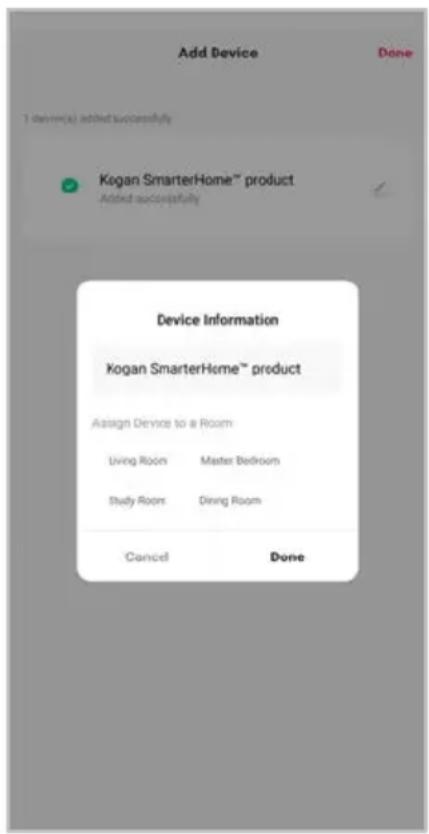
- After successfully being added, you will have the option to rename the device and assign it to a location. It will now be listed on the app's home page. Tap the device listing to enter its control page.
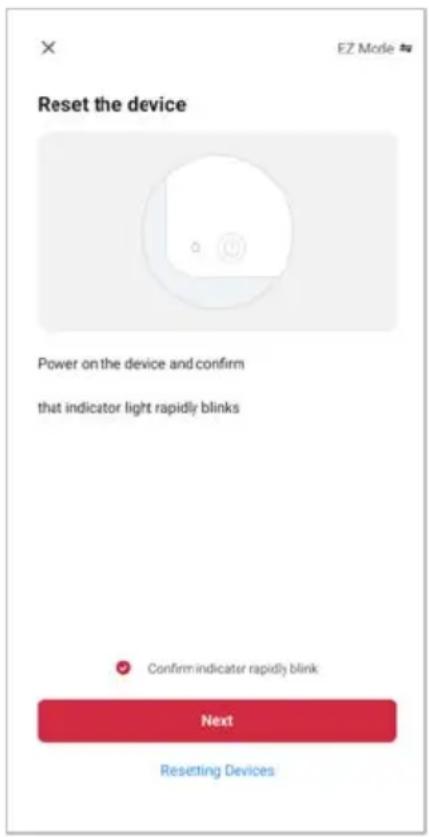
Note:
Once connected, you can select Create Scene from the “+” in the upper right corner (or from the Scene tab) to group connected SmarterHome™ products and automate their functions.
Having trouble connecting?
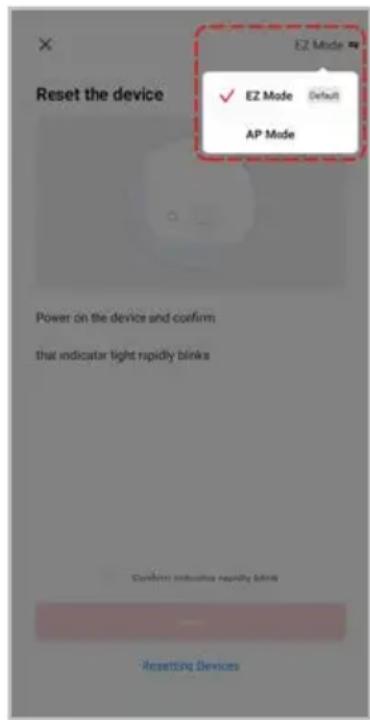
The prior steps detail the process for “EZ Mode” connection. If that does not work for your connection, we suggest trying it again, and if still no success, attempting the following method for AP Mode connection.
Set device in AP pairing mode
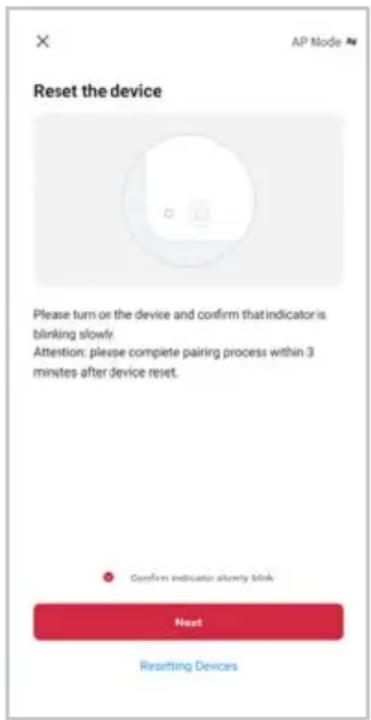
Set the device in pairing mode by pressing and holding the five seconds until Wi-Fi indicator is flashing slowly.
Using AP Mode to add device
- Follow the previous steps to select your product type (Heating & Cooling > Heaters).
- Adjust your connection method by tapping on the mode type in the top-right corner of the screen. Select "AP Mode" for the set-up type.
- Ensure that the device is in pairing mode, with the Wi-Fi indicator slowly flashing, and tap "Next".
- Enter your Wi-Fi details. It is important that your SmarterHome™ device and the app are connected to the same Wi-Fi network during setup.
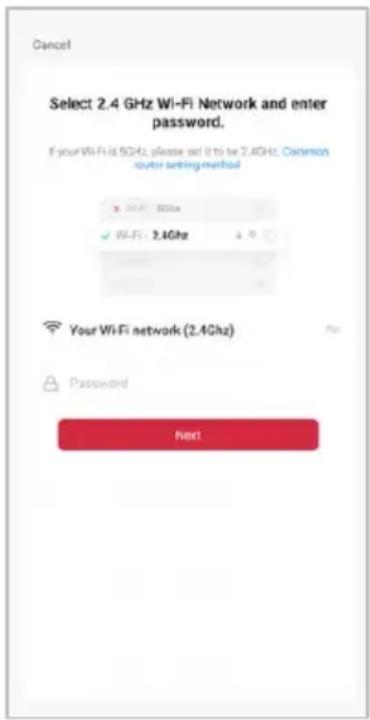
Notes:
- The device and the app have to use the same Wi-Fi network.
- The device is only compatible with 2.4Ghz networks.
Using the App
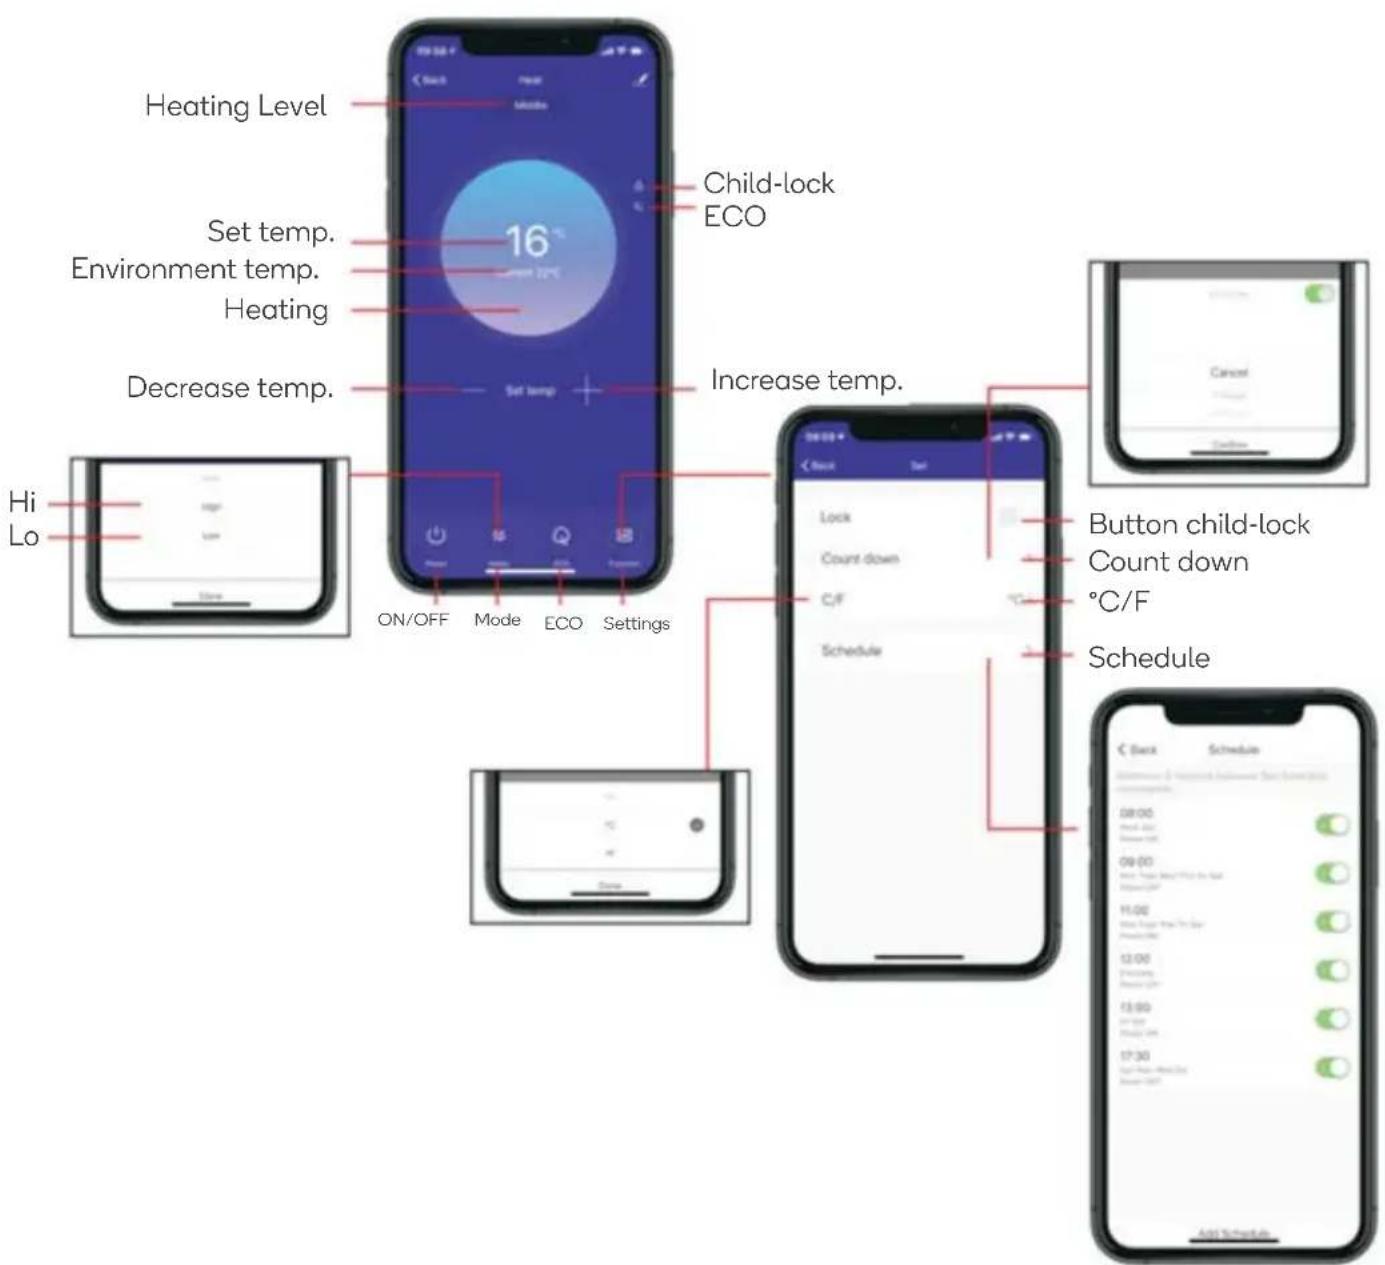
Notes:
- When device is online, it can be controlled.
- When device is offline, it displays "Offline" and cannot be remotely powered on.
OPERATION
Turn the Heater On/Off
- Connect the heater to a power socket and turn on the main switch: the heater will be in standby.
- Press the power button to begin heating operation: the display will show the current ambient temperature.
- Press the power button to turn the heater off.
Temperature Setting
- Press the setting button first to enter the temperature setting mode. Use the up and down buttons to select the desired temperature (5–45°C).
- The selected temperature will be set when there is no input for 5 seconds.
Timer Setting
- With a timer set, the heater will turn off automatically once the set time has been reached.
- Press the setting button twice to enter the timer setting mode. Use the up and down buttons to select the desired timer (in hours).
- The current timer setting will be accepted when there is no input for 5 seconds.
High/Low Heat Mode Selection
- Press the “ [icon] ” button on the remote to toggle between high and low heating modes. The respective indicator will be illuminated.
• To adjust the high/low temperature, on the display:
o Press the “☐” button.
Press the “☐” button to adjust the high temperature. Press the “☐” button to adjust the low temperature.
Press the “☐” button, the temperature will flash, use the “☐” and “☐” buttons to select the desire temperature.
- The selected temperature will be set when there is no input for 5 seconds.
Child-Lock Function
- In heating mode, press and hold both up and down buttons on the display for 3 seconds and the child lock function will be enabled. After 5 seconds, the display will show the ambient temperature.
- To remove the child lock, press and hold both up and down buttons on the display for 2 seconds again.
Display Buttons Activation
During operation, the display buttons will not be illuminated. Touch the panel below the display and they will come on.
Eco Function (Night Mode)
- When in either heating mode, press and hold the setting and down buttons for 3 seconds.
- Alternatively, press the ECO button on the remote control to activate this function. The display will then only illuminate the indicators relevant to the current heating/timer settings.
Press and hold both the setting and up buttons for 10 seconds to swap between Celsius and Fahrenheit.
Open Window Detection
- If the temperature decreases by 3^ C or more within 2 minutes, the Open Window Detection feature will enable and the heater will stop heating. The temperature indicator will flash.
- To restore normal operation, use the power button to turn the heater off, then turn it on again after a few seconds.
Wi-Fi Reset
- During operation, press and hold the setting button for 5 seconds.
- Wi-Fi will now be reset, and the Wi-Fi indicator light will be flashing rapidly.
- Connect the heater to the Kogan SmarterHome™ app following the steps from the “Connect To SmarterHome™ App” section of this user guide.
GOOGLE HOME CONTROL
Note:
You will need to have set up a Google Home account prior to linking your Kogan SmarterHome™ device.
Adding "SmarterHome" to the Google Home app
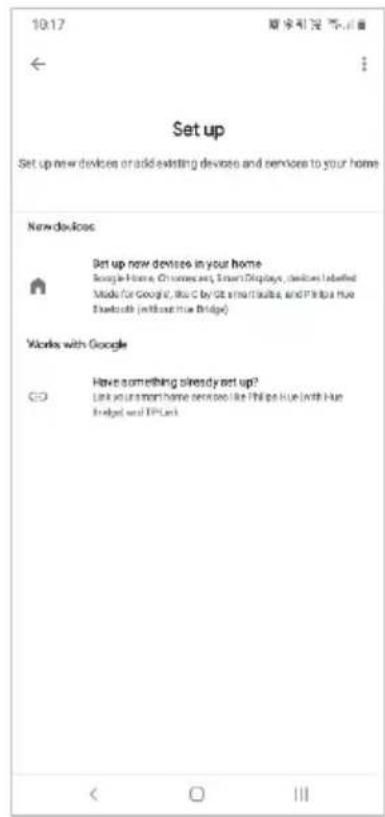
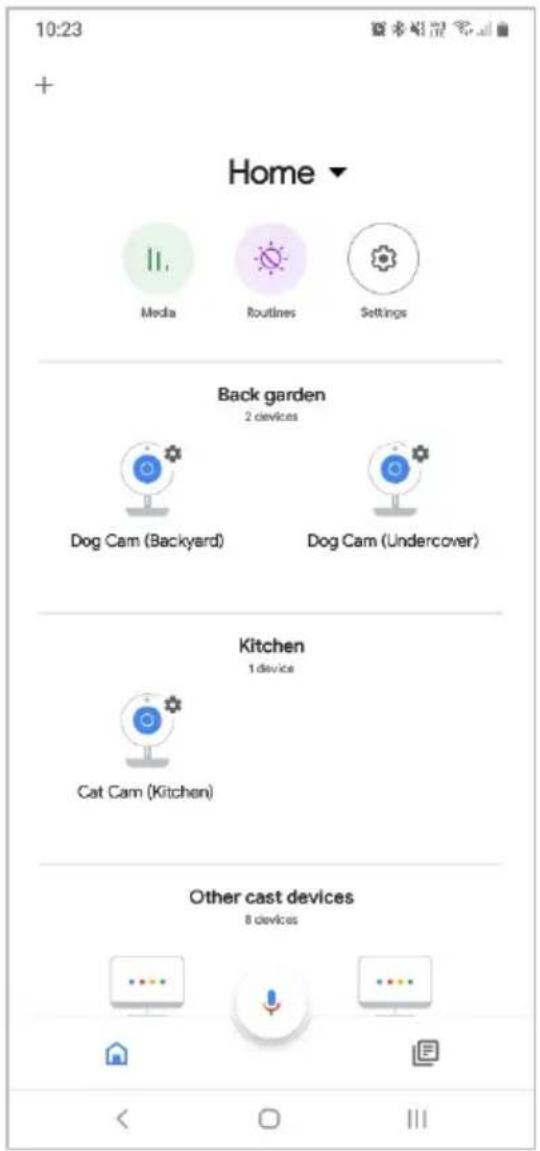
- From the home page of the Google Home app, select the “+” icon to access the ‘Add and manage’ page.
- Select 'Set up device', then under the Works with Google banner, select 'Have something already set up?'
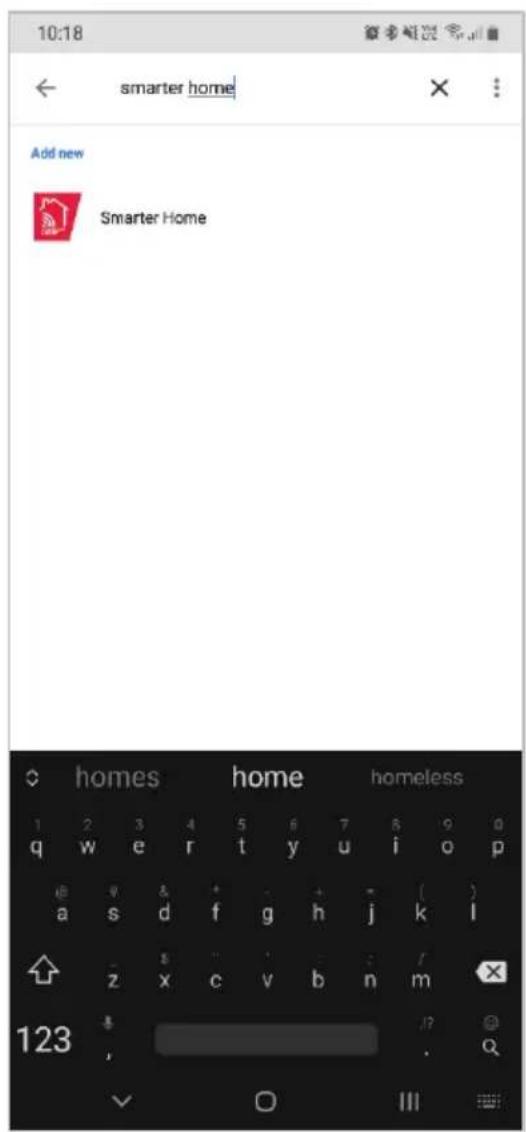
- Select the search bar and type 'Smarter Home' to locate the Kogan SmarterHome™ service.
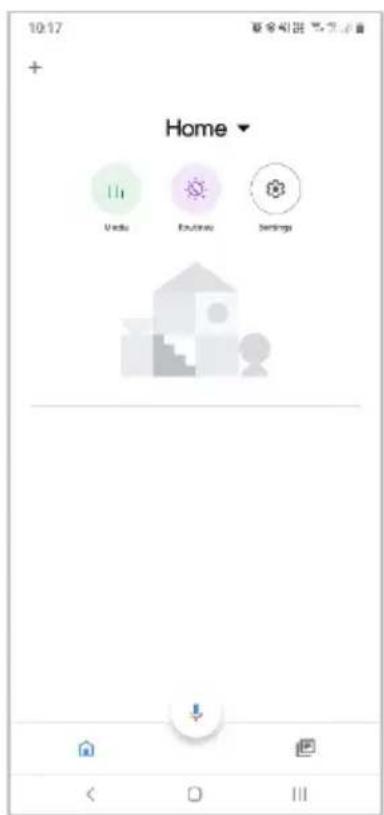
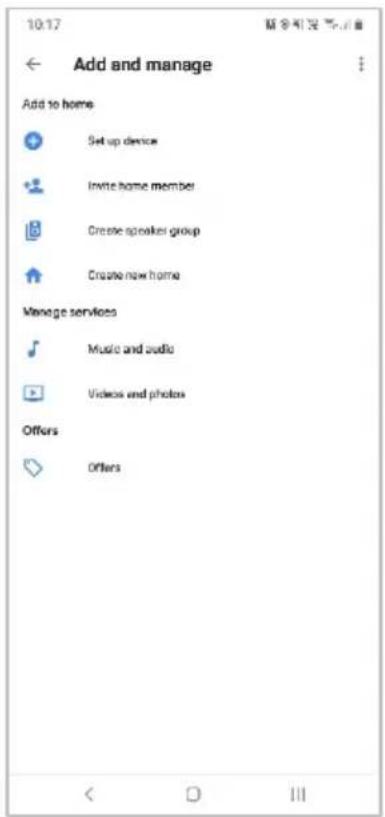
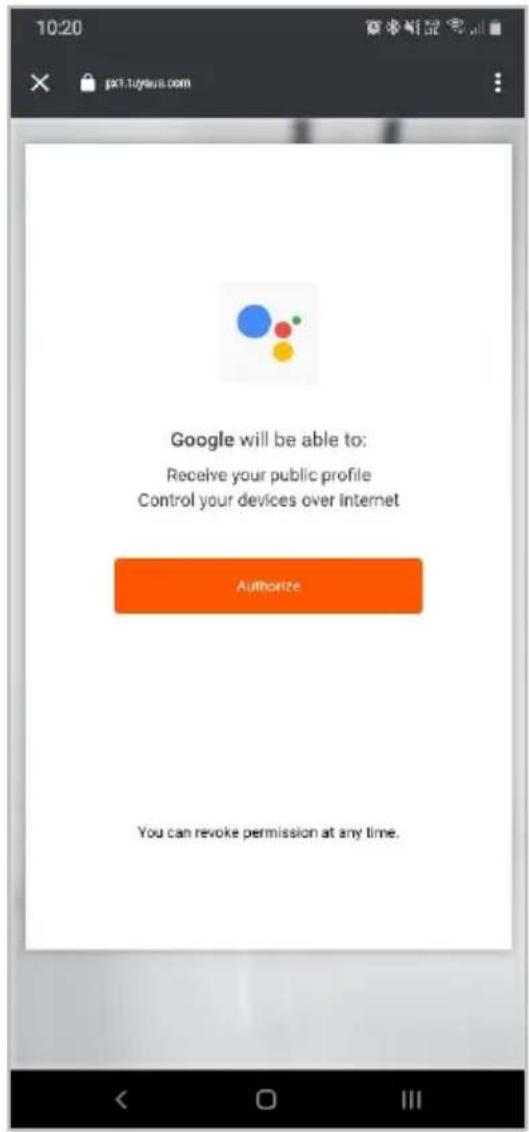
- Tap 'Authorise' to grant Google permission to access the SmarterHome™ app and your devices.
- From here, you will be prompted to sign into your SmarterHome™ account using either your email or mobile phone number, depending on which method you used to register your account.
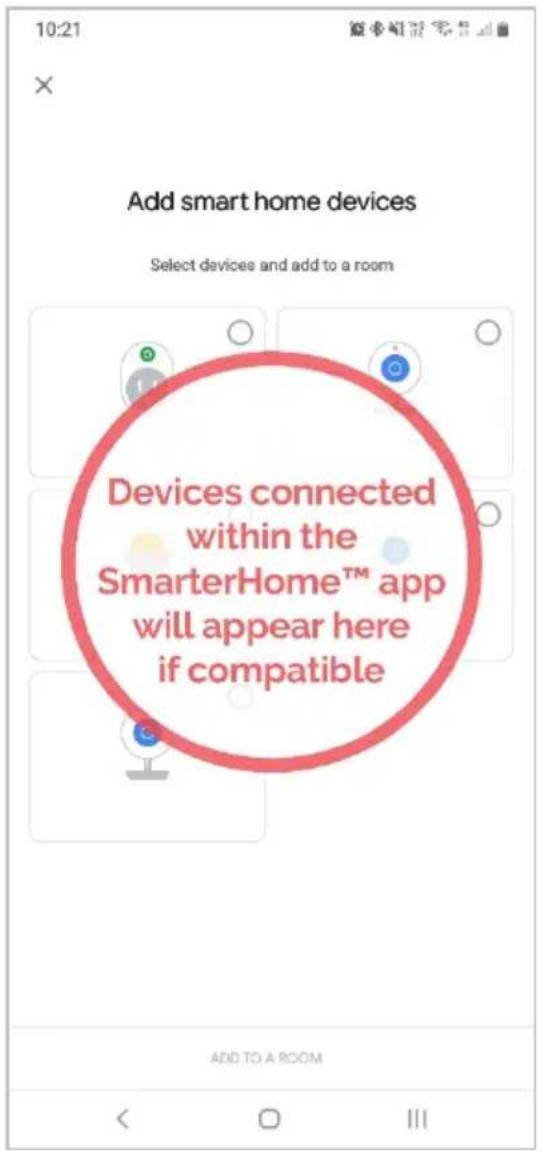
- Once connected, the app will display any compatible devices linked to your SmarterHome™ account. From here you can assign them to rooms and set up any routines.
- Tap on any of the devices to view a list of available commands.
Note:
Please note that Google Home can only control the base/core functions of any compatible SmarterHome™ devices. To make full use of this product's smart functionality, please use the Kogan SmarterHome™ app.
AMAZON ALEXA CONTROL
Note:
You will need to have set up an Alexa account prior to linking your Kogan SmarterHome™ device.
Adding "SmarterHome" to the Alexa app
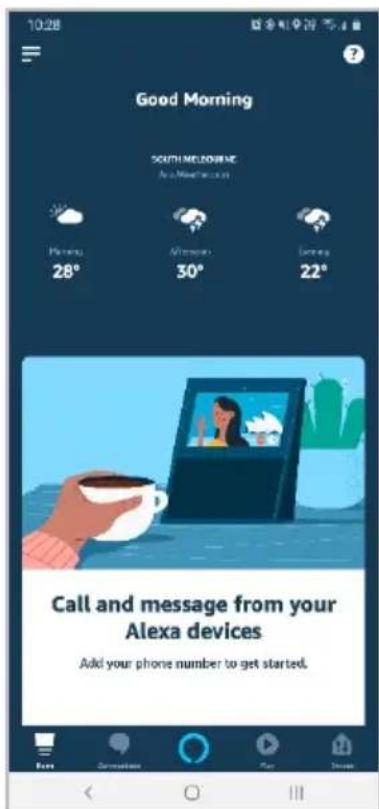
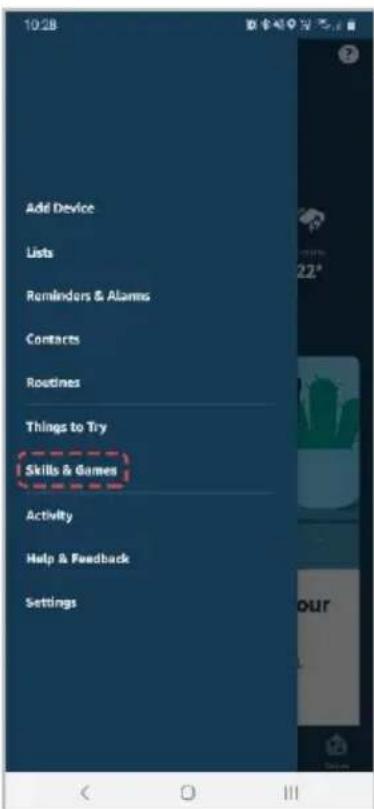
- From the home page of the Alexa app, select the “≡” icon in the top-right and select Skills & Games from the sidebar.
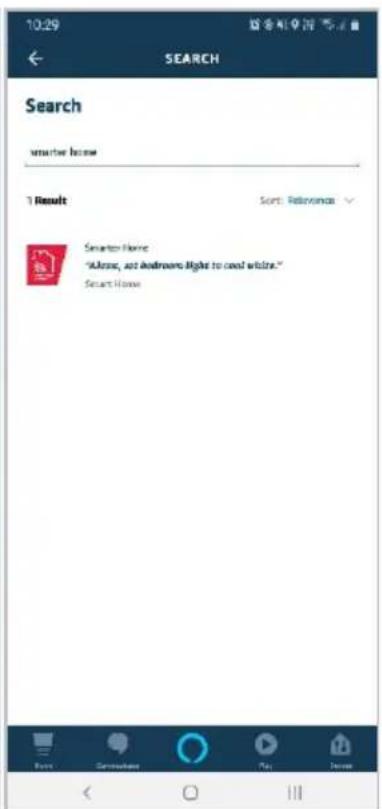
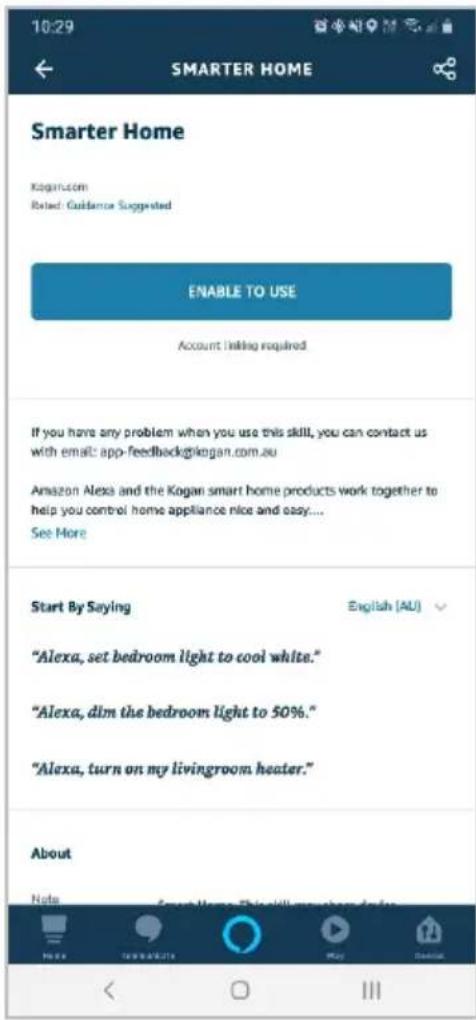
- Select the search bar and type 'Smarter Home' to locate the Kogan SmarterHome™ skill.
- Tap 'Enable to Use' to add the Kogan SmarterHome™ skill to Alexa.
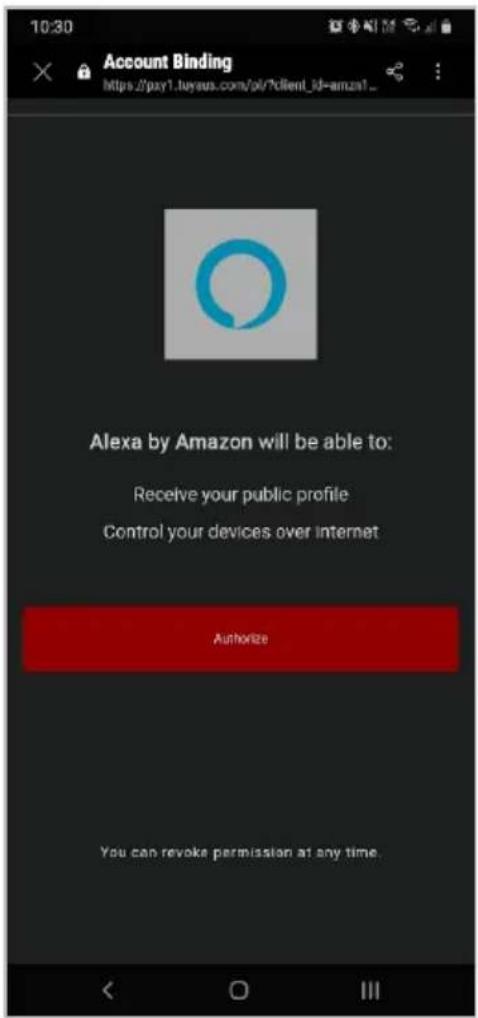
- From here, you will be prompted to sign into your SmarterHome™ account using either your email or mobile phone number, depending on which method you used to register your account.
- Tap 'Authorise' to grant Alexa permission to access the SmarterHome™ app and your devices.
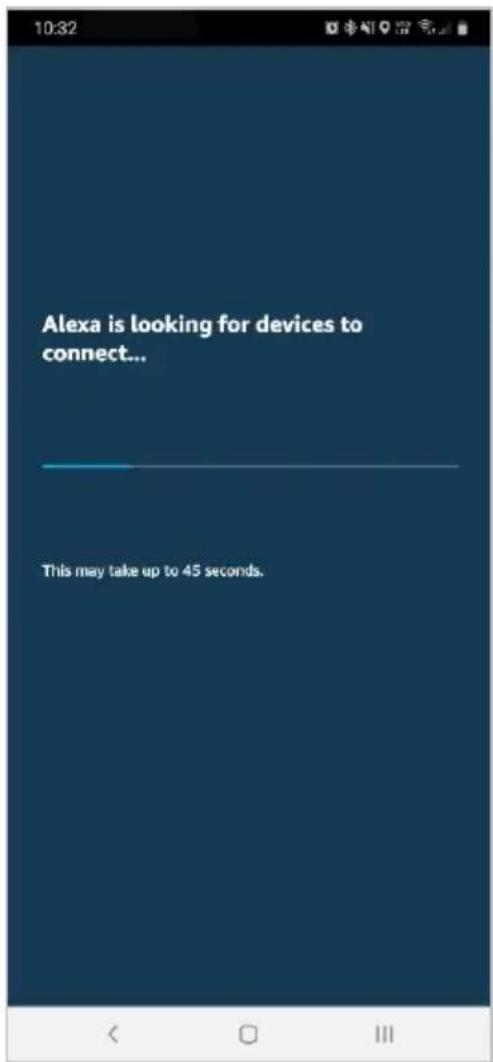
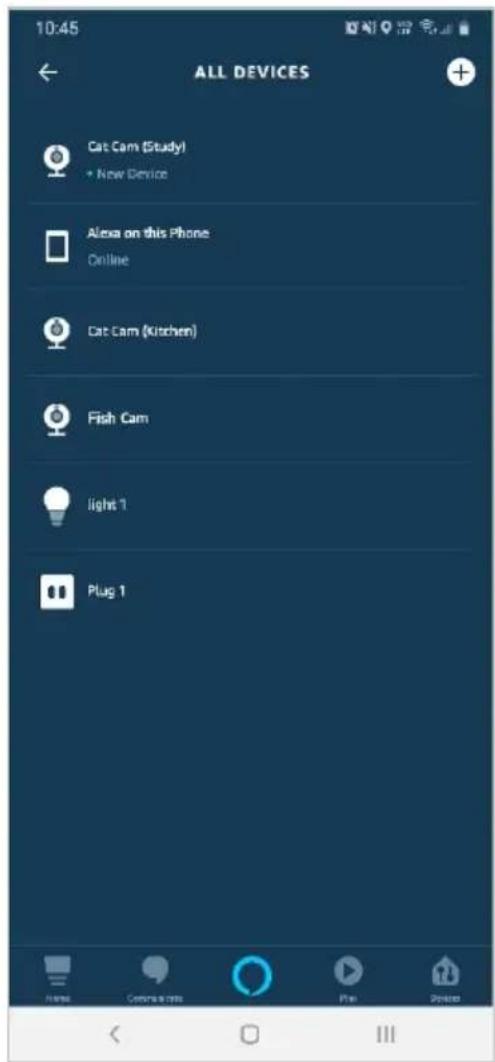
- Once connected, the app will perform a search and display the devices linked to your SmarterHome™ account.
- When your devices have successfully connected to the Alexa app, you will be able to control your Kogan SmarterHome™ devices via Alexa's voice commands.
Note:
Please note that Alexa can only control the base/core functions of any compatible SmarterHome™ devices. To make full use of this product's smart functionality, please use the Kogan SmarterHome™ app.
NOTES
Need more information?
We hope that this user guide has given you the assistance needed for a simple set-up.
For the most up-to-date guide for your product, as well as any additional assistance you may require, head online to help.kogan.com
kogan.com
- KOGAN SMARTERHOME™ 2400W GLASS PANEL HEATER
- SAFETY & WARNINGS
- COMPONENTS
- INSTALLATION
- Leg Installation
- Notes:
- Wall Mount Installation
- Note:
- Removing the Heater
- CONNECT TO SMARTERHOME™ APP
- Install App
- To register:
- Set device in pairing mode
- Add device through network
- Having trouble connecting?
- Set device in AP pairing mode
- Using AP Mode to add device
- Using the App
- OPERATION
- Turn the Heater On/Off
- Temperature Setting
- Timer Setting
- High/Low Heat Mode Selection
- Child-Lock Function
- Display Buttons Activation
- Eco Function (Night Mode)
- Open Window Detection
- Wi-Fi Reset
- GOOGLE HOME CONTROL
- Adding "SmarterHome" to the Google Home app
- AMAZON ALEXA CONTROL
- Adding "SmarterHome" to the Alexa app
- NOTES
- Need more information?
Brand : Kogan
Model : KASGSHT24BA
Category : Heating