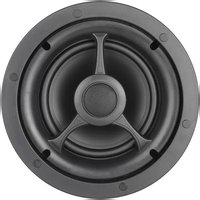
ICTS-6.1-IP - Loudspeaker ATLANTIC - Free user manual and instructions
Find the device manual for free ICTS-6.1-IP ATLANTIC in PDF.


| Brand | Atlantic |
| Model | ICTS-6.1-IP |
| Product Type | Ceiling Speaker |
| Speaker Type | 2-way coaxial |
| Woofer Size | 6.5 inches (165 mm) |
| Power Handling (RMS) | 30 W |
| Power Handling (Program) | 60 W |
| Impedance | 8 ohms / 100V line |
| Frequency Response | 80 Hz - 20 kHz |
| Sensitivity (1W/1m) | 90 dB |
| Maximum SPL | 107 dB |
| Coverage Angle | 90° conical |
| Enclosure Material | ABS plastic with metal grille |
| Grille Color | White (paintable) |
| Ingress Protection | IP44 (splash-proof) |
| Dimensions (Diameter x Depth) | 220 mm x 89 mm (8.7 in x 3.5 in) |
| Cut-out Hole Diameter | 185 mm (7.3 in) |
| Weight | 1.0 kg (2.2 lbs) |
| Mounting Type | Flush mount with dog ear brackets |
| Transformer Taps (100V) | 6 W / 3 W / 1.5 W |
| Operating Temperature | -10°C to 50°C |
| Certifications | CE, RoHS |
Frequently Asked Questions - ICTS-6.1-IP ATLANTIC
User questions about ICTS-6.1-IP ATLANTIC
0 question about this device. Answer the ones you know or ask your own.
Ask a new question about this device
Download the instructions for your Loudspeaker in PDF format for free! Find your manual ICTS-6.1-IP - ATLANTIC and take your electronic device back in hand. On this page are published all the documents necessary for the use of your device. ICTS-6.1-IP by ATLANTIC.
USER MANUAL ICTS-6.1-IP ATLANTIC
Installation Instructions
Thank you for purchasing Atlantic Technology speaker products. These high quality 2-way speakers solve a myriad of surround sound and distributed audio installation problems. We work very hard to ensure that all of our speakers consistently deliver exceptional performance and value.
We hope you enjoy them to their fullest. Please take a moment to read these instructions so you can get the most from your speakers.
Mounting Specifications
These speakers are intended for mounting in a ceiling, in material ranging from 1/2 inch to 1 inch thick. They require at least 5/8 inches of depth as measured from the front surface of the ceiling. The cutout opening for the ICTS-6.1 is 73/8 inches in diameter ( 311/16 inches radius). These speakers will work equally as well in a wall as in a ceiling; however note that they require more mounting depth than is normally available in a 2x4 studded wall.
Mounting Locations
Generally, it's best to keep the speaker at least 24 inches away from any nearby wall boundaries (wall/corner), since placing any speaker in close proximity to other boundary surfaces will artificially reinforce the upper bass/lower midrange sound, adversely “coloring” the sound that the speaker produces.
The ICTS-6.1's 1-inch dome tweeter is mounted in a pivoting housing, so it to can be directed precisely towards the listening area for best sound.
Specifications
| Dimensions 8 | 9/16'' (220 mm) |
| Cutout Dimensions 7 | 3/8'' (188 mm) |
| Mounting Depth (from front surface of ceiling) 4 | 5/8'' (118 mm) |
| New Construction Bracket (optional) IC-NC-6.1 | |
| In-ceiling Back Box (optional) IC-BOX-6/8 | |
| Frequency Response 59-20kHz +/- 3dB | |
| Sensitivity 88dB 1Watt/1 Meter | |
| Recommended Amplifier Power 10-100 Watts RMS | |
| Impedance 6 ohms | |
| Woofer | 6 1/2'' Polypropylene cone |
| Tweeter | 1" Pivoting soft dome |
| Net Weight | 4.6 Lbs (2.1 kg) |
Model ICTS-6.1
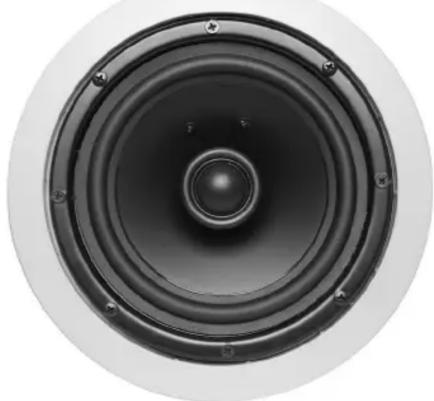
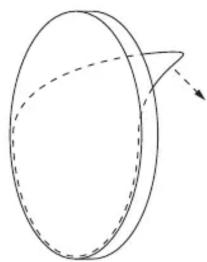
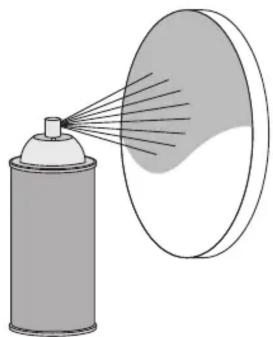
When painting the grille...
1. Remove Scrim
- Paint Grille
- Reapply Scrim

New Construction and Retrofit Installations
Note: A new construction rough-in kit and back box kit are optionally available from Atlantic Technology. Please refer to the instructions included in those kits for their use. If the rough in kit has been used please go directly to Step 2 below.
Mounting Hole Specifications:
ICTS-6.1: Diameter = 7 3/8 in., 188mm; Depth = 4 5/8 in., 118mm
1 Cut an appropriately sized opening in the ceiling material. Be sure that the ceiling material can support the weight of the speaker. Also be sure that the sides of the opening are at least 1 1/2 inches away from any beams or studs within the cavity. If it is not, the rotating clamps will be restricted in their movement and may not clamp properly.
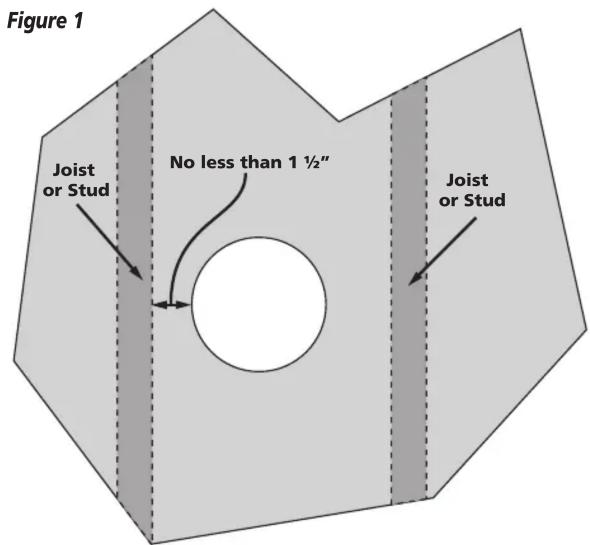
2 Be sure that all foreign material in the ceiling is kept out of the speaker assembly, particularly the back of the woofer cone. There is a cloth shield on the rear of the woofer, but please use care anyway.
3 For conventional Connection to an audio amplifier/receiver:
Attach the speaker wires that have been already run through the ceiling to the speaker terminals. Simply remove 1/2 inch of insulation from the end of each input wire. Push down on the terminal connector and an opening will appear in the connector that is capable of holding up to 14 gauge wire. Insert the bare wire into the opening and release the terminal. Be sure to observe correct polarity, connecting the positive (+) leads to the red terminals and the negative (-) leads to the black terminals. Also be sure that no stray strands of wire touch across any terminals. See Figure 2.
Figure 2

For Connection to an IP-type system, like NetStreams®:
Unscrew the 4 setscrews on top of the built-in Phoenix connector and pull the wires away from the connector. See Fig. 3 (You may tie or clip wires that used to con- here.)
Connect the wires from the NetStreams amplifier to the ICTS-6.1's Phoenix connector and screw down tightly. Consult your NetStreams manual for wiring details.

4 Mount the speaker in the ceiling.
Tighten the mounting screws one at a time. As you tighten the screws, the clamps on the back of the assembly will turn and lower, grabbing the back of the ceiling and sandwiching the ceiling between themselves and the frame's circular trim ring.
5 Snug all four mounting screws in this manner. Be careful not to over-tighten them.
IMPORTANT: If you are using an electric screwdriver, make sure it is set to the “low torque” position.
6 You may now install the grille into the frame by gently pushing it into the recess.

Atlantic Technology
343 Vanderbilt Avenue Norwood, MA 02062
(781) 762-6300 www.atlantictechnology.com

Brand : ATLANTIC
Model : ICTS-6.1-IP
Category : Loudspeaker