
HP-560SB - Soundbar Power Acoustik - Free user manual and instructions
Find the device manual for free HP-560SB Power Acoustik in PDF.


| Brand | Power Acoustik |
| Model | HP-560SB |
| Product Type | Soundbar |
| Dimensions (W x H x D) | 36 x 3 x 2.5 inches (approx.) |
| Weight | 5.5 lbs (approx.) |
| Power Supply | AC 100-240V, 50/60Hz |
| Power Consumption | 30W (typical) |
| Audio Output | 2 x 15W RMS |
| Frequency Response | 40Hz - 20kHz |
| Connectivity | Bluetooth 5.0, 3.5mm AUX, USB, Optical |
| Remote Control | Included (battery CR2025) |
| Mounting | Wall-mountable (brackets included) |
| Material | ABS plastic with metal grille |
| Color | Black |
| Controls | Touch buttons on unit: Power, Volume, Input |
| LED Indicators | Power and Bluetooth pairing status |
| Cleaning | Wipe with dry soft cloth; avoid liquids |
| Safety | Do not expose to moisture or heat sources |
| Spare Parts | Remote control, power adapter available from manufacturer |
| Repairability | Score 7/10; common parts replaceable |
| Warranty | 1 year limited |
Frequently Asked Questions - HP-560SB Power Acoustik
User questions about HP-560SB Power Acoustik
0 question about this device. Answer the ones you know or ask your own.
Ask a new question about this device
Download the instructions for your Soundbar in PDF format for free! Find your manual HP-560SB - Power Acoustik and take your electronic device back in hand. On this page are published all the documents necessary for the use of your device. HP-560SB by Power Acoustik.
USER MANUAL HP-560SB Power Acoustik
natural_image
Black electronic device with a circular speaker grille and indicator lights (no visible text or symbols)Model:HP-560SB 2.1 Ch Audio Sound Bar
READ THESE INSTRUCTIONS COMPLETELY BEFORE USE AND KEEP FOR FUTURE REFERENCE.
Contents
Page
Contents 1
Important Safety Instructions 2
01 Before you start
Introduction 3
Replacing the battery 3
Hints on installation 3
02 Controls and locations of parts
Main unit 4
Remote control 5
03 Connections
Rear panel 6
Front panel 6
04 Basic operation
Source control 7
Sound control 7
Surround control 7
05 Additional information
Troubleshooting guide 8
Specifications 8
IMPORTANT SAFETY INSTRUCTIONS
The following safety precautions should always be followed when using domestic electrical products to reduce the risk of electric shock, personal injury or fire. It is important to keep these instructions for future reference after you have read and understood them and before attempting to use this product.
- This is a domestic electrical product, which must only be used for its intended purpose, in accordance with these instructions. The product should never be used in a commercial environment.
- Check the rating plate to ensure that the correct input voltage is being supplied to the product.
- Always switch the product off and remove the plug from the wall socket when not in use and before cleaning or changing accessories.
- Always ensure the product is switched off before connecting it to the power supply.
- Never reach for an electrical product that has fallen into water. This may lead to an electric shock. Switch off the power at the wall socket and disconnect the plug before attempting to remove it from the water. After removing, never attempt to re-connect the product until it has fully dried and has been tested and approved by a qualified technician.
- This electrical device is not designed to be used by children. Any child using this electrical product should be closely supervised by an adult to ensure all instructions and safety precautions are adhered to.
- Never allow the power cable to come into contact with a heat source, water or any other liquid.
- Never carry this product by the power cord as it could cause damage resulting in electrical failure when it is used again.
- Never operate this product if the cable or plug is damaged. NOTE: Only a qualified electrician should attempt repair.
- Be aware that many electrical products tend to become hot during use. Never touch the appliance when it is hot. Turn off the unit when not in use.
- Never operate this product with wet hands. Always ensure your hands, the device and work area, are dry before switching on the product.
- Never use this product outdoors. This product is designed for indoor use only.
- The ventilation should not be impeded by covering the ventilation openings with items, such as newspapers, table-cloths, curtains, etc.
- No naked flame sources, such as lit up candles, should be placed on the apparatus.
- It shall not be exposed to dripping or splashing and no objects filled with liquids, such as vases, shall be placed on the apparatus.
- Do not place the product in closed bookcases or racks without proper ventilation.
- Where the power plug is used as the disconnect device, the disconnect device shall remain readily operable.
- If this product stops working, switch off and unplug the product immediately. Seek professional advice before attempting to re-use this product.



WARNING
To reduce the risk of fire or electric shock, do not expose this appliance to water or moisture. There are no user-serviceable parts inside. Refer servicing to a qualified electrician.
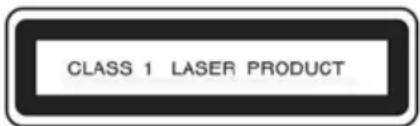
CAUTION
Visible and invisible laser radiation when open and interlocks disengaged. To prevent direct exposure to laser beam, do not try to open the enclosure.
01 Before you start
Introduction
Congratulations on purchasing the HP-560SB 2.1Ch Audio Sound Bar. Please read this instruction manual to learn about the features and controls of this unit.
Hints on installation
We want you to enjoy using this product for many years so please use the following guidelines when choosing a suitable location:
Do...
- Use in a well ventilated room.
- Place on a solid, flat, level surface, such as a table, shelf or stereo rack.
Don't...
- Use in a place exposed to high temperatures or humidity, including near radiators and other heat-generating appliances.
- Place on a window sill or a place where the player will be exposed to direct sunlight.
- Use in an excessively dusty or damp environment.
- Place directly on top of an amplifier or other component in your stereo system that becomes hot when in use.
- Use on a thick rug or carpet, or cover with cloth – this may prevent proper cooling of the unit.
- Place on an unstable surface, or one that is not large enough to support all four of the unit's legs.
02 Controls and location of parts
Main unit

1 SURROUND
Enable/disable surround mode.
7 TV INPUT JACK
TV input to connect audio from a TV.
2 MUTE
Enable/disable sound output. DVD input to connect audio from a DVD player.
8 DVD INPUT JACK
nect audio from a DVD player.
3 SOURCE
Select music source.
9 AUX IN
Insert external audio source using 3.5mm stereo connector.
4 V-
Decrease sound volume level.
10 POWER ON/ OFF
11 POWER CABLE PLUG IN JACK
5 V+
Sound volume level increase.
12 Wall brackets
6 REMOTE IR SENSOR
Remote control
1 Treble level increase + / decrease - buttons
2 Bass level increase + / decrease - buttons
3 AUX source select button
4 TV source select button
5 DVD source select button
6 Mute button
7 Volume UP + / DOWN - buttons
8 Surround mode button

Using the remote control
Keep in mind the following when using the remote control.
- Make sure that there are no obstacles between the remote and the remote sensor on the unit.
• The remote has a range of about 6 m (19.7 ft.). - Remote operation may become unreliable if strong sunlight or fluorescent light is shining on the unit's remote sensor.
- Remote controllers for different devices can interfere with each other. Avoid using remotes for other equipment located close to this unit.
- Replace the batteries when you notice a fall off in the operating range of the remote.
03 Connections
Rear panel

04 Basic operation
In normal use you can switch the soundbar on and off by pressing the power button on the Real Panel.
Selecting a source
Press the SOURCE button on the control panel repeatedly to cycle through the DVD, TV, and AUX IN sources.
From the remote control. Press one of the source select buttons-DVD, TV or AUX IN.
Volume control
Press the V+ or V- buttons on the control panel or on the remote control to increase or reduce the volume level from the soundbar.
Surround control
Press SURROUND button on the control panel or SUR button on the remote control to listen to a virtual surround environment. Press SURROUND again to return to stereo sound mode.
Bass and treble
Press the TREBLE+ or TREBLE- buttons to change the level of the treble.
Press the BASS+ or BASS- buttons to change the level of the bass.
05 Additional information
Troubleshooting guide
If the unit encounters any problem, please check the following first before seeking service.
No power/ No display.
- Check that the power cord is connected securely.
No sound.
- Make sure the audio source is turned on, and a music track is selected and playing.
• Volume might be set at its minimum. Increase the volume level.
Sound is too low.
- Increase volume setting of the audio source.
• Volume might be set at its minimum. Increase the volume level.
System does not respond to remote control.
- The batteries in the remote are weak: Put in new ones.
- The distance between the remote and the player is too great: use the remote within its operating range.
- The remote is not pointed at the remote sensor of the player.
- There are obstacles between the remote and the player.
- Unplug the power cable for 1 minute, and then plug it back in. This will reset the system.
Specifications
AC power supply : AC 100-240V 50/60HZ
Dimensions : 32 1/4" (W) x 3 7/8" (H) x 4 3/4" (D)
Net weight : 11 lbs
Woofer : 4", 75 W
Mid-range : 2.75", 50 V x
Total Power : 175 W
Frequency response : 50 Hz \~ 20 kHz
S/N : >90dB
Input Sensitivity : Woofer: 480mV
: Mid-range: 520mV
Technical support is available Monday
through Friday from 7am to 4pm at
(323)724-4600 extension 293. If Tech Support is
busy, please leave a message and you will get
a return call within 24 hours. For faster
service, please email
tech-support@poweracoustik.com
Power Acoustik
natural_image
Black electronic device with a circular button and speaker grille (no visible text or symbols)Modelo:HP-560SB 2.1 Ch Audio Sound Bar
PRECAUCIÓN
- Model:HP-560SB 2.1 Ch Audio Sound Bar
- Contents
- Page
- Before you start
- Controls and locations of parts
- Connections
- Basic operation
- Additional information
- IMPORTANT SAFETY INSTRUCTIONS
- WARNING
- CAUTION
- Introduction
- Hints on installation
- Do...
- Don't...
- Controls and location of parts
- SURROUND
- TV INPUT JACK
- MUTE
- DVD INPUT JACK
- SOURCE
- AUX IN
- V-
- POWER ON/ OFF
- POWER CABLE PLUG IN JACK
- V+
- Wall brackets
- REMOTE IR SENSOR
- Remote control
- Using the remote control
- Rear panel
- Selecting a source
- Volume control
- Surround control
- Bass and treble
- Troubleshooting guide
- No power/ No display.
- No sound.
- Sound is too low.
- System does not respond to remote control.
- Specifications
- Power Acoustik
- Modelo:HP-560SB 2.1 Ch Audio Sound Bar
- PRECAUCIÓN
Brand : Power Acoustik
Model : HP-560SB
Category : Soundbar