
CTV 4859 - Television AEG - Free user manual and instructions
Find the device manual for free CTV 4859 AEG in PDF.


| Product Type | 19-inch TFT LCD TV with DVB-T |
| Display Diagonal | 482.6 mm (19 inch) |
| Dimensions (with stand) | W 480 x H 398 x D 195.5 mm |
| Net Weight | 6 kg |
| Power Consumption (operating) | 41 ~ 55 W |
| Power Consumption (standby) | 4.2 ~ 4.5 W |
| Power Supply (TV) | DC 12 V, 4.5 A (via AC-DC adaptor) |
| AC-DC Adaptor Input | AC 110-240 V, 50/60 Hz |
| Speaker | 8 Ω × 2 |
| Audio Output | < 3 W |
| Receiving System | B/G, I, D/K, L, L' |
| Colour System | PAL, SECAM, NTSC (auto) |
| Connectivity | SCART, HDMI, VGA, RCA (Video, Audio L/R), YPbPr, PC Audio In, Earphone, USB, Card Slot (SD/MMC/MS), RF Antenna (75 Ω) |
| Tuner | Analog (PAL/SECAM) and DVB-T digital |
| Remote Control | Infrared, 2× AAA batteries (supplied), range up to 8 m |
| Picture Modes | Normal, Dynamic, Soft, Custom |
| Sound Modes | Normal, News, Music, Custom; Surround (Off, Concert, Church, Passive, Live) |
| Aspect Ratios | 16:9, 4:3, Zoom, 16:9 FS, Panorama |
| Teletext | Analog TV and DVB-T teletext supported |
| USB/Smart Card Playback | Movies, Music, Photos |
| Built-in Games | Boxman, Tetris, Hit Rat |
| Child Lock / Parental Control | PIN code (default 0000, master 8888) |
| EPG (Electronic Programme Guide) | Yes (DVB-T mode) |
| Cleaning Instruction | Unplug power, wipe with dry soft cloth |
| Safety Compliance | CE, low voltage directive, electromagnetic compatibility |
Frequently Asked Questions - CTV 4859 AEG
User questions about CTV 4859 AEG
0 question about this device. Answer the ones you know or ask your own.
Ask a new question about this device
Download the instructions for your Television in PDF format for free! Find your manual CTV 4859 - AEG and take your electronic device back in hand. On this page are published all the documents necessary for the use of your device. CTV 4859 by AEG.
USER MANUAL CTV 4859 AEG
Operating Instructions
natural_image
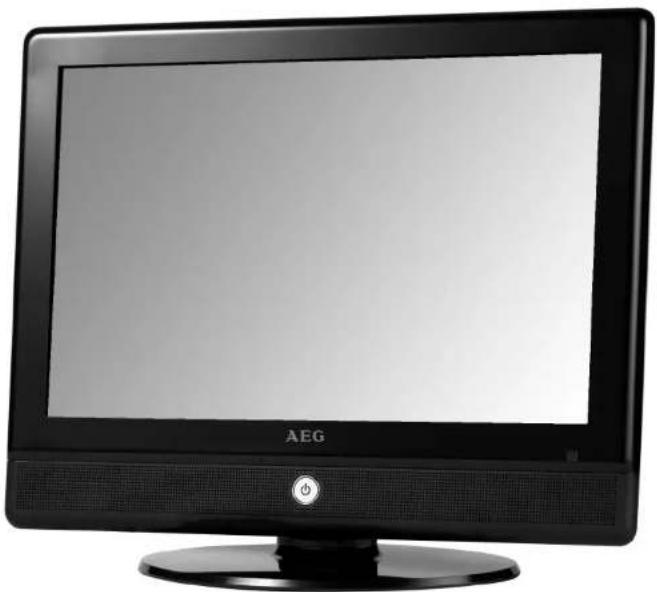
Black AEG television monitor with a power button and stand (no visible text or symbols on the screen)19" TFT LCD TV
CTV 4859 LCD/DVB-T
INHALTSVERZEICHNIS/CONTENTS
Seite
2 Important Safety Instruction 38
3 Installation 43
4 Functional Parts 45
5 USB/card slot apply 46
6 Side view of TV set 47
7 Remote control unit 48
8 Teletext operations 50
9 DVB-T Operations 51
10 Menu Screens 53
11 Change DVB-T system settings 56
12 About the DVB-T receiver 57
13 Programme Manager 59
14 USB connection / card slot 60
15 EPG / Time Reservation 61
16 Games 62
17 Additional functions 63
18 Trouble shooting tips 64
19 The causes of interference 66
20 Disposal 67

VORSICHTI
natural_image
Simple line drawing of a monitor with a black X mark on the screen (no text or symbols)
VORSICHTI

VORSICHT!

VORSICHT!
natural_image
Simple line drawing of a broken structure and a door, no text or symbols present
VORSICHT!
natural_image
Illustration of a person in business attire standing next to a monitor with a globe and crossed-out hand (no text or symbols)
VORSICHTI
natural_image
Simple line drawing of a heating element with steam rising (no text or symbols)
VORSICHT!

WARNUNG!
natural_image
Two line drawings showing electrical connections with wires and components, no text or symbols present
WARNUNG!
natural_image
Diagram showing two views of a cylindrical device with internal components and a separate open panel (no text or symbols)Vorgehensweise
DC 12V IN
RCA (Video, Audio Links, Audio Rechts)
YPbPr
HDMI
VGA
SCART
PC-A IN
FARB TEMP: Normal, Warm, Kalt
ANSICHT: 16:9, 4:3, Zoom, 16:9 FS, Panorama
Receiving System: B/G, I, D/K, L, L'
Colour System: PAL SECAM
LCD Panel: 482.6 mm (19 inch) diagonal
Ext. Antenna: 75 Ohm Coaxial Cable
Ext. In/Out: EARPHONE, SCART, PC
(VGA/AUDIO) IN, HDMI IN
Speaker: 8 OHM X 2
Audio Output: < 3 W
Power consumption: 41\~55 W
Standby power consumption: 4.2\~4.5 W
Wall Power Supply:
TV Power Supply:
AC 110-240V 50/60Hz
DC 12V, 4.5A
Dimension: W 480 X H 398 X D
195.5
(mm) (with standing foot)
Net Weight: 6 kg
GB
Note
Design and specifications are subject to change without prior notice.
This device has been tested according to all relevant current CE guidelines, such as electromagnetic compatibility and low voltage directives, and has been constructed in accordance with the latest safety regulations.

WARNING!
RISK OF ELECTRIC SHOCK
DO NOT OPEN
TO REDUCE THE RISK OF ELECTRIC SHOCK DO NOT
REMOVE COVER OR BACK. NO USER-SERVICEABLE PARTS INSIDE.
REFER SERVICING TO QUALIFIED SERVICE PERSONNEL.

The lighting flash with arrow head within a triangle is intended to tell the user that parts inside the product are a risk of electric shock to persons.

The exclamation point within a triangle is intended to tell the user that important operating and servicing instructions are in the papers with the appliance.
CAUTION: TO REDUCE THE RISK OF ELECTRIC SHOCK DO NOT EXPOSE THIS APPARATUS TO RAIN OR MOISTURE AND OBJECTS FILLED WITH LIQUIDS, SUCH AS VASES, SHOULD NOT BE PLACED ON THIS APPARATUS.
CAUTION
Never tamper with any components inside your set, or any other adjustment controls not mentioned in this manual. When you clean up dust or stick of stain on the LCD panel. The power cord should be pulled out from the plug receptacle, then wipe the receiver with dry soft cloth. During thunder and lighting, unplug the power cord and antenna cord to prevent your TV set from damage. All television receivers are high voltage instruments. All "inside work" on your receiver should be performed by the TV service personnel.
IMPORTANT SAFETY INSTRUCTION


CAUTION!
Do not drop or push objects into the television cabinet slots or openings. Never spill any kind of liquid on the television receiver.

CAUTION!
Do not insert anything in the ventilation holes. If metal or something flammable enters, it may result in fire or electric shock.

CAUTION!
Do not place objects on this unit, it may damage the screen surface.
GB
IMPORTANT SAFETY INSTRUCTION
natural_image
Simple line drawing of a monitor with a black X mark on the side (no text or symbols)
CAUTIONI
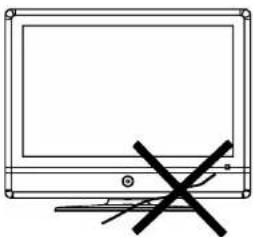
Do not squash power supply cord under the television receiver.


CAUTION!
Do not throw anything at the set. The screen glass may explode by impact and cause serious injury.


CAUTION!
Never stand on, lean on, or suddenly push the television or its stand. You should pay special attention to children. Serious injury may result if it should fall.

natural_image
Simple line drawing of a broken box and a door with motion lines (no text or symbols)
CAUTION!
Do not place your television on an unstable cart, stand, shelf or table. Serious injury to an individual, and damage to the television, may result if it should fall.
IMPORTANT SAFETY INSTRUCTION
natural_image
Illustration of a person running away from a television screen with a crossed-out phone and a circular device (no text or symbols)
CAUTION!
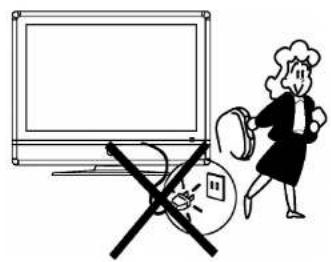
When the television receiver is not used for an extended period of time, it is advisable to disconnect the AC power cord from the AC outlet.
natural_image
Simple line drawing of a heating element with steam rising (no text or symbols)
CAUTION!
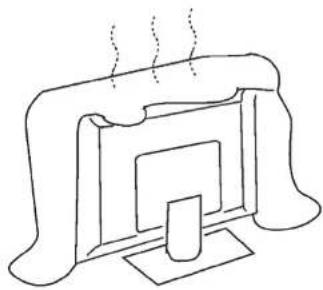
Do not block the ventilation holes in the back cover. Adequate ventilation is essential to prevent failure of electrical component.

WARNING!
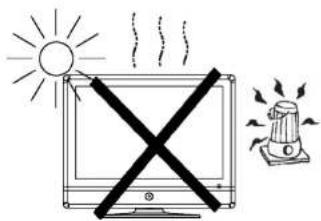
Avoid exposing the television receiver to direct sunlight and other source of the heat. Do not stand the television receiver directly on other produces which give off heat. E.g. video cassette players. Audio amplifiers. Do not place naked flame sources, such as lighted candle on the television. Do not expose the LCD screen surface to the sun, it may damage the screen surface.
natural_image
Two line drawings showing electrical connections with wires, no text or symbols present
WARNING!
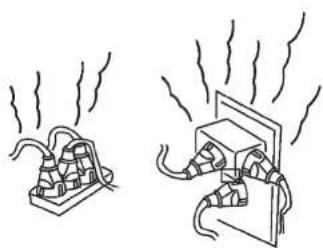
Take care not to connect many appliances to the same mains socket as this could result in fire or electric shock.


WARNING!
High voltages are used in the operation of this television receiver. Do not remove the cabinet back from your set. Refer servicing to qualified service personnel.

WARNING!
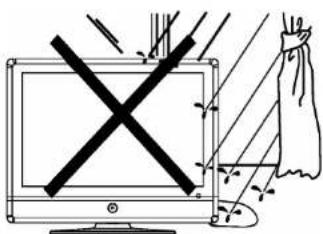
To prevent fire or electrical shock hazard, Do not expose the television receiver to rain or moisture.

natural_image
Illustration of a computer monitor with broken lightning bolts and a bag, no text or symbols present
WARNING!
For you own safety, Do not touch any part of the set, main lead or aerial lead during lighting storms.


CAUTIONI
If the television is to be built into a Compartment or similarly enclosed, the minimum distances must be maintained. Heat build-up can reduce the service life of your television, and can also be dangerous.
Thank you very much for your purchase of this product. To enjoy your set to the full from the very beginning, read this manual carefully and keep it handy for ready reference.
Locate the TV -Set in the room where direct light does not strike the screen. Total darkness or a reflection on the picture screen can cause eyestrain. Soft and indirect lighting is recommended for comfortable viewing.
- Allow enough space between the TV- Set and the wall to permit ventilation.
- Avoid excessively warm locations to prevent possible damage to the cabinet or premature component failure.
This TV operates on a DC supply provided by the AC-DC adaptor. The voltage is as Indicated on the label on the back cover. Only use the AC-DC adaptor supplied with the TV and never apply an AC mains to the TV directly. The AC-DC adaptor operates on and AC mains supply, the voltage is as indicated on the label of the AC-DC adaptor. Connect the DC plug of the AC-DC adaptor to the DC 12 V socket at the rear side of the TV. Connect the AC-DC adaptor and its mains cord. Insert the mains plug in the wall socket having a mains voltage of 230 V/50 Hz.
Do not install the TV -Set in a location near heat sources such as radiator, air ducts, direct sunlight, or in a place somewhere like close compartment and close area.
■ Do not cover the ventilation openings when using the set.
Intended Use
This device is exclusively determined for the reception and replay of image and sound signals.
Any other use is considered non-intended use and is prohibited. The device must not be used for commercial purpose.
Insert the battery into the remote control
2 batteries (AAA, R03, 1.5V) are requested (supplied).

natural_image
Diagram showing two views of a cylindrical device with internal components and a separate open panel (no text or symbols)Procedure
- Remove the battery cover by pressing it and liding it down.
- Insert the batteries, make sure the polarity (+/-) of the batteries matches the polarity marks inside the compartment.
- Replace the battery cover by sliding it on the remote control, you hear a click sound.
Note
A wrong proceeding can leak the battery or to corrosion, which could damage the remote control maintenance.
Precautions
- Batteries are not to be disposed of together with domestic wastes. Dispose of the used batteries at the relevant collection bin or at your dealer's.
Do not expose the batteries to high temperatures or direct sunlight. Never throw batteries into the fire. There is a danger of explosion!
■ Batteries do not reload, short circuit or take apart!
■ Different battery types or new and used batteries must not be used together. - If you cause an electrostatic unloading by touching and the equipment does not function any longer, simply pull the plug from the AC plug socket, wait a few minutes and connect the cable again. The equipment should function completely normally again.
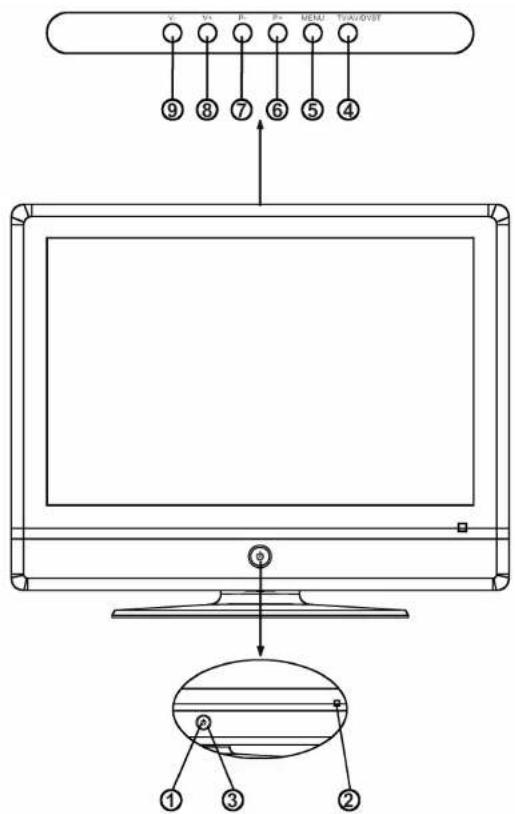
1 LED indicator lamp
2 Remote Sensor
3 Standby/Power Button
4 TV/AV/DVB-T Button
5 MENU Button
6 P + Button
7 P - Button
8 V + Button
9 V - Button
GB
To turn the TV power On
Put the TV set on the correct place, then connect the DC plug of the AC-DC adaptor to the DC 12V socket at the rear side of the TV set. Connect the adaptor main cord to the wall outlet, then the LED indicator lamp turns red/blue and the TV set is at Standby/work Mode. At Standby Mode, if Standby Button is pressed the power indicator will change to blue. It takes a few seconds before the picture appears.
To turn the TV power Off
Press the Standby Button to make the TV set in Standby Mode, then disconnect the power plug from the wall outlet.
Note
If TV is the selected input without signal received and NO operation is performed for about 5 minutes continuously, the TV set will enter standby mode. For any inputs other than TV, the TV set will not enter standby mode automatically without users instruction. If you are not going to use this TV set for a long time, switch off the set and disconnect the power plug from the wall outlet.

USB/card slot apply
1 USB connection
2 Card Slot
Switch the device to DVB-T mode. Insert a USB data carrier or a SD/MMC or MS smart card into the provided slot on the left side. Press the MENU button at the lower area of the remote control to open the DVB-T menu.
Select between the following options in the main menu:
- Movie
- Music
- Photo
Note:
■ Only the selected file types are displayed.
If both a USB data carrier and a smart card are insert, select the required medium by using the "▼/▲" arrow buttons.
DC 12V IN
RCA (Video, Audio Left, Audio Right)
YPbPr
HDMI
VGA
SCART
PC A IN
EARPHONE OUT
TUNER (RF out)

natural_image
Pure electrical circuit lines without any symbols
Note
■ Precautions when connecting to other equipment.
■ When using external equipment with this TV set, please read the instruction manual of the external equipment.
■ Switch off all power supplies to the equipment and TV set before connection.
■ Always ensure that the input and output terminals are correctly connected.
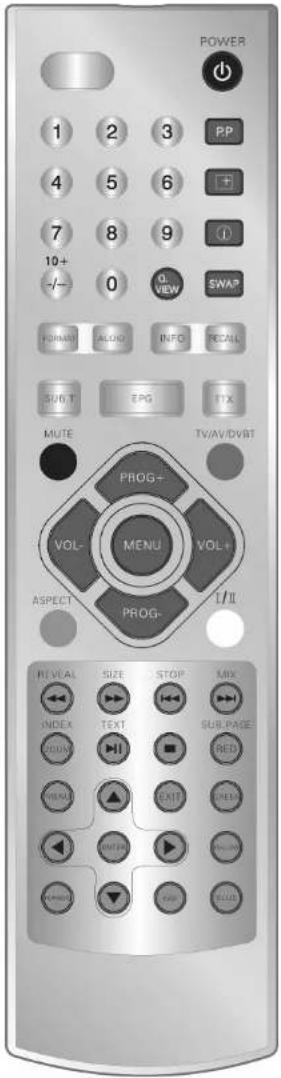
POWER Button
Press this button to switch on the TV when at standby mode or enter standby mode.
MUTE Button
Press this button to mute or restore sound.
P.M Button
Press this button to select the desired picture mode:
Custom -- Normal -- Dynamic -- Soft
Display Button (analog TV only)
Press this button to display the setting on the screen.
Timer Button
Press this button to set the sleep timer, the order shown below (minutes):
0-10-20-30-40-50-60-70-80-90-100-110-120
When the preset length of the time has passed, the TV set enters standby mode.
TV/AV/DVB-T Button
Press this button to switch among TV broadcast, AV input program and other inputs. Press TV/AV/DVB-T button to enter the AV menu. Press the PROG+/PROG- buttons to select the AV source and press VOL+ to confirm.

-/- Button (0-9) (analog TV only)
Press this button to select one-digit, two-digit or tree digital channels input options.
To select an one-digit channel (e.g. Channel 8), press this (-/-) button to change channel selection to "-" on screen display and press the (8) button only.
To select a two-digit channel (e.g. Channel 28), press this (-/-) button to change channel selection to "--" on screen display and press (2) and (8) buttons.
To select a three-digit channel (e.g. Channel 128), press this (-/-) button to change channel selection to “---” on screen display and press (1), (2) and (8) buttons.

MENU Button (analog TV only)
Press this button to enter the menu screens for various optional adjustable settings.
PROG +/- Button (analog TV only)
Press the program up button to select the program forwards. Press the program Down button to select the program Backwards.
VOL +/- Button
Press volume up/down buttons to adjust sound level.
Q.VIEW Button (analog TV only)
Press this button to return to the previously viewed program.
I/II Button (analog TV only)
Press this button to switch between stereo and mono or audio channel I and audio channel II (dualsound channel broadcasting).
SWAP Button (analog TV only)
You can adjust your TV program list order, press this button the program swap menu will be displayed, as shown below. E.g. Swap channel 0 and 7, press (SWAP) button, press (PROG+/PROG-) to choose "From" and then press (VOL+/VOL-) to change channel number; so as to the "To", select (7), lastly move to "Save", press (VOL+) to implement this change.
| From | CH 0 |
| To | CH 7 |
| Save |
ASPECT Button
Press this button to select the aspect ratio:
16:9, 4:3, ZOOM, 16:9 FS, PANORAMA


For models with Teletext function and analog TV only
TEXT Button
Press this button to enter or exit the Teletext mode.
INDEX Button
Press the button to go to the index page.
REVEAL Button
Press this button to reveal the hidden information for some Teletext pages (e.g. answers to puzzles or riddles). Press again to hide the information.
MIX Button
Press this button enter to mix mode. (For SUBTITLE or NEWSFLASH page, please use mix mode). Press this button again to exit.
SIZE Button
Press this button to change the Teletext screen display mode among the following:
■ Upper half screen enlarged
■ Lower half screen enlarged
Normal screen state
STOP Button
Press this button to hold the Teletext page on display to prevent the page from changing. Press again to release the hold state.
SUB. Page Button
Press this button to display sub. Page.
TOP Teletext function
To select the corresponding teletext page as indicated in the color-block press the remote control buttons as follows:
MUTE = red
ASPECT = yellow
TV/AV/DVB-T = green
I/II = blue

For models with DVB-T function only
FORMAT-Button
Direct switching between TV formats (4:3LB, 4:3PS, 16:9).
AUDIO-Button
– Selection of the audio language insofar as several languages are offered.
- Switching between stereo and mono on the left or right.
INFO-Button
Displaying the current channel's reception data.
RECALL-Button
Switching to the previously selected channel.
SUB.T-Button
Shows subtitles (if available).
EPG-Button
Call up the Electronic Programme Guide.
TTX-Button
Activation of the DVB-T Teletext.
ZOOM-Button
Activation of Zoom function.
◀-Button
- Enlarges the zoomed picture after pressing the ZOOM button.
- For fast reverse of the file in USB/memory card mode.
▶-Button
- Scales the zoomed picture after pressing the ZOOM button.
- For fast forward of the file in USB/memory card mode.
Cursor Buttons
▲ – Switching to the next highest channel space.
- Moving the cursor up.
- Move up in the zoomed picture.
▼ – Switching to the next lowest channel space.
- Moving the cursor down.
- Move down in the zoomed picture.
- Raise volume.
- Menu option to the right.
- Move to the right in the zoomed picture.
◀ - Lower volume.
- Menu option to the left.
- Move to the left in the zoomed picture.
Note: Have you regulated the volume by pressing the ▶/◀ buttons, the setting is stored.

For models with DVB-T function only
◀-Button
For selecting the previous file in USB/memory card mode.
▶-Button
For selecting the next file in USB/memory card mode.
▶II-Button
- "Freeze" the current DVB-T picture. "II" is displayed on the screen. Press this button again to deactivate the function.
- Start playing music/videos via USB/smart card
■-Button
Stop plaing music/videos via USB/smart card.
MENU-Button (at the lower area)
Calling up the DVB-T menu.
EXIT-Button
- Displaying the list of stations.
TV/RADIO-Button
Switching between TV and radio, if radio is available.
FAV-Button
Calling up the list of favourites.
RED-Button
- In EPG mode for switching to the daily mode.
- Adds channels to favourites in the „channel organizer“ menu.
GREEN-Button
- In EPG mode for switching to the weekly mode.
- Deletes channels in the „channel organizer“ menu.
YELLOW-Button
- In EPG mode for selecting the advanced info mode.
- Moves stations in the „channel organizer“ menu.
BLUE-Button
- In EPG mode for selecting the timer.
- Blocks channels in the „channel organizer“ menu.

This TV allows you to adjust any setting from the menu screens using "MENU", "VOL+/-" and "PROG+/-" buttons. Press "MENU" button to display the menu, press "VOL+/-" to change menu from one to another, then press "PROG -" to enter the item of each menu, press "VOL +/-" to change the value or state of each item. Press "MENU" again to exit the menu mode
Picture Menu
You can select Contrast, Brightness, Colour, Hue (only in NTSC systems), Sharpness, Colour Temp, Aspect and Picture Mode by pressing PROG+/-.
You can adjust
CONTRAST: (only custom mode),
BRIGHTNESS: (only custom mode)
COLOUR: (only custom mode)
HUE: (only in NTSC systems)
SHARPNESS: (only custom mode)
COLOUR TEMP: Normal, Warm, Cool
ASPECT: 16:9, 4:3, Zoom, 16:9 FS, Panorama
PICTURE MODE: Normal, Dynamic, Soft, Custom
by pressing VOL+/-

Sound Menu
You can select Bass, Treble, Balance, Sound Mode by pressing PROG+/-.
You can adjust
BASS: (only custom mode),
TREBLE: (only custom mode)
BALANCE
SOUND MODE: Normal, News, Music, Custom
by pressing VOL+/-
GB
MENU SCREENS

Setup Menu
You can select Noise Durace, TXT Language, Blue Screen by pressing PROG+/-.
You can adjust
NOISE DURACE: Off, Weak, Middle, Strong
TXT LANGUAGE: West, East, Russian, Arabic, Farsi
BLUE SCREEN: On/Off
by pressing: VOL+/-.
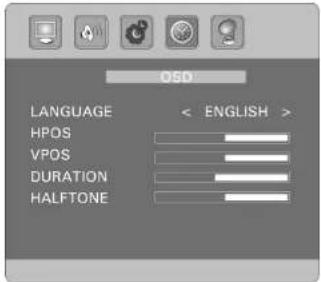
OSD Menu
You can select Language, HPOS, VPOS, Duration and Halftone by pressing PROG+/-.
You can adjust
LANGUAGE: Choose the desired OSD language.
HPOS: (picture: horizontal position)
VPOS: (picture: vertical position)
DURATION: (duration of menu 5 - 60 sec.)
HALFTONE: (halftone image)
by pressing VOL+/-.

Tune Menu
You can select Colour Sys., Sound Sys., Auto Scan, Manuel Search, Fine Tune, Skip and AFC by pressing VOL+/-
You can adjust
COLOUR SYS.: PAL, NTSC, SECAM, Auto
SOUND SYS.: B/G, I, D/K, L, L'
by pressing VOL+/-.
AUTO SCAN: Press VOL+ to begin search program, and press MENU to exit auto search.
MANUEL SEARCH: Press VOL+/- buttons to start searching until a program is searched, or press MENU to stop it.
FINE TUNE: Frequency data can be fine-tuned in upward or downward by VOL+/-
SKIP: Set this item on to skip the channel which you are watching.
AFC: Activate (ON) or deactivate (OFF) the automatic frequency control.

PC Menu (only for PC monitor mode: ADJUST).
You can select H-Position, V- Position, Clock, Phase, Auto-Config by pressing PROG+/-
You can adjust
HPOS: (picture: horizontal position)
VPOS: (picture: vertical position)
CLOCK: Press the VOL+/- to minimize any vertical bars or stripes visible on the screen background.
PHASE: When necessary, adjust the pixel phase of the picture to avoid picture interference.
AUTO CONFIG: To adjust the screen settings automatically. It will take a few seconds and during this process the screen will be black.
Note
If the set is cold, there may be a small "flicker" when the set is switched on. It is normal. There is nothing wrong with the set. If possible, use the VESA 1024X768@60HZ video mode to obtain the best image quality for your LCD monitor. Under other resolutions some scaled or processed pictures may appear on the screen. Some dot defects may appear on the screen, like red, green or blue Spots, however, this will have no impact or effect on the monitor performance. Do not press the LCD screen with your finger for a long time as it may incur some damage to the screen.
Attention: Select only the option "on" with "active antenna", if you connect an active DVB-T antenna. Otherwise, the DVB-T receiver or antenna may be damaged.
Press the MENU button, at the lower part of the RC and call up the Digital TV/Configuration" menu. You can carry out the following settings in the submenus.
| Setting Options Explanation | ||
| OSD Theme 1-5 You can select the OSD menu background color. | ||
| Time on OSD | OFF/ON | You can select whether time is to be permanently displayed. |
| OSD Timeout 1-6 | Select the time after which the OSD is to fade out. | |
| OSD Trans 0%-60% Select the transparency of the OSD menu. | ||
| OSD Language You can select the required language for the screen menu. | ||
| MP4 subtitlesLanguage | Here you can select the preferred subtile language for MPEG4 files. | |
| 1st Audio language2nd Audio language | You can select the first and second audio language. | |
| Display Mode | Auto/PAL/NTSC | If you are not sure which TV standard is suitable, select „Auto". |
| Aspect Ratio | 4:3LB/4:3PS/16:9 | Select between 4:3 format or 16:9 format (wide screen) according to your screen. |
| Video Output | S-VIDEO | In this menu no changes can be made. |
| Bightness, contrast,hue, saturation | Adjust brightness, contrast, hue (NTSC only) and saturation. | |
| EQ Setup | Standard/Classic/Rock/Jazz/POP | You can select the required sound option. |
| Surround | OFF/Concert/Church/Passive/Live | This function creates different acoustics for a specific surrounding, e.g. at a concert or in a church. |
| Active Antenna | OFF/ON | When „OFF“, no voltage is connected to the antenna output – suitable for connection to the roof antenna and the passive DVB-T antenna. When “ON” an active DVB-T antenna without its own power supply can be connected. |
| JPEG effect | OFF/ON | You can select whether in the photo mode each picture is faded in with each picture change. |
| LCN | OFF/ON | If supported by TV channels, with the LCN function switched on, your regional channels are saved sorted, independent from their frequency. If the LCN function is activated the programme slot numbers are also moved. |
| Area | Select your country | |
| Time Here you can set the time of the | receiver (see, Changetime settings section. | |
| Wake up Timer | Here, you can programme the timer or change/deleteexisting programmes. | |
| Parental Lock Here, you can change the p | n code of the receiver. Thecode preset by the factory is "0000". | |
Search and edit channels
In order to quickly search a channel or to change the features of saved channels, select the "Installation" submenu.
Automatic channel search (Area search):
For an automatic search run, select the "Area search" option.
Press the "ENTER" button".
All available channels will be searched and stored in a programme slot.
Manual search:
The individual settings for a station can be carried out in this menu. For this method, it is necessary to know the searched- for programme's channel number, frequency and bandwidth
For changing the settings, use "◀" and "▶" arrow buttons.
■ After carried out all settings, the search run is activated by pressing the „ENTER“ button.
All channels found in the area will be stored in a programme slot.
Auto. Search:
In this menu, start and end frequency and band width can be adjusted, in order to search for a specific frequency band.
- Select the different options by using the „▼” or „▲“ arrow buttons.
For change the settings, use the „◀“ and „▶“ arrow buttons.
■ After having carried out all settings, the search run is activated by pressing the „ENTER“ button.
All channels found in the area will be stored in a programme slot.
Child Protection/Password (PIN code)
In the „Parental Lock“, you can carry out the following settings:
■ Changing the password.
Changing the password
You may change the password (PIN code) set in the factory and enter any other four-digit number as your personal PIN code. The password "0000" has been pre-programmed in the factory.
Note: Note your new password; once changed, only the new code is valid for all password queries. If you've forgotten your personal password, you can assign a new password by means of the master password "8888".
■ Enter the old password (PIN) using the numerical buttons.
Enter the new password using the numerical buttons. The display will automatically change to the menu item "New PIN".
Enter the new password again. The display will automatically change to the menu item "Confirm PIN".
The new password is integrated.
Factory defaults
The receiver is reset to ist conditions on delivery. All of your settings and stored data are deleted.
- Select the „Factory default" submenu in the „Digital menu" by using the „▼” or „▲” arrow buttons.
Press the „ENTER" button. You will be prompted to confirm your selection.
If you want to reset the receiver to factory setting, select "Yes" by using the "◀" and "▶" arrow buttons.
Select "No" if you want to exit the menu. - Confirm your selection with „ENTER“.
The process may take a few minutes.
■ Press the „EXIT" button to return to the TV channel.
Changing time settings
You can select between the „Auto" timer mode and „Manual" timer mode menus in the „Configuration/Time“ submenu.
„Auto“ timer mode
If GMT is activated, select deviation from main time (GMT) of your local time by adjusting it in the "GMT offset" submenu.
Note: Switch on/off summer time in the „Summer time" menu option.
„Manual“ timer mode
If GMT is activated, select „Date“ using the „▼” or „▲“ arrow buttons.
Using the „▼” or „▲, ◀“ and „▶“ arrow buttons to select the date and confirm your selection with the „ENTER“ button.
To set the correct time use the „▼“ and „▲“ arrow buttons to select the menu item „Time“.
■ Use the numeral buttons to set the current time.
- Press the „ENTER“ button in order to save your selection.
Operation
Basic operating steps
Switching between radio and TV mode
To switch between radio mode and TV mode, press the „TV/RADIO“ button.
Note: Radio programmes are not offered in all broadcast areas. Please ask programme providers and in specialist shop for more information.
Selecting channel
To change to the previous or next channel press the „▼“ and „▲“ arrow buttons.
- You may also switch directly to a sation by entering the memory space number of the station using the numerical buttons..
Volume
To increase or reduce the volume, press the volume buttons „VOL+“ and „VOL-”.
To switch the sound off at the receiver, press the "MUTE" button.
Note: With the „▶/◀” arrow buttons you can also adjust the volume. This will only change the volume of the receiver. Important: The setting will be stored by the device. With sound problems make sure that the volume of the receiver is adjusted to maximum!
User interface on the TV screen
You may carry out individual settings on your receiver via the user interface menus. The user interface is comprised of the main menu and its sub-menus.
■ Press the „MENU“ button.
A miniature view of the current station is displayed on the right-hand side of the screen.
- Select the desired sub-menu using the „▼“ or „▲” arrow buttons and press the “ENTER” button.
The sub-menu is displayed.
Structure of the sub-menus
Top: Name of the menu
Left: Menu options
Right: Miniature view of the channel wich is set.
Menu overview
| Submenu | Menu Item / Description |
| Channel manager | You can sort, group, edit and delete saves channels. |
| Installation | Automatis channel search (local search), see page 57Manual search, see page 57Auto. Search, see page 57 |
| Configuration | You can change system setting of the device, see page 56 |
| Software upgrade | You can install new software by using a USB stick, if required. |
| Factory Default | You can reset the device to the conditions as supplied, see page 57 |
| Version | Displays information on the receiver and installed software. |
Programme Manager
Select the „Channel manager“ menu.
You can choose between the submenus:
You can completely delete channels from the Programme Table.
- Select the „Channel organizer“ submenu in the „Channel manager“ menu.
Use the „▼“ and „▲“ arrow buttons to select the channel you wish to delete.
If you want to delete a channel, press the „GREEN“ button on the remote control. The selected channel will be markt with an “X”.
■ Repeat these Stepps for any other channel you may wish to delete. - Exit the menu by pressing the „EXIT“ button repeatedly. The selected channels will be deleted from the table.
If you do not want to delete the channel, press the „GREEN“ button again for removing the highlighting. - Exit the menu by pressing the „EXIT“ button repeatedly.
Add Favourites
For an easier and quicker access to your favourite channel, you can add these channels to your Favourites List.
- Select the „Channel organizer“ submenu in the „Channel manager“ menu.
Use the „▼“ and „▲“ arrow buttons to select the desired channel.
To add the selected channel to the favourites list press the „RED“ button on the remote control. The selected channel will be marked with a heart symbol. - Repeat these Stepps for the next stations which you would like to include in the list of favourites.
If you would like to remove a station from the list of favourites, select it using the „▼“ and „▲“ arrow buttons and press the „RED“ button again.
Press the „EXIT“ button once you have marked all desired stations as favourites. The
Note: Radio channel setting can only be carried out if these channels are broadcast by your provider. If necessary, ask your provider.
■ Select the desired sub-menu.
stations have now been integrated into the list of favourites.
Locking
You may lock stations; these cannot then be called up without inputting the password.
- Select the „Channel organizer“ submenu in the „Channel manager“ menu.
Use the „▼“ and „▲“ arrow buttons to select the station which you would like to lock.
If you want to block a channel, press the "BLUE" button on the remote control.
■ You are requested to enter the password.
Enter the current password by using the numeric buttons. The selected staion is
marked with the symbol "
■ Repeat these Stepps for the next station which you would like to lock.
If you want to unlock the channel, select it by using the „▼“ or „▲“ arrow buttons and press the „BLUE“ button again.
Press the „EXIT" button after you have locked all channels you wish to lock.
Moving (Mov)
You can rearrange the stations to form your own personal order.
- Select the „Channel organizer“ submenu in the „Channel manager“ menu.
Use the „▼“ and „▲“ arrow buttons to select the desired channel.
If you would like to move the stations, press the „YELLOW“ button on the remote control. The selected staions is marked with the symbol „N“.
Use the „▼“ and „▲“ arrow buttons to select the programme slot to which you would like to move the marked station. - Press the „ENTER" button. The station is moved.
■ Repeat the above Stepps for the next station which you would like to move.
- Press the „EXIT“ button when you have highlighted each channel you want to skip.
Note: If you have switched on „System setup“ / „LCN“ in the submenu, the programme number is also moved.
Rename and sort
You may change the names of channels and sort the channels by various criteria.
Renaiming channels:
- Select the „Channel organizer“ submenu from the „Channel manager“ menu.
Use the „▼“ or „▲“ arrow buttons to select the channel you wish to rename.
Press the "▶" button on the remote control. A keypad will be displayed on the screen.
■ Enter each figure for the new designation by using the numeric buttons.
To accept the new name press the "ENTER" button.
The new name is stored.
Sorting:
Select the „Channel sorting“ submenu in the „Channel manager“ menu.
The following sorting options are available:
by places
by encoding
■ by alphabet as the case may be transponder
- Select the required option by using the „▲“ or „▲“ arrow buttons.
Then, select the desired option by using the "◀" and "▶" arrow buttons.
- Exit the menu by simply pressing the „EXIT“ button repeatedly.
Grouping channels
You can assign programmes to different categories.
- Select the „Channel Grouping“ submenu in the „Channel manager“ menu.
- Select the channel you want to assign to a certain category by using the „▲“ or „▼“ arrow buttons.
Assign the channel to a category on the list on the right side. Press the suitable numeric button. The respective symbol is displayed next to the highlighted channel.
Note: Then use the „◀“ and „▶“ arrow buttons to select the corresponding option.
Editing channels
You can edit already saved channels or add a new channel to the list in the „Edit channel“ submenu.
Delete all
You can delete all TV and radio channels in the „Delete all" submenu.
Select the required option.
■ Press „ENTER“. A confirmation dialogue is displayed.
Select "Yes" by using the "◀" button and press "ENTER" and any saved TV/radio programmes are deleted.
USB connection / card slot
You can display video, audio and picture files via the USB connection and card slot.
The device has been designed according to the state of the art in the area of USB and smart cards. Unfortunately, due to the huge variety of different data carriers, which are available today, it is not possible to ensure full compatibility with any data carrier. Therefore, there may occasionally be problems with reproducing USB data carriers and smart cards, which is not considered a malfunction of the device.
- Insert a USB data carrier/smart card into the provided slot.
Select between the following options in the main menu:
Movie
Music
Photo
Note: Only the selected file types are displayed.
- Press „ENTER“. A new window is opened.
If both a USB data carrier and a smart card are inserted, select the required medium by using the „▼” or “▲” arrow buttons. - Press the „ENTER“ button again. The device is now working in the file access mode.
- Select the file that you want to play/display using the „▼“ or „▲“ arrow buttons.
Press „ENTER“. - Press the „■“ button to return to the file access mode.
Note: When you have selected a direcroty, if present, press the „EXIT“ button in order to return to the superior directory.
Display pictures
If you have selected the option „Photo" in the main menu, you can display the pictures on your connected USB carrier/smart card.
- Select an image file by using the „▼“ or „▲“ arrow buttons and press „ENTER“.
In order to display a picture for some longer time, press the „▶II“ button.
Press the "▶" or "◀" buttons in order to rotate the pictures clockwise/anticlockwise. - Press the „■“ button to return to the file access mode.
Note: Take size into consideration when saving your image files, as pictures that are too large may be displayed either very slowly or not at all. At best, the size of the pictures equal the size of the picture format of the reproducer. Usually, the size of TVs is 1024x576 pixels (aspect ratio 16:9) or 768x576 (aspect ratio 4:3).
Please note that any conversion usually leads to information loss with regard to the original format.
EPG (Electronic Programme Guide)
Your digital receiver is equipped with an electronic programme guide. With this feature you can view the programme information of one or more programmes on the display. You can get an overview on the currently running broadcasts or on the broadcasts of the day.
The EPG features enable you to:
■ View information on programme contents on the display
■ To preselect broadcast to be automatically switched on when they start
■ To programme broadcasts
Note: This function can only be used if it is supported by the selected station.
In order to display the Electronic Programme Guide, press the „EPG“ button.
The Electronic Programme Guide is displayed. On the left side of the screen you will see the channel list and on the right side the list of programmes.
Use the ◀, ▶, ▼, ▲ arrow buttons to select the desired programme/broadcast.
For information on the content of the chosen programme, press the „YELLOW“ button. A new window is openend.
- Press the „EXIT button in order to hide the window.
Note:
- You can switch between the weekly and daily display modes by using the „GREEN“ and „RED“ buttons.
By using the „▶“ or „◀◀” buttons you can move forward/go backwards one day.
Preselection/programming of broadcasts:
■ Press the EPG button. The Programme Overview window will be displayed.
■ Use the ◀, ▶, ▼, ▲ arrow buttons to select the desired programme/broadcast.
Press the „BLUE“ button. A new window is opened.
- Press „ENTER“ in order to adopt the settings.
- Press the „EXIT“ button to return to the TV programme.
If the start time of the selected broadcast has been reached, the device switches to this broadcast/channel.
Note: To change the data predefined by the channel (start/end time, etc.) select the corresponding line using the "▼" and "▲" arrow buttons.
Time Reservation
The receiver can be programmed to switch to a specific channel at the desired time. Furthermore, you can programme the receiver in a way that it switches on or off that a short message is displayed at a specific time.
Set the timer as follows:
- Select the „Configuration/Wakeup Timer“ submenu in the „Digital TV“ menu.
By using the „▼“ and „▲“ arrow buttons you select the lines.
By using the "◀" and "▶" arrow buttons you carry out settings. - Select a free timer position in the line „Timer No.“.
- Select the required option in the line „Timer mode“.
- Select the required option in the line „Wakeup Mode".
- Select the required option in the line "Wakeup Message". This menu option depends on the Wakeup mode option.
- Adjust the required date in the line „Wakeup Date“.
Press the "▶" button. A calendar is displayed. Selected the required date by using the arrow buttons. - Confirm your entry with „ENTER“.
GAMES
- Adjust the time by using the numeric buttons in the line „On Time“.
- Adjust the duration of the programme in the line „Duration". The device will return to the previous programme position once duration has expired.
- Press „ENTER“ in order to activate the timer.
- Press the „EXIT“ button in order to return to the TV programme.
Games
You can choose between the games Boxman, Tetris and Hit Rat.
Boxman
If you want to play Boxman, select the option „Boxman“ and press „ENTER“.
In order to start the game, press the "ENTER" button in the line "New Game".
You have to move the Boxman in order to place the boxes above the stars.
To move the Boxman, press the „▶”, „◀”, „▼” or „▲” arrow buttons.
Press „ENTER“ in order to Stopp the game and to switch to the left options column. In the options column you have the following options:
- New Game = Starts a new game.
- Reset = Restarts the current level.
- Continue = Continues the current game.
- Level = Displays the current level.
- Help = By using the ▶/◀◀ buttons you can scroll the help section in the lower left box.
- Exit Game = Returns to the submenu "Native Games".
Tetris
If you would like to play Tetris, select the option „Tetris“ and press „ENTER“ button.
In this game, you have to rotate building blocks comprised of four parts in such a way that they form an unbrocken wall. An unbrocken wall row is removed. The game is over when the building blocks reach the top edge of the screen.
In order to start the game, press the „ENTER“ button in the line „New Ga
Rotate the building blocks using the „▲“ button and move the blocks using the „◀“ or „▶“ and „▼“ arrow buttons.
Press „ENTER“ inn oder to Stopp the game and to switch to the left option column. In the options column you have the following options:
- Start Game = Starts a new game.
- Setting = You can select speed and level of difficulty. Press "ENTER" to take over any changes.
- Help = By using the ▶/◀ buttons you can scroll the help section in the lower left box.
- Score List = The ranking is displayed in the lower left box.
- Exit Game = Returns to the submenu „Native Games“.
- Continue = Continues the current game.
- Main Menu = Returns to the „Tetris“ main menu.
Hit Rat
If you want to play Hit Rat, select the option "Hit Rat" and press "ENTER".
In order to start the game, press the "ENTER" button in the line "New Game".
In this game, you need to "beat" the rat using the numeric buttons (1-9). A game is over, as soon as time is up.
Press „ENTER“ in order to Stopp the game and to switch to the left options column. In the options column you have the following options:
- New Game = Starts a new game.
- Speed = You can adjust speed.
- Score List = The ranking is displayed in the lower left box.
- Help = By using the ▶/◀ buttons you can scroll the help section in the lower left box.
- Exit Game = Returns to the submenu "Native Games".
- Continue = Continues the current game.
- Main Menu = Returns to the „Hit Rat“ main menu.
Additional functions
Displaying information
Note: This function is only available if the station brocasts corresponding data.
You may display the following information on the current channel.
To display additional information on the screen, press the "INFO" button.
Note: Press the „INFO“ button twice in order to display details on the current programme such as frequency, band width, etc.
To return to the normal screen display, press the "INFO" button again.
Show Channel List
- Press the „ENTER" button to view the list of TV or radio channels (depending on the types of use).
Now mark a station using the „▼“ or „▲“ arrow buttons.
To switch to the marked station, press the „ENTER“ button. - Press the „EXIT" button, in order to return to the normal screen display.
Note: If you have assigned programmes to specific categories, you can switch a category by using the “◀” and “▶” arrow buttons (see “Channel Grouping”).
Displaying Favourite List
To call up the list of your favourite stations, press the „FAV“ button during operation.
Note: This function can only be used if you have defined a list of favourites (see Page 60).
Use the „▼“ and „▲“ arrow buttons to select the desired station.
To switch to the marked station, press the "ENTER" button.
To leave the list of favourites, press the „EXIT“ button.
Displaying teletext
To call up teletext, press the „TTX" button during operation.
Press „ENTER“.
■ Enter the desired page number using the numerical buttons.
Note: This function can only be used if the stations which is set offers teletext.
In order to exit the teletext, press the „EXIT" button.
Selecting an audio setting
This setting can be used to switch between stereo, and (mono) left or (mono) right.
In order to change audio settings, press the „AUDIO“ button during operation.
Press the „▶“ button until the required setting is displayed.
- Press the „EXIT" button, in order to return to the normal screen display.
Recall
To call up the channel which was last selected again, press the „RECALL“ button.
Before calling for service, you can check the following items on symptoms and solutions.
TV mode
No picture
Check other channel, maybe station problem.
Adjust the tuning control.
Ensure that the input setting is at TV state.
Ensure that the LCD is on.
Ensure that the equipment is connected properly.
■ No sound and distorted sound
Ensure that the input settings for the TV and sound are proper. Adjust the tuning control.
Probably local interference, such as an appliance.
Re-orient aerial (if indoor type).
Ensure that the equipment is connected properly.
With sound interferences in DVB-T mode make sure that the volume of the receiver is adjusted to maximim.
No remote Control
Check the battery are installed with the correct polarity.
Point the remote control unit at the remote control sensor and operate.
Remove the obstacles between the remote control and the remote control sensor.
Operate the remote control unit at a distance of not more than 8 meters from the remote control sensor.
PC mode
■ NO SYNC SIGNAL or POWER SAVE displayed
Check if the wire is connected correctly.
Ensure the computer or other equipments are at power on mode.
Ensure the computer is not at power save mode.
Ensure the TV input setting is at pc mode.
■ Invalid Scan Fred displayed
Check if the input setting is compatible to the monitor specification.
Check if the wire is connected correctly.
TROUBLE SHOOTING TIPS
■ Led lamp indicator on but no picture Check the monitor setting :contrast ,brightness. Check if the wire is connected correctly.
Some unusual spots on screen Some dot defects may appear on the screen, like red, green or blue, Spots, However, this will have no impact or effect on the monitor performance.
Incorporated in your TV receiver are the most up-to-date devices to eliminate interference. Local radiation however, can create disturbances which visibly affect your picture. Proper installation, a good aerial are your best safe-guards against these disturbances.
■ RF interference
Moving ripples across the screen are caused by nearby transmitting or receiving short-wave radio equipment.
Diathermy
Herringbone pattern and partial picture loss can result from the operation of diathermy equipment from a nearby doctors surgery or hospital.
Snow
Weak TV signals from long distant stations result in an instead picture and give the effect of falling snow. An antenna adjustment or antenna amplifier may be needed.
Ghost
Multiple image caused by TV signals reflected back from surrounding buildings, hills, aircraft, ect. Is minimized by correct aerial positioning.
Car ignition
Nearby cars and electrical motors can cause small streaks across the picture or make the picture roll.

Meaning of the „Dustbin“ Symbol
Protect our environment: do not dispose of electrical equipment in the domestic waste.
Please return any electrical equipment that you will no longer use to the collection points provided for their disposal.
This helps avoid the potential effects of incorrect disposal on the environment and human health.
This will contribute to the recycling and other forms of reutilisation of electrical and electronic equipment.
Information concerning where the equipment can be disposed of can be obtained from your local authority.
GARANTIE-KARTE
Garantiebewijs • Carte de garantie Certifi cato di garanzia • Tarjeta de garantia Cartão de garantia • Guarantee card Garantikort • Karta gwarancyjna • Záruční list Garancia lap • Гарантийная карточка
CTV 4859 LCD/DVB-T
24 Monate Garantie gemäß Garantie-Erklärung • 24 maanden garantie overeenkomstig schriftelijke garantie • 24 mois de garantie conformément à la déclaration de garantie • 24 mesus de garantie según la déclaration de garantia • 24 meses de garantia, conforme a declaração de garantia • 24 mesi di garanzia a seconda della spiegazione della garanzia • 24 months guarantee according to guarantee declaration 24 méneders garanti i henhold til garantierklaering • 24 miesiące gwarancji na podstawie karty gwarancyjini • Záruka 24 mésció podle prohlásení o záruce • A garanciát lásá o hazsnálati utasításban Garantíйные обязательства – смотри руководство пользователя
Kaufdatum, Händlerstempel, Unterschrift „Knoplatum, Stempel van de leverancier, Handlekening – Date dachal, cachei du revenuier, signature – Fecha de compra, Setlo del vendedor, Firma – Data de compra, Carimbo do vendedor, Assinatura – Data delinquato, timbro del commerciante, firma – Purchase data, Dealer stamp, Signature – Kopedato, stempel fra forhandler, underskrift – Data kupna, Pieczika sklepu, Postpe – Ostium koue, Rasilico prodejze, Podpis – A væslaarslai datum, a væslaarslai hely beløregje je alaïrse Date puglen, teitve tortoles, podpis

- Operating Instructions
- INHALTSVERZEICHNIS/CONTENTS
- Seite
- VORSICHTI
- VORSICHT!
- WARNUNG!
- Vorgehensweise
- Note
- WARNING!
- RISK OF ELECTRIC SHOCK
- CAUTION
- IMPORTANT SAFETY INSTRUCTION
- CAUTION!
- CAUTIONI
- Intended Use
- Insert the battery into the remote control
- Procedure
- Precautions
- To turn the TV power On
- To turn the TV power Off
- USB/card slot apply
- Note:
- POWER Button
- MUTE Button
- P.M Button
- Display Button (analog TV only)
- Timer Button
- TV/AV/DVB-T Button
- -/- Button (0-9) (analog TV only)
- MENU Button (analog TV only)
- PROG +/- Button (analog TV only)
- VOL +/- Button
- Q.VIEW Button (analog TV only)
- I/II Button (analog TV only)
- SWAP Button (analog TV only)
- ASPECT Button
- For models with Teletext function and analog TV only
- TEXT Button
- INDEX Button
- REVEAL Button
- MIX Button
- SIZE Button
- STOP Button
- Page Button
- TOP Teletext function
- For models with DVB-T function only
- FORMAT-Button
- AUDIO-Button
- INFO-Button
- RECALL-Button
- SUB.T-Button
- EPG-Button
- TTX-Button
- ZOOM-Button
- ◀-Button
- ▶-Button
- Cursor Buttons
- ▶II-Button
- ■-Button
- MENU-Button (at the lower area)
- EXIT-Button
- TV/RADIO-Button
- FAV-Button
- RED-Button
- GREEN-Button
- YELLOW-Button
- BLUE-Button
- Picture Menu
- Sound Menu
- BALANCE
- MENU SCREENS
- Setup Menu
- OSD Menu
- Tune Menu
- Search and edit channels
- Automatic channel search (Area search):
- Manual search:
- Auto. Search:
- Child Protection/Password (PIN code)
- Changing the password
- Factory defaults
- Changing time settings
- „Auto“ timer mode
- „Manual“ timer mode
- Operation
- Basic operating steps
- Switching between radio and TV mode
- Selecting channel
- Volume
- User interface on the TV screen
- Structure of the sub-menus
- Programme Manager
- Add Favourites
- Locking
- Moving (Mov)
- Rename and sort
- Grouping channels
- Editing channels
- Delete all
- USB connection / card slot
- Display pictures
- EPG (Electronic Programme Guide)
- Preselection/programming of broadcasts:
- Time Reservation
- GAMES
- Boxman
- Tetris
- Hit Rat
- Additional functions
- Displaying information
- Show Channel List
- Displaying Favourite List
- Displaying teletext
- Selecting an audio setting
- Recall
- TV mode
- No picture
- ■ No sound and distorted sound
- No remote Control
- PC mode
- ■ NO SYNC SIGNAL or POWER SAVE displayed
- ■ Invalid Scan Fred displayed
- TROUBLE SHOOTING TIPS
- Meaning of the „Dustbin“ Symbol
- GARANTIE-KARTE
- CTV 4859 LCD/DVB-T
Brand : AEG
Model : CTV 4859
Category : Television