L23IP11 - Television Logik - Free user manual and instructions
Find the device manual for free L23IP11 Logik in PDF.
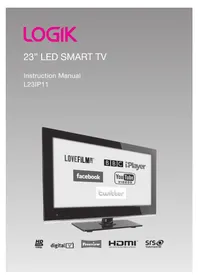


| Type de produit | LED TV |
| Taille de l'écran | 23 pouces |
| Résolution | 1366 x 768 pixels |
| Alimentation | AC 100-240V, 50/60Hz |
| Consommation électrique (veille) | < 0.5 W |
| Poids (avec support) | 3.5 kg |
| Dimensions (avec support) | 530 x 340 x 150 mm |
| Connectivité HDMI | 1 entrée |
| Connectivité USB | 1 port |
| Entrée VGA | Oui |
| Tuner TV | DVB-T2/C/S2 |
| Sortie audio | 1 x prise casque, puits de haut-parleurs intégrés |
| Fonctions | Écran à cristaux liquides (LED), télétexte, sleep timer |
| Nettoyage | Chiffon doux et sec, pas de produits abrasifs |
| Consignes de sécurité | Ne pas exposer à l'humidité, ventiler les fentes, ne pas obstruer |
| Pièces détachées | Télécommande incluse, adaptateur possible en service |
| Réparabilité | Score à vérifier, généralement réparable par professionnel |
Frequently Asked Questions - L23IP11 Logik
User questions about L23IP11 Logik
0 question about this device. Answer the ones you know or ask your own.
Ask a new question about this device
Download the instructions for your Television in PDF format for free! Find your manual L23IP11 - Logik and take your electronic device back in hand. On this page are published all the documents necessary for the use of your device. L23IP11 by Logik.
USER MANUAL L23IP11 Logik
WE KNOWHOW™ TO HELP YOU WITH YOUR TV
We want you to be able to enjoy your new TV for many years. From getting it home and setting it up, to helping you to get the most out of your new purchase. And in the unlikely event your product lets you down, we can get it working again in no time.
Here are some of our TV services but if you want to know more look us up at knowhow.com or call us on: 0844 561 1234
TV SET UP & DEMO
We'll assemble the stand and connect your new TV to the existing equipment. We'll tune your TV so it's ready to watch. We'll also give you a demonstration of your new TV's functions.
TV WALLMOUNT & DEMO
We'll fix your TV to a suitable position on the wall and connect to your existing equipment, so it's all ready to go. We'll use neat wire management so you don't have to look at any untidy cabling and to complete your fuss-free installation, we'll test and demonstrate your TV's functions.
FREESAT® SET UP & DEMO
We'll set up the Freesat® receiver and connect it to your existing dish, TV and cabling. We'll then tune in all available channels.
AERIAL INSTALL & TUNE
We'll supply, install and align a new, high quality aerial and connect it to your Freeview receiver and TV. Then we'll scan and tune in all available digital channels.
HOME THEATRE SET UP & DEMO
We'll un-box, connect and set up your new and existing equipment. We'll then configure, calibrate and optimise the equipment. To avoid ugly trailing cables, we'll clip them to your skirting board, if you'd like us to. Then we'll give you a demonstration.
FAULT & FIX SERVICES
With our FAULT & FIX services, we can repair a wide range of products at our new state-of-the-art repair lab. This service is available for:
- Computer Desktops
- Laptops
- Netbooks
- TVs
- Games Consoles
- Sky & Freeview Digi Boxes
Preparation....5
Unpacking the TV 5
Installing / Removing the Base Stand 6
Front / Top / Side View and Controls 7
Rear View and Sockets....8
Installing Batteries in the Remote Control 9
Remote Control Operation Range....9
Remote Control 10
Connections....12
Making Video and Audio Connections....12
Connecting an AV Device with an HDMI Cable 12
Connecting a Computer with a VGA Cable....13
Connecting an AV Device with a Component (YPbPr) Cable....13
Connecting an AV Device with a SCART Cable....14
Connecting an AV Device with Composite Cable....14
Connecting a Digital (Coaxial) Audio Receiver....15
Connecting Earphones....15
Initial Setup 16
Turning the TV on for the First Time....16
- Target Region Descriptor....17
- Selecting the Input Source....17
- Channel Selection ....17
- Display Channel Information ....17
– Volume Adjustment....17
Using the Features 18
TV Settings (TV, DTV or Radio Mode) 18
- Auto Scan (ATV / DTV mode)....18
- DTV Manual Tuning (DTV mode) 18
- ATV Manual Tuning (ATV mode) 19
- Programme Edit (ATV / DTV Mode)....19
– Signal Information (DTV Mode)....20
- CI (Common Interface) (DTV Mode)....21
- Software Update (USB)....21
Picture Setting 22
Customising the Sound Setting 23
- Mono / Nicam Stereo Sound Reception (ATV Mode) 24
- Speaker Sound Output Selection (DTV Mode) 24
Extras Setting 25
- Sleep Timer 25
- Start Recording....25
- Schedule List 26
- Recorded List....26
- Timer Record 27
- PVR File System (DTV Mode)....27
- PC Setup (PC Mode) 28
Options Setting 29
- OSD Language 29
- Audio Language (DTV Mode)....29
- Subtitle Language (DTV Mode) 30
- Menu Time Out....30
- Country....30
- Restore Factory Default....31
- Auto Standby....31
Lock Setting 32
- Lock System 32
- Set Password 32
- Lock Channel 33
- Parental Guidance 34
Using the Features ....35
EPG (Electronic Programme Guide) (DTV Mode) 35
- Switch On / Off EPG.... 35
- Select a Programme .... 35
- Button Functions in a 7 Days Guide....35
Teletext (ATV Mode)....36 - To Turn on Teletext Function....36 Digital Teletext (DTV Mode) 37 - Teletext within Digital Service.... 37
Entertainment 38
Connecting to Network....38
- Connecting to a Wired Network 38 – Wired Network Setup....38
- Connecting to a Wireless Network .... 39 – Wireless Network Setup....39
- WPS (WiFi Protected Setup)....40
Personal Account Setup 41
Access Personal Account....41
Using the i-Player 42
- i-Player Search 43
- i-Player Advanced Setting....43
- i-Player Upgrade 45
Connecting a USB Storage Device....46
Viewing Photos....46 Listening to Music....47 Watching Movies....48 Viewing Texts 48
PVR (Personal Video Recorder)....50
Time Shift Function (DTV Mode)....50 Recording DTV Programme onto a USB Storage Device 51 Timer Programming ....51 Play Recorded Programme 52
Maintenance....53
Hints and Tips....54
Display Modes ....55
YPbPr Mode 55 PC Mode 55 HDMI Mode 55
Specifications 56
Safety Warnings ....58
Thank you for purchasing your new Logik 23" LED Smart TV.
Your new TV has many features and incorporates the latest technology to enhance your viewing experience. We recommend that you spend some time reading this instruction manual in order that you fully understand these features. You will also find some hints and tips to help you resolve any issues.
Read all the safety instructions carefully before use and keep this instruction manual for future reference.

Unpacking the TV
Remove all packaging from the TV. Retain the packaging. If you dispose of it please do so according to local regulations.
The following items are included:

TV

Remote Control / AA Batteries x 2 (P.N.: 118020207 & 118030018)

Mains Adapter (P.N.: 118010045)
TV Base
(P.N.: 104130001)
Glass Stand Screw A x 3
(P.N.: 0103020024 (2822/ST4*10F))
Stand Neck Screw B x 4
(P.N.: 103010046 (M4*10))
Component Adapter Cable (P.N.: 117030014)
A/V Adapter Cable (P.N.: 117030015)
Ethernet Cable (3m)
(P.N.: 0114090187)

Instruction Manual (P.N.:XXXXX)

Quick Start Guide (P.N.: 120010111)
Digital TV Switchcover Addendum (P.N.: DTVADM-001)

If items are missing, or damaged please contact Partmaster (UK only). Tel: 0844 800 3456 for assistance.

Installing / Removing the Base Stand

- Remove the base stand before mounting the TV onto the wall.
- The LED display is very fragile, and must be protected at all times when installing and removing the base stand. Be sure that no hard or sharp object, or anything that could scratch or damage the LED display, comes into contact with it. DO NOT exert pressure on the front of the TV at any time because the screen could crack.
- Disconnect all cables connected to the TV.
- Lay the TV down on a flat surface with the back side facing up. Please make sure to place a soft cushioned material (such as a pillow or thick piece of foam) beneath the screen.
- To install the base stand, attach the base stand with the arrows facing down. Then use the 3 screws to fix the base stand to the TV.
- To remove the base stand, lay the TV down on a flat surface with the back side facing up. Please make sure to place a soft cushioned material (such as a pillow or thick piece of foam) beneath the screen. Untighten the 3 screws that hold the base stand to the rear of the TV. Slide the base stand out.

Keep all the spare screws should you want to use the base stand option.
- Mounting on the wall. This TV is designed to be wall-mounted with a standard 100 mm x 100 mm mounting kit designed for flat-panel TVs (sold separately). Mount this TV according to the instructions included in the mounting kit. Due to space restrictions, we recommend that you make all connections (refer to pages 12-15 and page 46 for details) before mounting on to the wall.


- Please read this instruction manual carefully while setting up your TV. - If you require additional assistance please call our UK Call Centre on 0844 561 1234. Our UK Customer Contact Centre is open Monday-Saturday 8am-8pm or Sunday 8am-6pm.

Front / Top / Side View and Controls

| Item Description | |
| 1 POWER LED | Illuminates green when the TV is turned on. Illuminates red when the TV is in standby mode. The LED will illuminate green when the timer programming has started in the standby mode. |
| 2 IR (Infrared Receiver) | Receives IR signals from the remote control.Do not put anything near the sensor, as its function may be affected. |
| 3 MENU Displays the OSD (on screen display) menu. | |
| 4 CH + / - Press to select a channel or select a sub-menu from the OSD menu. | |
| 5 VOL + / - | Adjusts the volume.Press to select and adjust a setting in the OSD menu. |
| 6 TV/AV | Press to select among different input signal sources:DTV / ATV / SCART / YPBPR / PC / HDMI / AV / USB.Confirmed the selection on OSD menu. |
| 7 STANDBY | Switches the TV on from standby mode.Switches the TV back to standby mode. |
| 8 USB / WIFI | To connect to the Wireless LAN Adaptor.Allows the insertion of a USB storage device to play video, audio, photo and text files (Media mode) and record DTV programmes on to a USB storage device. |
| 9 NETWORK To connect the broadband router. | |

Socket Description
| 1 POWER Connects the mains adapter to the mains socket. | |
| 2 USB | Allows the insertion of a USB storage device to play video, audio, photo and text files (Media mode) and record DTV programmes on to a USB storage device. |
| 3 HDMI | To connect to a High-Definition (HD) signal output device, such as a set-top box, blu-ray disc player or AV receiver. |
| 4 VGA / PC-IN To connect to a computer or other devices with a VGA interface. | |
| 5 SCART To connect to a VCR, DVD Player, or other AV device with a SCART output socket. | |
| 6 📊 Headphone out | To connect to the earphones. |
| 7 Common Interface Slot | Allows the insertion of a Common Access Module. (Refer to page 21 for details) |
| 8 Aerial To connect to the aerial socket on the wall with the RF coaxial cable. | |
| 9 AV | To connect to the Composite VIDEO and AUDIO (L/R) output sockets on external video devices. |
| 10 YPbPr / AV | To connect to a DVD player, Digital Set-Top-Box, or other AV devices with component (YPbPr) video and audio output sockets. |
| 11 Digital (Coaxial) | To connect to the audio socket on the digital/standard 5.1 audio system. |

Installing Batteries in the Remote Control
- Press and lift the back cover to open the battery compartment of the remote control.
- Insert two AA size batteries. Make sure to match the (+) and (-) ends of the batteries with the (+) and (-) ends indicated in the battery compartment.
- Close the battery compartment cover.


Handling the Batteries
- Improper or incorrect use of batteries may cause corrosion or battery leakage, which could cause fire, personal injury or damage to property. Only use the battery type indicated in this manual.
- When the batteries are exhausted, the remote will not function. Replace both batteries at the same time with new ones.
- Do not install new batteries with used ones and do not mix different types of batteries.
- Do not dispose of used batteries as domestic waste. Dispose of them in accordance with local regulations.
Handling the Remote Control
- Take care of your fingernails when you press and hold the battery release tab.
- Do not drop or cause impact to the remote control.
- Do not spill water or any liquid on the remote control. Do not place the remote control on a wet object.
- Do not place the remote control under direct sunlight or near sources of excessive heat.
- Remove the battery from the remote control when not in use for a long period of time, as it could cause corrosion or battery leakage and may result in physical injury and/or property damage including fire.

Remote Control Operation Range
Point the remote control at the TV no more than 5 metres from the remote control sensor on the TV and within 60° in front of the TV. The operating distance may vary depending on the brightness of the room.


Remote Control
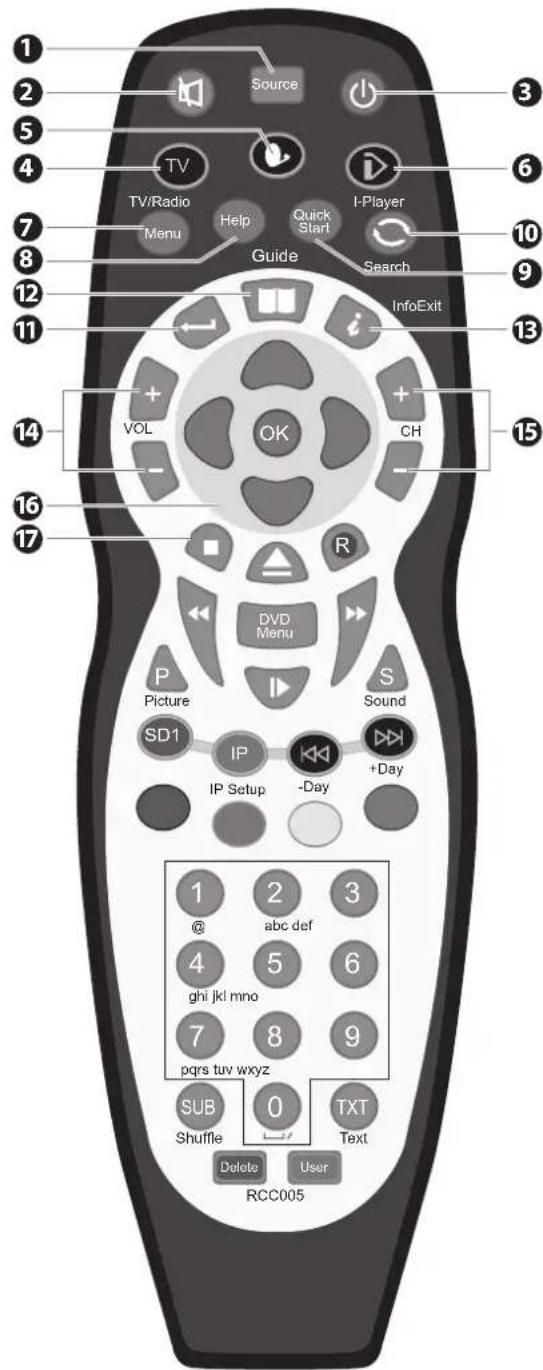
1. Source
Select among the different input signal sources: DTV / ATV / SCART / YPBPR / PC / HDMI / AV / USB.
2.
Mutes and restores your TV sound.
3. ⏻
Switches the TV between on and standby mode.
4. TV / Radio
- A short-cut to switch input source to TV / Digital radio channels.
- Press to exit from i-Player and go to TV mode. (Internet Player mode)
5.
Press to set the multi-satellite mode.
No Satellite Receiver
Press the Button and then press the numeric 0.
Satellite Receiver with Recorder (known as "Plus" type) Press the Button and then press the numeric 1.
- Satellite Receiver with High Definition (known as "HD" type)
Press the button and then press the numeric 2.
Digital Satellite Receiver (known as "Digital" type)
Press the button and then press the numeric 3.
6. ▷I-Player
Press to switch to Internet Player mode. (Internet Player mode)
7. Menu
Display the OSD (On Screen Display) menu.
8. Help
Display the helpline.
9. Quick Start
One press button to search all TV channels. It will take up to 10 minutes.
10. Search
• Return to the previous viewing channel. (ATV / DTV mode) • Search on the internet. (Internet Player mode)
11. ← Exit
Exit the OSD menu.
12. Guide
Displays the EPG (Electronic Programme Guide). (DTV mode)
13. i Info
- Display the present channel information such as the current time and channel name. (ATV / DTV mode) • Display the present disc information. (DVD mode) • Display the information of the current playing media and the next media. (Media mode)
14. VOL + / -
Adjusts the volume.
15. CH + / -
Select a channel.
16.
Allows you to navigate the OSD menus and adjust the system settings to your preference.
OK
Confirm the selection in the OSD menus.
17.
To stop the playback or recording. (DVD / Media mode)

Please note that there are DVD mode functions on the remote control only operate on TV models with a built-in DVD player.
18.
Eject a disc. (DVD mode)
19. R
Record the current programme. (DTV mode)
20.
To reverse playback rapidly. (DVD / Media mode)
21.
To advance playback rapidly. (DVD / Media mode)
22. DVD Menu
Display the DVD menu. (DVD mode)
23. P
- Press the P button once and then press the ▶ buttons to select picture mode: Standard / Dynamic / User / Mild.
- Press the P button twice and then press the ▶ buttons to allow you to watch the screen in various picture formats: 4:3 / 16:9 / Zoom1 / Zoom2 / Panorama.
24.
• To start the timeshift playback. (DTV mode) • To start playback or pause. (Media / DVD mode)
25. S
- Press the S button once and then press the ▶ buttons to select sound mode: Standard / Music / Movie / Sports / User.
- Press the S button once and then press the ▶ buttons to select Mono to Nicam Stereo (ATV mode).
26. SD1
Display the onscreen keyboard. (Internet Player mode)
27. IP
Press for the initial setup and to connect to the network. (Internet Player mode)
28.
To skip to the beginning of the previous chapter / track / photo. (DVD / Media mode)
-Day
Press to view the schedule of the previous day.
29.
To skip to the beginning of the next chapter / track / photo. (DVD / Media mode)
+Day
Press to view the schedule of the next day.
30. Coloured buttons
Access the TELETEXT items or channel edit when using Digital / Freeview TV Channels. (ATV / DTV mode)
31.0-9 Number Button
- Press to select a programme. (ATV / DTV mode)
- Press to select Sat Channel number (Satellite mode)
- Press to enter numbers and text. (Internet Player mode)
32. SUB
- Selects subtitles which are broadcast with the programme. (DTV / Satellite mode). • Selects subtitles on the DVD. (DVD mode)
Shuffle
Press to shuffle play list. (Media mode)
33. TXT
Turns on and off the teletext function. (ATV / DTV mode)
34. Delete
Press to remove a character during text entry. (Internet Player mode)
35. User
Press to create / access a user account. (Internet Player mode)

Please note that there are DVD mode functions on the remote control only operate on TV models with a built-in DVD player.


Making Video and Audio Connections
Not all AV devices have the ability to connect to a TV. Please refer to the owner's manual of your AV device for compatibility and connection procedures.
When connecting any external AV device, do not connect the mains adapter cable to the mains socket until all other connections are complete.
| Signal Type | Separate Audio Connection Required | |
 HDMI HDMI | HDMI(480i/480p/576i/576p/720p/1080i/1080p) | No |
 VGA VGA | VGA | YesPC-IN |
 Y/Pb/Pr Y/Pb/Pr | Component Video(480i/480p/576i/576p/720p/1080i/1080p) | YesAV IN |
 SCART SCART | SCART (RGB Input) No | |
| [IWK7CA/V IN | Composite Video | YesAV IN |

Connecting an AV Device with an HDMI Cable
- This TV can accept High-Definition Multimedia Interface (HDMI) and supports HDCP (High-Bandwidth Digital Content Protection) Protocol.
- When you connect to the output of an HD ready player (blu-ray disc player, game console, set-top box, or computer), switch to the HDMI function and the TV will automatically detect the resolution used by the HDMI source.
- To get the best picture quality, adjust the blu-ray disc player, game console, or set-top box output resolution up to 1920 x 1080p.
- Use an HDMI cable to connect the TV's HDMI input socket to the external AV device's HDMI output socket.
- Plug the connected devices into the mains socket before switching on the TV.
- Press the STANDBY button on the top panel of the TV or the ⏻ button on the remote control to turn on your TV.
- Press the TV/AV button on the top panel of the TV or the Source button on the remote control to display the Source List. Use the ▲▼ buttons to select HDMI and then press the OK button to confirm.

Although this TV is able to connect to an HDMI device, it is possible that some devices may not operate correctly.
Rear Bottom View of TV

Connecting a Computer with a VGA Cable
- Use a VGA cable to connect the TV's VGA input socket to a computer's VGA output socket. Use an audio cable to connect the TV's PC-IN input socket to the computer's audio output socket.
- Plug the connected devices into the mains socket before switching on the TV.
- Press the STANDBY button on the top panel of the TV or the ⏻ button on the remote control to turn on your TV.
- Press the TV/AV button on the top panel of the TV or the Source button on the remote control to display the Source List. Use the ▲▼ buttons to select PC and then press the OK button to confirm.

• The best resolution is 1920 x 1080. - If your computer is set to shut down after a few minutes of idle mode, the TV will also switch to standby due to no signal being received, this is to save energy. Press the STANDBY button on the top panel of the TV or the ⏻ button on the remote control to restart the TV.


Connecting an AV Device with a Component (YPbPr) Cable
- Connect the included component adapter cable and a component cable to the TV's YPbPr input sockets to an external AV device's component output sockets.
- Connect the included A/V adapter cable and an AV cable to the TV's AV input socket to the external AV device's component audio sockets. (Audio Left = white, and Audio Right = red)
| Component port on the TV Y Pb Pr |
| Video output ports on DVD player | Y Pb | Pr | |
| Y Cb | Cr |
- Plug the connected devices into the mains socket before switching on the TV.
- Press the STANDBY button on the top panel of the TV or the ⏻ button on the remote control to turn on your TV.
- Press the TV/AV button on the top panel of the TV or the Source button on the remote control to display the Source List. Use the ▲▼ buttons to select YPBPR and then press the OK button to confirm.
![graph TD A["Common Interface"] --> B["Component Adapter Cable (included)"] B --> C["Green (V)"] B --> D["Blue (Pb/Cb)"] B --> E["Red (Pr/Cr)"] B --> F["White (L)"] B --> G["Red (R)"] B --> H["White (L)"] B --> I["Red (R)"] B --> J["Yellow (Video)"] B --> K["A/V Cable (not included)"] B --> L["A/V Ad…](/content/2026/05/1050202/images/9fd2876a52718281f0b767469868ecefc2cb9a9eceb779032ed1006df8dbdcd7.jpg)

Connecting an AV Device with a SCART Cable
- Use a SCART cable to connect the TV's SCART input socket to an external AV device's SCART output socket.
- Plug the connected devices into the mains socket before switching on the TV.
- Press the STANDBY button on the top panel of the TV or the ⏻ button on the remote control to turn on your TV.
- The TV will change the input source to SCART automatically once the AV device is switched on.
![graph TD A["Power HD/USB POWER"] --> B["SCART Cable (not included)"] B --> C["Headphone out"] D["VCR"] --> E["Set-top Box"] F["DVD Player / Recorder"] --> G["Satellite Receiver"] H["Satellite antenna cable"] --> I["SCART Cable (not included)"]](/content/2026/05/1050202/images/5dc1330caf6275430e1e7679c1b000a865600dea95ba5770cdf29845013f6a47.jpg)

Connecting an AV Device with Composite Cable
- Connect the included A/V adapter cable and an AV cable to the TV's AV input sockets to an external AV device's composite audio/video sockets. (Video = yellow, Audio Left = white, and Audio Right = red)
- Plug the connected devices into the mains socket before switching on the TV.
- Press the STANDBY button on the top panel of the TV or the ⏻ button on the remote control to turn on your TV.
- Press the TV/AV button on the top panel of the TV or the Source button on the remote control to display the Source List. Use the ▲▼ buttons to select AV and then press the OK button to confirm.


Connecting a Digital (Coaxial) Audio Receiver
For better sound quality, you may want to play the audio through your multi-channel audio receiver.
- Use an audio cable to connect the TV's Digital (Coaxial) audio output socket to an external audio receiver's audio coaxial input socket.
- Plug the connected devices into the mains socket before switching on the TV.
- Press the STANDBY button on the top panel of the TV or the ⏻ button on the remote control to turn on your TV.
- Press the TV/AV button on the top panel of the TV or the Source button on the remote control to display the Source List. Use the ▲▼ buttons to select any desired input source and then press the OK button to confirm.

The TV's volume control will have no effect. You may control the audio level via the Audio Receiver.


Connecting Earphones
Connect your earphones to the TV's socket.
Before putting on earphones, turn the volume down, then put the earphones on and slowly increase the volume until you reach a comfortable listening level.

Listening to loud sounds for prolonged periods of time may permanently damage your hearing.


Turning the TV on for the First Time
- Connect one end of the AERIAL (RF) coaxial cable to the aerial socket on the wall and the other end of the cable to the AERIAL (RF 75Ω) socket at the rear right side of your TV.

Do not connect the TV to the mains supply until you have completed all the connections.

- Connect the mains adapter to the mains adapter socket after you have completed all the connections. At this stage, the TV switches to standby mode. The red LED indicator will illuminate on the front panel of the TV.
- In standby mode, press the STANDBY button on the top panel of the TV or the ⏻ button on the remote control to turn the TV on. The red LED indicator will turn green.


- Only use the included mains adapter. Do not use it with any other equipment.
- Always disconnect the TV from the mains socket when not in use for a long period of time.
- The STANDBY button on the top panel of the TV or the ⏻ button on the remote control is only used for switching the TV into standby, it does not disconnect the TV from the mains power. To completely disconnect the mains power, please remove the mains adapter from the mains socket.
- The first time you turn the TV on, a screen will be displayed (Press the EXIT button if you do not want to continue the tuning function). To continue with tuning function, press the ▲▼ buttons to select your desired language and then press the OK button to confirm. The Quick Start menu will display.
- Please ensure the aerial is plugged in and then press the OK button. Make sure the remote control is in TV mode by pressing the TV/Radio button. (If you have already installed the TV using the Quick Start Guide, please go to the "Selecting the Input Source" section on the next page.)
- Press the OK button to start auto scan. Channel tuning will commence. This operation may take up to 10 minutes. The display will show the progress of the tuning and the number of channels found.
- After tuning is complete, the channels are arranged in the broadcaster's preset order. If you wish to skip channels, modify the preset order or rename channels, select Programme Edit under the TV SETTINGS menu (refer to pages 19-20 for details).

Alternative
Press the Quick Start button to recall the first time installation at any time.
![graph TD A["UK"] --> B["DEUTSCHLAND"] B --> C["OK"]](/content/2026/05/1050202/images/46b9f9dd976ae6527042056f44178578cdfd69689cb97c04472e120e7e0c2404.jpg)


Target Region Descriptor
During tuning your TV may have received signals from more than one transmitter. If this has occurred the Target Region Descriptor screen will be displayed. This will enable you to select the correct regional transmission for the local news service that you require.
Press the ◀▶ buttons to adjust each option's setting and then press the OK button to confirm.
| Country Code This will be shown as GBR for the UK. | |
| Primary Region | This will show the regional country (England, Wales, Scotland, NI). |
| Secondary Region | This will allow you to set the region for your local news service on BBC and ITV (London, Beds and Cambs etc). |
| Tertiary Region | You may receive signals from more than one transmitter within the Secondary Region, (e.g Beds and Cambs may have Luton or Sandy Heath). |
| Target Region Setting | |
| Country Code | GBR |
| Primary Region | England |
| Secondary Region | London |
| Tertiary Region | |
Selecting the Input Source
- Press the TV/AV button on the top panel of the TV or the Source button on the remote control to display the Input source list.
- Press the ▲▼ buttons to select the input source that you want: DTV / ATV / SCART / YPBPR / PC / HDMI / AV / USB.
- Press the OK button to confirm your selection. If you do not press the OK button to confirm, the TV will automatically confirm the selected input source within 4 seconds.

Alternative
Press the TV/Radio button to switch to digital radio channels directly.
| Input Source |
| DTV |
| ATV |
| SCART |
| YPBPR |
| PC |
| HDMI |
| AV |
| USB |
Channel Selection
- Press the CH + / - buttons on the remote control repeatedly or the 0-9 buttons to select the channel.

Alternative
Press the OK button to enter the Channel List. Then use the ▲▼ buttons to highlight and select the channel. Press the OK button to view the selected channel.
- If a blocked channel is selected, the password screen will be displayed. Press the 0-9 buttons to enter the password, the channel will then be unlocked (refer to pages 19-20 for details on Programme Edit).
- Press the ↩ button to return to the previously viewed channel.
Display Channel Information
- Press the INFO button to view the current information.
Volume Adjustment
- Press the VOL+ or – button on the top panel of the TV or on the remote control to adjust the volume.
- If you wish to switch the sound off, press the button. Press the button again or the VOL + button to resume audio listening.

TV Settings (TV, DTV or Radio Mode)
Auto Scan (ATV / DTV mode)
Use this to automatically find and store all available channels. This is normally recommended if some channels have been added or removed by the broadcaster or if you have moved house.
- Press the Menu button and then press the ◀ buttons to select the TV SETTINGS menu.
- Press the ▲▼ buttons to select Auto Scan and then press the OK button.
- Press the ▲▼ buttons to select Country and then press the ◀▶ buttons to select the country where you will operate the TV.
- Press the ▲▼ buttons to select Tune Type and then press the ◀▶ buttons to select ATV / DTV / DTV + ATV. Press the OK button to confirm.
- Channel tuning will commence. This operation may take up to 10 minutes. The display will show the progress of the tuning and the number of channels found.
- If you want to skip the ATV tuning, press the MENU button to interrupt the tuning half way. A pop-up screen will be displayed, press the ◀ button to select YES to confirm. You will then go straight to DTV tuning. You may repeat the above step if you also want to skip the DTV tuning. An installation reminder will appear the next time you turn on the TV.
- After tuning is complete, the channels are arranged in a preset order. If you wish to skip channels, modify the preset order or rename channels, select Programme Edit under the TV Settings menu (refer to pages 19-20 for details).
- Press the Menu button to return back to the main menu.
- Press the ← Exit button to exit the menu.


DTV Manual Tuning (DTV mode)
Allows you to make manual fine tuning adjustments of the channel under DTV mode.
- Press the Menu button and then press the ◀ buttons to select the TV SETTINGS menu.
- Press the ▲▼ buttons to select DTV Manual Tuning and then press the OK button.

- The DTV Manual Tuning screen will pop up. Press the ◀▶ buttons to select the desired UHF channel and then press the OK button to commence the search of that channel. When the signal has been tuned, the picture and signal strength will be displayed on the screen.
- Press the Menu button to return back to the main menu.
- Press the ← Exit button to exit the menu.

ATV Manual Tuning (ATV mode)
Allows you to make manual fine tuning adjustments if the channel reception is poor under ATV mode.
- Press the Menu button and then press the ◀ buttons to select the TV SETTINGS menu.
- Press the ▲▼ buttons to select ATV Manual Tuning and then press the OK button.
- The ATV Manual Tuning screen will pop up. Use the ▲▼ buttons to select the following options and the ◀ buttons to adjust the setting.
| Storage To Presets the channel number. | |
| System | Selects the sound system: I / DK / BG / L (for SECAM). |
| Current CH Displays the current channel number. | |
| Search | Press the◀buttons to start the manual tuning. |
| Fine-Tune | Press the◀buttons to make manual fine tuning adjustments. |
| Frequency Displays the current tuned frequency. | |
- After finishing the manual tuning adjustment of a channel, press the RED button to save your channel before tuning the next channel.
- Press the Menu button to return back to the main menu.
- Press the ← Exit button to exit the menu.
Programme Edit (ATV / DTV Mode)
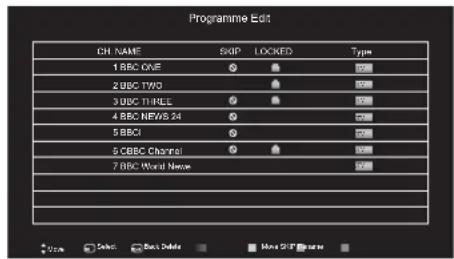
Allows you to edit TV programmes in the Channel List.
- Press the Menu button and then press the ◀ buttons to select the TV SETTINGS menu.
- Press the ▲▼ buttons to select Programme Edit and then press the OK button.


- A Programme Edit screen will pop up. Press the ▲▼ buttons to select the programme you want to edit.
a. Delete
Press the RED button to delete the selected channel.
b. Move
Press the YELLOW button and then press the ▲▼ buttons to move to the selected channel. Press the YELLOW button or the OK button to confirm.
c. Skip
Press the BLUE button to select the channels that you want to skip when you are selecting channels. Press the BLUE button again to undo it.
d. Rename
Press the GREEN button to rename the selected channel. Press the ▲▼ buttons to select the characters to represent the station name. Press the ◀▶ buttons to move to the next character and then press the OK button to confirm the new name.
- Press the Menu button to return back to the main menu.
- Press the ← Exit button to exit the menu.

Care should be taken when editing the position of digital channels as this may affect EPG and reminder settings.
Signal Information (DTV Mode)
Allows you to view the signal information.
- Press the Menu button and then press the ◀ buttons to select the TV SETTINGS menu.
- Press the ▲▼ buttons to select Signal Information. Press the OK button to view the signal information.
- Press the Menu button to return back to the main menu.
- Press the ← Exit button to exit the menu.


CI (Common Interface) (DTV Mode)
The common interface allows the use of a Common Access Module to enable you to view scrambled (pay to view) services. These services are provided by TopUp TV (UK only) and others. The Common Access Module and viewing card can be obtained from the service provider.

Do not repeatedly insert or remove the Common Access Module as this may damage the interface and cause a malfunction.
This feature is not available in all countries.
To insert the Common Access Module
- Before you insert the Common Access Module, ensure that the TV is switched off and the viewing card is inserted in accordance with the Service Provider's instructions.
- Insert the Common Access Module into the slot. If you feel resistance when inserting the Common Access Module, flip the Module over and try again from the other side.
- Switch the TV on.
To remove the Common Access Module
- Before you remove the Common Access Module, ensure that the TV is switched off.
- Pull the Common Access Module from the slot.
- Switch the TV on.
To view the module information
- Press the Menu button and then press the ◀▶ buttons to select the TV SETTINGS menu.
- Press the ▲▼ buttons to select CI Information and then press the OK button to view the signal information.
- A CI Information Main menu will pop up. Press the ▲▼ buttons to display the module information, smart card information, language, software download. Press the OK button to confirm.
- Press the Menu button to return back to the main menu.
- Press the ← Exit button to exit the menu.
Software Update (USB)
This function is only for servicing purposes. Any update information for this TV (if any) will be available at the following website: http://knowhow.com/ or call our UK Call Centre on 0844 561 1234. Our UK Customer Contact Centre is open Monday-Saturday 8am-8pm or Sunday 8am-6pm.
Rear Right Side View of TV
CI (Common Interface)
Allows the Common Access Module to be inserted and access the content that has been encrypted.
![graph TD A["COMMON INTERFACE"] --> B["CARD FACE FRONT"] B --> C["Common Access Module"] C --> D["Downward arrow"] C --> E["Upward arrow"]](/content/2026/05/1050202/images/142b0905cbf39ad95e704391e4b243dd363c15a1c1f51a896731b190d1c1893c.jpg)


This screen is for illustration only.
Allows you to set your preferred picture mode.
- Press the Menu button and then press the ◀ buttons to select the PICTURE menu.

- Press the ▲▼ buttons to select the following picture options and then press the OK button. Press the ◀ buttons to adjust the settings.
| Picture Mode Cycles among picture mode: Dynamic / Standard / User / Mild. | ||||
 Alternative You may press the P button once and then press the ◀buttons to select the picture mode directly. Alternative You may press the P button once and then press the ◀buttons to select the picture mode directly. | ||||
| Contrast | Adjusts the difference between light and dark levels in the picture. (for User mode) | |||
| Brightness Increases or decreases the amount of white in the picture. (for User mode) | ||||
| Colour Controls the colour intensity. (for User mode) | ||||
| Sharpness Adjusts the level of crispness in the edges between light and dark areas of the picture. (for User mode) | ||||
| Tint (For NTSC format) | Adjusts the balance between red and green levels. (Tint is only available for NTSC signal reception.) | |||
| Colour Temperature | Cycles among colour temperature: Medium / Warm / User / Cool. Adjusts the colour components independently to achieve a warm or cool. (for User mode) Red: Increases red tint Green: Increases green tint Blue: Increases blue tint | |||
| Aspect Ratio | Allows you to watch the screen in various picture formats: 4:3 / 16:9 / Zoom1 / Zoom2 / Panorama.  Alternative You may press the P button twice and then press the ◀buttons to select the aspect ratio directly. Alternative You may press the P button twice and then press the ◀buttons to select the aspect ratio directly. | |||
| Input Signal 4:3 | Input Signal 16:9 | |||
| 4:3 | This selection will allow you to view a picture with an original 4:3 aspect ratio. Black bars will appear on both the left and right of the screen. |  | This selection will allow you to adjust the picture horizontally, in linear proportion. Black bars will appear on both the left and right of the screen. | |
| 16:9 | This selection will allow you to adjust the picture horizontally, in linear proportion, to fill the entire screen. |  | This selection will allow you to view a picture with an original 16:9 aspect ratio. | |
| Zoom1 | This selection is similar to 16:9 mode, but the picture slightly stretches vertically and clips off a little from the top and bottom. | This selection is similar to 16:9 mode, but the picture slightly stretches vertically and clips off a little from the top and bottom. | ||
| Zoom2 This selection will allow you to zoom in the picture without any alteration, while filling the entire screen. However, the top and bottom of the picture will be cropped. |  | This selection will allow you to zoom in the picture without any alteration, while the 4 sides of the picture will be cropped. |  | |
| Panorama Use this mode for the wide aspect ratio of a panoramic picture. | ||||
| Just Scan (HDMI mode) | Use the function to see the full image without any cutoff when HDMI (720p / 1080i / 1080p) signals are input. | |||
| Noise Reduction | Select to reduce the noise level of the connected device: Off / Low / Middle / High. (ATV mode) | |||
- Press the Menu button to return back to the main menu.
- Press the ← Exit button to exit the menu.

Customising the Sound Setting
Allows you to select an audio-enhancement technique.
- Press the Menu button and then press the ◀ buttons to select the SOUND menu.

- Press the ▲▼ buttons to select the following sound options and then press the OK button. Press the ◀ buttons to adjust the settings.
| Sound Mode | Allows the selection of an audio-enhancement technique: Standard / Music / Movie / Sports / User.AlternativeYou may press theSbutton to select the sound mode directly. | |
| TrebleControls therelative intensity of higher pitched sounds. (for User mode) | ||
| BassControls therelative intensity of lower-pitched sounds. (for User mode) | ||
| Balance | Adjusts the relative volume of the speakers in a multiple speaker system. | |
| Auto Volume | Volume levels are automatically controlled. (e.g. advertisements tend to be louder than the programmes) | |
| SRS TruSurround HD | SRS TruSurround HDTM(TS HD) is a robust multichannel virtualisation technology developed by SRS Labs that provides an enhanced listening experience unlike any other technology that has been offered for a two speaker playback environment. TruSurround HD builds upon its predecessor, the industry leading surround sound virtualiser, SRS TruSurround XT®. Not only does TruSurround HD process up to 6.1 channels for playback over two speakers or headphones, but it also utilises additional proprietary algorithms from SRS Labs to optimise bass performance, for deep rich bass, dialogue clarity for better intelligibility of vocals, and definition control for maximum high-frequency clarity. Press theOKbutton to selectOn / Off. | |
| AD Switch(For DTV mode) | Audio Description is an auxiliary audio function that provides an additional audio track for visually challenged persons. This function handles the Audio Stream for the AD (Audio Description), when it is sent along with the main audio from the broadcaster. Set to "Off" for normal broadcasting sound coming out from speakers. Set to "On" to activate the description sound track if available. The availability of Audio Description sound track is indicated by the visually impaired icon "V.I." in the information banner. | |
| AD Volume | Once the AD Switch is set to ON the AD commentary volume can be adjusted using the AD Volume option. (for DTV mode) | |
- Press the Menu button to return back to the main menu.
- Press the ← Exit button to exit the menu.
Mono / Nicam Stereo Sound Reception (ATV Mode)
When a programme is selected, press the S button twice and then press the ◀▶ buttons to select Mono / Nicam Stereo for the selected station.
| Broadcast On Screen Display | |
| Mono | MONO |
| Stereo | NICAM STEREO |
Mono sound selection
If the stereo signal is weak in stereo reception, you can switch to mono by pressing the S button twice and then press the ◀▶ buttons to select Mono / Nicam Stereo. In mono reception, the clarity of sound is improved. To switch back to stereo, press the S button twice and then press the ◀▶ buttons to select Mono / Nicam Stereo again.
Speaker Sound Output Selection (DTV Mode)
While watching a DTV programme, you can press the S button twice to display the audio language list (only applicable when the TV programme has this feature).
Press the ▲▼ buttons to select an audio language or audio format if available and then press the ◀▶buttons to select sound track between L/R (Stereo), L/L (Mono Left) and R/R (Mono Right). Press the OK button to confirm and exit.

Sleep Timer
The sleep timer automatically switches the TV to standby after the preset time has elapsed. The clock will be set automatically when receiving a digital signal. Time must be set before using Sleep Timer function.
- Press the Menu button and then press the ◀buttons to select the EXTRAS menu.
- Press the ▲▼ buttons to select Sleep Timer and then press the OK button.
- Press the ◀buttons to select a period of time after which the TV automatically switches to standby mode: OFF / 10 / 20 / ... / 180 / 240 min and then press the OK button to confirm. The timer begins to count down from the number of minutes selected.

If you turn the TV off after setting the sleep timer, the sleep timer setting will be erased.
- Press the Menu button to return back to the main menu.
- Press the ← Exit button to exit the menu.
Start Recording
Allows you to start an instant recording.
- Press the Menu button and then press the ◀ buttons to select the EXTRAS menu.
- Press the ▲▼ buttons to select Start Recording and then press the OK button.
- The recording bar will show (photo) and begins recording the programme on the current channel.
- Press the Menu button to return back to the main menu.
- Press the ← Exit button to exit the menu.


![RECORDING TIME: [08:10:15] MAX RECORDING TIME: [0001:30:40] Play FB FF Prev Next Pause Stop 1 BBC ONE BBC News 06:18](/content/2026/05/1050202/images/469f44e6ab919efcb63cd1376a8e45cc4fcb323cca94497d5d1e11fa5da98b1a.jpg)
Schedule List
Allows you to select your schedule list in the PVR. For further details, please refer to page 50.
- Press the Menu button and then press the ◀ buttons to select the EXTRAS menu.
- Press the ▲▼ buttons to select Schedule List and then press the OK button to view the Schedule List.
- Press the Menu button to return back to the main menu.
- Press the ← Exit button to exit the menu.
![Sleep Timer Start Recording Schedule List Recorded List Timer Record PVR File System PC Setup EXTRAS Schedule List Mode Time Date Program Name Channel Name Result [table data]](/content/2026/05/1050202/images/4007b29148a1bef43d9ed6c93181b5f5209de42389f769b0878491aae15a3f96.jpg)
Recorded List
Allows you to select your recorder list in the PVR. For further details, please refer to page 50.
- Press the Menu button and then press the ◀ buttons to select the EXTRAS menu.
- Press the ▲▼ buttons to select Recorded List and then press the OK button to view the Recorded List.
- Press the Menu button to return back to the main menu.
- Press the ← Exit button to exit the menu.


Timer Record
Allows you to select your timer record in the PVR. For further details, please refer to page 50.
- Press the Menu button and then press the ◀ buttons to select the EXTRAS menu.
- Press the ▲▼ buttons to select Timer Record and then press the OK button to view the Timer Record.
- Press the Menu button to return back to the main menu.
- Press the ← Exit button to exit the menu.


PVR File System (DTV Mode)
Allows you to select your preferences in the PVR File System.
- Press the Menu button and then press the ◀ buttons to select the EXTRAS menu.
- Press the ▲▼ buttons to select PVR File System and then press the OK button.
- Press the ▲▼ buttons to select the following PVR File System options and then press the OK button.

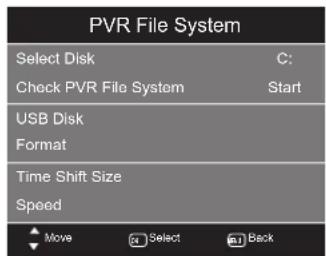
| Select Disk Select the disk where you want to store your recorded content. | |
| Check PVR File System | Press the OK button, the system will now check your USB device's suitability for PVR. The system will show "Checking". Upon the completion the system will show either "SUCCESS" or "FAIL". |
| USB Disk | If no USB storage device is connected, it will show "No USB Disk". If the Check PVR File System has a "SUCCESS" it will show "Pass". |
| Format | Press the OK button, a File System Size menu will pop-up. Press the ▶buttons to select your preferred file type between FAT32 and HiSpeed FS. If you select HiSpeed FS, press the ▼button and then press the ▶buttons to select your preferred file size. Press the OK button to confirm and then press the ▶button to start formatting. |
| Time Shift Size | After formatting the Time Shift Size menu will appear if you have selected HiSpeed FS in PVR File System Type. Press the ◀▶ buttons to select your preferred file size. Press the OK button to confirm. This option cannot be chosen if you have selected FAT32 in PVR File System Type. |
| Speed This shows you | the transfer rate of your USB storage device. |
- Press the Menu button to return to the main menu.
- Press the ← Exit button to exit the menu.
PC Setup (PC Mode)
Allows you to adjust the PC desktop content. (PC mode only)
- Press the Menu button and then press the ◀ buttons to select the EXTRAS menu.
- Press the ▲▼ buttons to select PC Setup and then press the OK button.
- Press the ▲▼ buttons to select the following PC Setup options and then press the OK button.
| Horizontal Pos. Adjusts the position of the picture left and right in the window. |
| Vertical Pos. Adjusts the position of the picture up and down in the window. |
| Size Allows you to adjust the picture horizontally, in linear properties. |
| Phase Controls the signal phase, which can improve focus clarity and image stability based on the PC mode. |
- Press the Menu button to return to the main menu.
- Press the ← Exit button to exit the menu.


OSD Language
Allows you to select your desired on-screen menu language.
- Press the Menu button and then press the ◀ buttons to select the OPTIONS menu.
- Press the ▲▼ buttons to select OSD Language and then press the OK button. The default on-screen menu language is set as English.
- Press the ▲▼ buttons to select your desired OSD language. Press the OK button to confirm and return to the previous menu.
- Press the ← Exit button to exit the menu.


Audio Language (DTV Mode)
Allows you to select your desired audio language. (Available for digital channels if multiple audio languages are broadcast.)
- Press the Menu button and then press the ◀ buttons to select the OPTIONS menu.
- Press the ▲▼ buttons to select Audio Language and then press the OK button.
- Press the ▲▼ buttons to select your desired audio language. Press the OK button to confirm and return to the previous menu.
- Press the ← Exit button to exit the menu.


Subtitle Language (DTV Mode)
Allows you to select your desired subtitle language or turn off the subtitle. (Available for digital channels if multiple subtitle languages are broadcast.)
- Press the Menu button and then press the ◀ buttons to select the OPTIONS menu.
- Press the ▲▼ buttons to select Subtitle Language and then press the OK button.
- Press the ▲▼ buttons to select your desired subtitle language. Press the OK button to confirm and return to the previous menu.
- Press the ← Exit button to exit the menu.


Menu Time Out
Allows you to select the display time of the on-screen menu.
- Press the Menu button and then press the ◀ buttons to select the OPTIONS menu.
- Press the ▲▼ buttons to select Menu Time Out and then press the OK button.
- Press the ▲▼ buttons to select the 5 / 10 / 15 / 20 / 25 / 30 / 35 / 40 sec. Press the OK button to confirm and return to the previous menu.
- Press the ← Exit button to exit the menu.


Country
This shows the country where you have selected in auto scan. If you want to change the country, please refer to Auto Scan on page 18.
Restores all settings to the factory defaults.
- Press the Menu button and then press the ◀ buttons to select the OPTIONS menu.
- Press the ▲▼ buttons to select Restore Factory Default and then press the OK button.
- Press the ▲▼ buttons to select YES and then press the OK button to confirm. All settings will be reset to factory defaults and the OPTIONS menu will disappear.


Auto Standby
This TV has eco-friendly power saving technology enabled, and will automatically switch to standby mode after 4 hours if none of the TV remote control buttons have been used.
A reminder screen will pop up informing you that the "Auto Standby Feature" countdown timer of 10 minutes has been activated, after which the TV will switch to standby mode.
To continue viewing, press the OK button on the remote control, and it will cancel the "Auto Standby Function" and will continue for a further 4 hours of viewing.
- To permanently disable the Auto Standby Feature, press the Menu button and then press the ◀ buttons to select the OPTIONS menu.
- Press the ▲▼ buttons to select Auto Standby and then press the OK button to change On to Off.
To reactivate the Auto Standby Feature, repeat the above procedure and then press the OK button to change Off to On.
- Press the ← Exit button to exit the menu.


Lock Setting
To access the LOCK menu, you must enter the password. Enter the default password "0000" for first time use. To change the password, please refer to page 32 "Set Password".
Lock System
The Lock System is designed to prevent accidental retuning of the TV / losing channels and prevent children watching unsuitable programmes.
The Lock System must be set to On for this function to operate. If the Lock System is set to On, a valid password must be entered when you access Auto Scan / Manual Tuning / Programme Edit.
- Press the Menu button and then press the ◀ buttons to select the Lock menu.
- Press the ▲▼ buttons to select Lock System and then press the OK button.
- Use the 0-9 buttons to input a 4-digit password.

The default password is "0000".
If you change the password, be sure to remember the new password! If you forget the new password, use the master password "8899".
- Press the ▲▼ buttons to select On / Off. If the Lock System is set to On, a valid password must be entered when you access Auto Scan / Manual Tuning / Programme Edit.
- Press the Menu button to return back to the main menu.
- Press the ← Exit button to exit the menu.


Set Password
- Press the Menu button and then press the ◀▶ buttons to select the Lock menu.
- Press the ▲▼ buttons to select Lock System and then press the OK button.
- Use the 0-9 buttons to input a 4-digit password to enter the LOCK menu.

The default password is "0000".
If you change the password, be sure to remember the new password! If you forget the new password, use the master password "8899".


- Press the ▲▼ buttons to select Set Password and then press the OK button.
- Use the 0-9 buttons to input the old password and then input the new 4-digit password. Re-enter the new password for confirmation.

The default password is "0000". If you change the password, be sure to remember the new password! If you forget the new password, use the master password "8899".
- Press the Menu button to return to the main menu.
- Press the ← Exit button to exit the menu.
Lock Channel
Lock Channel is designed to prevent children from watching unsuitable programmes.
- Press the Menu button and then press the ◀ buttons to select the Lock menu.
- Press the ▲▼ buttons to select Lock System and then press the OK button.
- Use the 0-9 buttons to input a 4-digit password to enter the LOCK menu.

The default password is "0000". If you change the password, be sure to remember the new password! If you forget the new password, use the master password "8899".
- Press the ▲▼ buttons to select Lock Channel and then press the OK button.


- A Programme Edit screen will pop up. Press the ▲▼ buttons to select a channel. Press the GREEN button on the remote control to lock or unlock the channel. Press the GREEN button again to unblock.
- Press the Menu button to return back to the main menu.
- Press the ← Exit button to exit the menu.

When a channel is locked, a valid password must be entered.

Parental Guidance
This function allows you to set up blocking schemes to block specific programmes and ratings. It operates according to information from the broadcasting station, therefore if the signal has incorrect information, this function will not operate. This allows you to set up blocking schemes to block specific programmes and ratings.
This TV is programmed to remember which option it was last set to even if you switch the TV off.
- Press the Menu button and then press the ◀ buttons to select the Lock menu.
- Press the ▲▼ buttons to select Lock System and then press the OK button.
- Use the 0-9 buttons to input a 4-digit password to enter the LOCK menu.

The default password is "0000". If you change the password, be sure to remember the new password! If you forget the new password, use the master password "8899".
- Press the ▲▼ buttons to select Parental Guidance and then press the OK button.
- Press the ▲▼ buttons to select an age rating: Off, 4-18. Then press the OK button to confirm and return to the previous menu.
- Press the ← Exit button to exit the menu.

When a programme is rated above the selected age rating, the programme will be blocked, and a valid password must be entered.


EPG (Electronic Programme Guide) (DTV Mode)
This system has an Electronic Programme Guide (EPG) to help you navigate through all the possible viewing options.
The EPG supplies information such as programme listings, start and end times for all available services. In addition, detailed information about the programme is often available in the EPG (the availability and amount of programme information will vary, depending on the particular broadcaster).
This function can be used only when the EPG information is broadcast by broadcasting companies.
The EPG displays the programme details for the next 7 days.
Switch On / Off EPG
- Press the ■ Guide button to switch on EPG.
- Press the ▲▼ buttons to move to the top line PROGRAMME GUIDE and then press the ◀▶ buttons to select between TIME and CHANNEL. TIME format displays EPG of all channels at the same time. CHANNEL format displays EPG of one channel hour by hour.
- Press the Guide button again or the ← Exit button to switch off EPG and return to normal TV viewing.

Programme Guide by Channel Format

Programme Guide by Time Format
Select a Programme
Programme Guide by Channel Format
Press the ▲▼ buttons to move to the Channel field and then press the ◀▶ buttons to select the desired channel. Press the ▲▼ buttons to select the desired programme and then press the OK button to confirm.
Programme Guide by Time Format
Press the ▲▼ buttons to move to the Time field and then press the ◀▶ buttons to select the desired time. Press the ▲▼ buttons to select the desired programme and then press the OK button to confirm.
Button Functions in a 7 Days Guide
| Remote Control Button Function | |||||||
| ® (Record) | Timer ProgrammingSee page 51 for details on Timer Programming. | ||||||
| RED (Delete) | Press the RED button in the Schedule List to delete the selected preset reminder. | ||||||
| GREEN (Remind) | Press the GREEN button while on the selected programme, the Remind Menu will be displayed.Press the ◀▲Buttons to adjust the settings and then press the OK button to confirm the settings. After confirmation, the Schedule List will then be displayed with your preset reminders shown. Press the GREEN button again to return to the EPG. The TV will automatically tune to the selected programme when it starts. |  | |||||
| YELLOW (Schedule) | Press the YELLOW button to view the preset reminders or scheduled recordings in the Schedule List. | Schedule List | |||||
| TimeMode Result/Date | Programme Title | Channel Name | |||||
| Move Delete SNU Back EST Quit | |||||||
| BLUE (To Top) | Press the BLUE button and then press the ◀▶buttons to select CHANNEL / TIME. The Programme Guide will be sorted by channel or time. | ||||||
| ◀or ▶ | Press to select a channel. (for Programme Guide sorted by channel)Press to select the date. (for Programme Guide sorted by time) | ||||||
| ▲ or ▼ | Press to view the channel. (for Programme Guide sorted by channel)Press to view the schedule of the previous / next day. (for Programme Guide sorted by time) | ||||||
| OK Press to confirm and view the selected channel. | |||||||
| EXIT Press to switch off the EPG. | |||||||

Teletext (ATV Mode)
Teletext is a free service broadcast by some TV stations which gives up-to-the-minute information on news, weather, television programmes, share prices and many other topics. Using the Teletext control buttons you can view pages of information that are listed in the teletext index.
To Turn on Teletext Function

Make sure the TV channel you are watching transmits teletext. "No Teletext" sign will show on the screen if teletext is not available.
In ATV mode, press the TXT button to enter Teletext mode.
Press the TXT button three times to exit and the TV will return to the channel you were watching.
To select a page of text
Find the number of the page in the index and enter it using the 0-9 buttons. The number of the page will appear on the top left corner of the screen.
The page counter will search for your page. When it finds it, the page will be displayed.
To move to the next page of text, press the ▲ button.
To move to the previous page, press the ▼ button.
Mix
To view a page of text while watching a TV programme, press the TXT button twice. The text will be superimposed over the TV programme.
Fasttext
At the bottom of the teletext screen is a row of subject headings in red, green, yellow and blue.
The remote control has a row of colour buttons corresponding to the row of coloured subjects on the screen.
Pressing one of the colour buttons will take you directly to the page corresponding to the subject heading.
Digital teletext can access special digital teletext services and specific services which broadcast digital teletext. You will need to turn off Subtitle Function before using teletext (refer to page 30 for details).
Teletext within Digital Service
- In DTV mode, press the OK button to display the Channel List.
- Press the TXT button to display the teletext page.
- Press the 0-9 buttons to select a page number.
- Follow the instructions on digital teletext and move onto the next step by pressing OK, ◀▲▼▶, RED, GREEN, YELLOW, BLUE or 0-9 buttons etc.
- To change digital teletext service, select a different service by pressing the 0-9 buttons or the ▲▼ buttons.


Alternative
Press the TXT button while watching some programmes to reveal the teletext page (MHEG).
- Press the TXT button to exit.

Connecting to Network
You can set up your TV through your local area network (LAN) using a wired or wireless connection.

- If wired and wireless networks are both available, wired network is the preferred method.
- Do not connect a modular phone cable to the NETWORK socket. After making a physical connection, a small number of home networks may require the TV network settings to be adjusted. For most home networks, the TV will connect automatically without any adjustments.
- Since there are various connection configurations, please follow the specifications and instructions of your telecommunication carrier, internet service provider, and router setting user manual.
Connecting to a Wired Network
Use a Local Area Network (LAN) cable or an Ethernet cable to connect the TV's NETWORK socket to the corresponding port on your router socket.

Wired Network Setup
Use the Network Setup when connecting your TV to a wired network.
- Plug the connected devices into the mains socket before switching on the TV.
- Press the STANDBY button on the top panel of the TV or the ⏻ button on the remote control to turn on your TV.
- Press the ▶ I-Player button on the remote control to enter i-Player. When you first enter i-Player there is a delay whilst the network card boots. Please be patient.

- The TV will automatically connect to the i-Player server and register with it. If there is an update available, the server will deliver it at this time.

- If you have difficulty connecting or there is a "No Internet Connection" message on the screen. Press the IP button on the remote control. The Network SETUP menu will be displayed.
- Press the ▲▼ buttons to select Connection Type. Press the OK button and then press the ▲▼ buttons to select Wired. Press the OK button to confirm.
- Press the ▲▼ buttons to select IP Address. Press the OK button and then press the ▲▼ buttons to select Automatic IP or Fixed IP. Press the OK button to confirm.
Automatic IP
Select this if the network supports is a DHCP (Dynamic Host Configuration Protocol). The IP address will automatically be determined.
Fixed IP
Select this if there is no DHCP server on the network or you want to set the IP address manually.
Press the ▲▼ buttons to select Edit. Use the ▲◀▶▼ buttons to navigate IP Address / Network Mask / Gateway / DNS Server and then press the 0-9 buttons to enter your IP address details.
- Press the ▲◀▶▼ buttons to select Apply and then press the OK button to confirm.

In Wired mode the TV will connected to the router automatically as soon as the connection is made. You will see a message "Not connected" change to "Connected" at the top of the screen. This means you are connected to your local network.


Connecting to a Wireless Network
Use the Wireless LAN adapter to connect the TV's USB / WIFI socket.
![graph TD A["Network"] -->|USB WiFi| B["Wireless LAN Adapter (not included)"] B --> C["Internet"] D["Rear Left Side View of TV"] --> A E["Wireless Router"] --> F["Internet"] style A fill:#f9f,stroke:#333 style B fill:#ccf,stroke:#333 style C fill:#cfc,stroke:#333 style D fill:#fcc,stroke:#333 style E…](/content/2026/05/1050202/images/3b0ecf16c40abc33bde9373282f600c2f8e462386d2d7d8b9fdc175087c6da7e.jpg)
Wireless Network Setup
Use the Network Setup when connecting your TV to a wireless network.
- Plug the connected devices into the mains socket before switching on the TV.
- Press the STANDBY button on the top panel of the TV or the ⏻ button on the remote control to turn on your TV.
- Press the ▶ I-Player button on the remote control to enter i-Player. When you first enter i-Player there is a delay whilst the network card boots. Please be patient.

- The TV will automatically connect to the i-Player server and register with it. If there is an update available, the server will deliver it at this time.
- If you have difficulty connecting or there is a "No Internet Connection" message on the screen. Press the IP button on the remote control. The Network SETUP menu will be displayed.
- Press the IP button on the remote control and then press the ▲▼ buttons to select Connection Type. Press the OK button and then press the ▲▼ buttons to select Wireless and then press the OK button to confirm.
- Press the ▲◀▶▼ buttons to select Rescan Wifi and then press the OK button. The new connection setting resets the current network settings.
- Press the ▲▼ buttons to select Network Name (SSID) and then press the OK button. Press the ▲▼ buttons to select your network from the list and then press the OK button.

Alternative
Press the SD1 button on the remote control to display the online keyboard and then use the ▲◀▶ buttons and the OK button to select the desired characters to enter the Network Name (SSID). Press the ▲◀▶▼ buttons to select the √ icon and then press the OK button to confirm.
- Press the ▲▼ buttons to select Encryption Type and then press the SD1 button on the remote control to display the online keyboard. Press the ▲◀▶ buttons to select the characters to enter the Network Name (SSID) (the same key to enter on a laptop to connect).
- Press the ▲◀▶▼ buttons to select Apply and then press the OK button to confirm.
WPS (WiFi Protected Setup)
If your router has a WPS button, press the ▲◀▶▼ buttons to select WPS and then press the WPS button on the router. The connection will be made automatically.


Personal Account Setup
Use the setup a personal account.
- In iPTV mode, press the User button to display the LOGIN screen. Press the ▲▼ buttons to select the Create New User and then press the OK button.
- Press the ▲◀ buttons to select the User Name and then press the SD1 button to display the online screen. Press the ▲◀ buttons and the OK button to enter the desired character. Press the ▲◀ buttons to select the √ icon and then press the OK button to confirm.
- If you want to set the PIN, press the ▲◀▶ buttons to select the PIN and then press the SD1 button to display the online screen. Use the ▲◀▶▼ buttons and the OK button to select the desired characters. Press the ▲◀▶▼ buttons to select the √ icon and then press the OK button to confirm. Press the ▲▼ buttons to select Repeat PIN and re-enter the PIN for confirmation.
- Press the ▲◀▶▼ buttons to select Store User Data and press the OK button to confirm.
- Press the ▲◀▶▼ buttons to select Apply.


Access Personal Account
Use the access personal account.
In iPTV mode, press the User button to display the LOGIN screen. Press the OK button and then press the ▲▼ buttons to select the User Name. Press the ▲▼ buttons to select Login and then press the OK button.


Using the i-Player
- Press the ▶ I-Player button on the remote control to enter i-Player.

- The i-Player Main Menu will be displayed.

IPTV Services
Press the ◀▶ buttons and then press the OK button to select different IPTV services.

Widgets
Press the buttons to select different Widgets or Apps. Press the YELLOW or BLUE button to select different pages of each Widget.

- During watching IPTV Services, press the Menu button to return to the i-Player Main Menu.
- Press the TV button on the remote control to exit the i-Player and return to TV mode.
i-Player Search
To search for a subject on YouTube or your home media. Home media can be on USB storage devices or from a PC on your home network, provided the PC has media server software.
- In the i-Player Main Menu, press the SEARCH button to enter SEARCH MEDIA.
- Press the ▲▼ buttons and then press the OK button to select the search location (YouTube / Home Media). A tick box will be displayed.
- Press the ▲▼ buttons to move to the SEARCH field, then press the SD1 button on the remote control to display the on-screen keyboard.
- Press the ▲◀▶▼ buttons and the OK button to enter the desired characters. Press the ▲◀▶ buttons to select the icon, then press the OK button to enter the name of your search.

You do not need to type the full name. It will search for files that contain the letters you type within the file name.
- Press the RED button to search. The search results will be displayed.
- Press the ▲▼ buttons to select the desired subject, then press the OK button to play.
i-Player Advanced Settings
- Press the IP button on the remote control. The Network SETUP menu will be displayed.
- Press the BLUE button on the remote control to select the General SETUP menu.
Slideshow Delay
Press the ▲▼ buttons to select Slideshow delay, then press the OK button. Press the ▲▼ buttons and then press the OK button to select the desired options.
Detect USB
Press the ▲▼ buttons to select Automatically display content of USB device upon insertion, then press the OK button. A tick box will be displayed.


i-Player Information
Press the ▲▼ buttons to select OPEN in the About field. Press the OK button to display the information.
- Press the RED button to display the License. • Press the GREEN button to display the Copyrights.
- Press the BLUE button to display the IP and MAC data in Network.

Widget Preferences
a. Press the ▲▼ buttons to select Preferences in the Widget field. Press the OK button to display the Widget Preferences SETUP menu. b. Press the ▲▼ buttons to move to the page number field. Press the ◀▶ buttons to select more widget preferences pages. Press the OK button to confirm. c. Press the ▲◀ buttons and then press the OK button to select the desired widget. A tick box will be displayed. d. Some Widgets can be edited either to alter their action or to enable/disable them. Press the ▲◀▶ buttons to select Edit and then press the OK button.

Edit the weather widget
This will change the location that the weather is reported for.
a. In the Widget SETUP menu, press the ▲◀ buttons and then press the OK button to select Edit next to the Weather. The Weather Widget Settings will be displayed. b. Press the ◀▶ buttons to select °C or °F. c. In the USER LOCATION, press the ▲▼ buttons and then press the 0-9 buttons to enter your location postcode or press the SD1 button to display the online keyboard and enter the desired characters.

As delivered, the TV will report the weather for the region where it is connected to the internet. This may not be close to where you live.
d. Press the ◀▶ buttons to select SEARCH and then press the OK button. e. Your location will be displayed on the map. If this is correct, press the ▲◀▶ buttons to select Apply.

Authorise the Facebook widget for your account
a. In the Widget SETUP menu, press the ▲◀▶ buttons and then press the OK button to select Edit next to the Facebook widget. The authorisation instruction will be displayed. b. You will be provided with a Code and web address. On your PC, access the web address and enter the code provided. c. Press the ▲◀▶▼ buttons and then press the OK button to select Complete Process. The widget will then be authorised. d. Press the ▲◀▶ buttons to select Apply.

Authorise the Twitter widget for your account
a. In the Widget SETUP menu, press the ▲◀▶ buttons and then press the OK button to select Edit next to the Twitter widget. The authorisation instruction will be displayed. b. Press the ▲◀▶▼ buttons and then press the OK button to select Generate Code. c. You will be provided with a Code and web address. On your PC, access the web address and enter the code provided. d. Press the ▲◀▶▼ buttons and then press the OK button to select Complete Process. The widget will then be authorised. e. Press the ▲◀▶ buttons to select Apply.

i-Player Upgrade
i-Player upgrades are delivered online. They can add applications, fix software bugs, or just keep you up-to-date.
An "upgrade is available" message will be displayed when you switch on the i-Player.
If you accept the upgrade, press the ◀ buttons and then press the OK button to select YES. An "upgrade successful" message will be displayed when finished.

Do not turn off the TV or interrupt the upgrade once you start it. This could damage the TV.
If you do not want to upgrade, press the ◀ buttons and then press the OK button to select X. The "upgrade is available" message will disappear. The message will display again when the i-Player is turned on next time.
There are updates available for download. Do you wish to upgrade?


Connecting a USB Storage Device
- Switch off the TV before connecting any USB storage device.
- Connect your USB storage device to the USB port of your TV.
- Plug the connected devices into the mains socket before switching on the TV.
- Press the STANDBY button on the top panel of the TV or the ⏻ button on the remote control to turn on your TV.
- Press the TV/AV button on the top panel of the TV or the Source button on the remote control to display the Source List. Use the ▲▼ buttons to select USB and then press the OK button to confirm.


- If a hard disk is used, make sure its mains adapter is connected to the mains supply.
- If a USB hub is used, make sure its mains adapter is connected to the mains supply as the total current consumption may exceed 500mA.
- The maximum supported storage space of the hard disk is 1 TB. • The file system only supports FAT32 format.
- If you want to store the video streaming of a DTV programme, the transfer rate of the USB storage device must not be less than 5MB/s, otherwise the picture and sound of the programme will be affected and a warning statement will be shown on the screen. If this happens, please upgrade your USB storage device.
- The TV screen will be blank temporarily as it will take time to start up and stabilise the connected hard disk. This is normal and the starting time may vary depending on the brand and the memory size of the connected hard disk.
- Disconnect the USB storage device if it is not in use.

Viewing Photos
- Press the TV/AV button on the top panel of the TV or the Source button on the remote control then press the ▲▼ buttons to select the USB mode and then press the OK button to display the root menu.
- Press the ◀▶ buttons to select PHOTO and then press the ▲▼ buttons to select your storage device and then press the OK button.

File format supported: JPEG.
- Press the ◀▲▼▶ buttons to navigate in the picture folder and then press the OK button. Select the picture file and then press the OK button. A tick box will be displayed. If you need to delete the file, press the RED button. Press the ▶ button to start to play.


- Press the OK button to display the function bar. Press the ◀▶ buttons and then press the OK button to select the function: Repeat (Repeat 1 / Repeat All / Repeat None) / Music / Playlist / Info. / Rotate clockwise / Rotate anti-clockwise / Zoom In / Zoom Out / Move View.

If this folder also contains music file. You can select a music track to play at the same time while viewing your photo.
- Press the ■ button to return back to the previous menu and to select another file to play. Press the ← Exit button repeatedly to return to the root menu.


Listening to Music
- Press the TV/AV button on the top panel of the TV or the Source button on the remote control then press the ▲▼ buttons to select the USB mode and then press the OK button to display the root menu.
- Press the ◀▶ buttons to select MUSIC and then press the ▲▼ buttons to select your storage device and then press the OK button.
- Press the ◀▲▼▶ buttons to navigate in the music folder and then press the OK button. Select the music and then press the OK button. A tick box will be displayed. If you need to delete the file, press the RED button. Press the ▶ button to start to play.

- Some audio file formats will not be supported. - Supported file formats: MP3, WMA, AAC
- Press the ▲▼ buttons to select the music you want to play, it will show the music information (Album / Title / Artist / Bit Rate / Sampling / Year / Size).
- Press the ◀ buttons to select the function from the function bar.
Repeat
a. Press the ◀▶ buttons to select Repeat. b. Press the OK button repeatedly to select among: Repeat 1 / Repeat All / Repeat None.
Search
a. Press the ◀▶ buttons to select Search. b. Press the OK button to display the time table. c. Press the ◀▲▼▶ buttons and the 0-9 buttons to set the time. d. Press the ◀▲▼▶ buttons to select OK and then press the OK button to start to search.
Screen Saver
Press the BLUE button to enter the Screen Saver mode. Press the BLUE again to exit.
- Press the ■ button to return back to the previous menu and to select another file to play. Press the ← Exit button repeatedly to return to the root menu.
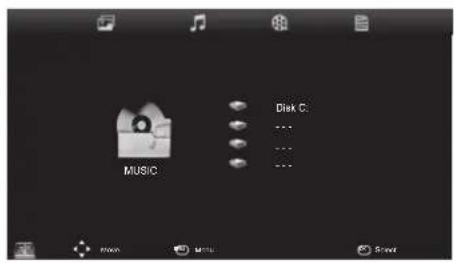


Watching Movies
- Press the TV/AV button on the top panel of the TV or the Source button on the remote control then press the ▲▼ buttons to select the USB mode and then press the OK button to display the root menu.
- Press the ◀▶ buttons to select MOVIE and then press the ▲▼ buttons to select your storage device and then press the OK button.
- Press the ◀▲ buttons to navigate in the movie folder and then press the OK button. Select the movie you want to view and then press the OK button to play. A tick box will be displayed. If you need to delete the file, press the RED button. Press the ▶ button to start playback.

- Some audio file formats will not be supported. - Supported file formats: MPEG 1/2, MPEG 4
- Press the OK button to display the function bar. Press the ◀▶ buttons and then press the OK button to select the function: Repeat 1 / Repeat All / Repeat None / Set A-B / Playlist / Info / Slow / Step / Search / Zoom In / Zoom Out / Aspect Ratio / Move View.
- Press the ■ button to return to the previous menu and to select another file to play. Press the ← Exit button repeatedly to return to the root menu.


Viewing Texts
- Press the TV/AV button on the top panel of the TV or the Source button on the remote control, then press the ▲▼ buttons to select the USB mode and then press the OK button to display the root menu.
- Press the ◀▶ buttons to select TEXT and then press the ▲▼ buttons to select your storage device and then press the OK button.
- Press the ◀▲▼▶ buttons to navigate in the text folder and then press the OK button. Select the text file and then press the OK button. A tick box will be displayed. If you need to delete the file, press the RED button. Press the ▶ button to start playback.


- Press the OK button to display the function bar. Press the ◀ buttons and then press the OK button to select the function: Prev. page / Next page / Prev. / Next / Stop / Music / Playlist / Info.

If this folder also contains music files, you can select a music track to play at the same time while viewing your text.
- Press the ■ button to return to the previous menu and to select another file to play. Press the ← Exit button repeatedly to return to the root menu.


Time Shift Function (DTV Mode)
This function allows the TV to virtually record the live viewing broadcast programme.

• Time Shift Mode and Recording functions may not work if the signal strength is weak. - Stop the time-shift function before switching to another input source.

If the transfer rate of the USB storage device is too slow for recording or time shift function, a warning statement will be shown on the screen. If this happens, please upgrade your USB storage device.
During normal TV viewing, you may press the ▶ button to virtually pause the live viewing broadcast programme if you want to go out for a while (e.g. going to the bathroom / kitchen). "II" will show on the screen.

Alternative
Press the ← Exit button to display the PVR Time Shift progress bar and then press the ◀▶ buttons to select "▶ Play" on the bar. Press the OK button to confirm.
When you have returned, press the ▶ button to play the missed broadcast programme. "s" will show on the screen.
There may be a few seconds delay in video and sound when the unit starts to playback the missed broadcast programme. It will return to normal.
![SHIFT TIME/MAX SHIFT TIME [00:00:33/00:04:22] Play FB FF Prev. Next Pause Stop 06:18](/content/2026/05/1050202/images/529cb5c50bbca061032c6c5e48da3f5df116cd79813cd797c8629bf0a3cf043f.jpg)
The 'PVR Time Shift Progress Bar'
1 Indicates the time lagging behind the live broadcast (DVR reviewing) 2 Indicates the available recording time on your USB storage device 3 Indicates the status of the currently displayed video (▶/IV ◀◀ ▶▶) 4 Indicates the current time
Using the Remote Control
You can shift playback to any point of the virtually recorded programme. The PVR Time Shift progress bar will be displayed on the screen for 15 seconds. Press the ← Exit button to display the PVR Time Shift progress bar again.
| ▶ | During playback, press the ▶ button to display a still screen and then press the ▶ button again to resume playback.During fast forward / fast backward state, press the ▶ button to return to normal playback. |
| ◀ or ▶When playing,Press the◀button repeatedly to speed up ◀2 / x 4 / x 8 / x 16.Press the▶button repeatedly to speed up ◀2 / x 4 / x 8 / x 16.During fast forward / fast backward state, press the▶button to return to normal playback. | |
| ◀ or ▶Press the button to jump about 10% forward.Press the◀button to jump about 10% back. | |
| OK | During playback, press the OK button to display a still screen and then press the ▶ button again to resume playback. |
| ■ | If you want to exit the PVR Time Shift progress bar and return to the current live broadcast, press the ■button. |

Recording DTV Programme onto a USB Storage Device
Use this function to record the DTV programme you are watching on the main screen and save them for future viewing.
Make sure that your connected USB storage device has enough available memory space.
- Press the Ⓗ button to record the programme that you are currently watching.

The recording progress bar will disappear after 15 seconds. To display the recording progress bar again, press the Ⓡ button or the ←Exit button.
- Press the ■ button to stop recording.

Recording will stop automatically when the disk is full.
![RECORDING TIME: [00:10:15] MAX RECORDING TIME: [00:01:30:40] Play FB FF Prev. Next Pause Stop 06:18](/content/2026/05/1050202/images/8841e63284e8b8129e819846255cdd38625fe536f423e523107dd0b9b88c70d1.jpg)

If you want to turn off your TV during recording, press the button. A dialogue will display. Press the ▲▼ buttons to select your desired option and then press the OK button to confirm.
If you select the middle option in the box, the screen will turn off but the recording will still in progress, the LED indicator will alternatively flash red and green.


Timer Programming
This function is used to perform scheduled recording.
- Press the ■ Guide button on the remote control. The EPG menu will appear.

Programme Guide by Channel Format

Programme Guide by Time Format
- Press the Ⓚ button on the remote control while on the selected programme, the Recorded Mode menu will be displayed. Press the ▲◀▶ buttons to select the settings in the Recorded Mode menu for the Channel, Start time, End time and Mode.
| Start time(for Mode Once, Every Day, Weekly) | Press the ▲buttons to select the Minutes / Hour / Month / Date and then press the ◀buttons to adjust the start time. |
| End time(for Mode Once, Every Day, Weekly) | Press the ▲▼ buttons to select the Minutes / Hour / Month / Date and then press the ◀buttons to adjust the end time. |
| Mode Press the | ◀buttons to select the Once / Every Day / Weekly. |
| Recorded Mode | ||
| 5 five | ||
| OnceMode | ||
| Start Time | ||
| Minute | 00 | |
| Hour | 10 | |
| Month | Dec | |
| Date | 25 Date | |
| End Time | ||
| Minute | 15 | |
| Hour | 10 | |
| Month | Dec | |
| Date | 25 Date | 25 |
- After finishing all the recorder adjustments, press the OK button to confirm your settings. A Timer Save Success screen will display.
- The Schedule List will then be displayed with your preset reminders shown.
- Press the Menu button to return to the EPG.
- Press the ← Exit button to exit EPG.

- When the preset time is reached, the TV will start recording automatically.
- If a programme recording starts when the TV is in standby mode, the LED indicator will alternatively flash red and green.
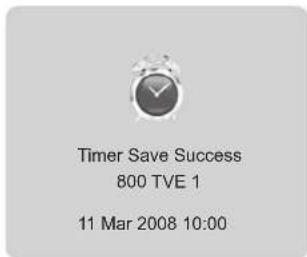


Play Recorded Programme
You can play a recorded programme from the recorded programme list or from a USB Storage Device.
- Press the TV/AV button on the top panel of the TV or the Source button on the remote control then press the ▲▼ buttons to select the USB mode and then press the OK button to display the root menu.
- Press the ◀▶ buttons to select MOVIE and then press the ▲▼ buttons to select your storage device and then press the OK button.
- Press the ◀▲▼▶ buttons to navigate in the movie folder and then press the OK button. Select the movie you want to view and then press the OK button to play. A tick box will be displayed. If you need to delete the file, press the RED button. Press the ▶ button to start to play.
- Press the OK button to display the function bar. Press the ◀▶ buttons and then press the OK button to select the function: Repeat 1 / Repeat All / Repeat None) / Set A-B / Playlist / Info / Slow / Step / Search / Zoom In / Zoom Out / Aspect Ratio / Move View.
- Press the ■ button to return back to the previous menu and to select another file to play. Press the — Exit button repeatedly to return to the root menu.

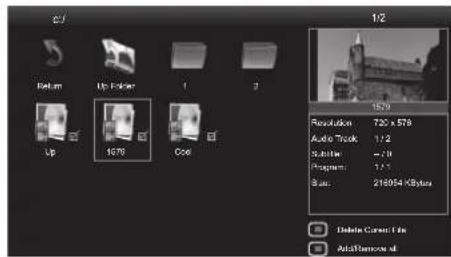

Careful and regular cleaning can prolong the life of your TV.

Be sure to switch off the STANDBY button on the top panel of the TV or the ⏻ button on the remote control to turn off the TV. Disconnect the mains adapter from the mains socket before any cleaning.
- Use a soft dry cloth to wipe away the dust from the screen and surfaces.
- If the surfaces are extremely dirty, clean the TV with a cloth which has been dipped in a weak soapy water. Wring the cloth until it is almost dry, then use it to wipe the TV.
- Ensure there is no excess water on the screen. Allow any water or dampness to evaporate before switching the TV on.

Never use alcohol, benzine, paint-thinner, cleaning fluid or other chemicals. Do not use compressed air to remove dust.


Hints and Tips
The following table contains various hints and tips to get the best performance from your TV. If you require additional assistance please call our UK Call Centre on 0844 561 1234. Our UK Customer Contact Centre is open Monday-Saturday 8am-8pm or Sunday 8am-6pm.
| The TV does not operate properly. | |
| The TV does not respond when pressing any buttons | The TV may freeze up during use. Disconnect the mains adapter from the mains socket for a few minutes. Reconnect the mains adapter and try to operate it again as usual. |
| TV cannot be switched on | Check that the TV is connected to the mains supply.Make sure all connected AV devices are switched off before switching on your TV. |
| The remote control does not work | Check to see if there are any objects between the TV and the remote control causing an obstruction. Ensure that you are pointing the remote control directly at the TV.Ensure that the batteries are installed with the correct polarity (+ to +, - to -).Install new batteries. |
| Power is suddenly turned off | Check the power of the TV. The mains supply maybe interrupted.Check if the sleep timer is set.Check whether the Auto Standby is activated. |
| The video function does not work. | |
| No Picture & No Sound | Check whether the TV is switched on.Try another channel. The problem may be caused by the broadcaster. |
| Picture appears slowly after switching on | This is normal, the image is muted during the TV startup process. Please contact your service centre, if the picture has not appeared after five minutes. |
| No or poor colour or poor picture | Adjust the settings in the PICTURE menu.Try another channel. The problem may be caused by the broadcaster.Check if the video cables are connected properly. |
| Horizontal / Vertical bar or picture shaking | Check for local interference such as an electrical appliance or power tool. |
| Poor reception on some channels | Station or cable channel may be experiencing problems, tune to another station.Station signal is weak, reposition the aerial for better reception.Check for sources of possible interference. |
| Lines or streaks in pictures | Check aerial (Change the position of the aerial.) |
| No pictures when connecting HDMI | Check if the input source is HDMI. |
| Picture appears in wrong ratio | Adjust the Aspect Ratio settings in the PICTURE menu. |
| The audio function does not work. | |
| Picture OK but no sound | Press the VOL + / - buttons.Sound muted? Press the button.Try another channel. The problem may be caused by the broadcaster. |
| No output from one of the speakers | Adjust the Balance settings in the SOUND menu. |
| Unusual sound from Inside the TV | A change in ambient humidity or temperature may result in an unusual noise when the TV is switched on or off and does not indicate a fault with the TV. |
| No sound when connecting HDMI | Check if the input source is HDMI. |
| Audio noise | Keep the RF coaxial cable away from the other connected cables. |
| Password | |
| Lost password | Select the Set Password setting in the LOCK menu, then use the following master password “8899”. The master password clears your previous password and allows you to enter a new password. |
| There is a problem in PC mode. | |
| The signal is out of range (Invalid format) | Adjust the resolution, horizontal frequency, or vertical frequency. |
| Vertical bar or stripe on background & Horizontal Noise & Incorrect position | Use Auto configure or adjust clock, phase, or H/V position. |
| Screen colour is unstable or single colour | Check the signal cable.Reinstall the PC video card. |
| FAQs (Frequently Asked Questions) | |
| Why have I lost some / all of my channels? | It happens sometimes, if you have a weak signal. Usually it just means you'll need to rescan your digital box or TV. Don't worry, it easy to do. And once you've done it, you should get all the Freeview channels available to you. If problems persist you may need to get your aerial checked. Talk to your retailer or contact your local aerial installer. |
| Why do I get ‘blocking’ on my digital picture? | In most cases, blocking is caused by a reception problem – either the signal is too weak or there is some kind of interference. Talk to your retailer or contact your local aerial installer.Blocking can also be caused by a digital signal that is too strong. If you are still experiencing blocking and the signal is strong, consult your local aerial installer for advice. |
| Can I watch Freeview using a portable set-top aerial? | Some, but only a few, homes may be able to use a set top aerial. However, for a much better reception, we strongly recommend that you use a rooftop aerial.If you do not have access to a rooftop aerial – for example, if you rent a flat and the aerial is the responsibility of your landlord, or if you're using a second TV in the bedroom and don't want the hassle and expense of using extension cables, a set – top aerial may be your only option. |
| What type of aerial do I need? | If you are installing a new aerial, we recommend a wideband rooftop aerial rather than a loft aerial. Loft aerials generally receive a weaker digital signal and are more likely to get interference from other electrical devices in the home. We suggest you have an aerial survey done before getting an aerial upgrade.Talk to your retailer or contact your local aerial installer. |
The screen resolution has been optimised during production for the display modes listed below.
YPbPr Mode
| Resolution Vertical Frequency (Hz) Aspect Ratio | ||
| 480I: 720 x 480 | 60 | Auto / 4:3 / 16:9 / Zoom1 / Zoom2 / Panorama |
| 480P: 720 x 480 | ||
| 576I: 720 x 576 | 50 | |
| 576P: 720 x 576 | ||
| 720P: 1280 x 720 | 50 | |
| 60 | ||
| 1080I: 1920 x 1080 | 50 | |
| 60 | ||
| 1080P: 1920 x 1080 | 50 | |
| 60 | ||
PC Mode
Please check the display settings of your computer before connecting to the TV. If the display setting of your computer does not match the TV, there may be no video.
| Resolution Vertical Frequency (Hz) Aspect Ratio | ||
| 640 x 480 | 60 | 4:3 / 16:9 |
| 72 | ||
| 75 | ||
| 800 x 600 | 60 | |
| 72 | ||
| 75 | ||
| 1024 x 768 | 60 | |
| 70 | ||
| 75 | ||
| 1360 x 768 60 | ||
| 1920 x 1080 60 | ||
HDMI Mode
| Resolution Vertical Frequency (Hz) Aspect Ratio | ||
| 480l: 1440 x 480 60 | Auto / 4:3 / 16:9 / Zoom1 / Zoom2 / Just Scan / Panorama | |
| 480P: 720 x 480 60 | ||
| 576l: 1440 x 576 50 | ||
| 576P: 720 x 576 50 | ||
| 720P: 1280 x 720 | 50 | |
| 60 | ||
| 1080l: 1920 x 1080 | 50 | |
| 60 | ||
| 1080P: 1920 x 1080 | 50 | |
| 60 | ||
| Model L23IP11 | |
| Panel System 23 inch LED Backlight Panel | |
| Display Resolution 1920 pixels (horizontal) x 1080 pixels (vertical) | |
| Television System PAL I / BG / DK / SECAM BG/DK | |
| Brightness 250 cd/m | 2 |
| Contrast Ratio 1000:1 | |
| Power Source 100-240V~50/60Hz | |
| Energy Efficiency Class B | |
| Screen Size (measured diagonally) Approx. | 58 cm (23 inch) |
| Power Consumption (In HOME / STANDBY mode) | 30W |
| Average Annual Energy Consumption 44kWh | |
| Standby Power Consumption 0.45W | |
| Operating Temperature 0°C - 40°C | |
| Operating Humidity 10% - 50% RH | |
| Mercury Content (mg) | X |
| Presence of Lead | √ |
| Reference Period | 2010/1062 - 2011 |
| Speaker Power | 3 W + 3 W |
| Dimension (W x D x H) with base | 583 x 165 x 420 mm |
| Weight (Net) | 4.5 kg |
| Inputs / Output | |
| SCART | 1 |
| HDMI | 1 |
| VGA | 1 |
| PC AUDIO 1 | |
| YPbPr | 1 |
| Common Interface | 1 |
| AV | 1 |
| USB | 3 |
| AUDIO IN (RCA) | 1 (L + R) |
| DIGITAL (Coaxial) | 1 |
| RF (75 Ω) | 1 |
| Earphone (3.5mm) | 1 |
Features and specifications are subject to change without prior notice.


Safety Warnings
- Read all the instructions carefully before using the unit and keep them for future reference.
- Retain the manual. If you pass the unit onto a third party make sure to include this manual.
- Check that the voltage marked on the rating label matches your mains voltage.
Damage
- Please inspect the unit for damage after unpacking.
- Do not continue to operate the unit if you are in any doubt about it working normally, or if it is damaged in any way - switch off, withdraw the mains plug and consult your dealer.
Location of Unit
- The unit must be placed on a flat stable surface and should not be subjected to vibrations.
- Do not place the unit on sloped or unstable surfaces as the unit may fall off or tip over.
- The mains socket must be located near the unit and should be easily accessible. • This unit is designed for indoor use only.
Temperature
- Avoid extreme degrees of temperature, either hot or cold. Place the unit well away from heat sources such as radiators or gas / electric fires.
- Avoid exposure to direct sunlight and other sources of heat.
Naked Flames
- Never place any type of candle or naked flame on the top of or near the unit.
Moisture
- To reduce the risk of fire, electric shock or product damage, do not expose this unit to rain, moisture, dripping or splashing. No objects filled with liquids, such as vases, should be placed on the unit.
- If you spill any liquid into the unit, it can cause serious damage. Switch it off at the mains immediately. Withdraw the mains adapter and consult your dealer.
Ventilation
- To prevent the risk of electric shock or fire hazard due to overheating, ensure that curtains and other materials do not obstruct the ventilation vents.
- Do not install or place this unit in a bookcase, built-in cabinet or in another confined space. Ensure the unit is well ventilated. • Make sure that there is a gap of at least 10 cm on both sides and a gap of 20 cm at the top.

Safety
- Always disconnect the unit from the mains supply before connecting / disconnecting other devices or moving the unit.
- Unplug the unit from the mains socket during a lightning storm.
Mains Adapter Cable
- Make sure the unit or unit stand is not resting on top of the mains adapter cable, as the weight of the unit may damage the mains adapter cable and create a safety hazard.
Interference
- Do not place the unit on or near appliances which may cause electromagnetic interference. If you do, it may adversely affect the operating performance of the unit, and cause a distorted picture or sound.
Optimum viewing
- View the unit in moderate light to prevent eye strain. It is recommended to watch the unit from a distance 3-7 times that of the screen height.
LCD screen
- The LCD screen is manufactured using high-precision technology. However, some tiny black points and / or bright points (red, blue or green in colour) may constantly appear on the LCD screen. These points are generated in the manufacturing process and are normal.
Screen Burn
- A characteristic of Plasma and TV Panels is that displaying the same image for a long time may cause a permanent after-image to remain on the screen. This is called screen burn. Most pictures shown on the unit will be constantly moving and fill the screen. - Examples of images that you need to watch out for are as follows (this is not an all-inclusive list):
- Black Bars: If black bars appear at the left / right or top / bottom of the screen, it is recommended to change the format so that the picture fills the entire screen.
- TV Channel Logos: e.g. Shopping channel logos and pricing displays - especially if they are bright and stationary. Moving or low-contrast graphics are less likely to cause ageing of the screen.
3. Time Displays
- Teletext: Do not view a stationary page for long periods of time.
5. TV Menus
- Pause Mode: Do not leave the screen in pause mode for long periods of time, e.g. when watching videos.
- To prevent screen burn if viewing any of the above for long periods of time, reduce contrast and brightness when viewing. Once burn-in occurs it will never disappear completely.
Earphones
- Listening to loud sounds for prolonged periods of time may permanently damage your hearing.
- Before putting on earphones, turn the volume down, then put the earphones on and slowly increase the volume until you reach a comfortable listening level.
Standby
- The ⏻ button on the remote control does not switch off the unit completely. The unit will continue to draw electricity from the mains supply while in standby. In the interests of safety and to avoid unnecessary energy consumption, never leave the unit in standby while unattended for long periods of time, e.g., overnight, while on holiday, or while out of the house. Disconnect the mains adapter from the mains socket.
Batteries
- Batteries used in the remote control for this unit are easily swallowed by young children and this is dangerous.
- Keep loose batteries away from young children and make sure that the battery holder tray is secure in the remote control. Seek medical advice if you believe a cell has been swallowed.
- Please dispose of batteries correctly by following the guidance in this manual.
Supervision
• Children should be supervised to ensure that they do not play with the unit and the remote control. - Never let anyone, especially children, push anything into the holes, slots, or any other openings in the case - this could result in a fatal electric shock.

CAUTION RISK OF ELECTRIC SHOCK DO NOT OPEN


The lightning flash with arrowhead symbol, within an equilateral triangle, is intended to alert the user to the presence of uninsulated "dangerous voltage" within the unit's enclosure that may be of sufficient magnitude to constitute a risk of electric shock.

The exclamation point within an equilateral triangle is intended to alert the user to the presence of important operating and maintenance (servicing) instructions in the manual accompanying the unit.
Service
- To reduce the risk of electric shock, do not remove screws. The unit does not contain any user-serviceable parts. Please leave all maintenance work to qualified personnel.
- Do not open any fixed covers as this may expose dangerous voltages.
Maintenance
- Ensure to unplug the unit from the mains socket before cleaning.
- Do not use any type of abrasive pad or abrasive cleaning solutions as these may damage the unit's surface. • Do not use liquids to clean the unit.
| If you require a replacement for any of the items listed below, please quote their corresponding part numbers: | |
| Replacement Part Part Number | |
| TV Base (Glass Stand) 104130001 | |
| Remote Control 118020207 | |
| AA Batteries 118030018 | |
| Mains Adapter 118010045 | |
| Component Adapter Cable 117030014 | |
| A/V Adapter Cable 117030015 | |
| Ethernet Cable (3m) 0114090187 | |
| Glass Stand Screw A 0103020024 (2822/ST4*10F) | |
| Stand Neck Screw B 103010046 (M4*10) | |
Visit Partmaster.co.uk today for the easiest way to buy electrical spares and accessories. With over 1 million spares and accessories available we can deliver direct to your door the very next day. Visit
www.partmaster.co.uk or call 0844 800 3456 (UK customers only) Calls charged at National Rate.

This symbol on the product or in the instructions means that your electrical and electronic equipment should be disposed at the end of its life separately from your household waste. There are separate collection systems for recycling in the EU.
For more information, please contact the local authority or your retailer where you purchased the product.
Notes for battery disposal
The batteries used with this product contain chemicals that are harmful to the environment. To preserve our environment, dispose of used batteries according to your local laws or regulations. Do not dispose of batteries with normal household waste.
For more information, please contact the local authority or your retailer where you purchased the product.
HDMI, the HDMI logo and High-Definition Multimedia Interface are trademarks or registered trademarks of HDMI Licensing LLC.
The FREEVIEW word and logo are trademarks of DTV services Ltd and are used under licence. ©DTV Services Ltd 2002
The "HD Ready" logo is a trademark of DIGITALEUROPE.
SRS TruSurround HD™ creates an immersive, feature-rich surround sound experience from two speakers, complete with rich bass, high frequency detail and clear dialogue.
TruSurround HD, SRS and the symbol are trademarks of SRS Labs, Inc.
All trademarks are the property of their respective owners and all rights are acknowledged.


- WE KNOWHOW™ TO HELP YOU WITH YOUR TV
- TV SET UP & DEMO
- TV WALLMOUNT & DEMO
- FREESAT® SET UP & DEMO
- AERIAL INSTALL & TUNE
- HOME THEATRE SET UP & DEMO
- FAULT & FIX SERVICES
- PREPARATION
- CONNECTIONS
- INITIAL SETUP
- USING THE FEATURES
- ENTERTAINMENT
- PVR (PERSONAL VIDEO RECORDER)
- MAINTENANCE
- HINTS AND TIPS
- DISPLAY MODES
- SPECIFICATIONS
- SAFETY WARNINGS
- THANK YOU FOR PURCHASING YOUR NEW LOGIK 23" LED SMART TV
- UNPACKING THE TV
- INSTALLING / REMOVING THE BASE STAND
- FRONT / TOP / SIDE VIEW AND CONTROLS
- INSTALLING BATTERIES IN THE REMOTE CONTROL
- HANDLING THE BATTERIES
- HANDLING THE REMOTE CONTROL
- REMOTE CONTROL OPERATION RANGE
- REMOTE CONTROL
- SOURCE
- ⏻
- TV / RADIO
- NO SATELLITE RECEIVER
- ▷I-PLAYER
- MENU
- HELP
- QUICK START
- SEARCH
- ← EXIT
- GUIDE
- I INFO
- VOL
- CH
- OK
- R
- DVD MENU
- P
- S
- SD
- IP
- DAY
- COLOURED BUTTONS
- NUMBER BUTTON
- SUB
- SHUFFLE
- TXT
- DELETE
- USER
- MAKING VIDEO AND AUDIO CONNECTIONS
- CONNECTING AN AV DEVICE WITH AN HDMI CABLE
- CONNECTING A COMPUTER WITH A VGA CABLE
- CONNECTING AN AV DEVICE WITH A COMPONENT (YPBPR) CABLE
- CONNECTING AN AV DEVICE WITH A SCART CABLE
- CONNECTING AN AV DEVICE WITH COMPOSITE CABLE
- CONNECTING A DIGITAL (COAXIAL) AUDIO RECEIVER
- CONNECTING EARPHONES
- TURNING THE TV ON FOR THE FIRST TIME
- ALTERNATIVE
- TARGET REGION DESCRIPTOR
- SELECTING THE INPUT SOURCE
- CHANNEL SELECTION
- DISPLAY CHANNEL INFORMATION
- VOLUME ADJUSTMENT
- TV SETTINGS (TV, DTV OR RADIO MODE)
- AUTO SCAN (ATV / DTV MODE)
- DTV MANUAL TUNING (DTV MODE)
- ATV MANUAL TUNING (ATV MODE)
- PROGRAMME EDIT (ATV / DTV MODE)
- MOVE
- SKIP
- RENAME
- SIGNAL INFORMATION (DTV MODE)
- CI (COMMON INTERFACE) (DTV MODE)
- TO INSERT THE COMMON ACCESS MODULE
- TO REMOVE THE COMMON ACCESS MODULE
- TO VIEW THE MODULE INFORMATION
- SOFTWARE UPDATE (USB)
- CI (COMMON INTERFACE)
- CUSTOMISING THE SOUND SETTING
- MONO / NICAM STEREO SOUND RECEPTION (ATV MODE)
- MONO SOUND SELECTION
- SPEAKER SOUND OUTPUT SELECTION (DTV MODE)
- SLEEP TIMER
- START RECORDING
- SCHEDULE LIST
- RECORDED LIST
- TIMER RECORD
- PVR FILE SYSTEM (DTV MODE)
- PC SETUP (PC MODE)
- OSD LANGUAGE
- AUDIO LANGUAGE (DTV MODE)
- SUBTITLE LANGUAGE (DTV MODE)
- MENU TIME OUT
- COUNTRY
- AUTO STANDBY
- LOCK SETTING
- LOCK SYSTEM
- SET PASSWORD
- LOCK CHANNEL
- PARENTAL GUIDANCE
- EPG (ELECTRONIC PROGRAMME GUIDE) (DTV MODE)
- SWITCH ON / OFF EPG
- SELECT A PROGRAMME
- PROGRAMME GUIDE BY CHANNEL FORMAT
- PROGRAMME GUIDE BY TIME FORMAT
- BUTTON FUNCTIONS IN A 7 DAYS GUIDE
- TELETEXT (ATV MODE)
- TO TURN ON TELETEXT FUNCTION
- TO SELECT A PAGE OF TEXT
- MIX
- FASTTEXT
- TELETEXT WITHIN DIGITAL SERVICE
- CONNECTING TO NETWORK
- CONNECTING TO A WIRED NETWORK
- WIRED NETWORK SETUP
- AUTOMATIC IP
- FIXED IP
- CONNECTING TO A WIRELESS NETWORK
- WIRELESS NETWORK SETUP
- WPS (WIFI PROTECTED SETUP)
- PERSONAL ACCOUNT SETUP
- ACCESS PERSONAL ACCOUNT
- USING THE I-PLAYER
- IPTV SERVICES
- WIDGETS
- I-PLAYER SEARCH
- I-PLAYER ADVANCED SETTINGS
- SLIDESHOW DELAY
- DETECT USB
- I-PLAYER INFORMATION
- WIDGET PREFERENCES
- EDIT THE WEATHER WIDGET
- AUTHORISE THE FACEBOOK WIDGET FOR YOUR ACCOUNT
- AUTHORISE THE TWITTER WIDGET FOR YOUR ACCOUNT
- I-PLAYER UPGRADE
- CONNECTING A USB STORAGE DEVICE
- VIEWING PHOTOS
- LISTENING TO MUSIC
- REPEAT
- SCREEN SAVER
- WATCHING MOVIES
- VIEWING TEXTS
- TIME SHIFT FUNCTION (DTV MODE)
- THE 'PVR TIME SHIFT PROGRESS BAR
- USING THE REMOTE CONTROL
- RECORDING DTV PROGRAMME ONTO A USB STORAGE DEVICE
- TIMER PROGRAMMING
- PLAY RECORDED PROGRAMME
- PC MODE
- DAMAGE
- LOCATION OF UNIT
- TEMPERATURE
- NAKED FLAMES
- MOISTURE
- VENTILATION
- SAFETY
- MAINS ADAPTER CABLE
- INTERFERENCE
- OPTIMUM VIEWING
- LCD SCREEN
- SCREEN BURN
- TIME DISPLAYS
- TV MENUS
- EARPHONES
- STANDBY
- BATTERIES
- SUPERVISION
- SERVICE
- NOTES FOR BATTERY DISPOSAL
Brand : Logik
Model : L23IP11
Category : Television