ST-MW7159GR - Microwave Saturn - Free user manual and instructions
Find the device manual for free ST-MW7159GR Saturn in PDF.


| Product Type | Microwave Oven |
| Brand | Saturn |
| Model | ST-MW7159GR |
| Capacity | 20 liters |
| Power Output | 800 W |
| Dimensions (W x D x H) | 440 x 360 x 260 mm |
| Weight | 11 kg |
| Power Supply | 230 V ~ 50 Hz |
| Functions | Defrost, Timer, Multiple Power Levels |
| Control Type | Mechanical Dials and Push Buttons |
| Interior Light | Yes |
| Turntable | Yes |
| Child Lock | No |
| Door Opening | Push-button |
| Color | Grey |
| Interior Material | Stainless Steel |
| Cleaning Method | Wipe with a damp cloth |
| Accessories Included | Glass turntable, instruction manual |
Frequently Asked Questions - ST-MW7159GR Saturn
User questions about ST-MW7159GR Saturn
0 question about this device. Answer the ones you know or ask your own.
Ask a new question about this device
Download the instructions for your Microwave in PDF format for free! Find your manual ST-MW7159GR - Saturn and take your electronic device back in hand. On this page are published all the documents necessary for the use of your device. ST-MW7159GR by Saturn.
USER MANUAL ST-MW7159GR Saturn
| meat or chops as the over temperature may do d a m a to the film |
[Unreadable]
As there is manufacturing remained on the oven cavity or heat element, it usually would smell the odor, even as a ligament msoik et I and would not occur after several times use, keep the door or window ensure good ventilation. So recommended to set at grill mode and operate dry several times, dry operation can only be conducted in the grill mode, it cannot be conducted at combination mode or microwave mode.
IMPORTANT SAFEGUARDS
The following basic precautions always be followed when using electrical appliance:
- Read all instructions before using.
- Make sure the voltage in your living area corresponding to the one shown on the rating label of the appliance. And the wall socket is properly grounded.
- To reduce the risk of fire in the oven cavity:
a. Do not overcook the food. b. Remove wire twist-ties plastic bags before placing bags in the oven.
c. Do not heat oil or fat for deep drying as the temperature of oil cannot be controlled.
d. After use wipe the wave with a damp cloth, followed by dry cloth
Built-up grease may overheat and begin to cause smoke or catch file. If materials inside the ove smoke or ignite, keep oven door closed, turn oven off and disconnect the power supply.
f. Close supervi using disposable containers made from plastic, paper or other combustible material.
- To reduce the risk of explosion and sudden boiling: a. Do not place sealed containers in the oven. Baby bottles fitted with a screw cap or teat are considered to be sealed containers.
b. When boiling liquid in the wide-mouthed container and stand
about 20 seconds at the end of cooking to avoid delayed eruptive boiling of liquids.
c. Potatoes, sausage and chestnut should be peeled or pierced before cooking. Eggs in their shell, whole hard-boiled eggs should not crowave ovens since they may explode, even after microwave head
d. The cooked liquid should moved out immediately. Several moments should be waited before removing. In order to avoid possible hazards caused by delayed eruptive boiling of liquids, due or oil. e. The contents of feeding bottles and baby food jars are to be stolen and the temperature is to before consumption, in order
-
Never operate the oven further if the door or door seals are oven is malfunctioned or supply cord is damaged. Return the a nearest authorized service center for repair and maintenance. Never try to adjust or repair the oven yourself.
-
If the supply cord is damaged it must be replaced by the ma service agent or a qualified technician in order to avoid a shock hazard.
- After cooking, the container is very hot. Using gloves to take out the food and avoid steam burns by directing steam away from the face and hands.
-
Slowly lift the furthest edge of dishes cover and microwave plastic wrap and carefully open popcorn and oven cooking bags away from the face.
-
To prevent the turntable from breaking:
a. Let the turntable cool down before cleaning.
b. Do not place hot foods or the cold turntable
the cold turntable. c. Do not place frozen foods or utensils on the hot turntable.
- Make sure the utensils do not touch the interior walls during cooking.
If failure to maintain the oven in a clean condition could lead to deterioration of the surface that could adversely affect the life of the appliance and possibly result in a hazardous situation.
-
Only use utensils that are suitable ^s s a r y for use in microwave ovens.
-
Do not store food or any other things inside the oven.
-
Do not operate the oven without any liquid or food inside the oven. This would do damage the oven.
-
This appliance is not intended for using by young children or infants without supervision.
-
When the appliance is operated in the combination mode, children should
only use the oven under adult supervision due to the temperatures generated 17. Any accessories not recommended by the manufacturer to persons.
-
Do not use outdoors. t10.dSave these instructions.
-
This appliance is not intended for sized toy persons (including children)
with reduced physical, sensory or mental capabilities, or lack of experience
and knowledge, unless they have been given supervision or
cerning use of the appliances by a per-son responsible for their safety.
Children should be supervised to ensure that they do not play with the appliance. e21. The appliance is not intended to be
conteotideby an external timer or sepa croa be orde mote - control
Household use only d or the
PRODUCT INTRODUCTION
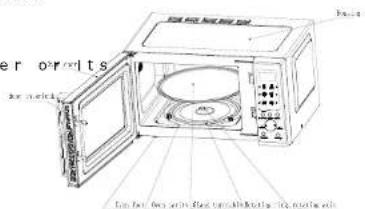

Notes: e n
1. Door interlock ensures the oven can only be activated when the door is
only be activated which the door is properly closed, which would prevent microwave radiation.
2. Control panel is illustrated in next page/Control panel is subject to
page (Control panel is subject to change without prior notice).
3. IDo not remove waveguide cover
4. Glass turntable turns to make food
are heated evenly.
- LED display will show the clock time, cooking mode and left operation tinsee which dependence on the current set mode.
3 times when plugged
in power supply. Then it will flash : prompting you to input the cooking menu and time.
The image is too blurry to recognize any text content.
ton
Y
increase or decrease cooking time and weight during operation by pressing Time. Weight/ Auto cooking button.
[Unreadable]
At the initial or input sta to cancel input programs and resume initial stage.
[Unreadable]
operation, press twice to cancel cooking programs.
a m u o
[Unreadable]
When your preset cooking p have finished, the LED Display will show E n d and three beeps sound will be heard to prompt you to take out food. If you do not press s t o p / c once or open the door the beep will be sounded at an interval of 3 minutes.
The image is too blurry to recognize any text content.
Use this feature to lock the control panel when you are cleaning or so that children can not use the oven unsupervised. All the buttons are inoperable in this mode. Stop/ Clear button about 3 until LED appears OFF.
stop/ Clear button about 3 until LED appears colon.
[Unreadable]
Press Micro Power button, LED will cycle to show 100P 80P 60P 40P 20P 100P --- High power, 100% microwave power. Applicable for quick and thorough cooking, such as meat, vegetable 80P --- Medium High power, 80% microwave power. Applicable for medium express cooking, such as eggs, fish, congee, rice, soup 60P --- Medium power, 60% microwave power. Applicable for steaming food 40P --- Medium Low power, 40% microwave power. Applicable for defrosting food
20P --- Low power, 20% microwave power. Applicable for keeping warm NOTE:
1) The max time which can be set is 60 minutes.
2) Never operate the oven empty. 3) Never use the Grill rack during microwave cooking. 4) If you turn the food during operation, press the Instant/Start button once
and the preset cooking procedure will continue.
5) If you intend to remove the food before the preset time, you must stop/ Clearbutton once to clear preset procedure to avoid unintended operation of next time use.
Example: To cook at80P for half minutes.
-
After power-up, the colon flashes or press stop/ clear button once
-
Select the desired microwave power by: pressing Micro Power button
-
Set the cooking time by pressing Time.weight/Auto-cooking
- Press Instant/Start button to start, and LED will count down to show running time.
during cooking. And it is recommend to turn over the food halfway, after you turn the food. Press Instant/Start button once to continue.
earbutton
Press this button LED Display will cycle to show 0:30--1:00--1:30 This function will allow you to heat a cup of water or beverage conveniently, omitting the steps of setting time. Choose the proper time depending on the hov
e range capacity. 0:30 -- default 30 sec op 1:00 --- default 1 minute o 1:30 --- default time is 1 minutes
Example: To cook with expr minute
- After power-up, the colon flashes or press button once.
-
Depress Express button consecutively to select desired menu.
-
Start cooking by pressing In- stant.Startbutton
EOK
Press defrost/CLOCK button and the LED display will circle to show d.1 d.2
d.3. d.1---for defrosting meat, the range from 0.1Kg to 2.0 Kg d.2---for defrosting poultry, the range from 0.2 to 3.0Kg. d.3---for defrosting seafood, range from 0.1 to 0.9Kg. Note:
-
It is necessary to turn over the food during operation to object.
-
Usually defrosting will need longer time than that of cooking the food.
- If the food can be cut by knife, the defrosting process can be considered completed.
- Observe the below Defrost guide to
achieve best performance.
Example: To defrost 1. After power-up, the colon flashes or
press stops Clear button once a.rSelect the food kind by pressing
[图]
-
Set defrosting weight by pressing the time. weight/Auto cooking button
-
Start cooking by pressing Instant/ Start button and LED will show running time.
-
Half way during defrosting 3 beep sound will be heard two times to prompt
you turn over the food. C and turn over the food and shield the
warm portion. Press Instant/Start button again to continue the defrosting. If
you do not when an audib sounds, the defrosting cycle will contin-
ue until the time count down to 0.
Clock Setting: After power-up, t colon flashes
Press defrost/CLOCK button three seconds and
The formality will enter clock state, input hour you need by press Time.
Auto cooking
Button.press defrost/CLOCK again, the same method to setting minute.
[Unreadable]
[Unreadable]
-Shield thin end of chops
- Position the food with the centre in a single layer on alshallow.
dish. If pieces are stuck to separate as soon as possible.
- When the oven beleps, it is you to turn over the food rearrange and shield the defrosted portions.
- Press Instant/Start button to continue defrosting.
- After defrost time, stand of aluminium foil for 5-15 minutes.
Minced Beef
- Place frozen minced beef on a shallow dish. Shield edges.
- When the oven Beeps, it is you to turn over the food
frosted portions, turn over edges with fill strips
- Press Instant/Start button to contin-
- After defrost time, stand aluminium foil for 5-15 minutes.
Roast Meat (Beef/pork/lamb)
- Shield the edges with foil strips. - Place joint with lean side face upwards
(if possible) on a shallow dish.
-When the oven Beeps, it is to prompt you to turn over the food. Turn over,
and shield the defrosted portions.
- Press Instant/Start button to contin-
ue defrosting
After defrost time, stand aluminium foil for 10-30 minutes.
Poultry
- Remove from original wrapp wing and leg tips with foil.
- Place breast side down on a shallow dish.
e Wuhren daw no vton Beeps, it is you to turn over the food
shield the defrosted portions.
- Press Instant/Start button to contin- needefronttime. door
- After defrost time, stand aluminium foil for 15-30 minutes.
Note: After standing run und wates biogramnave giblets if necessary.
Chicken pieces (chicken wings and drumstick)
- Shield the exposed bone - Place chicken pieces on a shallow dish.
- When the oven beeps, it is you to turn over the food
rearrange and shield the defrosted por- tions.
- Press Instant/Start button to continue defrosting.
- After defrost time, stand aluminium foil for 5-30 minutes.
steaks with
The oven has default cooking menu for simple operation. When the LED flashes
colon, tdrn Time. weight / Auto ing km verb. and tpoED will cycl
AC.1、AC.2...AC.6
Choose the appropriate menu according to the food type and weight and strictly
observe the directions of below table, otherwise the cooking effect will be
largely influenced
Example: Steam 0.45kg f d.vAefrteedr wp lot w er-up, the col o
press stop/ Clear button once
- Choose the appropriate menu by
pressing the Time. Weight/Auto cooking button
- Start cooking by pressing In-
stent/Starbutton, and LED will count
d oRwenm pov es hdoew- running time. and shield
Auto
| #y | Category | # |
| oP | Suitable f popping a bag of corn, which is available In the market, weighted 85g (3.00Z). Pop-corn prior to completing, if the popping speed has been de creased time per 1-2 seconds you should press stop/cle button to the popping process | |
| oP | Same as A except 100 (3.50Z) weight | |
| Pizza | W chilled pizza of 0.15Kg | |
| Beverage | Heating a cup of 250 ml liquid. The liquid temperature is about 5-10. Use a big mouth cup and do not seal | |
| Beverage | Heating a cup of 500 ml liquid. The liquid temperature is about 5-10. Use a big mouth and do not seal | |
| y r | d d | Cpoklgg the potato strips, cut into 5mm width and height, length. To about 0.45kg. Place the strips on a large dish and cover the dish with film to pre water loss |
| oP |
Note: 1. The temperature of food before cooking would be 20,250°C unless eth
Cooking would be 20-250C unless otherwise indicated
2. The temperature, weight and shape
of food will largely influence the cooking effect. If any deviation has been to the factor noted on above menu, you can adjust the cooking time for best result.
10. Automatic starting (delayed
function)
If you do not want the menu be s
If you do not want the menu be immediately, you can preset the cooking menu and time and the preset menu will be automatically started at your time. The setting will consist of 2 steps:
1. Setting the current clock; 2. Setting
the cooking menu and time.
E x a m p l e: Now it is 12:30 clock, if you
1 hope that the microwave oven will au-
t o t h a t w a t i m a t o n a l y s t a r t c o o k i n g with 100P mi-
crowave power for 9 minutes and 30
seconds at 14:20.
seconds at 14.20
a r
stop
1. Set the current time
1.1 Depress Clock button
1.2 Turn Time.weight/Auto cooking knob
to set hours, and hours will be flashed
1.3 Depress'Clock button again
1.4 Turn Time, weight/Auto cooking knob to set minutes
1.5 Depress Clock button or waiting for 5 seconds, and the numbers will go steadily.
2. Set the cooking menu and time
2.1 Select cooking power by pressing Power button
2.2 Turn Time.weight/Auto cooking knob in set cooking time
2.3 To return to current clock, hold Clock button for 3 seconds, then a short beep sound will be heard 3. Set the time you expect to start. Repeat the steps of 1.2, 1.3, 1.4
4. Depress Clock button to confirm the delayed menu. Now the program been activated. And the menu started at 14:20
- You may check the preset starting cup time by depressing Clock button Note: Delay function is not applicable for express, auto cook and de 11. Multi-sequence cooking
T o o b t a I pes call for different cook and time. You may program your personalized menu as follows w e i g Example: Y o u w a n t t 100P microwave for 3 minutes then 20P microwave for 9 minutes. This is 2 sequences setting.
a th i _n 100P microwave for 3min even 0.1 Press Power button to select desired menu.
1.2 Turn time, weight/Auto cooking knob to set cooking time. When 100P microwave power co finished, microwave oven will microwave operation automatically. Note: Max 4 sequences can be set per time by repeating step1 and step2 op-
tionally if you like to set more.
found
Place thicker areas toward outside of dish and the thinner meat and spread them evenly. Do not overlap if possible.
t2a Cooking time
Start cooking with the sho time and extend it according to the actual needt Overcooking may result in smoking and burning.
3) Cover foods before cooking refer to
the recipe Use paper towels, microwave plastic wrap or a cover to cover food so that prevent spattering and help foods to cook evenly. (Helps keep oven clean). 4) Partial shielding of food
Use small pieces of aluminum foil to cover thin areas of meats or poultry to
avoid overcooking.
5) Stir foods From outside to center of dish once or
From outside to center of dish of twice during cooking, if possible.
twice during cooking, if possible. 6) Turn foods
Foods such as chicken steaks should be turned over once during cooking.
7) Rearrange foods
Please change the positions of food in half way during cooking such as: from top to bottom and from the center of the dish to the outside.
8) Allow standing time
After cooking ensure a deq time. Remove food from oven and stir if possible. Cover for standing time which allows the food to finish cooking without overcooking.
a) halseck for doneness
Observe the food color and hardness to
determine whether the
山
-Steams throughout food, not just at
edge part.
- jolats of Poultry move easily. - Pork and poultry show no ev blood. n b e s - Fish is opaque and flakes easily with a fork.
10) Condensation i s I to is a normal k case of oml cr oding. The humidity and moisture of food will influence the amount of moisture in the oven. Generally, covered foods will not cause as much condensation as uncovered foods. Ensure that the ventilation openings are not blocked.
11) Microwave safe plastic wrap For cooking food with high odkoi nmo t sbr ing the wrap in co
the findbas it only melt
12) Microwave safe plastic cookware
Some microwave safe plast
2.1.3. 2017, 4:25-2018, 4:26-
is not suitable for cooking foods with high fat and sugar content.
CLEANING & MAINTENANCE
The oven should be cleaned regularly and any food deposits removed. Suggest you perform below every time use.
Never use hard detergent, gasoline, abrasive powder or metall brush to clean any part of the appliance. Clean the oven at regular intervals
图中/图
fore cleaning. And if possi door open to inactivate the cleaning.
Exterior:
The outside may be cleaned wipe with a soft and damp cloth. Avoid the use of harsh abrasive cleaners.
F
Wipe the door and window o sides, the door seals and adjacent parts frequently with a damp clo any spills or spatters. Do not use abrasive cleaners
Control panel:
Care should be taken in cleaning the control panel. Wipe the panel with a cloth dampened slightly. Do not scrub or use any sort of chemical cleaners.
Interior walls:
I do c l e a soft and damp cloth for hygienic reasons. After use wipe the waveguide cover in the oven with a soft damp cloth to remove any food splashed. Buildup splashes may overheat and begin to smoke or catch fire. Do not remove the waveguide cover. Do not use a commercial oven cleaner, abrasive or harsh cleaners and scouring pads on any part of your microwave oven. Never spray oven cleaners directly onto any part of your oven.
Turntable/ Rotating ring/Rotating axis
lidence of
TIP: When the microwave oven has been used for a long time, some strange odors exist in oven, following 2 methods are not rid of them.
lowing, 3 methods can get rid of them: 1. Place several lemon slices in a cup, then heat with high power for 2-3 min. 2. Place a cup of red tea in oven, then heat with high power.
- Put some orange peel into oven, then heat them with high power for 1 minute.
-
s#t content
Wating: it is hazardous for anyone, other than a qualified service technician, to carry out any service for
2.0 P
info@jogong.com
10
protection against exposure to mi-
Caution: MICROWAVE RADIATION
Warning:The temperature of acces-
sible surface may be appliance is operating.
Dinuropalda
from the microwave generator or
other parts conductin
energy.
[Unreadable]
liable to be removed and give access to
potentials above250V to earth.
-
Magnetron
-
High voltage transformer
-
High voltage capacitor
-
High voltage di
-
High voltage route
-
High voltage of bus
-
High voltage fuse
Below listed condition may
microwave exposure during servicing.
-
Unproper fitting of magnetron.
-
Unproper matching of Door interlock, door hinge and door
-
Unproper fitting of switch support
-
Door. Door seal or enclosure has been
-
Door, Door seal or enclosure has been damage.
-
D
T ewo
Microwave Power: 800 W
Grill Power: 1000 W Rated Voltage: 228-23
Rated voltage: 220-230 V Rated Frequency: 50 Hz
Rated Frequency. 50Hz Rated Current: 58A
Rated Current: 5,0A
金
Microwave Oven
1
Instruction Manual with
W a r r a n t y B o o k
akcaP 1
ENVIRONMENT FRIENDLY AL

Y o u c a n
environment!
Please remember to re-
spect the local regula-
tions: hand in the non-
working electrical equip-
ments
to an appropriate waste
disposal centre.

The manufacturer re-
serves the right to
change the design of the product.
RU
Микроволновая печь
Это специ-

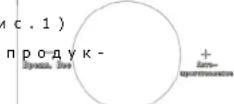
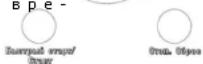
□
Time.weight/ Auto cooking. Снова
Time.weight/ Auto cooking. Начните
[Unreadable due to severe distortion and noise]
The following table is a duplicate of the previous table:
Видка не
The Warranty is provided for the period of 2 years or more if the Law on User Right of the country where the appliance was bought provides for a greater minimum warranty period.
All terms of warranty comply with to the Law on Protection of the Consumer Rights and are governed by the legislation of the country where the product was bought.
The warranty and free of charge repair are provided in any country where the product is delivered to by Saturn Home Appliances or authorized representative thereof, and where no restriction of import or other legal provisions interfere with rendering of warranty services and free of charge repair.
Cases uncovered by the warranty and free of charge repair:
-
Guarantee coupon is filled in improperly.
-
The product has become inoperable because of the Buyer's nonobservance of the service regulations indicated in the instruction.
-
The product was used for professional, commercial or industrial purposes (except for the models, specially intended for this purpose that is indicated in the instruction).
-
The product has external mechanical damage or damage caused by penetration of the liquid inside, dust, insects and other foreign objects.
-
The product has damages caused by non-observance of the rules of power supply from batteries, mains or accumulators.
-
The product was exposed to opening, repair or modification of design by the persons, unauthorized to repair; independent cleaning of internal mechanisms etc. was made.
-
The product has natural wear of parts with limited service life, expendables etc.
-
The product has deposits of scale inside or outside of fire-bar elements, irrespective of used water quality.
-
The product has damages caused by effect of high (low) temperatures or fire on non-heat resistant parts of the product.
-
The product has damages of accessories and nozzles which are included into the complete set of product shipment (filters, grids, bags, flasks, cups, covers, knives, scaling rings, graters, disks, plates, tubes, hoses, brushes, and also power cords, headphone cords etc.).
On the warranty service and repair, please contact the authorized service centers of Saturn Home Appliances.
CZ
MEZINÁRODNÍ ZÁRUKA
When purchasing the product,
please require its checking before you;
BE SURE
that the goods sold to you, are functional and complete
and that the warranty coupon is filled in correctly.
This warranty coupon confirms the absence of any defects in the product you purchased and provides for free of charge repair of the product failed through the fault of the manufacturer throughout the period of warranty service and free of charge repair.
Failing the presentation of this coupon, in case of its improper filling in, infringement of factory seals (if any), and also in cases indicated in the warranty obligations, the claims are not accepted, and no warranty service and free of charge repair is made!
The warranty coupon is valid only in the original copy with the stamp of trading organization, signature of the seller, date of sale and signature of the buyer.
CZ
ZÁRUČNÍ LIST
Při koupi výrobku
Buyer's Signature confirming the acquaintance and consent with conditions of free of charge maintenance service of the product, and absence of the complaints on appearance and color of the product.
- [Unreadable]
- IMPORTANT SAFEGUARDS
- The image is too blurry to recognize any text content.
- ton
- Y
- earbutton
- EOK
- [图]
- Auto cooking
- Minced Beef
- Roast Meat (Beef/pork/lamb)
- Poultry
- Chicken pieces (chicken wings and drumstick)
- steaks with
- Automatic starting (delayed
- found
- CLEANING & MAINTENANCE
- Control panel:
- D
- 金
- ENVIRONMENT FRIENDLY AL
- RU
- Микроволновая печь
- [Unreadable due to severe distortion and noise]
- Cases uncovered by the warranty and free of charge repair:
- MEZINÁRODNÍ ZÁRUKA
- ZÁRUČNÍ LIST
Brand : Saturn
Model : ST-MW7159GR
Category : Microwave