
LM05-19U1-300G - Screen HANNSPREE - Free user manual and instructions
Find the device manual for free LM05-19U1-300G HANNSPREE in PDF.


| Product Type | LED Monitor |
| Screen Size | 19 inches |
| Resolution | 1366 x 768 pixels |
| Aspect Ratio | 16:9 |
| Brightness | 300 cd/m² |
| Contrast Ratio | 1000:1 |
| Response Time | 5 ms |
| Viewing Angle (H/V) | 170° / 160° |
| Input Connectors | VGA, DVI |
| Power Supply | AC 100-240V, 50/60Hz |
| Power Consumption | 20 W (typical) |
| Standby Power | Less than 0.5 W |
| VESA Mount | 100 x 100 mm |
| Dimensions (W x H x D) | 440 x 345 x 170 mm (with stand) |
| Weight | 3.5 kg (with stand) |
| Operating Temperature | 0°C to 40°C |
| Cleaning Instructions | Use a soft dry cloth; avoid solvents |
| Safety Warning | Do not block vents; use correct power source |
| Spare Parts Availability | Contact Hannspree support for parts |
| Warranty | 1 year limited warranty |
Frequently Asked Questions - LM05-19U1-300G HANNSPREE
User questions about LM05-19U1-300G HANNSPREE
0 question about this device. Answer the ones you know or ask your own.
Ask a new question about this device
Download the instructions for your Screen in PDF format for free! Find your manual LM05-19U1-300G - HANNSPREE and take your electronic device back in hand. On this page are published all the documents necessary for the use of your device. LM05-19U1-300G by HANNSPREE.
USER MANUAL LM05-19U1-300G HANNSPREE
CHECKINGTHECONTENTSOFTHEPACKAGE......8
POWER....9
CONTROLSANDCONNECTORS10....
ADJUSTINGTHEVIEWINGANGLE....11
OPERATINGINSTRUCTIONS....12
GENERALINSTRUCTIONS....12
FRONTPANELCONTROL....13
HOWTOADJUSTASETTING....14
PLUGANDPLAY....18
TECHNICALSUPPORT(FAQ)....19
Q&AFORGENERALDEFECTS....19
ERRORMESSAGE&POSSIBLESOLUTION....20
APPENDIX....21
SPECIFICATIONS....21
CONNECTORPINASSIGNMENT....22
Beforeoperatingthemonitor, pleasereadthismanualthoroughly. Thismanualshould be retainedforfuturereference.
FCCClassBRadioFrequencyInterferenceStatement
This equipment has been tested and found to comply with the limits for a Class Digital device, pursuant to Part 15 of the FCC Rules. These limits are designed to provide reasonable protection against harmful interference in a residential installation. This equipment generates, uses and can radiate radio frequency energy, and if not installed and used in accordance with the instructions, may cause harmful interference or communication. However, there is no guarantee that interference will not occur in particular installation. If this equipment does cause harmful interference or radio or television reception, which can be determined by turning the equipment off and on, the user is encouraged to try to correct the interference by one or more of the following measures:
■ Reorientorrelocatethereceivingantenna.
■ Increase these separation between the equipment and receiver.
■ Connecttheequipmentintoanoutletonacircuitdifferentfromthattowhichthe receiverisconnected.
■ Consultthedealeroranexperiencedradio/TVtechnicianforhelp.
Thedevic ecomplieswithPart15oftheFCCRules.
Operationissubjecttothefollowing
twoconditions:(1)thisdevicemaynotcauseharmfulinterference;and(2)thisdevice
must accept any interference received, including interference that may cause undesired operations.
CANADA
ThisClassBdigitalapparatusmeetsallrequirementsoftheCanadianInterference-Causing EquipmentRegulation.
CE
This device complies with requirement of EMC directive 89/336/EEC with regard to Electromagnetic Compatibility, and 73/23/EEC and 93/68/EEC with regard to Low Voltage directive.
Socket-outletshallbeneartheequipmentandshallbeaccessible.
TCO'03(TCO'03appliedmodelonly)

Congratulations!
ThedisplayyouhavejustpurchasedcarriestheTCO'03 Displayslabel. Thismeansthatyourdisplayisdesigned, manufacturedandtestedaccordingtosomeofthestrictest qualityandenvironmentalrequirementsintheworld. Thismakes forahighperformanceproduct, designedwiththeuserinfocus thatalsominimizetheimpactonournaturalenvironment.
SomeofthefeaturesoftheTCO'03Displayrequirements:
Ergonomics
- Goodvisualergonomicsandimagequalityinordertoimprovetheworkingenvironment fortheuserandtoreducesightandstrainproblems.Importantparametersare luminance,contrast,resolution,reflectance,colourrenditionandimagestability.
Energy
- Energy-savingmodeafteracertainty–beneficialbothfortheuserandthe environment
- Electricalsafety
Emissions
• Electromagneticfields
- Noiseemissions
Ecology
- Theproductmustbepreparedforrecyclingandthemanufacturermusthaveacertified environmentalmanagementsystemsuchasEMASorISO14001
- Restrictionson
○ chlorinatedandbrominatedflameretardantsandpolymers - heavymetalssuchascadmium,mercuryandlead.
TherequirementsincludedinthislabelhavebeendevelopedbyTCODevelopmentin cooperationwithscientists,experts,usersaswellasmanufacturersallovertheworld. Sincetheendofthe1980sTCOhasbeeninvolvedininfluencingthedevelopmentofIT equipmentinamoreuser-friendlydirection.Ourlabellingsystemstartedwithdisplaysin 1992andisnowrequestedbyusersandIT-manufacturersallovertheworld.
Formoreinformation,pleasevisit
www.tcodevelopment.com
RECYCLINGINFORMATION
HANNspreeInc.caresaboutenvironmentalprotectionstrategiesandinusingmanufacturing methodsandtreatmentsthatlendthemselvesvetoconservationandrecyclingdevicesatthe end-of-life.
Ourproducts,wheneverpossible,containrecyclablematerialswhichcanberecycledintonew devices.Whennecessaryforoperation,othermaterialsmaybeclassifiedashazardousor poisonoussubstances.Westronglyencourageyoutoresearchtheprovidedinformation aboutrecyclingthisdevice.
UnitedState:http://newyork.earth911.org/
Asia:http://recycle.epa.gov.tw/public/public4_2.htm
Europe:
Ireland
Company:McGrathEnvironmentalConsultantsLtd.
ContactPerson:Ms.McGrathClodagh
Address:20LowerJohnStreet,Cork,Ireland.
Tel:0214554833Fax:0214505805
Norway:
Company:Bergfald&CoasContactPerson:Mr.Solevåg∅ystein
Address: Solavågsvegen90, EIDSNES, NORWAY, PostCode: N-6037
Tel:+4740234705Fax:+4770194017
WebSite:http://www.bergfald.no/bergfald_english.html
UnitedKingdom:
Company: ARENANetworkContactPerson: Dr. TillotsonAllen
Address: BankBuildingsTreforestEstate, Pontypridd, RhonddaCynonTaff, KindomPost
Code:
CF375UR
Tel:01443844001Fax:01443844002
WebSite:http://www.arenanetwork.org
SAFETYNOTICE
- Changesormodificationsnotexpresslyapprovedbythepartyresponsiblefor compliancecouldvoidtheuser'sauthoritytooperatetheequipment.
- Shieldedinterfacecables and AC powercord, if any, must be used in order to comply with the emission limits.
- ThemanufacturerisnotresponsibleforanyradioorTVinterferencecausedby unauthorizedmodificationtothisequipment.Itistheresponsibilitiesoftheuserto correctsuchinterference.
WARNING:
Topreventfireorshockhazard, donotexposethemonitortorainormoisture. Dangerously highvoltagesarepresentinsidethemonitor. Donotopenthecabinet. Forallservice issues, pleaserefertoqualifiedpersonnelonly.
PRECAUTIONS
- Donotusethemonitornearwater, e.g. nearabathtub, washbowl, kitchensink, laundry tub, swimmingpoolorinawetbasement.
- Donotplacethemonitoronanunstablecart,stand,ortable.Ifthemonitorfalls,itcan injureapersonandcauseseriousdamagetotheappliance.Useonlyacartorstand recommendedbythemanufacturerorsoldwiththemonitor.Ifyoumountthemonitoron awallorshelf,useamountingkitapprovedbythemanufacturerandfollowthekit instructions.
- Slotsandopeningsinthebackandbottomofthecabinetareprovidedforventilation.To ensurereliableoperationofthemonitorandtoprotectitfromoverheating,besurethese openingsarenotblockedorcovered.Donotplacethemonitoronabed,sofa,rug,or similarsurface.Donotplacethemonitornearoroveraradiatororheatregister.Donot placethemonitorinabookcaseorcabinetunlessproperventilationisprovided.
- Themonitorshouldbeoperatedonlyfromthetypeofpowersourceindicatedonthe label.Ifyouarenotsureofthetypeofpowersuppliedtoyourhome,consultyourdealer orlocalpowercompany.
- Unplugtheunitduringalighteningstormorwhenitwillnotbeusedforlongperiodof time. This will protect the monitor from damage due to power surges.
- Donotoverloadpowerstripsandextensioncords. Overloadingcanresultinfire and/or electricshock.
- Neverpushanyobjectintotheslotonthemonitorcabinet.Itcouldshortcircuitparts causingafireorelectricshock.Neverspillliquidsonthemonitor.
- Donotattempttoservicethemonitorbyyourself;openingorremovingcoverscan exposeyoutodangerousvoltagesandotherhazards.Pleasereferallservice issuestoqualifiedservicepersonnel.
- Toensuresatisfactoryoperation, usethemonitoronlywithULlistedcomputerswhich haveappropriateconfiguredreceptaclesmarkedbetween100-240VAC, Min.5A.
- Thewallsocketshallbeinstalledneartheequipmentandshallbeeasilyaccessible.
SPECIALNOTESONLCDMONITORS
The following symptoms are normal with LCD monitor and do not indicate a problem.
- Duetothenatureofthefluorescentlight,thescreenmayflickerduringinitialuse. Turn offthePowerSwitchandthenturnitonagaintomakesuretheflickerdisappears.
- Youmayfindslightlyunevenbrightnessonthescreendependingonthedesktoppatternyouuse.
- TheLCDscreenhaseffectivepixelsof99.99%ormore.Itmayincludeblemishesof 0.01%orlesssuchasamissingpixelorapixellitallofthetime.
- DuetofthenatureofLCDscreens,anafterimageofthepreviousdisplayedcontentmay remainifthisimagehasbeenthedisplayedforseveralhours.TheLCDscreenshould recoveriftheimageischangedorpoweredoffforseveralhours.
- If the screens suddenly flashes erratically or the backlighting fails, please contact your dealer or service center for repair. Donot attempt to repair them onitory yourself.
PREFACE
ThankyouforpurchasingaHannspreeLiquidCrystalDisplayMonitor(LCDMonitor).
Please carefully read this manual in its entirety before setting up, using or operating your Monitor. To ensure the safe and correct installation and operation so the Monitor, it is important that the safety and operation instructions in this manual are followed.
ThisinstructionmanualisdesignedtoassistyouinsettingupandusingtheMonitor. Theinformationinthismanualhasbeencarefullycheckedforaccuracy;however,no guaranteeisgiventothecorrectnessofthecontents.Theinformationinthismanualis subjecttochangewithoutnotice.
Totheextentallowedbyapplicablelaw,Hannspree,Inc.( “Hannspree”)shallnotbe liablefordirect,indirect,special,exemplary,incidentalorconsequentialdamages arisingfromanydefectoromissioninthismanual,evenifadvisedofthepossibility ofsuchdamagesinadvance.
Theproductpackageshouldincludethefollowingitems:
LCDMonitor
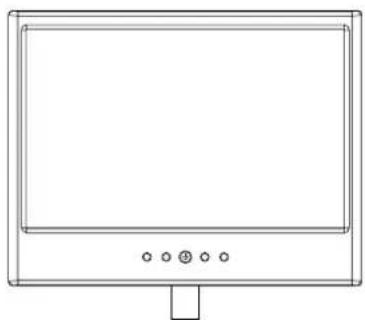
natural_image
Line drawing of a flat-screen computer monitor with control buttons at the bottom (no text or symbols)ScreenBase
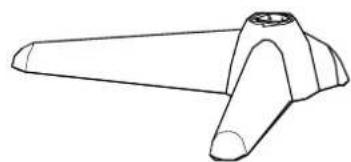
natural_image
Line drawing of a mechanical component with triangular blades and a central hub (no text or symbols)* Note: Thescreenandbasedesignmayvaryondifferentmodels. Formoreinformation, please refertotheQuickStartGuideofyourMonitormodel.
CablesandUsermanual
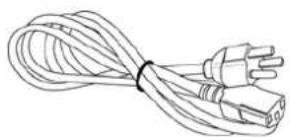
natural_image
Line drawing of a cord with two leads, no text or symbols present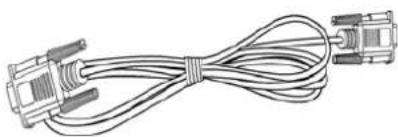
natural_image
Coiled cable with two connectors and two U2B ports (no text or symbols visible)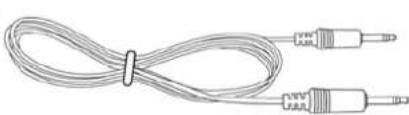
natural_image
Coiled cable with two external connectors (no text or symbols visible)PowerCordVGACableAudioCable
natural_image
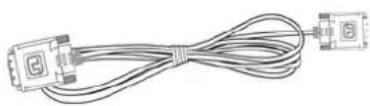
Coiled cable with two connectors and a connector icon, no text or symbols visibleUser's manual DVI-DCAbler(OptionalServiceManual
* Note: Imagesareforillustrationonlyandmayvarybymodelorregion.
POWER
POWERSOURCE:
- Makesurethatthepowercordisthecorrecttyperequiredinyourarea.
- This LCD monitor has an internal universal powers supply that allows operation either 100/120VAC or 220/240VAC voltage area (Nouser adjustment is required.)
- PlugoneendoftheAC-powercordintotheLCDmonitor'sACinputsocketandtheother intoasurgeprotectionpowerstripordevice.
CONTROLSANDCONNECTORS
CABLECONNECTIONS:
Turnoff your computer before performing the procedure below.
- Connectoneendofthe15-pinD-Subcabletothebackofthemonitorandconnectthe otherendtothecomputer'sD-Subport. -or-
- Connectoneendofa24-pinDVI-Dtothebackofthemonitor. Connecttheotherendto thecomputer'sDVI-Dport. note: Thismonitoriscapableofoperatingin'Dualinput'mode. Onlyoneofeitherthe 15-pinD-suborthe24-pinDVI-Dconnectionsisneededfornormaloperation.
- Connect the audiocable between the monitor's audio input and the PC's audio output (greenport). This connection is optional and not required for normal operation of the monitor.
4.PlugoneendoftheAC-powercordintotheLCDmonitor'sACinputsocketandtheother intoasurgeprotectionpowerstripordevice. - Turnonyourmonitorandcomputer.
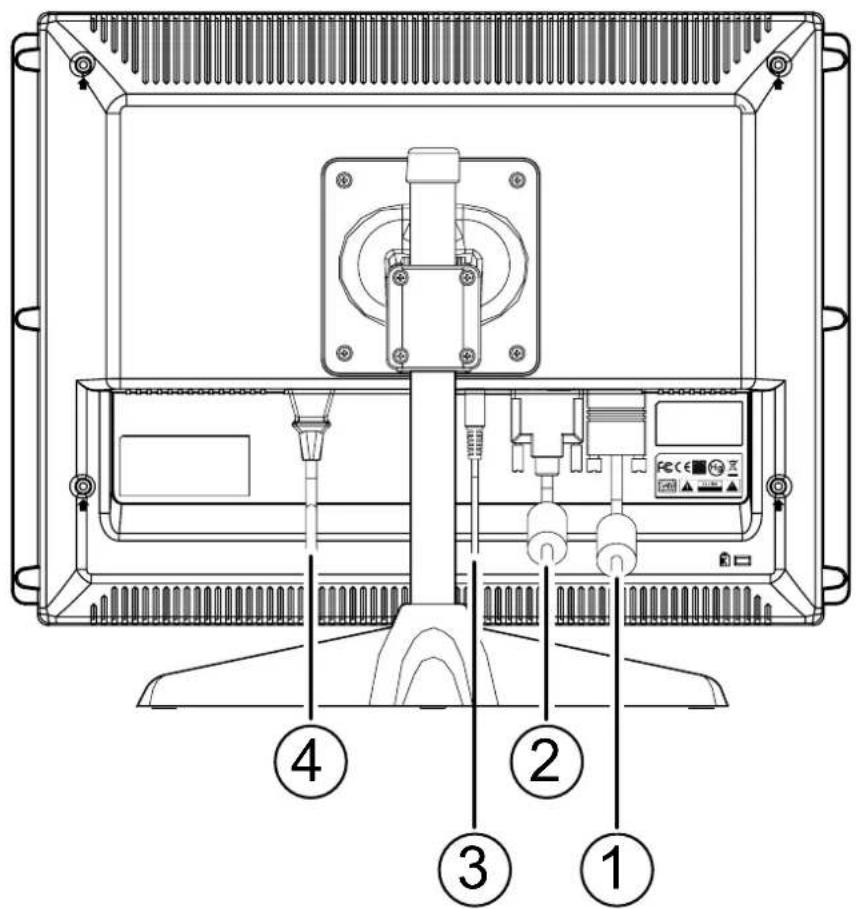
Figure.2. Connecting Cables
| 1.2.DVDEInput | ||
| 3.AudioInput4.PowerACInput |
10 HANNSpree
ADJUSTINGTHEVIEWINGANGLE
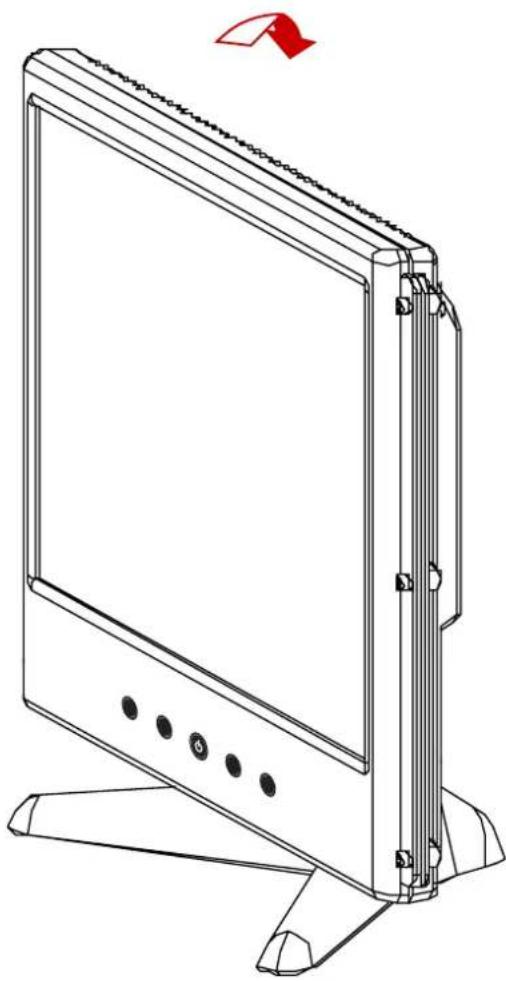
- Foroptimalviewingitisrecommendedtolookatthefullfaceofthemonitor,thenadjust themonitor'sangletoyourownpreference.
- Holdthestandsoyoudonottopplethemonitorwhenyouchangethemonitor'sangle.
- Youareabletoadjustthemonitor'sangleat20alternativefrom-5to15or0t820.
- Formoreinformation, pleaserefertotheQuickStartGuideofyourMonitormodel.
natural_image
Line drawing of a flat-screen TV or monitor with mounting base and side connectors (no text or symbols)Figure.3. monitor'sangle
NOTES:
- AvoidtouchingtheLCDscreenwhenchangingtheviewingangleasitmaycause damage.
- Becarefulnottoplacefingersorhandsnearthehingeswhentiltingthemonitor, otherwisepinchingcanresult.
OPERATINGINSTRUCTIONS
GENERALINSTRUCTIONS
Pressthepowerbuttontoturnthemonitoronoroff. The other control buttons are located at frontpanelofthemonitor(SeeFigure4). By changing thesesettings, the picture can be adjusted to your personal preferences.
- Thepowercordshouldbeconnected.
- ConnecttheSignalcablefromthemonitortothecomputer.
- Pressthepowerbuttontototurnonthemonitor.TheLEDwillturngreen.
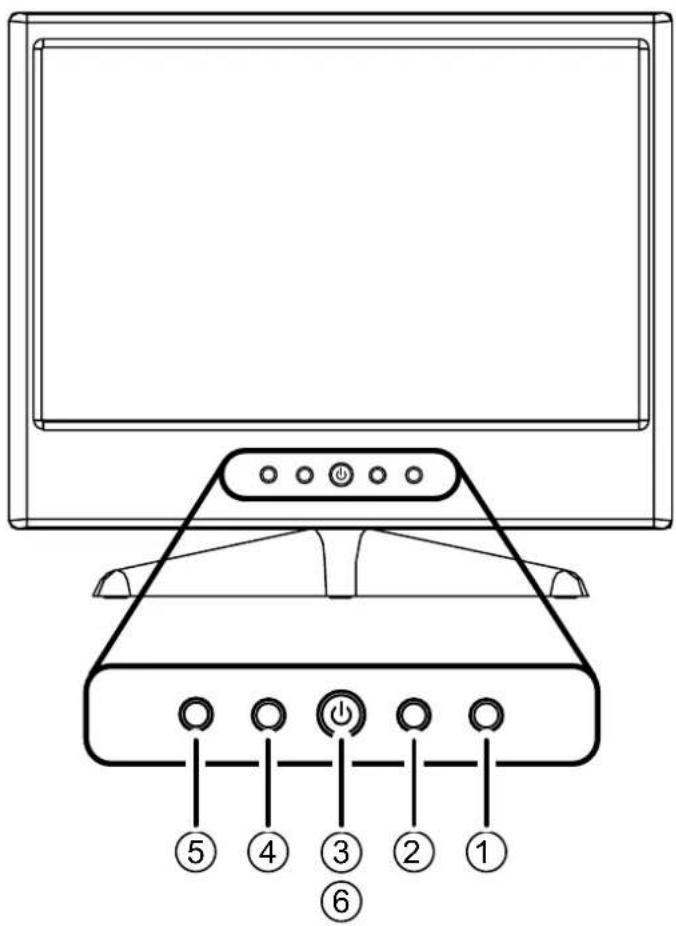
Figure.4.ExternalControlButton
EXTERNALCONTROLS:
| 1.MENU2.VOL+ | ▶ | |
| 3.POWER4. | ◀ VOL- | |
| 5.AUTO6.PowerIndicator(LED) |
FRONTPANELCONTROL
- PowerButton:
Pressthisbuttontoswitchthemonitoronandoff.
• PowerIndicator(LED):
Green—PowerOnmode.
Orange—Powersavingmode
- MENU/ENTER:
- ActivatetheOSDmenuoradjustthefunctionsettingsandconfirmation.
2.ExitOSDmenuwheninvolumeOSDstatus.
• ▲ VOL-/VOL+:
- ActivatesthevolumecontrolwhentheOSDisOFF.
- NavigatethroughadjustmenticonswhenOSDisONoradjustafunctionwhen functionisactivated.
- AutoAdjustbutton:
When OSDmenuisinoffstatus, pressthisbuttonontoactivatetheAutoAdjustment function.
(TheAutoAdjustmentfunctionisusedtooptimizedtheH-Position, V-Position, Clockand Phase.)
NOTES:
- Donotinstallthemonitorinalocationnearheatsourcessuchasradiatorsorairdusts, or in a place subject to direct sunlight, or excessive dust or mechanical vibration or shock.
- Savetheoriginalcartonandpackingmaterials,astheywillcomeinhandyifyouever havetoshipyourmonitor.
- Toensureproblem-freeshipping,packyourmonitorinthesamepackingmaterials andcartonasitwasshippedfromthefactory.
- To keep the monitor looking new, periodically clean it with a soft cloth. Stubborn stains may be removed with cloth lightly dampened with amilldetergents solution. Never use strong solvent such as paint thinners, benzene, or abrasive cleaning products. These and other harsh cleaning agents will damage the cabinet of them on monitor.
HOWTOADJUSTASETTING
| OSDDiagramOSDDescription | |
Main Menu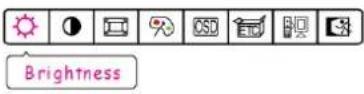 ...... 50H:80.0KHz V:75.0Hz1280x1024 ...... 50H:80.0KHz V:75.0Hz1280x1024 | Brightnessadjustment:Selectthe「Brightness」optiononthe「MainMenu」.Pressenterandadjustthelevel. |
Main Menu ...... 50H:80.0KHz V:75.0Hz1280x1024 ...... 50H:80.0KHz V:75.0Hz1280x1024 | Contrastadjustment:Select the「Contrast」option on the「MainMenu」.Pressenterandadjustthelevel. |
Main Menu ...... 50H:80.0KHz V:75.0Hz1280x1024 ...... 50H:80.0KHz V:75.0Hz1280x1024 | Howtoadjustscreenpositionandquality:Select「ImageSetting」onthe「MainMenu」,andthenPressenter. |
Image Setting ...... 50 ...... 50 | Horizontalpositionadjustment:Select the「H-position」option to shift the screenimagetotheleftorright.Pressenter andadjustthelevel. |
Image Setting ...... 50 ...... 50 | Verticalpositionadjustment:Select the「V-position」option to shift the screenimageupordown.Pressenterandadjustthelevel. |
Image Setting Clock Adjustment......50 Clock Adjustment......50 | Clockadjustment:Selectthe「ClockAdjustment」optiontoreducetheverticalflickerofcharactersonthescreen.Pressenterandadjustthelevel. |
Image Setting Phase Adjustment......50 Phase Adjustment......50 | Phaseadjustment:Selectthe「PhaseAdjustment」optiontoreducethehorizontalflickerofcharactersonthescreen.Pressenterandadjustthelevel. |
Main Menu Color SettingH:80.0KHz V:75.0Hz1280x1024 Color SettingH:80.0KHz V:75.0Hz1280x1024 | Howtoadjustcolor:Selectthe「ColorSetting」optiononthe「MainMenu」,andthenPressenter. |
Color Setting 9300°K............50............50............50 9300°K............50............50............50 | Movethecursortooneofthepresetoptionsandselectit. |
Color Setting UserR G B 50............50............50............50 UserR G B 50............50............50............50 | Userdefinedoption:MovethecursortotheUseroptionandselectit1.Toadjustthered,enterthe「R」optionandadjustthelevel.2.Toadjustthegreen,enterthe「G」optionandadjustthelevel.3.Toadjusttheblue,enterthe「B」optionandadjustthelevel. |
Main Menu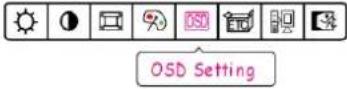 H:80.0KHz V:75.0Hz1280x1024 H:80.0KHz V:75.0Hz1280x1024 | HowtosettheOSD:Select「OSDSetting」onthe「MainMenu」,andthenPressenter. |
OSD Setting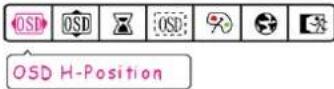 ............ 50 ............ 50 | OSDhorizontaladjustment:Selectthe「OSDH-Position」optiontoadjustthehorizontalpositionoftheOSD.Pressenterandadjustthelevel. |
OSD Setting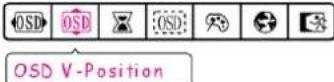 ............ 50 ............ 50 | OSDverticalpositionadjustment:Selectthe「OSDV-Position」optiontoadjusttheverticalpositionoftheOSD.Pressenterandadjustthelevel. |
OSD Setting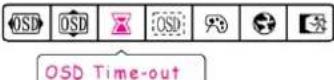 ............ 50 ............ 50 | OSDtimersetting:Selectthe「OSDTime-out」optiontosetheOSDtimeoutfrom10to120seconds.Pressenterandadjustthelevel. |
OSD Setting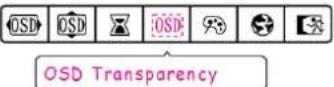 0<1<2<3<4<5<6 0<1<2<3<4<5<6 | OSDTransparencysetting:Select the「OSD Transparency」option toadjustthetransparencyoftheOSD.Pressenterandadjustthelevel. |
OSD Setting OSD Color1 2 3 4 5 6 OSD Color1 2 3 4 5 6 | OSDcolorsetting:Selectthe「OSDColor」settingoptiontoadjustthecoloroftheOSD.Pressenterandadjustthelevel. |
OSD Setting Language繁體中文 简体中文日本語 한국이English DeutschFrançais EspañolItaliano PortuguêsNederlands Language繁體中文 简体中文日本語 한국이English DeutschFrançais EspañolItaliano PortuguêsNederlands | Language:Selectthe「Language」 optiontochangethelanguageoftheOSD.Pressenterandselectalanguage.(Pleasenotethediagramisforreferenceonly.TheOSDLanguageoptionsmayvarybymodelandregion.) |
Other Setting VolumeXXXXXXXX.... 50 VolumeXXXXXXXX.... 50 | Volumeadjustment:Selectthe「Volume」 optiontochangethevolumelevel.Pressenterandadjustthelevel. |
Other Setting Sharpness0 < 1 < 2 < 3 < 4 < 5 < 6 Sharpness0 < 1 < 2 < 3 < 4 < 5 < 6 | Sharpness:Selectthe「Sharpness」 optiontoadjustthesharpnessofthedisplay.Setthevaluefrom0 to 6 . |
Other Setting DOS Mode720X400 640X400 DOS Mode720X400 640X400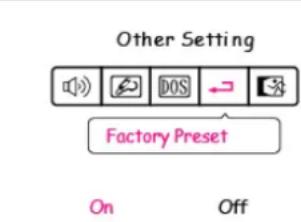 | DOSmode:Selectthe「DOSmode」 optiontosetthemonitorforusewithPC.Pressenterandselect720x400or640x400.Recallthefactorysettings:Selectthe「FactoryPreset」optiontoreset tothemonitor'sdefaultsetting.Thiswill erasethecurrentsettings.Pressenterand selectOnorOff. |
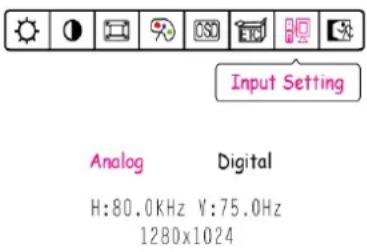
| Main Menu | InputSetting:Selectthe「InputSetting」optiontochange betweentheanalog(D-Sub)orDigital (DVI)source.PressenterandselectAnalog orDigital. |
 | |
PLUGANDPLAY(Plug&PlayDDC2BFeature)
ThismonitorisequippedwithVESADDC2BcapabilitiesaccordingtotheVESADDC STANDARD.Itallowsthemonitortoinformthecomputerorhostsystemofitsidentityand, dependingonthelevelofDDCused,communicateadditionalinformationaboutitsdisplay capabilities.TheDDC2Bisabidirectionaldatachannelbasedontheprotocol.The hostcanrequestEDIDinformationovertheDDC2Bchannel.
If your computer, videocard, and operating systems support DDC2B, your monitor should automatically be set to its optimal configuration. Some computers system may not have the capability to properly detect this information. In addition, some computers system will require manually configuring the video options. In most cases, software and/or driver updates will correct this issue. Please contact your computer or video card manufacturer formoredetails.
THISMONITORWILLAPPEARTOBENON-FUNCTIONALIFTHEREISNOVIDEO INPUTSIGNAL.INORDERFORTHISMONITORTOOPERATEPROPERLY,THERE MUSTBEAVIDEOINPUTSIGNAL.
This monitor meets the Green monitor standards as set by the Video Electronics Standards Association(VESA) and/or the United States Environmental Protection Agency (EPA) and The Swedish Confederation Employees (NUTEK). This feature is designed to conserve electrical energy by reducing power consumption when there is no video-input signal present. When there is no video input signal this monitor, following a time-out period, will automatically switch to an OFF mode. This reduces the monitor's internal power supply consumption. After the video inputs signals restored, full power is restored and the display is automatically redrawn. The appearance is similar to a "Screen Saver" feature except the display is completely off. The display is restored by pressing a key on the keyboard, or clicking them mouse.
18 HANNSpree
TECHNICALSUPPORT(FAQ)
Q&AFORGENERALDEFECTS
| PROBLEM&QUESTION | POSSIBLESOLUTION |
| PowerLEDisnoton | *Checkthepowercord. |
| NoPlug&Playorscreen imageisstretchorseems outofproportion | *CheckifthePCsystemisPlug&Playcompatible.*CheckiftheVideoCardisPlug&Playcompatible.*CheckiftheD-15plugpinofVideoCableisbentor broken. |
| Pictureisdim,toobrightor fuzzy | *AdjusttheClock,PhaseorContrastandBrightness Controls.*Manuallysetresolutionto1440X900 (for19"Widemodels)or1280X1024for19"models.Pleaseconsultyouroperatingsystemmanualforspecific instructions.*UpdateVideoCarddriver |
| Picturebouncesorawave patternispresentinthe picture | *Repositionelectricaldevicesthatmaycauseelectrical interference. |
| ThepowerLEDisON (orange)butthere'sno videoornopicture. | *ComputerPowerSwitchshouldbeintheONposition.*ComputerVideoCardshouldbesnuglyseatedinitsslot.*Makesuremonitor'svideocableisproperlyconnected tothecomputer.*Inspectmonitor'svideocableandmakesurenoneof thepinsarebent.*MakesurecomputerisoperationalbyhittingtheCAPS LOCKkeyonthekeyboardwhileobservingtheCAPS LOCKLED.TheLEDshouldeitherturnONorOFFafter hittingtheCAPSLOCKkey. |
| Missingoneoftheprimary colors(RED,GREEN,or BLUE) | *Inspectthemonitor'svideocableandmakesurethat noneofthepinsarebent. |
| Screenimageisnotcentered orsizedproperly. | *AdjustpixelfrequencyCLOCKandPHASEorpress hot-key(AUTO). |
| Picturehascolordefects (whitedoesnotlookwhite) | *AdjustRGBcolororselectcolortemperature. |
| Horizontalorvertical disturbancesonthescreen | *Usewin95/98/2000/NT/ME/XP;"shut-downmode.AdjustCLOCK"andPHASEorperformhot-key(AUTO). |
ERRORMESSAGE&POSSIBLESOLUTION
■ CABLENOTCONNECTED:
- Checkwhetherthesignal-cableisproperlyconnected.Iftheconnectorisloose, tightentheconnectorscrews.
- Check the signal-cable's connection pins for damage.
■ INPUTNOTSUPPORT:
Yourcomputerhasbeensettoanunsuitabledisplaymode.Setthecomputerto adisplaymodefromthetablebelow:
FACTORYPRESETTIMINGTABLE:
| TIMINGMODE | HORIZONTAL FREQUENCY(kHz) | VERTICAL FREQUENCY(Hz) | |
| 640x350VGA-35031.46970.087 | |||
| 640x400VGA-GRAPH31.46970.087 | |||
| 640x400NECPC982131.570.15 | |||
| 640x480VGA-48031.469 | 59.94 | ||
| 640x480 | APPLEMAC-480 | 35.00 | 66.67 |
| 640x480 | VESA-480-72Hz | 37.86172.809 | |
| 640x480 | VESA-480-75Hz37.5 | 75 | |
| 720x400 | VGA-400-TEXT | 31.46970.087 | |
| 832x624 | APPLEMAC-800 | 49.725 | 74.55 |
| 800x600 | SVGA | 35.156 | 56.25 |
| 800x600 | VESA-600-60Hz | 37.87960.317 | |
| 800x600 | VESA-600-72Hz | 48.07772.188 | |
| 800x600 | VESA-600-75Hz | 46.875 | 75 |
| 1024x768XGA 48.36360.004 | |||
| 1024x768 | COMPAQ-XGA | 53.96466.132 | |
| 1024x768 | VESA-768-70Hz | 56.47670.069 | |
| 1024x768 | VESA-768-75Hz | 60.02375.029 | |
| 1024x768 | APPLEMAC-768 | 60.24 | 75.02 |
| 1152x864 | 75Hz | 67.50 | 75.00 |
| 1280x960 | 60Hz | 60.00 | 60.00 |
| 1280x1024 | VESA-1024-60Hz | 64 | 60 |
| 1280x1024 | VESA-1024-75Hz | 80 | 75 |
| * 1440x900 | VESA-1440-60Hz | 55.93559.887 | |
| * 1440x900 | VESA-1440-75Hz | 70.635 | 75 |
* Thetwotimingmodesarefor19"widescreensupportonly.
SPECIFICATIONS
| LCDPanel | Displaysize | 19"(16:10)19"(5:4) | |
| Pixelpitch0.2835 | (H)x0.2835(V)0.294(H)x0.294(V) | ||
| InputH-Frequency31KHz-80KHz | Video | R,G,BAnalogInterfaceDigital(Dual-InputModel)H/VTTL | |
| V-Frequency56-75Hz | |||
| DisplayColors16.2MColors | |||
| DotClock135MHz | |||
| Max.Resolution1440x9001280x1024 | |||
| Plug&Play | VESADDC2B ^TM | ||
| EPA ENERGYSTAR ^ | ONMode | ≤36W | |
| OFFMode | ≤1W | ||
| Audiomaximumpoweroutput 1.2W(Amplifier) | |||
| InputConnector | D-Sub15pinDVI-D24pin(Dual-InputModel) | ||
| MaximumScreenSize | Hor.:408.24mmVer.:255.15mm | Hor.:376.32mmVer.:301.056mm | |
| PowerSource | 100~240VAC,50~60HZ | ||
| Environmental Considerations | OperatingTemp:5°to35°CStorageTemp:-20°to60°COperatingHumidity:10%~85%,non-condensing | ||
| Dimensions(W*D*H) | LM01:465*193*482mmLM02:485*212*402mmLM03:449*293*416mmLM05:449*180*409mmMax:485*293*482mm | ||
| Weight(GW/NW) | Max.8kg/6.5kg | ||
| RegulatoryCompliance | UL/CUL,BSMI,CCC,CE,CB,PSB,FCC,VCCI,C-TICKNEMKO-GS*,TCO'03* | ||
The abovespecificationissubjecttoactualpanelspecificationandissubjecttochange withoutpriornotice.
* Appliedmodelsonly.
Note:
MaximumResolutionisdependantonthesupportofyourcomputersystemandvideocard.
Pleaseseehttp://www.hannspree.comformoreinformation.
CONNECTORPINASSIGNMENT
■ 15-PinColorDisplaySignalCable:
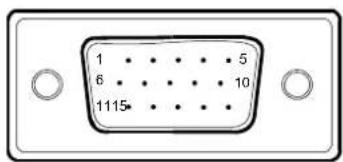
| PINNO.DESCRIPTIONPINNO.DESCRIPTION | ||
| 1.Red9. | +5V | |
| 2.Green | 10.CableDetection | |
| 3.Blue1 | 1.Ground | |
| 4.Ground | 12.DDC-SerialData | |
| 5.Ground | 13.H-Sync | |
| 6.R-Ground | 14.V-Sync | |
| 7.G-Ground | 15.DDC-SerialClock | |
| 8.B-Ground | ||
■ 24-PinColorDisplaySignalCable:(DualInputMode)
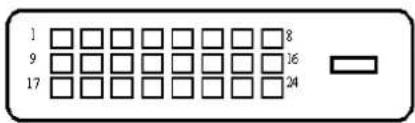
| PINNO. | DESCRIPTION | PINNO. | DESCRIPTION |
| 1. | TMDSData2- | 13.NoConnection | |
| 2. | TMDSData2+ | 14.+5VPower | |
| 3. | TMDSData2/4Shield | 15.Ground(for+5V) | |
| 4. | NoConnection | 16.HotPlugDetect | |
| 5. | NoConnection | 17.TMDSData0- | |
| 6. | DDCClock | 18.TMDSData0+ | |
| 7. | DDCData | 19.TMDSData0/5Shield | |
| 8. | NC | 20.NoConnection | |
| 9. | TMDSData1- | 21.NoConnection | |
| 10.TMDSData1+ | 22.TMDSClockShield | ||
| 11.TMDSData1/3Shield | 23.TMDSClock+ | ||
| 12.NoConnection | 24.TMDSClock- | ||
HANNSPREE CALIFORNIA, INC.
TEL: 1-510-360-3080
Toll Free : 1-888-808-6789
FAX:1-510-360-3001
Corporate website :
http://www.hannspree.com/us
Service website :
http://usservice.hannspree.net
Service Email :
webservice_us@hannspree.com
Australia
Phone: 1-300-HANNSPREE (1-300-426677)
Corporate website :
http://www.hannspree.com/au
Service website :
http://auservice.hannspree.net
New Zealand
Phone: 0-800-HANNSPREE(0-800-426677)
Corporate website :
http://www.hannspree.com/nz
Service website :
http://nzservice.hannspree.net
Europe GmbH
TEL: +49 (0) 2154 953 23-0
FAX: +49 (0) 2154 953 23-123
Corporate website :
http://www.hannspree.com/eu
Service website :
http://euservice.hannspree.net
瀚斯寶麗股份有限公司
電話:886-2-87518000
傳真:886-2-87514755
Corporate website :
http://www.hannspree.com/tw
Service website :
http://twservice.hannspree.net
瀚斯宝丽科技(上海)有限公司
电话:+86.21.3912.6999
传真:+86.21.3912.6969
Corporate website :
http://www.hannspree.com/cn
Service website :
http://cnservice.hannspree.net
Hannspree Hong Kong Service Center
TEL:(852) 23453822
FAX: (852) 23453790
Corporate website :
http://www.hannspree.com/hk
Service website :
http://hkservice.hannspree.net
Japan
電話番号: 03.6914.5088
ファクス: 03.6914.5087
Corporate website :
http://www.hannspree.com/jp
Service website :
http://jpservice.hannspree.net
- FCCClassBRadioFrequencyInterferenceStatement
- CANADA
- CE
- TCO'03(TCO'03appliedmodelonly)
- Congratulations!
- Ergonomics
- Energy
- Emissions
- Ecology
- RECYCLINGINFORMATION
- Europe:
- Ireland
- Norway:
- UnitedKingdom:
- SAFETYNOTICE
- WARNING:
- PRECAUTIONS
- SPECIALNOTESONLCDMONITORS
- PREFACE
- POWER
- POWERSOURCE:
- CONTROLSANDCONNECTORS
- CABLECONNECTIONS:
- HANNSpree
- ADJUSTINGTHEVIEWINGANGLE
- NOTES:
- OPERATINGINSTRUCTIONS
- GENERALINSTRUCTIONS
- FRONTPANELCONTROL
- - PowerButton:
- • PowerIndicator(LED):
- - MENU/ENTER:
- • ▲ VOL-/VOL+:
- - AutoAdjustbutton:
- HOWTOADJUSTASETTING
- PLUGANDPLAY(Plug&PlayDDC2BFeature)
- THISMONITORWILLAPPEARTOBENON-FUNCTIONALIFTHEREISNOVIDEO INPUTSIGNAL.INORDERFORTHISMONITORTOOPERATEPROPERLY,THERE MUSTBEAVIDEOINPUTSIGNAL.
- HANNSpree
- TECHNICALSUPPORT(FAQ)
- ERRORMESSAGE&POSSIBLESOLUTION
- ■ CABLENOTCONNECTED:
- ■ INPUTNOTSUPPORT:
- CONNECTORPINASSIGNMENT
- HANNSPREE CALIFORNIA, INC.
- Australia
- New Zealand
- Europe GmbH
- 瀚斯寶麗股份有限公司
- Hannspree Hong Kong Service Center
- Japan
Brand : HANNSPREE
Model : LM05-19U1-300G
Category : Screen