Dvd suite 7 ultra - Logiciel photo/vidéo CYBERLINK - Free user manual and instructions
Find the device manual for free Dvd suite 7 ultra CYBERLINK in PDF.

| Product Type | Photo & Video Software Suite |
| Brand | CyberLink |
| Model | DVD Suite 7 Ultra |
| Version | 7 Ultra |
| Platform | Windows |
| License Type | Retail (Physical or Download) |
| Language | English (Multilingual available) |
| Main Functions | Video editing, DVD authoring, photo editing, slideshow creation, menu design, disc burning |
| Video Editing Features | Timeline editing, transitions, effects, title overlay, audio editing |
| Photo Editing Features | Enhancement, cropping, red-eye removal, filters, batch processing |
| DVD Authoring | Chapter creation, animated menus, subtitles, Dolby Digital audio |
| Supported Output Formats | DVD-Video, AVCHD, MPEG-2, MPEG-4, AVI, WMV, JPEG, PNG |
| Minimum CPU | Intel Pentium 4 or AMD Athlon 64 |
| Minimum RAM | 512 MB (1 GB recommended) |
| Hard Disk Space | 3 GB for installation, plus additional for projects |
| Supported OS | Windows 2000/XP/Vista/7 (32/64-bit) |
| Optical Drive | DVD burner required for DVD creation |
| Display | 1024x768 or higher, 16-bit color |
| Maintenance & Cleaning | Not applicable (software), keep installation disc clean if physical |
| Safety | Standard computer usage precautions |
| Spare Parts & Repairability | Software updates and patches available from CyberLink |
Frequently Asked Questions - Dvd suite 7 ultra CYBERLINK
User questions about Dvd suite 7 ultra CYBERLINK
0 question about this device. Answer the ones you know or ask your own.
Ask a new question about this device
Download the instructions for your Logiciel photo/vidéo in PDF format for free! Find your manual Dvd suite 7 ultra - CYBERLINK and take your electronic device back in hand. On this page are published all the documents necessary for the use of your device. Dvd suite 7 ultra by CYBERLINK.
USER MANUAL Dvd suite 7 ultra CYBERLINK
Copyright and Disclaimer
All rights reserved. No part of this publication may be reproduced, stored in a retrieval system, or transmitted in any form or by any means electronic, mechanical, photocopying, recording, or otherwise without the prior written permission of CyberLink Corporation.
To the extent allowed by law, CyberLink DVD Suite IS PROVIDED "AS IS", WITHOUT WARRANTY OF ANY KIND, EITHER EXPRESS OR IMPLIED, INCLUDING WITHOUT LIMITATION ANY WARRANTY FOR INFORMATION, SERVICES, OR PRODUCTS PROVIDED THROUGH OR IN CONNECTION WITH CyberLink DVD Suite AND ANY IMPLIED WARRANTIES OF MERCHANTABILITY, FITNESS FOR A PARTICULAR PURPOSE, EXPECTATION OF PRIVACY, OR NON-INFRINGEMENT.
BY USING THIS SOFTWARE, YOU AGREE THAT CYBERLINK WILL NOT BE LIABLE FOR ANY DIRECT, INDIRECT, OR CONSEQUENTIAL LOSS ARISING FROM THE USE OF THIS SOFTWARE OR MATERIALS CONTAINED EITHER IN THIS PACKAGE.
The terms and conditions here under shall be governed and construed in accordance with the laws of Taiwan.
CyberLink DVD Suite is a registered trademark along with other company and product names mentioned in this publication, used for identification purposes and remain the exclusive property of their respective owners.
iTunes and QuickTime software and logos are licensed with Apple Computer, Inc., and CyberLink shall not be responsible for end user support for said software.


International Headquarters
Mailing Address CyberLink Corporation
15F, #100, Minchiuan Road, Shindian City
Taipei 231, Taiwan
Web Site www.cyberlink.com
Telephone 886-2-8667-1298
Fax 886-2-8667-1300
Copyright © 2008 CyberLink Corporation. All rights reserved.
Contents
Introduction...... 1
CyberLink DVD Suite Programs 2
The PowerStarter Program 2
Menu Icons 3
Quick Access Buttons 6
Version Table 8
System Requirements ....10
Music 13
Make a Music Disc ....14
Burn a Music Disc ....14
Rip an Audio CD 16
Data.... 17
Make a Data Disc ....18
Format a Disc ....20
Formatting a Disc 20
Using InstantBurn ....21
Movie Player 23
Play Media 24
Supported Media Types and Formats 24
Play Video Discs in PowerDVD 24
Play Movie Remixes 25
Playback Controls ....26
Main Controls 26
Extras 29
Movie Info Page 29
MoovieLive 29
Movie Collection ....30
Movie Remixes ....30
Configuration 31
Video & Photo 35
Create a Video Disc ....36
Select a Disc Format ....36
Capture/Import Media 36
Customize Your Disc's Menu Page 38
Final Output 39
Edit Your Videos ....40
Add Additional Content ....41
Edit Options Available 42
Magic Tools ....43
Add Effects ....44
Produce your Movie ....44
Edit Your Photos ....45
Manage Your Photos and Videos ....46
Media Library 47
Media Window 47
Tray 48
Favorites 48
Enhance Photos 49
Create Media with Your Photos ....50
Share Your Photos ....51
Enhance Your Videos ....52
Share Your Videos ....53
Burn a DVD Folder ....54
Copy & Backup 55
Copy a Data Disc ....56
Copy a Movie DVD 57
Back up and Restore Your PC ....58
Back Up Data ....58
Restore Data 60
Utilities 63
Create a Disc Image 64
Burn a Disc Image 65
Erase a Disc 66
Print a Disc Label 67
Step 1 - Select a Label Type ......68
Step 2 - Edit Disc Information ....68
Step 3 - Edit Layout ....68
Step 4 - Print ....68
Technical Support...... 69
Before Contacting Technical Support ....70
Web Support ....71
Index 73
CyberLink DVD Suite
Chapter 1:
Introduction
Welcome to CyberLink DVD Suite, the multimedia suite that opens up the world of digital entertainment on your PC. CyberLink DVD Suite includes a wide variety of CyberLink products that provide you with the ultimate playback and creativity software, all in one convenient place.
CyberLink DVD Suite allows you to:
- watch movies in style with the world's #1 DVD player.
- keep track of your disc collection, your favorite movies and Movie Remixes in the Movie Collection.
- read movie reviews and share your Movie Remixes with friends on the MoovieLive web site.
- burn music or data discs in a variety of formats.
- edit videos with an editing tool that provides unlimited possibilities.
- download content for your creations from Flickr, Freesound and DirectorZone.
• author Blu-ray Disc*, AVCHD* and DVD discs with motion menus. - organize, enhance, and share your photos and videos.
- create media with your photos, including animated slideshows that move to the beat of background music.
- back up and restore your data.
- create and print disc labels.
- access useful disc tools (erase discs, create and burn disc images).
- burn data by simply dragging and dropping it onto a disc.
Note: * Available in CyberLink DVD Suite Ultra and Pro versions only.
CyberLink DVD Suite Programs
You can access all of CyberLink DVD Suite's programs from within the CyberLink PowerStarter interface. It provides easy access to a variety of CyberLink's home entertainment software for whatever task you have at hand. From managing your media files and creating movies to organizing your disc content, burning discs and much more.
The PowerStarter Program
CyberLink PowerStarter appears as follows:
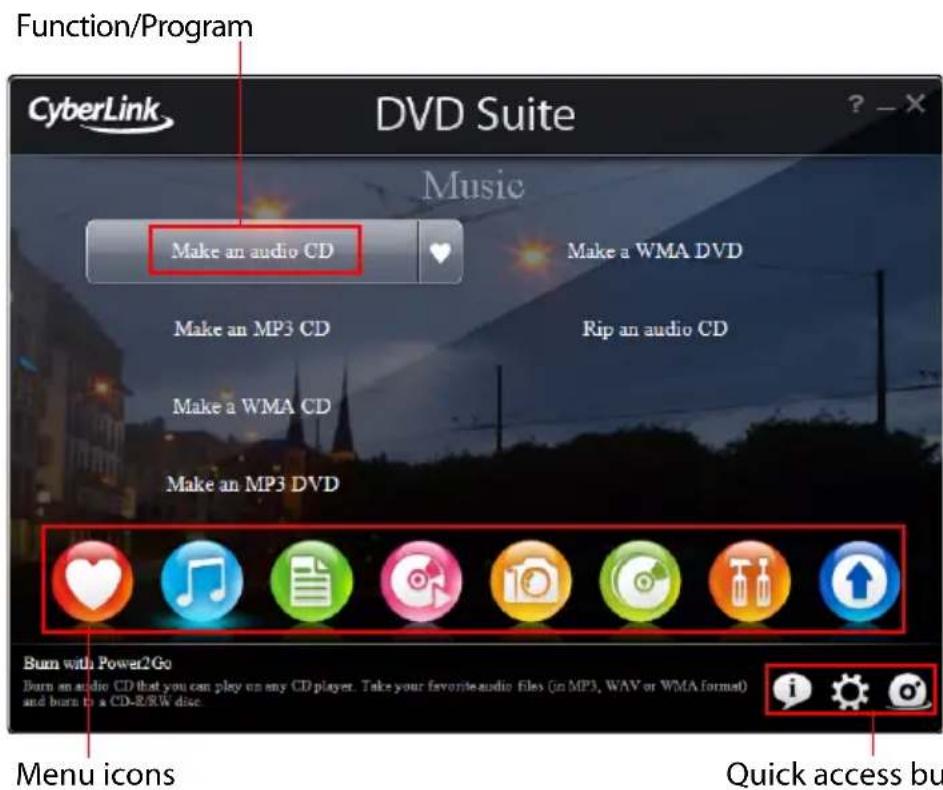
Note: If the user interface displayed in your version of CyberLink DVD Suite 7 is different, please click and check the help file for detailed information. Computers that do not meet the minimum VGA requirements, will use a version without background images.
CyberLink PowerStarter offers a more complete interface, allowing you to work with media using a task-based approach, launch CyberLink software programs all from one convenient location, or upgrade/update any of these programs more easily.
Menu Icons
Click the menu icon that corresponds to the type of media or feature you want to explore.
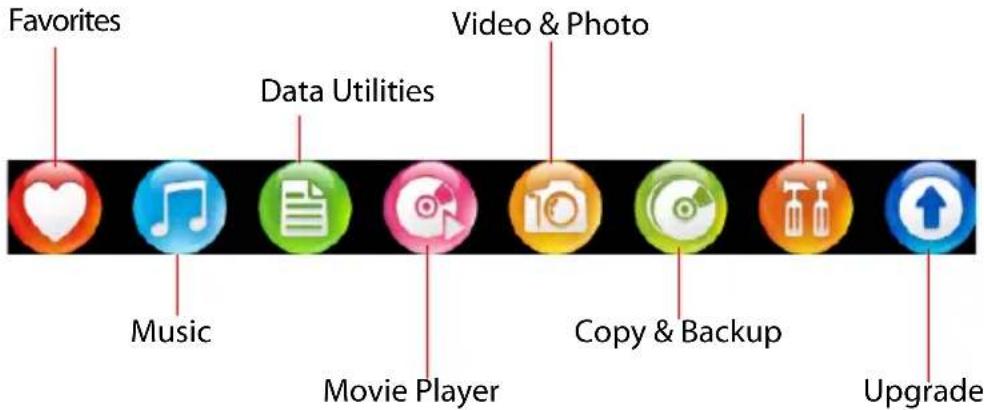
This section describes the different functions that can be accessed through CyberLink PowerStarter.
Favorites

The Favorites menu allows you to add the functions and programs you use most often, so you can access them all from one convenient location. By default, this window contains no icons.
To add a function or program to the Favorites menu, click the appropriate menu icon to display the function or program. Hover your mouse over the function and then click

If you have added a function or program to the Favorites menu, you can remove it hovering over the function and then click

Music

The Music menu contains functions for burning audio files to a disc, in a variety of popular formats. You can also rip an audio disc to your hard drive.
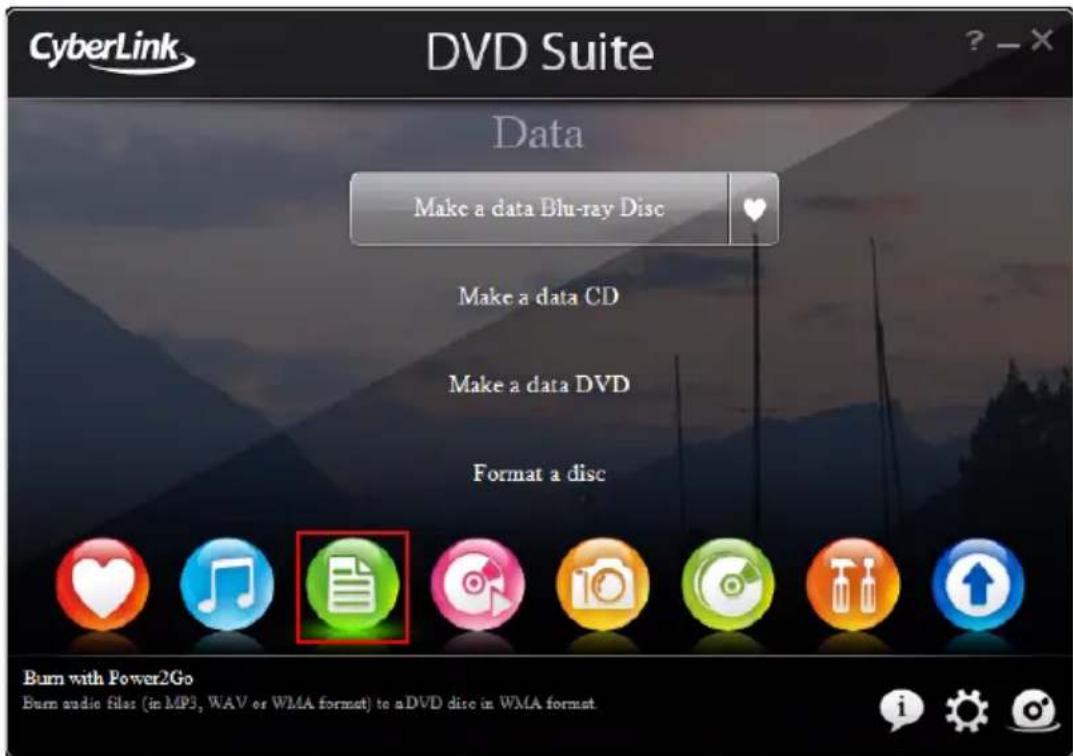
Data

The Data menu contains functions for burning data files to disc. You can also create a bootable disc and format discs with CyberLink InstantBurn to support drag-and-drop burning on rewritable discs.
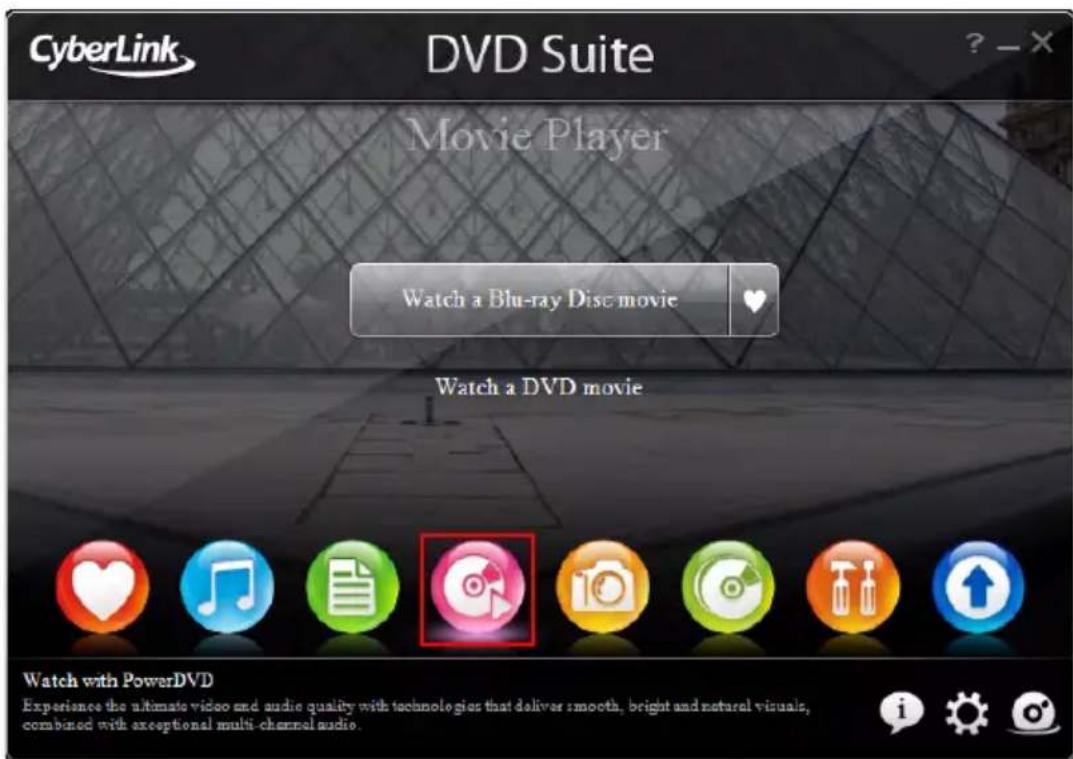
Movie Player

The Movie Player menu lets you access CyberLink DVD for watching movies using feature-rich navigation controls for an interactive and tailored viewing experience.
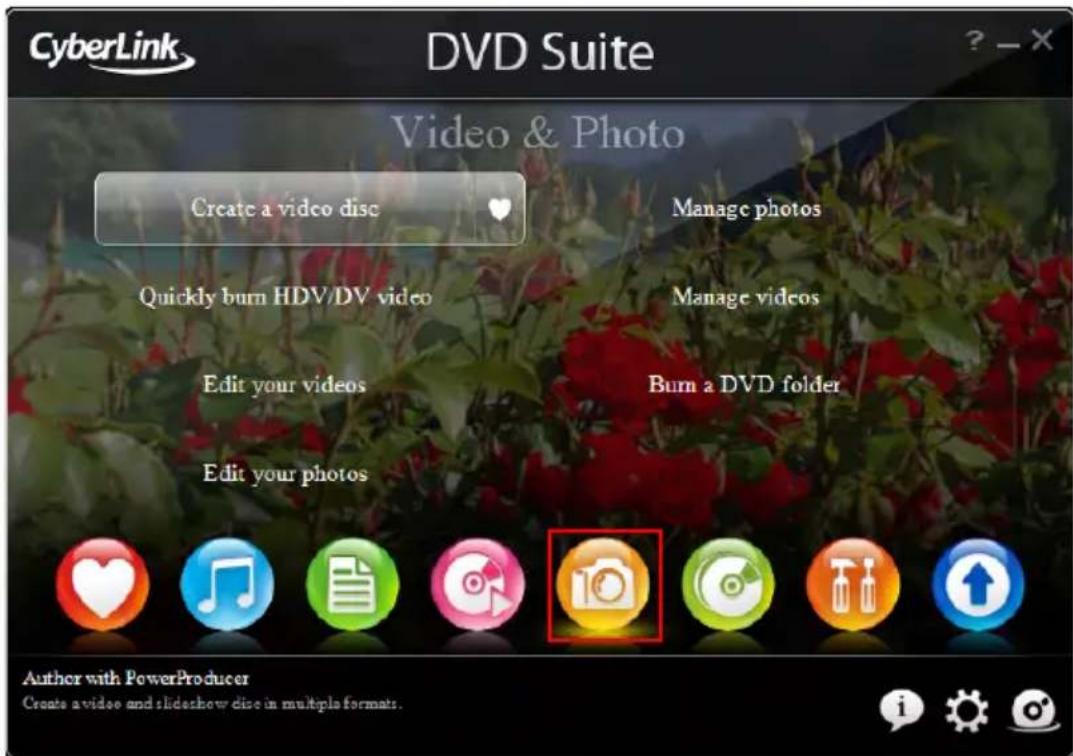
Video & Photo

The Video & Photo menu contains functions for:
- capturing and importing videos and photos from a variety of sources.
• managing your videos and photos.
• editing, fixing and fine tuning your videos and photos. - creating animated slideshows that move to the beat of background music.
• authoring discs that contain professional looking motion menus.
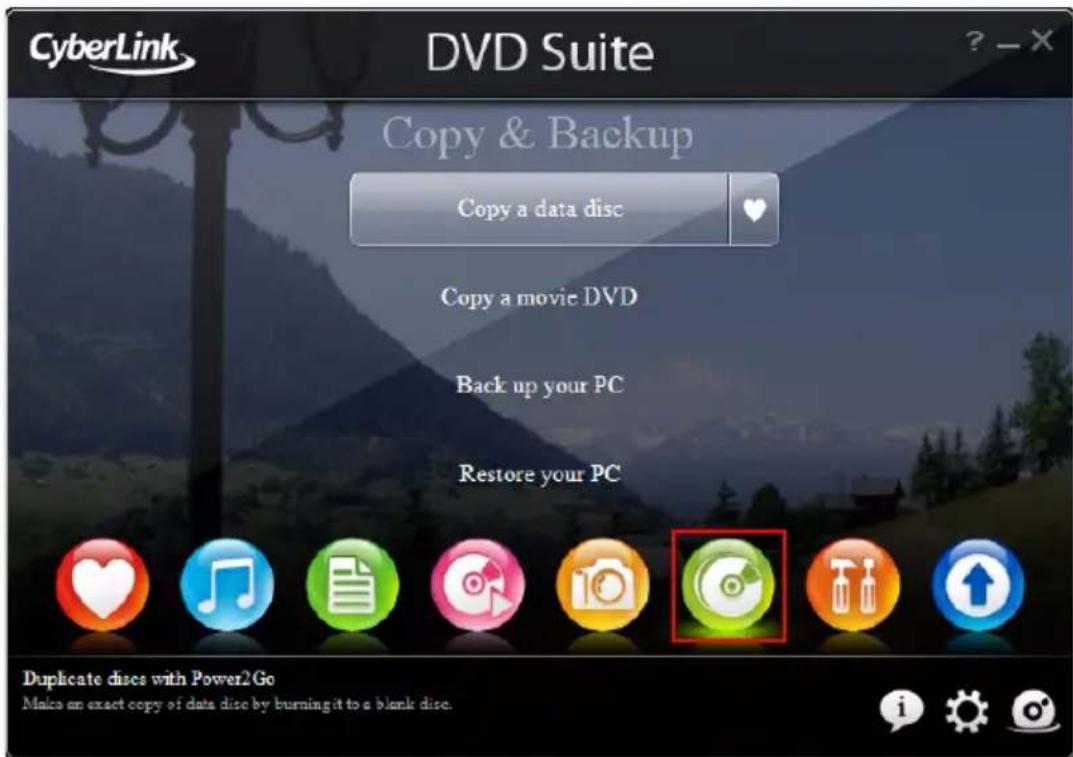
Copy & Backup

The Copy & Backup menu contains functions for copying discs and DVD movies. You may also back up all of your important data and then restore it when and if required.
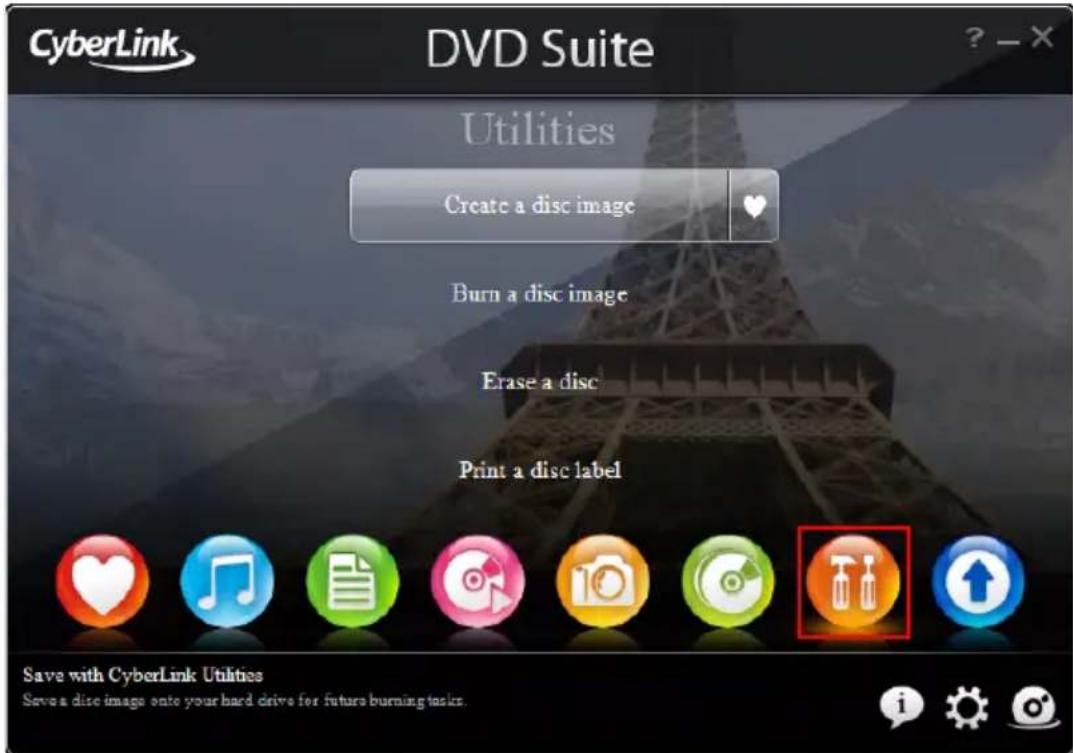
Utilities

The Utilities menu contains functions for managing your discs, such as erasing current disc content, designing and printing disc labels, and creating or burning disc images.
Note: If the number of items in a particular function exceeds the space provided by CyberLink PowerStarter, use the <buttons to scroll right or left as required.
Upgrade

The Upgrade window lets you view product version information for the CyberLink programs currently installed on your computer. They are listed in a table, along with the current version number and an icon indicating whether or not there is an upgrade or an update available.
Display the Latest Software Versions
CyberLink PowerStarter automatically checks for updates every 14 days. However, you can manually update this information by clicking CyberLink PowerStarter checks your computer and displays the latest version numbers of all of the available CyberLink software programs.
Check for Software Updates
If any updates are available, the button becomes enabled. To download updates, click to access the CyberLink Upgrade Center web site.
Click on 🏻 in the Free update column to open a page that lets you download the latest update for the corresponding software. You may also click on 🏻 in the Upgrade software column to open a page that allows you to upgrade the specific product.
Quick Access Buttons
The three quick access buttons in the lower right-hand corner of the program open the About, Preferences and CyberLink Products windows. These windows are explained in the following sections.

About
Click to display PowerStarter version information.
Preferences Window
To configure the behavior of the CyberLink PowerStarter program, click the 📄 button, and then select your desired preferences.
- Return to PowerStarter after you close a program: when enabled, after you close a program that you accessed through this interface, you will return to the main CyberLink
PowerStarter window. - Automatically check for the latest version: when enabled, CyberLink PowerStarter will automatically check for newer versions of the installed software programs every 14 days.
- Receive CyberLink product information: allows you to enable/disable banner and running text on the upgrade page.
- Use system default language: select this option for the CyberLink PowerStarter language display to be the same as the language of your operating system.
- Select another language: if you want to use a language that is different than your operating system language, select this option and then select the language from the drop-down list that you want CyberLink PowerStarter to use.
Interface background
CyberLink PowerStarter dynamically displays a series of images in the user interface background as you navigate around the program. This option lets you specify the images displayed.
- Use default images: select this option to use the default images in the background of the CyberLink PowerStarter user interface.
- Use my own images: select this option and then click Browse to specify a folder that contains the images you want to display in the background of the CyberLink PowerStarter user interface.
CyberLink Products Window
To view a complete list of the CyberLink programs, click .you can then select any of the program names to open the corresponding software.
Note: The specific CyberLink software available within CyberLink
PowerStarter is dependent on the products installed on your computer and the versions you purchased. For more information, see the "Version Table" on page 8.
Version Table
The following table shows the differences between the available versions of Cyberlink DVD Suite 7.0.
| Product | CDS 7.0 Ultra | CDS 7.0 Pro | CDS 7.0 Centra |
| PowerDVD | 8.0 Ultra8ch | 8.0 Standard8ch | 8.0 Standard8ch |
| PowerDirector | 7.0 HE 7.0 HE 7.0 DE | ||
| PowerProducer | 5.0 UltrawithDolby 6ch | 5.0 UltrawithDolby 6ch | 5.0 DVDwithDolby 6ch |
| MediaShow | 4.0 DE 4.0 DE 4.0 DE | ||
| Power2Go | 6.0 Deluxe withoutauthoring | 6.0 Deluxe withoutauthoring | 6.0 Deluxe withoutauthoring |
| PowerBackup | 2.5Standard | 2.5Standard | 2.5Standard |
| Instant Burn | 5.0Standard | 5.0Standard | 5.0Standard |
| PowerDVD Copy | 1.0Standard | 1.0Standard | 1.0Standard |
| LabelPrint | 2.5Standard | 2.5Standard | 2.5Standard |
| PhotoNow | 1.0Standard | 1.0Standard | 1.0Standard |
| PowerStarter | 7.0 7.0 7.0 | ||
| iTunes | 7 | 7 | 7 |
Note: Some functions or programs may not be available in the version of CyberLink DVD Suite that you are running. For information on the features contained in specific programs, see that program's readme or help file.
System Requirements
The system requirements listed below are recommended as minimums for working with the program. You may find that your system, while meeting these recommended minimums, requires expanded capacity for specific tasks.
| Minimum System Requirements | |
| OS | • Microsoft Windows Vista / XP |
| Screen Resolution | • 1024 x 768, 16bit color or above |
| Memory | • 512 MB required (1 GB or above recommended)• 2GB DDR2 or above recommended for editing HD videos |
| CPU | • DVD Quality (MPEG-2) Profiles: Pentium 4 2.2 GHz or AMD Athlon XP 2200+• High Quality MPEG-4 and Streaming WMV, QuickTime, RealVideo) Profiles: Pentium 4 2.4 Ghz or AMD Athlon XP 2400+• AVCHD and MPEG-2 HD (for Blu-ray Disc burning) Profiles: Pentium Core 2 Duo E6400 or Athlon 64 X2 5000+ |
| VGA | • Higher than Intel 945GM• 6 4 M B - V R A M o r a b• Some animation effects may be turned off or degraded for lower end graphics system |
| HDD Space | • 5 GB required (400MB for SmartSound Quicktrack Library)• 10 GB (20 GB recommended) required for DVD production• 60 GB (100 GB recommended) required for Blu-ray Disc/AVCHD production |
| DV | • OHCI IEEE 1394 compliant device |
| Video Capturing Device | • PCI or USB1.0/2.0 capture device compliant with WDM standard (i.e. PC Camera and TV tuner with WDM driver)• DV camcorder connected via OHCI-compliant IEEE1394 (check CyberLink web site) for supported model list)• DVD camcorder connected via USB2.0 (check CyberLink web site for supported model list)• Sony MicroMV/AVCHD/HDV camcorder (check CyberLink web site for supported model list) |
| Burning | • A CD or DVD burner (CD-R/RW, DVD+R/RW or DVD-R/RW) is required to burn VCD/DVD/SVCD/AVCHD titles• A Blu-ray Disc recordable drive is required to burn Blu-ray Disc titles |
Note: Computers that do not meet the minimum VGA requirements, will use a version of CyberLink PowerStarter without background images.
CyberLink DVD Suite
Chapter 2:
Music
The Music function lets you burn audio files to a DVD or CD with CyberLink Power2Go. You can also rip music from an audio CD onto your hard drive.
Note: To ensure that your computer has the required CODECs for burning and ripping music files, please make sure that Windows Media Player 11 is installed on your computer.
Make a Music Disc
CyberLink Power2Go makes it easy to create discs to play back your music. You can create a regular audio CD for playback on traditional CD players or create a DVD or CD that contains MP3 or WMA files.
The steps are the same for creating these discs, but the outputted discs are different.
Note: For a more detailed description of this program and its functions, please consult the product's help file.
Burn a Music Disc
To burn a music disc, do this:
- Select the music disc type you want in the CyberLink PowerStarter program window. The Music Disc window is displayed.
![CyberLink Power2Go - [MY_AUDIO_092607_1.p2g] Project Edit Gaming Help New Task Configuration Erase Disc Upgrade Power2Go Desktop Media Name Duration Album Artist Genre Music Artist Album Genre Year Recently added H:\SONY_DVD_RW\DRU-B20A 2.0c Track Title Artist Duration File Name 1 MUSCO1 Unknown artist 02:10.98 D:\Media_Close\Audio Clips\MUSCO1,MP3 2 MUSCO2 Unknown artist 03:37.98 D:\Media_Close\Audio Clips\MUSCO2,MP3 3 MUSCO3 Unknown artist 05:03.32 D:\Media_Close\Audio Clips\MUSCO3,MP3 4 MUSCO4 Unknown artist 01:44.65 D:\Media_Close\Audio Clips\MUSCO4,MP3 5 MUSCO5 Unknown artist 04:12.64 D:\Media_Close\Audio Clips\MUSCO5,MP3 6 MUSCO6 Unknown artist 03:51.84 D:\Media_Close\Audio Clips\MUSCO6,MP3 7 MUSCO7 Unknown artist 01:29.64 D:\Media_Close\Audio Clips\MUSCO7,MP3 8 MUSCO8 Unknown artist 06:31.64 D:\Media_Close\Audio Clips\MUSCO8,MP3 0min 10min 20min 30min 40min 50min 60min 70min Track: 0 Disc capacity: 74:00.00 Remaining time: 53:53:29 Play time: 20:06:70 Burn now](/content/2026/05/1047620/images/c3dba5a971b85b8b4abbb95bb5850d1e61f8445beb0a5b23156367811c17c205.jpg)
- Use the search pane to navigate to the files you want to include on your disc. The Media tab allows you to conveniently perform an
advanced search for your music files by album, artist, genre, recently added or year using the CyberLink Media Library service.
-
Select the audio files you want to burn and then drag them to the destination disc or click the button.
-
When you have added all of the audio that you want to burn, click

-
If required, adjust the configurations on the Music (Audio CD, MP3 Quality, WMA Quality), Common or Burner tabs.
-
Click Burn when you are ready to burn your disc. CyberLink Power2Go will proceed to burn your disc.
-
When burning is complete, select an option in the dialog box that opens:
-
Click View Log to view the burning log. The log opens in your default TXT editor, where you can view and save it.
- Click Print Label to print a disc label and then open the CyberLink LabelPrint program. See "Print a Disc Label" on page 67.
- C l i c k OK to close the dialog and then exit.
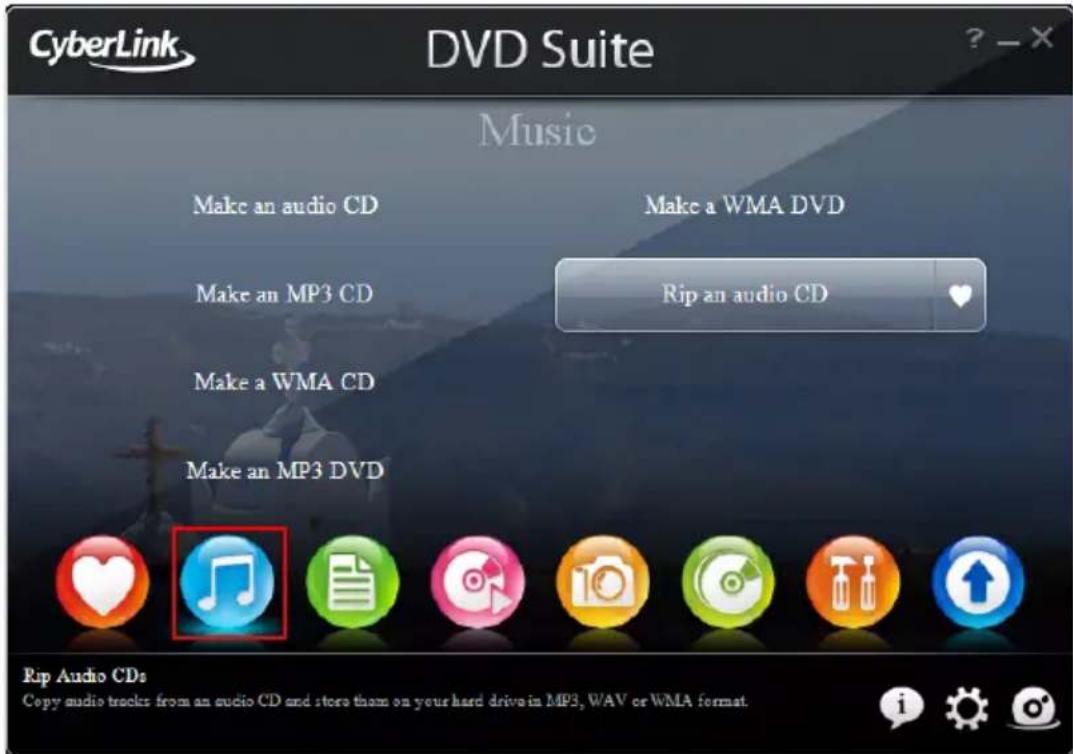
Rip an Audio CD
The Rip Audio function copies audio tracks from a CD that contains audio files to your hard drive in the MP3, WAV or WMA format.
To rip audio files to your hard drive, do this:
- Click on Rip an audio CD in the CyberLink PowerStarter program window.
- Insert your disc and then select your drive.
- If you change discs or select a different drive, click Refresh to ensure that the most updated information is displayed.
-
Select the audio track(s) you want to rip to your hard drive.
-
Locate the folder you want to rip the audio tracks to.
-
Click Go to begin ripping files. CyberLink Power2Go will rip the files to the specified folder.
Chapter 3:
Data
CyberLink DVD Suite offers a number of burning functions, including making data discs with CyberLink Power2Go. You can burn to a Blu-ray Disc, DVD or CD and format a disc for use with CyberLink InstantBurn.
Make a Data Disc
To burn a data disc, do this:
- Select the type of data disc you want from the CyberLink PowerStarter program window. The Data Disc window opens.
![CyberLink Power2Go - [MY_DATA_082307_1.p3g] Project: 1.0K New York Help New Task Configuration Erase Disc Upgrade Power2Go Desktop Recent Data Desktop My Documents Adobe Backup Cyberlink Golf Information My Data Files My eBooks My Favorites My Music My Pictures Name Size Type Date Modified ACHE Project Presentation.ppt 2,043 KB Microsoft PowerPoint... 10/10/2006 07:12 PM ACHE project.doc 99 KB Microsoft WordDoc... 08/16/2006 11:20 AM ACHE Proposal.doc 325 KB Microsoft WordDoc... 11/08/2006 05:05 PM Contacts.xls 51 KB Microsoft Excel Work... 11/12/2006 09:34 PM Convention presentation.ppt 2,652 KB Microsoft PowerPoint... 11/16/2006 09:42 AM Convention Report.doc 20 KB Microsoft WordDoc... 12/16/2006 04:02 PM Finances.xls 55 KB Microsoft Excel Work... 09/12/2006 05:32 PM Financial report - January.doc 19 KB Microsoft WordDoc... 06/20/2006 10:33 AM My golf status.xls 17 KB Microsoft Excel Work... 10/13/2006 01:07 PM Sample L.pdf 28 KB Adobe Acrobat 7.0 ... 07/07/2006 09:27 AM Thumbs.db 6 KB Data Base File ... 07/16/2007 04:40 AM Work Freq Template.doc 31 KB Microsoft WordDoc... 07/12/2006 11:22 AM FJHF DVD Writer SHCB LIGHT Disc Compilation Name Slots Type Date Modified MY_DATA_082307 Start adding your data files to the disc by dragging and dropping then here or by selecting the file and clicking the Add File button. OMB 400MB 900MB 1200MB 1600MB 2000MB 2400MB 2800MB 3200MB 3600MB 400MB 440MB Folders: 0 Flex: 0 Disc capacity: 4.590.20KB Free space: 4.589.20KB Used space: 1.00KB Burmow](/content/2026/05/1047620/images/ec5a137e1c3cd44cb8524df2046291a6876fe78e3767c08688f4e2e8832f1aa8.jpg)
-
Use the search pane to navigate to the files you want to include on your disc. The Recent Data tab allows you to conveniently perform an advanced search for your data files by recently added or opened, using the CyberLink Media Library service.
-
Select the files or folders you want to burn and then drag them to the destination disc or click the button.
-
When you have added all of the content that you want to burn,
click

-
If required, adjust the configurations on the Data, Common or Burner tabs.
-
Click Burn when you are ready to burn your disc. CyberLink Power2Go will proceed to burn your disc.
-
When burning is complete, select an option in the dialog box that opens:
-
Click View Log to view the burning log. The log opens in your default TXT editor, where you can view and save it.
- Click Print Label to print a disc label and open the CyberLink LabelPrint program. See "Print a Disc Label" on page 67.
- C l i c k OK to close the dialog and then exit.
Format a Disc
CyberLink InstantBurn allows you to write data by folder or file onto a DVD or CD by simply dragging and dropping the data onto the disc like with a floppy or other removable disks. You can write onto the disc until it is full, or drag and drop unwanted files and folders to the Recycle Bin to remove them from the disc.
Note: During the installation of CyberLink DVD Suite, by default, CyberLink InstantBurn is not installed on computers running Windows Vista.
Before you can begin dragging and dropping your data onto a DVD or CD, you must first format the disc. CyberLink InstantBurn is packet-writing software, so it formats discs in UDF (Universal Disc Format) format.
Note: Once you have formatted a disc using InstantBurn, you cannot use it for burning using CyberLink Power2Go or other burning software.
Formatting a Disc
To format a disc that can be used with CyberLink InstantBurn, do this:
- Insert a blank unformatted disc into the drive.
- Click on Format a disc in the CyberLink PowerStarter window. The InstantBurn window will be displayed.
- Select the drive where the disc to be formatted was inserted, then click Next.
- Click Properties to check the disc properties. If everything is OK, click Next.
- Input the volume label, then click Finish. You can change the volume label after the disc was formatted.
- Click OK on the confirmation prompt that appears to start formatting.
Using InstantBurn
Before you begin, check that the InstantBurn icon is in the system tray in the bottom right of the screen.
| Icon Description | |
| Indicates that CyberLink InstantBurn is running, but either no disc is currently in the drive or the current disc needs to be formatted. | |
| Indicates that CyberLink InstantBurn is running and is ready to be used. | |
Note: For a more detailed description of this program and its functions, please consult the product's help file
Write to Disc
- Open My Computer to display the disc drive icon you want to copy data to.
- Open a separate window to display the files/folders you want to copy. Make sure it does not hide the window you opened in Step 1.
- Click on the files/folders in the window then drag them onto the disc drive icon. The files/folders are copied onto the disc.
Supported discs
Instant Burn 5.0 supports rewritable media and certain write-once media. You can only use CD-RW, DVD-RW, DVD+RW, DVD-RAM, BD-RE and BD-R discs.
CyberLink DVD Suite
Chapter 4:
Movie Player
CyberLink DVD Suite provides access to CyberLink PowerDVD, a software disc player with the features and controls of a normal living-room disc player. It offers feature-rich navigation controls for an interactive and tailored viewing experience.
CyberLink PowerDVD also lets you create your own versions of your favorite movies in the Movie Remix room and keep track of your movies, favorites and Movie Remixes in the Movie Collection.
Note: For a more detailed description of this program and its functions, please consult the product's help file.
Play Media
CyberLink PowerDVD supports the playback of a variety of different media for your convenience. From high definition content and DVDs to video files and even audio CDs, CyberLink PowerDVD provides you with the complete digital media playback experience.
Supported Media Types and Formats
The optical discs and file formats that CyberLink PowerDVD supports are listed below:
| Optical Disc Types File Formats |
| Blu-ray Discs* BDAV, BDMV |
| DVD DVD-Video, AVCHD*, AVCREC*, DVD-VR,DVD+VR |
| CD VCD, SVCD, Audio |
Note: * Available in CyberLink DVD Suite Ultra (Blu-ray Disc version) only.
CyberLink PowerDVD allows you to open and play files in the following formats:
Audio Formats: .MP3, .M3U, .MP2, .M4A, .WAV, .WMA, .AOB, .AC3, .CDA, .MID, .RMI.
Video Formats: .MPG, .MPEG, .AVI, .DAT, .WMV, .ASF, .VOB, .DVR-MS, .MOD, .TOD, .M2TS, .MP4, .DV, .EVO, .DIV, .DivX, .MPV, .M1V, .TRP, .M2V, .AVC, .MOV, .RMX, .TIVO, .VRO.
Play Video Discs in PowerDVD
When you insert a video disc into your disc drive, CyberLink PowerDVD will begin to play it automatically. If there is a disc already in your disc drive when you opened CyberLink PowerDVD, select the drive (by
clicking that contains the disc if necessary and then click the play button.
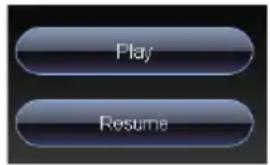
If you click Stop or Exit during playback, and even play other files or discs immediately afterwards, the next time you click play for that specific disc title, you may resume from the last scene.
The Auto-Resume feature remembers exactly where you left off the last time you watched the disc. Click Resume to continue watching from the point where you previously stopped watching it.
Play Movie Remixes
Movie Remixes are parodies or alternate versions of movies. They can be created within the Movie Remix room of CyberLink PowerDVD or downloaded from the MoovieLive web site.
Note: To play a Movie Remix, the original movie's disc must be inserted into your disc drive.
After you have finished watching a movie with CyberLink PowerDVD, you can use MoovieLive to find any existing Movie Remixes for the movie. You can then download them into the program and then watch them for additional movie enjoyment of the current movie.
Playback Controls
CyberLink PowerDVD playback controls provide effortless navigation of discs and other media, and easy access to all of the program's main features.
Main Controls
CyberLink PowerDVD main playback controls give you access to some of the most commonly used functions.
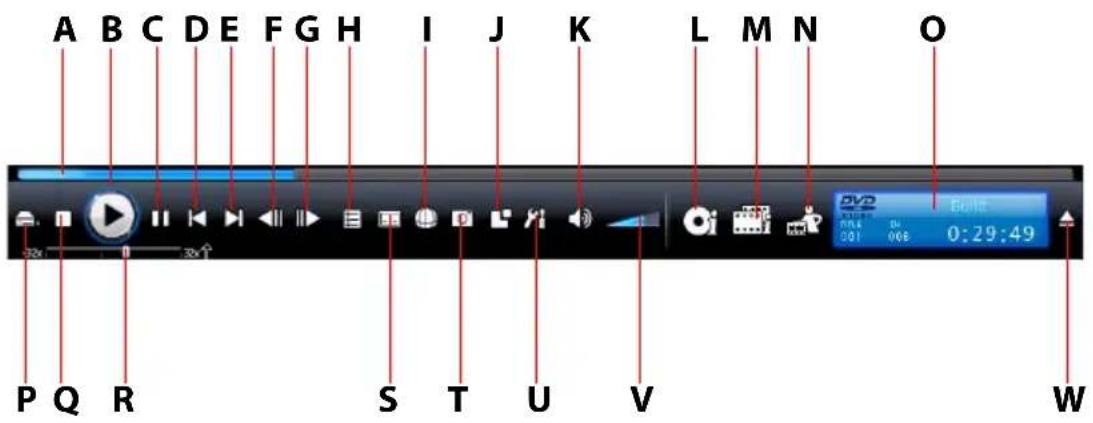
Button/Icon Hotkey Description
A Navigational slider Visually displays elapsed
time. Click along slider to jump to other locations.
B P I a y E n t e r P I a y s m e
C Pause Space Bar Pauses playback.
D Previous P Returns to previous chapter.
| E Next | N | Jumps to next chapter. |
| F Step backward | E | Goes to previous frame. |
| Button/Icon | Hotkey | Description |
| G Step forward T Goes to next frame. | ||
| H Menu L Provides access to the disc menu. | ||
| I Next audio stream H Switches among available audio streams. (e.g. different languages). The number of audio streams depends on the disc title itself. | ||
| J More Functions Provides access to more functions, including A/V options, the number pad and extra buttons. | ||
| K M u t e Q | M u t e v o l u m e | |
| L Display/Hide Movie Info page | F2 | Provides access to detailed information and reviews about the current movie. |
| M Display/Hide Movie Collection | F3 | Provides access to your Movie Collection. |
| N Display/Hide Movie Remix room | F4 | Provides access to the Movie Remix room. |
| O Info Display | Displays current playback information about the current media, including duration. | |
| P Select Source | Ctrl+O | Selects media source for playback. |
| Q Stop | S Stops playback. | |
| R Speed Control | B/F | Shuttles reverse/forward at incremental speeds. |
| Button/Icon Hotkey Description |
| S Next subtitle U Switches among available subtitles during playback. |
| T Capture frame C Captures video content as an image file. (Not supported during Blu-ray Disc playback.) |
| U Configuration Ctrl+C Configuration settings are all located here. |
| V Volume adjustment +,- Increase or decrease volume. |
| W Eject Ctrl+E Ejects the current disc drive. |
Extras
CyberLink PowerDVD includes some extra features designed to enhance your moving watching experience. They include allowing you to make your own versions of your favorite movies in the Movie Remix room, the management of your disc titles in your Movie Collection and viewing detailed movie information in the Movie Info page.
Movie Info Page
The Movie Info page displays detailed information about the current disc title that your are watching. CyberLink PowerDVD downloads the movie information from the MoovieLive web site and also retrieves other saved data from your computer if the disc was previously viewed.
To view the Movie Info page, select On the main control panel.
The movie information displayed includes detailed production information, related Movie Remixes, your viewing history and disc technical information.
MoovieLive
MoovieLive is a web service for viewing and sharing movie viewing experiences. When signed into MoovieLive you can:
• view rating, review and viewing information about a movie.
• view detailed information about a movie.
- submit your reviews, ratings and updates to the movie information.
- view and download available Movie Remixes for a movie.
• view detailed disc information for a movie.
Movie Collection
Your Movie Collection displays a list of your favorite movies, movies you own and Movie Remixes that you have created and downloaded.
To view your Movie Collection, select on the main control panel.
Use the search function in the top right corner to find a specific movie or Movie Remix within your collection.
Movie Remixes
You can create your own versions and parodies of your favorite movies in the Movie Remix room. Your Movie Remixes can then be uploaded to the MoovieLive web site and shared with other fans of a movie. To
display the Movie Remix room, select on the main control panel.
Configuration
The Configuration window lets you configure CyberLink PowerDVD to suit your specific playback requirements. The Configuration window can be accessed at any time by clicking the Configuration button within the playback controls or pressing Ctrl+C on your keyboard.
Player Configuration
On the Player Configuration tab you can:
- set your default CD/DVD-ROM Drive.
- set CyberLink PowerDVD to run automatically at Windows startup.
• have CyberLink PowerDVD show tool tips whenever your cursor is positioned over a specific function or feature.
- enable DVD+VR playback.
- auto check for software updates.
- run full screen if you would like the playback default to use your monitor's maximum screen area.
• video always on top keeps the CyberLink PowerDVD Video on top of all other applications.
- decide whether to show the Rate This Movie dialog or not.
• to access more player settings, click Advanced.
Note: For a detailed description of the Advanced settings, please consult the product's help file.
User Interface Configuration
This configuration gives you creative control over your CyberLink PowerDVD appearance, including letting you select the UI skin, startup image and display language.
MoovieLive Configuration
MoovieLive configuration lets you set CyberLink PowerDVD's interaction with the MoovieLive web service.
Movie Remix Configuration
The Movie Remix configuration tab lets you set preferences when creating and importing Movie Remixes.
Video Configuration
You can configure your video playback options with the following features:
- enable hardware acceleration to activate IDCT and Motion Compensation. By enabling this option, some features will be unavailable.
- select a color profile from the drop-down menu to change the overall color scheme of video content during playback.
- select TrueTheater Lighting (CyberLink Eagle Vision 2) to enhance video using a technology developed by CyberLink that detects video content and dynamically adjusts the brightness/contrast/saturation ratios so that you do not need to manually change the color settings if the movie you are watching contains scenes that are overly dark or too bright. Select the Automatic option to let CyberLink PowerDVD apply required TrueTheater Lighting level. Select Manual to use the level slider to adjust the TrueTheater Lighting effect the desired amount.
- select a Display mode when you enable TrueTheater Lighting and to let you select the method that it is displayed during the playback of a video.
- check Automatically enable Read-It-Clearly in full screen mode if you want PowerDVD to activate Read-It-Clearly when you are watching movies in full screen.
- to access more video settings, click Advanced. For a detailed description of the Advanced settings, please consult the product's help file.
Audio Configuration
You can configure your audio playback options with the following features:
- select your Speaker Environment by clicking the drop-down menu and making your selection.
- select your Output Mode by clicking the drop-down menu and making your selection.
• to access more audio settings, click Advanced.
Note: For a detailed description of the Advanced settings, please consult the product's help file.
Information Configuration
This configuration is for users who are searching for pertinent information regarding all aspects of their DVD entertainment.
Blu-ray Disc Configuration
The Blu-ray Disc tab* lets you configure the settings for the playback of Blu-ray Disc titles, including setting the local storage folder and selecting a region code.
Note:* Available in CyberLink DVD Suite Ultra (Blu-ray Disc version) only.
CyberLink DVD Suite
Chapter 5:
Video & Photo
The Video & Photo functions in CyberLink DVD Suite let you perform a variety of tasks, including the capture of video content from a variety of sources and the production of video discs with CyberLink PowerProducer.
You can also perform editing tasks on your video with CyberLink PowerDirector or edit your photos with CyberLink PhotoNow! CyberLink MediaShow lets you manage, enhance and share all of your photos and videos. You can also create media with your photos, including dazzling slideshows.
Create a Video Disc
CyberLink PowerProducer allows you to finalize your digital video productions and burn them to disc, providing easy access to all the features you require to make a professional looking disc.
Note: For a more detail description of any of the following steps, please consult the product's help file.
Select a Disc Format
The first step in producing a movie disc is selecting the format of the disc you want to create. Factors that influence the disc format you should use include the type of disc burner you have on your system, the length and quality of the video you use and the type of player you intend for playback.
You may select from the following available formats in the CyberLink PowerStarter window:
• Video CD: to create a lower-quality video or a slideshow.
• DVD: to create a longer, high-quality video.
- Blu-ray Disc*: to create a high-quality high definition video that will play back on a Blu-ray Disc player.
- AVCHD*: to create a high-quality high definition video that uses the MPEG-4 AVC (H.264) video codec.
Note: * Available in CyberLink DVD Suite Ultra and Pro versions only.
Capture/Import Media
In order to assemble a video production you must first acquire your video content. You may already have digital files you simply want to import into CyberLink PowerProducer or you may have raw footage from either an analog or a digital source that you need to capture.
The import and capture functions are located in the Content window.
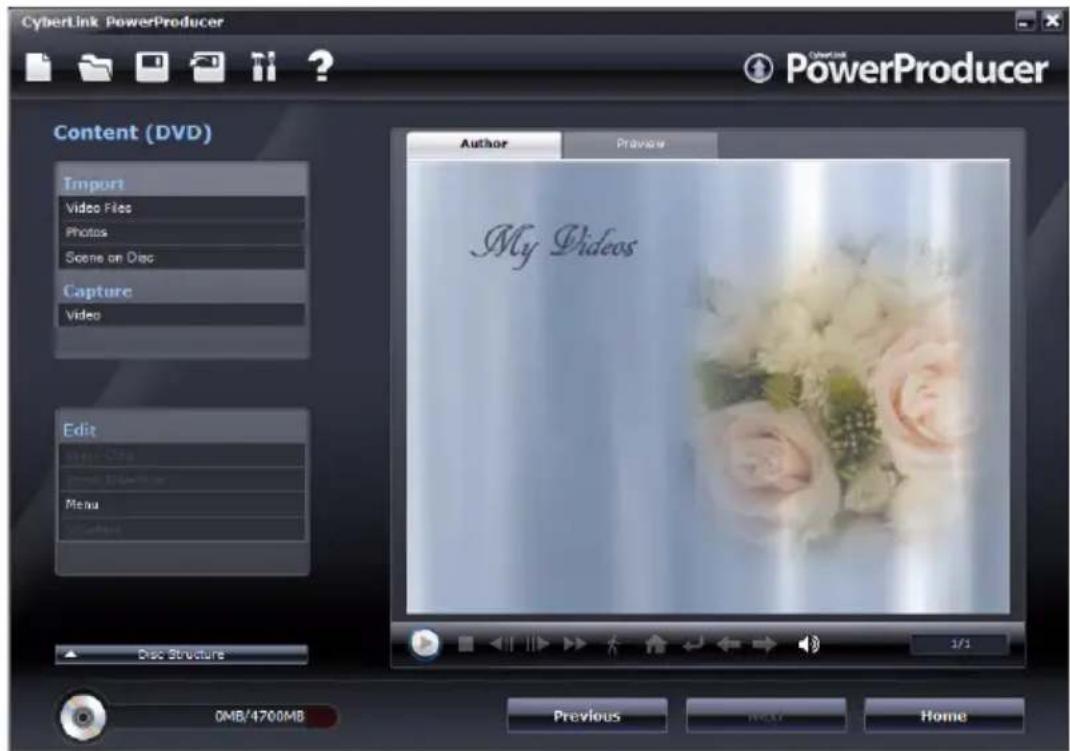
With CyberLink PowerProducer you can capture video (including the audio) from:
- a DV camcorder.
• an HDV camcorder.
• a T V . - a P C w e b c a m .
· a V C R .
Once you have imported your content you may perform light editing to your video using CyberLink PowerDirector. See "Edit Your Videos" on page 40 for more information.
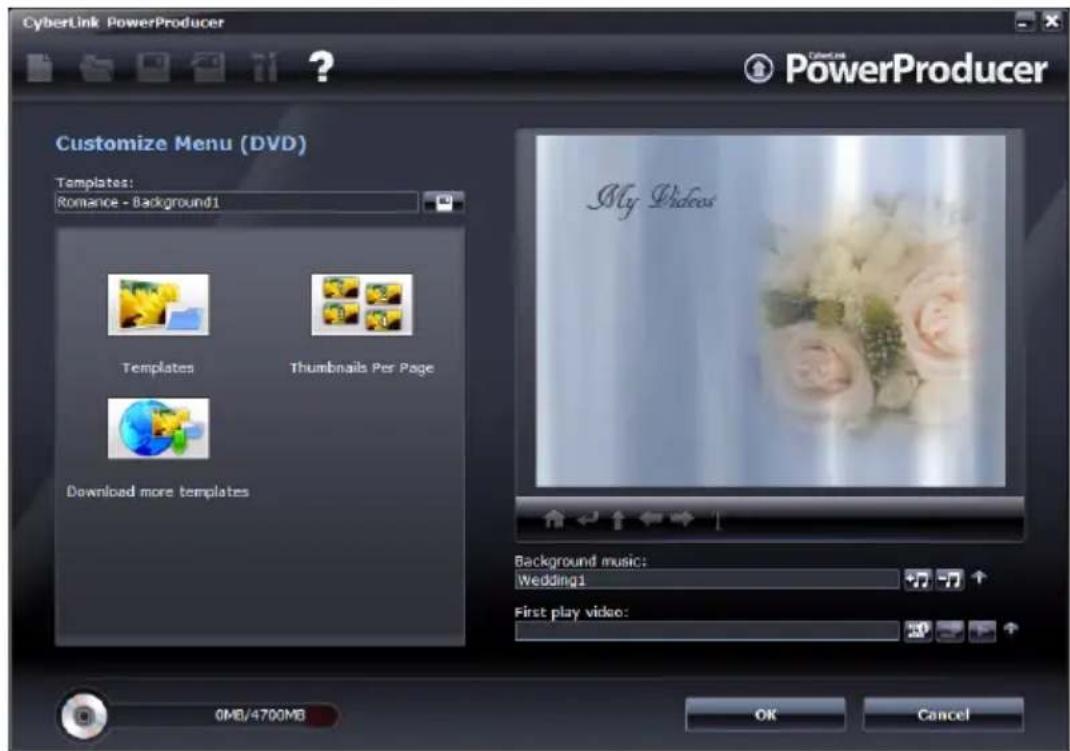
Customize Your Disc's Menu Page
Menus allow you to navigate around on your final disc. The Customize Menu window gives you creative control over the look and creation of your disc menu. You can:
- select a custom background as your menu or choose from a number of pre-defined templates.
- modify text and overall layout of buttons and text.
- add chapters, a first play video and background music.
To open the Customize Menu window, click Menu under the Edit function on the Content window.
Final Output
CyberLink PowerProducer offers several methods to finalize your production, which are useful under different circumstances. You can burn your production to disc as the last step in your movie production process, save your production as a disc image for later burning, or create a folder to organize your media files on your hard drive.
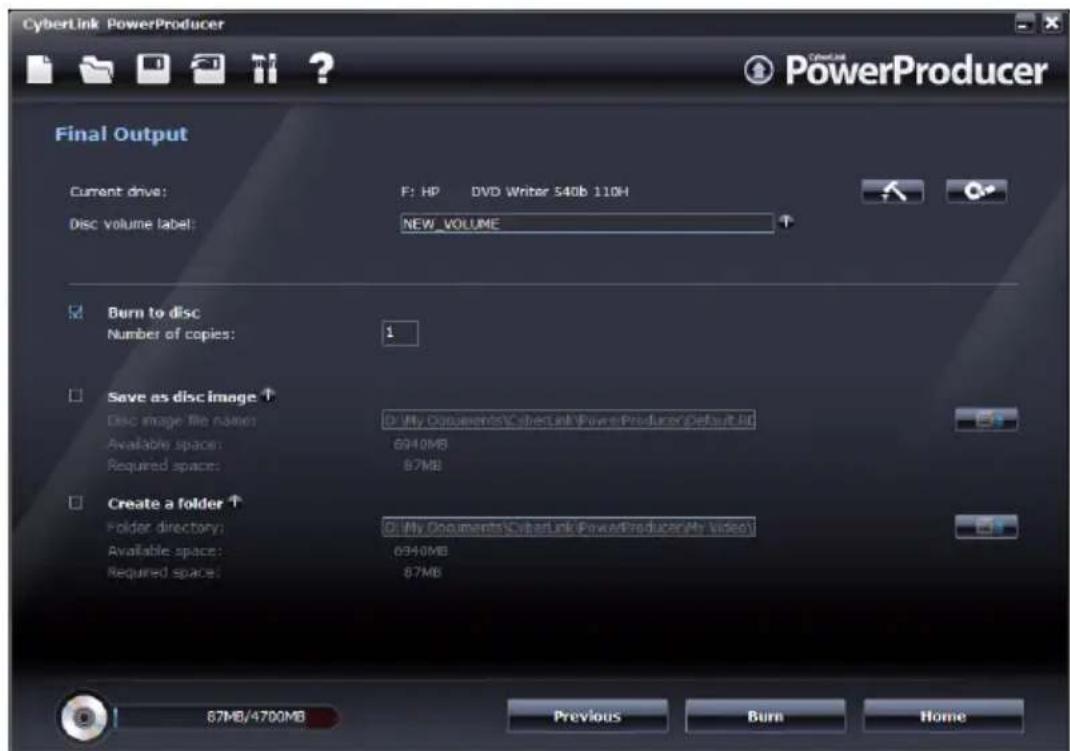
Depending on your burning drive and disc type, one or more of these options may be available simultaneously.
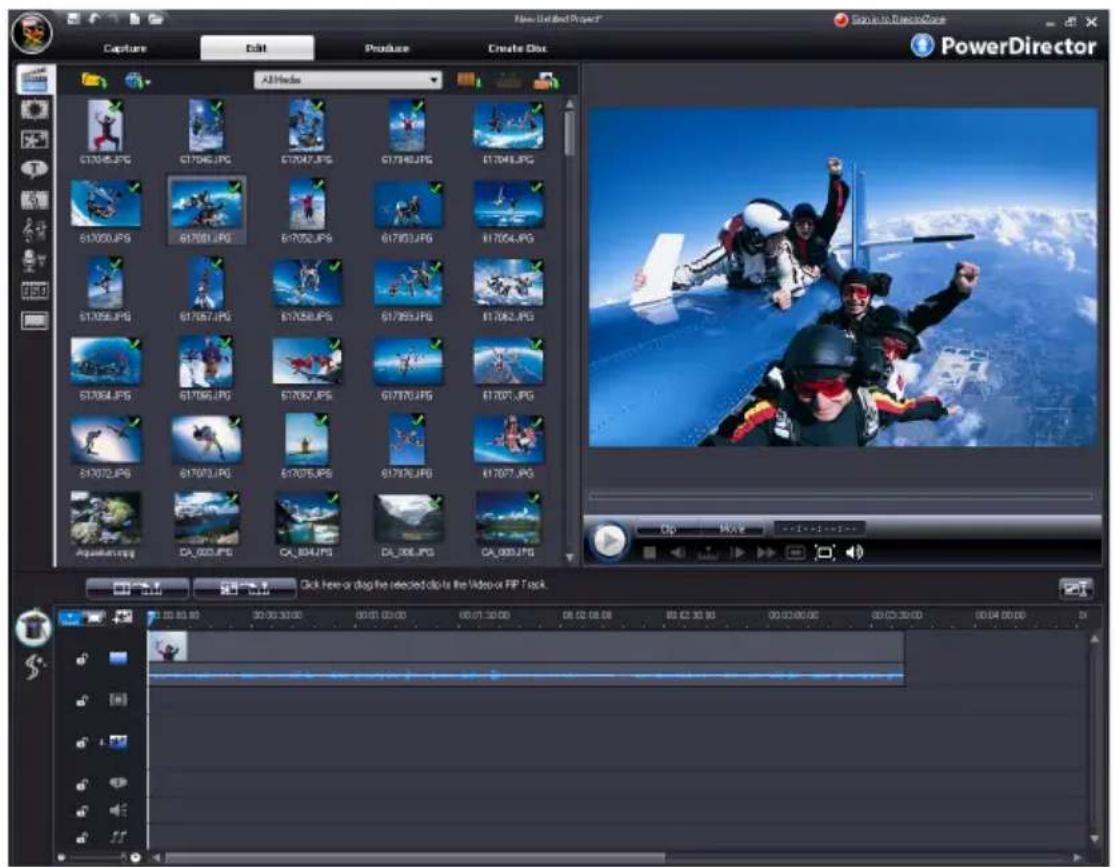
Edit Your Videos
You may want to edit your video or add some transitions or titles for a more professional looking video. CyberLink PowerDirector has a variety of tools to refine your video as required.
To begin editing your videos, select Edit your videos in the CyberLink PowerStarter window.
Note: For a more detailed description of this program and its functions, please consult the product's help file.
Add Additional Content
If you feel that you do not have enough media for your project or you are looking for specific media to make your creation just perfect, you can now search for, download and then import photos from Flickr or audio from Freesound directly into CyberLink PowerDirector. You can also download additional PiP objects and title effects from DirectorZone.
Download Photos From Flickr
You can download your own photos directly from your account on Flickr into CyberLink PowerDirector. You can also search for and browse other users' photos from within CyberLink PowerDirector, and then import them into your Media Library for use in a project.
Download Audio From Freesound
You can download audio samples, such as sound effects or music clips, from the Freesound service into CyberLink PowerDirector
Download Templates from DirectorZone
If you are looking for additional PiP objects or title effects for your library, you can download them from the DirectorZone web site by clicking on within the PiP Objects Room and the Title Effects Room.
The additional templates are created by either CyberLink or other CyberLink PowerDirector users, who have uploaded them to DirectorZone.
Edit Options Available
Editing is a broad term that encompasses a number of different functions, including:
- Splitting a Clip: You can split a media clip into two clips at the current position of the Timeline slider.
- Performing a Trim: Video clips captured from external capture devices often contain unwanted portions at the beginning, between scenes or at the end. These unwanted portions can easily be removed in CyberLink PowerDirector using the Trim function.
• Take a Still Snapshot of a Video Clip: You can capture a single frame from a video clip and automatically load the snapshot in the Library.
- Change the Speed of a Video Clip: Slow-motion or fast-motion effects can grab your audience's attention as well as break up the rhythm of a movie.
- Freeze Frame Effect: You can add a freeze frame effect to your video files instantly with the Freeze Frame button. By selecting a specific moment within your video and then clicking on Freeze Frame, CyberLink PowerDirector will take a snapshot of the frame of video and insert it into the timeline. It will also insert a video effect and title template, to enhance the freeze frame effect during video playback.
- Mix Audio Levels in the Audio Mixing Room: Using the Audio Mixer in the Audio Mixing Room gives you very precise control over the volume levels of the audio clips in the work space.
- Add a Fade Effect to an Audio Clip: You can fade an audio clip in or out to give your video a professional sounding sound track.
Magic Tools
CyberLink PowerDirector's Magic Tools make working with audio, video and image clips easier than ever before. Magic Tools allow you to:
- Magic Movie Wizard: If you are new to the editing process and not sure how or where to get started, then the Magic Movie Wizard can help. The Magic Movie Wizard can take all of your media and create a dazzling movie production in just a few steps.
- Perform Magic Clean on an Image Clip: When applied to image clips, CyberLink PowerDirector's Magic Clean tool enhances the image for a sharper, brighter picture.
- Perform Magic Clean on a Video Clip: When applied to video clips, CyberLink PowerDirector's Magic Clean tool automatically adjusts the video output for a sharper, brighter picture.
- Perform Magic Clean on an Audio Clip: The Magic Clean tool uses CLNR (CyberLink Noise Reduction) technology to improve output audio.
- Magic Cut: The Magic Cut tool is ideal for condensing long video segments into shorter clips - for example, cutting one hour of video down to ten minutes.
- Magic Fix: CyberLink PowerDirector's Magic Fix tool fixes shaky videos, blurry photos and removes red eye from your pictures.
- Magic Style: CyberLink PowerDirector's Magic Style tool transforms clips into a finished movie that is ready to be produced.
Add Effects
CyberLink PowerDirector lets you add a variety of effects to your home movie.
- Effects: You can add special effects to video or image clips in your movie.
- PiP Objects: You can add graphics on the video or photo clip in the PiP Track.
• Transition Effects: You can add transition effects to your movie, giving it that professional looking feel. - Title Effects: You can add creative titles to your movie by adding text and images.
Produce your Movie
After you have completed the editing process, your movie is ready for final production. In just a few simple steps, the Production Wizard compiles all the separate elements of your movie into a playable movie file, in a variety of formats, that can be played, shared with friends or burned to disc.
To produce your movie in CyberLink PowerDirector, click on

and follow the easy to use Production Wizard steps.
Edit Your Photos
CyberLink PhotoNow! allows you to touch-up your photos by adjusting brightness and contrast, removing red eye and more.
To begin editing your photos, select Edit your photos in the CyberLink PowerStarter window.
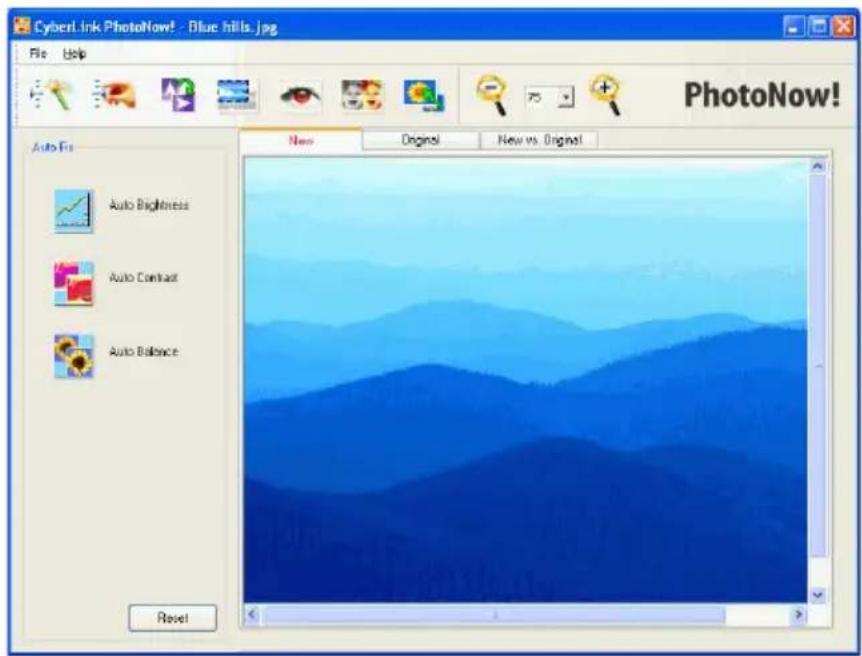
Some of PhotoNow!'s features include:
• automatic adjustment of levels, contrast and equalization.
- manual adjustment of brightness, contrast, saturation and sharpness.
• automatic and manual red eye removal.
- crop, resize and rotate functions.
- customized special effects.
Note: For a more detailed description of this program and its functions, please consult the product's help file.
Manage Your Photos and Videos
CyberLink MediaShow lets you import, manage and enhance your videos and photos within an engaging 3D liquid interface. You can also share your media directly from the program to Flickr or YouTube, and create media with your photos, including dazzling slideshows.
Function buttons
Perform a variety of useful functions instantly
Tray
Hold the media you want to view in a slideshow, burn to a DVD and more
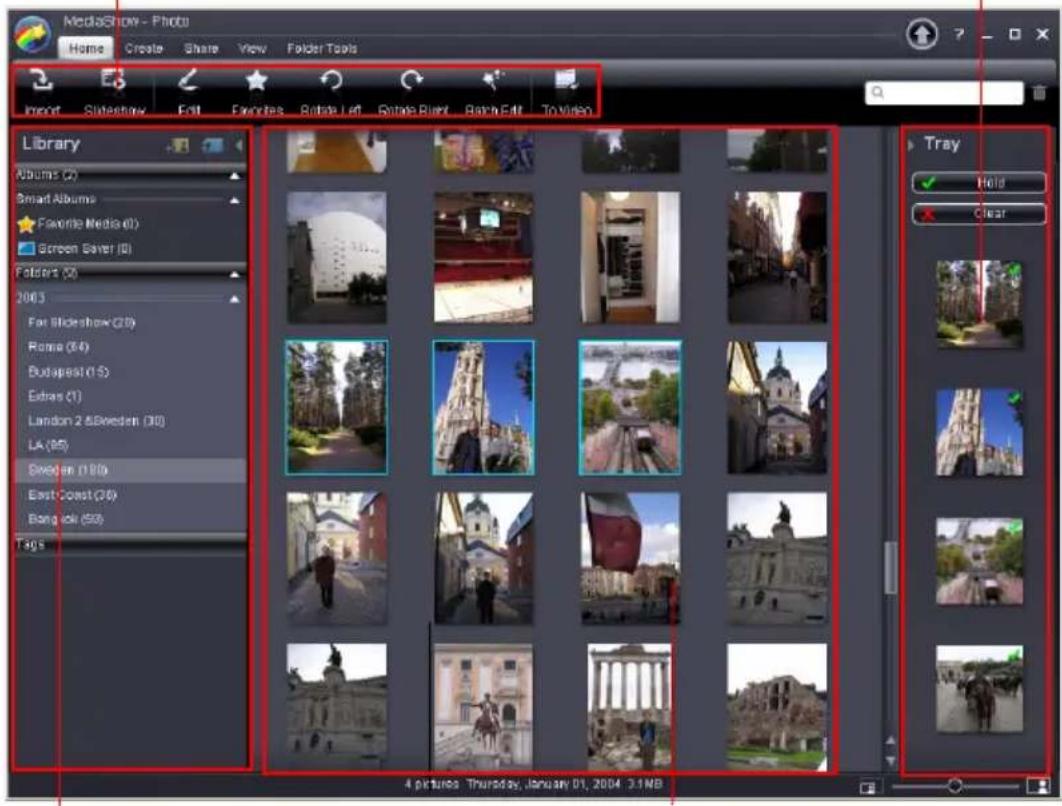
Library
Conveniently organizes all of your media files by album, folder and tags
Media Window
Contains resizable thumbnails for all the imported media
Note: For a more detailed description of this program and its functions, please consult the product's help file.
Media Library
The Library is a convenient way to organize and keep track of all your media. When you import your media, CyberLink MediaShow categorizes all of it into a series of folders for easy browsing.
CyberLink MediaShow will scan the folders in your Library for new media every time the program is launched.
The Library consists of the following sections:
- Importing Media into the Library
- Folders
- Tags
Import Media into the Library
When you first launch CyberLink MediaShow you will be guided through a wizard that assists with the import of your photos and videos.
If there is some media that was missed, was added after the original import or you have media on an external/removable device, you can use the Import window to import it into CyberLink MediaShow. You may also drag and drop photos and videos into the CyberLink MediaShow window to import them into the program.
Media Window
The Media Window contains thumbnails of all the media that has been imported into CyberLink MediaShow.
There are several options available to you within the Media Window. Right-click on a photo or video for a listing of available functions.
You may dynamically resize the thumbnails in the Media Window by:
• using the slider in the bottom right corner of the window.

- selecting View > Thumbnails and then select the desired size.
Search for Media
If you are in the situation where you cannot find a specific media file or folder in the Media Window, you can use the Search function to assist in your search.
Simply type in a search keyword in the search field located in the top right of the program window, and CyberLink MediaShow will filter the media files within the Media window based on the keyword.

Tray
The Tray is a convenient little area that lets you hold the media you want to add to an album, view in a slideshow, include on a DVD, etc.
When you are browsing through your media within different folders in the Media Window, clicking on a photo or video will display a thumbnail of it in the Tray.
If you would like to hold a photo or video in the Tray for future use, click on Hold. The item will be held in the Tray until you select it and click on the Clear button.
Favorites
CyberLink MediaShow lets you add the photos and videos you like the most to your Favorites. When you add media to your Favorites, it will be added to the Favorite Media folder in Albums, where you can easily view them or add them to a disc.
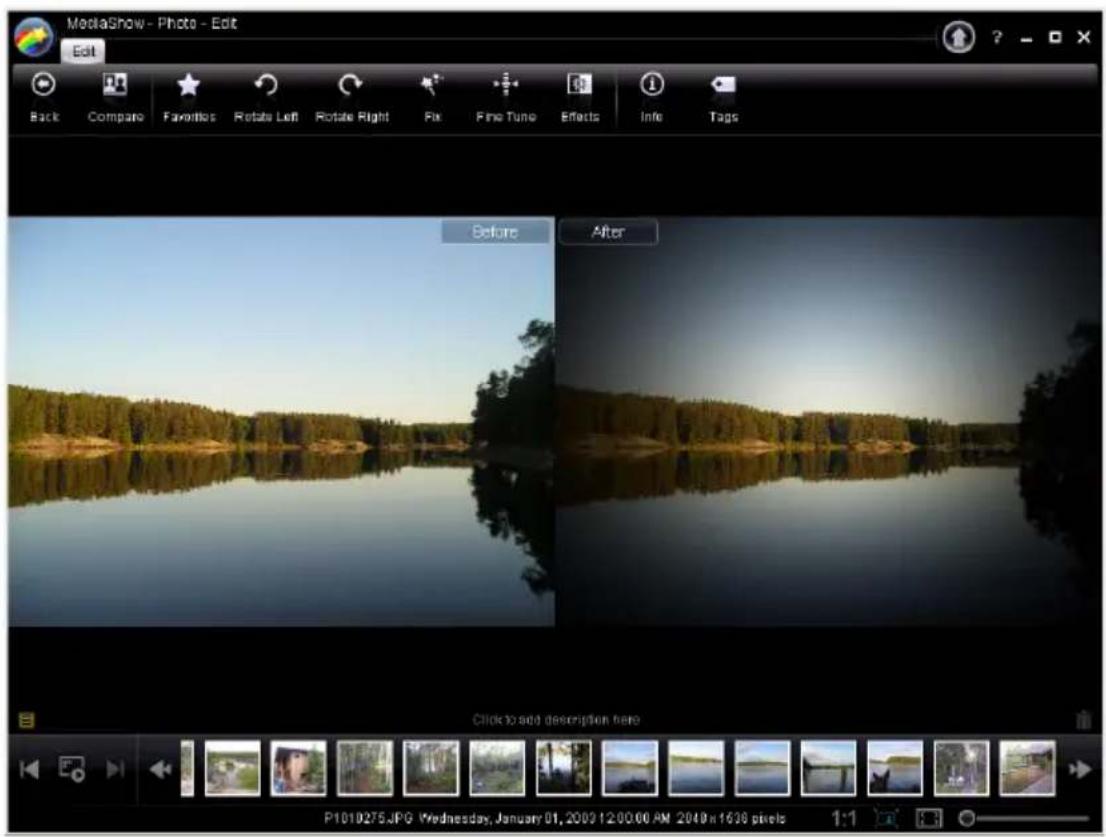
Enhance Photos
CyberLink MediaShow offers several editing features, including adding creative effects to your photos or performing various touch ups in preparation for slideshows and discs.
Use the Compare feature for a better view of the changes you make to your photos.
Fine Tune Photos
Use the Fine Tune function if you want to manually adjust the Brightness, Contrast, Saturation, White balance or Sharpness of your photos. To manually adjust your photo's properties, click on Fine Tune and then use the relevant sliders to adjust the properties.
Photo Effects
CyberLink MediaShow lets you add display and color effects to your photos. Click on the Effects button to open the Photo Effects window and apply one of the creative effect options.
Photo Description, Info and Tags
CyberLink MediaShow also lets you add descriptions and tags to your photos, as well as view detailed information about a photo.
Batch Edit
The Batch Edit function is available in the main Photo window. Select multiple photos and then select the desired edit function from the Batch Edit drop-down to apply it to all the items.
Create Media with Your Photos
CyberLink MediaShow lets you create several types of media with your photos, including screen savers and slideshow videos that can be burned to a disc. To begin creating media with your photos, click on Create in the main Photo window.
Set a Photo as Desktop Background
You can set any of the photos in your Library as your desktop background.
Create a Screen Saver
CyberLink MediaShow lets you create a screen saver with the photos in your Media Library.
Create a Slideshow Movie
You can create a slideshow movie file in the WMV or MPEG-2 format, which you can burn to a disc, e-mail to friends or upload to the Internet.
Share Your Photos
CyberLink MediaShow lets you e-mail photos or upload them to Flickr so you can share them with your friends, family or the world. To do this, select Share on the main Photo window.
E-mail Photos
You can e-mail one or more photos in the Library to your friends and family from within CyberLink MediaShow.
Upload Photos to Flickr
You can upload photos from the Library within CyberLink MediaShow directly to the Flickr photo sharing web service.
Enhance Your Videos
CyberLink MediaShow provides several editing features, including adding touch ups in preparation for burning them to a disc.
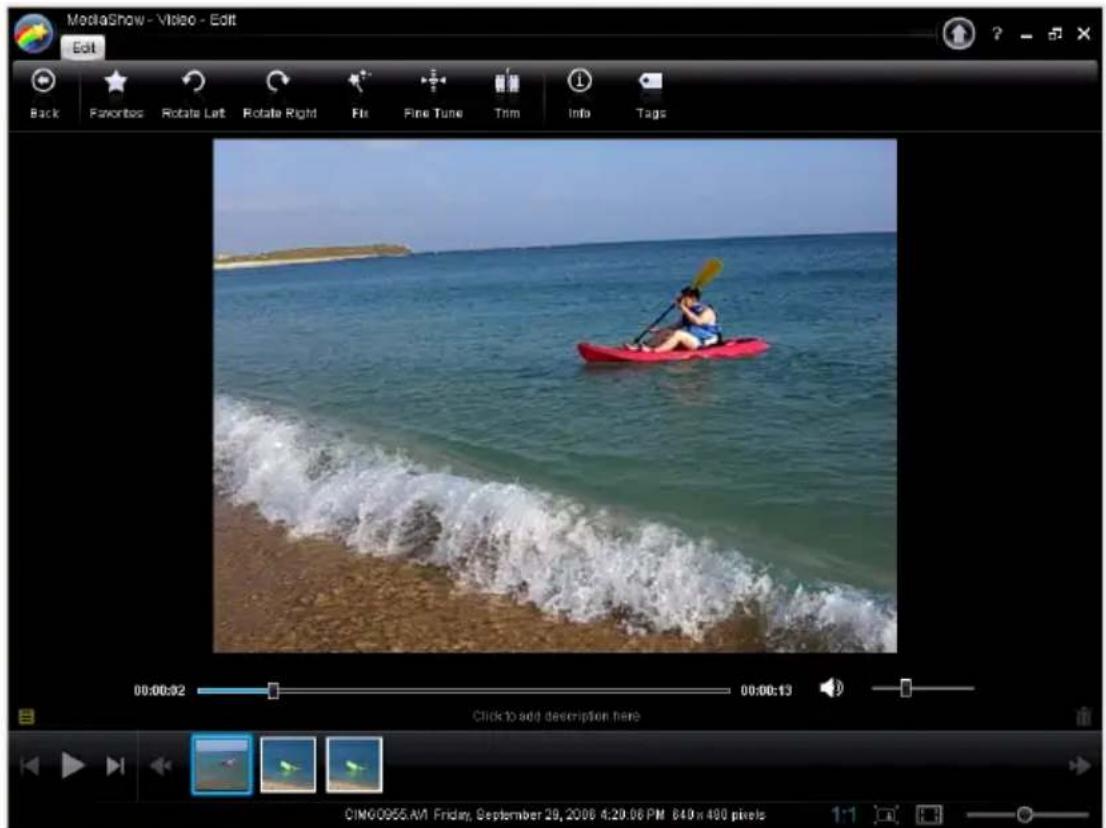
Video Fixes
CyberLink MediaShow provides you with several common required quick fixes for your videos, including automatic fixes and a video stabilizer feature. Click on the Fix button to open the Video Fixes window.
- Fix Shaky Video: select this option to automatically correct shaky video.
- Auto Fix Lighting: select this option to automatically fix the lighting within the video.
- Reduce Background Noise: use this option to filter out background noise from the audio track. Drag the slider to remove more or less noise.
Fine Tune Videos
Use the Fine Tune function if you want to manually adjust the Brightness, Contrast, Saturation, or White balance of your videos. To manually adjust your video's properties, click on Fine Tune and then use the relevant sliders to adjust the properties.
Video Description, Info and Tags
CyberLink MediaShow also lets you add descriptions and tags to your videos, as well as view detailed information about a video.
Share Your Videos
CyberLink MediaShow lets you e-mail videos or upload them to YouTube so you can share them with your friends, family or the world. To do this, select Share on the main Video window.
E-mail Videos
You can e-mail one or more videos in the Library to your friends and family from within CyberLink MediaShow.
Upload Videos to YouTube
You can upload videos from the Library within CyberLink MediaShow directly to the YouTube video sharing web service.
Burn a DVD Folder
If you have created a DVD folder you can burn this folder to a disc for storage.
To burn a disc from a DVD folder, do this:
- Select Burn a DVD folder in the CyberLink PowerStarter window.
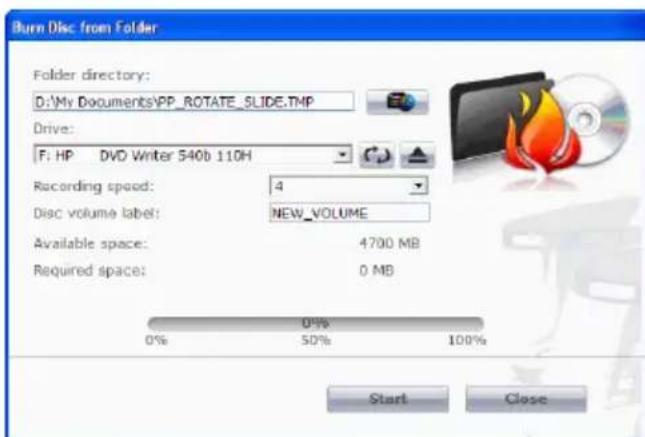
-
Insert your disc and select your drive.
-
Click, then select the folder you want to burn from.
-
Click Start to begin. CyberLink PowerProducer displays the real-time progress of the task.
Note: For additional help using this program, please see the help system it contains.
Chapter 6:
Copy & Backup
With CyberLink DVD Suite, you can easily make an exact copy of a data DVD or CD using CyberLink Power2Go and copy a non-CSS protected DVD Video disc with CyberLink PowerDVD Copy. You may also back up all your data and restore it when and if required using CyberLink PowerBackup.
Copy a Data Disc
The Copy Disc option allows you to make an exact copy of a disc of any format. However, you must copy the disc contents onto a blank disc of the same disc type. (You cannot, for example, copy content from a CD onto a DVD.)
To copy a disc, do this
- Select the data disc type (Blu-ray Disc, DVD or CD) you want to copy from the CyberLink PowerStarter program window.
![Copy Disc From E:\ASUS DVD-EB16A 1.06 Read speed: 2x [Maximum speed] ✓ Ignore reading error ☐ Copy to hard disk ✓ Copy whole disc To F:\HP DVD Writer 540b 110H Write speed: Maximum speed Number of copies: 1 ✓ Perform write simulation ☐ Verify recorded data ☐ Enable select management Copy Cancel](/content/2026/05/1047620/images/f1d47f148f3214545b46d283b9791f749d389254ac98c61dbfd4c713002584ac.jpg)
- Select your source and target drives.
- Click Copy. CyberLink Power2Go burns the copied data onto the disc.
- When burning is complete, select an option in the dialog box that opens:
- Click View Log to view the burning log. The log opens in your default TXT editor, where you can view and save it.
- C l i c k OK to close the dialog and then exit.
Copy a Movie DVD
CyberLink PowerDVD Copy is a specialized tool for copying DVD movies from disc or hard drive onto a back-up DVD. You can likewise create a DVD folder on your hard drive, or burn it to a DVD as a movie. Easy-to-select options and an uncomplicated interface simplify the DVD-copying process.
To copy a movie DVD, do this
-
Select Copy a movie DVD in the CyberLink PowerStarter program window.
-
In the CyberLink PowerDVD Copy window, select your video source of the movie DVD you would like to copy.
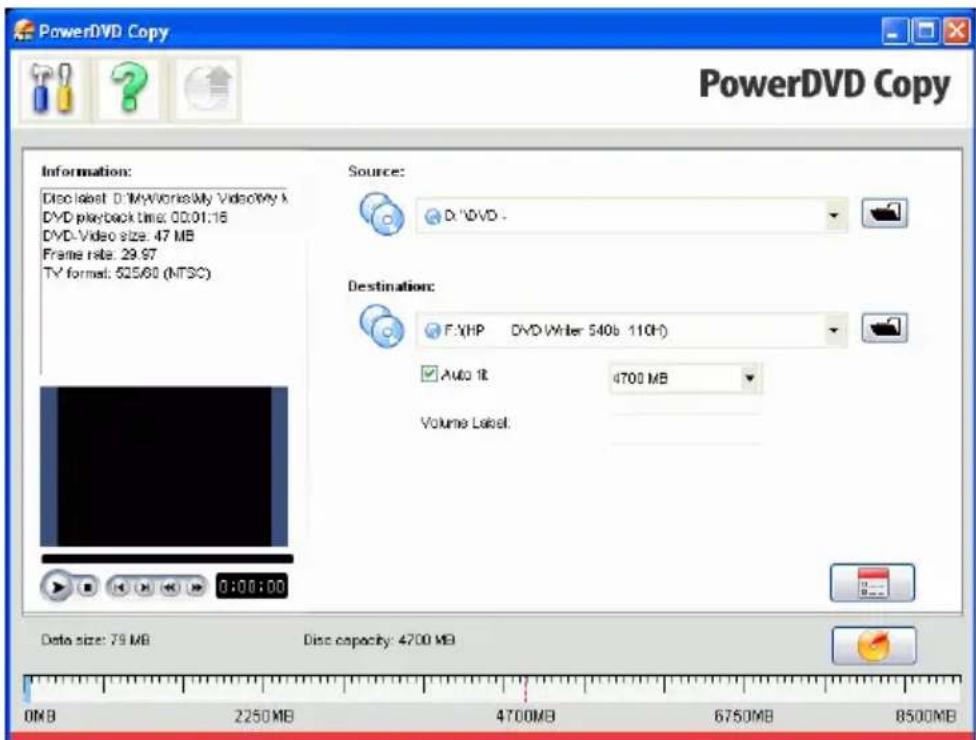
-
Select the destination where to copy the movie DVD.
-
Click the button and select the specific content from the DVD you want to copy, if not all is required.
-
Click . CyberLink PowerDVD Copy burns the movie onto the disc.
Back up and Restore Your PC
Backing up data is an important security procedure that can save large amounts of time and money in case of disaster, disk failure, attack by a hacker or virus, etc. By keeping a backup copy of your important data on another medium, you can quickly and reliably restore your data to its original state.
Back Up Data
To backup your data, first select Backup your PC from the CyberLink PowerStarter program window and follow these simple steps:
![CyberLink PowerBackup - Backup - [MyBackup.PBJ] Back Edit View Tools Help Backup Restore Compare Scheduler New Open Save Close Doc Options Help PowerBackup Backup Procedure 1 Select Source 2 Select Destination 3 Select Method 4 Back-Up File Details Files to back up 0 Total file size: 0.05 Step 1. Select the files and folders you want to back up. Select the type of files you want to back up Files and Folders Application Data Back up from My Documents B00615_Pinnacle-CHF Adobe BRL RM CDS DVD Case CL User Guides CPAS CyberLink DVD Play Help Eventio Project EventioCopy FAQ FAQ Document Caraoke2Go MagicSports MakeMyVideo Merge My eBooks My Plastic My Pictures My Received Files AngelMaker Practice PCNHelp File Docs PCRS Reads PowerDirector 6 RP 3.7 Name ONOLIS Private-COIL Adobe BRC-RM CDS DVD Case CL User Guides CPAS CyberLink DVD Play Help Eventio Project EventioCopy FAQ FAQ Document Karaoke2Go MagicSports MakeMyVideo Merge My eBooks My Plastic My Pictures My Received Files PageMaker Practice PCNHelp File Docs PCRS Reads PowerDirector 6 PowerDirector 6 Size Type Date/Pl: File Folder File Folder File Folder File Folder File Folder File Folder File Folder File Folder File Folder File Folder File Folder File Folder File Folder File Folder File Folder File Folder File Folder File Folder File Folder File Folder File Folder File Folder File Folder File Folder File Folder File Folder File Folder File Folder File Folder File Folder File Folder File Folder File Folder File Folder File Folder File Folder File Folder File Folder File Folder File Folder File Folder File Folder File Folder File Folder File Folder File Folder File Folder File Folder File Folder File Folder File Folder Filer Filer Filer Filer Filer Filer Filer Filer Filer Filer Filer Filer Filer Filer Filer Filer Filer Filer Filer Filer Filer Filer Filer Filer Filer Filer Filer Filer Filer Filer Filer Filer Filer Filer Filer Filer Filer Filer Filer Filer Filer Filer Filer Filer Filer Filer Filer Filer Filer Filer Filen Filer Filer Filer Filer Filer Filer Filer Filer Filer Filer Filer Filer Filer Filer Filer Filer Filer Filer Filer Filer Filer Filer Filer Filer Filer Filer Filer Filer Filer Filer Filer Filer Filer Filer Filer Filer Filer Filer Filer Filer Filer Filer Filer Filer Filer Filer Filer Filer Filer Filing Dnel Dnel Dnel Dnel Dnel Dnel Dnel Dnel Dnel Dnel Dnel Dnel Dnel Dnel Dnel Dnel Dnel Dnel Dnel Dnel Dnel Dnel Dnel Dnel Dnel Dnel Dnel Dnel Dnel Dnel Dnel Dnel Dnel Dnel Dnel Dnel Dnel Dnel Dnel Dnel Dnel Dnel Dnel Dnel Dnel Dnel Dnel Dnel Dnel Dnel Drel Drel Drel Drel Drel Drel Drel Drel Drel Drel Drel Drel Drel Drel Drel Drel Drel Drel Drel Drel Drel Drel Drel Drel Drel Drel Drel Drel Drel Drel Drel Drel Drel Drel Drel Drel Drel Drel Drel Drel Drel Drel Drel Drel Drel Drel Drel Drel Drel Drel DRel DRel DRel DRel DRel DRel DRel DRel DRel DRel DRel DRel DRel DRel DRel DRel DRel DRel DRel DRel DRel DRel DRel DRel DRel DRel DRel DRel DRel DRel DRel DRel DRelD RelD RelD RelD RelD RelD RelD RelD RelD RelD RelD RelD RelD RelD RelD RelD RelD RelD RelD RelD RelD RelD RelD RelD RelD RelD RelD RelD RelD RelD RelD RelD RelD RelD RelD RelD RelD RelD RelD RelD RelD RelD RelD RelD RelD RelD RelD RelD RelD RelD RelD Refi Refi Refi Refi Refi Refi Refi Refi Refi Refi Refi Refi Refi Refi Refi Refi Refi Refi Refi Refi Refi Refi Refi Refi Refi Refi Refi Refi Refi Refi Refi Refi Refi Refi Refi Refi Refi Refi Refi Refi Refi Refi Refi Refi Refi Refi Refi Refi Refi Refi Refit Refi Refi Refi Refi Refi Refi Refi Refi Refi Refi Refi Refi Refi Refi Refi Refi Refi Refi Refi Refi Refi Refi Refi Refi Refi Refi Refi Refi Refi Refi Refi Refi Refi Refi Refi Refi Refi Refi Refi Refi Refi Refi Refi Refi Refi Refi Refi Refi Refi Refin Retn Retn Retn Retn Retn Retn Retn Retn Retn Retn Retn Retn Retn Retn Retn Retn Retn Retn Retn Retn Retn Retn Retn Retn Retn Retn Retn Retn Retn Retn Retn Retn Retn Retn Retn Retn Retn Retn Retn Retn Retn Retn Retn Retn Retn Retn Retn Retn Retn Retn Retm Retm Retm Retm Retm Retm Retm Retm Retm Retm Retm Retm Retm Retm Retm Retm Retm Retm Retm Retm Retm Retm Retm Retm Retm Retm Retm Retm Retm Retm Retm Retm Retm Retm Retm Retm Retm Retm Retm Retm Retm Retm Retm Retm Retm Retm Retm Retm Retm Retm RetrRetrRetrRetrRetrRetrRetrRetrRetrRetrRetrRetrRetrRetrRetrRetrRetrRetrRetrRetrRetrRetrRetrRetrRetrRetrRetrRetrRetrRetrRetrRetrRetrRetrRetrRetrRetrRetrRetrRetrRetrRetrRetrRetrRetrRetrRetrRetrRetrRetrRetrRETRRETRRETRRETRRETRRETRRETRRETRRETRRETRRETRRETRRETRRETRRETRRETRRETRRETRRETRRETRRETRRETRRETRRETRRETRRETRRETRRETRRETRRETRRETRRETRRETRRETRRETRRETRRETRRETRRETRRETRRETRRETRRETRRETRRETRRETRRETRRETRRETRRETRRE TRRETRRETRRETRRETRRETRRETRRETRRETRRETRRETRRETRRETRRETRRETRRETRRETRRETRRETRRETRRETRRETRRETRRETRRETRRETRRETRRETRRETRRETRRETRRETRRETRRETRRETRRETRRETRRETRRETRRETRRETRRETRRETRRETRRETRRETRRETRRETRRETRRETRRETrERETRRETIRETRRETIRETRRETIRETRRETIRETRRETIRETRRETIRETRRETIRETRRETIRETRRETIRETRRETIRETRRETIRETRRETIRETRRETIRETRRETIRETRRETIRETRRETIRETRRETIRETRRETIRETRRETIRETRRETIRETRRETIRETRRETIRETRRETIRETRRETIRETRRETIRETRRETIRETRETIRETRETIRETRETIRETRETIRETRETIRETRETIRETRETIRETRETIRETRETIRETRETIRETRETIRETRETIRETRETIRETRETIRETRETIRETRETIRETRETIRETRETIRETRETIRETRETIRETRETIRETRETIRETRETIRETRETIRETRETIRETRETIRETRETIRETRETIRETRETIRETRETIRETRETIRETRETIRETRETIRETDETIRETRETIRETRETIRETRETIRETRETIRETRETIRETRETIRETRETIRETRETIRETRETIRETRETIRETRETIRETRETIRETRETIRETRETIRETRETIRETRETIRETRETIRETRETIRETRETIRETRETIRETRETIRETRETIRETRETIRETRETIRETRETIRETRETIRETRETIRETRETIRETRETIRETRETIRETRETIRETRETIRETRETIRETRETIRETRETIRETRETIRETRETIRETRETIRETRETIRETRETIRETRETIRETRETIRETRETIRETRETIRETRETIRETRETIRETRETIRETRETIRETRETIRETRETIRETRETIRETRETIRETRETIRETRETIRETRETIRETRETIRETRETIRETRETIRETRETIRETRETIRETRETIRETRETIRETRETIRETRETIRETRETIRETRETIRETGTERTURE TATORE TATORE TATORE TATORE TATORE TATORE TATORE TATORE TATORE TATORE TATORE TATORE TATORE TATORE TATORE TATORE TATORE TATORE TATORE TATORE TATORE TATORE TATORE TATORE TATORE TATORE TATORE TATORE TATORE TATORE TATORE TATORE TATORE TATORE SUTTER SUTTER SUTTER SUTTER SUTTER SUTTER SUTTER SUTTER SUTTER SUTTER SUTTER SUTTER SUTTER SUTTER SUTTER SUTTER SUTTER SUTTER SUTTER SUTTER SUTTER SUTTER SUTTER SUTTER SUTTER SUTTER SUTTER SUTTER SUTTER SUTTER SUTTER SUTTER SUTTER SUTTERSUTTER SUTTER SUTTER SUTTER SUTTER SUTTER SUTTER SUTTER SUTTER SUTTER SUTTER SUTTER SUTTER SUTTER SUTTER SUTTER SUTTER SUTTER SUTTER SUTTER SUTTER SUTTER SUTTER SUTTER SUTTER SUTTER SUTTER SUTTER SUTTER SUTTER SUTTER SUTTER SUTTER SULTE TATORE TATORE TATORE TATORE TATORE TATORE TATORE TATORE TATORE TATORE TATORE TATORE TATORE TATORE TATORE TATORE TATORE TATORE TATORE TATORE TATORE TATORE TATORE TATORE TATORE TATORE TATORE TATORE TATORE TATORE TATORE TATORE TATORE](/content/2026/05/1047620/images/9920aa40f1b6f18b05133e70cf9b1f768930123fef2ea43e989510583130be90.jpg)
Step 1 - Select Source
In the Backup window select the source by locating and checking the files and folders that you want to back up in the two file directory panes. (These panes resemble Windows Explorer in functionality.) You
can choose to backup Files and Folders or Application Data by selecting the desired file type above the directory panes.
Step 2 - Select Destination
Click Select Destination, then set your backup destination.
- Back up to: Select your backup destination from the drop-down box. Backup destinations may include hard disk or a disc burner (depending on your available hardware).
- Back up as: Give each backup file a unique name. To save the backup file to a different directory, click Browse, then locate and select the folder you want to use.
- Include Restore Tool: Select to create an executable (.exe) file that allows you to restore your data on a computer that does not have the PowerBackup program installed.
- Split into volumes: Divide your backup files into volumes (portions) of the size you specify.
Step 3 - Select Method
Click Select Method, then choose the backup method (and advanced options, if desired) that you want to use.
• Backup methods include Full, Differential and Incremental.
- For more options, click Options.
Note: The specific functions of this program depend on the version you have purchased, and therefore some features may not be available.
Step 4 - Back Up Files
Click Back Up Files. Verify that the settings are correct, then click one of the buttons to begin your backup.
- Click Backup Now to begin backing up immediately.
- Click Add to Scheduler to schedule the backup for a later time.
Restore Data
To restore your data after a backup, first select Restore your PC from the CyberLink PowerStarter program window and follow these simple steps:

Step 1 - Select Source
In the Restore window select the source by selecting the restoration source from the Restore from drop-down box.
- Backup file: Restore from an existing backup file. To open a backup file, click Browse, then locate and open the file you want to use.
• My Catalog: Restore from existing records of previous backup jobs. (To delete records from My Catalog, use the Edit > Delete Catalog Record or Delete All Catalog Records command.)
• Disc drive: Restore from a disc.
Once you select the source, select the files you want to restore.
Step 2 - Select Destination
Click Select Destination, then set your restoration destination.
- Original location: Restore to the original location from which the files were backed up.
- Alternative location: Restore to a new location. To set a new directory, click Browse, then locate and select the folder you want to use.
- Single directory: Restore all of the backed up files to a single new directory. To set a new directory, click Browse, then locate and select the folder you want to use.
Step 3 - Select Method
Click Select Method, then choose the restoration method you want to use.
- Do not overwrite: Restores only files that are not found on your hard drive, and does not overwrite existing files.
• Overwrite older files: Overwrites existing files on your hard drive if the backed-up copy is newer. - Always overwrite the files on my computer: Overwrites existing files on your hard drive with the backed-up copy in every case.
- Ask before overwriting: Prompts you to decide which copy you want to keep.
Click Restore Files and then verify that the settings are correct. Click Restore Now to begin restoring files immediately.
CyberLink DVD Suite
Chapter 7:
Utilities
CyberLink DVD Suite provides you with a number of useful disc utilities, including allowing you to erase rewritable discs that previously contained recorded data. You can also design and print professional looking labels using CyberLink LabelPrint to complete the disc making process or create and burn a disc image.
Create a Disc Image
Creating and saving a disc image onto your hard drive is useful for backing up your discs on your computer for future burning tasks.
To save a disc image, do this:
- Select Create a disc image in the CyberLink PowerStarter window.
![Save Disc Image From E:\ASUS DVD-E6164.1.06 Read speed: 2x [Maximum speed] Ignore reading error Copy whole disc Enable defect management To D:\My Documents\Image.p2i Browse... Save Cancel](/content/2026/05/1047620/images/ebed9cd1f11785775fddc0146166092ff999ff1d8f9d3377c9ab7ab45b24c300.jpg)
-
Insert your disc. If necessary, select your source drive in the From drop-down box.
-
Enter the destination folder and disc image file name in the To entry box, or click Browse..., select a folder and enter the disc image file name.
-
Click Save to save the disc image.
Burn a Disc Image
Burning a disc image to disc allows you to restore a saved disc image to disc as well as burn disc images created by the CyberLink Image Recorder.
To burn a disc image, do this:
- Select Burn a disc image in the CyberLink PowerStarter window.
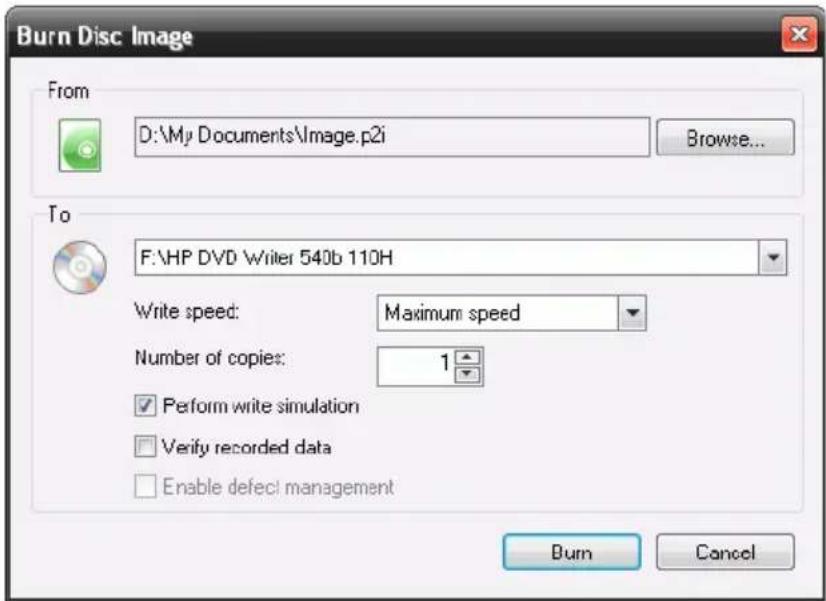
- Click Browse... and locate the disc image.
- Insert your disc and select your drive in the drop-down list.
- Click Burn to start burning it to disc.
Erase a Disc
If you are using a rewritable disc, you can erase content that has been previously recorded onto it. This allows you to reuse the same discs over and over without the need to continually buy new discs.
To erase a disc, do this:
-
Select Erase a disc in the CyberLink PowerStarter window.
-
Insert your disc and select your burner in the Erase Tool window.
![Erase Tool [F:] [0,1,0] HP DVD Writer 540b 110H DVD+RW disc. Erase Method Normal Erase (Estimated time: approx. 20-40 min.) Quick Erase (Estimated time: approx. 1 min.) If you need to erase the disc completely, select Normal Erase. CyberLink Eject Start Close](/content/2026/05/1047620/images/2c548100e97439a6bdafb235325d23fd21d02c5a32891ff6a56b1a034015003d.jpg)
-
Select an erase method:
-
The Normal Erase option erases all of the content the disc contains.
-
The Quick Erase option erases the disc index contained on the disc.
-
Click Start to start. When the task is completed, a screen message appears, informing you of the status.
Print a Disc Label
Cyberlink LabelPrint offers a wide variety of layout formats and supports a number of printing options, including printing directly on your disc using LightScribe and Labelflash technologies.
Note: For a more detailed description of this application and its functions, please consult the product's help file.
To begin creating a label, select Print a disc label on the CyberLink PowerStarter window.
![CyberLink LabelPrint - [My Label] LabelPrint Step 1. Select the type of label you want to print. LightScribe Labelflash™ Disc Label MinDisc Label Front Cover Back of Front Cover Disc May](/content/2026/05/1047620/images/ec750da9748d4f368d7f2325c1a152e170ec04ddcd41acc0fbb48087937f8b0d.jpg)
Step 1 - Select a Label Type
The first step in creating a label is to select the type of label you want to print. You can select to create LightScribe label, Labelflash label, a disc label, a mini disc label, a front cover, back cover or a disc inlay.
Step 2 - Edit Disc Information
Add or edit disc information, such as a title, which will allow you to recognize the disc. Add or edit the content list information to keep track of which files you have added to the disc. You can add or edit this information on the Edit Disc Information page.
Step 3 - Edit Layout
By selecting a layout, modifying the fonts, and using a custom background image, you can create a more personalized disc label. You can:
- select a label layout.
- add a background image.
- a d d o r m o d i f y t e x t .
Step 4 - Print
You are now ready to print your label with CyberLink LabelPrint. You can print on one of the following media:
- Plain paper: Allows you to print on any sheet of paper your printer supports.
- Label paper: Provides labels for easy printing.
- Directly onto your disc: Does away with paper labels, but requires a special LightScribe or Labelflash burning drive and disc.
Chapter 8:
Technical Support
This chapter contains technical support information. It includes all the information to find the answers you need to assist you. You may also find answers quickly by contacting your local distributor/dealer.
This chapter contains the following sections:
- "Before Contacting Technical Support" on page 70
- "Web Support" on page 71
Before Contacting Technical Support
Please take advantage of one of CyberLink's free technical support options:
- consult the user's guide or the online help installed with your program.
• refer to the Knowledge Base in the Support section of the CyberLink web site.
http://www.cyberlink.com/prog/support/cs/index.do
The FAQs may have information and helpful hints that are more current than the User Guide and online help.
When contacting technical support by email or phone, please have the following information ready:
- registered activation key (Your activation key can be found on the CD cover, the Box cover, or in the email received after you purchased CyberLink products on the Cyberlink store).
- the product name, version and build number, which generally can be found by clicking on the product name image on the user interface.
- the version of Windows installed on your system.
- hardware devices on your system (capture card, sound card, VGA card) and their specifications.
- the wording of any warning messages that were displayed (You may want to write this down or take a screen capture).
- a detailed description of the problem and under what circumstances it occurred.
Web Support
Solutions to your problems are available 24 hours a day at no cost on the CyberLink web sites:
Note: You must first register as a member before using CyberLink web support.
CyberLink provides a wide range of web support options, including FAQs and a user community forum, in the following languages:
| Language Web Support URL | |
| English | http://www.cyberlink.com/prog/support/cs/index.do |
| Traditional Chinese | http://tw.cyberlink.com/prog/support/cs/index.do |
| Japanese | http://jp.cyberlink.com/prog/support/cs/index.do |
| Italian | http://it.cyberlink.com/prog/support/cs/index.do |
| German | http://de.cyberlink.com/prog/support/cs/index.do |
| French | http://fr.cyberlink.com/prog/support/cs/index.do |
| Spanish | http://es.cyberlink.com/prog/support/cs/index.do |
CyberLink DVD Suite
Index
fine tune photos 49
fine tune videos 53
Burning
data discs 18
disc images 65
DVD Folder 54
A
About 6
Add to favorites 3
Alternative location option 61
Always overwrite the files on my computer option 61
Ask before overwriting option 61
Audio
reduce background noise 53
Audio configuration 33
Audio tracks, ripping to hard disk 16
Auto-resume 25
AVCHD 36
B
Background
images 7
Backing Up Data 58
Batch edit, photos 50
Blu-ray Disc 36
configuration 33
playback 24
player 23
Brightness
C
Capture/Import Media 36
CD
ripping music from 16
Compare 49
Configuration 31
Blu-ray Disc 33
MoovieLive 32
Movie Remix 32
Configuration window 6
Contrast
fine tune photos 49
fine tune videos 53
Controls 26
main 26
Copy & Backup menu 4
Copy discs 56
Copying a Movie DVD 57
Create
Blu-ray Disc 36
CD
VCD 36
disc labels 67
DivX 36
DVD 36
movie disc 36
screen saver 50
slideshow 46
SVCD 36
VCD 36
Customize disc menu 38
CyberLink Products window 7
D
Data menu 4
Delete all catalog records 60
Delete catalog record 60
DirectorZone
downloading templates 41
Disc formats
supported 24
Disc image
burning 65
saving 64
Disc menus
customizing 38
Disc types
supported 24
Disc utilities
burn disc Image 65
Erase disc 66
Rip audio 16
Save disc image 64
Do not overwrite option 61
Downloading
media 41
photos 41
PiP templates 41
title templates 41
DVD 36
playback 24
player 23
E
Edit
fix videos 52
photos 45
videos 40
Effects 44
Effects, photos 50
Enhance
photos 49
video 52
Erase disc
procedure 66
F
Fast-motion 42
Favorites
add/remove media 48
overview 48
Favorites menu 3
File directory panes 58
File formats
supported 24
Fine tune, photos 49, 53
Fix
shaky video 52
videos 52
Fix lighting
videos-auto 52
Flickr 41
Freeze frame 42
Full screen 31
Function buttons 46
H
Hotkeys 26
|
Import
photos 41
InstantBurn
erasing a disc 66
supported discs 21
using InstantBurn 21
Interface background 7
L
LabelPrint 67
Library
overview 47
search 48
LightScribe 68
M
Magic Movie Wizard 43
Magic Tools 43
Media
resize 47
search for 48
Media available for printing on 68
Media library service 14, 18
Media tab 14
Media window
overview 47
resize thumbnails 47
MediaShow
create slideshow 50
enhance photos 49
enhance videos 52
manage photos, videos 46
share photos 51
share videos 53
MoovieLive
configuration 32
overview 29
Movie collection 30
Movie info page 29
Movie Player menu 4
Movie Remix
configuration 32
playback 25
Movie remix 30
Music
ripping to hard drive 16
Music menu 4
My Catalog 60
N
Navigational slider 26
Next audio stream 27
Normal erase 66

Original location option 61
Overwrite older files option 61

Paper templates 68
Photos
batch edit 50
compare 49
effects 50
enhance 49
fine tune 49
resize thumbnails 47
screen saver 50
search for 48
set as background 50
share 51
PiP objects
download 41
Plain paper 68
Play back
discs, video files, audio files 24
Playback
controls 26
Movie Remix 25
Power2Go
burn a music disc 14
burn data disc 18
burning a disc image 65
copying discs 56
create a music disc 14
creating a disc image 64
rip an audio CD 16
PowerBackup
backing up data 58
restoring data 60
PowerDirector
adding effects 44
using magic tools 43
PowerDVD 23
Configuration
Audio 33
Information 33
Player 31
Skin 31
Video 32
PowerDVD Copy
copying a movie disc 57
PowerProducer
burning a DVD folder 54
capture/import media 36
create a movie disc 36
final output 39
PowerStarter Program 2
Preferences 6
available media 68
disc label 67

Quick access buttons 6
Quick erase 66
R
Recent Data tab 18
Recently created documents 18
Recently opened documents 18
Remove from favorites 3
Resize thumbnails 47
Restore tool 59
Restoring Data 60
Rip audio procedure 16
S
Saturation
fine tune photos 49
fine tune videos 53
Scheduling a backup for later 59
Screen saver create 50
Search
album 14
artist 14
genre 14
recently added 14
year 14
Search media 48
Selecting source 24
Selecting speaker environment 33
Share
photos 51
videos 53
Sharpness, fine tune photos 49
Single directory option 61
Slideshow, create 50
Slow-motion 42
Source
select 24
Speaker environment selection 33
Speed
video clips 42
Split into volumes 59
Subtitles
Read-It-Clearly 32
Supported disc and file formats 24
SVCD
playback 24
System Requirements 10
T
Thumbnails
resize thumbnails 47
Title effects
download 41
Tray, overview 48
TrueTheater
Lighting 32
U
Upgrade 5
Utilities menu 5
V
VCD
playback 24
Version Table 8
Video & Photo menu 4
Video CD 36
Videos
auto fix lighting 52
enhance 52
fix 52
fix shaky video 52
reduce background noise 53
resize thumbnails 47
search for 48
share 53
speed 42
View Log 15, 19
W
White balance
fine tune photos 49
fine tune videos 53