
KS-F315 - Radio JVC - Free user manual and instructions
Find the device manual for free KS-F315 JVC in PDF.


| Product Type | Car Stereo with Cassette Player and FM/AM Tuner |
| Brand / Model | JVC KS-F315 |
| Maximum Power Output | Front: 40 W per channel, Rear: 40 W per channel |
| Continuous Power Output (RMS) | 16 W per channel into 4 Ω, 40 Hz–20 kHz, ≤0.8% THD |
| Load Impedance | 4 Ω (4 Ω to 8 Ω allowance) |
| Frequency Response (Audio) | 40 Hz – 20,000 Hz |
| Tuner Frequency Ranges | FM1/FM2: 87.5 – 108.0 MHz; FM3: 65 – 74 MHz; AM (MW): 522 – 1,620 kHz; AM (LW): 144 – 279 kHz |
| Cassette Deck Features | Auto Reverse, Wow & Flutter 0.15% (WRMS), Fast-Wind Time 190 s (C-60) |
| Audio Controls | Bass (±10 dB at 100 Hz), Treble (±10 dB at 10 kHz), Loudness on/off, Preset Sound Modes (BEAT, POP, SOFT) |
| Special Tuner Features | SSM (Strong-station Sequential Memory), Manual Preset (6 stations per band), One-Touch EX button |
| Display | Frequency, Clock, Sound mode indicators |
| Detachable Control Panel | Yes, with locking mechanism and carrying case |
| Clock | Built-in, settable 12-hour or 24-hour (not specified) |
| Power Requirements | DC 14.4 V (11 V – 16 V allowance), Negative ground |
| Operating Temperature | 0°C to +40°C |
| Dimensions (Installation) | 182 mm × 52 mm × 150 mm (W × H × D) |
| Dimensions (Panel) | 188 mm × 58 mm × 14 mm (W × H × D) |
| Mass | 1.3 kg (excluding accessories) |
| Supplied Accessories | Hard case, trim plate, sleeve, mounting bolts, power cord, handles |
| Maintenance | Clean tape heads every 10 hours of use with wet-type head cleaning tape |
| Safety Precautions | Do not raise volume to block outside sounds; stop car before complex operations; wait for normal temperature before use |
| Reparability | Resettable by holding SEL and power button; fuse replaceable; connectors cleanable |
Frequently Asked Questions - KS-F315 JVC
User questions about KS-F315 JVC
0 question about this device. Answer the ones you know or ask your own.
Ask a new question about this device
Download the instructions for your Radio in PDF format for free! Find your manual KS-F315 - JVC and take your electronic device back in hand. On this page are published all the documents necessary for the use of your device. KS-F315 by JVC.
USER MANUAL KS-F315 JVC
For installation and connections, refer to the separate manual.
Thank you for purchasing a JVC product. Please read all instructions carefully before operation, to ensure your complete understanding and to obtain the best possible performance from the unit.
CONTENTS
BASIC OPERATIONS .... 3
RADIO OPERATIONS.... 4
Listening to the radio ....4
Storing stations in memory.... 5
FM station automatic preset: SSM 5
Manual preset 6
Storing your favorite stations into the one-touch operation button (EX) 7
Tuning into a preset station 8
Other convenient tuner functions ......9
Scanning broadcast stations 9
Selecting FM reception sound 9
TAPE OPERATIONS 10
Listening to a tape ....10

SOUND ADJUSTMENTS 11
Turning on/off the loudness function ....11
Selecting preset sound modes 11
Adjusting the sound....12
Storing your own sound adjustments ....13

OTHER MAIN FUNCTIONS 14
Setting the clock ....14
Detaching the control panel ....15

MAINTENANCE 16
To extend the lifetime of the unit....16
How to Reset your unit....16

TROUBLESHOOTING 17
SPECIFICATIONS 18
BEFORE USE
* For safety....
- Do not raise the volume level too much, as this will block outside sounds, making driving dangerous.
- Stop the car before performing any complicated operations.
* Temperature inside the car....
If you have parked the car for a long time in hot or cold weather, wait until the temperature in the car becomes normal before operating the unit.

Note:
When you use this unit for the first time, set the built-in clock correctly, see page 14.
1
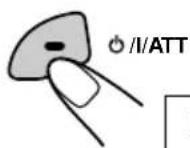
Turn on the power.
Notes on One-Touch Operation:
- When you select tuner as a source in step 2 below, the power automatically comes on. You do not have to press this button to turn on the power.
- If the cassette is already in the cassette compartment, tape play starts automatically.
2
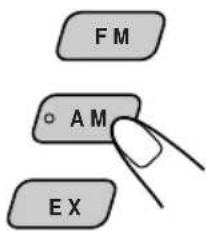
Play the source.
To operate the tuner, see pages 4 – 9.
To operate the tape deck, see page 10.
EX (extra) button: To use this button, you need to preset your favorite station in advance. For details, see pages 7 - 8.
3

natural_image
Illustration of a hand holding a small electronic device with polarity markings (no text or symbols)Adjust the volume.

Volume level appears
4
Adjust the sound as you want (see pages 11 - 13).
To drop the volume in a moment
Press Ⓧ/I/ATT briefly while listening to any source. "ATT" starts flashing on the display, and the volume level will drop in a moment.
To resume the previous volume level, press the button briefly again.
To turn off the power
Press ⏻/1/ATT for more than 1 second.
Listening to the radio

1

Turn on the power.
Note on One-Touch Operation:
When you select a band in step 2 below, the power automatically comes on. You do not have to press this button to turn on the power.
2
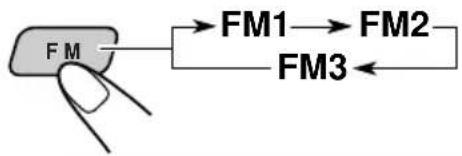
flowchart
graph TD
    A["FM"] --> B["FM1"]
    B --> C["FM2"]
    C --> D["FM3"]
FM1 and FM2: 87.5 - 108 MHz FM3: 65 - 74 MHz
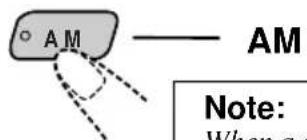
Select the band (FM1, FM2, FM3 or AM).
You can select any one of FM1, FM2, and FM3 to listen to an FM station.
87.5
FM1
BEAT POP SOFT
Note:
When a cassette is in the cassette compartment, you cannot select the tuner. Be sure to eject the cassette from the cassette compartment to listen to the radio.
3

natural_image
Diagram of a mechanical component with dashed lines indicating motion or alignment, no text or symbols presentTo search stations of higher frequencies.
To search stations of lower frequencies.
Start searching a station.
When a station is received, searching stops.
88.3
FM1
BEAT POP SOFT
To stop searching before a station is received, press the same button you have pressed for searching.
To tune in a particular frequency manually:
1 Press FM or AM to select the band.
2 Press and hold or until "M" starts flashing on the display.
Now you can manually change the frequency while "M" is flashing.
3 Press or repeatedly until the frequency you want is reached.
- If you hold down the button, the frequency keeps changing (in 50 kHz intervals (87.5 - 108 MHz), in 30 kHz intervals (65 - 74 MHz) for FM and 9 kHz intervals for AM — MW/LW) until you release the button.
Storing stations in memory
You can use one of the following two methods to store broadcasting stations in memory.
• Automatic preset of FM stations: SSM (Strong-station Sequential Memory)
- Manual preset of both FM and AM stations.
FM station automatic preset: SSM
You can preset 6 local FM stations in each FM band (FM1, FM2 and FM3).

1


Select the FM band number (FM1, FM2 or FM3) you want to store FM stations into.
2

Press and hold the button for more than 2 seconds.

“SSM” appears, then disappears when automatic preset is over.
Local FM stations with the strongest signals are searched and stored automatically in the band number you have selected (FM1, FM2 or FM3). These stations are preset in the number buttons — No. 1 (lowest frequency) to No. 6 (highest frequency).
When automatic preset is over, the station stored in number button 1 will be automatically tuned in.
Manual preset
You can preset up to 6 stations in each band (FM1, FM2, FM3 and AM) manually.
Example: Storing an FM station of 88.3 MHz into the preset number 1 of the FM1 band.

1

Select the FM1 band.
87.5
FM1
BEAT POP SOFT
2

Tune into a station of 88.3 MHz.
See page 4 to tune into a station.
88.3
FM1
BEAT POP SOFT
3
Press and hold the button for more than 2 seconds.
88.3
Preset number "P1" flashes for a while.
4
Repeat the above procedure to store other stations into other preset numbers.
Notes:
- A previously preset station is erased when a new station is stored in the same preset number.
- Preset stations are erased when the power supply to the memory circuit is interrupted (for example, during battery replacement). If this occurs, preset the stations again.
Storing your favorite stations into the one-touch operation button (EX-extra)
You can preset an FM or AM station (such as your favorite station or traffic announcement station); and recall it by one touch operation even if the unit is turned off.
EXAMPLE: Storing an FM station of 88.3 MHz into the one-touch operation button (EX).
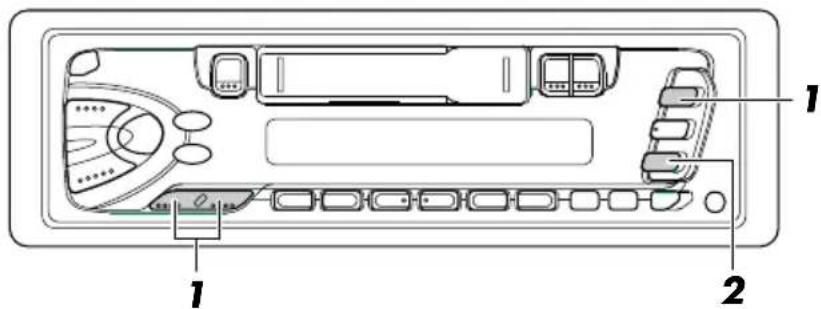
1
Follow the steps 1 and 2 on page 6.
2
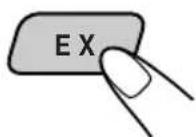
Press and hold the button for more than 2 seconds.
"P0" flashes on the display, showing that the station has been preset.
88.3
PO FM BEAT POP SOFT
Notes:
- A previously preset station is erased when a new station is stored.
- Preset station are erased when the power supply to the memory circuit is interrupted (for example, during battery replacement). If this occurs, preset the station again.
Tuning into a preset station
You can easily tune into a preset station.
Remember that you must store stations first. If you have not stored them yet, see page 5 or 6.

1
flowchart
graph TD
    A["FM"] --> B["FM1-FM2"]
    A --> C["FM3"]
    D["AM"] --> E["AM"]
    style A fill:#f9f,stroke:#333
    style D fill:#f9f,stroke:#333
    style B fill:#ccf,stroke:#333
    style C fill:#ccf,stroke:#333
    style E fill:#ccf,stroke:#333
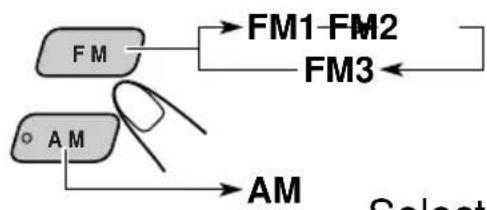
Select the band (FM1, FM2, FM3 or AM) you want.
2



Select the number (1 - 6) for the preset station you want.
To tune in the favorite station

The unit automatically turns on (if it has been off).
Your favorite station is turned in – except when the tape is playing.
- If you press the button again, the last received station will be turned in.
Other convenient tuner functions
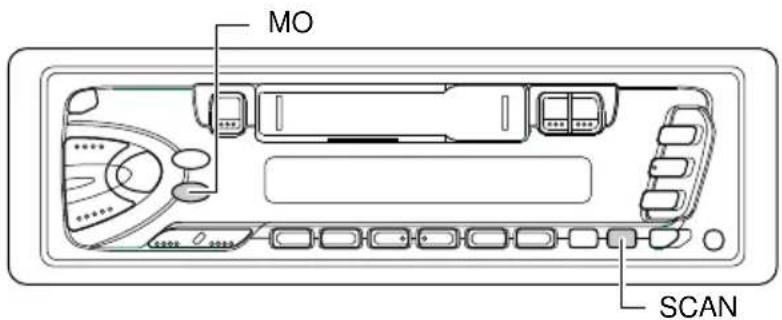
Scanning broadcast stations
When you press SCAN while listening to the radio, station scanning starts. Each time a broadcast is tuned in, scanning stops for about 5 seconds (tuned frequency number flashes on the display), and you can check what program is now being broadcast.
If you want to listen to that program, press the same button again to stop scanning.
Selecting FM reception sound
When an FM stereo broadcast is hard to receive:
Press MO while listening to an FM stereo broadcast. The sound you hear becomes monaural but reception will be improved.
Lights when receiving an FM broadcast in stereo

To restore the stereo effect, press the same button again.
Listening to a tape

1
Turn on the power.
2

natural_image
Diagram of an electronic device showing internal components and a directional arrow (no text or symbols)Insert a cassette.
When one side of the tape reaches its end during play, the other side of the tape automatically starts playing. (Auto Reverse)
3
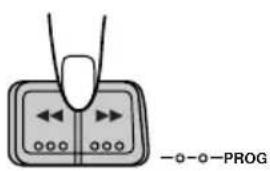
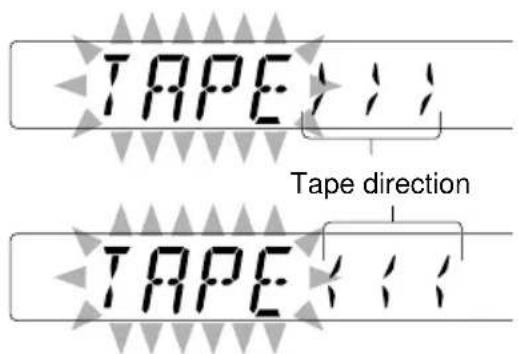
Select the tape direction.
- Press the both buttons at the same time. Each time you press the button, the tape direction changes alternatively – forward (TAPE: : :) and reverse (TAPE: : :
To stop play and eject the cassette
Press ▲.
Tape play stops and the cassette ejects from the cassette compartment.
You can hear the last received station.
- You can also eject the cassette with the unit turned off.
To fast-wind a tape
Press either ▶▶ or ◀◀.
The tape will be wound in the direction of the arrows
(▶▶ or ◀◀).
To restart playback, press ▶▶ or ◀◀ lightly.
Turning on/off the loudness function
The human ear is less sensitive to low and high frequencies at low volumes.
The loudness function can boost these frequencies to produce a well-balanced sound at low volume levels.
Each time you press LOUD, the loudness function turns on/off alternatively.


Selecting preset sound modes
You can select a preset sound adjustment suitable to the music genre.
Each time you press SOUND, the sound mode changes as follows.


flowchart
graph LR
    A["→SCM OFF"] --> B["BEAT"] --> C["POP"] --> D["SOFT"]
| Indication For: Preset values | |||
| Bass Treble Loudness | |||
| SCM OFF (Flat sound) 00 00 On | |||
| BEAT Rock or disco music +2 00 On | |||
| POP Light music +4 +1 Off | |||
| SOFT | Quiet background music +1 -3 Off | ||
Notes:
- You can adjust the preset sound mode to your preference, and store it in memory. If you want to adjust and store your original sound mode, see “Storing your own sound adjustments” on page 13.
- To adjust only the bass and treble reinforcement levels to your preference, see “Adjusting the sound” on page 12.
- When one of the sound modes is selected, it is shown on the display as follows:
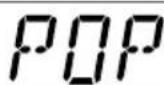

For example, when "POP" is selected.
Adjusting the sound
You can adjust the treble/bass sound and the speaker balance.

1

Select the item you want to adjust.

flowchart
graph LR
    A["BAS"] --> B["TRE"]
    B --> C["FRD"]
    C --> D["BAL"]
    D --> E["VOL"]
| Indication | To do: Range | |
| BAS Adjust (bass) | the bass -6 (min.) — +6 (max.) | |
| TRE Adjust (treble) | the treble -6 (min.) — +6 (max.) | |
| FAD Adjust (Fader)* balance | the front and rear speaker R6 (rear only) — F6 (front only) | |
| BAL Adjust (Balance) balance | the left and right speaker L6 (left only) — R6 (right only) | |
| VOL Adjust (Volume) | the volume 00 (min.) — 50 (max.) |
Note:
* If you are using a two-speaker system, set the fader level to "00".
2

natural_image
Illustration of a hand holding a small electronic device with no visible text or symbolsAdjust the level.
Note:
Normally the + and - buttons work as the volume control buttons.
So you do not have to select "VOL" to adjust the volume level.
Storing your own sound adjustments
You can adjust the sound modes (BEAT, POP, SOFT: see page 11) to your preference and store your own adjustments in memory.

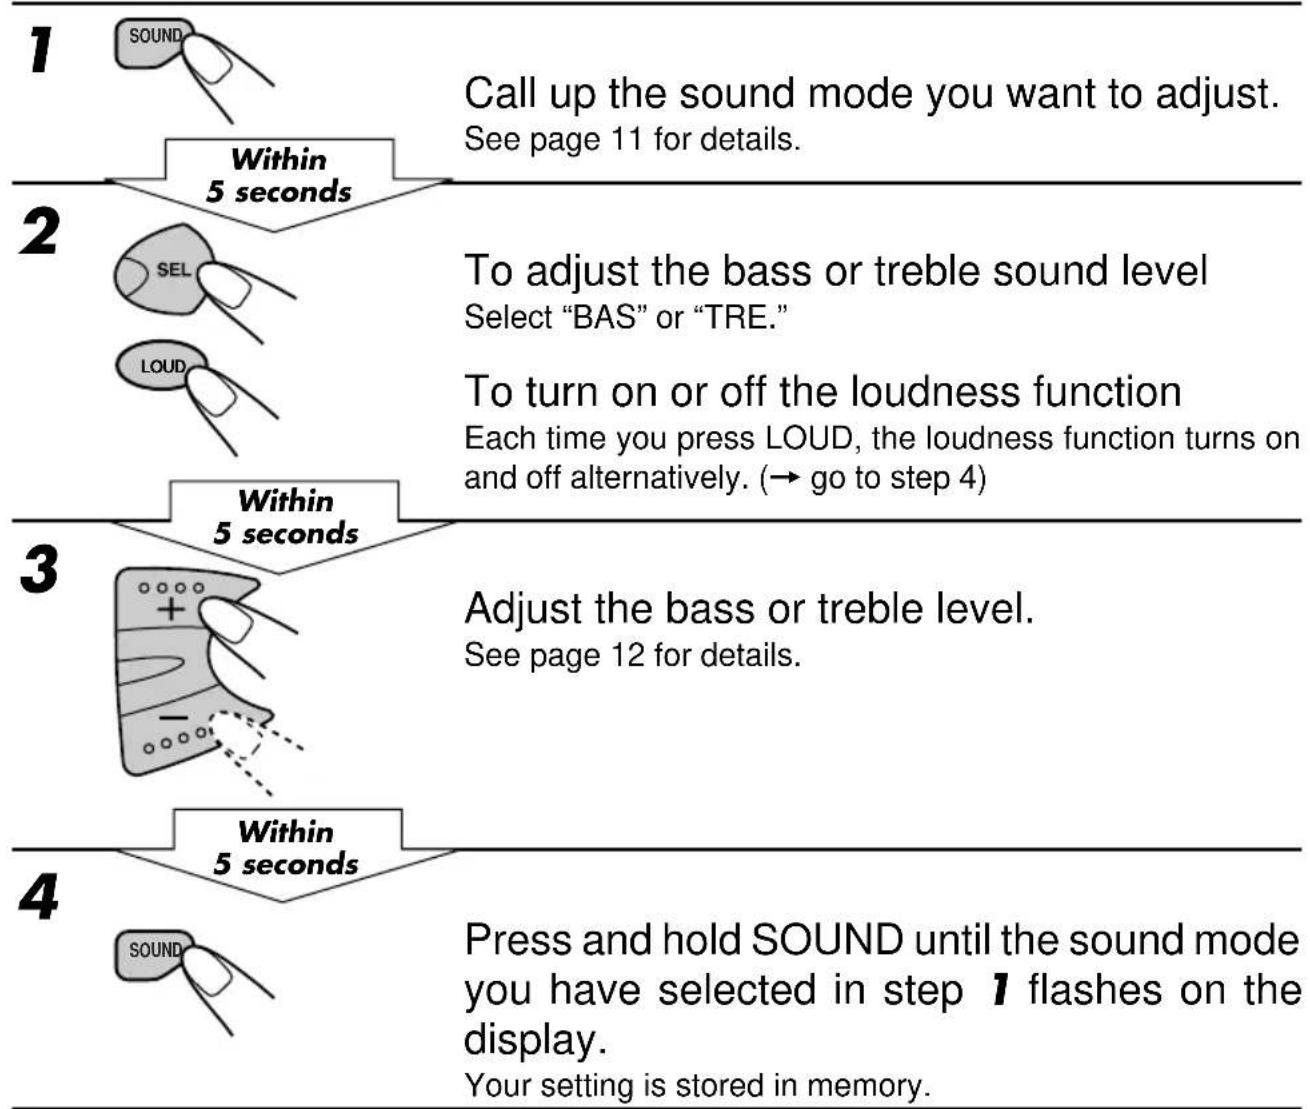
flowchart
graph TD
    A["1 SOUND"] --> B["2 Within 5 seconds"]
    B --> C["3 Within 5 seconds"]
    C --> D["4 SOUND"]
    style A fill:#f9f,stroke:#333
    style B fill:#ccf,stroke:#333
    style C fill:#cfc,stroke:#333
    style D fill:#fcc,stroke:#333
5 Repeat the same procedure to store other settings.
To reset to the factory settings
Repeat the same procedure and reassign the preset values listed in the table on page 11.
Setting the clock

Press and hold the button for more than 2 seconds.
"CLOCK H" or "CLOCK M" appears on the display.
2

Set the hour.
- Select "CLOCK H" if not shown on the display.

- Adjust the hour.
3

Set the minute.
- Select "CLOCK M."

- Adjust the minute.
4

Finish the setting.
To check the current clock time (changing the display mode)
Press DISP repeatedly. Each time you press the button, the display mode changes as follows.
| During tuner operation:Frequency←→ Clock | During tape operation:Play mode←→ Clock |
Detaching the control panel
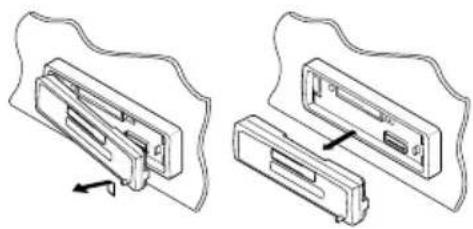
You can detach the control panel when leaving the car.
When detaching or attaching the control panel, be careful not to damage the connectors on the back of the control panel and on the panel holder.
How to detach the control panel
Before detaching the control panel, be sure to turn off the power.
1
Unlock the control panel.
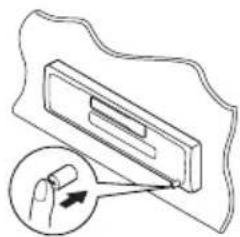
natural_image
Diagram of a mechanical component with an arrow indicating force application (no text or symbols present)2
Lift and pull the control panel out of the unit.
natural_image
Technical line drawing showing two views of a mechanical component with arrows indicating direction (no text or symbols)3
Put the detached control panel into the provided case.

natural_image
Technical line drawing of a mechanical component with an open lid and internal slots, showing rotational motion (no text or symbols)How to attach the control panel
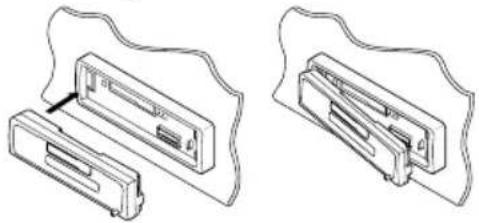
1
Insert the left side of the control panel into the groove on the panel holder.
natural_image
Technical line drawing of two mechanical components with no visible text or symbols2
Press the right side of the control panel to fix it to the panel holder.

natural_image
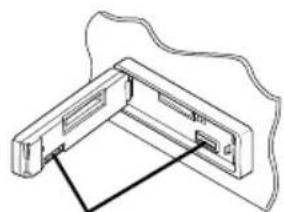
Technical line drawing of a mechanical component with no visible text or symbolsNote on cleaning the connectors:
If you frequently detach the control panel, the connectors will deteriorate.
To minimize this possibility, periodically wipe the connectors with a cotton swab or cloth moistened with alcohol, being careful not to damage the connectors.
natural_image
Technical line drawing of a mechanical component with no visible text or symbolsConnectors
To extend the lifetime of the unit
This unit requires very little attention, but you will be able to extend the life of the unit if you follow the instructions below.
To clean the heads

- Clean the heads after every 10 hours of use using a wet-type head cleaning tape (available at an audio store). When the head becomes dirty, you may realize the following symptoms:
– Sound quality is reduced.
– Sound level decreases.
- Sound drops out.
- Do not play dirty or dusty tapes.
- Do not touch the highly-polished head with any metallic or magnetic tools.
To keep the tape clean

natural_image
Illustration of a sun shining on a cassette tape, with no text or symbols present.• Always store the tapes to their storage cases after use.
- Do not store tapes in the following places:
- Subject to direct sunlight
- With high humidity
- At extremely hot temperatures
CAUTIONS:
- Do not play the tapes with peeling labels; otherwise, they can damage the unit.
- Tighten tapes to remove slack since loose tape may become entangled with the mechanism.
- Do not leave a cassette in the cassette compartment after use, as the tape may become slack.
How to reset your unit
Press and hold both the SEL (Select) and ⏻/I/ATT (Standby/On/ATT) buttons at the same time for several seconds.
This will reset the built-in microcomputer.
NOTE: Your preset adjustments — such as preset channels or sound adjustments — will also be erased.

What appears to be trouble is not always serious. Check the following points before calling a service center.
| Symptoms | Causes | Remedies |
| ·A cassette tape cannot be inserted. | You have tried to insert a cassette in the wrong way. | Insert the cassette with the exposed tape facing right. |
| ·Cassette tapes become hot. | This is not a malfunction. | —— |
| ·Tape sound is at very low level and sound quality is degraded. | The tape head is dirty. | Clean it with a head cleaning tape. |
| ·Sound is sometimes interrupted. | Connections are not good. | Check the cords and connections. |
| ·Sound cannot be heard from the speakers. | The volume control is turned to the minimum level. | Adjust it to the optimum level. |
| Connections are incorrect. | Check the cords and connections. | |
| ·Static noise while listening to the radio. | The antenna is not connected firmly. | Connect the antenna firmly. |
| ·The unit does not work at all. | The built-in microcomputer may function incorrectly due to noise, etc. | While holding SEL, press Ⓒ/1/ATT for more than 2 seconds to reset the unit. (The clock setting and preset stations stored in memory are erased.) (See page 16.) |
AUDIO AMPLIFIER SECTION
Maximum Power Output:
Front: 40 watts per channel
Rear: 40 watts per channel
Continuous Power Output (RMS):
Front: 16 watts per channel into 4 Ω, 40 Hz to 20 000 Hz at no more than 0.8% total harmonic distortion.
Rear: 16 watts per channel into 4 Ω, 40 Hz to 20 000 Hz at no more than 0.8% total harmonic distortion.
Load Impedance: 4 Ω (4 Ω to 8 Ω allowance)
Tone Control Range
Bass: ±10 dB at 100 Hz
Treble:±10 dB at 10 kHz
Frequency Response: 40 Hz to 20 000 Hz
Signal-to-Noise Ratio: 70 dB
Line-Out Level/Impedance: 1.0 V/20 kΩ load (250 nWb/m)
TUNER SECTION
Frequency Range
FM1/FM2:87.5 MHz to 108.0 MHz
FM3: 65 MHz to 74 MHz
AM: (MW)522 kHz to 1 620 kHz (LW) 144 kHz to 279 kHz
[FM Tuner]
Usable Sensitivity: 11.3 dBf (1.0 μV/75 Ω)
50 dB Quieting Sensitivity: 16.3 dBf (1.8 µ V/75 Ω )
Alternate Channel Selectivity (400 kHz): 65 dB
Frequency Response: 40 Hz to 15 000 Hz
Stereo Separation: 30 dB
Capture Ratio: 2.0 dB
[MW Tuner]
Sensitivity: 20 μV
Selectivity: 35 dB
[LW Tuner]
Sensitivity: 50 μV
CASSETTE DECK SECTION
Wow & Flutter: 0.15% (WRMS)
Fast-Wind Time: 190 sec. (C-60)
Frequency Response: 50 Hz to 14 000 Hz
Signal-to-Noise Ratio: 52 dB
Stereo Separation: 40 dB
GENERAL
Power Requirement
Operating Voltage: DC 14.4 volts (11 volts to 16 volts allowance)
Grounding System: Negative ground
Allowable Working Temperature: 0° C to +40° C
Dimensions (W x H x D)
Installation Size: 182 mm x 52 mm x 150 mm
Panel Size: 188 mm x 58 mm x 14 mm
Mass: 1.3 kg (excluding accessories)
Design and specifications subject to change without notice.
Having TROUBLE with operation?
Please reset your unit
Refer to page of How to reset your unit
- This unit is designed to operate on 12 volts DC, NEGATIVE ground electrical systems.
INSTALLATION (IN-DASH MOUNTING)
- The following illustration shows a typical installation. However, you should make adjustments corresponding to your specific car. If you have any questions or require information regarding installation kits, consult your JVC IN-CAR ENTERTAINMENT dealer or a company supplying kits.
РУССКИЙ
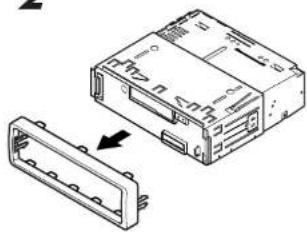
1 Before mounting: Press ▲ (Control Panel Release button) to detach the control panel.
2 Remove the trim plate.
3 Remove the sleeve after disengaging the sleeve locks.
①Stand the unit.
Note: When you stand the unit, be careful not to damage the fuse on the rear.
②Insert the 2 handles between the unit and the sleeve, as illustrated, to disengage the sleeve locks.
③ Remove the sleeve.
Note: Be sure to keep the handles for future use after installing the unit.
4 Install the sleeve into the dashboard.
* After the sleeve is correctly installed into the dashboard, bend the appropriate tabs to hold the sleeve firmly in place, as illustrated.
5 Fix the mounting bolt to the rear of the unit's body and place the rubber cushion over the end of the bolt.
6 Do the required electrical connections.
7 Slide the unit into the sleeve until it is locked.
8 Attach the trim plate so that the projection on the trim plate is fixed to the left side of the unit.
9 Attach the control panel.
natural_image
Diagram of an electronic device with a USB drive and a separate card slot, showing internal components (no text or symbols)2
natural_image
Technical line drawing of an electronic device housing with a separate component shown in view (no text or symbols)Sleeve
Муфта
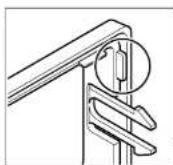
Note: When installing the unit on the mounting bracket, make sure to use the 6 mm-long screws. If longer screws are used, they could damage the unit.
- Before removing the unit, release the rear section.
1 Remove the control panel.
2 Remove the trim plate,
3 Insert the 2 handles into the slots, as shown. Then, while gently pulling the handles away from each other, slide out the unit. (Be sure to keep the handles after installing it.)
1

natural_image
Diagram of a computer drive showing internal components and a separate housing (no text or labels)2

natural_image
Diagram of a device with an open lid and internal components, showing no text or symbolsУдаление устройства
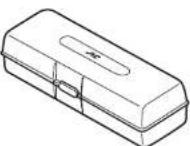
Parts list for installation and connection
The following parts are provided with this unit.
After checking them, please set them correctly.
Hard case Жесткий футляр
• The fuse blows.
^ Are the red and black leads connected correctly?
• Power cannot be turned on.
* Is the yellow lead connected?
• No sound from the speakers.
* Is the speaker output lead short-circuited?
• Sound is distorted.
* Is the speaker output lead grounded?
* Are the “-” terminals of L and R speakers grounded in common?
- Unit becomes hot.
^ Is the speaker output lead grounded?
* Are the “-” terminals of L and R speakers grounded in common?
To prevent short circuits, we recommend that you disconnect the battery's negative terminal and make all electrical connections before installing the unit. If you are not sure how to install this unit correctly, have it installed by a qualified technician.
Note:
This unit is designed to operate on 12 volts DC, NEGATIVE ground electrical systems. If your vehicle does not have this system, a voltage inverter is required, which can be purchased at JVC IN-CAR ENTERTAINMENT dealers.
- Replace the fuse with one of the specified rating. If the fuse blows frequently, consult your JVC IN-CAR ENTERTAINMENT dealer.
- If noise is a problem...
This unit incorporates a noise filter in the power circuit. However, with some vehicles, clicking or other unwanted noise may occur. If this happens, connect the unit's rear ground terminal (See connection diagram below.) to the car's chassis using shorter and thicker cords, such as copper braiding or gauge wire. If noise still persists, consult your JVC IN-CAR ENTERTAINMENT dealer.
- Maximum input of the speakers should be more than 40 watts at the rear and 40 watts at the front, with an impedance of 4 to 8 ohms.
- Be sure to ground this unit to the car's chassis.
- The heat sink becomes very hot after use. Be careful not to touch it when removing this unit.
РУССКИЙ
A If your car is equipped with the ISO connector
For some VW/Audi or Opel (Vauxhall) automobile
You may need to modify the wiring of the supplied power cord as illustrated.
PRECAUTIONS on power supply and speaker connections:
- DO NOT connect the speaker leads of the power cord to the car battery; otherwise, the unit will be seriously damaged.
- Connect the black lead (ground), yellow lead (to car battery, constant 12V), and red lead (to an accessory terminal) correctly.
- BEFORE connecting the speaker leads of the power cord to the speakers, check the speaker wiring in your car.
- If the speaker wiring in your car is as illustrated in Fig. 1 and Fig. 2 below, DO NOT connect the unit using that original speaker wiring. If you do, the unit will be seriously damaged.
Redo the speaker wiring so that you can connect the unit to the speakers as illustrated in Fig. 3.
If the speaker wiring in your car is as illustrated in Fig. 3, you can connect the unit using the original speaker wiring in your car.
- If you are not sure of the speaker wiring of your car, consult your car dealer.

Fig. 1
Рисунок 1
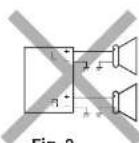
Fig. 2
Рисунок 2

Fig. 3
Рисунок 3
Twist the core wires when connecting.
flowchart
graph LR
    A["Hand holding pen"] --> B["Arrow pointing to pencil tip"]
    B --> C["Arrow pointing to paper clip"]
    C --> D["Arrow pointing to pen tip"]
Before connecting: Check the wiring in the vehicle carefully not to fall in connecting this unit. Incorrect connection may cause a serious damage to this unit.
1 Cut the ISO connector.
2 Connect the colored leads of the power cord to the car battery, speakers and power aerial (if any) in the following sequence.
①Black:ground
② Yellow: to car battery (constant 12V)
③Red: to an accessory terminal
④Blue with white stripe: to power aerial (200mA max.)
⑤ Others: to speakers.
3 Connect the aerial cord.
4 Finally connect the wiring harness to the unit.
Since this unit has line-out terminals, an amplifier and other equipment can be used to upgrade your car stereo system.
- Connect the remote lead (blue with white stripe) to the remote lead of the other equipment so that it can be supplied the power through this unit.
- For amplifier only: Connect this unit's line-out terminals to the amplifier's line-in terminals.


- CONTENTS
- BASIC OPERATIONS .... 3
- RADIO OPERATIONS.... 4
- TAPE OPERATIONS 10
- SOUND ADJUSTMENTS 11
- OTHER MAIN FUNCTIONS 14
- MAINTENANCE 16
- TROUBLESHOOTING 17
- SPECIFICATIONS 18
- BEFORE USE
- Note:
- 1
- Turn on the power.
- Notes on One-Touch Operation:
- 2
- Play the source.
- 3
- Adjust the volume.
- 4
- To drop the volume in a moment
- To turn off the power
- Listening to the radio
- Note on One-Touch Operation:
- To tune in a particular frequency manually:
- Storing stations in memory
- FM station automatic preset: SSM
- Manual preset
- Notes:
- Storing your favorite stations into the one-touch operation button (EX-extra)
- Tuning into a preset station
- To tune in the favorite station
- Other convenient tuner functions
- Scanning broadcast stations
- Selecting FM reception sound
- Listening to a tape
- To stop play and eject the cassette
- To fast-wind a tape
- Turning on/off the loudness function
- Selecting preset sound modes
- Adjusting the sound
- Adjust the level.
- Storing your own sound adjustments
- To reset to the factory settings
- Setting the clock
- To check the current clock time (changing the display mode)
- Detaching the control panel
- How to detach the control panel
- How to attach the control panel
- Note on cleaning the connectors:
- To extend the lifetime of the unit
- To clean the heads
- To keep the tape clean
- CAUTIONS:
- How to reset your unit
- AUDIO AMPLIFIER SECTION
- TUNER SECTION
- [FM Tuner]
- [MW Tuner]
- [LW Tuner]
- CASSETTE DECK SECTION
- GENERAL
- Having TROUBLE with operation?
- Please reset your unit
- INSTALLATION (IN-DASH MOUNTING)
- РУССКИЙ
- Удаление устройства
- Parts list for installation and connection
- A If your car is equipped with the ISO connector
- For some VW/Audi or Opel (Vauxhall) automobile
- PRECAUTIONS on power supply and speaker connections:
Brand : JVC
Model : KS-F315
Category : Radio