
GeoVision 5050BT Navitel - Gps PRESTIGIO - Free user manual and instructions
Find the device manual for free GeoVision 5050BT Navitel PRESTIGIO in PDF.


| Product Type | Portable GPS Navigator |
| Brand | Prestigio |
| Model | GeoVision 5050BT Navitel |
| Display Size | 5.0 inches |
| Display Resolution | 480 x 272 pixels |
| Touchscreen | Yes, resistive |
| Preloaded Maps | Navitel (regional) |
| GPS Chipset | SiRF Atlas V or equivalent |
| Built-in Speaker | Yes |
| Bluetooth | Yes (hands-free calling) |
| FM Transmitter | Yes |
| Battery Type | Lithium-ion rechargeable |
| Battery Capacity | 1100 mAh |
| Power Supply | 12/24V car charger, USB |
| Dimensions (W x H x D) | 135 x 85 x 15 mm |
| Weight | 180 g |
| Operating Temperature | 0°C to 45°C |
| Care & Cleaning | Wipe with a soft dry cloth; avoid liquids |
| Safety | Use only approved charger; do not disassemble |
| Spare Parts & Repairability | Contact Prestigio support; battery and charger available |
| General Information | Includes mount, car charger, USB cable, Navitel maps |
Frequently Asked Questions - GeoVision 5050BT Navitel PRESTIGIO
User questions about GeoVision 5050BT Navitel PRESTIGIO
0 question about this device. Answer the ones you know or ask your own.
Ask a new question about this device
Download the instructions for your Gps in PDF format for free! Find your manual GeoVision 5050BT Navitel - PRESTIGIO and take your electronic device back in hand. On this page are published all the documents necessary for the use of your device. GeoVision 5050BT Navitel by PRESTIGIO.
USER MANUAL GeoVision 5050BT Navitel PRESTIGIO
Important Safety Instructions
CAUTION
RISK OF ELECTRIC SHOCK DO NOT OPEN!


The exclamation point within an equilateral triangle is intended to alert the user to the presence of important operating and maintenance (servicing) instructions in the literature accompanying the appliance.
CAUTION
- To reduce the risk of electric shock, do not remove the cover (or back). No user-serviceable parts inside. Refer servicing to qualified service personnel.
- The manufacturer should not hold responsibility for the damage caused by any substitutions and modifications of the product without authorization from the manufacturer or authorized unit
WARNING
The device should not be exposed to dripping or splashing and no objects filled with liquids should be placed on the device.
To prevent the GPS from being damaged, be sure to keep the GPS out of direct sunlight or heat. Maintain well-ventilated conditions around the unit to avoid overheating.
Accessories
Accessories List
| ITEM | NAME | |
| Car Charger 1 | ||
| Mounting Cradle 1 | ||
| USB Cable 1 | ||
| Stylus Pen 1 | ||
| Driver/Documentation CD 1 | ||
| User Manual 1 | ||
| Warranty Card | 1 |
View of Main Unit
Front and Side View
2
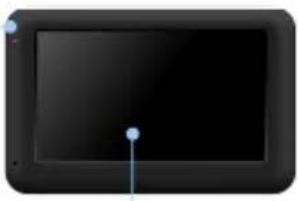
natural_image
Black rectangular electronic device with a blue indicator light and two small dots on the screen (no text or symbols visible)1

1. LCD Touch Screen
Tap the screen with touch pen or finger to select menu commands or to enter information.
2. Battery Status Indicator
The indicator glows in bright amber color when battery is fully charged and in red color when charging.
3. Headphone Port
Connects to stereo headphones or headsets.
4. microSD Slot
Receives microSD memory card for data access or memory expansion.
5. Micro-USB Port
Connect to USB Cable for data access or battery charging.
Device Connection
Rear and Top View

1. Speaker
Emits sound, voice or music.
2. Stylus pen
3. Reset Button
Press to reset the device.
4. Power Button
Press to power ON/OFF device.
EN-2
Device Connections
Inserting microSD Card
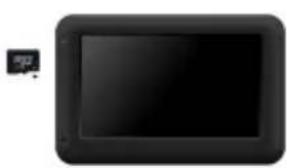
natural_image
Black rectangular electronic device with a small icon on the left (no visible text or symbols)- To insert a microSD card, place connector towards device and card label towards the front side of the device.
- To remove a microSD card, gently press the edge of the card to release the safety lock and pull the card out of the slot.

NOTE:
Please always make sure that no application is accessing the microSD card before extraction.
Connecting to External USB Device (Charging)

natural_image
Black rectangular electronic device with a small icon on the left side (no text or symbols visible)- Insert the mini USB connector into the appropriate mini USB port.
- Insert the other USB connector into the USB port on PC to start charging.
Cautions on Battery Charging
Connecting to Earphones
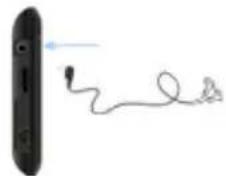
natural_image
Black rectangular device with a blue arrow pointing to a white cable or wire (no text or symbols visible)- Insert earphone jack (earphones not included) into the appropriate earphone port to switch audio output from device speaker to earphone.

NOTE:
High volume level is a potential risk to your hearing. Please turn down the volume before connecting the earphone and gradually turn up the volume to a comfortable level.
Connecting to Car Charger
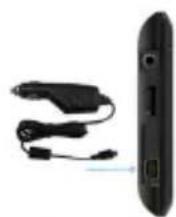
- Insert USB connector into the appropriate USB port.
- Insert car charger connector into vehicle 12V accessory/cigarette socket to start charging.

NOTE:
Please connect the car charger to vehicle 12V accessory/cigarette socket after vehicle engine is started to protect the device from sudden surges in current.
Cautions on Battery Charging
About Rechargeable Battery
The device is equipped with a built-in rechargeable battery. Please fully charge the battery (for at least 8 hours) before initial use. The battery status indicator glows in red color when charging, and turns green color when the battery is full. Charging time is approximately 2 hours.
Working conditions and precautions for the rechargeable battery
● Device with new batteries should be fully charged before initial use.
- Battery should only be used and charged when temperatures are between 0° \~ 37°C.
- It is not necessary to start charging the device before the battery is fully discharged.

NOTE:
Please connect the car charger to vehicle 12V accessory/cigarette socket after vehicle engine is started to protect the device from sudden surges in current.
Using Mounting Cradle
Device Mounting Procedures
The device can be securely mounted on vehicle dashboard or windshield with the mounting cradle included. Please follow procedures below to install the mounting cradle:
- Select an appropriate location on windshield or dashboard where the device and mounting cradle will not obstruct driver field of vision.
- Please also make sure that the device has a clear view of sky to attain best GPS reception.

natural_image
Black rectangular device with a screen and attached antenna, labeled 1, 2, and 3 (no visible text or symbols on the device itself)- Place the device on the bracket with the bottom positioned on the appropriate socket as illustrated by Arrow 1.
- Push on the top edge as illustrated by Arrow 2 to securely install device onto the cradle.
- Lift the suction cup lever and press the suction cup at desired location.
- Press down the suction cup lever as illustrated by Arrow 3 to secure the mounting cradle on the surface.
- Rotate the knob to adjust device to desired viewing angle.
To Dismount Device
- Push the tap on top of the mounting cradle to release the device.
- Lift the suction cup lever to easily remove the suction cup from windshield or dashboard.
Getting Started
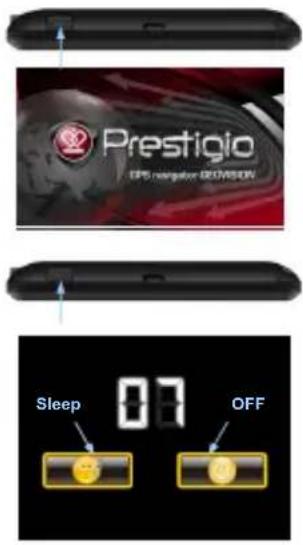
- Press and hold Power Button to turn on the device.
- Shortly after the loading screen is shown, the main menu will be displayed.
- Tap the corresponding buttons with touch pen included to navigate various functions.
- Press and hold Power Button to turn off the device or to allow the device to enter sleep mode.
- Tap Sleep icon to enter sleeping mode or OFF icon to complete turn off the device.
Bluetooth Function Main Menu
Bluetooth function (optional)
The following is shown how to select, switch on/off the Bluetooth function
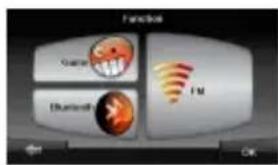

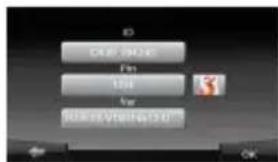
- Tap on Function icon on the main menu.
- Tap on Bluetooth icon to start using Bluetooth function.
- Tap on ON/OFF icon to enable/disable Bluetooth function.
- Tap Info icon to review Bluetooth information.
- Tap on 3 to reset a new PIN code. The default setting is 1234.
Bluetooth Connection
How to operate the Bluetooth function.
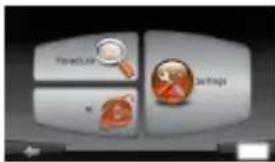
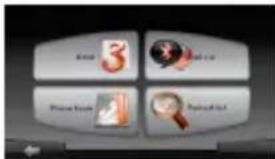

- Tap on DUN icon or HF icon on the main menu.
- Tap on Paired List icon to start pairing with mobile phone device with GPRS function.
- Please make sure Bluetooth function on mobile phone is detectable by other devices.
- Tap on to start searching process.
- Mobile phone name desired for connection will be displayed on the list when search is completed.
- Tap on the mobile phone name and tap on to establish connection.
- Enter PIN code 1234 when PIN number is required on mobile phone device.
- Tap on to disconnect current Bluetooth connection.
- Select mobile phone name from Paired List and tap on to re-connect from previously connected mobile phone.
- Select mobile phone name from Paired List and tap on remove it from the list.
Hands Free Function


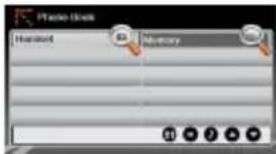
- Tap on HF icon on the main menu.
NOTE:
Please refer to Bluetooth Connection section before connecting by Hands Free function. - Tap on Dial icon to make phone calls.
- Tap on digit buttons and tap on to start dialing.
- Tap on to answer a call if it is on standby.
- Tap on to end call.
- Tap or to switch the call to mobile phone or switch it back to device.
- Tap on 3 to show dialing keypad to dial more numbers.
- Tap on Phone Book icon to view phonebook entries.
- Tap on to browse phonebook entries stored in SIM card.
- Tap ▲/▼ to scroll pages up/down
- Select a phonebook entry and tap to make the call.
- Select a phonebook entry and tap to delete it.
Hands Free Function

- Tap on Calls List icon to review call history.
- Tap 🔒 to view Dialed Call list, Received Call list, and Missed Call list.
- Tap scroll pages up/down.
- Select a phonebook entry and tap to make the call.
- Select a phonebook entry and tap to delete it.
FM Function
FM function (optional)


- Tap on Function icon on the main menu.
- Tap on FM icon to start using Bluetooth function.
- Tap on — / to tune FM frequency down/up.
- Tap on to open the selected frequency for broadcast.
- Tap on save to save current FM station.
- Tap on to cancel settings and exit.
Bluetooth Connection

No. Name Function
| 1 Sound Sound menu opens by pressing this button | ||
| 2 Compass | Context menu opens by pressing this button. In this menu switches the orientation of the map («North up» - lock icon is next to the compass, «Rotate in accordance with the movement» - route is next to the compass), the type of card (Flat view «2D» and the Panoramic view of the «3D») and the skins («Night», «Day», «Auto»). When driving the compass always points to the North. | |
| 3 | Information panel | A sign of the upcoming maneuver. There are various turns, distance to the next maneuver in meters or kilometers, etc. on a gray background. Clicking on the sign stops the route guidance and more route options. |
| 4 | Information panel | The estimated total time in a way, the total length of the route, time of arrival at the final point of the route. |
| 5 Route The active route. | ||
| 6 GPS-cursor Your location indicator. | ||
| 7 | Menu | Main menu opens by pressing this button. |
EN-8
Program interface
No. Name Function
| 8 | Progress-bar | Bar is filled in as you approach the place of maneuver. |
| 9 | Traffic lane | Displays the traffic lanes with valid maneuvers at the next intersection. |
| 10 | Information panel | Shows the name of the street you are currently driving along. Available only if GPS/GLONASS connection is established. If there is no street name, the direction will be shown. |
| 11 Scale button Zoom out. | ||
| 12 Scale button Zoom in. | ||
| 13 Navitel.Events * Navitel.Events button | ||
| 14 | Speed limit and camera | In excess of the established speed displays the speed limit on that road section.If warning of the cameras turned on in the settings, then when approaching the camera distance to it displays. |
| 15 | Battery | Icon shows the level of battery charge. Press it to see the remaining memory. |
| 16 | GPS | GPS/GLONASS connection icon. If the indicator is grey — receiver is disabled, red — switched on, but the connection is not established, yellow - poor connection, green – connection established. There is a number of the satellites in the dot. |
| 17 | Navitel.Friends | Pop-up menu to work with Navitel.Friends service. Here you can add friends, see them on map and talk to them. |
| 18 | Route panel | Allows you to see the entire route, your location and traffic jams* on the route directly on the Map page. |
Program interface
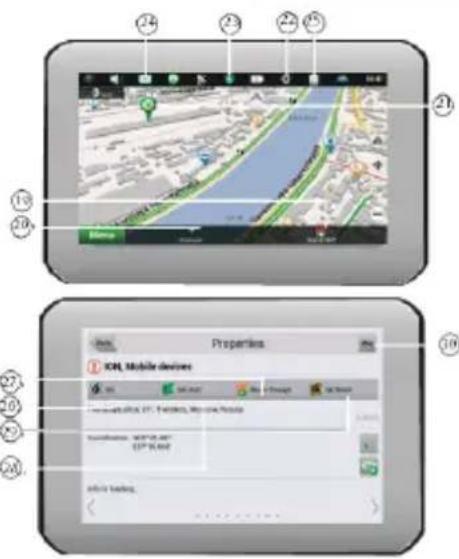
No. Name Function
19 «Save» Saves current marc on map as a waypoint.
20 «Cursor» Shows the point menu.
Program interface
No. Name Function
| 21 | Mark on the map | You can set the mark by taping on the map. You can save this mark as a waypoint, add it to the route or see object's characteristics the mark was set on. |
| 22 | Track record | Track record. Red dot means that the track is recording, grey dot means that the record stopped. |
| 23 | Traffic Jams* | Shows the current traffic jams on a 10-point scale. |
| 24 | Navitel.SMS* | This button is intended to read/send SMS-messages. Near the icon you can see the number of unread messages. |
| 25 | Software update* | Shows available updates. |
| 26 | «Go!» | Marks the current position on the map as the end of the route |
| 27 | «Route through» | Mark becomes the start point on the route. You should turn off your GPS/GLONASS receiver. |
| 28 | «Set start» Mark becomes the middle point of the route. | |
| 29 | «Set finish» | Mark on the map becomes the end of the route. And previous end of the route becomes the middle point. |
| 30 | Map Back to map. | |
* - This function is available only on some devices with GSM or Bluetooth with DUN support. Please, refer to your supplier for more information.
Autorouting
Route to the objects.
To create a route to the object with known address, press the «Menu» button at the lower left corner of the screen [1]. Then select «Find», «By address» [2]. Press the «Select country» button and enter its name [4]. To minimize the keyboard, press the icon at the right top of the screen. Select the required country[5]. Menus «Select city», «Select street» and «Select building» will become active [6]. After choosing the required information press «Go!» to create a route. The route will be shown on the map [8]. You can follow this route or start simulation by pressing the «Demo route» button.

Fig. 1

Fig. 2
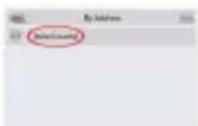
Fig.3

Fig. 4
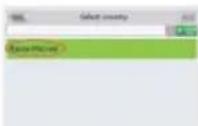
Fig. 5
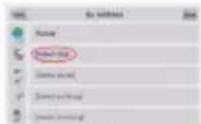
Fig. 6

Fig. 7
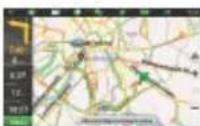
Fig. 8

Fig.9
EN -10
Autorouting
Route to the selected point on the map.
You can set the route to any point on the map. This point will be the end of the route, your current position will become the start of the route. Create a mark on the route by pressing any place on the map[1]. Press the «Cursor», then «Go!»[2]. The route is created[3].

Fig.1

Fig.2

Fig. 3
Route from point to point.
If you want to create a route from point to point you should create a point on the map[1]. Then set this button as a start route by pressing «Cursor» > «Go!». If you didn't turn off your GPS receiver, the system will ask you to do it[3]. The start point will be marked by green flag[4]. Then find the finish point, tap on map and press «Cursor» > «Go!»[5]. The
9route will be created from point to point.
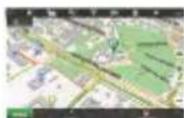
Fig.1

Fig.2

Fig. 3

Fig.4
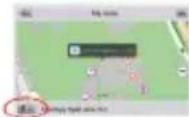
Fig.5

Fig. 6
Additional features
If your device has GSM/GPRS module, you will be able to use some «Navitel Navigator» software features like «Navitel. Traffic Jams» and «Navitel .SMS» services.
Navitel. Traffic

Fig.1

Fig.2
Using this service you can see the information about the traffic jams. To set the service go to «Settings > «Online services» > «Traffic jams». When the service is active the roads are painted in different colors.
Red - traffic jam, Orange - traffic is bad, Yellow - traffic is a bit difficult, Green - normal traffic[1].
Navitel.Friends
Interactive service «Navitel.Friends» allows you to see the location of your friends on a map in real time, to share your geographic location with friends, send messages or route to meet them.
Note:
For more detailed information regarding the functionality of Navitel software, please, refer to the complete user manual on CD, or to www.prestigio.com.
Troubleshooting

NOTE:
Immediately turn off the device and disconnect the power adapter if the device is not working properly. Never try to repair the unit without authorized professionals for it may damage the unit.
PROBLEM
Users can't turn on the unit.
There is no sound.
There is no picture.
The unit can receive signals now but can't then; signals received are not stable.
POSSIBLE CAUSE
| The adaptor doesn't connect well. | Connect the adaptor correctly. |
| The built-in rechargeable battery is weak. | Use the adaptor to supply power or charge the battery. |
| The volume may be turned down or mule. | Turn up the volume or turn on the sound output. |
| The brightness may be turned down. | Adjust the brightness of the LCD. |
| The built-in rechargeable battery is weak. | Use the adaptor to supply power or charge the battery. |
| The unit may be obstructed by veil, such as heat insulation paper. | Remove the veil. |
| Swing of the unit is too great. | Avoid great swing of the unit. |
Technical specifications
| MODEL | GV5050/5050BT | GV4050/4050BT |
| Navigation Software Navitel Navitel | ||
| GPS Chipset Mstar MSB2521A, ARM9500MHz | Mstar MSB2521A,ARM9 500MHz | |
| Channels | 64 | 64 |
| Antenna | Internal | Internal |
| Interface | USB | USB |
| Display size 5" 4.3" | ||
| Resolution | 480x272 | 480x272 |
| Display type TFT, Touch screen TFT, Touch screen | ||
| RAM | 128MB, | DDR3 |
| Flash | 4GB, MLC | 4GB, MLC |
| Expansion slot | Micro SD-Card slot,max 8GB | Micro SD-Card slot,max 8GB |
| Battery type/capacity | Li-poly/1050mAh | Li-poly/950mAh |
| Operating system | Windows CE .NET 6.0 Windows CE .NET 6.0 | |
| Speaker | Built-in, 1W | Built-in, 1W |
| Video formats supported | AVI/ASF/ASX/MPEG/MPG/W,V/MP4/3GP2 | AVI/ASF/ASX/MPEG/MPG/W,V/MP4/3GP2 |
| Audio formats supported | MP3,WMA | MP3,WMA |
| Earphone jack | 3.5mm | 3.5mm |
| Operating Temperature | -10C ~ +50°C | -10C ~ +50°C |
| Operating humidity | 10% to 90%non-condensing | 10% to 90%non-condensing |
128MB,
PC Connection
To establish connection with PC for data access and synchronization, please execute setup file included in the Driver/Documentation CD or download the file from Microsoft website to install:
Microsoft Active Sync® software for operating system Microsoft XP or earlier versions (http://www.microsoft.com/windowsmobile/en-us/downloads/microsoft/activesync-download.mspx)
and/or
Microsoft Mobile Device Center® software for operating system Microsoft Vista (http://www.microsoft.com/windowsmobile/en-us/downloads/microsoft/device-center-download.mspx). DDR3
Please refer to its user manual for more detailed instructions.
Disclaimer
CE As the Prestigio products are constantly updated and improved, your device's software and hardware may have a slightly different appearance or modified functionality than presented in this Quick Start Guide.
Prestigio hereby states that this GPS Navigator complies to basic requirements and another relevant regulations given by the EU directive1999/5/ES. Full version of the declaration of conformity is available on http://www.prestigio.com/compliance
- Important Safety Instructions
- CAUTION
- WARNING
- Accessories
- View of Main Unit
- Front and Side View
- LCD Touch Screen
- Battery Status Indicator
- Headphone Port
- microSD Slot
- Micro-USB Port
- Device Connection
- Rear and Top View
- Speaker
- Stylus pen
- Reset Button
- Power Button
- Device Connections
- Cautions on Battery Charging
- About Rechargeable Battery
- Working conditions and precautions for the rechargeable battery
- NOTE:
- Using Mounting Cradle
- Device Mounting Procedures
- To Dismount Device
- Getting Started
- Bluetooth Function Main Menu
- Bluetooth function (optional)
- Bluetooth Connection
- Hands Free Function
- FM Function
- FM function (optional)
- Program interface
- No. Name Function
- Autorouting
- Route to the objects.
- Route to the selected point on the map.
- Route from point to point.
- Additional features
- Navitel.Friends
- Troubleshooting
- PROBLEM
- POSSIBLE CAUSE
- Technical specifications
- PC Connection
- Disclaimer
Brand : PRESTIGIO
Model : GeoVision 5050BT Navitel
Category : Gps