RDE125 - Vacuum Cleaner CENTURION - Free user manual and instructions
Find the device manual for free RDE125 CENTURION in PDF.


| Product Type | Canister Vacuum Cleaner |
| Brand | Centurion |
| Model | RDE125 |
| Dimensions (L x W x H) | 40 cm x 30 cm x 25 cm |
| Weight | 5 kg |
| Power Consumption | 1200 W |
| Power Cord Length | 6 m |
| Dust Collection Type | Bagged (paper bag) |
| Dust Capacity | 2.5 L |
| Filtration System | HEPA filter (washable) |
| Accessories Included | Crevasse tool, upholstery brush, combination floor head |
| Maintenance | Replace dust bag when full; clean HEPA filter every 3 months |
| Safety Features | Thermal overload protection; automatic shut-off |
| Spare Parts Available | Dust bags, filters, brush rollers, belts |
| Repairability | User-accessible components for belt and filter replacement |
| Noise Level | 78 dB (A) |
| Warranty | 2 years |
Frequently Asked Questions - RDE125 CENTURION
User questions about RDE125 CENTURION
0 question about this device. Answer the ones you know or ask your own.
Ask a new question about this device
Download the instructions for your Vacuum Cleaner in PDF format for free! Find your manual RDE125 - CENTURION and take your electronic device back in hand. On this page are published all the documents necessary for the use of your device. RDE125 by CENTURION.
USER MANUAL RDE125 CENTURION
Bruksanvisning(Swedish/English)
RDE125
INNEHÅLL
SÄKERHET SW-2
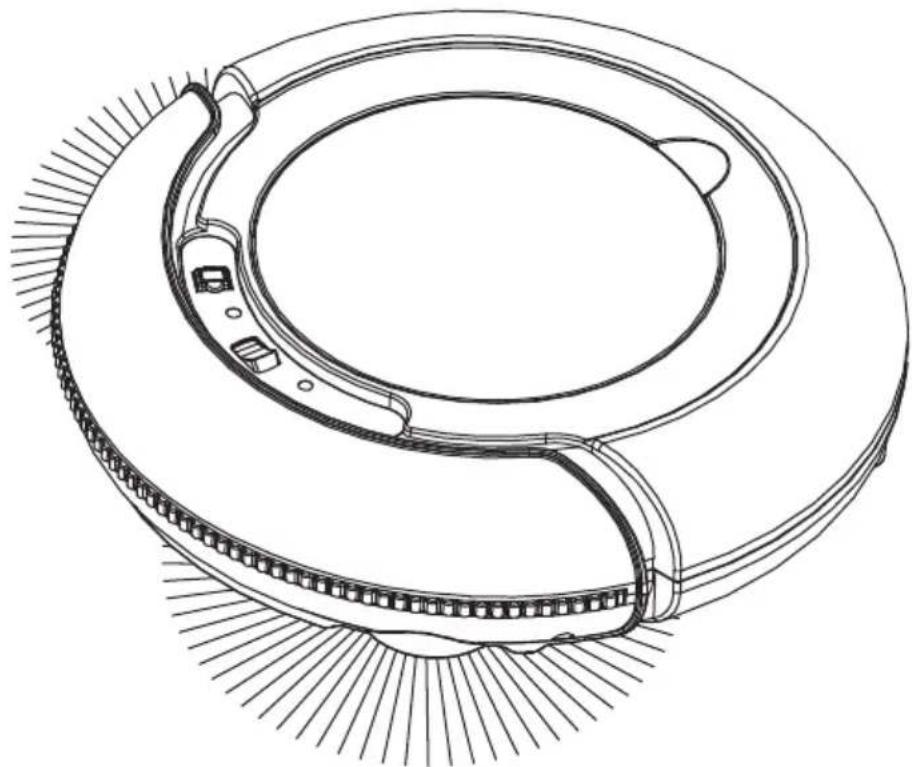
RDE125, 1 st

Laddningsbart batteri, 1 st
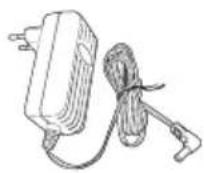
Laddare, 1 st
SKÖTSEL OCH RENGÖRING
* Safety Instructions
* Battery and Recharging Instructions
SPECIAL FEATURES EN-3
MAJOR COMPONENTS AND ATTACHMENTS ---- EN-3
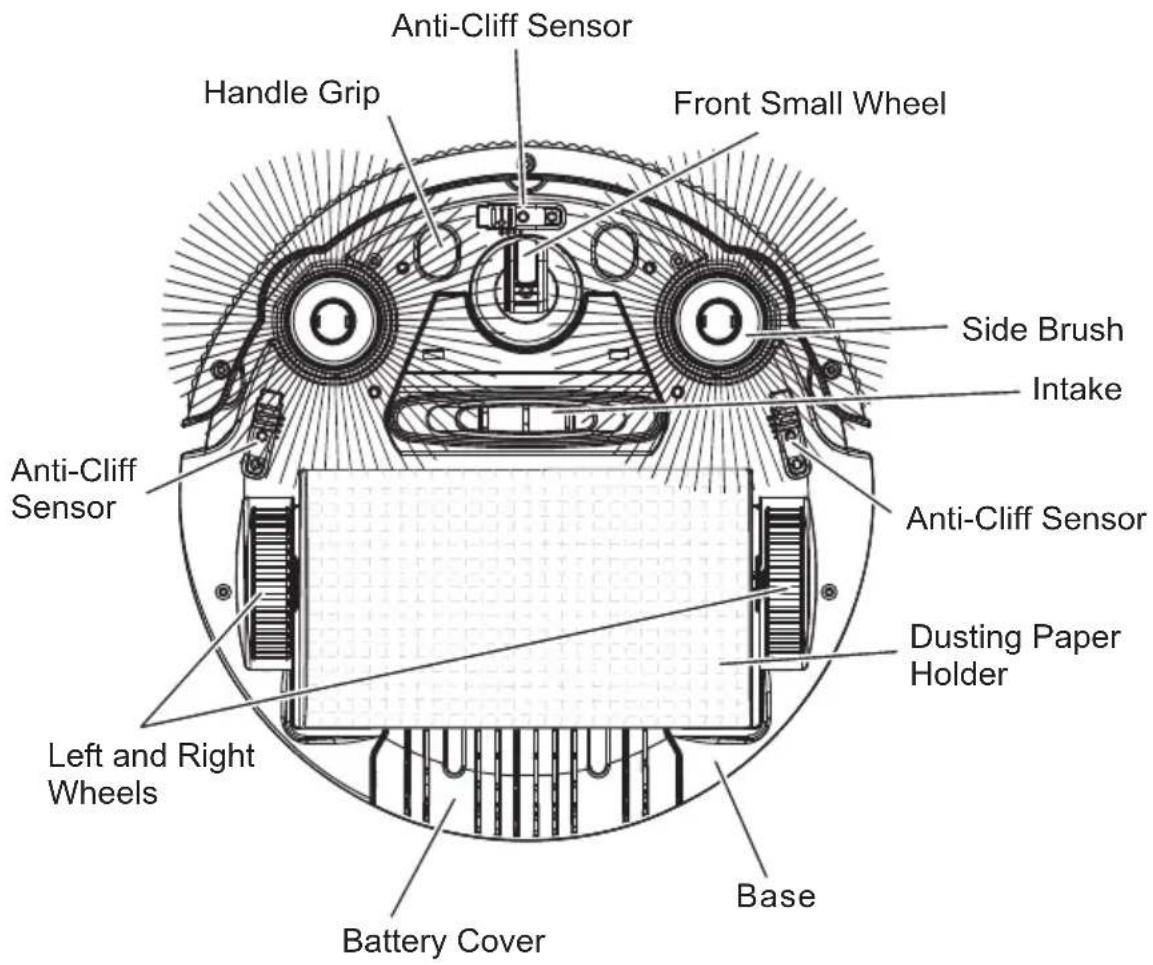
RDE125 OVERVIEW EN-4
BATTERY INSTALLATION AND REMOVAL ---- EN-5
RECHARGING BATTERY EN-6
ADJUSTMENT OF ANTI-CLIFF SENSORS ---- EN-6
GENERAL OPERATION EN-7
* Starting Operation
INSTALLING AND REMOVING SIDE BRUSH ---- EN-7
INSTALLATION GUIDE EN-8
CLEANING AND MAINTENANCE EN-9
* Cleaning Dust Bin
* Cleaning Intake
* Clean Side Burshes
TROUBLESHOOTING EN-13
SAFETY INSTRUCTIONS
Please read the safety instructions in the Operation Manual before operating RDE125 and keep this manual handy for your future reference. Observe the basic safety rules to prevent any occurrence of fire, electric shock and personal injury.
Safety Instructions
- Please read the Operation Manual before operating RDE125.
- Do not operate RDE125 outdoors.
- Before starting RDE125, be sure to install the RDE125 dust bin filter properly in case of any damage of RDE125.
- Do not operate RDE125 on wet floor or in moisture conditions, e.g. Bathroom. Water and moisture could damage the circuit board in RDE125.
- Prior to operate RDE125 remove any loose articles on the floor such as clothes, paper, loose cables, and extension cords as well as making sure to lift curtains and drapes off the floor to avoid any possible accidents. In case of a loose cable is tangled with RDE125, the cable might move around with RDE125 as RDE125 works and topple down the table, chairs, or cabinet and cause property damage.
- Never stand or sit on RDE125. Beware of children or pets while RDE125 is in operation.
- Never use RDE125 to clean up sparking cigarette butts or burning ashes form fireplace.
- Never use RDE125 to clean up combustible or highly volatile liquids such as gasoline.
- While RDE125 is in operation, make sure all doors leading outside are closed.
- During operation, the heat vent should avoid being clogged. If heat vent clogged, RDE125 could be damaged.
- If RDE125 is malfunctioned or damaged by force, do not operate RDE125 regardless the cause. Please call your local dealer for service information.
- Turn off the power and remove the battery from RDE125 if the unit will not in use for a long period of time.
- This appliance is not intended for use by persons (including children) with reduced physical, sensory or mental capabilities, or lack of experience and knowledge, unless they have been given supervision or instruction concerning use of the appliance by a person responsible for their safety.
- Plug must be removed from the socket-outlet before cleaning or maintaining the appliance.
- Automatic battery-operated cleaners shall also be provided with cautionary instructions for room preparation and constant care.
Battery and Recharging Instructions
- The battery is rechargeable. Please use the voltage and current specified on the packing. If you are not sure of the voltage and current of your house, please contact your local power company or a licensed electrician.
- Use only the battery supplied with your RDE125.
- Charging adaptor is for indoors only.
- Use only the charging adaptor supplied with your RDE125.
- Do not recharge the battery if the cable or plug of the battery is damaged.
- Never touch the charger, plug or cable with damped hands.
- If RDE125 requires cleaning, unplug the adaptor, switch off the unit and take out the battery.
- Please take out the battery pack before disposing of the unit.
- Please switch off RDE125 before taking out the battery.
- Please recycle and dispose the waste battery properly.
SPECIAL FEATURES
Congratulations on purchases the RDE125 Mini Vacuum Robot.
This revolution Mini Vacuum Robot is equipped with functions suitable for cleaning up floor surfaces of home and office such as wood, tile, and linoleum. You can also operate this unit with the provided micro fiber cloths to help you clean more effectively. The RDE125 Mini Vacuum Robot is definitely a household helper.
![graph LR A["Random"] --> B["Spiral"] B --> C["Along the wall"] C --> D["Spiral"]](/content/2026/05/1046658/images/90a56621eca3c2c421d29dd2540ce062d87441da3cd8973d151361e09cca977c.jpg)
MAJOR COMPONENTS AND ATTACHMENTS

RDE125 Cleaner x1

Rechargeable Battery x1

Adaptor x1
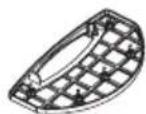
Dust Bin Filter x1

Dusting Paper Holder x1

Dusting Paper x3
Operation Manual x1
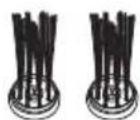
Side Brush x2

BATTERY INSTALLATION AND REMOVAL
- Make sure the power switch of RDE125 is turned off.
- Remove the dusting paper holder.(Fig. 1)
- Open the battery cover(see Fig. 2).
- Insert the battery into the battery reservoir and close the cover.(Fig. 3)
- To remove the battery, please follow step#3 above in reverse.
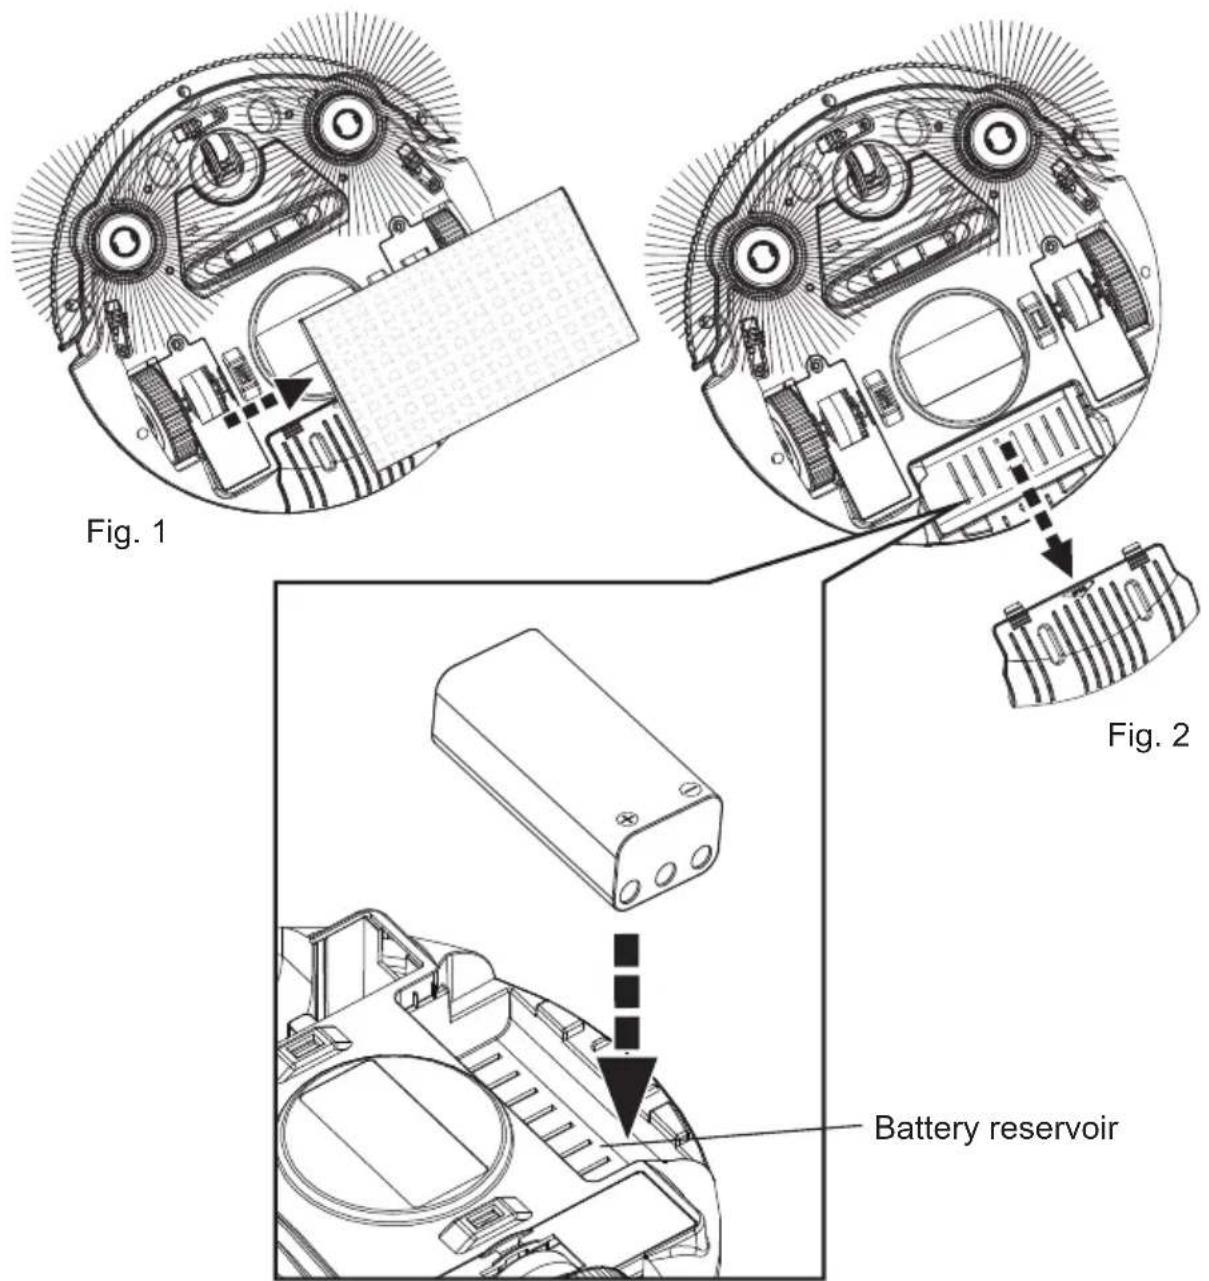
Fig. 3
RECHARGING BATTERY
- To ensure the best performance of the rechargeable battery and lengthen its life span, the battery is best used after fully charged for 4 hours every time.
The charging function will be cut off automatically for continuously charging 4 hours.
-
Before charging, make sure the battery is correctly installed and the power switch has been turned to "OFF" position.
-
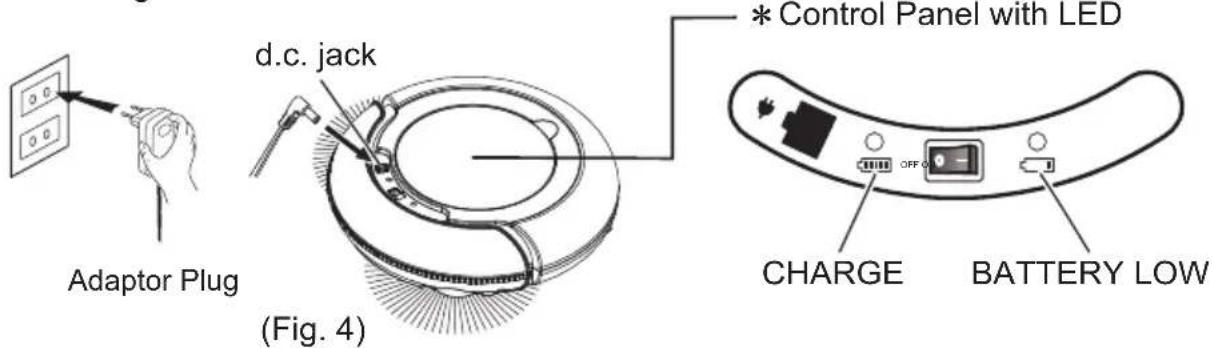
To charge, plug output of the d. c. adaptor into the DC jack plug of the RDE125 and the input into the AC power outlet (Fig. 4).
-
When charging, the "CHARGE" LED indication lamp on the control panel of RDE125 (as below diagram) will flash green, and it will stay green when the battery is fully charged.
-
When the "BATTERY LOW" LED indication lamp on the control panel(as below diagram) will stay in RED.
* If you forget to turn off the power of RDE125 before charging, after the cleaner is fully charged, you have to switch off the cleaner and turn it on again to make it start cleaning.
ADJUSTMENT OF ANTI-CLIFF SENSORS
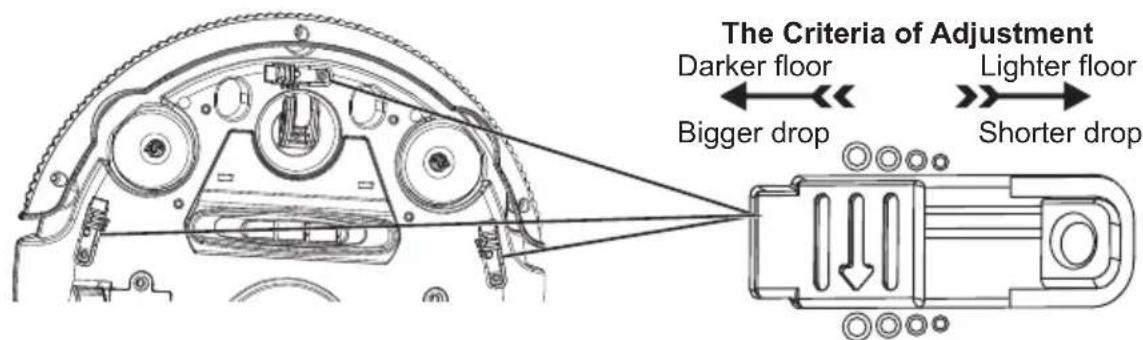
There are three “Anti-Cliff” sensors at the bottom of RDE125 to prevent the unit from falling down stairs. If the distance between the stair and the ground is shorter than usual, please adjust all windows of “Anti-cliff” sensors to “◎” or “◎” or “○” or “.” position to prevent the cleaner from falling down stairs. Please test it before it starts to clean.
*ATTENTION: If the color of the floor is dark (ex. Black), it means that reflectivity of the floor is bad, at this time, you have to open the window to a larger scale.
Please refer to the criteria of adjustment for adjusting the windows.
GENERAL OPERATION
Start Operation
※ Caution: Remove the dusting paper holder & side brush before using on the carpet.
※ This product is not suitable for long-pile carpets.
- Be sure the dust bin filter is installed properly.
- Place the cleaner on place with more free space in the room, and turn on the power.
- When the cleaner runs out of power, the "BATTERY LOW" LED lamp on the unit will be red and the cleaner will automatically stop.
- When the cleaner is not use or prior to recharging, make sure the power switch of RDE125 is in the "OFF" position.
INSTALLING AND REMOVING SIDE BRUSH
To install: Put the brushes directly onto the holder and spread the brush bristle evenly, then press on the cap to fix it. (Fig. 5)
To Remove: Hold the brush bristle and pull upward to remove the brush. (Fig. 6)
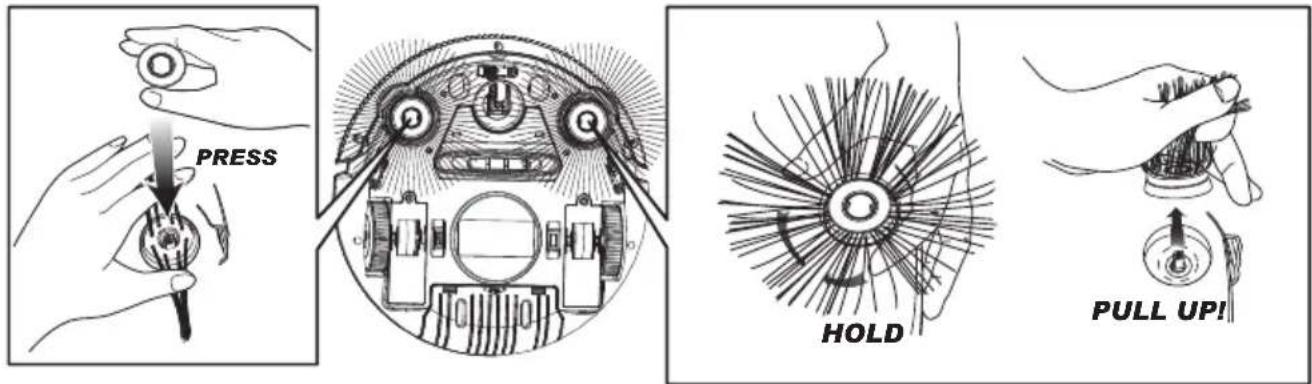
Fig. 5 Fig. 6
INSTALLATION GUIDE
Installing Dusting Paper
- Remove the dusting paper holder following the instruction shown in Fig. 7.
- Flat the dusting paper and put it one floor or table. Then place the holder (the side with 4 stoppers face up) on the paper at the midpoint as shown in Fig. 8.
- Remove 4 stoppers from the holder, fold the hem of dusting paper on two sides back to the holder, and place back 4 stoppers on top of the paper then press firmly to fix the paper onto holder (Fig. 9).
- Then place the dusting paper holder to the bottom of unit by aiming one bolt of holder at the hole (near the big wheel) on cleaner, click the holder on the cleaner, and then do it again for the other side. (Fig. 10)
NOTE:
- Do not use mopping function on the carpet. At the same time you should remove the side brushes to prevent it from damaging the brushes.
- If you don't need to use mopping function, please remove the dusting paper holder from the cleaner (follow the instructions shown in Fig. 7) before you turn it on for cleaning.


Hole for the stopper

Fig. 8
Press the two bolts on the dusting paper holder into the two holes on the bottom of the cleaner.
CLEANING AND MAINTENANCE
Cleaning Dust Bin
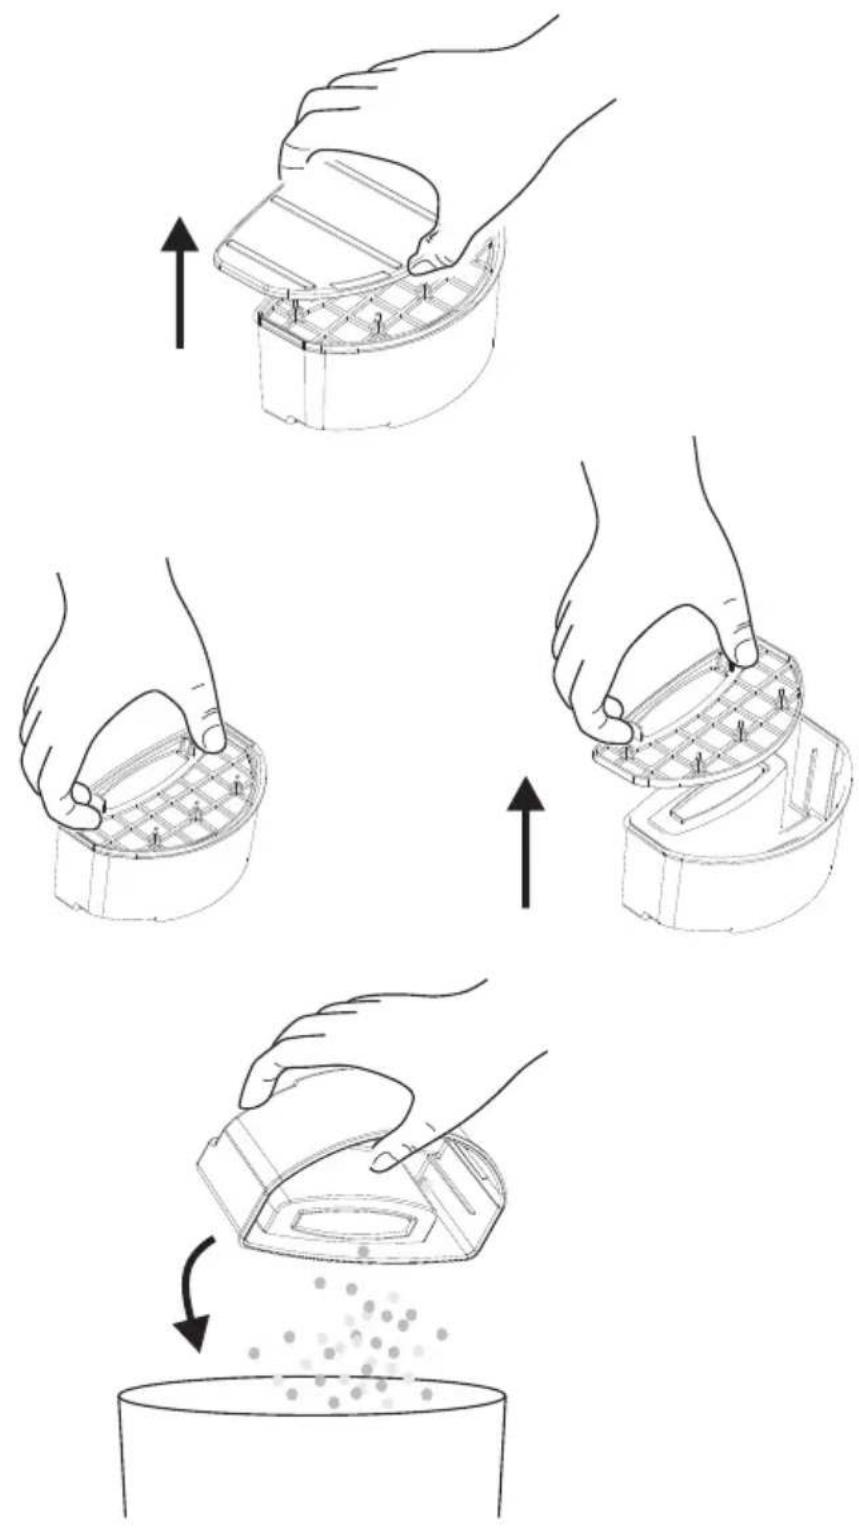
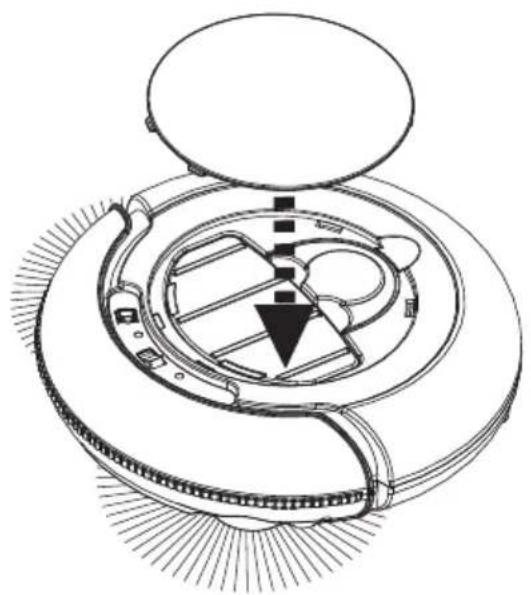
- Left the top cover as shown in diagrams below.
- Take out the dust bin from the cleaner.

CLEANING AND MAINTENANCE
- Open the upper cover of the dust bin.
- Lift up and take out the filter.
- Empty the dust bin.
CLEANING AND MAINTENANCE
- Rinse the dust bin with tap water. It is not necessary to wash every time.
Do not put it into the washing machine to clean it.
-
Periodically clean the filter with a soft bristle brush.
-
Once dry, reinstall the filter and the dust bin lid.
-
Place back the dust bin into the cleaner.
ATTENTION!! Before starting the cleaner, please be sure to install the dust bin filter has properly installed in case any damage occurs.


CLEANING AND MAINTENANCE
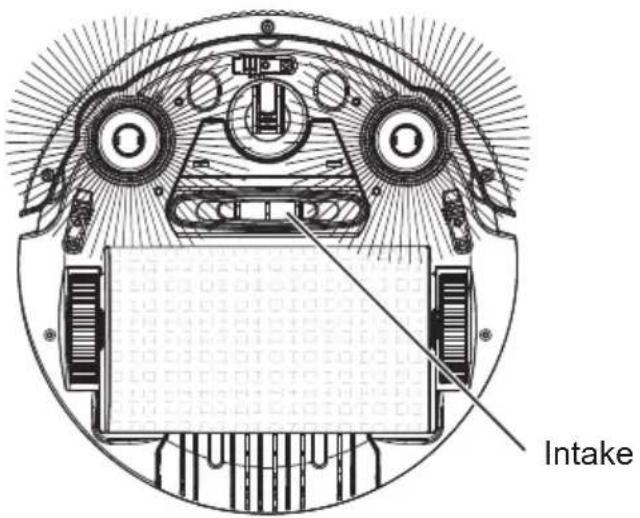
Cleaning Intake
After repeated use, dirt and dust could accumulate around the intake of the RDE125 and might reduce the working efficiency. To ensure the best efficiency and constant airflow, the intake should be cleaned periodically.
Clean Side Brushes
- After being used for a period of time, the brushes need to be replaced for working more effectively.
- Turn off the power, place bottom of the cleaner upward on a flat surface. Hold the brush bristle and pull upward to remove the brush (see diagram below).
- The side brushes can be rinsed and if they become crooked, you can soak them in hot water to make them recover to the original shape. Install the brushes back after cleaning.

| Problem | Possible Cause | Solution | |
| 1 | Red LED stays after power on. | 1. Battery Low condition.2. RDE125 is lifted from floor. | 1. Recharge the battery.2. Place RDE125 back to floor. |
| 2 | Vacuum on but can not collect dirt on hair. | 1. The dust bin is full.2. The filter is not installed correctly. | 1. Clean the dust bin.2. Re-install the filter correctly. |
| 3 | RDE125 is moving backwards after being started. | RDE125 is on the floor in darker color. (it means the reflectivity of floor is bad) | Please adjust all windows of “Anti-cliff” sensors.(Please refer to page 6.) |
| 4 | LED indicators keep blinking GREEN after 4hrs charging. | RDE125 has the protective function to cut off charging after 4 hour, if the LED indicator keep blinking in Green after 4 hours, the power supply might has been cutoff while RDE125 was charging. | RDE125 is operable if the battery has been charged on and off over 4 hours. |
| 5 | The side brush had become crooked, not good to sweep. | Being used for a long time. | If it becomes crooked, you could scald it in hot water to recover it to its original shape. |
| 6 | Cannot start the RDE125. | 1. The battery is not installed properly.2. Battery power is low. | 1. To install the battery correctly, please refer to the Operation Manual for battery installation.2. To have the battery fully charged. (Turn off the cleaner first.) |
| 7 | RDE125 circles around only, cannot go straight. | One of the wires of the wheels might be loosened. | Open the wheel cover and connect the loosen wire of the wheel properly or contact your local dealer for service. |
※ If the solution can not solve the problem, Please contact to your local dealer for service.

This symbol on the product or in the instructions means that your electrical and electronic equipment should be disposed at the end of its life separately from your household waste. There are separate collection systems for recycling in the EU. For more information, please contact the local authority or your retailer where you purchased the product.
- INNEHÅLL
- SÄKERHET SW-2
- SKÖTSEL OCH RENGÖRING
- SPECIAL FEATURES EN-3
- MAJOR COMPONENTS AND ATTACHMENTS ---- EN-3
- RDE125 OVERVIEW EN-4
- BATTERY INSTALLATION AND REMOVAL ---- EN-5
- RECHARGING BATTERY EN-6
- ADJUSTMENT OF ANTI-CLIFF SENSORS ---- EN-6
- GENERAL OPERATION EN-7
- INSTALLING AND REMOVING SIDE BRUSH ---- EN-7
- INSTALLATION GUIDE EN-8
- CLEANING AND MAINTENANCE EN-9
- TROUBLESHOOTING EN-13
- SAFETY INSTRUCTIONS
- BATTERY AND RECHARGING INSTRUCTIONS
- SPECIAL FEATURES
- MAJOR COMPONENTS AND ATTACHMENTS
- BATTERY INSTALLATION AND REMOVAL
- RECHARGING BATTERY
- ADJUSTMENT OF ANTI-CLIFF SENSORS
- GENERAL OPERATION
- START OPERATION
- INSTALLING AND REMOVING SIDE BRUSH
- INSTALLATION GUIDE
- INSTALLING DUSTING PAPER
- NOTE
- CLEANING AND MAINTENANCE
- CLEANING DUST BIN
- CLEANING INTAKE
- CLEAN SIDE BRUSHES
Brand : CENTURION
Model : RDE125
Category : Vacuum Cleaner