IPC-600D - Frying Pan Imarflex - Free user manual and instructions
Find the device manual for free IPC-600D Imarflex in PDF.


| Product Type | Electric Pressure Cooker |
| Brand | Imarflex |
| Model | IPC-600D |
| Rated Voltage | 230 V ~ 60 Hz |
| Power Consumption | 1000 W |
| Max. Rice Capacity | 12 cups |
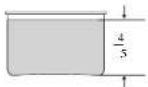
| Max. Food Level | 4/5 of inner pot height |
| Cooking Functions | Rice, Roasting/Cake, Slow Cooking/Congee, Stew, Beef, Soup, Bean, Tendon, Porridge, Fish, Pizza, Baby's Food, Thawing, Frying |
| Display | LED digital display |
| Control Panel | MENU, UP+/DOWN-, PRESET, OFF/KEEP WARM |
| Safety Features | Floating valve, pressure release valve, safety lock, overheating protection |
| Included Accessories | Inner pot, steamer, measuring cup, soup ladle, spatula, dew collector |
| Inner Pot Material | Non-stick metal (estimated) |
| Cleaning & Maintenance | Removable inner pot and cover, washable rubber gasket |
| Usage | Household only |
| Error Codes | E1 (sensor open circuit), E2 (sensor short circuit), E3 (overheating), E4 (signal switch malfunction) |
Frequently Asked Questions - IPC-600D Imarflex
User questions about IPC-600D Imarflex
0 question about this device. Answer the ones you know or ask your own.
Ask a new question about this device
Download the instructions for your Frying Pan in PDF format for free! Find your manual IPC-600D - Imarflex and take your electronic device back in hand. On this page are published all the documents necessary for the use of your device. IPC-600D by Imarflex.
USER MANUAL IPC-600D Imarflex
SPECIFICATION:
MODEL NO. : IPC-600D
RATED VOLTAGE : 230Va.c. 60Hz
POWER CONSUMPTION : 1000 Watts
IMPORTANT SAFEGUARD:
When using electrical appliances, basic safety precautions should always be followed, including the following:
- Read all instructions carefully.
- Do not use the Pressure Cooker next to devices, which react sensitively to magnet (e.g. radios, TV, cassette recorders, etc.).
- Keep curtains, furniture, flammable materials, etc. away from the Pressure Cooker and from the convenience outlet where the Pressure Cooker is plugged.
- Before using the Pressure Cooker, check if the voltage indicated corresponds with the convenience outlet (230Va.c.)
- Do not use any appliance with a damaged cord or plug. If the cord is damaged it should be replaced with the same type and size or bring the Pressure Cooker to the nearest Authorized Service Center.
- Do not use two-way socket with other appliance.
- This appliance is not intended for use by persons (including children) with reduced physical, sensory or mental capabilities, or lack of experience and knowledge, unless they have been given supervision or instruction concerning use of the appliances by person responsible for their safety.
- The amount of water or food added to the inner pot should be determined in line with step 2 in the section "HOW TO USE".
- Do not damage the seal belt or replace it with other rubber belt or tension belt.
- Do not open the lid with force until the floating valve falls down.
- Do not put any weight on the pressure relief valve or replace it with other substitutes.
- Do not heat the inner pot on other thermal sources or have it replaced with other cookers.
- Do not disassemble the unit by yourself or make any replacement with the accessories.
- For household use only, not intended for any business purposes.
REMINDER: Please do not forget to fill-up and send the warranty card.
CIRCUIT DIAGRAM
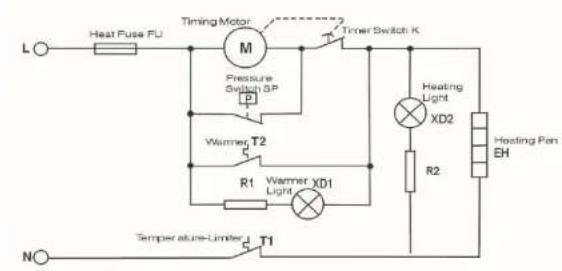
flowchart
graph TD
    L["Power Source L"] --> M["Motor M"]
    M --> T1["Temperature-Limeter T1"]
    T1 --> R1["R1"]
    R1 --> WmterT2["Warmer T2"]
    WmterT2 --> P["Pump Pressure Switch SP"]
    P --> M
    M --> T2["Timer Switch K"]
    T2 --> R2["R2"]
    R2 --> XD2["Heating Light XD2"]
    XD2 --> HeatingPenEH["Heating Pen EH"]
    HeatingPenEH --> R2
    R2 --> WmterXD1["Warmer XD1"]
    WmterXD1 --> T2
    style M fill:#f9f,stroke:#333
    style T1 fill:#ccf,stroke:#333
    style R1 fill:#cfc,stroke:#333
    style XD2 fill:#fcc,stroke:#333
    style R2 fill:#cff,stroke:#333
    style WmterT2 fill:#ffc,stroke:#333
    style P fill:#ffc,stroke:#333
    style WmterXD1 fill:#cfc,stroke:#333
    style R1 fill:#cfc,stroke:#333
    style XD2 fill:#fcc,stroke:#333
    style R2 fill:#cfc,stroke:#333
    style WmterT2 fill:#ffc,stroke:#333
    style P fill:#ffc,stroke:#333
    style WmterXD1 fill:#cfc,stroke:#333
    style R1 fill:#cfc,stroke:#333
    style XD2 fill:#fcc,stroke:#333
    style R2 fill:#cfc,stroke:#334
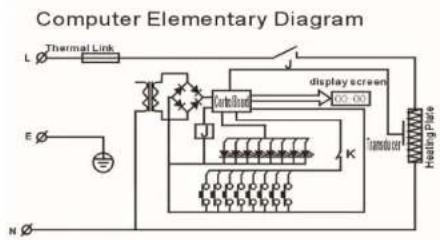
flowchart
graph TD
    A["Thermal Link"] --> B["Coating Board"]
    B --> C["Display Screen"]
    D["Electricity Source E"] --> E["Ground"]
    F["Power Supply N"] --> G["Control Unit K"]
    H["Thermal Control"] --> I["Refrigerator"]
    J["Heating System"] --> K["Refrigerator"]
DESCRIPTION OF PARTS
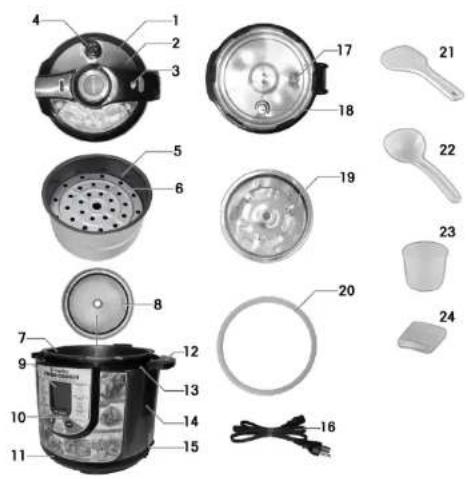
| 1. Cover Handle | 13. Upper Edge |
| 2. Cover | 14. Unit Body |
| 3. Floating Valve | 15. Cord Socket |
| 4. Pressure Release Valve | 16. Cord |
| 5. Inner Pot | 17. Floater |
| 6. Steamer | 18. Filter |
| 7. Inner Body | 19. Cover Plate |
| 8. Cover Plate | 20. Rubber Gasket |
| 9. LCD Display | 21. Spatula |
| 10. Control Panel | 22. Soup Ladle |
| 11. Unit Base | 23. Measuring Cup |
| 12. Unit Handle | 24. Dew Collector |
CONTROL PANEL
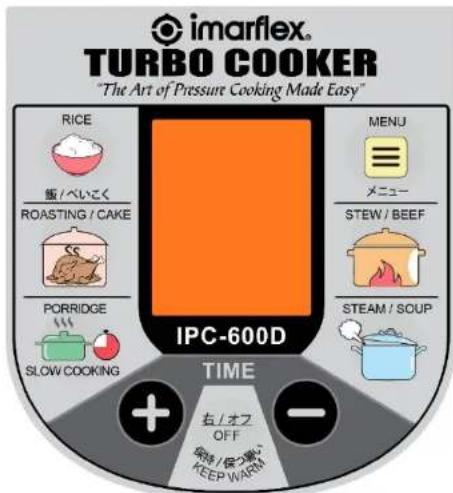
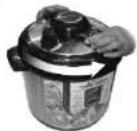
- OPEN THE COVER - Hold the handle firmly with the right hand, slide the cover with the other hand clockwise to the clamping position and then lift it. (See Figure 1).
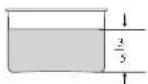
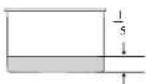
- CAPACITY - The amount of food and water should not exceed 4/5 of the height of inner pot. For food that will expand in water, the level should not exceed 3/5 of the inner pot. The minimum allowable level would be 1/5 of the inner pot. (See Figure 2)
5. How to clean Pressure Release Valve
5.1
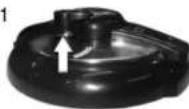
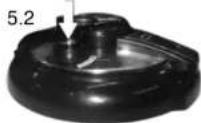
- Lift the Pressure Release Valve and clean the holes with soft brush to ensure smooth flow of steam during the cooking process.
- Push down the Pressure Release Valve.
- Return the Pressure Release Valve to the cover.
6. How to clean Steamer
6.1
6.2
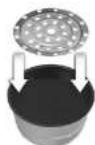
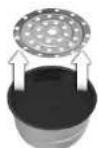
- Lift the steamer attachment in the inner pot and wash it with soap and water. Let it dry.
- Push down the steamer attachment to place it back to the inner pot.
3. How to clean the Due Collector
3.1
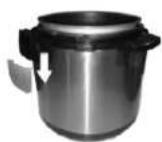
- Slide down the Due Collector and wash it with soap and water.
3.2
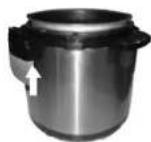
- Slide up and return the Due Collector to the base unit.
4. How to clean the Inner Pot
4.1
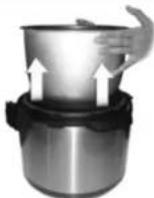
- Lift the Inner Pot and wash it with soap and water.
4.2
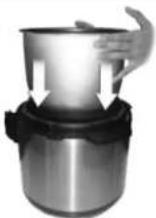
- Return the Inner Pot to the base unit.
2
★ For Rice Cooking, the maximum amount of rice allowed 12 cups. ★ The standard measurement/ratio is one (1) cup of rice to one (1) cup of water, however, the measurement may depend on the type of rice.
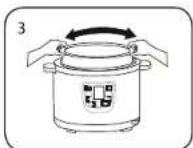
- INNER POT – Wipe the bottom part of the inner pot, put the inner pot inside the unit, turn it slightly from left to right to ensure that the pot is properly fitted into the heater plate, level the rice. (See Figure 3).
- CLOSE THE COVER
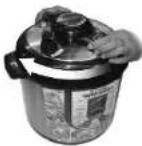
- Make sure that the Rubber Gasket is fitted into the Cover; - Close the Cover and turn the handle counter-clockwise until a clamping sound is heard. (See Figure 4.)
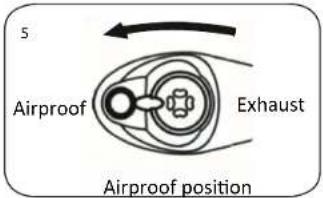
- Make sure that the Pressure Release Valve is in position; slide it to 'Airproof' position and check whether the Floater is also in its proper position. (See Figure 5).
- Plug the unit into the convenience outlet and a Beep sound will be heard and "00:00" will appear in the Display.
7. MENU BUTTON
Press the "MENU" button, the beef function will appear on the screen with the default time of (30 minutes). To see the other functions available in the menu, press the menu button continuously.
Press "RICE", Button, the default time (12 minutes) will appear on the display and will flash 5 times and the cooking process will start. Press "UP+" or "-DOWN" to adjust the cooking time.
2. How to clean the Rubber Gasket
2.1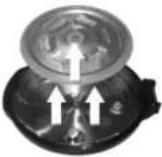 - Remove the Cover Plate from the Cover.- Wash the Cover with soap and water. Let it dry. - Remove the Cover Plate from the Cover.- Wash the Cover with soap and water. Let it dry. | ??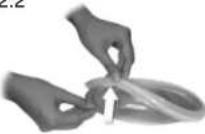 - Detach the Rubber Gasket from the Cover Plate.- Wash the Cover Plate and Rubber Gasket with soap and water. - Detach the Rubber Gasket from the Cover Plate.- Wash the Cover Plate and Rubber Gasket with soap and water. |
2.3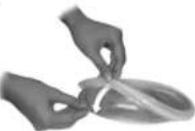 - Return the Cover Plate to the cover. - Return the Cover Plate to the cover. | 2.4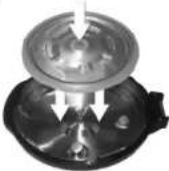 - Return the Cover Plate to the cover. - Return the Cover Plate to the cover. |
CLEANING AND MAINTENANCE
Unplug the unit before cleaning.
- How to clean the Cover
1.1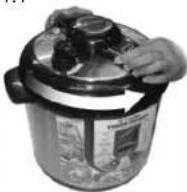 - Hold the Handle firmly, turn it clockwise. - Hold the Handle firmly, turn it clockwise. | 1.2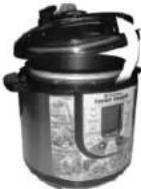 - Lift the Cover. - Lift the Cover. | 1.3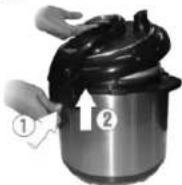 - Push the Cover Release Button (1) and tilt the cover to detach the cover (2).- Clean the Cover, Floating Valve, and Pressure Release Valve and wipe it with towel. - Push the Cover Release Button (1) and tilt the cover to detach the cover (2).- Clean the Cover, Floating Valve, and Pressure Release Valve and wipe it with towel. |
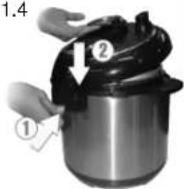 - Push the Cover Release Button (1) and tilt the cover to detach the cover (2). - Push the Cover Release Button (1) and tilt the cover to detach the cover (2). | 1.5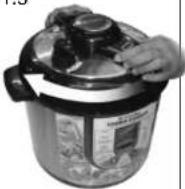 - Hold the Handle firmly, turn it counter clockwise. - Hold the Handle firmly, turn it counter clockwise. |
ROASTING / CAKE
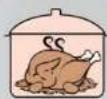
Press "ROASTING/CAKE", Button, the default time (30 minutes) will appear on the display and will flash 5 times and the cooking process will start. Press "UP+" or "-DOWN" to adjust the cooking time.
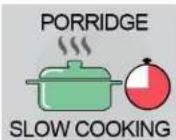
Press "SLOW COOKING/ CONGEE" Button, the default time (25 minutes) will appear on the display and will flash 5 times and the cooking process will start. Press "UP+" or "-DOWN" to adjust the cooking time.
Press "STEW" Button, the default time (30 minutes) will appear on the display and will flash 5 times and the cooking process will start. Press "UP+" or "-DOWN" to adjust the cooking time.
• MORE COOKING FUNCTIONS
(BEEF, SOUP, BEAN, TENDON, PORRIDGE, FISH)
Press "PRESET" Button to select cooking time, the set time will appear on the display and will flash 5 times and the cooking process will start.
- OFF / KEEP WARM
a. When the cooking process is done, 3 beep sounds will be heard..
b. While cooking, press "OFF/KEEP WARM" button to stop the current operation menu and return back to original stage.
c. After plugging the unit, press "OFF/KEEP WARM" Button once, the WARM icon will appear on the Display.
• AFTER COOKING
a. When the cooking process is done, 3 beep sounds will be heard and Warm Function will appear on the Display.
b. Turn the Pressure Release Valve to "EXHAUST" position to release steam until the Safety Lock is in proper position. (See Figure 6).
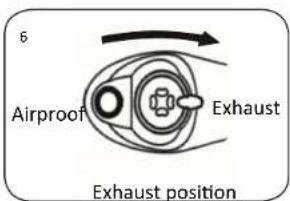
For liquid food (Porridge, Soup and etc.), do not move the Pressure Release Valve to "EXHAUST" position, to avoid liquid to splash out from the vent hole. Wait for the temperature and the Lock to drop down before opening.
a. Unplug the power supply.
b. Hold the handle firmly, turn it clockwise to the clamping position and then lift it. (See Figure 1)
COOKING GUIDE
| COOKING TIME RANGE FUNCTION | DEFAULT TIME (minute/s) | MAXIMUM (minute/s) |
| Rice | 12 | 15 |
| Roasting/ Bake | 30 | 60 |
| Porridge/ Slow Cooking | 20 | 30 |
| Stew/ Beef | 30 | 60 |
| Steam/ Soup | 15 | 30 |
| Pizza | 30 | 99 |
| Bean | 30 | 50 |
| Tendon | 40 | 60 |
| Baby's Food | 8 | 20 |
| Thawing | 5 | 25 |
| Fish | 10 | 15 |
| Frying | 60 | 99 |
TROUBLESHOOTING
| MALFUNCTION CODE | PROBLEM/ CAUSE |
| E1 | Open circuit of the sensor |
| E2 | Short circuit of the sensor |
| E3 | Overheating |
| E4 | Signal switch malfunction |
-8-
-7-
| PROBLEM | CAUSES | SOLUTION |
| Difficulty in closing the Cover | Rubber Gasket is not properly fitted | Fit in the Rubber Gasket properly |
| Floating Valve stuck on the bar | Push the bar lightly | |
| Difficulty in opening the Cover | Floating Valve has not sunk | Press the valve slightly with chopsticks |
| Steam leaking out around the Cover | Rubber Gasket is not in place | Fit in the rubber gasket |
| Dirty Rubber Gasket | Clean the rubber gasket | |
| Damage Rubber Gasket | Replace the rubber gasket | |
| Cover is not closed tightly | Close the Cover according to the instructions | |
| Steam leakage from the floating valve | Dirty seal ring for floating valve | Clean the seal ring for floating valve |
| Damaged seal ring for floating valve | Replace the seal ring for floating valve | |
| Floating valve is not rising up | The amount of food and water is lower than the minimum level | Determine the amount of food according to the instructions |
| Steam leakage around the Cover or from Pressure Release Valve | Send the product to the Service Center for checking purposes |
- SPECIFICATION:
- IMPORTANT SAFEGUARD:
- CIRCUIT DIAGRAM
- CONTROL PANEL
- How to clean Pressure Release Valve
- How to clean Steamer
- How to clean the Due Collector
- How to clean the Inner Pot
- MENU BUTTON
- How to clean the Rubber Gasket
- CLEANING AND MAINTENANCE
- ROASTING / CAKE
- • MORE COOKING FUNCTIONS
- - OFF / KEEP WARM
- • AFTER COOKING
Brand : Imarflex
Model : IPC-600D
Category : Frying Pan