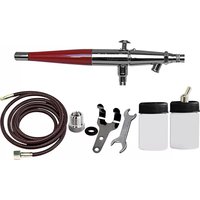
VL-1AS - Paint gun Paasche - Free user manual and instructions
Find the device manual for free VL-1AS Paasche in PDF.


| Product Type | Airbrush / Paint Gun |
| Brand | Paasche |
| Model | VL-1AS |
| Application | Detail painting, model building, illustration, automotive touch-up |
| Feed Type | Siphon feed (suction) |
| Nozzle Size | 0.55 mm (standard) |
| Fluid Cup Capacity | 0.5 oz (15 ml) |
| Operating Air Pressure | 15-50 psi (1.0-3.5 bar) |
| Air Connection | 1/8" NPT female |
| Weight (approx.) | 0.3 lbs (136 g) |
| Dimensions (L x W x H) | 6.5 x 2 x 4.5 in (165 x 51 x 114 mm) |
| Body Material | Brass and stainless steel |
| Finish | Nickel-plated |
| Maintenance | Disassemble and clean nozzle, needle, and cup after each use with appropriate solvent |
| Safety | Use in well-ventilated area; wear respirator when spraying; keep away from children |
| Included Accessories | Airbrush, 0.55 mm nozzle/needle/head assembly, siphon cup, wrench |
| Warranty | 1 year limited manufacturer warranty |
| Country of Origin | USA |
Frequently Asked Questions - VL-1AS Paasche
User questions about VL-1AS Paasche
0 question about this device. Answer the ones you know or ask your own.
Ask a new question about this device
Download the instructions for your Paint gun in PDF format for free! Find your manual VL-1AS - Paasche and take your electronic device back in hand. On this page are published all the documents necessary for the use of your device. VL-1AS by Paasche.
USER MANUAL VL-1AS Paasche
natural_image
Close-up of a red and silver jet nozzle with a glossy finish (no visible text or symbols)INTRODUCTION:
Paasche® model VL features hand crafted construction using quality materials. The body is machined brass, polished and chrome plated. Fluid tips are nickel silver, needles are stainless steel & the needle packing is PTFE. Preferred by professional and hobbyist alike.
Airbrush Operation:
- Press down on Trigger to release air and pull back on Trigger to control quantity of color.
- To spray a fine line without heavy ends, start moving the airbrush without release of color. Then start the color at the beginning of line and stop the color at the end, but continue the motion of the airbrush after the color has stopped.
- Practice until you can spray a fine line or a broad pattern without heavy build up at the beginning or end of your strokes.
- Speed of movement controls density of color and fading effects at beginning and end of strokes.
- For detail, hold the airbrush very close to the surface and then push down for air and pull back very slowly on the Trigger to release a small amount of paint.
- For background work and broad effects, hold the airbrush away from the work surface and pull back on Trigger to release required amount of color.
Head Sizes - Patterns - Fluid Thickness
Size 1 - Tip size .55mm
- Pencil Line to 1" patterns
-Paint thinned further than 3 & 5
Size 3 -Tip size .73mm
-1/32" to 1-1/2" patterns
-Thicker paint than size 1
Size 5 -Tip Size 1.06mm
-1/16" to 1-1/2" patterns
-Thicker paint than size 3
Working Pressures:
- Operating pressures 20-55 PSI; Maximum pressure 75 PSI
• 20-30 PSI is best for detail spraying w/ properly thinned paint - Use the higher pressures for thicker material where fine detail is not critical or thin the paint to allow lower pressures.
Equipment Set-up:
The Airbrush is held in the same manner as a pen, with the index finger comfortably over the Trigger.
-
Attach airhose to air supply and to airbrush. If using a regulator, set pressure between 20 -30 PSI.
-
Attach the color cup or bottle assembly to color socket.
REMOVING/REPLACING THE NEEDLE AND HANDLE :
- Unscrew the handle and loosen the Locknut #34 by turning counterclockwise. Depress the Trigger #7 and hold in Down position while removing or inserting the needle. This assures the needle moves freely through the trigger. Gently remove the needle, rotating if necessary, Do NOT force out!
- Inspect the condition of the needle. If it is bent or misshapen in any way, replace it with a new needle. A bent needle can damage or split the Tip #3 causing bubbles or a rough spray pattern.
- Hold trigger in DOWN position, insert the new needle into the Rocker Assembly #28. Gently push needle through, rotating if necessary. until the needle stops in the front of the tip.
- Release trigger and tighten locknut by turning clockwise.
REPLACING THE TRIGGER:
( If the Trigger #7 is removed, it must be replaced inside the airbrush shell, before the Rocker Assembly #28 and needle are re-inserted. )
-
Hold the trigger so the opening in the lever is in-line with the opening in the end of the airbrush shell and the flat side of the trigger stem is to the rear.
-
Insert trigger so the bottom of the stem covers the round top of the valve plunger.
REPLACING THE TIP:
- Remove handle, loosen Locknut #34 and withdraw needle about one inch (1").
- Un-screw the Head #2 and remove. The Tip #3 can now be easily removed by hand. If stuck in shell tap lightly with wrench.
- Place a new tip into position and tighten head to shell with a wrench. Push needle forward until it seats fully forward in tip and tighten locknut.
ADJUSTING OR REPLACING WORN PACKING WASHER:
- If PTFE Packing #19 becomes worn or loose it must be tightened or replaced.
- You will need a small screwdriver to remove or tighten the Packing Nut #19.
- When replacing your PTFE Packing press packing onto the Packing Nut #19. Use a small screwdriver to tighten packing nut into shell until it is tight then back out one-half turn, may vary.
- Now insert needle - you should feel a slight resistance. If too loose or too tight adjust the packing nut with screwdriver until you feel some slight resistance.
- Now completely re-assemble guts of airbrush.
CLEANING THE AIRBRUSH:
- Paint passes from the bottle connection forward so the trigger area back will most likely not need cleaning.
- You can back flush the paint into your bottle by covering the Needle Protector with your finger and then pressing down on the trigger and pulling slightly back. This forces paint from the fluid passage back into the bottle. Never use open cup for back flushing.
- In between color changes or before storing the airbrush attach bottle with appropriate cleaner and spray into sink until it runs clear.
- Remove needle and wipe clean then replace.
- If paint has dried, you can remove the front tip and head for soaking, or you can soak just the front of the airbrush in cleaner.
- Use cleaner for the material you are spraying. Keep trigger area dry if soaking.
PERSONAL SETTINGS:
-
Needle Adjustment Sleeve - Used to increase or decrease spring tension for the trigger pull back. Thread into the shell until the trigger stroke feels comfortable. Threading in until it stops can cause the trigger to jam.
-
Line Adjustment Assembly - Used to preset paint flow. When rotated clockwise the trigger will retract opening the fluid passage. This allows a set paint flow when only pushing down on the trigger.
TROUBLESHOOTING:
Bubbling in cup:
-
VLH Head #2 needs to be wrench tightened Skipping or spitting:
-
Paint too thick -Reduce with thinner
- Tip not seated -Tighten VLH Head with wrench
- Tip split or damaged Needle -Replace tip or needle
- Needle or tip dirty -Clean and replace
-
Air pressure too low -Increase pressure or thin paint further (20 or more PSI to spray most paints) Airbrush not spraying:
-
Clogged Tip -Remove tip and clean
- Needle not moving -Tighten needle locknut
- Loose VLH Head - Wrench tighten
- Low air pressure - Increase pressure (need 20 or more PSI to spray most paints)
- Bottle vent hole plugged -Use needle or pin to clear air hole
Sprays double line or heavy to one side:
- Split tip or bent needle - Replace
- Dirty tip or needle - Remove and clean
- Tip not centered in head - Remove head and clean airbrush and tip seat then reassemble. Use wrench for head
Jammed trigger or poor trigger motion:
-
Adjust Needle Adj. Sleeve - Screw or unscrew the sleeve to lessen or increase tension on trigger
-
Paint leaking to trigger area - Remove guts of airbrush and slightly tighten packing or replace if needed
-
Lubricate needle and trigger - Apply lubricant to needle shaft and trigger slot area
WARNING: Spray materials may be harmful if inhaled or allowed to come into contact with the skin or eyes. Consult the product label and material safety data sheet supplied for the spray material. Follow all safety precautions. CAUTION: Well Ventilated Area Required to remove fumes, dust or overspray. Maximum Air Pressure 75 P.S.I.

NO. PART DESCRIPTION
- XI-41 Needle Protecting Cap
- VLH-1, 3 or 5 Head (Specify Size)
- VLT-1, 3 or 5 Tip (Specify Size)
- VLN-1, 3 or 5 Needle (Specify Size)
- VL-229 Trigger
- TAL-26 O-ring
- VL-175 Line Adjustment Assembly
- VL-163 Shell Assembly W/VL-20
- MU-612 PTFE Packing & Packing Nut
- VL-215 Air Valve Assembly
- VL-20 Valve Casing
- VL-214 Valve Plunger (with A-53)
- A-22 Valve Spring
- A-23R Air Valve Nut
- VL-186 Needle Valve Assem. L/Needle
- VL-191A Rocker Assembly
- VL-140 Spring
- VL-136A Needle Adjusting Sleeve
- VL-141 Locknut
- VL-134N Handle
Optional Items:
- VLN-1POL Hand Polished Needle
- VL-54 Reamer
- VL-231 Slanted Trigger
- A-53 Valve 'O' Ring (pack of 6)
- HVL-202 Metal Handle with Cut-Out
- VL-224 O-ring
VL-127 Pickup tube Paint Strainer
VL-227-1, 3 or 5 Multiplehead (Specify Size)
VLH-1, 3 or 5 Head (Specify Size)
VLT-1, 3 or 5 Tip (Specify Size)
VLN-1, 3 or 5 Needle (Specify Size)
AIRHOSES W/FACTORY INSTALLED COUPLINGS
A-1/8-size Braided Airhose W/Couplings
(6', 8', 10', 15', 20', 25' & 50')
HP-1/8-size PVC-Red Plastic Airhose W/Couplings
(6', 8' & 10')
Old Style Head
Parts still available

VL-189

VLA-1,3 or 5

VLB
VL-229 & VL-214
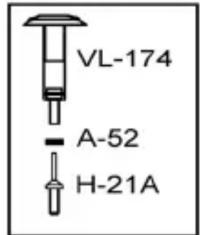
Replace Old Style
Parts: VL-174, A-52 and H-21
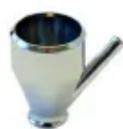
VL-1/4-OZ (1/4oz Metal)
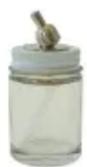
VL-1-OZ (1oz Glass)

VL-3-OZ (3oz Glass)

VLP-3-OZ (3oz Plastic)

VL-2-OZ
(2oz Metal)
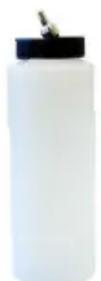
VLP-8-OZ (8oz Plastic)
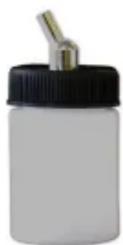
BA-60-1P (1oz Plastic)
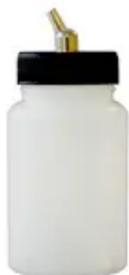
BA-60-3P (3oz Plastic)

BA-60-2P (2oz Plastic)

BA-60-4P (3oz Plastic)
The BA bottle assemblies are a new cover configuration and all use plastic bottle. The 2P and 4P are narrow neck and work with most airbrush paint bottles like Createx and Paasche
For Multi-Language Manuals Go To: www.paascheairbrush.com
- INTRODUCTION:
- Airbrush Operation:
- Head Sizes - Patterns - Fluid Thickness
- Working Pressures:
- Equipment Set-up:
- REMOVING/REPLACING THE NEEDLE AND HANDLE :
- REPLACING THE TRIGGER:
- REPLACING THE TIP:
- ADJUSTING OR REPLACING WORN PACKING WASHER:
- CLEANING THE AIRBRUSH:
- PERSONAL SETTINGS:
- TROUBLESHOOTING:
- Bubbling in cup:
- PART DESCRIPTION
- Optional Items:
- VL-227-1, 3 or 5 Multiplehead (Specify Size)
- AIRHOSES W/FACTORY INSTALLED COUPLINGS
- For Multi-Language Manuals Go To: www.paascheairbrush.com
Brand : Paasche
Model : VL-1AS
Category : Paint gun