Optimum Plus - Iron Izzy - Free user manual and instructions
Find the device manual for free Optimum Plus Izzy in PDF.

User questions about Optimum Plus Izzy
0 question about this device. Answer the ones you know or ask your own.
Ask a new question about this device
Download the instructions for your Iron in PDF format for free! Find your manual Optimum Plus - Izzy and take your electronic device back in hand. On this page are published all the documents necessary for the use of your device. Optimum Plus by Izzy.
USER MANUAL Optimum Plus Izzy
natural_image
Exterior view of a O'TIMUM PLUS air conditioner unit (no visible text or symbols on body)We thank you for having chosen an appliance from the IZZY range.
Safety Interlocks
Please read these instructions carefully before using the appliance and save them for future reference. Please keep the sales receipt for guarantee purposes (pls see below “Guarantee and Customer Service”). Any use which does not conform to the instructions will absolve IZZY from any liability.
- Make sure your electricity supply is the same as the one shown on the underside of the device.
• Always plug your device into an outlet that is earthed. Failure to comply with this requirement may result in electric shock and possible serious injury.
- Never leave the appliance unattended when in operation.
- Close supervision is necessary when your device is being used near children or infirm people. Ensure that they do not play with the device.
- This device is not intended for use by people with reduced physical, sensory or mental capabilities, children or those with lack of experience and knowledge, unless they have been given supervision or instruction concerning use of the device by a person responsible for their safety.
- Switch off and unplug:
- If a disturbance occurs
- After use
- Before cleaning or maintenance
- When filling the water tank
- When you do not use the appliance
- Never use the device for any other use than indicated.
- The device is intended only for domestic use. Any other use will cancel the warranty.
- Do not use the appliance outdoors or in the bathroom.
- Do not operate or place the appliance or parts in places of high humidity or where it may get wet.
- Do not immerse the appliance in water or any other liquid.
- Check the power cord periodically for possible damages. If the power cord or the plug of the device has been damaged, do not use the device and contact an authorized BENRUBI Service Center.
- Make sure that the power cord does not come into contact with the hot parts of the appliance.
- Always use the appliance on a dry, flat surface, resistant to hig temperatures.
- Do not place the appliance near heat sources, on or next gas or electric hobs or over hot oven.
- Do not let the power cord of the appliance hang over the edge of a table or bench top or where a child could grab it. Do not let the power cord to touch any hot surface.
- Never leave the power cable wrapped during use. Unwind it completely.
- Do not touch the hot surfaces of the appliance. High temperatures are generated during use which could cause burns. Always use the handle and warn others (especially children) of the possible dangers of burns from steam, hot water or the soleplate.
- The appliance gives off steam which can cause burns. Handle your iron carefully, particularly when using the vertical steam function. Never direct the steam towards persons or animals.
- Make sure to keep the sole plate of the iron very smooth. Do not run it over metal objects like buttons, zips etc.
- Never dampen or iron cloths while wearing them.
- Always place the iron on the heat resistant base. Never allow the iron stand on its heel.
- Make sure that the iron is placed on its stand and that the stand is placed on a stable surface.
- Make sure the water does not exceed the MAX indication on the water tank.
- Do not put any detergents or chemical substances in the water tank.
- Do not move the device by pulling it off the power cord. Ensure that the power cord is not blocked in any way. Do not wrap the cable around the body of the device or rotate it.
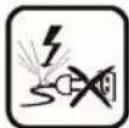
- Do not use an extension cord or voltage converter with this device.
- Never disconnect the device from the mains by pulling the cord. Disconnect always by pulling the plug.
- The appliance is installed with a magnetic device. The appliance may not function properly when located near a strong electromagnetic field
(e.g. television). When you use and store the appliance, please keep it away from any electromagnetic field.
- If the appliance does get wet, immediately remove the power cord from the wall outlet and contact one of the authorized BENRUBI servic centers.
- Do not use corrosive, abrasive detergents or hard brushes as they can scratch and cause damage to the appliance.
- Do not move the appliance when it is in operation.
- Do not touch the appliance with wet or damp hands.
- In case of a possible damage, do not attempt to repair the device by yourself. Please contact one of the authorized BENRUBI service centers. Any repair made by an unauthorized BENRUBI Service Center CANCELS THE GUARANTEE.
- Any misuse of the device cancels the warranty.
- Use only original spare parts.
- The device conforms to EU directive 2014/30/EU on Electromagnetic Compatibility, the 2014/35/EU Low Voltage Directive, the 2011/65/E RoHS Directive, and the directive 2009/125/EC for eco-design.
SAVE THESE INSTRUCTIONS
Parts of the Appliance
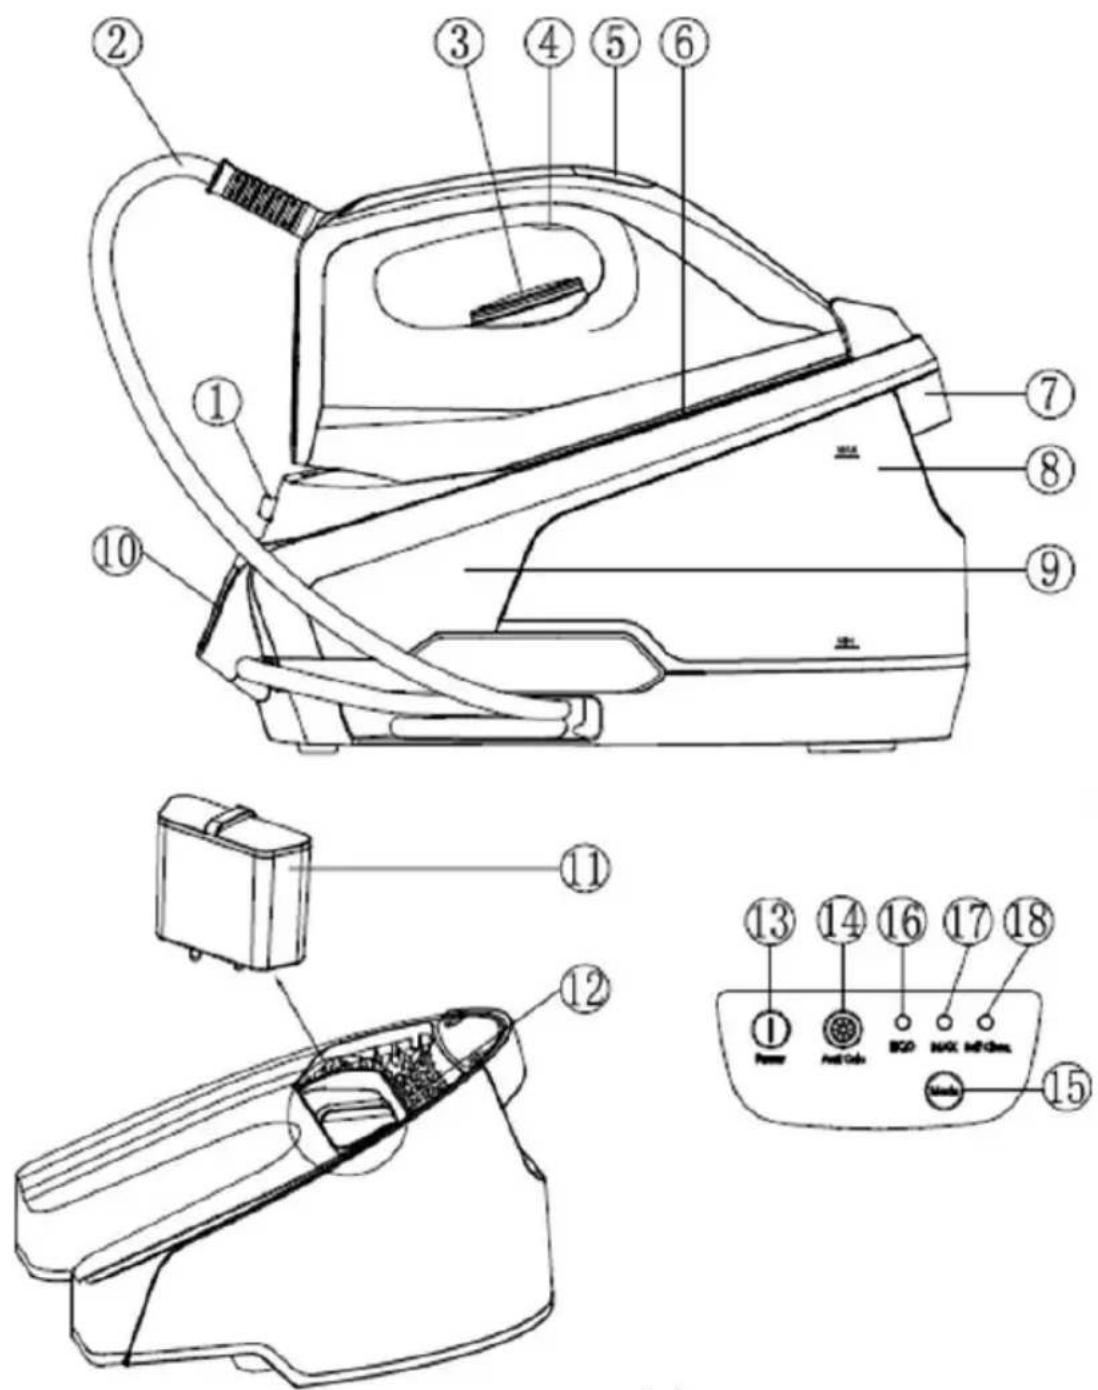
- Lock/unlock button
- Steam feed tube
- Temperature setting knob
- Steam button
- Mode display screen
- Ceramic sole plate
- Water tank handle
- Water tank
- Body
-
Mode control panel
-
Filter
- Water fill
- "Power" button with indicator light
- "Anti Calc" filter change indicator
- "Mode" selection button
- "ECO" mode indicator
- "MAX" mode indicator
- "Self Clean" mode indicator
Before the First Use
- Remove any sticker or protective cover from the soleplate before using the appliance
- Before the first use of the steam generator, use a damp cloth to remove any potential residuals from the soleplate as there may be debris from the steam vents. Use the steam generator for the first time on an old piece of fabric to ensure that the soleplate and the water tank are completely clean.
- When the steam generator is used for the first time, some vapour may be emitted. However, after a short while this will cease to exist.
Suitable Water for Steam Generator
- You can use tap water unless the tap water is too hard. If the water in your area is very hard and contains a lot of salts, use distilled water.
- Do not use water of any chemical composition, refrigerated water, clothes dryers, batteries, air conditioners, flavored water, water softener, and rain water. In these cases, the water contains organic waste or metallic elements that accumulate during heating, causing stains on the clothes and helping to shorten the life of the device.
- The use of water of any chemical composition in accordance with the above cancels the warranty.
- Water containing sediments and salts will cause damage to the plate holes as well as to the internal operation of the iron. The specially designed steam chamber and anti-calc rinsing cap protect the steam generator from wear.
• To ensure maximum appliance life: - Do not use chemical composition water.
Use of the Appliance – Steam Ironing
Before starting ironing, make sure the lock/unlock button (1) is in “” position.
- Remove the water tank (8) and fill it with water, without exceeding the MAX maximum water capacity indicator. Use tap water.
NOTE! The appliance operates with tap water. If the water hardness is high it is advisable to use distilled water in a 50% solution with tap water. Alternatively, use bottled water.
- Insert the water tank (8), first placing the base of the reservoir and then pushing gently until a "click" is heard and snaps securely to its original position.
- Connect the cable of the appliance to the wall outlet.
- Press the "Power" button (13). The indicator light will turn on.
-
Turn the temperature setting knob (3) to the desired temperature. The color section shows the ironing area you can choose.
-
Press the "Mode" button (15) to select either "ECO" (16) or "MAX" (17) mode. The corresponding indicator lights will turn on as well as the indication on the mode display screen (5).
- The red indicator (5) will flash until the device reaches the selected temperature.
The red indicator (5) and the "Power button" (13) will stabilize when the device reaches the selected temperature.
- Press the steam button (4) and start ironing.
Note: It is normal for some steam to come out after the steam button is released.
- When you finish ironing, press the steam button (4) until all remaining steam released. If you do not release the steam, the next time you turn on the device, steam and water droplets will come out of the sole plate.
- Press the "Power" button (13) and unplug the appliance.
- Allow the appliance to cool down and empty the water tank (8) before storage. To
lock the iron on its base, make sure that the lock / unlock button (1) is in position.

NOTE! If you press the steam switch, the steam emission stops for a few seconds, it is normal and indicates that the water pumping process from the tank to the pump has been activated.
Use of the Appliance – Dry Ironing
Before starting ironing, make sure the lock/unlock button (1) is in “” position.
- Connect the cable of the appliance to the wall outlet.
- Press the "Power" button (13). The indicator light will blink.
- Turn the temperature setting knob (3) to the desired temperature. The color section shows the ironing area you can choose.
- Press the "Mode" button (15) to select either "ECO" (16) or "MAX" (17) mode. The corresponding indicator lights will turn on as well as the indication on the mode display screen (5).
- The red indicator (5) will flash until the device reaches the selected temperature.
The red indicator (5) and the "Power button" (13) will stabilize when the device reaches the selected temperature. - The appliance is ready for use. Press the steam button (4) and start ironing.
Note: It is normal for some steam to come out after the steam button is released.
-
When you finish ironing, press the "Power" button (4) and unplug the appliance.
-
Allow the appliance to cool down and empty the water tank (8) before storage. To
-
When you finish ironing, press the "Power" button (4) and unplug the appliance.
- Allow the appliance to cool down and empty the water tank (8) before storage. To
lock the iron on its base, make sure that the lock / unlock button (1) is in position.

Vertical Steam Ironing
The vertical steam ironing system allows you to use the iron for vertical ironing. This is especially useful for getting wrinkles out of hanging clothes, curtains etc.
- Hang the garment on a clothes' hanger and pull the garment tight with one hand.
- Hold the iron in vertical position with the other hand and press the steam button (3) to iron the garment.
- Touch the garment lightly with the soleplate of the iron to remove creases.
Water Refill in the Watertank
- If the water runs out or when you want to recharge while ironing, press the "Power" button (13) in the "Off" position and unplug the appliance.
- Remove the water tank (8) and fill it with water, without exceeding the MAX maximum water capacity indicator.
- Insert the water tank (8), first placing the base of the reservoir, and then pushing gently until a "click" is heard and snaps securely to its original position.
- Plug the device into the wall socket.
- Press the Power button (13) and continue ironing.
Tips for Better Results
- Divide the washing according to the correct ironing temperatures and in accordance with the International Fabric Care Code, which is on the labels label.
- If you do not know what fabric is made of fabric, determine the appropriate ironing temperature by ironing a point on the fabric that is not apparent when wearing it or using it.
- Silk, woolen and synthetic fabrics should be ironed from the riverside so as not to create shiny patches.
- First iron the fabrics that require the lowest temperature and then the fabrics that require a higher temperature.
- Do not iron metal objects such as zippers, hooks, rings, etc. as these may scratch the plate.
- Fabrics such as velvet and wool and accessories such as gloves, bags, etc. They will recover the brand new look and texture by simply passing the iron near the surface of the cloth and pressing the steam button.
- For professional results, you can follow the steps below:
- Hold the iron about 20 cm above the fabric and press the steam button (3). Pass the iron over the cloth in a circular motion so that the cloth becomes damped from the steam. Slightly crumpled fabrics require only a little steam. While heavy fabrics garments with particularly difficult aspects, they need more steam to get wet.
- During the second phase (dry ironing), check that the temperature setting button (4) is in the correct position for the fabric type. Iron the garment without pressing the steam button. The special ironing plate prevents the fabrics from getting glossy. Using this
ironing technique, you can give your clothes a truly professional ironing finish.
- Fabrics that have some kind of finishing (glossy surfaces, wrinkles, etc.) can ironed at low temperatures.
- For fabrics containing different fibers in their composition, always choose the appropriate temperature for ironing, which corresponds to the highest percentage of fabric. For example, if a fabric contains 60% polyester and 40% cotton, you should choose the appropriate temperature for the polyester and iron the fabric without steam - For woolen fabrics, select the middle temperature and press the steam button intermittently to achieve small steam emissions without touching the iron on the cloth.
Recommended Temperature Table
| Type of fabric | Temperature setting | Ironing instructions |
| Acetate Acrylic Nylon | ● | Dry ironingFollow the instructions on the label of the garment.This type of fabric generally requires very light ironing. |
| Pollyester Rayon | ● | Dry ironingIron inside out. When ironing mixed fabrics.Select the Lowest recommended temperature. |
| Silk | ●● | Dry ironingIron inside out. |
| Wool Light cotton Light linen | ●● | Steam ironingIron inside out. Place a thin cloth over the fabric in order to avoid a shiny finish |
| Cotton Fine linen Starched fabrics | ●●● | Steam ironingDampen the fabric before ironing.Heavier fabrics and tarched fabrics can be ironed on the front; darker colours and embroidered garments should be ironed inside out. |
| Linen | ●●● | Steam ironingUse plenty of steam and iron dark fabrics inside out in order to avoid a shiny finish, Iron lapels and cuffs on the right side for better finish. |
Changing Filter
- When the "Anti Calc" filter change indicator (14) turns on, you will need to replace the filter (11).
- Unplug the appliance and allow the appliance to cool down completely.
- Remove the water tank (8) and drain the water.
- Pull up the filter (11) which is already installed.
- Insert the new filter into place.
- Turn on the appliance by pressing the "Power" button (13) and press the "Anti Calc" button (14) for 5 seconds until the indicator light goes out.
Care and Cleaning
CAUTION: Before cleaning, ensure that the steam generator iron is unplugged and the unit has cooled down completely.
- Do not use abrasives or abrasive cleaners and wire to clean the plate.
- Keep the soleplate smooth. Avoid contact with hard, metal objects. Do not scratch or damage the surface of the soleplate.
- Do not place the iron on any metal base as this could damage it. Place it on the heat-resistant stand which has non-slip pads and has been designed to withstand hi temperatures.
- Wipe the upper part of the appliance with a damp cloth. Do not use abrasives or harsh cleaners as they may damage the surface of the steam generator.
- Never immerse the appliance in water or nay other liquid. Never hold the iron or the base unit under the tap.
- To clean the steam holes simply use a damp cloth to wipe away any build up of lint or starch from inside the steam holes.
Storage
- Allow the ironing system to cool down completely before storing.
- It is necessary to remove water from the water tank (8) after each use or before storage.
- Store in a place without humidity, where it is not reachable by children.
Technical Characteristics
Model: Ironing System E48D OPTIMUM PLUS
Power: 2400W
Steam rate: 180gr/min
Steam ready heat time: 60-90 seconds
Water tank capacity: 1.8Lt (MAX)
Pressure: 8 BAR
Safe Appliance Disposal
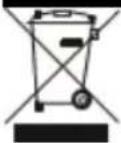
At the end of its working life, the product must not be disposed of as urban waste. It must be taken to a special local authority differentiated waste collection centre or to a dealer providing this service. Disposing of a household device separately avoids possible negative consequences for the environment and health deriving from inappropriate disposal and enables the constituent materials to be recovered to obtain significant savings in energy and resources.
As a reminder of the need to dispose of household devices separately, the product is marked with a crossed-out wheeled dustbin.
Guarantee & Customer Service
- BENRUBI Company guarantees its products for any manufacturing defect or defective materials for a period of two (2) years from the date of purchase or delivery by presenting purchase receipt. If your product malfunctions or you find any defects, please revert to the retail location you have purchased it from or contact an authorized BENRUBI Service Centre. To find the nearest authorized BENRUBI Service Centre, visit our website www.benrubi.gr. It is in the discretion of BENRUBI Company to replace or repair the defective product.
- The warranty does not cover damages resulting from normal wear, breakage, scaling improper installation or maintenance of the product, mishandling, abnormal working conditions, failure to implement the instructions, conversion or repair of the product by an unauthorized technician who does not belong to the BENRUBI Service Centers.
Also, the warranty does not cover the following indicative factors:
• Stains, discoloration or scratches.
- Burns due to exposure to heat or flame.
- Damage from thermal shock (sudden temperature change or change of voltage).
FOR MORE INFORMATION CONTACT:
(NEW) H. BENRUBI & FILS SA
27 Aghiou Thoma str, GR15124
Maroussi – Athens
Tel.: 210 6156400, Fax: 210 6199316
e-mail: benrubi-sda@benrubi.gr