
RCM-1503 - Coffee maker Redmond - Free user manual and instructions
Find the device manual for free RCM-1503 Redmond in PDF.


| Product Type | Coffee Maker |
| Brand | Redmond |
| Model | RCM-1503 |
| Capacity | 1.5 liters (approx. 12 cups) |
| Power Consumption | 900 W |
| Voltage | 220-240 V ~ 50/60 Hz |
| Dimensions (W x D x H) | 25 x 20 x 35 cm |
| Weight | 2.5 kg |
| Material | Plastic and stainless steel |
| Filter Type | Permanent mesh filter included |
| Water Tank | Removable, transparent |
| Functions | Keep warm function, anti-drip system, automatic shut-off |
| Indicator Light | Power on/off indicator |
| Cleaning | Descaling recommended every 2-3 months |
| Safety Features | Overheat protection, auto power off |
| Spare Parts | Carafe, filter basket, water tank available |
| Repairability | User-replaceable parts (carafe, filter) |
| Warranty | 1 year |
| Manual Languages | EN, RU, and others |
Frequently Asked Questions - RCM-1503 Redmond
User questions about RCM-1503 Redmond
0 question about this device. Answer the ones you know or ask your own.
Ask a new question about this device
Download the instructions for your Coffee maker in PDF format for free! Find your manual RCM-1503 - Redmond and take your electronic device back in hand. On this page are published all the documents necessary for the use of your device. RCM-1503 by Redmond.
USER MANUAL RCM-1503 Redmond
natural_image
Exterior view of a redmond coffee machine (NON-DRIP SYSTEM) with control knobs and buttons, no visible text or symbols on the device itself.INSTRUCTION MANUAL
ИНСТРУКЦИЯ
|
—
|
|
[Non-Text]
[Non-Text]
[Non-Text]
[Non-Text]
[Non-Text]
[Non-Text]
[Non-Text]
[Non-Text]
[Non-Text]
[Non-Text]
[Non-Text]
[Non-Text]
[Non-Text]
[Non-Text]
[Non-Text]
[Non-Text]
[Non-Text]
[Non-Text]
[Non-Text]
[Non-Text]
[Non-Text]
|
|
|
1
—
[Non-Text]
[Non-Text]
[Non-Text]
[Non-Text]
[Non-Text]
[Non-Text]
[Non-Text]
[Non-Text]
[Non-Text]
[Non-Text]
[Non-Text]
[Non-Text]
[Non-Text]
[Non-Text]
[Non-Text]
[Non-Text]
[Non-Text]
[Non-Text]
[Non-Text]
[Non-Text]
[Non-Text]
[Non-Text]
[Non-Text]
[Non-Text]
[Non-Text]
[Non-Text]
[Non-Text]
[Non-Text]
[Non-Text]
[Non-Text]
[Non-Text]
[Non-Text]
[Non-Text]
[Non-Text]
[Non-Text]
[Non-Text]
[Non-Text]
[Non-Text]
[Non-Text]
[Non-Text]
[Non-Text]
[Non-Text]
[Non-Text]
[Non-Text]
[Non-Text]
[Non-Text]
[Non-Text]
[Non-Text]
[Non-Text]
[Non-Text]
[Non-Text]
[Non-Text]
[Non-Text]
[Non-Text]
[Non-Text]
[Non-Text]
[Non-Text]
[Non-Text]
[Non-Text]
[Non-Text]
[Non-Text]
[Non-Text]
[Non-Text]
[Non-Text]
[Non-Text]
[Non-Text]
[Non-Text]
[Non-Text]
[Non-Text]
[Non-Text]
[Non-Text]
—
1
|
|
|
1
[Non-Text]
[Non-Text]
[Non-Text]
[Non-Text]
[Non-Text]
[Non-Text]
[Non-Text]
[Non-Text]
[Non-Text]
[Non-Text]
[Non-Text]
[Non-Text]
[Non-Text]
[Non-Text]
[Non-Text]
[Non-Text]
[Non-Text]
[Non-Text]
[Non-Text]
[Non-Text]
[Non-Text]
[Non-Text]
[Non-Text]
[Non-Text]
[Non-Text]
[Non-Text]
[Non-Text]
[Non-Text]
[Non-Text]
[Non-Text]
[Non-Text]
[Non-Text]
[Non-Text]
[Non-Text]
[Non-Text]
[Non-Text]
[Non-Text]
[Non-Text]
[Non-Text]
[Non-Text]
[Non-Text]
[Non-Text]
DEAR CUSTOMER!
Thank you for preferring the domestic appliance manufactured by REDMOND.
REDMOND means quality, reliability and thoughtful attitude towards our clients. We hope that in future you will also select products of our company.
natural_image
Product line drawings of two washing machines, one with a motor and the other a handheld device (no text or symbols visible)
natural_image
Product line showing a kitchen appliance with layered packaging and a hand mixer (no visible text or symbols)
natural_image
Product photo of a white and gray washing machine (no visible text or symbols)

natural_image
Product photo of a RMV-460R vacuum cleaner (no visible text or symbols on device body)


natural_image
Product photo of a kitchen blender with colorful food inside, no visible text or symbols on the device itself.
natural_image
Exterior view of a metallic cylindrical electronic component (no visible text or symbols)
natural_image
Two iron steamers, one white and one dark purple, displayed side by side (no text or symbols visible)VTOR RI-A207

VIKOI
RI-C208

natural_image
Illustration of a pair of iron iron machines, one purple and one black, with no visible text or symbols.V-01 RI-C209

natural_image
Close-up of a white iron with blue and silver casing (no visible text or symbols)VICI RI-C210

natural_image
Two compact vacuum cleaner units, one red and one blue, with coiled cable (no text or symbols visible)Пылбосс RV-303

natural_image
Close-up of a black vacuum cleaner with coiled tubing (no visible text or symbols)Гылассо RV-307

Пылосос
RV-308

Пь песс
RV-309
Коллекция 2010-2011

Redmond Industrial Group LLC USA
Redmond Industrial Group, LLC USA
REDMOND
Professional series


natural_image
Black and white photo of a set of stainless steel utensils including a whisk, cup holder, and stand (no text or symbols visible)5.1erwe0 RHB-2904

natural_image
Black and white photo of kitchen utensils including a whisk, cup, and stand (no text or symbols visible)SHERMED RHB-M2904

natural_image
Black and white photo of a hand mixer on a stand (no text or symbols visible)Миксер RHM-2101

Becu RS-714

Becu RS-M711

bytee6pondnica
RSM-M1402
REDMOND
Coffee maker
Кофеварка
RCM-1503
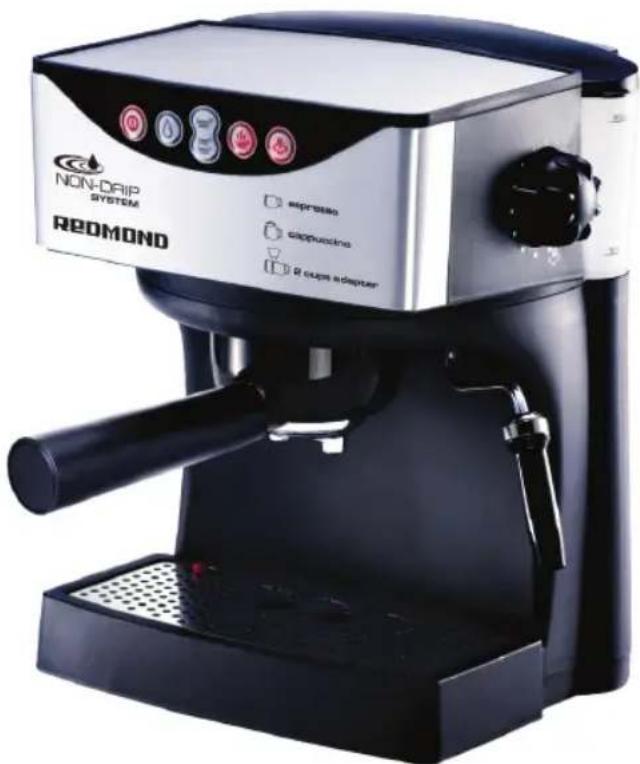
INSTRUCTION MANUAL
ИНСТРУКЦИЯ
CONTENT
Complete set
Technical data
Model description
I. BEFORE OPERATING
Safety measures
Before operating
Rinse the system for the espresso function
Rinse the system for the steam function
Espresso preparation
Cappuccino preparation
III. CLEANING AND MAINTENANCE
IV. BEFORE CONSULTING THE SERVICE CENTER
V. GUARANTEE
СОДЕРЖАНИЕ
Комплектация
natural_image
White ceramic teacup filled with red coffee beans, placed on a saucer surrounded by scattered coffee beans under a bright spotlight (no text or symbols visible)PRODUCT SPECIFICATION
Model RCM-1503
Voltage 220–240 V
Power 970-1150 W
Material of the body Metallic covering/plastic
Capacity of water tank 1 l
Pressure 15 bar
Type of control electronic
Work light indication light-emitting diode
Programming water quantity of water +
2-level Coffee temperature setting +
Cup warming +
Cord storage +
Auto shut off +
Overheat safety protection +
Removable drip tray +
Steam nozzle for frothy Cappuccino +
COMPLETE SET
- Coffee maker - 1 pc
- Filter holder with coffee filter
- 1 pc
- Measuring spoon - 1 pc
- Instruction manual - 1 pc
- Service booklet - 1 pc
The manufacturer has the right of making modifications to design, delivered set and technical data of the device in the course of improvement of the products without additional notifying of such modifications.
While operating the appliance, follow the instructions given below. If used properly, it will serve you for many years.
■ Before connecting the appliance to electric outlet, check that the mains voltage coincides with supply voltage of the appliance.
The later can be found in technical data or on the factory nameplate of the appliance.
■ If you want to use an extension cord, make sure that it suits the power consumed by the appliance.
Different voltage can lead to a short-circuit failure or to the cable ignition.
■ Connection of the appliance should be provided only to grounded sockets.
Otherwise the appliance will not correspond to the requirements of protection against electric shock.
■ If you want to disconnect the appliance from electric outlet, pull the power cord while holding the plug with your dry hands, but not the cord.
Otherwise, the cord rupture or an electric shock may follow.
■ Do not stretch the power cord near sharp edges or corners.
This may lead to failures not covered by the guarantee.
■ Watch over the cord so that it didn't twist and bend over the
edge of table. Place appliance only on dry flat surface.
Also keep generally accepted safety rules during work with appliance.
■ It is not allowed to use the appliance and packing materials as children toys.
■ Do not allow children to use the appliance until they are explained and understood the safety operation instructions.
Never leave little children beside the working appliance unattended.
■ Do not use the appliance outdoors. There is a danger of
malfunction because of rain and other weather conditions.
■ It is prohibited to use an appliance in case of any malfunctions. If it is faulty or functions incorrectly, disconnect it from mains, taking plug off the socket, and contact the authorized service center.
■ Unassisted repair or modification of appliance is prohibited. All works related to maintenance and repair should be carried out by an authorized service center. The work carried out non-professionally can cause breakage, injuries and property damaging.
■Use device according to it's purpose. Using it for something else is considered as violation of generally accepted safety rules while operating the appliance.
Use device only domestically, it is not designed for industrial purposes.
■ Do not remove the metal funnel when appliance in brewing coffee or making steam.
■ Do not touch the hot surface of appliance (such as steam wand, and the steel mesh just boiling). Use handle or knobs.
■Before cleaning of the appliance make sure that it is disconnected from the mains and the appliance's components rotation has stopped completely. Always keep the appliance clean.

ATTENTION!
It is prohibited to use an appliance in case of any malfunctions. The manufacturer has no responsibility for any
damage caused by violation of safety rules and operating instructions.
This appliance is not intended to be operated by means of an external timer or separate remote-control system.
Note! Keep this instruction manual for further use.
PRIOR TO THE FIRST USE
Remove all packing and advertising stickers carefully. Wipe appliance with damp cloth, then wipe it dry.
RINSE THE SYSTEM BEFORE FIRST USE

natural_image
Close-up of a hand using a brush to press or spread paper onto a black industrial machine (no visible text or symbols)Disconnect the appliance from mains supply. Fill the water tank (1) with water. Do not exceed MAX position.
natural_image
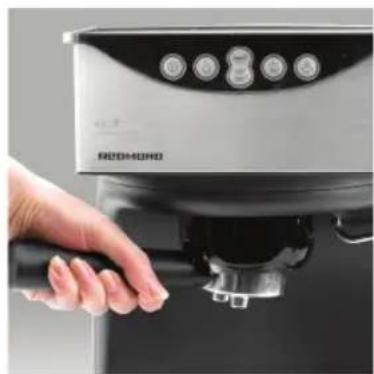
Close-up of a hand operating a modern espresso machine (no visible text or symbols)Put the empty filter holder (16) in place by turning from left firmly to right, as it shown on the picture.

natural_image
Close-up of a white coffee mug being processed with a black espresso machine on a perforated tray (no text or symbols visible)Place the jug on the cup rest grille under the Brewing Head. Connect the appliance to a suitable mains supply outlet and it will be switched on with a deep sound, and the ON/OFF button indication light flashes.

natural_image
Close-up of a modern kitchen appliance with control buttons and a red indicator light (no visible text or symbols)The button Ⓤindication light stops flashing as soon as the appliance has reached the required temperature.
natural_image
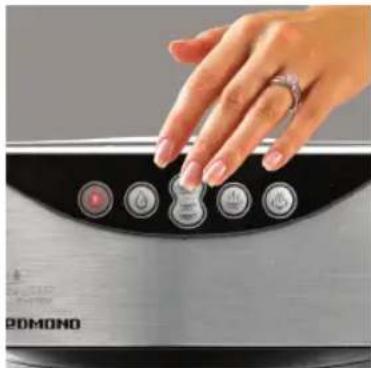
Close-up of a hand pressing down on a white appliance control panel (no visible text or symbols)Press 2-cup pre-set espresso button to start the water running from coffee dispenser. Repeat this step three times.
ATTENTION: Before each use it is obligatory to start a cycle of preparation of a drink without a bookmark in a small horn of ground coffee. It is required that water in the device has heated up! Recommended time of 10-15 seconds without coffee, then having inserted a small horn from coffee start a cycle of preparation of coffee.
RINSE THE SYSTEM FOR THE STEAM FUNCTION

natural_image
Close-up of a hand pressing down on a stainless steel microwave oven (no visible text or symbols)Press the Cappuccino Button 📄, the temperature indication light flashes with a deep sound

natural_image
Exterior view of a modern espresso machine with a coffee mug beside it (no visible text or symbols)The ON/OFF button① indication light stops flashing as soon as the appliance has reached the required temperature. Place a container under the steam nozzle.

natural_image
Black sculpted face with stylized eyes and dotted lines, no visible text or symbolsTurn the Steam Control to MAX position. Let the steam function being operated for 1 minute, then empty the container.Repeat steps 3 and 4 three times.
PREPARING AN ESPRESSO BY USING PRE-SET FUNCTION

natural_image
Close-up of a modern red and white appliance with control buttons and a 'REDOMOND' branding (no readable text beyond branding)Disconnect the appliance from mains supply. Fill the water tank with water. Do not exceed MAX position. Connect the appliance to a suitable mains supply outlet, The ON/OFF button① indication light stops flashing as soon as required temperature will be reached.

natural_image
Close-up of a mechanical component with a metallic cylindrical body and black cylindrical protrusions (no visible text or symbols)Remove the filter holder from the appliance by turning from right to left as it is shown on the picture. Put the ground coffee into the filter holder by using the measuring spoon. Remove any excess coffee on the edge of the filter.
natural_image
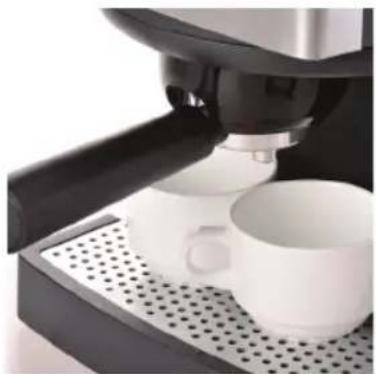
Close-up of a white espresso machine with a cup on a perforated base (no visible text or symbols)Put the filter holder back by turning from left firmly to right. Place coffee cup(s) under the filter holder on the cup reset grille. Press pre-set Espresso buttons to obtain the coffee.

natural_image
Close-up of a hand pressing down on a kitchen appliance control panel (no visible text or symbols)Press pre-set Espresso buttons to obtain the coffee. The appliance provides two pre-set espresso quantity, 1-cup espresso quantity = 35 to 65cc per shot, 2-cup espresso quantity = 95 to 125cc per shot.

natural_image
Black and white photo of a coffee cup on a saucer with a spoon, accompanied by a pitcher (no text or symbols visible)Brewing stops automatically when the pre-set quantity of espresso is obtained. To change the pre-set quantity, please follow the instruction "Change pre-set espresso quantity"
Remove the filter holder (16) by turning from right to left and throw out the used ground coffee. Clean the filter holder by water.
IMPORTANT! It is not recommended to press the coffee into the filter tightly. Use the medium grounded coffee. While making coffee from different types of grounded grains the degree of cup volume could slightly vary from above values.
natural_image
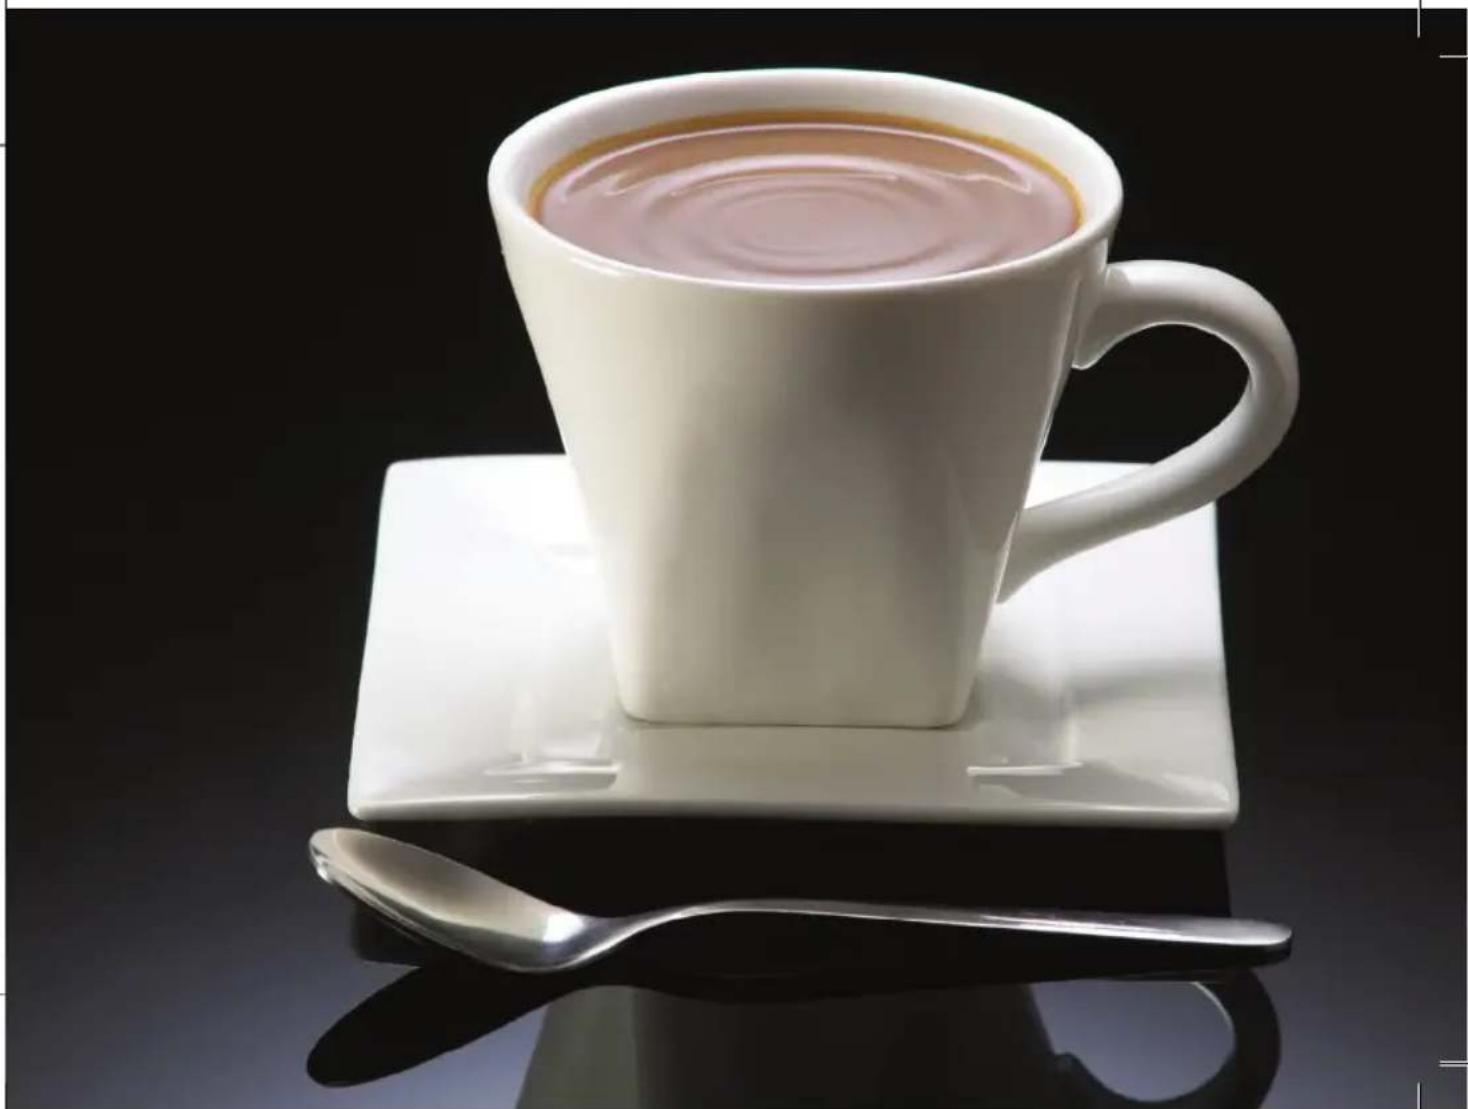
White ceramic coffee cup filled with tea, placed on a saucer with a metallic spoon beside it against a black background (no text or symbols visible)PREPARING AN ESPRESSO BY USING MANUAL FUNCTION
Espresso can be obtained without using the pre-set coffee quantities. The manual espresso function allows you to obtain a coffee with quantity that fits your need. Follow the instruction 1-9 in “Preparing an Espresso by using pre-set function”, then press and hold the manual espresso button until the desired espresso is obtained.

natural_image
Hand operating a semi-mercaptop with control buttons and a coffee mug, no visible text or symbols on the device itself.It is possible to hold and press the manual espresso button to obtain extra coffee after a espresso made by the pre-set mode. It is possible to obtain less coffee by pressing the ON/OFF Button to stop the brewing anytime while coffee is being made under pre-set mode.
SET THE TEMPERATURE OF ESPRESSO
The appliance provides 2 espresso temperature alternatives:
hot-65-75°C
hotter - 75-85°C

natural_image
Close-up of a hand pressing down on a stainless steel MCHD brand microwave oven (no visible text or symbols)To set hotter espresso, press the temperature button and the ON/OFF Button indication light goes on with a deep sound. Wait until the ON/OFF button indication light stops flashing. Operate the preset or manual espresso mode to obtain a hotter espresso.

natural_image
Glass mug filled with coffee and coffee beans, placed on a glass plate (no text or symbols visible)To set hot espresso, keep the temperature button at OFF mode (the temperature button indication light goes off). Operate the pre-set or manual espresso mode to obtain a hot espresso.
CHANGE PRE-SET ESPRESSO QUANTITY
The appliance has been factory programmed two espresso quantities per shot:
1-cup = 35 to 65 ml
2-cup = 95 to 125 ml
The programming can be completed while an espresso is being made. Follow the instruction 1-9 in “Preparing an Espresso by using pre-set function”.
natural_image
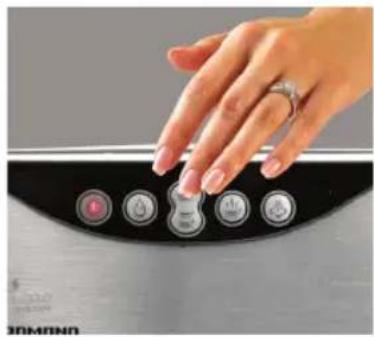
Close-up of a hand pressing down on a kitchen appliance control panel (no visible text or symbols)NOTE:
The brewing time for programming should not less than 9 seconds; otherwise the programming may not be completed.
Press and hold the Espresso Button (1-cup espresso or 2-cup espresso depending on which one is to be programmed) until you obtain the desire espresso quantity. The programming is completed.
RESET TO THE FACTORY PROGRAMMED QUANTITY.
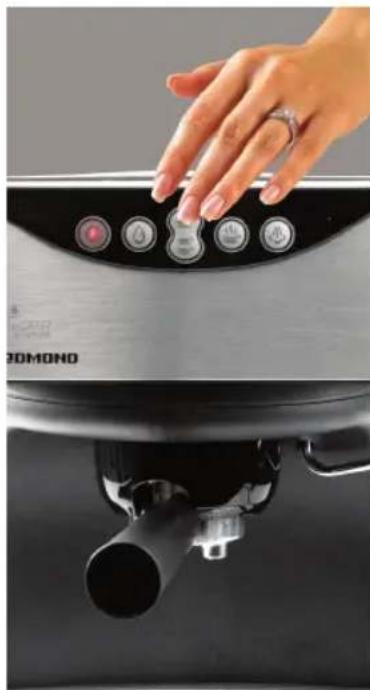
Follow the instruction in step 1-6 "RINSE THE SYSTEM FOR ESPRESSO FUNCTION". Press and hold 1 Cup Espresso Pre-set Button, and then press and hold the ON/OFF button (keep both buttons pressed and held). After 10 seconds, set the ON/OFF button free and then set the 1 Cup Espresso Pre-set Button free.
The 1 Cup Espresso Pre-set mode has been reset to the factory programmed quantity. If the 2 Cup Espresso preset mode needs to be reset, follow the instruction 1-4 with pressing 2 Cup Espresso Button but not 1 Cup Espresso Button.

natural_image
Close-up of a creamy dessert with a brown topping, likely a steamed or caramel-dusted cake (no text or symbols visible)CAPPUCCINO PREPARATION
As the temperature required producing steam is higher than the temperature for espresso, therefore espresso should be prepared before making frothy milk, otherwise the espresso might be burnt.
Remember that foam exceeds milk on volume by three times, therefore the mug with milk should be big enough.
natural_image
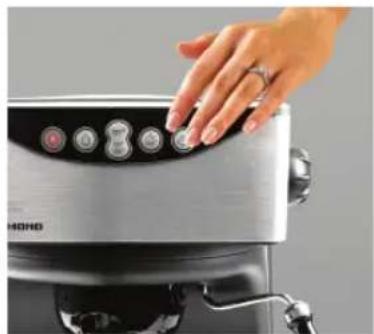
Close-up of a hand pressing down on a metal HONG brand microwave oven (no visible text or symbols)Preparing espresso coffee with a larger cup. Press the Cappuccino Button, the ON/OFF button indication light flashes with a deep sound. The ON/OFF button indication light stops flashing as soon as the appliance has reached the required temperature.

natural_image
Exterior view of a modern espresso machine with a mug beside it (no visible text or symbols)Place a container under the steam nozzle and turn the Steam Control to MAX position.
ENGLISH

natural_image
Close-up of a metal bowl containing a white liquid with bubbles, being stirred by a black cylindrical container (no text or symbols visible)Let the water flows until steam appears, then turn the Steam Control back to position "OFF"Immerse the Steam Nozzle about 5 cm deep into a container with milk as it is shown on the picture.

natural_image
Close-up of a black sculptural mask with stylized eyes and nose, mounted on a dark surface with white dots (no text or symbols visible)Turn the Steam Control slowly to max steam position. It is possible to vary the delivery of steam power by turning the Steam Control.

natural_image
Close-up of a spoon holding a white, spherical food item with visible dust (no text or symbols)When the milk is hot enough with froth appeared, turn the Steam Control Back to position" Off".
Pour the frothy milk into the espresso coffee. Cappuccino is prepared.
FILLING THE WATER BOILER

natural_image
Hand inserting a black plug into a white electrical outlet (no text or symbols visible)Disconnect the appliance from mains supply. Fill the water tank (1) with water.

natural_image
Close-up of a coffee machine with a mug and spout, no visible text or symbolsConnect the appliance to a suitable mains supply outlet, the appliance will be switched on with a deep sound and the ON/OFF button indication light flashes. Place a empty container under the Brewing Head.
natural_image
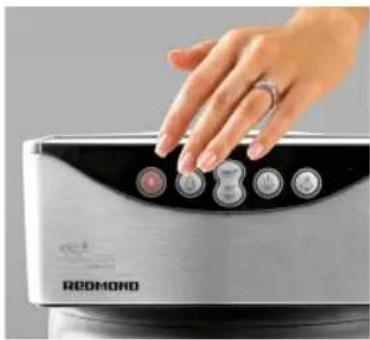
Close-up of a hand pressing down on a white appliance control panel (no visible text or symbols)Press manual espresso button Ⓞ to allow half water in the water thank to run through. The boiler is filled.
AUTO TURN OFF

natural_image
Close-up of a modern red LED brand heater with control buttons and a 'REDMOND' logo (no readable text beyond branding)The appliance will switch off automatically if it has not been operated for 1 hour. Press ON/OFF Button to restart the appliance.
Be careful! Steam Nozzle (13) is hot!
Make sure the Temperature Indication Light goes off before preparing frothy milk
Always use the steam function again until the Temperature Indication Light goes off. If the Temperature Indication Light goes flashing during the frothy milk is being prepare, turning the Steam Knob back to position "OFF" and waiting until the Indication Light stops flashing.
III. CLEANING AND MAINTENANCE
natural_image
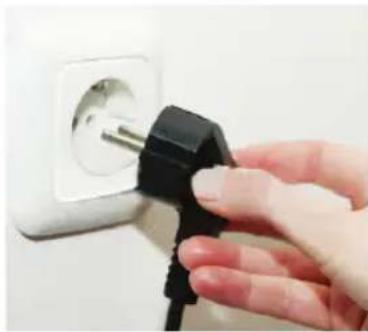
Hand inserting a black plug into a white electrical outlet (no text or symbols visible)Plug off the coffee maker before cleaning. Let it cool down.
IT IS FORBIDDEN TO PLACE THE DEVICE IN WATER. IT IS FORBIDDEN TO CLEAR THE DEVICE BY MEANS OF THE DISHWASHER.
Wipe the housing of the appliance with a damp cloth or a damp sponge.
natural_image
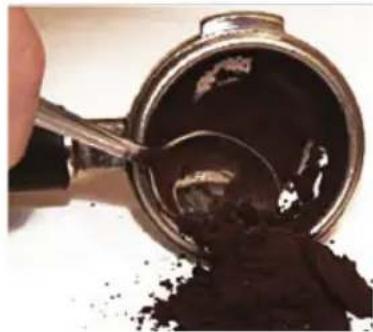
Close-up of a hand pouring dark granular substance into a metal container with a spoon (no text or symbols visible)Turned left, take off filter holder from coffee maker. See draw. Turn the filter holder over and delete used-up coffee from it. Shake it if necessary. Wash filter holder by stream of water.
ENGLISH
natural_image
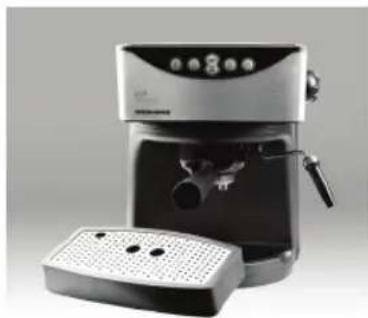
Modern espresso machine with control panel and side vent (no visible text or labels)Remove the drip tray grid and drip tray from the appliance and remove the spilt of coffee and water then clean them by a damp cloth or a damp sponge.

natural_image
Close-up of a black espresso machine with a red triangular marker on the nozzle (no visible text or symbols)When the water in the drip tray is full, the empty drip tray indicator will rise over the cup rest grille. The water in the drip tray needs to be cleared.

natural_image
Close-up of a black and white industrial machine with a handle, showing internal components (no visible text or symbols)Remove the Cappuccino accessory by pulling downwards for cleaning.
DE-SCALING
It is recommend de-scaling the appliance every 3 months by using citric acid. Dissolve 2 spoonfuls (about 30gram) of citric acid in 1 liter of water.
Disconnect the appliance from mains supply. Make sure the appliance has completely been cooled down. Before de-scaling, unscrew the percolation grid from the percolation head by using a suitable screw driver as it is shown on the picture.
Clean the percolation grid and percolation head of any tartar and coffee ground residue. Replace the valve spring and gasket on the percolation head and screw down firmly. Remove the cappuccino accessory from the steam nozzle.

natural_image
Close-up of a metallic mechanical component with a black handle and central hub (no visible text or symbols)Fill the tank to MAX by using dissolved 1 liter citric acid solution. Close the lid of water tank and refit the water tank to the appliance. Place one empty container under the percolation head and one under the steam nozzle.
Connect the appliance to a suitable mains supply outlet. Press the Cappuccino Button, the ON/OFF button indication light flashes with a deep sound.
The ON/OFF button indication light stops flashing as soon as the appliance has reached the required temperature.
Press manual espresso button (3) until half of the de-scaling solution has ran
through. Rotate the Steam Control to maximum position. When the steam comes out, rotate it back to OFF position Let the remainder of de-scaling solution to work on the interior of the machine for about 10 minutes.
Place one empty container under the percolation head. Press Manual Espresso Button.
Allowing the descaling solution to run through completely. Continue by allowing two tanks of clean water run through by press and hold the manual espresso button. Refill the water tank again.
Place one empty container under the percolation head and one under the steam nozzle.
Press the cappuccino button and wait until the indication light stops flashing.
Turn the steam control to Max for 30sec. The switch off the cappuccino button.
Press manual espresso button to allowing remain of water to run through the percolation head. Press On/Off button by switch off the machine and allow it to cool.
Unscrew the valve spring and the gasket from the percolation head and replace percolation grid with the valve spring and the gasket on the percolation head. Finally replace the cappuccino accessory on the steam nozzle.
IV. BEFORE CONSULTING THE SERVICE CENTER
| Trouble Probable cause Remedy | ||
| Carafe leakage water or water leaks out from lid of carafe | The carafe is not located properly | Let centreline of carafe aligns with leakage opening of brew basket well. |
| The level of water in the tank exceeds the scale of MAX. | The water level in the tank should be within the scale of MIN and MAX. | |
| The metal parts in the tank have rust. | The descaler is not recommended type. It may corrode the metal parts in the tank. | Use the descaler recommended by manufacturer. |
| Water leaks from the bottom of coffee maker. | There is much water in the drip tray. | Please clean the drip tray. |
| The coffee maker is malfunction. | Please contact with the authorized service facility for repairing. | |
| Water leaks out of outer side of filter. | There is some coffee powder on filter edge. | Get rid of them. |
ENGLISH
| Acid (vinegar) taste exists in Espresso coffee. | No clean correctly after cleaning mineral deposits. | Clean coffee maker per the content in “before the first use” for several times. |
| The coffee powder is stored in a hot, wet place for a long time. The coffee powder turns bad. | Please use fresh coffee powder, or store unused coffee powder in a cool, dry place. After opening a package of coffee powder, reseal it tightly and store it in a refrigerator to maintain its freshness. | |
| The coffee maker cannot work any more. | The power outlet is not plugged well. | Plug the power cord into a wall outlet correctly, if the appliance still does not work, please contact with the authorized service facility for repairing. |
| The steam cannot froth. | The steam ready indicator (green indicator) is not illuminated. | Only after the steam ready indicator (green indicator) is illuminated, the steam can be used to froth. |
| The container is too big or the shape is not fit. | Use high and narrow cup. | |
| You have used skimmed milk Use whole milk or half-skimmed milk | ||
V. GUARANTEE
The period of guarantee for the product is 12 months from the selling date. The guarantee covers defects of material and workmanship. Under the present guarantee, the manufacturer undertakes to repair or replace any part recognized as faulty on condition that the product is sent to the seller. The present guarantee shall be valid only in case the product was used in compliance with this instruction, no modifications were made to it, it was not repaired or disassembled by unauthorized persons, or was not damaged due to improper handling. Also, the complete set of the product must be retained. This guarantee does not cover natural wear of the product as well as brittle objects such as ceramic components, lamps, etc. The guarantee shall not become effective unless the date of purchase is confirmed by the seller's signature and seal on the guarantee coupon. Any repair under this guarantee shall not extend the period of guarantee and shall not initiate the beginning of a new guarantee.
In compliance with paragraph 2, article 5 of the Federal Law of the RF «On protection of consumers' rights», the manufacturer has established a minimum service life for this product, which is 2 years from the date of manufacture on condition that the product is used in strict compliance with this manual and technical requirements.

natural_image
Top-down view of a glass mug filled with coffee and coffee beans, surrounded by scattered coffee beans (no text or symbols visible)natural_image
Close-up of a hand using a brush to press or spread paper onto a black industrial machine (no visible text or symbols)natural_image
Close-up of a hand operating a modern espresso machine (no visible text or symbols)natural_image
Close-up of a white coffee mug being processed with a black espresso machine (no visible text or symbols)natural_image
Close-up of a modern kitchen appliance with control buttons and a 'REDOMOND' logo (no readable text beyond branding)natural_image
Close-up of a hand pressing down on a power appliance control panel (no visible text or symbols)natural_image
Close-up of a hand pressing down on a stainless steel microwave oven (no visible text or symbols)natural_image
Exterior view of a modern espresso machine with a coffee mug beside it (no visible text or symbols)natural_image
Black sculpted face mask with dotted pattern and 'OFF' text on top (no other visible text or symbols)natural_image
Close-up of a modern red and black appliance with control buttons and a 'REDOMOND' branding (no readable text beyond branding)natural_image
Close-up of a mechanical component with a metallic cylindrical base and black cylindrical top, no visible text or symbols.natural_image
Close-up of a white espresso machine with two cups on a perforated tray (no visible text or symbols)natural_image
Close-up of a hand pressing down on a kitchen appliance control panel (no visible text or symbols)natural_image
Close-up of a white ceramic cup filled with dark coffee, accompanied by a white teacup and saucer, with a spoon on the saucer (no text or symbols visible)natural_image
White ceramic coffee cup filled with tea, placed on a saucer with a metallic spoon beside it against a black background (no text or symbols visible)natural_image
Close-up of a hand operating the Monho coffee maker with control buttons and a coffee mug (no visible text or symbols)natural_image
Close-up of a hand pressing down on a stainless steel KHOOD brand microwave oven (no visible text or symbols)natural_image
Glass mug filled with coffee on a glass plate, surrounded by scattered coffee beans (no text or symbols visible)natural_image
Close-up of a hand pressing down on a kitchen control panel with four buttons (no visible text or symbols)natural_image
Close-up of a hand pressing down on a DMONO microwave oven (no visible text or symbols)natural_image
Close-up of a modern kitchen appliance with control buttons and a 'REDMOND' label (no readable text beyond branding)natural_image
Close-up of a hand pressing down on a metal HONG brand microwave oven (no visible text or symbols)natural_image
Exterior view of a modern espresso machine with a mug, no visible text or symbolsnatural_image
Close-up of a hand pouring liquid into a metal bowl with a black plastic container (no visible text or symbols)natural_image
Close-up of a black sculpted face with abstract eye-like features, mounted on a dark surface with white dots (no text or symbols visible)natural_image
Hand inserting a black plug into a white electrical outlet (no text or symbols visible)natural_image
Close-up of a coffee machine with a mug and spool, no visible text or symbolsnatural_image
Close-up of a hand pressing down on a white appliance control panel (no visible text or symbols)natural_image
Hand inserting a black plastic plug into a white electrical outlet (no text or symbols visible)natural_image
Close-up of a hand pouring dark granular substance into a metal container with a spoon (no text or symbols visible)natural_image
Exterior view of a modern espresso machine with a side panel and control panel (no visible text or symbols)natural_image
Close-up of a black espresso machine with a red arrow pointing to a textured surface (no visible text or symbols)natural_image
Close-up of a black and white industrial machine with a handle, showing internal components and no visible text or symbols.natural_image
Close-up of a metallic mechanical component with a black handle and central hub (no visible text or symbols)

- DEAR CUSTOMER!
- REDMOND
- CONTENT
- СОДЕРЖАНИЕ
- PRODUCT SPECIFICATION
- COMPLETE SET
- ATTENTION!
- PRIOR TO THE FIRST USE
- RINSE THE SYSTEM BEFORE FIRST USE
- RINSE THE SYSTEM FOR THE STEAM FUNCTION
- PREPARING AN ESPRESSO BY USING PRE-SET FUNCTION
- PREPARING AN ESPRESSO BY USING MANUAL FUNCTION
- SET THE TEMPERATURE OF ESPRESSO
- CHANGE PRE-SET ESPRESSO QUANTITY
- NOTE:
- RESET TO THE FACTORY PROGRAMMED QUANTITY.
- CAPPUCCINO PREPARATION
- FILLING THE WATER BOILER
- AUTO TURN OFF
- CLEANING AND MAINTENANCE
- DE-SCALING
- BEFORE CONSULTING THE SERVICE CENTER
- GUARANTEE
Brand : Redmond
Model : RCM-1503
Category : Coffee maker