L32W781A - TV AOC - Free user manual and instructions
Find the device manual for free L32W781A AOC in PDF.

| Product Type | LED Television |
| Screen Size | 32 inches (81 cm) |
| Display Resolution | 1366 x 768 (HD Ready) |
| Aspect Ratio | 16:9 |
| Contrast Ratio | 1200:1 (typical) |
| Viewing Angle | 178°/178° |
| Refresh Rate | 60 Hz |
| HDMI Inputs | 2 x HDMI 1.4 |
| USB Ports | 1 x USB 2.0 |
| Other Connections | VGA, Component, Composite, RF input |
| Audio Output | 1 x 3.5mm headphone jack |
| Built-in Speakers | 2 x 8W |
| Power Supply | AC 100-240V, 50/60Hz |
| Power Consumption (Typical) | 45 W |
| Standby Power | <0.5 W |
| Energy Efficiency Class | F (EU rating) |
| Dimensions with Stand (WxHxD) | 735 x 485 x 180 mm |
| Weight with Stand | 5.2 kg |
| VESA Mounting | 100 x 100 mm |
| Remote Control | Included |
| TV Tuner | DVB-T/T2/C/S/S2 |
| Features | Digital noise reduction, parental lock, 16:9 zoom modes |
Frequently Asked Questions - L32W781A AOC
User questions about L32W781A AOC
0 question about this device. Answer the ones you know or ask your own.
Ask a new question about this device
Download the instructions for your TV in PDF format for free! Find your manual L32W781A - AOC and take your electronic device back in hand. On this page are published all the documents necessary for the use of your device. L32W781A by AOC.
USER MANUAL L32W781A AOC
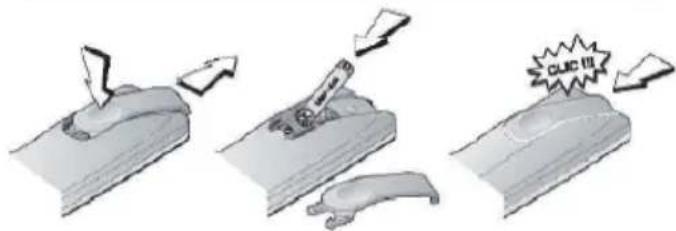
1 Insert batteries into Remote Control
text_image
Diagram illustrating three stages of a tool or process: cutting, pressing, and collapsing with a label 'CUC 11'.Remove the cover of the battery compartment. Install two LR03 / AAA batteries in the remote control.
2
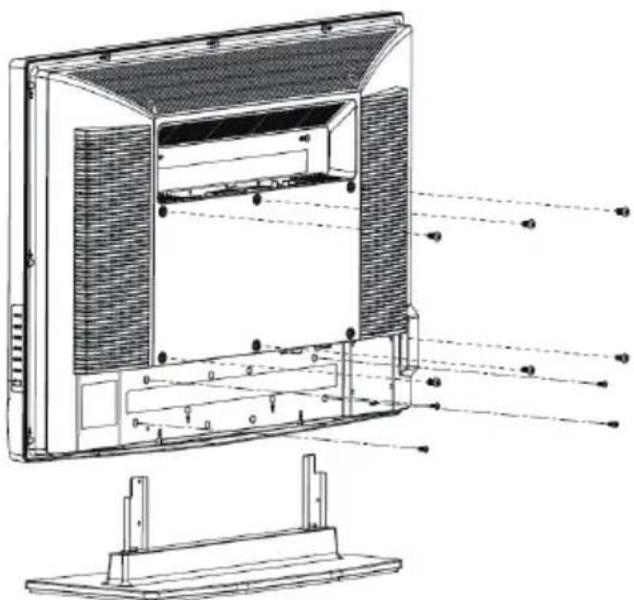
Install TV
How to assemble and disassemble base:
Lay TV set face-down on a cloth or other soft surface.
1 assemble: Insert the stand base and fix these four screws.
② disassemble: Unfix these four screws and remove the stand base.
How to reveal screw holes to fit wall mounting:
1 Remove the stand base
2 Fasten six units M4.0 X 10mm screws to secure the wall mount bracket.
natural_image
Technical line drawing of an open computer monitor with visible internal components and mounting base (no text or symbols)3
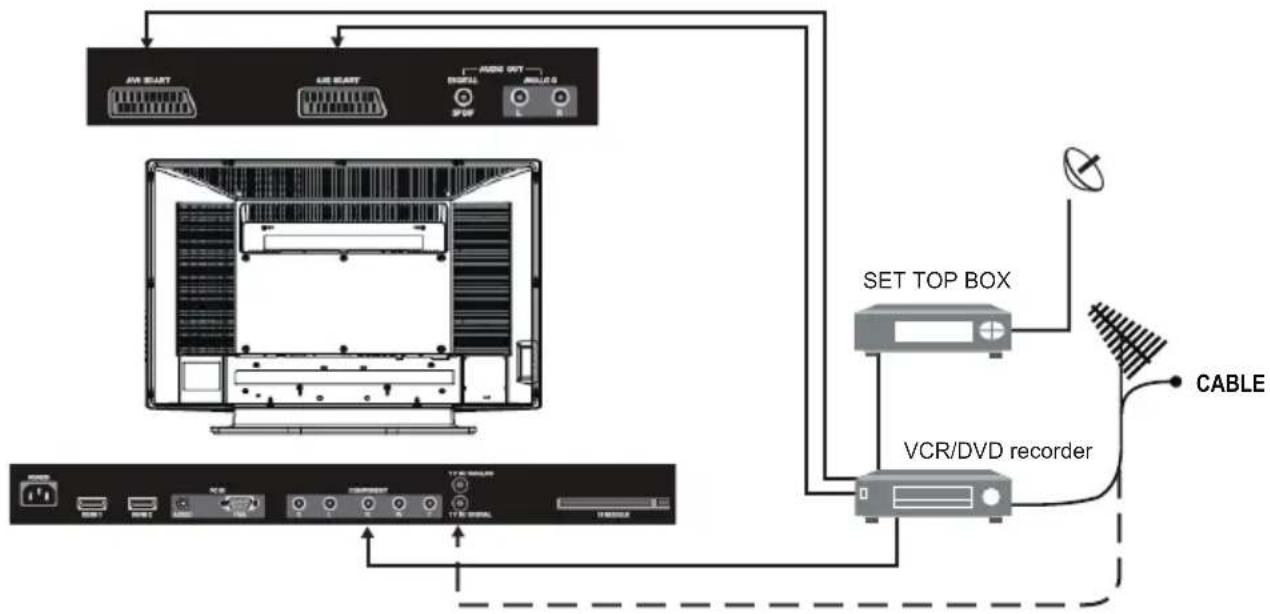
Connections
Plug in aerial and firmly into the aerial socket ANT IN 75 at the back of the TV and connect ancillary equipment.
flowchart
graph TD
    A["TV Device"] --> B["AV START"]
    A --> C["AU START"]
    A --> D["MODI OUT"]
    A --> E["MODI OUT"]
    B --> F["Computer Panel"]
    C --> F
    D --> F
    E --> F
    F --> G["Set Top Box"]
    G --> H["VCR/DVD recorder"]
    H --> I["CABLE"]
    I --> J["Output Line"]
    style A fill:#f9f,stroke:#333
    style J fill:#ccf,stroke:#333
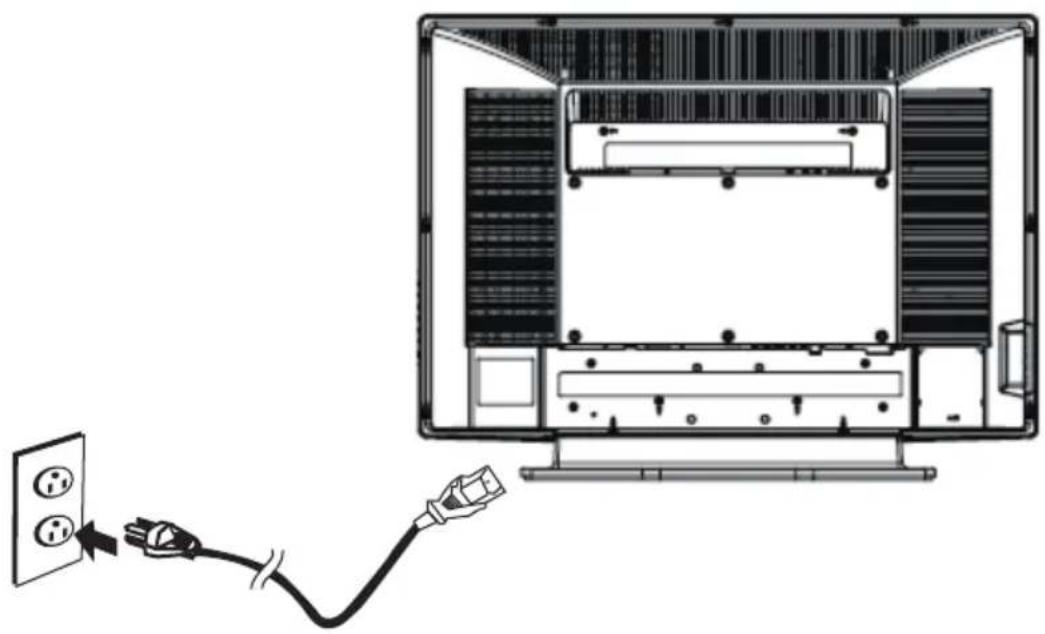
2 Plug the power cord into household mains socket.
natural_image
Diagram showing a cable being inserted into a computer monitor with an outlet, no text or symbols presentNOTE: Outline for reference only
4
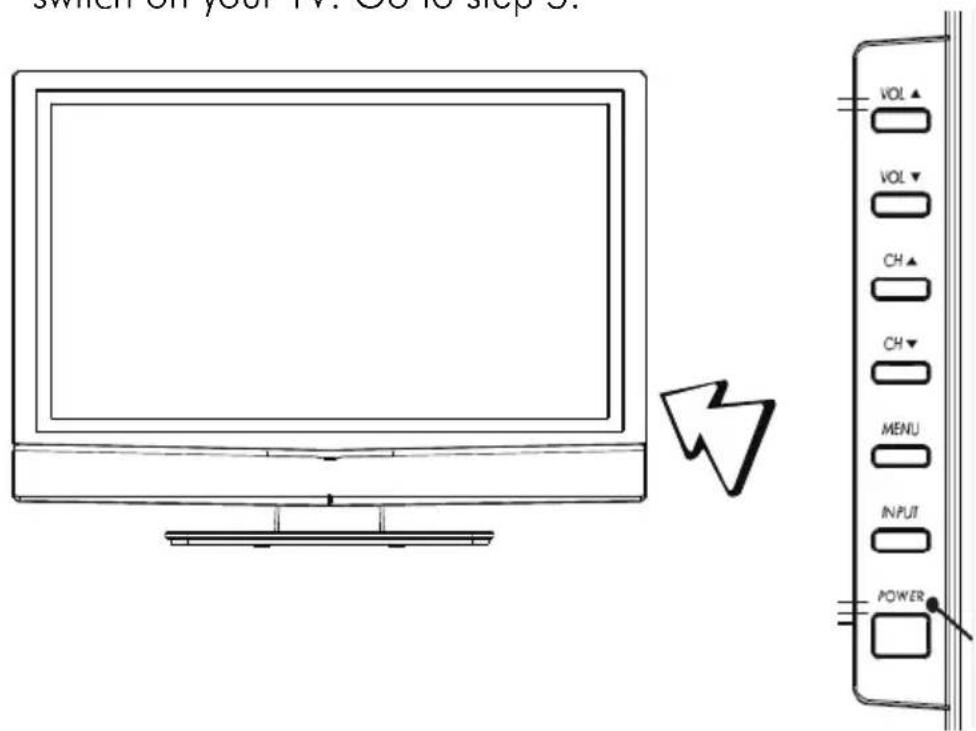
Switch on
Plug your TV and any other equipment that you have connected into the mains.
2 Press the On/Standby switch ( ⏻ on the right side of your TV to switch on your TV. Go to step 5.
text_image
Switch on your TV. Go is stop it. VOL VOL▼ CH▲ CH▼ MENU INPUT POWERNOTE: Outline for reference only
IMPORTANT NOTES

There are two ways to switch the TV set to stand-by mode.
(A) Press the switch on the LCD TV and check GREEN LED is lit.
OR
(B) Press the Power button on the remote controller.
The remote controller can switch on the TV set if it was switched to stand-by using method (A) or method (B).

Press CH “▲”, “▼” or MENU “▲”, “▼” button on the remote controller to brows through the TV channels.

Press VOL“+”, “-” or MENU “◀”, “▶” button on the remote controller to adjust the volume.
5
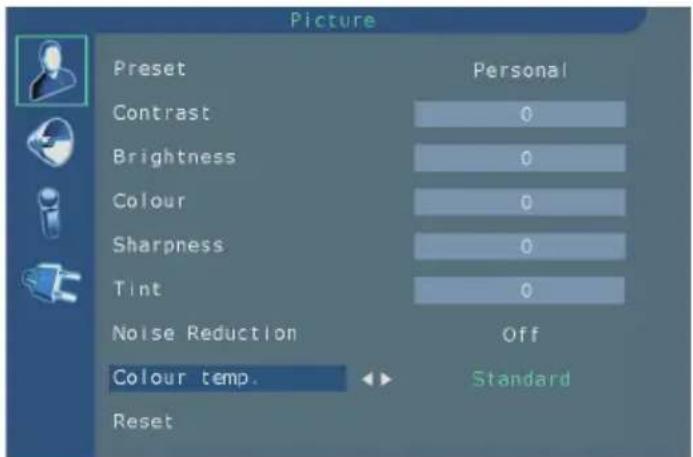
Quick OSD Guide

Press the MENU button on the remote controller into the main OSD (On Screen Display).
text_image
Picture Preset Personal Contrast 0 Brightness 0 Colour 0 Sharpness 0 Tint 0 Noise Reduction Off Colour temp. Standard ResetUse the “▲”, “▼” button on the remote controller to select the desired item, then use “◀” or “▶” button to enter it, and use “MENU” button for exit.

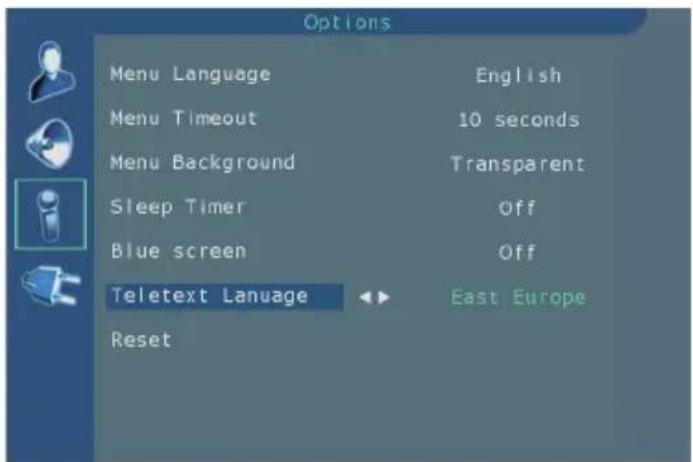
Select the Language From MENU → OPTIONS → MENU LANGUAGE,
to select the desired language.
text_image
Options Menu Language English Menu Timeout 10 seconds Menu Background Transparent Sleep Timer Off Blue screen Off Teletext Lanuage East Europe Reset
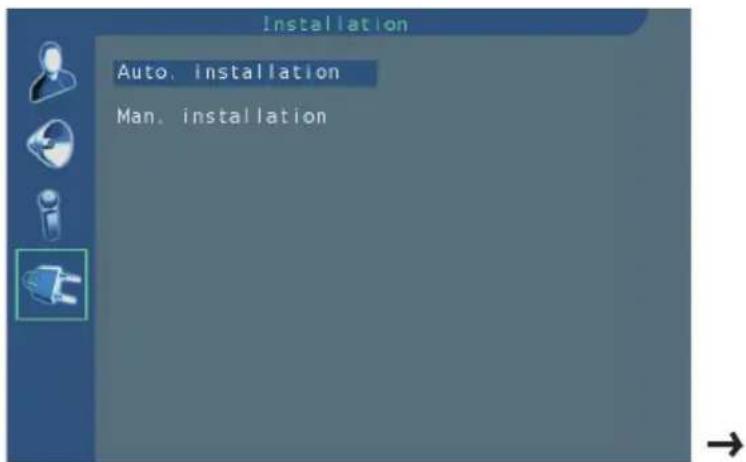
Select the Country From MENU → INSTALLATION → AUTO. INSTALLATION → COUNTRY, to select the desired country
text_image
Installation Auto. installation Man. installation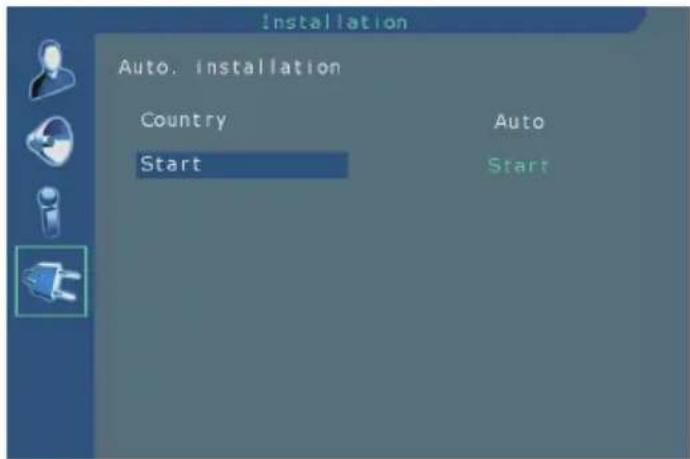
text_image
Installation Auto. Installation Country Start Auto StartWhen selected country ok, move to "START", then press "◀" or "▶" button to scan programme, your stations will be located and stored.

Programme Sorting
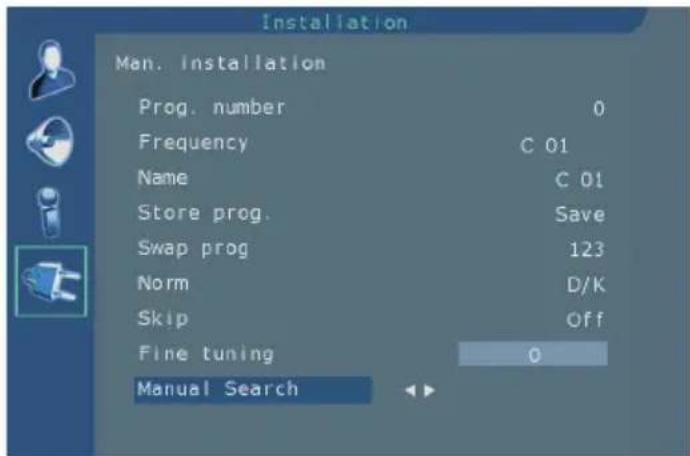
From MENU→INSTALLATION→MAN. INSTALLATION
text_image
Installation Man. Installation Prog. number 0 Frequency C 01 Name C 01 Store prog. Save Swap prog 123 Norm D/K Skip Off Fine tuning 0 Manual Search
Store prog. : Allows to Save a channel on a new Program No, to Insert a channel on an already existing Program No(the channel previously saved on this program no will be shifted to the upper program no) or to Delete the Program No.
Once a channel has been found and named, use the V botton to select the Store prog. option.
Using the < / > buttons, select Save, Insert or Delete and press the OK button to confirm.

Swap prog : Allows to swap 2 programme numbers.
Using the ^ / ∨ buttons select the Prog. number option.
Using the < / > buttons, select the program to be moved.
Using the V botton, select the Swap prog option.
Using the > botton, enter the swap function.
Using the 0-9 digit, enter the new programme number(3 digits).
Press the OK button to confirm, the programme numbers are swapped.