
DPG801BK - Digital photo frame VIEWSONIC - Free user manual and instructions
Find the device manual for free DPG801BK VIEWSONIC in PDF.


| Product Type | Digital Photo Frame |
| Brand | ViewSonic |
| Model | DPG801BK |
| Display Size | 8 inches (diagonal) |
| Display Resolution | 800 x 600 pixels |
| Aspect Ratio | 4:3 |
| Supported Memory Cards | SD, SDHC, MMC, MS, XD |
| Supported Photo Formats | JPEG, BMP, GIF, PNG |
| Internal Memory | 128 MB (expandable via card) |
| Slideshow Modes | Single, all, random, with transition effects |
| Power Supply | 5V DC, 1.5A (AC adapter included) |
| Power Consumption | Approximately 5W (typical) |
| Dimensions (with stand) | 230 x 180 x 30 mm (9.1 x 7.1 x 1.2 in) |
| Weight | 0.5 kg (1.1 lbs) |
| Color | Black |
| Mounting Options | Tabletop stand (included); wall-mountable (VESA 75x75 mm) |
| Operating Temperature | 0°C to 40°C (32°F to 104°F) |
| Cleaning Instructions | Wipe with a soft, dry cloth. Avoid solvents. |
| Safety Precautions | Do not expose to moisture or extreme heat. Use only provided adapter. |
| Spare Parts & Repairability | No user-serviceable parts. Contact ViewSonic support for repairs. |
Frequently Asked Questions - DPG801BK VIEWSONIC
User questions about DPG801BK VIEWSONIC
0 question about this device. Answer the ones you know or ask your own.
Ask a new question about this device
Download the instructions for your Digital photo frame in PDF format for free! Find your manual DPG801BK - VIEWSONIC and take your electronic device back in hand. On this page are published all the documents necessary for the use of your device. DPG801BK by VIEWSONIC.
USER MANUAL DPG801BK VIEWSONIC
This device complies with part 15 of FCC Rules. Operation is subject to the following two conditions: (1) this device may not cause harmful interference, and (2) this device must accept any interference received, including interference that may cause undesired operation.
This equipment has been tested and found to comply with the limits for a Class B digital device, pursuant to part 15 of the FCC Rules. These limits are designed to provide reasonable protection against harmful interference in a residential installation. This equipment generates, uses, and can radiate radio frequency energy, and if not installed and used in accordance with the instructions, may cause harmful interference to radio communications. However, there is no guarantee that interference will not occur in a particular installation. If this equipment does cause harmful interference to radio or television reception, which can be determined by turning the equipment off and on, the user is encouraged to try to correct the interference by one or more of the following measures:
■ Reorient or relocate the receiving antenna.
■ Increase the separation between the equipment and receiver.
■ Connect the equipment into an outlet on a circuit different from that to which the receiver is connected.
■ Consult the dealer or an experienced radio/TV technician for help.
Warning: You are cautioned that changes or modifications not expressly approved by the party responsible for compliance could void your authority to operate the equipment.
For Canada
CE Conformity for European Countries

The device complies with the requirements of the EEC directive 2004/108/EC as amended by 92/31/EEC and 93/68/EEC Art.5 with regard to “Electromagnetic compatibility”, and 2006/95/EC as amended by 93/68/EEC Art.13 with regard to “Safety”.
Following information is only for EU-member states:
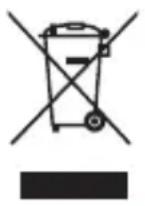
The mark shown to the right is in compliance with the Waste Electrical and Electronic Equipment Directive 2002/96/EC (WEEE).
The mark indicates the requirement NOT to dispose the equipment as unsorted municipal waste, but use the return and collection systems according to local law.
Important Safety Instructions
- Read these instructions.
- Keep these instructions.
- Heed all warnings.
- Follow all instructions.
- Do not use this unit near water.
- Clean with a soft, dry cloth. If still not clean, see “Cleaning the Display” in this guide for further instructions.
- Do not block any ventilation openings. Install the unit in accordance with the manufacturer's instructions.
- Do not install near any heat sources such as radiators, heat registers, stoves, or other devices (including amplifiers) that produce heat.
- Do not defeat the safety purpose of the polarized or grounding-type plug. A polarized plug has two blades with one wider than the other. A grounding type plug has two blades and a third grounding
prong. The wide blade and the third prong are provided for your safety. If the provided plug does not fit into your outlet, consult an electrician for replacement of the obsolete outlet.
-
Protect the power cord from being walked on or pinched particularly at plugs. Convenience receptacles and the point where they exit from the unit. Be sure that the power outlet is located near the unit so that it is easily accessible.
-
Only use attachments/accessories specified by the manufacturer.
-
Use only with the cart, stand, tripod, bracket, or table specified by the manufacturer, or sold with the unit. When a cart is used, use caution when moving the cart/unit combination to avoid injury from tipping over.

-
Unplug this unit when unused for long periods of time.
-
Refer all servicing to qualified service personnel. Servicing is required when the unit has been damaged in any way, such as: if the power-supply cord or plug is damaged, if liquid is spilled onto or objects fall into the unit, if the unit is exposed to rain or moisture, or if the unit does not operate normally or has been dropped.
Declaration of RoHS Compliance
This product has been designed and manufactured in compliance with Directive 2002/95/EC of the European Parliament and the Council on restriction of the use of certain hazardous substances in electrical and electronic equipment (RoHS Directive) and is deemed to comply with the maximum concentration values issued by the European Technical Adaptation Committee (TAC) as shown below:
| Substance Proposed Maximum Concentration | Actual Concentration | |
| Lead (Pb) 0.1% < 0.1% | ||
| Mercury (Hg) 0.1% < 0.1% | ||
| Cadmium (Cd) 0.01% < 0.01% | ||
| Hexavalent Chromium ( Cr^6+ ) | 0.1% < 0.1% | |
| Polybrominated biphenyls (PBB) 0.1% < 0.1% | ||
| Polybrominated diphenyl ethers (PBDE) | 0.1% < 0.1% | |
Certain components of products as stated above are exempted under the Annex of the RoHS Directives as noted below:
Examples of exempted components are:
-
Mercury in compact fluorescent lamps not exceeding 5 mg per lamp and in other lamps not specifically mentioned in the Annex of RoHS Directive.
-
Lead in glass of cathode ray tubes, electronic components, fluorescent tubes, and electronic ceramic parts (e.g. piezoelectronic devices).
-
Lead in high temperature type solders (i.e. lead-based alloys containing 85% by weight or more lead).
-
Lead as an allotting element in steel containing up to 0.35% lead by weight, aluminium containing up to 0.4% lead by weight and as a cooper alloy containing up to 4% lead by weight.
Table of Contents
Follow the instructions below to install and operate the unit. . . . 1
Step 1: Check the components.....1
System Requirements: 1
Controls on the front .....2
Controls on the back .....2
Step 2: Install the adjustable foot stand. . . . . . . . . . . . . . . . . . . . . . . . . . . . . . . . . . . . . . . . . . . . . . . . . . . . . . . . . . 3
Step 3: Connect the AC power....4
Step 4: (Optional) Insert a memory card.....5
Step 5: Turn on the unit. .....6
Step 6: Operate the unit. . . . . . . . . . . . . . . . . . . . . . . . . . . . . . . . . . . . . . . . . . . . . . . . . . . . . . . . . . . . . . . . . . . 6
Using the Photo mode....8
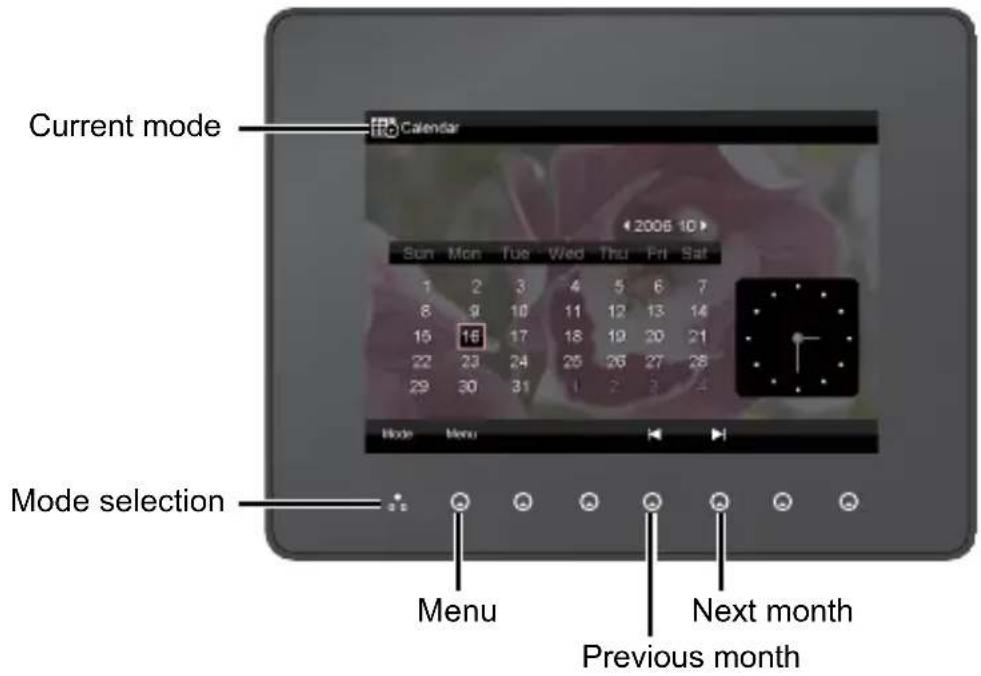
Using the Calendar mode ....8
Using the Music mode....9
Using the Video mode....10
Follow the instructions below to install and operate the unit.
Step 1: Check the components.
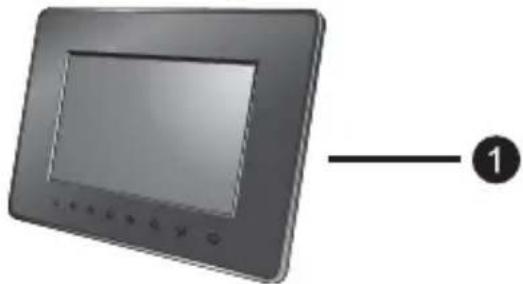
Carefully open the packing box and ensure that you have the following items.
- Digital photo frame (DPG801BK)
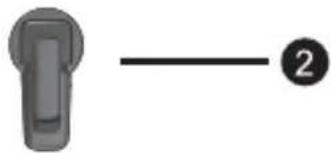
- Adjustable foot stand
- USB cable
- Quick Start Guide
- AC power adapter
natural_image
Illustration of a rectangular digital display with control buttons and a numbered label (1) pointing to it, no text or symbols present.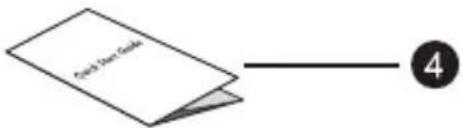
natural_image
Simple diagram of a door handle with a numbered line and circle (no text or symbols)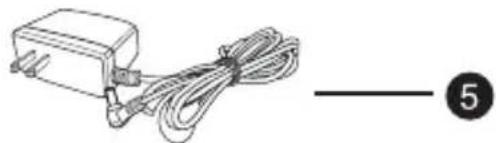
natural_image
Simple line drawing of a cable and plug assembly (no text or symbols)
natural_image
Simple line drawing of a cable with connectors and a numbered circle (3) beside it, no text or symbols present.System Requirements:
■ USB 2.0 interface
■ Windows 2000/XP/Vista
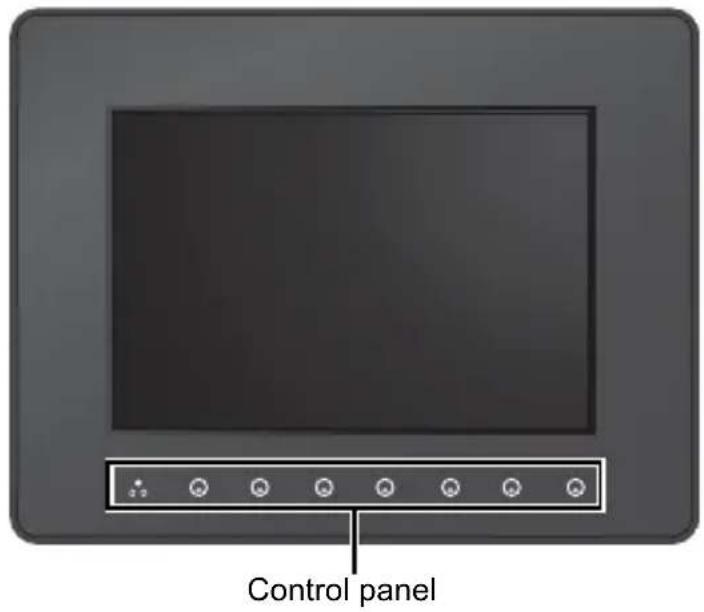
Controls on the front
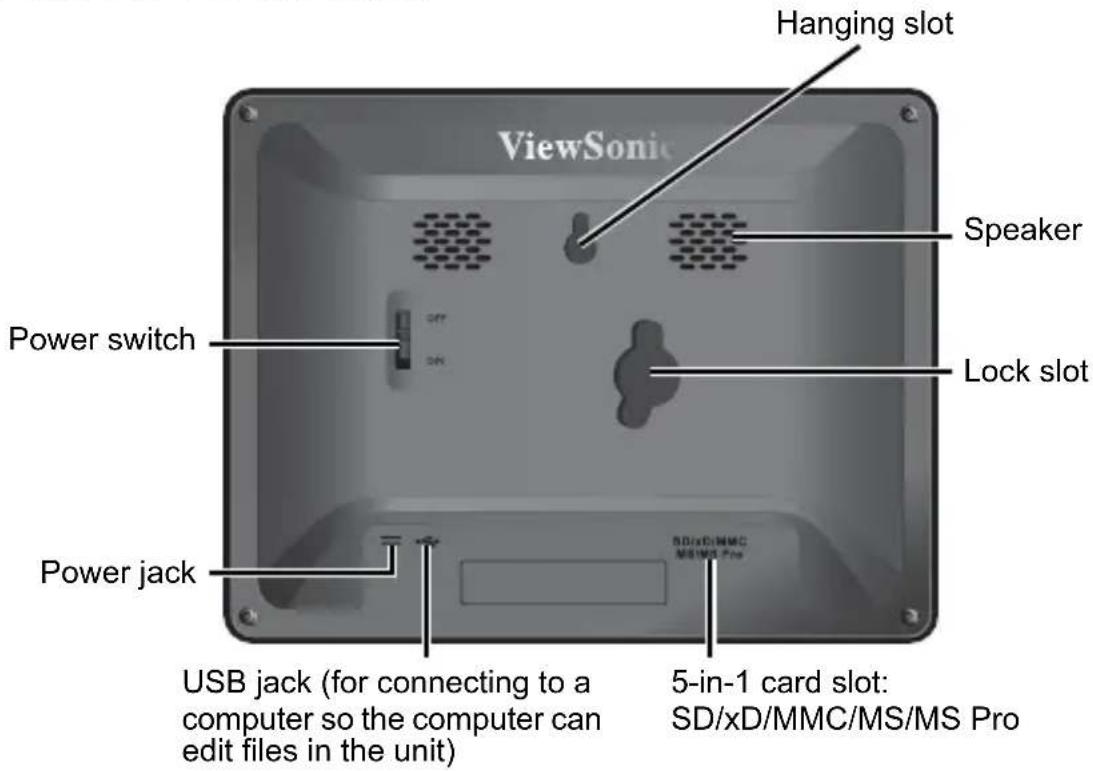
Controls on the back
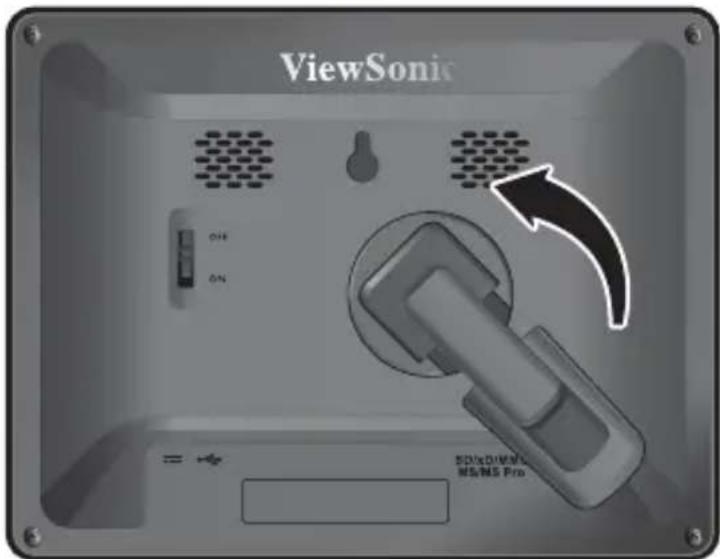
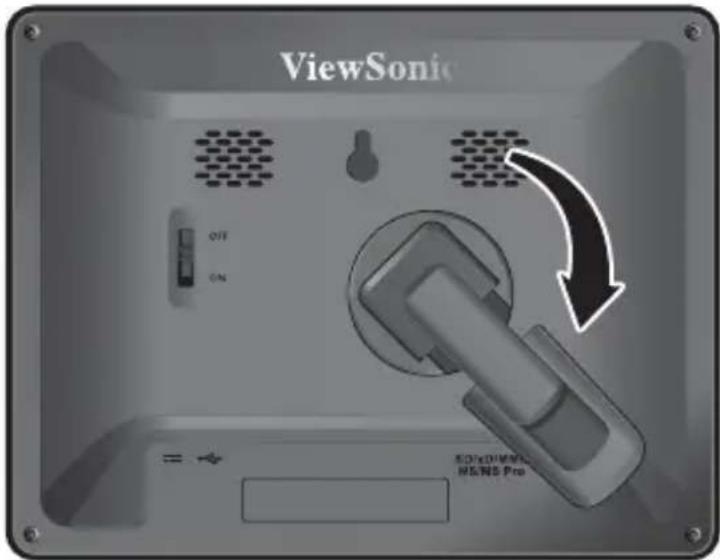
Step 2: Install the adjustable foot stand.
- On the back of the unit, attach the foot stand to the lock slot.
Lock slot
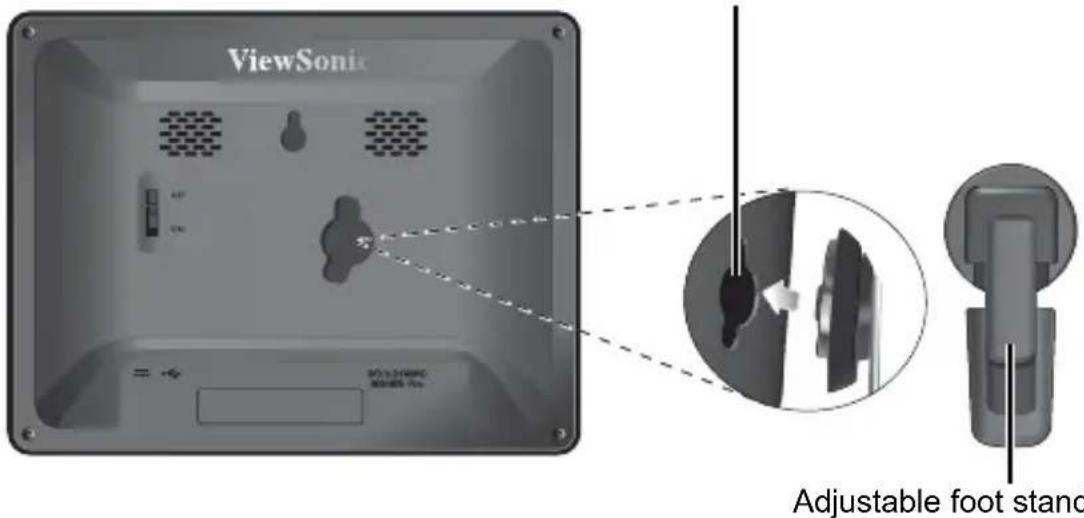
- To place the photo frame vertically, rotate the foot stand counterclockwise until it is secured to the photo frame.
- To place the photo frame horizontally, rotate the foot stand clockwise until it is secured to the photo frame.
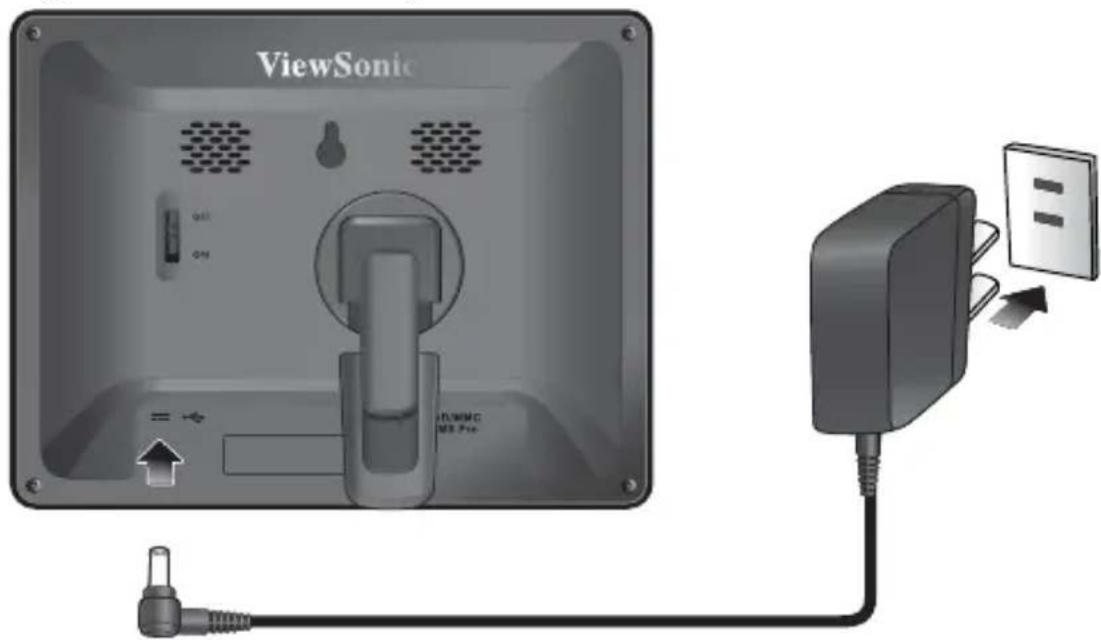
Step 3: Connect the AC power.
- Plug one end of the AC power adapter into the power jack on the back of this unit.
- Plug the other end into a power outlet.
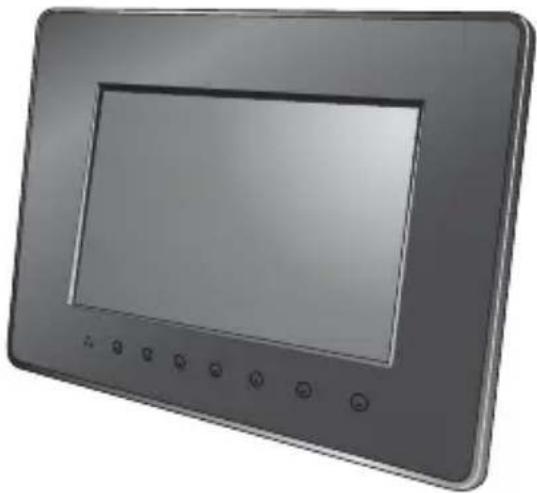
- Place this unit horizontally (recommended direction) or vertically on a stable surface.
natural_image
3D rendering of a rectangular digital display with control buttons (no text or symbols)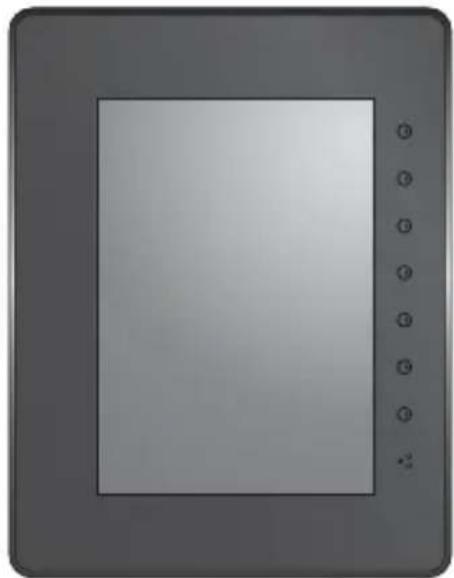
natural_image
Front view of a gray tablet device with control buttons on the right side (no text or symbols visible)Step 4: (Optional) Insert a memory card.
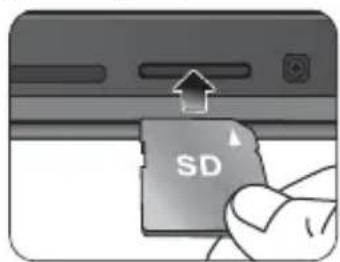
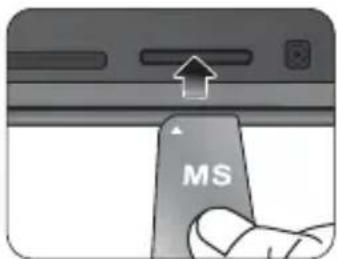
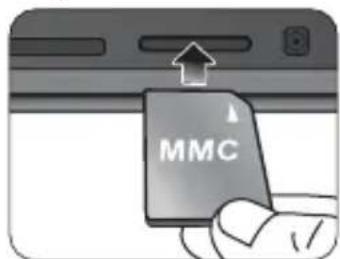
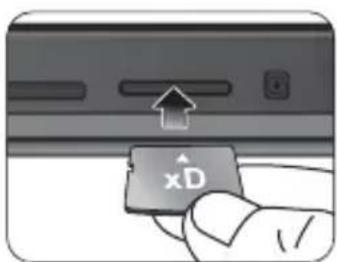
On the back of the unit, you can insert a memory card containing the content you want to show on the unit.

Note: Secure Digital™ Card (SD), xD-Picture Card™ (xD), MultiMedia Card™ (MMC), Memory Stick™ (MS), and Memory Stick Pro™ (MS Pro) memory card types are compatible with the unit. To use a Memory Stick Duo (MS Duo) memory card, a Memory Stick Duo (MS Duo) adapter is required.
Step 5: Turn on the unit.
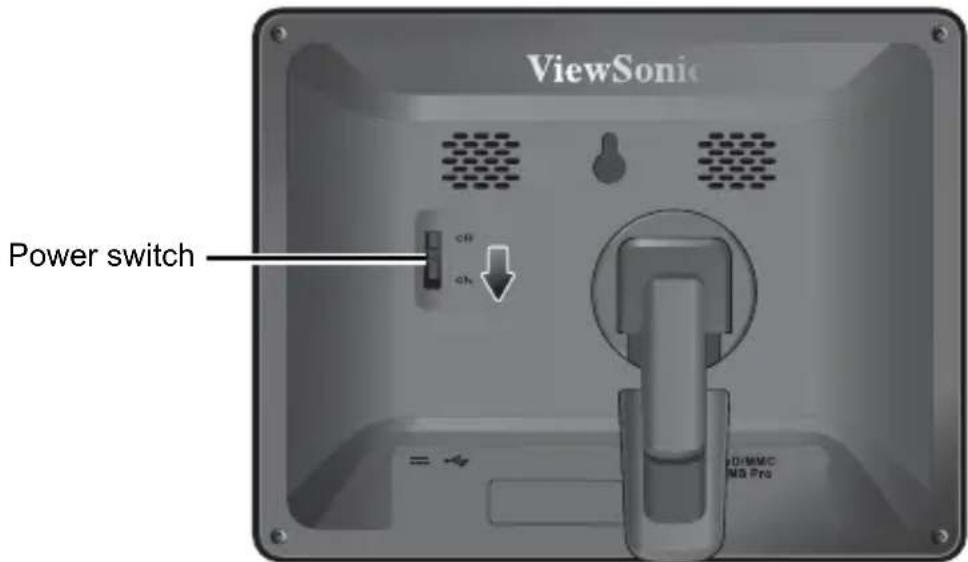
Slide the power switch to the ON position to power on the unit.
Step 6: Operate the unit.
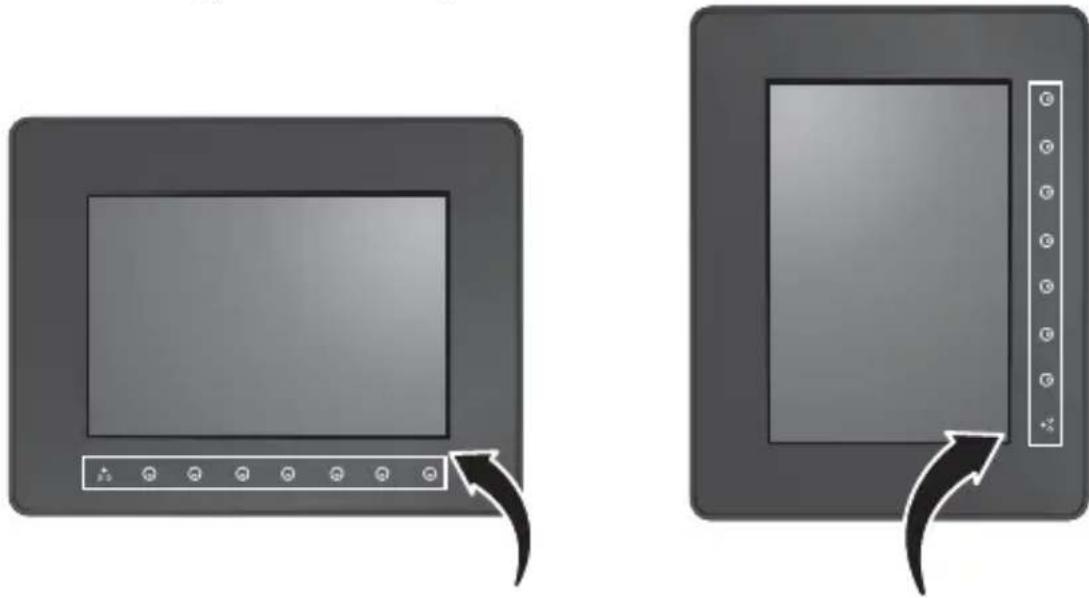
After the unit is turned on, available functions (represented by name or icon) show on the screen. Their corresponding buttons also light up on the control panel for a period of time.
Simply press the corresponding button below (if the unit is placed horizontally) or beside (if the unit is placed vertically) the name or icon indicating the function you want to use.
natural_image
Two grayscale images showing a monitor with control buttons and an arrow indicating rotation (no text or symbols)Control panel
■ To toggle among Photo, Calendar, Music, and Video modes, press
under Mode.
■ If the control panel is unused for a certain period of time, the LED turns off automatically. To turn on the backlight again, press anywhere on the control panel.

Using the Photo mode
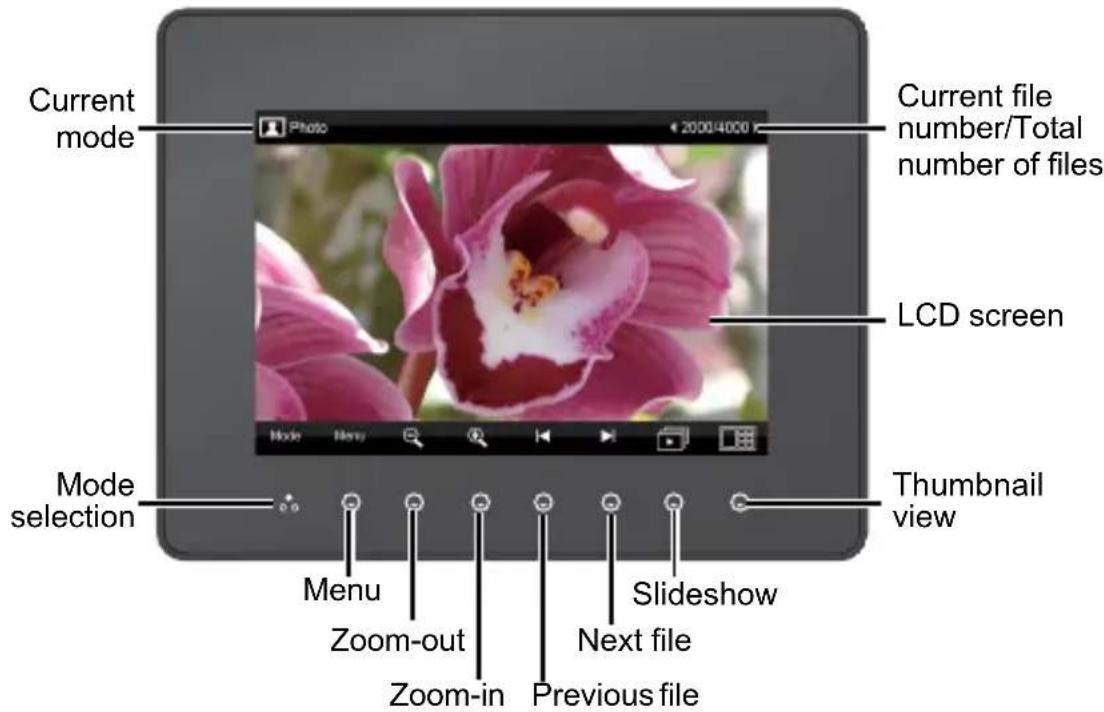

Note: Standard JPEG and BMP image file formats are supported.
Using the Calendar mode
Using the Music mode
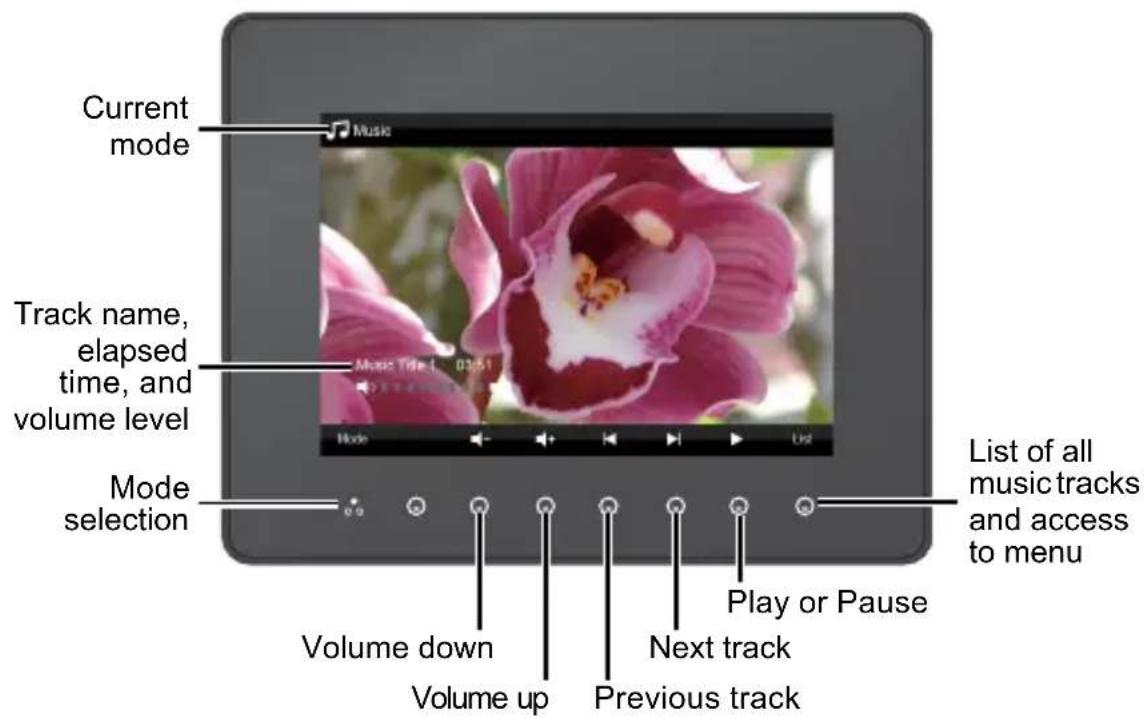

Note: MP3 and WMA audio file formats are supported.
Using the Video mode
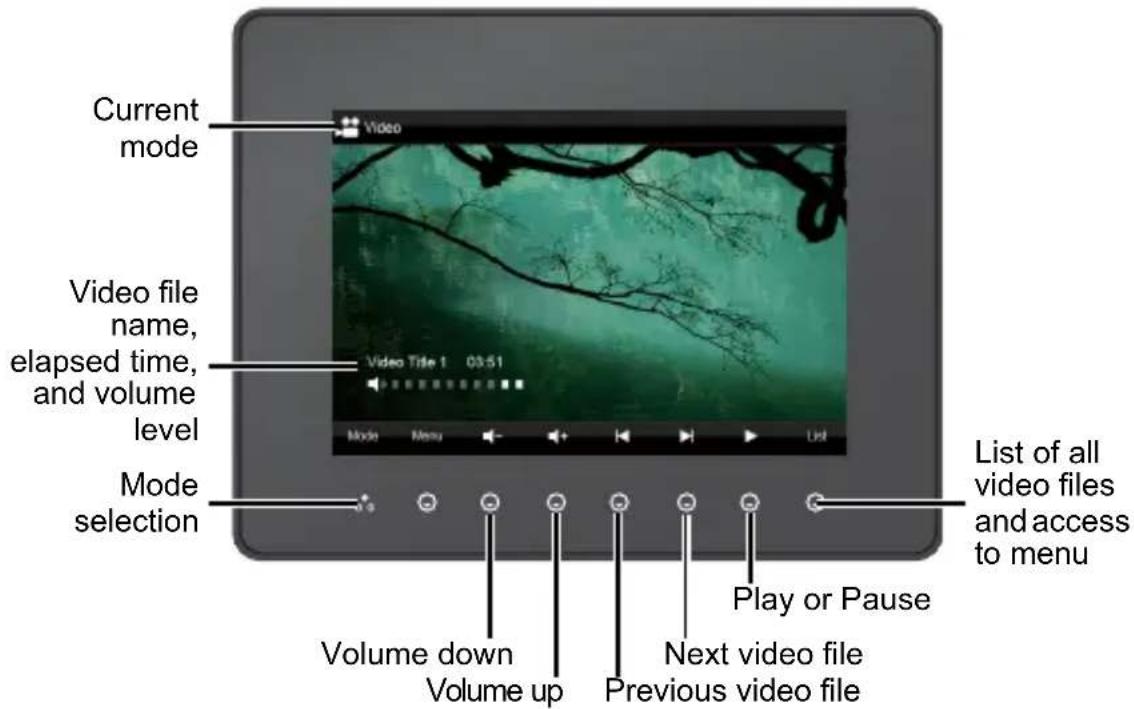

Note: The Motion JPEG (M-JPEG) compressed video files (*.avi and *.mov) are supported. However, not all files with these extensions can be played properly. Refer to the table below for limitations.
| AVI MOV MPEG | G MPG | WMV | |||
| Motion-JPEG- | O | O | X | X | X |
| MPEG1- | X | X | X | X | X |
| MPEG2- | X | X | X | X | X |
| MPEG4-(High Compress) | X | X | X | X | X |
| H.264- | X | X | X | X | X |
| H.263- | X | X | X | X | X |
| WMV- | X | X | X | X | X |
P/N: 4J.0NH01.001
- For Canada
- CE Conformity for European Countries
- Following information is only for EU-member states:
- Important Safety Instructions
- Declaration of RoHS Compliance
- Table of Contents
- Follow the instructions below to install and operate the unit.
- Step 1: Check the components.
- System Requirements:
- Controls on the front
- Controls on the back
- Step 2: Install the adjustable foot stand.
- Step 3: Connect the AC power.
- Step 5: Turn on the unit.
- Step 6: Operate the unit.
Brand : VIEWSONIC
Model : DPG801BK
Category : Digital photo frame