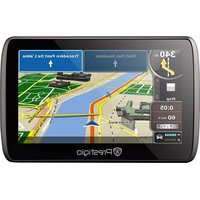
GeoVision 5000 - Gps PRESTIGIO - Free user manual and instructions
Find the device manual for free GeoVision 5000 PRESTIGIO in PDF.


| Product Type | GPS Navigator |
| Brand | Prestigio |
| Model | GeoVision 5000 |
| Display Size | 5.0 inches |
| Display Resolution | 480 x 272 pixels |
| Internal Memory | 4 GB |
| Memory Expansion | microSD card slot (up to 32 GB) |
| Battery | Rechargeable Li-ion 1500 mAh |
| Power Supply | 5V / 1A via car charger |
| Dimensions | 130 x 85 x 15 mm |
| Weight | 200 g |
| Navigation Features | Voice guidance, points of interest, turn-by-turn directions |
| Map Coverage | Preloaded maps for Europe |
| Additional Functions | Speed camera alerts, lane assist, trip computer |
| Mounting | Suction cup windshield mount |
| Connectivity | Mini USB for PC connection |
| Maintenance & Care | Clean with a soft, dry cloth; avoid solvents |
| Safety Advice | Use only as a navigation aid; obey traffic laws |
| Spare Parts & Reparability | Charger, mount, and battery available; repair via authorized center |
| General Information | Full user manual available for free download |
Frequently Asked Questions - GeoVision 5000 PRESTIGIO
User questions about GeoVision 5000 PRESTIGIO
0 question about this device. Answer the ones you know or ask your own.
Ask a new question about this device
Download the instructions for your Gps in PDF format for free! Find your manual GeoVision 5000 - PRESTIGIO and take your electronic device back in hand. On this page are published all the documents necessary for the use of your device. GeoVision 5000 by PRESTIGIO.
USER MANUAL GeoVision 5000 PRESTIGIO
GPS Personal Navigation
GEOVISION 5000
Quick Guide Version 1.0
Quick Start Guide
Prestigio GPS
GV5000

Prestigio
Important Safety Instructions


This symbol alerts you that important literature concerning operation and maintenance has been ed with this product.

This symbol indicates that high voltage is present inside. It is dangerous to make any kind of contact with any part of this product.
Caution
- Do not disassemble your device. It might cause electric shock. Only PRESTIGIO certified technicians are qualified to Repair your device. In calling upon nonqualified persons to repair your product, you run the risk of damaging your device and voiding your guaranty.
- Use only accessories that are PRESTIGIO branded or certified by manufacturer.
- Power off and disconnect the power supply cable before opening the unit.
contact with water voids your guaranty.
This product falls into the category of electric/electronic equipment and contain substances that are potentially dangerous to the environment and to human health. Therefore, you should not dispose of the PRESTIGIO
electronic device in a regular trash and should hand it over to the applicable collection point for the recycling.
CE As the Prestigio products are constantly updated and improved, your device's software and hardware may have a slightly different appearance or modified functionality than presented in this Quick Start Guide.
Prestigio hereby states that this GPS Navigator complies to basic requirements and another relevant regulations given by the EU directive 1999/5/EC. Full version of the declaration of conformity is available on: http://www.prestigio.com/compliance.
To prevent possible hearing damage, do not listen at high volume levels for long periods.
Warning
Keep your product away from any sources of humidity. This can seriously damage the device. Do not manipulate your device with wet hands. Any damage done to the device due to its
EN-1

Prestigio
Quick Start Guide
Prestigio GPS
GV5000
π
Open your package
• Prestigio GPS • Car Charger
- Mounting Cradle • USB Cable
- Stylus • CD-ROM
- Quick start guide • Warranty card
Using the mounting cradle

- Do not operate the device while driving.
- Please select an appropriate location on the dashboard or windshield where the device will not obstruct driver field of vision.
- Make sure that the device has a clear view of sky to attain best GPS reception.
Your GPS Navigator at a glance

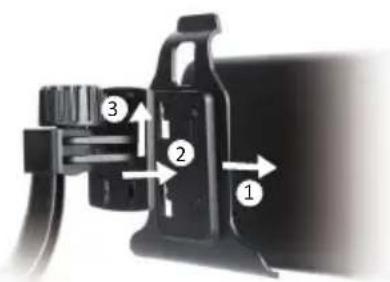
Please follow procedures below to operate mounting cradle:
- Place device on the bracket with bottom positioned on the appropriate socket.
- Push on the top edge to securely install device onto the cradle.
- Lift the suction cup lever and press the suction cup at desired
EN-2
Quick Start Guide
Prestigio GPS
GV5000

Prestigio
location.
- Press down the suction cup lever to secure the mounting cradle on the surface.
- Rotate the knob to adjust device to desired viewing angle.
To Dismount Device
- Push the tap on top of the mounting cradle to release the device.
- Lift the suction cup lever to easily remove the suction cup from windshield or dashboard.
Charging your GPS
Connect your GPS to the vehicle accessory/cigarette socket by using the included USB cable and car charger.

natural_image
Diagram showing a car fuel plug connecting to a vehicle, with an inset magnified view of the plug being inserted (no text or symbols present)
Please connect the car charger to vehicle 12V accessory/cigarette socket after vehicle engine is started to protect the device from sudden surges in current.
mZ
Stylus
While the first time you turn on the GPS navigator, you are asked to do calibration for the stylus. Thus, strokes or taps by the stylus will be precisely displayed on the screen. (Or go to Settings to do calibration).
Getting started
Press and hold the power key to power on your GPS.
Home screen
Your Home screen is the starting point to access all of the GPS navigator's features.
General operations
- Tap or to select your desired function on the Home screen.
- Go to Settings, Tap or to go to previous or next page.
- Tap to exit and return to your Home screen.
EN-3
E2

Prestigio
Quick Start Guide
Prestigio GPS
GV5000
Start GPS navigation
-
Press and hold the power key to power on your GPS.
-
Tap or to select .

- Tap the icon to start GPS navigation.
GPS


When Prestigio GeoVision is started the first time, you need to select whether to start the program in Simple mode or in Advanced mode.
The two operating modes of Prestigio GeoVision mainly differ in the menu structure and the number of available features. The controls and screen layouts are the same.
- Simple mode: you have easy access to the most important navigation functions and the basic settings only. The rest of the settings are set to values that are optimal for typical use. - Advanced mode: you have access to the full functionality of Prestigio GeoVision.
This Guide covers actions in Simple mode. See the User Manual for detailed instructions on both modes.
Later you can switch between the two operating modes:
• To switch from Simple mode to Advanced mode: on the
startup screen (Navigation Menu), tap
, Settings Advanced Mode
- To switch from Advanced mode to Simple mode: on the startup screen (Navigation Menu), tap 📄, .Simple Mode
Navigation Menu


After selecting Simple mode, the Navigation menu appears. From here you can reach all parts of Prestigio GeoVision. The Navigation menu contains the following options:
- Tap#d Pred Address to specify an address as your destination.
- Tap History for the list of recent destinations.
- Tap to select one of the stored Points of Interest.
- Tap★ for the list of your favourite destinations.
- Tap Map to navigate or to browse the map.
- Tap Settings to customise the way Prestigio GeoVision works.
- Tap Exit to stop navigation, and exit Prestigio GeoVision.
EN-4
Quick Start Guide
Prestigio GPS
GV5000

Prestigio

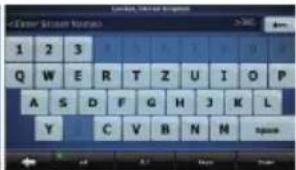
In the Navigation menu, tap may default, Prestigio
GeoVision proposes the country/state and settlement where you are. If needed, tap the button with the name of the country/state, and select a different one from the list. If needed, change the settlement:
• To select the settlement from the list of recently used ones,
tap the button.
• To enter a new settlement:
- Tap the button with the name of the settlement, or if you have changed the country/state, tap
. - Start entering the settlement name on the keyboard.
-
Get to the list of search results:
-
After entering a couple of characters, the names that match the string appear in a list.
-
Tap Done to open the list of results before it appears automatically.
-
Pick the settlement from the list.
mZ
Enter the street name:
- Tap
- Start entering the street name on the keyboard.
-
Get to the list of results:
-
After entering a couple of characters, the names that match the string appear in a list.
-
Tap Done to open the list of results before it appears automatically.
-
Pick the street from the list.
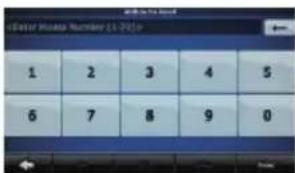
Enter the house number:
- Tap
. - Enter the house number on the keyboard.
- Tap Done to finish entering the address.
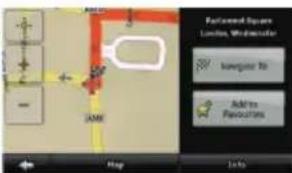
The map appears with the selected point in the middle. Tap from the Cursor menu. The route is then automatically calculated, and you can start navigating.
EN-5

Prestigio
Quick Start Guide
Prestigio GPS
GV5000
On the Map screen, tap to return to the Navigation menu.
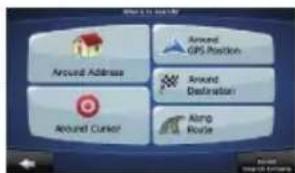
In the Navigation menu, tap 📄 Select the area around which the POI should be searched:
- The POI will be searched around a given address.
- The POI will be searched around the Cursor.
• 📄: The POI will be searched around the current GPS position.
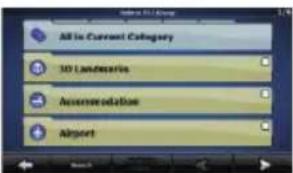
• : The POI will be searched around the destination of the active route. - The POI will be searched not around a given point but by the size of the detour it means from the active route. This can be useful if you search for a later stopover that causes only a minimal detour. For example upcoming petrol stations or restaurants. After this, the list of POI categories appear.

You can narrow the search with the following:
- Select the POI group (e.g. Accommodation), and after that, if needed, select the POI subgroup (e.g. Hotel or Motel).
- To find the POI by its name, tap Search, and use the keyboard to enter a part of the name.
- To list all POIs in a given POI group, press Search, and then Done without entering any letters of its name.
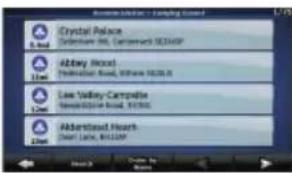
[optional] When finally the list of results appear, you can change the list order with the Order by Name or Button.
Tap the desired POI in the list.
The map appears with the selected point in the middle. Tap from the Cursor menu. The route is then automatically calculated, and you can start navigating.
EN-6
Quick Start Guide
Prestigio GPS
GV5000

Prestigio
Map Screen
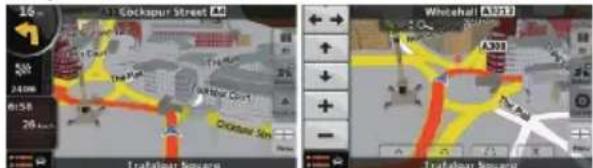
The most important and most often used screen of Prestigio GeoVision is the Map screen. The map looks similar to a conventional road-map. The blue arrow represents your current position, and the green line shows the recommended route. There are several screen buttons and data fields on the screen to help you navigate. Their functions are explained in detail in the User Manual.
During navigation, the screen shows route information and trip data (left screenshot), but when you tap the map, additional buttons and controls appear for a few seconds (right screenshot). Most parts of the screen behave as buttons.
or : Switches between 2D (classic top-down view) and
3D (perspective view for navigation) map modes.
: Opens the Navigation menu.
If you have moved the map, a button appears. Tap this button to move the map back to the current GPS position.

Prestigio
Quick Start Guide
Prestigio GPS
GV5000
Technical Specifications
| Item Specification | |
| GPS Receiver MT3328 | |
| Processor MT3351C ARM-11 CORE, 468MHz | |
| RAM 128MB DDR3 | |
| Display 5" TFT touch LCD | |
| Resolution 480 x 272 pixels | |
| Storage capacity | 4 GB flash memory, Memory card slot supports micro SDHC card up to 8 GB |
| Interfaces | USB 2.0, Micro SD (micro SDHC compatible) |
| Battery 850 mAh Li-Polymer battery | |
| Dimensions 131.8 x 92 x 10.3mm (L x W x H) | |
| Weight 160 g | |
| Storage Temperature | -10°C ~ +60°C |
| Operation Temperature | 0°C ~ +50°C |
| Operation Relative Humidity | 45% ~ 80% Non-Condensed |
| Storage Relative Humidity | 30% ~ 90% Non-Condensed |
EN-8

Brand : PRESTIGIO
Model : GeoVision 5000
Category : Gps