GeoVision 5050 iGo - Gps PRESTIGIO - Free user manual and instructions
Find the device manual for free GeoVision 5050 iGo PRESTIGIO in PDF.


| Product Type | GPS Navigator |
| Brand | Prestigio |
| Model | GeoVision 5050 iGo |
| Category | GPS |
| Display Size | 5 inches |
| Display Resolution | 480 x 272 pixels |
| Dimensions (W x H x D) | 135 x 85 x 15 mm |
| Weight | 180 g |
| Battery Type | Rechargeable Lithium-Ion |
| Battery Capacity | 1500 mAh |
| Operating System | Windows CE 6.0 |
| Processor | 500 MHz |
| RAM | 128 MB |
| Internal Storage | 4 GB |
| Navigation Software | iGo Primo |
| GPS Chipset | SiRF Atlas IV |
| Connectivity | USB, microSD card slot |
| Audio | Built-in speaker, headphone jack |
| Power Supply | Car charger included |
| Maintenance & Cleaning | Wipe with a soft, dry cloth. Avoid liquids. |
| Safety | Use only approved accessories. Keep away from moisture and extreme temperatures. |
| Spare Parts & Repairability | Contact authorized service center. No user-serviceable parts. |
| General Information | Manufacturer: Prestigio. Model year: 2015 (estimated). |
Frequently Asked Questions - GeoVision 5050 iGo PRESTIGIO
User questions about GeoVision 5050 iGo PRESTIGIO
0 question about this device. Answer the ones you know or ask your own.
Ask a new question about this device
Download the instructions for your Gps in PDF format for free! Find your manual GeoVision 5050 iGo - PRESTIGIO and take your electronic device back in hand. On this page are published all the documents necessary for the use of your device. GeoVision 5050 iGo by PRESTIGIO.
USER MANUAL GeoVision 5050 iGo PRESTIGIO
Important Safety Instructions
Accessories
| ITEM | NAME | |
| Car Charger 1 | ||
| Mounting Cradle 1 | ||
| USB Cable 1 | ||
| Stylus Pen 1 | ||
| Driver/Documentation CD 1 | ||
| User Manual 1 | ||
| Warranty Card | 1 |


The exclamation point within an equilateral triangle is intended to alert the user to the presence of important operating and maintenance (servicing) instructions in the literature accompanying the appliance.

CAUTION
- To reduce the risk of electric shock, do not remove the cover (or back). No user-serviceable parts inside. Refer servicing to qualified service personnel.
- The manufacturer should not hold responsibility for the damage caused by any substitutions and modifications of the product without authorization from the manufacturer or authorized unit
WARNING
The device should not be exposed to dripping or splashing and no objects filled with liquids should be placed on the device.
To prevent the GPS from being damaged, be sure to keep the GPS out of direct sunlight or heat. Maintain well-ventilated conditions around the unit to avoid overheating.
Device Connection
Front and Side View
Inserting microSD Card
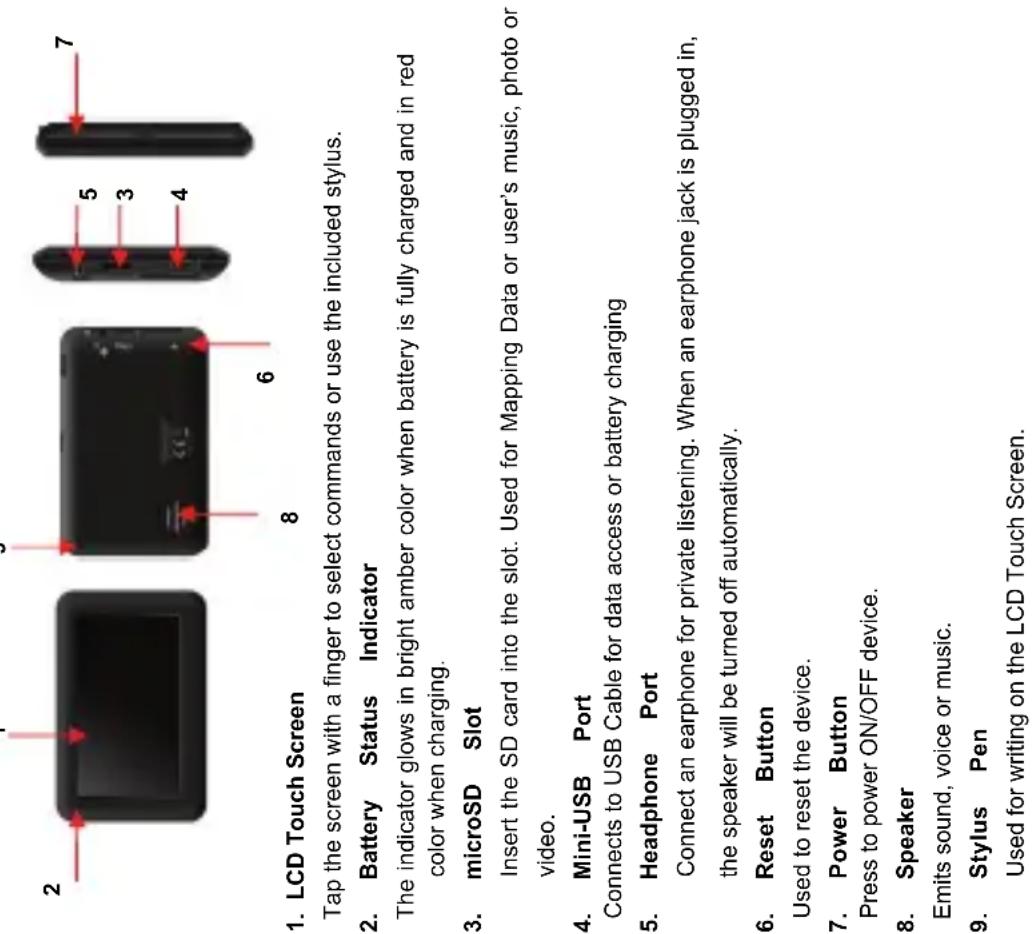
1. LCD Touch Screen
Tap the screen with a finger to select commands or use the included stylus.
2. Battery Status Indicator
The indicator glows in bright amber color when battery is fully charged and in red
color when charging.
3. microSD Slot
Insert the SD card into the slot. Used for Mapping Data or user's music, photo or
video.
4. Mini-USB Port
Connects to USB Cable for data access or battery charging
5. Headphone Port
Connect an earphone for private listening. When an earphone jack is plugged in,
the speaker will be turned off automatically.
6. Reset Button
Used to reset the device.
7. Power Button
Press to power ON/OFF device.
8. Speaker
Emits sound, voice or music.
9. Stylus Pen
Used for writing on the LCD Touch Screen.
Cautions on Battery Charging
About Rechargeable Battery
The device is equipped with a built-in rechargeable battery. Please fully charge the battery (for at least 8 hours) before initial use. The battery status indicator glows in red color when charging and turns bright amber color when charging is complete. Charging time is approximately 2 hours.

Working conditions and precautions for the rechargeable battery
● Device with new batteriey should be fully charged before initial use.
- It is not necessary to start charging the device before the battery is fully discharged.
Device Connection
2. Connecting to Car Charger
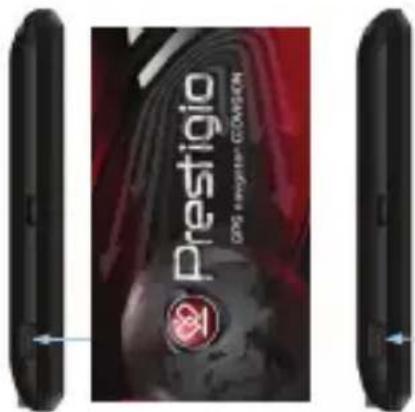
- Flip open the protective rubber cover towards the left side of the device. - Insert USB connector into the appropriate USB port. - Insert car charger connector into vehicle 12V accessory/cigarette se charging.
charging.
- Insert car charger connector into vehicle 12V accessory/cigarette socket to start charging.
Please connect the car charger to vehicle 12V accessory/cigarette socket after vehicle engine is started to protect the device from sudden surges in current.
Connecting to Earphones
- Flip open the protective rubber cover towards the front of the device.
- Insert earphone plug (not included) into the appropriate earphone port to switch audio output from device speaker to earphone.
NOTE:
Excessively loud volume is potentially detrimental to hearing. Please turn down the volume before connecting the earphone and gradually turn up the volume to a comfortable level.

Getting Started
Using Mounting
Device Mounting Procedures
The device can be securely mounted on vehicle dashboard or windshield with the mounting cradle included. Please follow procedures below to operate mounting cradle:
- Select an appropriate location on windshield or dashboard where the device and mounting cradle will not obstruct driver field of vision.
- Please also make sure that the device has a clear view of sky to attain best GPS
reception.
- Place device on the bracket with bottom positioned on the appropriate socket.
- Push on the top edge to securely install device onto the cradle.
- Lift the suction cup lever and press the suction cup at desired location.
- Press down the suction cup lever to
secure the mounting cradle on the surface. - Rotate the knob to adjust device to desired viewing angle.

To Dismount Device
- Push the tap on top of the mounting cradle to release the device.
t the suction cup lever to easily remove the suction cup from windshield or dashboard.
dashboard.
-
Press and hold Power Button to turn on device.
-
Shortly after the startup screen is shown, the main menu will be displayed.
-
Tap the corresponding buttons
with touch pen included to navigate various functions.
- Press and hold Power Button to turn off the device or to allow device to enter sleep mode.

When Prestigio GeoVision is started the first time, you need to select whether to start the program in Simple mode or in Advanced mode.
The two operating modes of Prestigio GeoVision mainly differ in the menu structure and the number of available features. The controls and screen layouts are the same.
- Simple mode: you have easy access to the most important navigation functions and the basic settings only. The rest of the settings are set to values that are optimal for typical use.
- Advanced mode: you have access to the full functionality of Prestigio GeoVision. This Guide covers actions in Simple mode. See the User Manual for detailed instructions on both modes.
Later you can switch between the two operating modes:
- To switch from Simple mode to Advanced mode: on the startup screen (Navigation Menu), tap Settings, Advanced Mode - To switch from Advanced mode to Simple mode: on the startup screen
(Navigation Menu), tap

After selecting Simple mode, the Navigation menu appears. From here you can reach all parts of Prestigio GeoVision.
The Navigation menu contains the following options:

- Tap to select one of the stored Points of Interest.
Tap for the list of your favourite destinations.
- Tap to navigate or to browse the map.
- Tap Settings to customise the way Prestigio GeoVision works. - Tap Exit to stop navigation, and exit Prestigio GeoVision.
Navigation

Enter the street name:

- Start entering the street name on the keyboard.
- Get to the list of results:
After entering a couple of characters, the names that match the string appear in a list.
- Tap to open the list of results before it appears automatically.
- Pick the street from the list. Enter
the house number:

- Enter the house number on the keyboard.
- Tap Dom to finish entering the ad

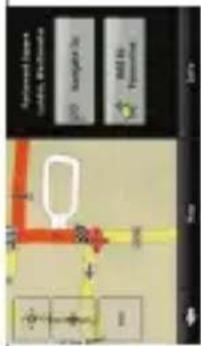
The map appears with the selected point in the middle. Tap from the Cursor menu. The route is then automatically calculated, and you can start navigating.
Navigation


In the Navigation menu, tap
By default, Prestigio GeoVision proposes the country/state and settlement where you are. If needed, tap the button with the name of the country/state, and select a different one from the list. If needed, change the settlement:
• To select the settlement from the list of recently used ones, tap the

• To enter a new settlement:
- Tap the button with the name of the settlement, or if you have

changed the country/state, tap
-
Start entering the settlement name on the keyboard.
-
Get to the list of search results:
• After entering a couple of characters, the names that match the string appear in a list.
- Tap to open th
automatically.
- Pick the settlement from the list.
Navigation


In the Navigation menu, tap
Select the area around which the POI should be searched:

The POI will be searched around a given address.

The POI will be searched around the Cursor.
position.
The POI will be searched around the destination of the

active route.
- : The POI will be searched not around a given point but by the size of the detour it means from the active route. This can be useful if you
search for a later stopover that causes only a minimal detour. For example upcoming petrol stations or restaurants. After this, the list of POI categories appear.


You can narrow the search with the following:
Select the POI group (e.g. Accommodation), and after that, if needed, select the POI subgroup (e.g. Hotel or Motel).

enter a part of the name.
- To list all POIs in a given POI group, press , and then Done without entering any letters of its name.
[optional] When finally the list of results appear, you can change the list order with

Tap the desired POI in the list.
Cursor menu. The route is then automatically calculated, and you can start navigating.

On the Map screen, tap Menu to return to the Navigation menu.
Troubleshooting
Take steps described in the tables below to solve simple problems before contacting customer service.
NOTE:

Immediately turn off the device and disconnect the power adapter if the device is not working properly. Never try to repair the unit without authorized professionals for it may damage the unit.
PROBLEM
POSSIBLE SOLUTION
| Users can't turn on the unit. | The adaptor doesn't connect well. | Connect the adaptor correctly. |
| The built-in rechargeable battery is weak. | Use the adaptor to supply power or charge the battery. | |
| There is no sound. | The volume may be turned down or mute. | Turn up the volume or turn on the sound output. |
| There is no picture. | The brightness may be turned down. | Adjust the brightness of the LCD. |
| The unit can't receive satellite signals or can't orient. | The unit may be obstructed by buildings or metal block. | Make sure to use the unit out of room; if in the vehicle, you can use the external GPS antenna to solve this problem. |
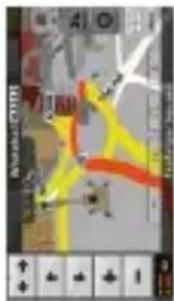

The most important and most often used screen of Prestigio GeoVision is the Map screen. The map looks similar to a conventional road-map. The blue arrow represents your current position, and the green line shows the recommended route.
There are several screen buttons and data fields on the screen to help you navigate. Their functions are explained in detail in the User Manual. During navigation, the screen shows route information and trip data (left screenshot), but when you tap the map, additional buttons and controls appear for a few seconds (right screenshot). Most parts of the screen behave as buttons.


(perspective view for navigation) map modes.

If you have moved the map, a button appears. Tap this button to move the map back to the current GPS position.

PC Connection
To establish connection with PC for data access and synchronization, please execute setup file included in the Driver/Documentation CD or download the file from Microsoft website to install:
| The built-in rechargeable battery is weak. | Use the adaptor to supply power or charge the battery. |
| The unit may be obstructed by veil, such as heat insulation paper. | Remove the veil. |
| Swing of the unit is too great. | Avoid great swing of the unit. |
POSSIBLE SOLUTION
POSSIBLE CAUSE
PROBLEM
| The unit can receive signals now but can't then; signals received are not stable. |
Microsoft Active Sync® software for operating system Microsoft XP or earlier
versions
(http://www.microsoft.com/windowsmobile/en-us/downloads/microsoft/activesync-download.mspx)
and/or
Microsoft Mobile Device Center® software for operating system Microsoft Vista (http://www.microsoft.com/windowsmobile/en-us/downloads/microsoft/device-center-download.mspx).
[Non-Text]
Please refer to its user manual for more detailed instructions.
Troubleshooting
Technical specifications
| MODEL | GV4050 | GV5050 |
| Audio formats supported | MP3,WMA MP3,WMA | |
| Earphone jack | 2.5mm mini jack 2.5mm mini jack | |
| Operating Temperature | 0~60°C | 0~60°C |
| Operating humidity | 10% to 90% non-condensing | 10% to 90% non-condensing |
Disclaimer
As the Prestigio products are constantly updated and improved, your device may have a slightly different appearance or modified functionality than presented in this Quick start Guide.
Technical specifications
| MODEL | GV4050 | GV5050 |
| Navigation Software | NavNgo iGo 8.3 | NavNgo iGo 8.3 |
| GPS Chipset | MSB2521A, ARM9 500MHz | MSB2521A, ARM9 500MHz |
| Channels | 64 | 64 |
| Antenna | Internal | Internal |
| Interface | USB | USB |
| Display size | 4.3" | 5" |
| Resolution | 480*272 | 272*480 |
| Display type | TFT Touch screen | TFT Touch screen |
| RAM | 128MB, DDR2 | 128MB, DDR2 |
| Flash | 4GB | 4GB |
| Expansion slot | Micro SD-Card slot, max8GB | Micro SD-Card slot, max8GB |
| Battery type/capacity | Li-polymer 950mAh | Li-polymer 1050mAh |
| Operating System | Microsoft Window CE6.0 | Microsoft Window CE6.0 |
| Speaker | 1w 8ohm built-in speaker | 1w 8ohm built-in speaker |
| Video formats supported | AVI,WMV,3GP,MOV,MP4,MPG | AVI,WMV,3GP,MOV,MP4,MPG |

- IMPORTANT SAFETY INSTRUCTIONS
- ACCESSORIES
- CAUTION
- WARNING
- DEVICE CONNECTION
- CAUTIONS ON BATTERY CHARGING
- ABOUT RECHARGEABLE BATTERY
- WORKING CONDITIONS AND PRECAUTIONS FOR THE RECHARGEABLE BATTERY
- CONNECTING TO CAR CHARGER
- CONNECTING TO EARPHONES
- NOTE
- GETTING STARTED
- USING MOUNTING
- DEVICE MOUNTING PROCEDURES
- TO DISMOUNT DEVICE
- NAVIGATION
- TROUBLESHOOTING
- PROBLEM
- POSSIBLE SOLUTION
- PC CONNECTION
Brand : PRESTIGIO
Model : GeoVision 5050 iGo
Category : Gps