
DF-1200 - Digital photo frame LENCO - Free user manual and instructions
Find the device manual for free DF-1200 LENCO in PDF.


| Product Type | Digital Photo Frame |
| Model | DF-1200 |
| Brand | Lenco |
| Display Size | 10.1 inches |
| Resolution | 1024 x 600 pixels |
| Supported Media | JPEG, BMP, PNG, GIF |
| Internal Memory | 8 GB |
| Memory Card Slot | SD/MMC up to 32 GB |
| USB Port | USB 2.0 Host |
| Power Supply | AC 100-240V, 50/60Hz |
| Dimensions (W x H x D) | 280 x 190 x 30 mm |
| Weight | 0.8 kg |
| Key Functions | Slideshow, Calendar, Clock, Adjustable Brightness |
| Care and Cleaning | Wipe with a soft dry cloth. Do not use liquids or abrasive cleaners. |
| Safety | Keep away from heat sources and moisture. Use supplied adapter only. |
| Spare Parts | AC adapter available from Lenco customer service |
| Repairability | No user-serviceable parts. Contact authorized service center. |
| General Information | Supports up to 8 hours continuous slideshow. Wall-mountable. |
Frequently Asked Questions - DF-1200 LENCO
User questions about DF-1200 LENCO
0 question about this device. Answer the ones you know or ask your own.
Ask a new question about this device
Download the instructions for your Digital photo frame in PDF format for free! Find your manual DF-1200 - LENCO and take your electronic device back in hand. On this page are published all the documents necessary for the use of your device. DF-1200 by LENCO.
USER MANUAL DF-1200 LENCO
natural_image
Digital tablet displaying a baby under a green blanket, with blue neon lights on the screen (no text or symbols visible)For information and support,
www.lenco.eu
Cautions
Precautions and maintenance
- For indoor use only
- To avoid risk of fire or electric shock, do not expose the unit to moisture or condensation.
- To avoid overheating, do not block the ventilation holes on the back of the Digital Photo Frame.
- Keep the Digital Photo Frame out of direct sunlight.
- Always use the eject buttons on the memory storage card slots to remove the storage cards.
- Do not dismantle the Digital Photo Frame. There is a risk of electric shock and there are no user-serviceable parts inside. Dismantling the Digital Photo Frame will void your warranty.
Cleaning the LCD Screen
- Treat the screen carefully. Because the screen of the Digital Photo Frame is made of glass and it would easily be broken or scratched.
- If fingerprints or dust accumulate on the LCD screen, we recommend using a soft, non-abrasive cloth such as a camera lens cloth to clean the LCD screen.
- Moisten the cleaning cloth with the cleaning solution and apply the cloth to the screen.
WARNING:
Please power off the unit before inserting or removing a card or USB device.
Failure to do so may cause damage to the card/USB and the unit. To reduce the risk of fire or electric shock, do not expose this appliance to rain or moisture.
Introduction:
Thank you for your purchase of the Digital Photo Frame. It is designed to allow quick and easy view of photos taken from your digital camera, mobile phone, or from a memory storage card. Please read this User Manual carefully to learn the correct way to use the Digital Photo Frame.
Features:
- Support Photo formats: JPEG, BMP, GIF
- Support Audio formats: Mp3,WMA
- Support Video File Formats: MPEG1, MPEG2, MPEG4 (AVI/Xvid), M-JPEG.
- Support Memory card: SD/MMC/MS/CF/XD
- USB Connection: USB2.0 HOST, mini-USB
- Touch menu for easy navigation of settings and functions with CCFL backlight
- Built-in Calendar, Clock, Alarm Clock
- Schedule Auto On/Off
- Adjustable brightness, contrast, saturation
- Support slideshow with background music
- Built-in stereo speaker (2x2W) and earphone
- Build in Memory: 128MB up to 1GB (Optional)
- Adjustable slideshow speed (3s-1Hour) and above 10 kinds of transition slideshow
- Include an ultra-slim remote control within 5 meters range.
- Copy and delete function
- OSD Language: English and other languages optional
Packaging Check List:
- 12.1 inch digital photo frame 1 piece
- User manual 1 piece
- Remote Control 1 piece
- AC/DC adapter 1 piece
- Bracket 1 piece
- Long USB Cable (Optional) 1 piece
Note: If the unit has built-in memory, item 6 will go with the machine, please refer to the accessories to go with the machine.
CONTENTS
1. Product Diagram 4
- 1 Remote Control----4
- 2 Touch Buttons and Right Side of Frame ----5
2. Installing&Replacing the Battery 5
3. Getting Started----5
4. Operating Instruction----6
4.1 Card and USB 6
4.2 Picture Mode 6
4.3 Music Mode 7
4. 4 Video Mode----7
4.5 File 8
5. Setup 9
5.1 Language 9
5.2 Slideshow Time----9
5.3 Slideshow Mode----9
5.4 Music Repeat Mode 9
5. 5 Movie Repeat Mode----9
5.6 Display Mode 9
5.7 Time 9
5.8 Alarm 9
5. 9 Brightness/Contrast/Saturation----9
5.10 Auto Power On/Off Time 9
5.11 Start Mode select----10
5.12 Default 10
6. Calendar 10
7. Stand Instruction----10
8. PC Connecting 11
9. Technical Parameter 11
10. Troubleshooting Guide----12
1 Product Diagram
1.1 Remote Control
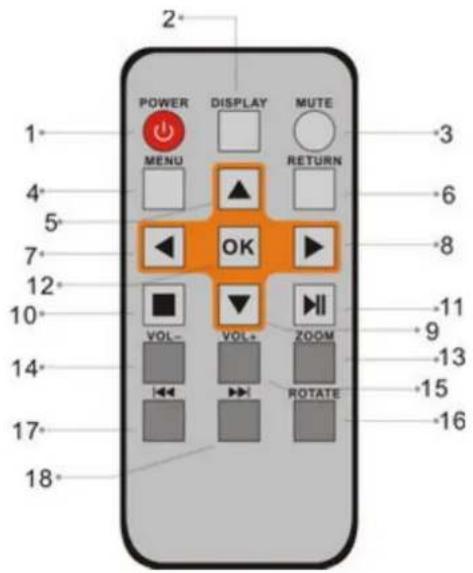
-
POWER—Turn on/off
-
16:9/4:3— Change picture display in these two ratios
-
MUTE—Press this button to silence the voice temporarily.
-
MENU—Press to enter "Info Bar" when playing pictures or videos, or show the menu for copy / delete function in file interface.
-
▲Functional selection button from the bottom to the top cursor.
-
RETURN— Return to upper page
-
— Functional selection button from right to left cursor
-
▶Functional selection button from left to right cursor
-
▼Functional selection button from the top to the bottom cursor.
-
SETUP—Enter to the setup menu.
-
BGM—Press this button, slideshow will play with background music.
-
OK—Press to confirm; Play/pause: Press OK directly to begin playback under stop or pause status, and repress it, it will pause again.
-
ZOOM— In single picture mode, magnify picture display size.
-
VOLUME- — Turn down the volume
-
VOLUME+ — Turn up the volume
-
ROTATE: In single picture mode, press to revolve the picture 90° in clockwise
-
Move back to previous picture, music or video file
-
▶▶- Move forward to next picture, music or video file
1.2 Touch Buttons and Right Side of Frame
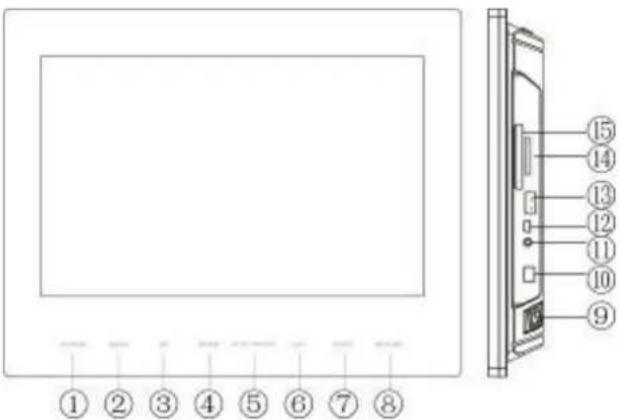
-
POWER 9. ON/OFF
-
MENU 10. DC IN
3.UP 11.EARPHONE
4.DOWN
- MINI USB
5.PLAY/PAUSE 13.USB
- LEFT 14. SD/MMC/MS/XD
7.RIGHT 15.CF
8.RETURN
2. Installing & Replacing the Battery
Place the upside of the remote control down, press down on the ridged area of the battery cover and pull towards you to remove the tray. Place one CR2025 lithium button-cell battery on the tray with the positive“+”side facing you. Reinsert the tray.
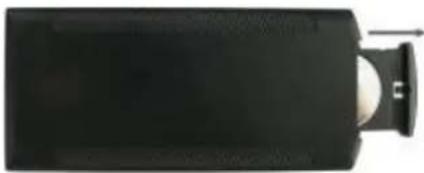
natural_image
Top-down view of a black rectangular electronic device with a metallic clip and a small circular component (no visible text or symbols)3. Getting Started
3.1 Extend the digital photo frame bracket on the back of the frame to the widest position for greatest stability, and then plug one end of the included AC adapter into a standard 110-240V AC electrical outlet and the other end into the right side the frame.
Note: There are different positions for the digital photo frame stand. Please refer to "Stand Instruction".
3.2. Remove the protective film covering the LCD.
3.3. Remove the plastic battery insulator from the battery compartment and make sure the remote control has a battery inside. Please refer to
"Installing & Replacing Battery" if you need a new battery.
3.4. Power on the unit by pressing the Power button on the remote control.
4. Operating Instruction
natural_image
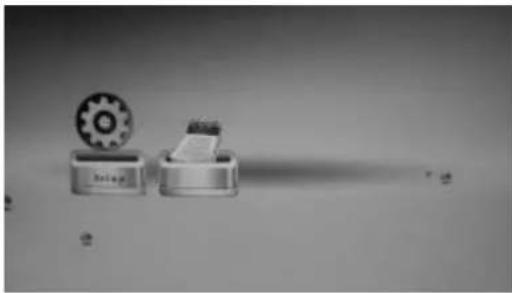
Two mechanical components with gear and paper-like elements, no visible text or symbolsAfter turning on the unit, you will view Setup and Calendar without inserting any card or USB device.
natural_image
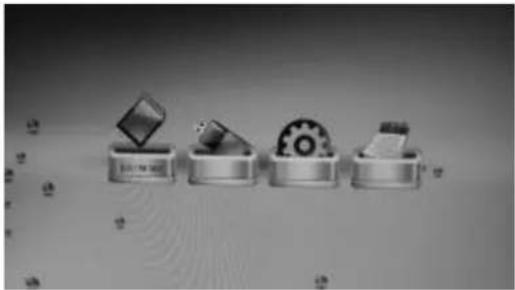
Four metallic mechanical components with gear and diamond symbols, arranged horizontally (no text or labels)After turning on the unit, press RETURN to the main menu. You will view USB-C/ CARD (SD/ MMC/ MS/ CF/ XD), Setup and Calendar with inserting a card or USB device.
Note:
1) If the unit has built-in memory, NAND will be shown on the startup interface
2) The startup effect is optional; please consult to 5.11 Start Mode select. (Startup effects: auto slideshow, auto slideshow with background music, auto video playing, auto music playing, calendar, card select.)
4.1 Card and USB
natural_image
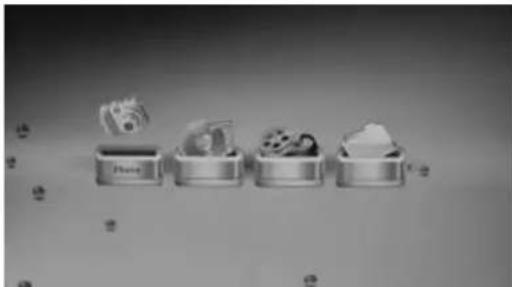
Monochrome illustration of four metallic objects with icons, no text or symbols presentIt supports SD, MMC, MS, CF, XD and USB 2.0. After inserting a card or USB device, you can view picture, music and video files from the card or USB device. Press OK to enter the card (SD/MMC/MS/CF/XD) or USB-C, then select Photo, Music, Video, or File. Press OK to confirm.
4.2 Picture Mode
natural_image
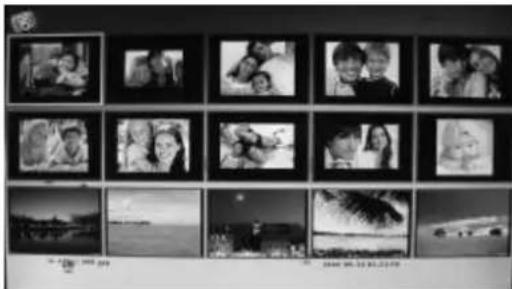
Grid of black-and-white photo frames arranged in 3 rows and 4 columns, showing various family and scenic subjects (no text or symbols visible)Press RETURN to choose USB-C/ Card (SD/MMC/MS/CF/XD) in the main menu. Press OK to Photo or File interface, then press OK to access to the fifteen-picture mode, then use ▲▼◀▶to choose the picture you want to display, press OK to play the picture.
natural_image
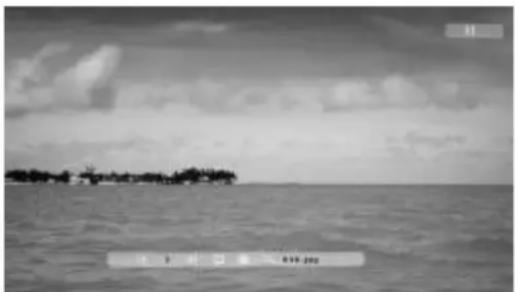
Black-and-white beach scene with a lone tree on the shore and cloudy sky (no text or symbols visible)When the picture is playing, press MENU to enter "Info Bar" and then press ▶▶to choose. Press OK to operate.
The functions in the Info bar from left to right as follows:
Previous-Move back to previous picture
Play/pause.
Next-Move forward to next picture
Rotate- Press this button, the picture will revolve 90^ in clockwise each time.
Return-Press this button, you can browse all the pictures in thumbnail mode
Zoom- When zooming the picture, press MENU to hide "info Bar", then picture can be moved using ▲▼◀▶
File name (no operation)
4.3 Music Mode
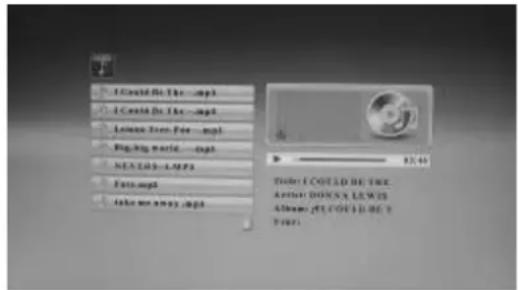
Press RETURN to choose USB-C/ Card (SD/MMC/MS/CF/XD) in the main menu. Press OK to Music or File interface, a list of music files will be shown. Press → to select the music you want to play from the playlist, press OK to play.
4.4Video Mode
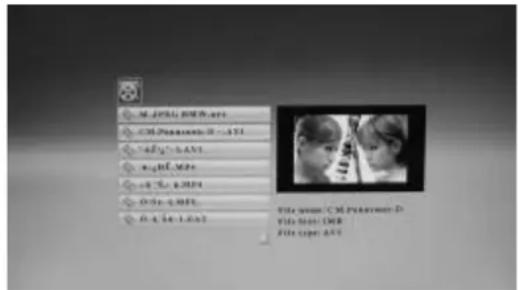
Press RETURN to choose USB-C/ Card (SD/MMC/MS/CF/XD) in the main menu. Press OK to Video or File interface, a list of video files will be shown. Use ▶ to highlight the video you want to play from the playlist, and you can preview the video with detailed information on the right, press OK to play.
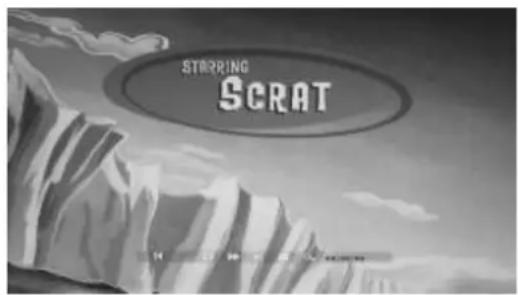
When the video is playing, press MENU to enter "Info Bar" and then press to choose. Press OK to operate.
The functions in the Info bar from left to right as follows:
Previous-Move back to previous video
Fast Rewind.
Play/pause.
Next-Move forward to next video
Fast Forward.
Return-Return to the video playlist
Zoom- When the video is playing, press Zoom and then press MENU to hide "info Bar", then video can be moved using ▲▼◀▶
Display playback times (no operation)
4.5 File
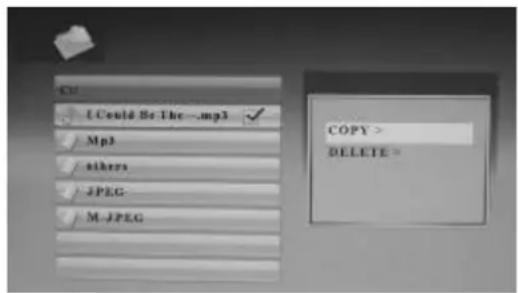
Press RETURN to choose USB-C/ Card (SD/MMC/MS/CF/XD) in the main menu. Press File, and then press OK to access to file interface. Press to select. You can browse all the files in the memory card.
Copy and Delete Operation
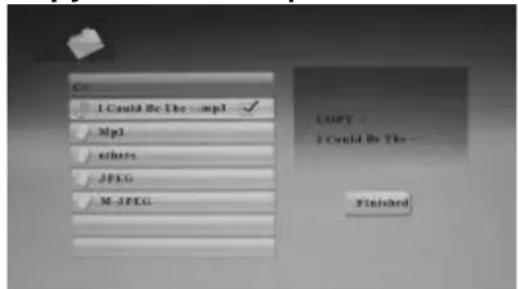
Use to highlight the file, then press ▶, a single √ will appear on the right. Press MENU to show the file function operation items. Press to access to copy function. After copying it, it will show Finished.
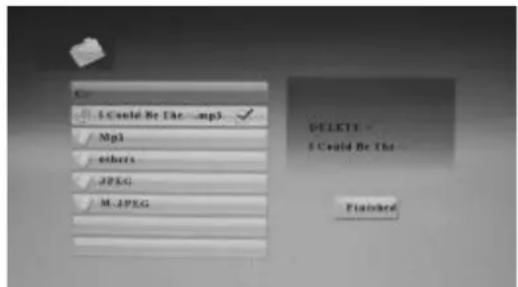
Use ▶ highlight the file, then press ▶, a single √ will appear on the right. Press MENU to show the file function operation items. Press ▶ to access to delete function. After deleting it, it will show Finished.
5. Setup
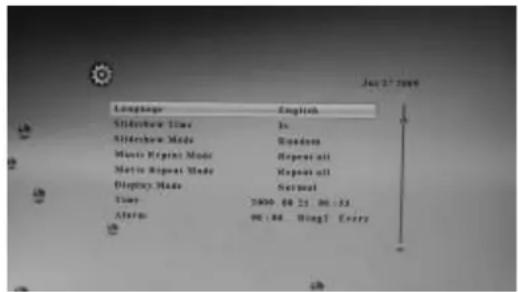
Press SETUP from the main menu, and then press OK to access to SETUP interface. Use to highlight the item you want to set up. Press to select, then press OK to confirm.
5.1. Language (English/French/Deutsch/Spanish/Italian)
Press ▶ to choose the language and press OK to confirm.
5.2. Slideshow Time (3s/5s/15s/1min/15mins/1hour)
Press ▶ to set picture slideshow time interval and press OK to confirm.
5.3.Slideshow Mode
Bottom_To_Top, Top_To_Bottom, Left_To_Right, Right_To_Left, Door_Close, Do or_Open Hori_Cross, Verti_Cross. Random, Fading, Vexpand_Top, Vexpand_Bottom, Vexpand_Middle, Off.
Press ▶ to choose Slide show Mode and press OK to confirm.
5.4. Music Repeat Mode (Repeat all, Repeat off and Repeat one).
Press ▶ to choose Music Repeat Mode. Press OK to confirm.
5.5. Movie Repeat Mode (Repeat all, Repeat off and Repeat one)
Press ▶ to choose Movie Repeat Mode. Press OK to confirm.
5.6. Display Mode (Crop, Stretch, Cinema.)
Press ▶ to choose picture Display Mode .Press OK to confirm.
5.7 Time
Press ▶ to the system date and time setup menu, use ▶ to choose the set items as follows : year, month, date, hour, minute, press ▶ to adjust the figures, then press OK to confirm.
5.8 Alarm
Press ▶ to the alarm time, ring and mode setup menu, use ▶ to choose the set items as follows: hour, minute, ring, mode (Every/Omce/Off), press ▶ to adjust the figures or choose the ring or mode, then press OK to confirm.
Note: If the unit has built-in memory, you can set your own favorite song (only MP3) as alarm clock ring. Use the USB cable to rename the song, to ring1 or ring2, then please consult to the above steps.
5.9 Brightness/Contrast/Saturation
Press ▶ to choose brightness/contrast/saturation figures from 0 to 16, then press OK to confirm.
5.10 Auto Power ON/OFF Time
Press ▶ to the auto power ON/OFF setup menu, use ▶ to choose the set items as follows: hour, minute, mode (On /Off), press ▶ to adjust the figures or choose the mode, then press OK to confirm.
5.11 Start Mode select(Calendar/picture/Music/Video/Comb/Card Select)
Press ▶ to choose start mode .Press OK to confirm, next time turning on the unit, the setting will be effected.
Note: Make sure there are supported picture, photo and video files in the card or USB device, then you can have all the startup effects: auto slideshow, auto slideshow with background music, auto video playing, auto music playing, calendar with slideshow, card select.
If there is no card or USB device, only Calendar Start Mode and Main Menu Mode can be selected.
5.12Default
Use to highlight, press OK to default values.
6.Calendar
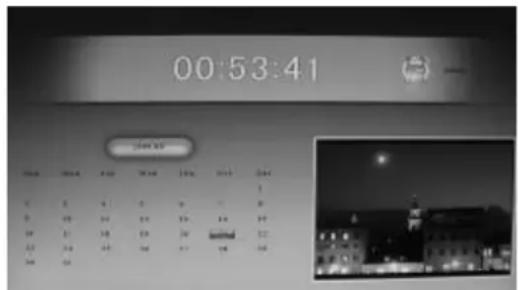
Select CALEDARE in main menu and press OK to access to the calendar interface, use ▲▼ to show the next/previous year of the calendar, use ◀▶ to show the last / next month of the calendar. Time and alarm clock will be showed on the top, if there are supported pictures in the memory card, you can view slideshow on the right.
7. Stand Instruction
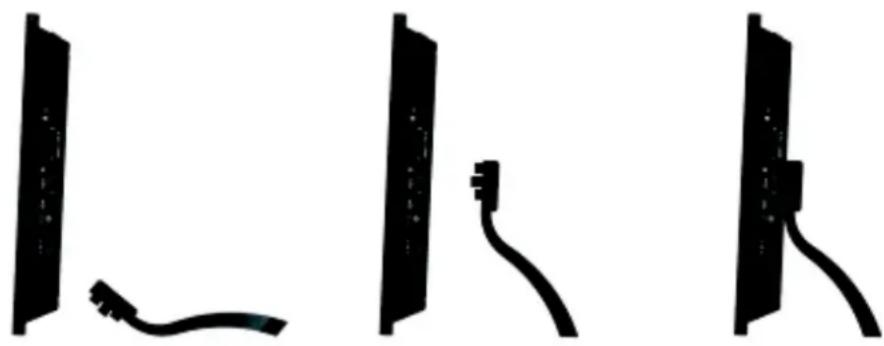
Insert the bracket into the slot of the digital photo frame. Please check and make sure the stand is locked in place before standing the photo frame up. Please refer to the illustration shown below.
natural_image
Three black silhouette icons of electronic components or connectors, no text or symbols present8. PC Connecting
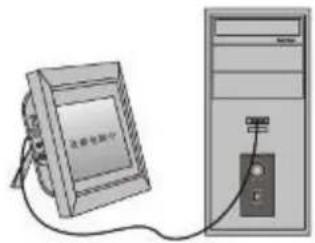
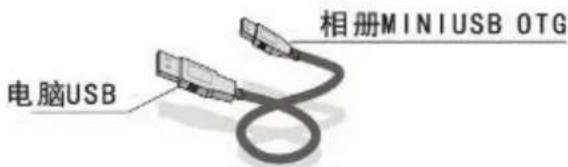
If the unit has built-in memory and MINI USB, you can connect it to external equipment by using USB cable:
A. Please turn on the digital photo frame, then connect it with your computer by using USB cable
B. The unit will be automatically detected and it will display "Copy Files......" information, when you are using Windows 2000/XP, then you can copy file between built-in memory and the digital photo frame.
Then you need to restart the digital photo frame when you finished the copy/delete operation.
IMPORTANT: Never disconnect the USB cable while files are transferring. Doing so may damage your DPF.
9. Technical Specifications
- Adapter: Input AC 100-240V 50/60HZ Output DC 12V/3A
● Picture Format: JPEG,BMP,GIF
● Audio Format: Mp3&WMA
● VideoFormat: MPEG1, MPEG2, MPEG4, M-JPEG, Xvid and AVI
● Memory Cards: SD/MS/MMC/XD/CF - USB:USB Host( high speed 2.0connected with the long USB Cable); MINI USB
- Screen Parameter:
Screen Size: 12.1 inch TFT
Resolution : 1280*3 RGB *800
Contrast: 300:1
Aspect Ratio: 16:9
Brightness: 300cd/m2
Response Time: 20ms
Working Temperature: 0°C\~40°C, Humidity: 10-85%
10. Troubleshooting Guide
If you are having problems with your player, please consult both this guide and manual. If you need further assistance, please contact Technical Support.
- No power:
Please check whether the plug is inserted correctly.
- Remote control no function:
Please check whether the battery has power (the battery can be used for half a year in normal conditions). Replace with new battery if necessary.
- Can not read the CARD or USB:
Please confirm whether there is storage in the card or USB device.
Empty devices cannot be read.
- Can not play the file:
Please confirm if the file format is compatible with the player.
● Display too bright or too dark:
Please adjust the brightness or contrast in the setup menu.
● The color is light or no color:
Please adjust the color and contrast setup.
- No sound:
Please check whether the volume is correct and the player is not in Mute mode.
- Cautions
- Precautions and maintenance
- Cleaning the LCD Screen
- WARNING:
- Introduction:
- Features:
- Packaging Check List:
- CONTENTS
- Product Diagram 4
- Installing&Replacing the Battery 5
- Getting Started----5
- Operating Instruction----6
- Setup 9
- Calendar 10
- Stand Instruction----10
- PC Connecting 11
- Technical Parameter 11
- Troubleshooting Guide----12
- Product Diagram
- Remote Control
- Touch Buttons and Right Side of Frame
- Installing & Replacing the Battery
- Getting Started
- Operating Instruction
- Note:
- Card and USB
- Picture Mode
- The functions in the Info bar from left to right as follows:
- Music Mode
- 4.4Video Mode
- File
- Setup
- 5.3.Slideshow Mode
- Time
- Alarm
- Brightness/Contrast/Saturation
- Auto Power ON/OFF Time
- Start Mode select(Calendar/picture/Music/Video/Comb/Card Select)
- 5.12Default
- 6.Calendar
- Stand Instruction
- PC Connecting
- Technical Specifications
- Troubleshooting Guide
Brand : LENCO
Model : DF-1200
Category : Digital photo frame