
EKS 2000 - Coffee maker Rommelsbacher - Free user manual and instructions
Find the device manual for free EKS 2000 Rommelsbacher in PDF.


| Product type | Coffee maker (filter) |
| Brand | Rommelsbacher |
| Model | EKS 2000 |
| Capacity | 1.25 liters (approx. 10 cups) |
| Power consumption | 1000 W |
| Voltage | 220-240 V, 50/60 Hz |
| Dimensions (W x D x H) | 25 x 30 x 35 cm |
| Weight | approx. 2.5 kg |
| Water tank | Removable, transparent with level indicator |
| Filter type | Permanent filter (reusable) or paper filter size #4 |
| Carafe | Glass, 1.25 L capacity, with drip-free spout |
| Keep-warm function | Integrated hot plate with automatic shut-off after 2 hours |
| Anti-drip system | Yes, removable filter basket with anti-drip valve |
| Controls | On/off switch with indicator light |
| Safety features | Automatic shut-off when carafe is removed or after brew cycle |
| Housing material | Stainless steel and plastic |
| Cleaning | Descaling recommended every 2-3 months; removable parts dishwasher safe |
| Spare parts availability | Carafe, filter basket, and water tank available |
Frequently Asked Questions - EKS 2000 Rommelsbacher
User questions about EKS 2000 Rommelsbacher
0 question about this device. Answer the ones you know or ask your own.
Ask a new question about this device
Download the instructions for your Coffee maker in PDF format for free! Find your manual EKS 2000 - Rommelsbacher and take your electronic device back in hand. On this page are published all the documents necessary for the use of your device. EKS 2000 by Rommelsbacher.
USER MANUAL EKS 2000 Rommelsbacher
natural_image
Abstract geometric pattern with vertical lines inside a circle (no text or symbols)ROMMELSBACHER
natural_image
Exterior view of a modern espresso machine with two cans on top, placed on a table with scattered coffee beans and a glass of milk (no text or symbols visible)EKS 2000 Espresso Maschine Espresso machine

D – Produktbeschreibung GB – Product description
General safety advices ....24
Safety advices for using the appliance....25
Application possibilities 25
Features 26
Operating elements.... 27
Status display of the temperature pilot lamp 27
Initial use of the appliance....27
Bleeding the system....28
Inserting the water filter 29
Refilling the water tank....30
Making espresso/coffee 31
Power save mode 26,33
Programming the cup capacity....33
Frothing milk....33
Making hot water 35
Cleaning and maintenance 36
Emptying the drip pan.... 37
Emptying the system....37
Descaling the appliance 37
Trouble shooting 40
Recipes....43
Einleitung

flowchart
graph TD
    ①[①: Serving with coffee cup and coffee cup icon] --> ②[②: Stabilized with water drop and steam drop icon]
    ③[③: Stabilized with water drop and steam drop icon] --> ④[④: Boiling with water drop icon]
    ⑤[⑤: Boiling with water drop icon] --> ①
Drehknebel
natural_image
Exterior view of a modern stainless steel coffee maker with open lid (no visible text or symbols)natural_image
Exterior view of a modern stainless steel coffee maker with open lid and side slippers (no visible text or symbols)natural_image
Two identical stainless steel laboratory devices with internal components and directional arrows, no visible text or symbols.natural_image
Exterior view of a modern espresso machine with a white mug and blue tray (no visible text or symbols)natural_image
Simple diagram with a circle, arrow, and curved arrows indicating direction (no text or symbols)natural_image
Simple diagram with curved arrows and a circle, no text or symbols presentnatural_image
Transparent plastic bag with a cylindrical cap, no visible text or symbolsnatural_image
Top-down view of a transparent plastic container with a small cylindrical object inside (no text or symbols visible)natural_image
Exterior view of a modern stainless steel coffee maker with open lid (no visible text or symbols)natural_image
Diagram showing a container with a downward arrow inside a transparent container (no text or symbols)natural_image
Exterior view of a modern stainless steel coffee maker with open lid and control panel (no visible text or symbols)natural_image
Two identical metallic square devices with white arrows indicating a mechanical press or press operation (no text or symbols visible)natural_image
Exterior view of a modern espresso machine with a white mug and metallic base (no visible text or symbols)natural_image
Simple diagram with a circular arrow and horizontal line, no text or symbols presentnatural_image
Exterior view of a modern stainless steel coffee maker with open lid and control panel (no visible text or symbols)natural_image
Exterior view of a modern stainless steel coffee maker with open lid and side panel (no visible text or symbols)natural_image
Two identical metallic industrial machines with white arrows indicating internal components (no text or symbols visible)natural_image
Exterior view of a modern espresso machine with a white mug and blue tray (no visible text or symbols)natural_image
Simple diagram with a circle, arrow, and curved arrows indicating direction (no text or symbols)natural_image
Simple diagram showing a circular arrow with a horizontal line and a circular symbol, no text or labels present.natural_image
Warning symbol of a triangular hazard sign with steam lines inside (no text or numbers)natural_image
Two identical metallic mechanical devices with internal components and directional arrows, no visible text or symbols.natural_image
Exterior view of a modern espresso machine with a white mug and control panel (no visible text or symbols)natural_image
Exterior view of a modern espresso machine (no visible text or symbols)natural_image
Two identical metallic industrial machines with internal components, shown from different angles (no text or symbols visible)natural_image
Two metallic cylindrical mechanical components on a plain background (no text or symbols visible)natural_image
Close-up of a mechanical component with a metallic handle and lever, no visible text or symbolsnatural_image
Close-up of a mechanical clamp or port jack with a black handle and metallic casing (no visible text or symbols)natural_image
Close-up of a hand using a tool to press or install a mechanical component, no visible text or symbolsnatural_image
Close-up of a metallic mechanical clamp or lever handle (no text or symbols visible)natural_image
Two identical stainless steel coffee maker machines with white arrows indicating compression or lifting process (no text or symbols visible)natural_image
Two identical metallic industrial machines with internal cavities and small white cups, shown side by side (no visible text or symbols)natural_image
Simple icon of an open book with an information symbol (no text or numbers present)natural_image
Two identical metallic industrial devices with internal components and directional arrows indicating movement or flow (no text or symbols visible)natural_image
Simple icon of an open book with an information symbol inside, no text or labels present.natural_image
Warning symbol of a triangle with steam lines inside, no text or numbers presentnatural_image
Two identical stainless steel coffee maker machines shown side by side, with white arrows indicating motion or movement (no text or symbols visible)natural_image
Exterior view of a modern espresso machine with a white mug and black arrow indicating compression (no text or symbols visible)natural_image
Simple diagram showing a circular arrow with a horizontal line and a circular symbol, no text or labels present.natural_image
Exterior view of a modern espresso machine with a white mug and black handle (no visible text or symbols)natural_image
Close-up of a metal mixing bowl with white liquid being stirred by a pipette (no text or symbols visible)natural_image
Simple diagram with a circular arrow and horizontal line, no text or symbols presentnatural_image
Exterior view of a modern espresso machine with a white mug and black arrow indicating motion (no text or symbols visible)natural_image
Simple diagram with a circular arrow and horizontal line, no text or symbols presentnatural_image
Pure graphical icons representing various UI elements (no text or symbols)natural_image
Warning symbol with a triangle and diagonal line, indicating heat or stress (no text or numbers present)natural_image
Two identical metallic coffee maker machines side by side, one with a white arrow indicating motion or operation (no text or symbols visible)natural_image
Exterior view of a modern espresso machine with a white mug and black handle (no visible text or symbols)flowchart
graph TD
    A["Document Icon"] --> B["Printer Icon"]
    B --> C["Water Drop Icon"]
    C --> D["Water Drop Icon"]
    D --> E["Arrow pointing to Document Icon"]
natural_image
Simple diagram with a circle, arrow, and curved arrows indicating direction (no text or symbols)natural_image
Simple diagram with a circle, arrow, and circular arrows indicating direction (no text or symbols)natural_image
Exterior view of a modern espresso machine with a white mug and blue tray (no visible text or symbols)natural_image
Close-up of a hand holding a tool near a metallic component, with a magnified circular detail highlighting a small droplet (no text or symbols visible)natural_image
Exterior view of a modern stainless steel industrial machine with a slotted lid (no visible text or symbols)natural_image
Diagram of a cylindrical object with an upward arrow inside a transparent container (no text or symbols)natural_image
Exterior view of a modern stainless steel coffee maker with glass lid and control panel (no visible text or symbols)natural_image
Two identical metallic square devices with white arrows indicating a mechanical or process operation (no text or symbols visible)natural_image
Close-up of a modern espresso machine with a white mug and metallic casing (no visible text or symbols)natural_image
Simple icon of an open book with an information symbol (no text or numbers present)natural_image
Exterior view of a modern espresso machine with a white mug and black tray (no visible text or symbols)natural_image
Simple circular diagram with arrows and a horizontal line, no text or symbols presentnatural_image
Modern espresso machine with a white mug and metal frame, no visible text or symbolsnatural_image
Two identical mechanical press devices with internal components and directional arrows, no visible text or symbols.natural_image
Exterior view of a modern stainless steel coffee maker with open lid (no visible text or symbols)natural_image
Simple icon of an open book with an information symbol inside, no text or labels present.natural_image
Exterior view of a modern stainless steel coffee maker with open lid and control panel (no visible text or symbols)natural_image
Two identical stainless steel coffee maker machines shown side by side, each with a white arrow indicating a process or operation (no text or symbols visible)natural_image
Exterior view of a modern espresso machine with a white mug and control panel (no visible text or symbols)Schritt 28:
natural_image
Exterior view of a modern espresso machine with a white mug and black handle (no visible text or symbols)Schritt 29:
natural_image
Simple circular diagram with arrows and a horizontal line, no text or symbols presentSchritt 31:
natural_image
Exterior view of a modern espresso machine with a white mug and metallic frame (no visible text or symbols)Schritt 32:
Schritt 33:
We are pleased you decided in favour of this superior espresso machine with portafi Iter and would like to thank you for your confi dence. Its easy operation and wide range of applications will certainly fi ll you with enthusiasm as well. To make sure you can enjoy using this appliance for a long time, please read
through the following notes carefully and observe them. Keep this instruction manual safely. Hand out all documents to third persons when passing on the appliance. Thank you very much.
Intended use
The appliance is designed for making espresso, coffee, hot water and milk froth (domestic use only). Other uses or modifications of the appliance are not intended and harbour considerable risks. For damage arising from not intended use, the manufacturer does not assume liability. The appliance is not designed for commercial use.
Technical data
Only connect the appliance to an isolated ground receptacle installed according to regulations.
The rated voltage must comply with the details on the rating label. Only connect to alternating current.
Nominal voltage: 230 V\~50 Hz
Nominal power: 1275 W
Max. pump pressure: 19 bar
Power save function: power save mode after 10 minutes
Usable length of the power cord: ca. 1.0 m
Dimensions: 26 x 25.5 x 30 cm
Weight: ca. 5.3 kg
Scope of supply
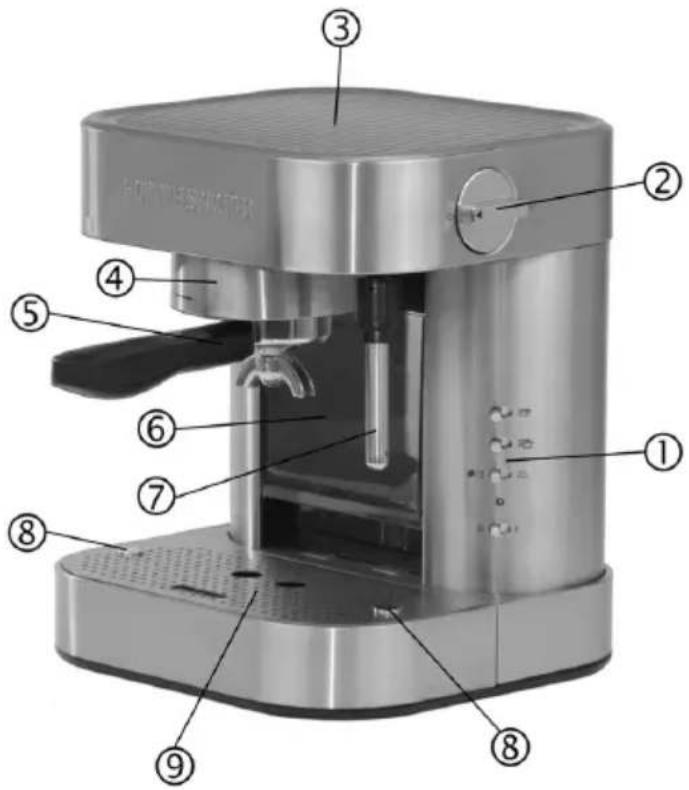
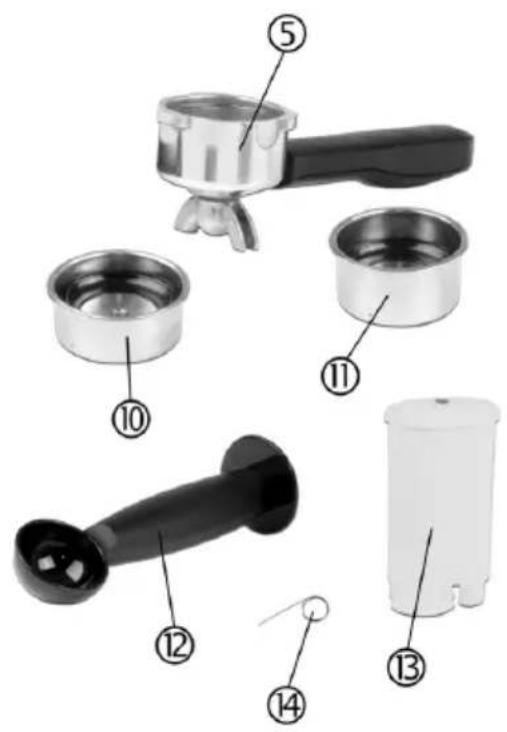
Check the scope of supply for completeness as well as the soundness of the product and all components (see product description page 2) immediately after unpacking.
Packing material
Do not simply throw the packing material away but recycle it.
Deliver paper, cardboard and corrugated cardboard packing to collecting facilities.
Also put plastic packing material and foils into the intended collecting basins.
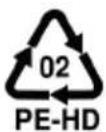
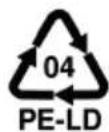
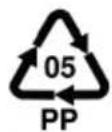

In the examples for the plastic marking PE stands for polyethylene, the code figure 02 for PE-HD, 04 for PE-LD, PP for polypropylene, PS for polystyrene.
For your safety

Warning: Read all safety advices and instructions. Non-observance of the safety advices and instructions may cause electric shock, fi re and/or bad injuries.
General safety advices:
- Packing material like e. g. foil bags should be kept away from children.
• Always keep children under 8 away from the product and the power cord. - Children from the age of 8 and persons not having the knowledge or experience in operating the appliance or having handicaps of physical, sensorial or mental nature must not operate the appliance without supervision or instruction by a person, responsible for their safety. Never leave the appliance unattended during operation.
• Children should be supervised in order to ensure that they do not play with the appliance. - Prior to each use, check the appliance and the attachments for soundness, it must not be operated if it has been
dropped or shows visible damage. In these cases, the power supply must be disconnected and the appliance has to be checked by a specialist.
- Pull the power plug after each use. Never let the cable hang down over the edge of the work surface so that the appliance cannot be pulled down accidentally.
- Keep the power cord away from hot surfaces, sharp edges and mechanical forces. Check the power cord regularly for damage and deteriorations. Damaged or entangled cords increase the risk of an electric shock.
- Do not misuse the power cord for unplugging the appliance.
- This electrical appliance complies with the relevant safety standards. In case of signs of damage to the appliance or the power cord, unplug the appliance immediately. Repairs may be affected by authorised specialist shops only. Improper repairs may result in considerable dangers for the user.
- Improper use and disregard of the instruction manual void all warranty claims.
Safety advices for using the appliance:

Warning – hazard of injury and burns!
Casing, brew head, portafi Iter, fi Iter inserts and hot water/steam nozzle are getting hot during use!
- Place the appliance on a solid and even surface and do not operate it in the vicinity of sources of heat (oven, gas flame etc.) or in explosive environments where infl ammable liquids or gases are located.
- Keep a distance of at least 0.5 m to all sides in order to avoid damage through heat or steam and to grant an unobstructed work area.
- Prior to switching the appliance on make sure that ...
... the appliance is assembled correctly. This applies especially for the portafilter and the filter in-sert – they must always be locked firmly in the brew head
... the rotary knob is in position "O"
... there is enough water in the water tank
... the drip pan is inserted and there is no residual water in it. - Only operated the unit with cold, clean tap water.
- Do not operate this unit with an external timer or a separate telecontrol system.
- Do not leave the appliance unattended during operation
- Never operate the appliance without water or with wet hands.
- Never immerse the appliance, power cord and power plug in water for cleaning.
Application possibilities
The appliance is perfect for ...
... making coffee/espresso with finely ground coffee/espresso beans
... making espresso with espresso pads E.S.E. (55 mm ∅)
... making coffee/espresso with coffee/espresso softpads (68 - 70 mm ∅)
... making hot water with the hot water/steam nozzle
... frothing milk with the hot water/steam nozzle.
Features
Power save function
The appliance has a power save function. The power save mode is activated 10 minutes after the last use, i. e. the thermoblock switches off, the temperature in the heating circuit cools down slowly. The appliance can be activated again any time and is ready for use after a few seconds. This saves energy and protects the environment.
Single circuit system
By means of the single circuit system, coffee/espresso, hot water and milk froth can be prepared. After preparing hot water or milk froth, the thermoblock has to cool down a little before coffee/espresso can be prepared.
19 bar pump pressure
For aromatic espresso with perfect crema, high pressure is required. The appliance is equipped with a high-quality pump generating high pressure up to max. 19 bar to press the hot water through the coffee/espresso powder in the portafilter. This ensures perfect results.
Aluminium die-cast thermoblock
The thermoblock is ready for use after a short heating-up period. The massive construction of the thermoblock ensures an always constant temperature for making espresso.
Pre-brew function
Before the actual brewing procedure, the coffee/espresso powder is sprinkled with hot water for a few seconds. Thus, the coffee/espresso powder steeps what dissolves the flavouring agents better. Afterwards, the brewing procedure is continued with high pressure and coffee/espresso is prepared.
Programmable cup capacity
The cup capacity can be adjusted individually via the integrated electronics.
Preparation starts at the push of a button and the appliance stops automatically when the set capacity is reached. The pre-set capacity for 1 cup is 50 ml and 100 ml for 2 cups.
Water filter
The appliance comes with an exchangeable water filter. It cleans and demineralises the water. It ensures a consistently good water quality and prevents the appliance from calcifying quickly. The filter must be exchanged regularly to ensure flawless function.
Electronic water level control
The appliance features an electronic water level control. If there is not sufficient water in the water tank, this state will be indicated by a quickly blinking pilot lamp.
Height-adjustable cup tray
The cup tray can be adapted to the size of the used cup. Thus, optimal filling of the cup is ensured.
Cup warmer function
The tray on the upper site of the appliance can be used as cup warmer. The waste heat of the internal thermoblock heats this area as long as the appliance is in use and not in power save mode.
Operating elements
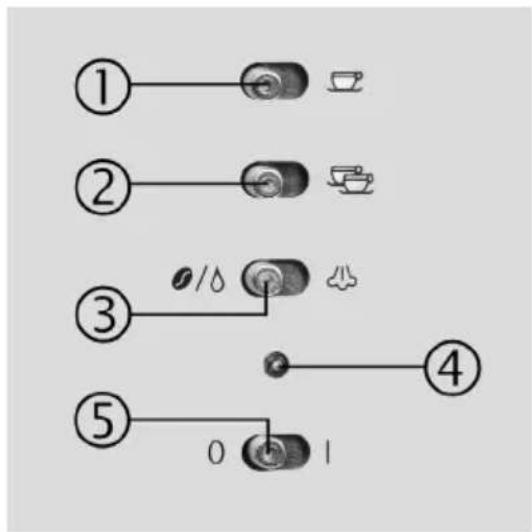
Operating panel
flowchart
graph TD
    ①[①] --> A["Coffee with teapot icon"]
    ②[②] --> B["Teapot with cup icon"]
    ③[③] --> C["Water drop with steam drop icon"]
    ④[④] --> D["Boiling with water drop icon"]
    ⑤[⑤] --> E["Boiling with water drop icon"]
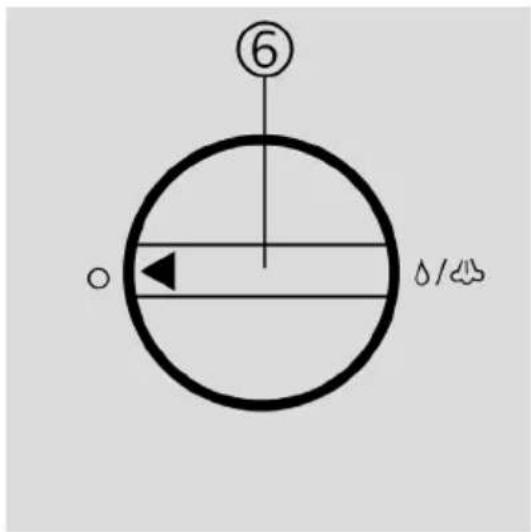
Rotary knob
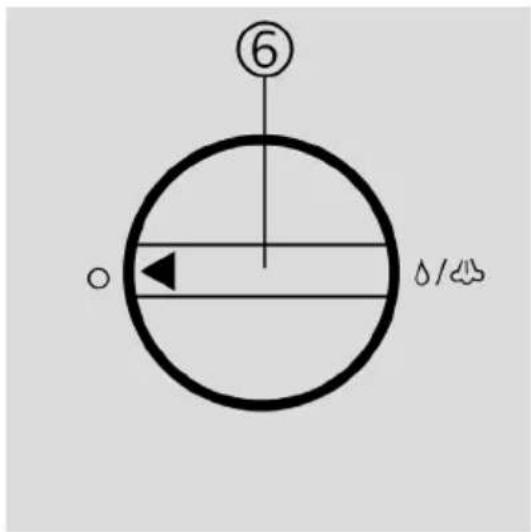
| Operating panel: | |
| 1 switch for 1-cup supply | |
| 2 switch for 2-cup supply | |
| 3 | switch for supply of- left position: coffee/espresso and hot water- right position: steam for milk froth |
| 4 temperature pilot lamp | |
| 5 | switch for operation- position “0”: off- position “I”: on |
| Rotary knob: | |
| 6 | rotary knob for hot water/steam- left position: off- right position: on |
Status display of the temperature pilot lamp
• permanent glowing: thermoblock is ready for use
- blinking every second: heating-up period of the thermoblock
- slow blinking every 2 seconds: power save mode without heating
- quick blinking every 0.5 second: water is missing or rotary knob is not positioned correctly.
Initial use of the appliance

- Remove all stickers and tapes and clean the appliance as well as all accessories. Please refer to "Cleaning and maintenance" for further information.
- Bleed the system. Please refer to "Bleeding the system" for further information.
- For better water quality insert the enclosed water filter. Please refer to "Inserting the water filter" for further information.
- The appliance can also be used without water filter.
Bleeding the system

- In order to ensure perfect operation of the appliance it is important that the system is bled prior to initial use or after a longer non-use period.
- If the water tank gets empty during use, the system will suck air which must be removed by bleeding the system.
Warning: Casing, brew head, portafilter, filter inserts and hot water/steam nozzle are getting hot during use!
natural_image
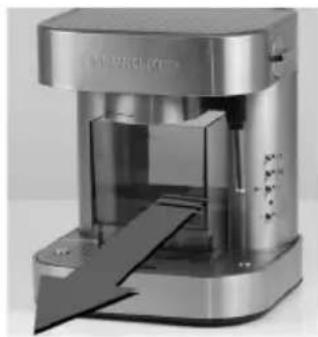
Exterior view of a modern stainless steel coffee maker with open lid and control panel (no visible text or symbols)Step 1: Remove the water tank (previously remove the portafilter if necessary).
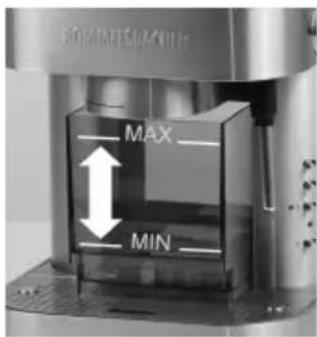
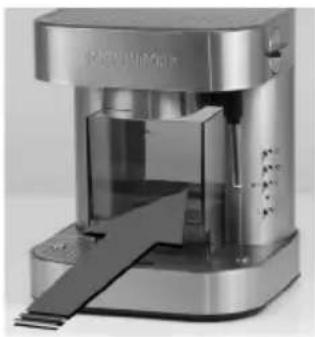
Step 2: Fill the water tank with fresh tap water. Observe the "MAX" marking!
natural_image
Exterior view of a modern stainless steel coffee maker with glass lid and control panel (no visible text or symbols)Step 3: Insert the water tank. Make sure the water tank is inserted as far as it will go on the gasket.
natural_image
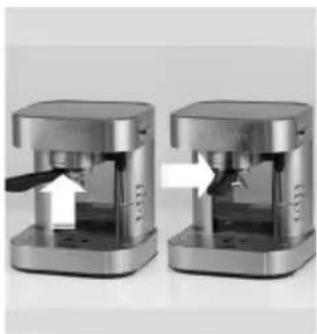
Two identical metallic square devices with white arrows indicating a mechanical or process operation (no text or symbols visible)Step 4: Position the portafilter without filter insert at the marking of the brew head and lock it by turning it to the right as far as it will go.
natural_image
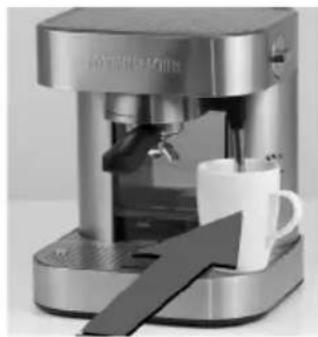
Exterior view of a modern espresso machine with a white mug and blue tray (no visible text or symbols)Step 5: Place a vessel below the outlet of the hot wa-ter/steam nozzle.
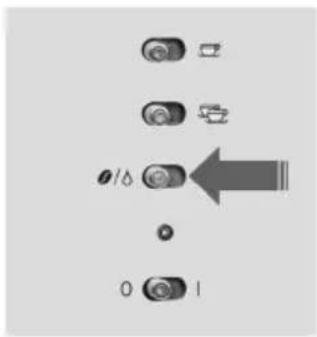
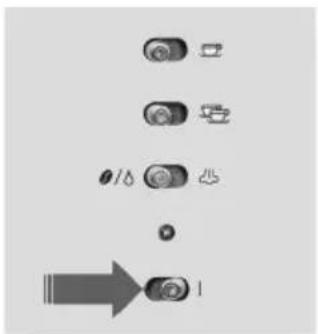
Step 6: Choose the function "espresso/hot water".
flowchart
graph TD
    A["Input"] --> B["Process Step 1"]
    B --> C["Process Step 2"]
    C --> D["Process Step 3"]
    D --> E["Output"]
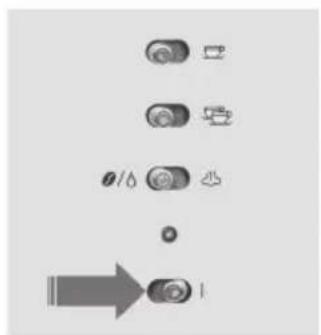
Step 7: Switch the appliance on. The appliance heats up and the pilot lamp blinks. When the lamp glows permanently, the appliance is ready for use.
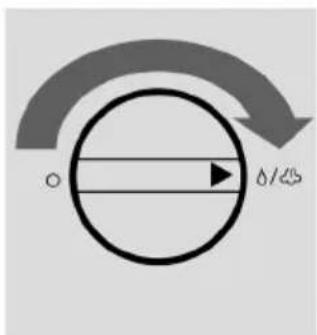
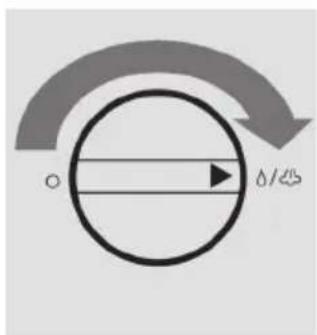
Step 8: Start hot water supply. Turn the rotary knob to the right. Dispense hot water until it comes without air. Use the water for warming the cups.
natural_image
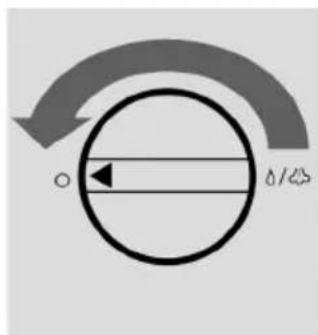
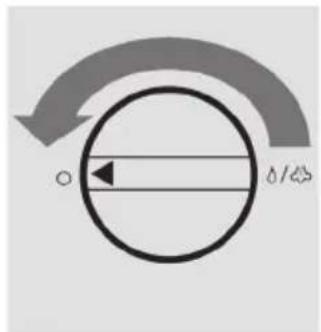
Simple diagram with a circular arrow and horizontal line, no text or symbols presentStep 9: Stop hot water supply. Turn the rotary knob to the left.
Inserting the water filter

- Make sure the appliance had been bled correctly before inserting the water filter (please refer to "Bleeding the system")!
- As this is an activated carbon filter, the water may take on colour when starting to rinse the filter. This is normal and will be cleared by rinsing the filter.
- For perfect function, the filter granulate must be completely soaked. Thus, follow all below steps consecutively.
- The date of exchange can be set on the upper side of the filter (1 – 12).
- Exchange the water filter after 30 litres or after 2 months at the latest.
- Replacement filters are available in specialised trade or from our customer service.
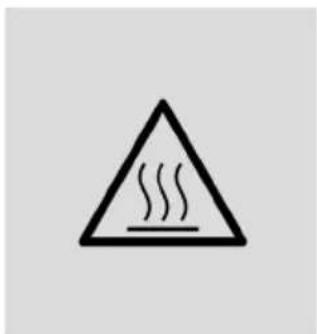
Warning: Casing, brew head, portafilter, filter inserts and hot water/steam nozzle are getting hot during use!
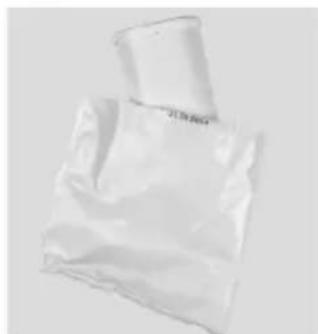
natural_image
Close-up of a plastic bag with crumpled paper and a cylindrical cap (no visible text or symbols)Step 1: Unpack the filter cartridge.
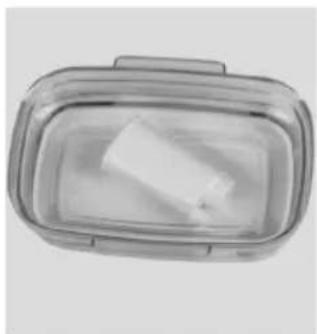
natural_image
Top-down view of a transparent plastic container with a white lid (no text or symbols visible)Step 2: Prepare filter cartridge. Steep the filter cartridge for 15 minutes at least in cold tap water.
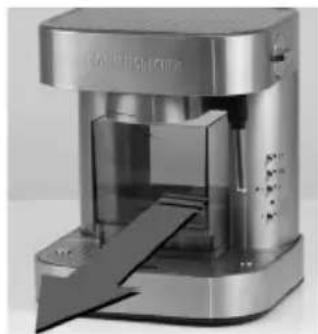
natural_image
Exterior view of a modern stainless steel coffee maker with open lid (no visible text or symbols)Step 3: Remove the water tank (previously remove the portafilter if necessary). Empty residual water.
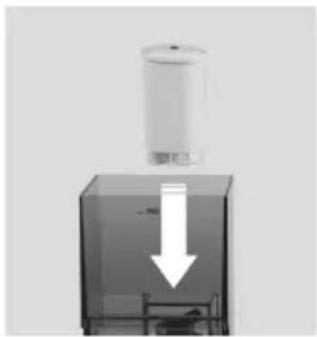
natural_image
Diagram of a container with a downward arrow indicating flow or movement (no text or symbols present)Step 4: Position the filter cartridge firmly in the intended holder at the bottom of the water tank.
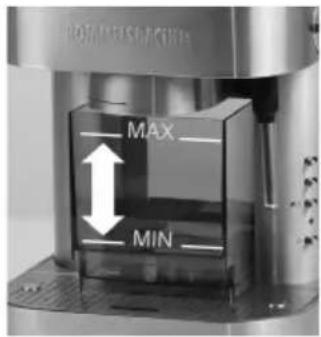
Step 5: Fill the water tank with fresh tap water up to the "MAX" marking.
natural_image
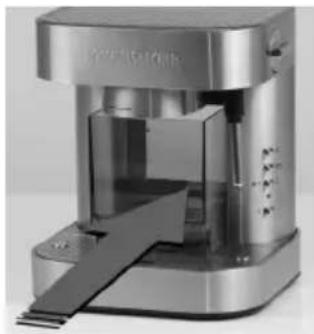
Exterior view of a modern stainless steel coffee maker with glass lid and control panel (no visible text or symbols)Step 6: Insert the water tank. Make sure the water tank is inserted as far as it will go on the gasket.
natural_image
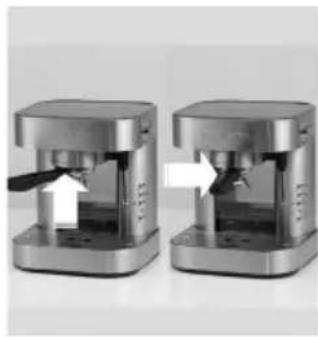
Two identical stainless steel coffee maker machines with white arrows indicating motion or operation (no text or symbols visible)Step 7: Position the portafilter without filter insert at the marking of the brew head and lock it by turning it to the right as far as it will go.
natural_image
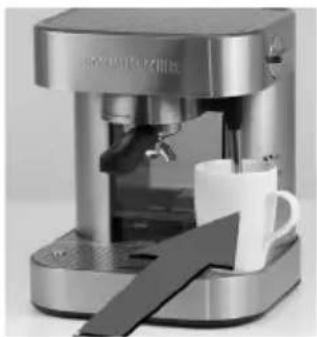
Exterior view of a modern espresso machine with a white mug and blue tray (no visible text or symbols)Step 8: Place a vessel below the outlet of the hot water/steam nozzle.
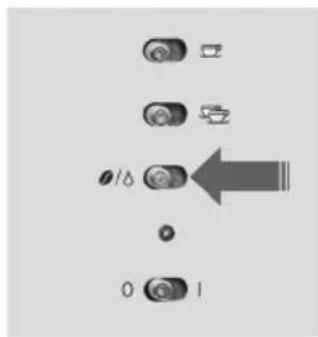
Step 9: Choose the function "espresso/hot water".
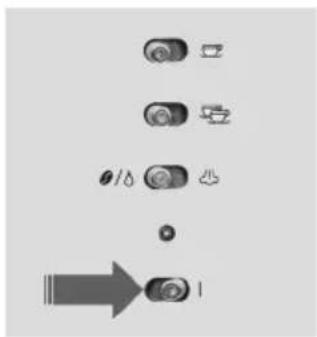
Step 10: Switch the appliance on. The appliance heats up and the pilot lamp blinks. When the lamp glows permanently, the appliance is ready for use.
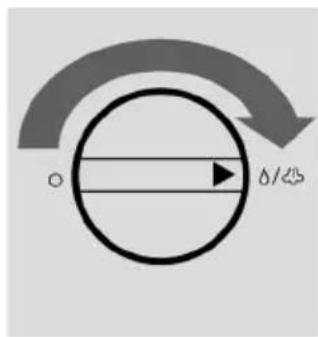
Step 11: Start hot water supply. Turn the rotary knob to the right. Dispense hot water for 1 minute. Use the water for warming the cups.
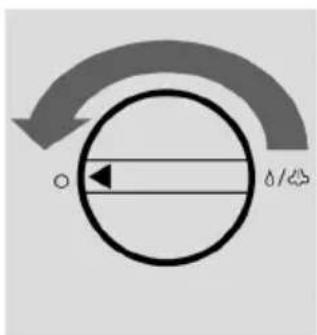
natural_image
Simple diagram with a circular arrow and horizontal line, no text or symbols presentStep 12:
Stop hot water supply.
Turn the rotary knob to the left.
Repeat step 11 + 12
3 times.
Step 13:
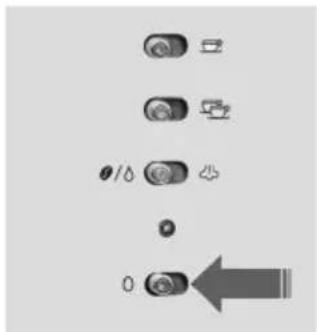
If the appliance is not needed any more, switch it off and pull the mains plug.
Refilling the water tank

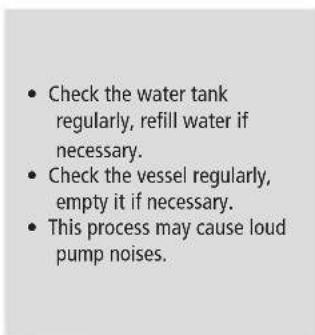
- Avoid that the water tank is drained completely during use! We recommend checking the water level prior to each use and refilling water up to the "MAX" marking.
- The appliance has an electronic water level control. If water is missing in the water tank, the pilot lamp will blink in short intervals and the pump will stop.
- For refilling the water tank, there is no need to take out the water filter.
• After refilling the water tank, bleed the system if necessary.
natural_image
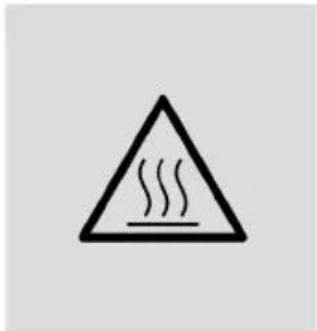
Warning symbol of a triangular hazard sign with steam lines inside (no text or numbers)Warning: Casing, brew head, portafilter, filter inserts and hot water/steam nozzle are getting hot during use!
natural_image
Exterior view of a modern stainless steel coffee maker with open lid (no visible text or symbols)Step 1:
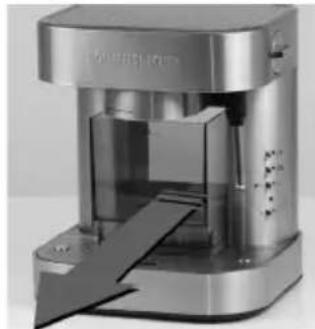
Remove the water tank (previously remove the portafilter if necessary).
Empty residual water.
Step 2:
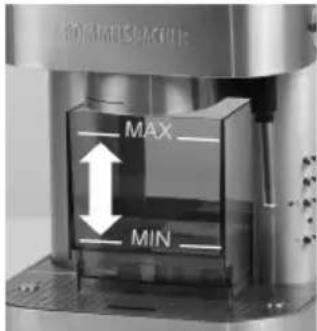
Fill the water tank with fresh tap water.
Observe the "MAX" marking!
natural_image
Close-up of a stainless steel coffee maker with glass lid and mechanical components (no visible text or symbols)Step 3:
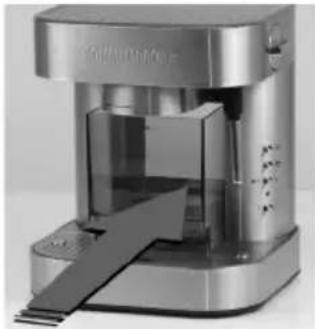
Insert the water tank.
Make sure the water tank is inserted as far as it will go on the gasket.
natural_image
Two identical stainless steel coffee maker machines shown side by side, with white arrows indicating motion or movement (no text or symbols visible)Step 4: (bleeding)
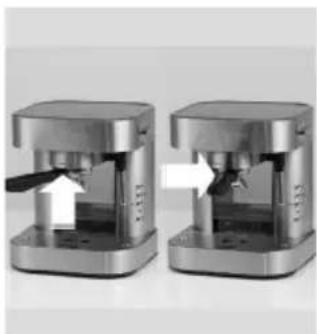
Position the portafilter without filter insert at the marking of the brew head and lock it by turning it to the right as far as it will go.
natural_image
Exterior view of a modern espresso machine with a white mug and metallic frame (no visible text or symbols)Step 5: (bleeding)
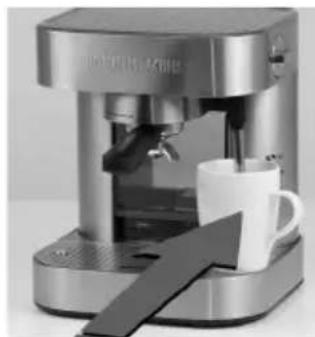
Place a vessel below the outlet of the hot water/steam nozzle.
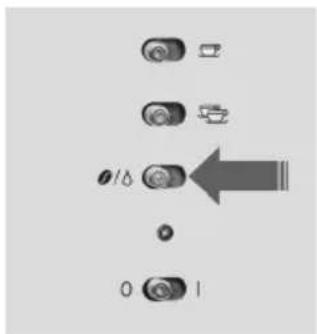
Step 6: (bleeding)
Choose the function "espresso/hot water".
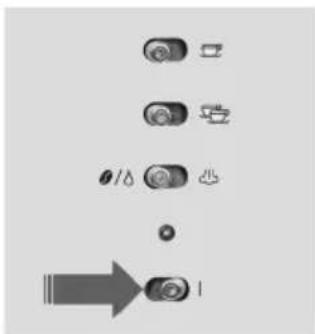
Step 7: (bleeding)
Switch the appliance on.
The appliance heats up and the pilot lamp blinks. When the lamp glows permanently, the appliance is ready for use.
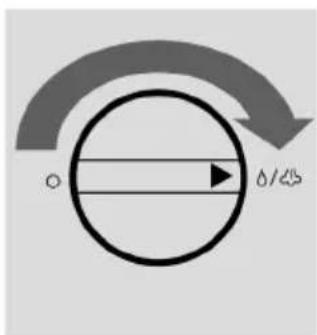
Step 8: (bleeding)
Start hot water supply.
Turn the rotary knob to the right. Dispense hot water until it comes without air. Use the water for warming the cups.
natural_image
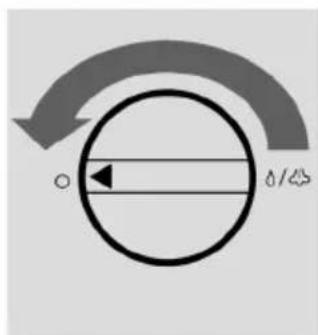
Simple diagram with curved arrows and a circle, no text or symbols presentStep 9: (bleeding)
Stop hot water supply.
Turn the rotary knob to the left.
Making espresso/coffee

• For a perfect result, we recommend ...
... initial use without filter insert and powder for preheating the system (see step 4a - 4d)
... preheating the cups
... using fresh tap water
... using freshly ground powder
... exchange water in the tank regularly.
Warning: Casing, brew head, portafilter, filter inserts and hot water/steam nozzle are getting hot during use!
Step 1:
Prepare the appliance.
Step 2:
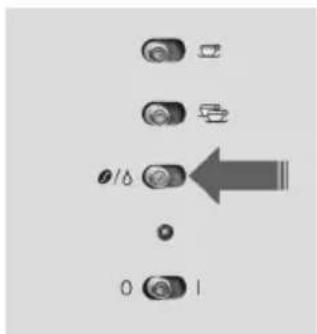
Choose the function "espresso/hot water".
flowchart
graph TD
    A["Input"] --> B["Step 1"]
    B --> C["Step 2"]
    C --> D["Step 3"]
    D --> E["Step 4"]
    E --> F["Output"]
Step 3:
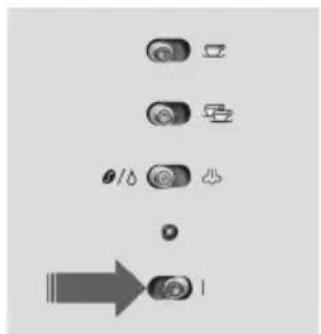
Switch the appliance on.
The appliance heats up and the pilot lamp blinks. When the lamp glows permanently, the appliance is ready for use.
Preheating the system:
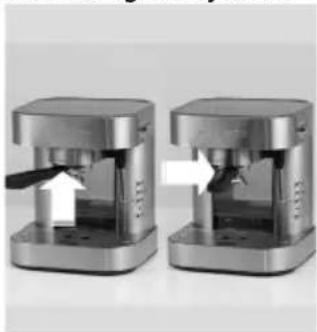
natural_image
Two identical metallic coffee maker machines side by side, each with a handle and white arrows indicating motion or operation (no text or symbols visible)Step 4a: (preheating)
Position the portafilter without filter insert at the marking of the brew head and lock it by turning it to the right as far as it will go.
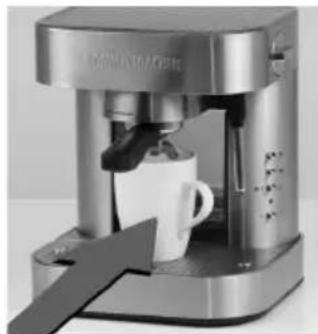
natural_image
Exterior view of a modern espresso machine with a white mug and control panel (no visible text or symbols)Step 4b: (preheating)
Place a vessel below the outlet of the portafilter.
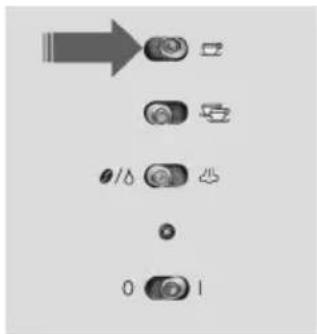
Step 4c: (preheating)
Start single serving function.
Tip the switch shortly. The appliance stops automatically afterwards.
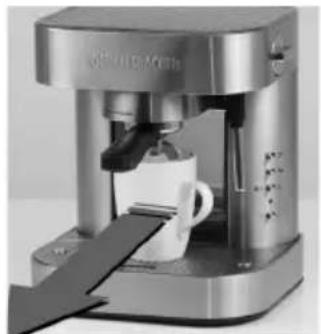
natural_image
Close-up of a modern espresso machine with metallic casing and white cup (no visible text or symbols)Step 4d: (preheating)
Remove the vessel below the outlet of the portafilter.
Making espresso:
natural_image
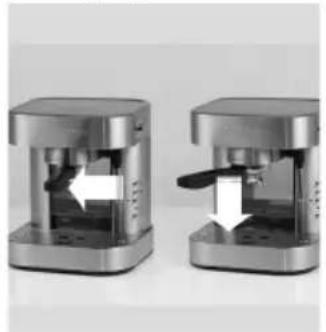
Two identical stainless steel coffee maker machines with white arrows indicating internal components (no text or symbols visible)Step 5:
Remove the portafilter.
Remove residual water from the
portafilter if necessary.
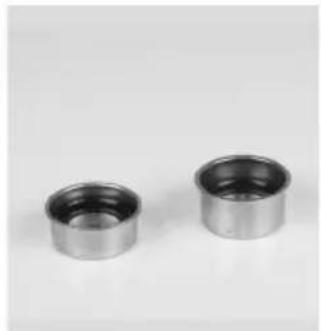
natural_image
Two metallic cylindrical mechanical components on a plain background (no text or symbols visible)Step 6:
Choose a filter insert:
- small insert for 1 cup
- small insert for 1 pad
- large insert for 2 cups.
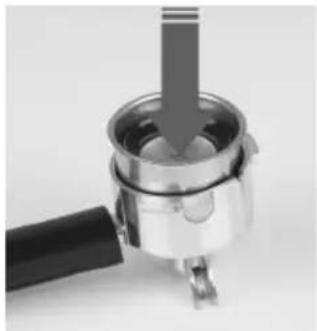
natural_image
Close-up of a mechanical component with a metallic handle and lever, no visible text or symbolsStep 7:
Place the filter insert in the portafilter and press it on firmly.
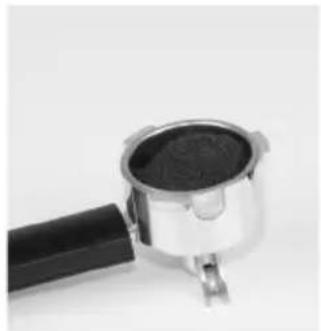
natural_image
Close-up of a mechanical clamp or port jack with a black handle and metallic body (no visible text or symbols)Step 8a: (with powder)
Use the enclosed coffee scoop for filling in powder.
1 coffee scoop (7 g) per cup
natural_image
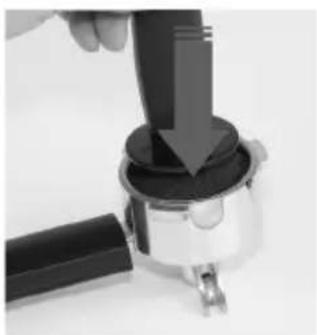
Close-up of a hand using a tool to press or install a mechanical component, no visible text or symbolsStep 8b: (with powder)
Press the powder on with the enclosed tamper. The rim of the filter insert must be clean.
natural_image
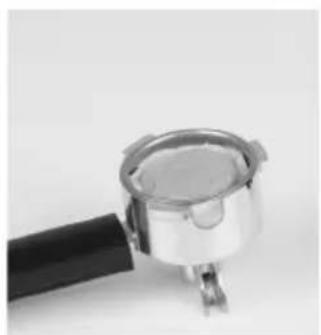
Close-up of a mechanical clamp or lever component (no visible text or symbols)Step 8c: (with pad)
Instead of powder, a suitable espresso pad can be used. It must not be pressed on. The rim of the filter insert must remain free.
natural_image
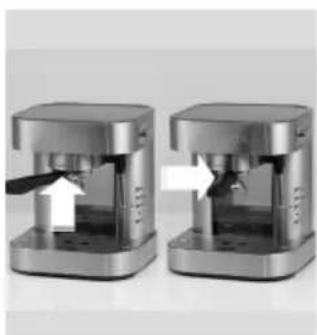
Two identical stainless steel coffee maker machines with white arrows indicating compression or disassembly process (no text or symbols visible)Step 9:
Position the portafilter with filter insert at the marking of the brew head and lock it by turning it to the right as far as it will go.
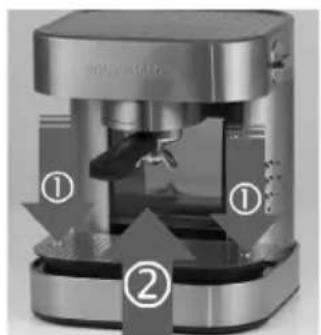
Step 10:
If necessary, the cup tray ② can be adjusted in height. For this, push both buttons ① simultaneously until they unlock.
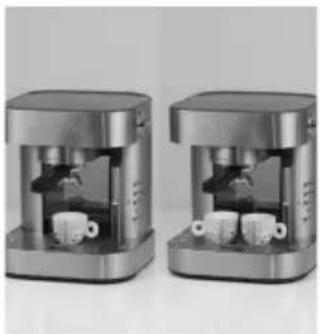
natural_image
Two identical stainless steel coffee maker machines side by side, each with a white cup and a small round object inside (no visible text or labels)Step 11:
Place the cup/cups below the portafilter.
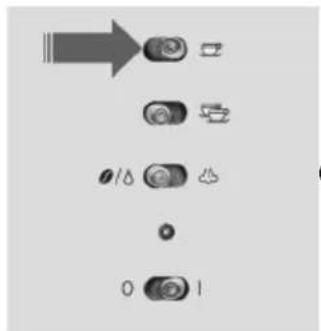
Step 12a: (1 cup)
Start espresso supply.
Tip the switch for 1 cup shortly.
The appliance stops automatically afterwards. By tipping the switch again, the process can be stopped.
OR
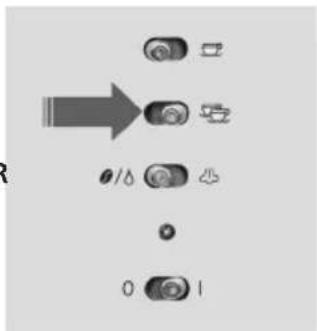
Step 12b: (2 cups)
Start espresso supply.
Tip the switch for 2 cups shortly.
The appliance stops automatically afterwards. By tipping the switch again, the process can be stopped.
natural_image
Simple icon of an open book with an information symbol (no text or numbers present)Pre-brew function:
The brewing process is interrupted after ca. 4 seconds for a few seconds. The powder is sprinkled with water and first flavouring agents are dissolved.
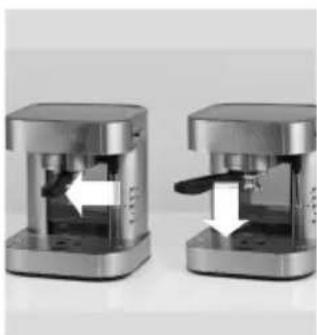
natural_image
Two identical metallic industrial devices with internal components and directional arrows indicating movement or flow (no text or symbols visible)Step 13:
Afterwards remove the portafilter, empty it and clean it under running water.
The portafilter drips slightly.

natural_image
Simple icon of an open book with an information symbol inside, no text or labels present.Power save mode:
After 10 min. without operation, the appliance switches to power save mode, without heating of the thermoblock. The pilot lamp blinks slowly (every 2 sec.). By tipping the switch for 1 or 2 cups, the appliance can be activated again. After a short heating-up phase, the appli-ance is ready for use.
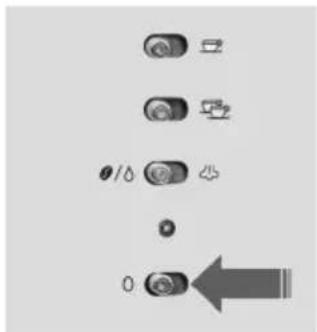
Step 14:
If the appliance is not needed any more, switch it off and pull the mains plug.

Step 15:
Clean the appliance and the accessories.
Programming the cup capacity

- The pre-set capacity for 1 cup is 50 ml and 100 ml for 2 cups.
- The max. programmable capacity for 1 cup is 150 ml and 250 ml for 2 cups.
- The newly programmed capacity is memorised permanently.
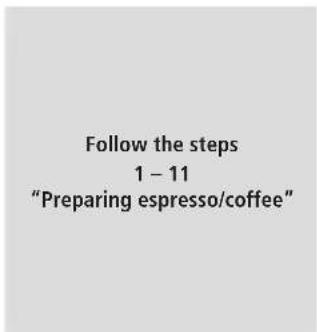
Step 1:
Prepare the appliance.
Step 2:
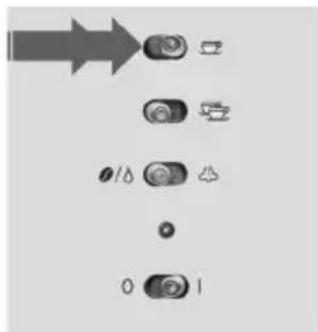
Start espresso supply. Apply the switch for 1 cup and hold it. Release the switch as soon as the desired capacity is reached. The appliance stops and the new capacity is programmed.
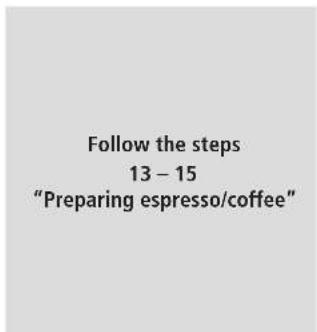
Step 3:
Further steps.
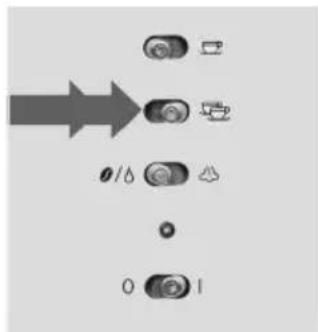
flowchart
graph TD
    A["0"] --> B["OK"]
    B --> C["Cancel"]
    C --> D["OK/OK"]
    D --> E["OK/OK"]
Programming the cup capacity for 2 cups is done the same way, however, with the switch for 2 cups.
Frothing milk

- For having perfect results, we recommend ...
... using refrigerated milk only
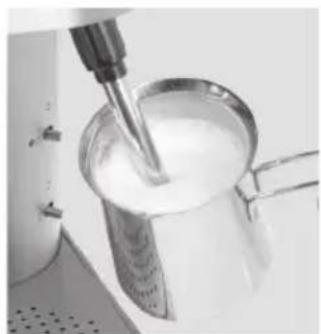
... using a stainless steel pot. - Dip the hot water/steam nozzle in the milk and start frothing in the upper third of the milk. Hold the pot a little slant and slightly move it up and down. The nozzle must remain under the milk surface as otherwise the milk froth will be too large-pored. (After a few trials and with a little practice, you will quickly find the correct method).

- Attention: Make sure that the holes in the nozzle are always clean and not clogged.
- Attention: For moving the nozzle, only touch it at the upper plastic part.
- Attention: After frothing, the system must be cooled manually (see steps 12 – 15).
natural_image
Warning symbol with a triangle and diagonal line, indicating heat or stress (no text or numbers present)Warning: Casing, brew head, portafi lter, fi lter inserts and hot water/steam nozzle are getting hot during use!
Step 1: Prepare the appliance.
natural_image
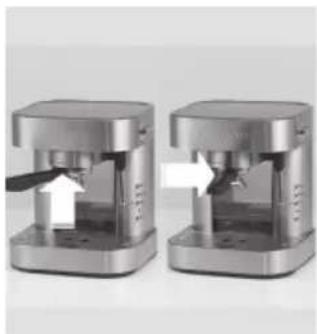
Two identical metallic square devices with white arrows indicating movement or force, no visible text or symbols.Step 2: Position the portafi Iter without fi Iter insert at the marking of the brew head and lock it by turning it to the right as far as it will go.
natural_image
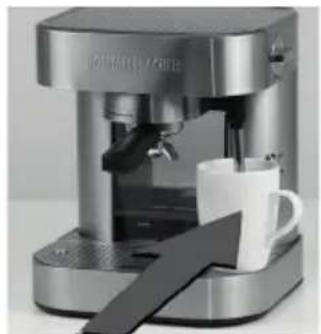
Exterior view of a modern espresso machine with a white mug and black tray (no visible text or symbols)Step 3: Place a vessel below the outlet of the hot water/steam nozzle.
flowchart
graph TD
    A["Step 0"] --> B["Step 1"]
    B --> C["Step 2"]
    C --> D["Step 3"]
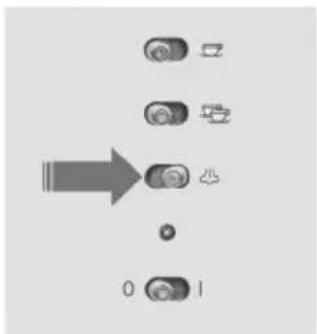
Step 4: Choose the function "steam".
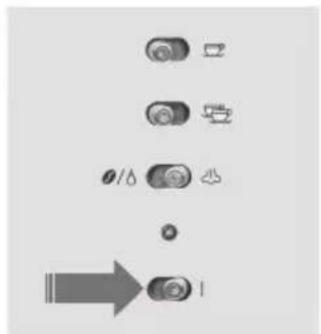
Step 5: Switch the appliance on. The appliance heats up and the pilot lamp blinks. When the lamp glows permanently, the appliance is ready for use.
natural_image
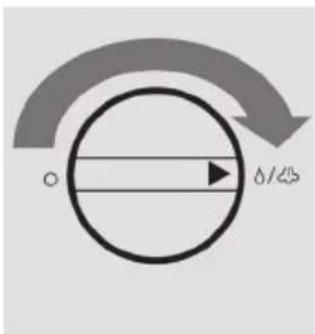
Simple diagram with a circular arrow and horizontal line, no text or symbols presentStep 6: Start steam supply. Turn the rotary knob to the right. Produce steam for 2 - 3 seconds to remove residual water from the system.
natural_image
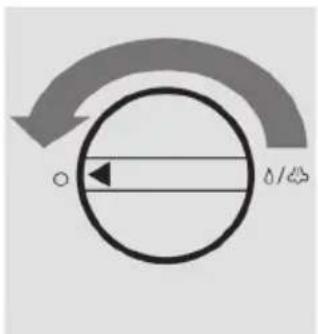
Simple diagram with curved arrows and a circle, no text or symbols presentStep 7: Stop steam supply. Turn the rotary knob to the left.
natural_image
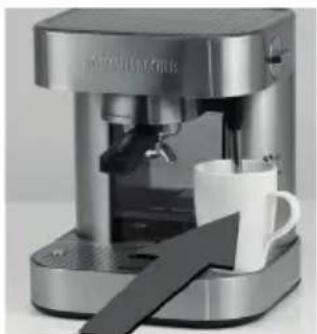
Exterior view of a modern espresso machine with a white mug and black handle (no visible text or symbols)Step 8: Remove the vessel.
natural_image
Close-up of a hand mixer blending white liquid into a metal cup (no text or symbols visible)Step 9: For frothing milk, dip the nozzle in the pot with milk.
natural_image
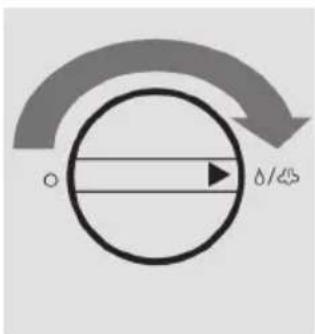
Simple diagram with a circle, arrow, and curved arrows indicating direction (no text or symbols)Step 10: Start steam supply. Turn the rotary knob to the right.
natural_image
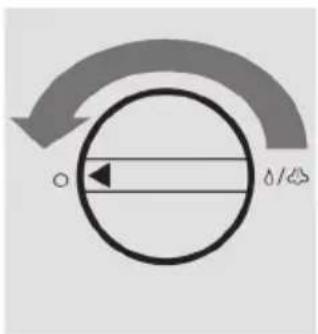
Simple diagram with curved arrows and a circle, no text or symbols presentStep 11: Stop steam supply. Turn the rotary knob to the left.
natural_image
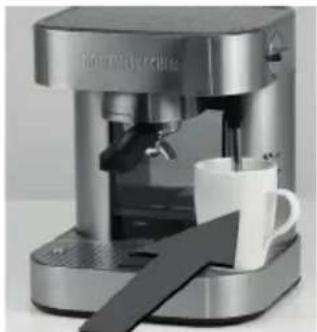
Exterior view of a modern espresso machine with a white mug and black handle (no visible text or symbols)Step 12: (cleaning/cooling) Place a vessel below the outlet of the hot water/steam nozzle.
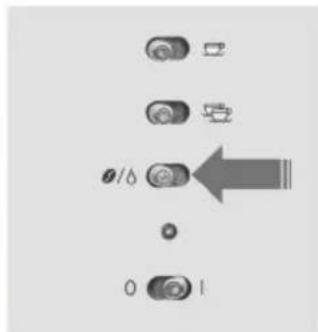
Step 13: (cleaning/cooling) Choose the function "espresso/ hot water". The pilot lamp blinks.
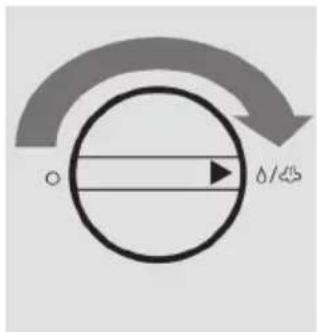
Step 14: (cleaning/cooling) Start hot water supply. Turn the rotary knob to the right. Dispense hot water for 10 seconds.
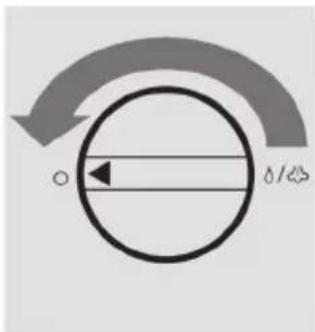
natural_image
Simple diagram with a circle, arrow, and circular arrows indicating direction (no text or symbols)Step 15: (cleaning/cooling) Stop hot water supply. Turn the rotary knob to the left. The appliance is ready for use.
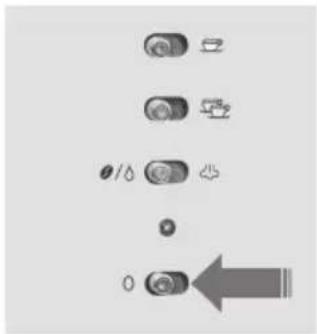
Step 16: If the appliance is not needed any more, switch it off and pull the mains plug.

Step 17: Clean the appliance and the accessories.
Making hot water
- With this appliance, hot water for tea etc. can be made.
• Water out of the hot water/steam nozzle has a temperature of ca. 85 °C.
• Max. 250 ml of hot water can be dispensed. - Attention: Make sure that the holes in the nozzle are always clean and not clogged.
- Attention: For moving the nozzle, only touch it at the upper plastic part.
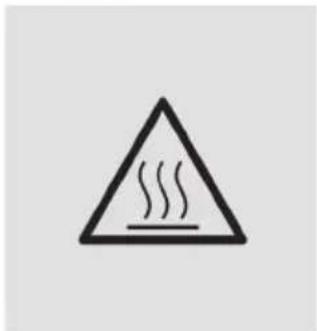
Warning: Casing, brew head, portafi lter, fi lter inserts and hot water/steam nozzle are getting hot during use!
Step 1: Prepare the appliance.
natural_image
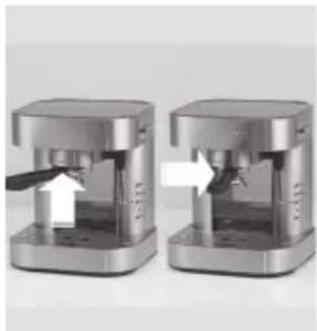
Two identical metallic square devices with white arrows indicating motion or operation, no visible text or symbols.Step 2: Position the portafi lter without fi lter insert at the marking of the brew head and lock it by turning it to the right as far as it will go.
natural_image
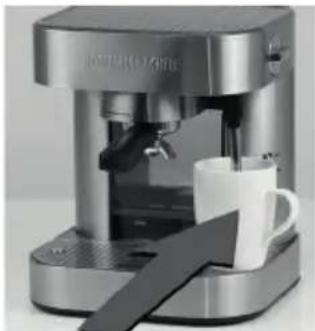
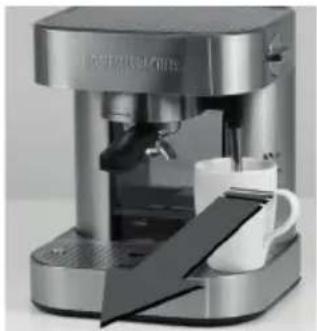
Exterior view of a modern espresso machine with a white mug and black tray (no visible text or symbols)Step 3: Place a vessel below the outlet of hot water/steam nozzle.
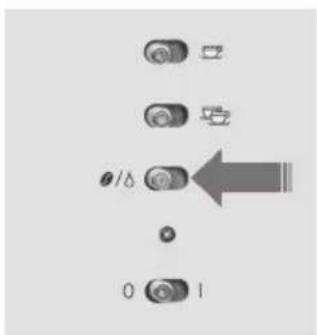
Step 4: Choose the function "espresso/hot water".
flowchart
graph TD
    A["Input"] --> B["Step 1"]
    B --> C["Step 2"]
    C --> D["Step 3"]
    D --> E["Step 4"]
    E --> F["Step 5"]
    F --> G["Output"]
Step 5: Switch the appliance on. The appliance heats up and the pilot lamp blinks. When the lamp glows permanently, the appliance is ready for use.
natural_image
Simple diagram with a circle, arrow, and curved arrows indicating direction (no text or symbols)Step 6: Start hot water supply. Turn the rotary knob to the right. Dispense the desired quantity of hot water.
natural_image
Simple diagram with a circle, arrow, and circular arrows indicating direction (no text or symbols)Step 7: Stop hot water supply. Turn the rotary knob to the left.
natural_image
Exterior view of a modern espresso machine with a white mug and blue tray (no visible text or symbols)Step 8: Remove the vessel.
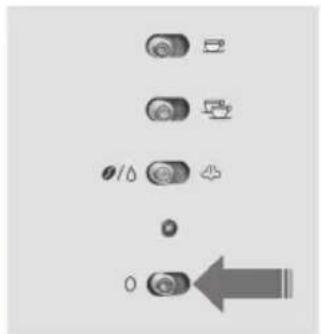
Step 9: If the appliance is not needed any more, switch it off and pull the mains plug.

Step 10: Clean the appliance and the accessories.
Cleaning and maintenance

Switch the appliance off before cleaning and always pull the mains plug! Do not immerse appliance, power cord and plug in water nor clean it under running water!
Attention – hazard of injury and burns! Prior to cleaning casing and accessories, let the complete appliance cool down!
- Clean the appliance immediately after use so that residues will not dry.
- Remove the accessories.
- Wipe the casing with a damp cloth and dry it afterwards.
- Clean the brew head's interior with a damp cloth to remove residues of the coffee powder. Make sure the internal gasket is always clean and without residues.
- Clean water tank (without filter cartridge), drip pan with cup tray, portafilter and filter inserts in hot water with some dishwashing detergent and wipe dry afterwards.
- Clean the filter inserts intensely from both sides with a cleaning brush occasionally. Demount the sieve by loosening the screw on the inside and remove the small sieve insert. Pierce sieve and holes carefully with the attached cleaning pin so that they remain free. Afterwards, assemble the sieve and tighten the screw.
- Clean the hot water/steam nozzle.
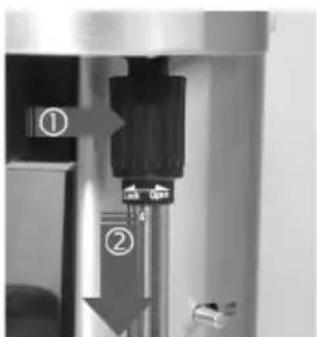
○ Remove the stainless steel bush of the hot water/steam nozzle and clean it thoroughly. Make sure that the outlet holes at the underside as well as the small openings in the upper area of the bush are always free.
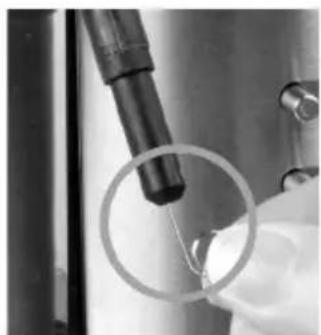
- Clean the hot water/steam nozzle with a damp cloth. Make sure the outlet hole at the underside is always free. Use the enclosed cleaning pin or a pointed object.
natural_image
Close-up of a mechanical device with labeled parts (① and ②), no readable text or symbols beyond labels① Touch the bush at its shaft for removing, turn it to the right and unlock it.
② Then, pull the bush down.
natural_image
Close-up of a precision tool tip interacting with a metallic surface, showing a circular detail (no text or symbols visible)Clean the outlet hole of the hot water/steam nozzle thoroughly!
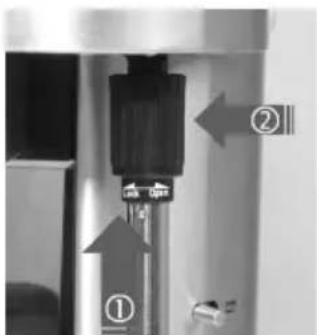
① Touch the stainless steel nozzle at the shaft for attaching it and push the nozzle on.
② Then, turn it to the left and lock it.
• The accessories are not dishwasher-proof.
• Do not use abrasives or dissolvents or sharp objects!
• Never use a steam jet appliance for cleaning the appliance and the accessories!
Emptying the drip pan

- The drip pan collects residual water developing during operation.
- A floater inside the drip pan shows the filling level. If the floater with red marking with indication "VOLL" (full) is visible in the front area of the drip pan, it must be emptied urgently.
- Make sure no residual water is spilled when taking the drip pan out.
Emptying the system
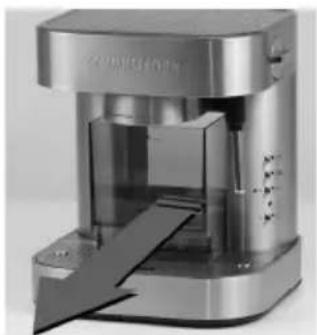
- For transport or before a longer non-use period, we recommend emptying the system from residual water.
- For this, remove the water tank and place a collecting vessel below the hot water/steam nozzle.
- Start hot water supply until there is no water any more, then stop the supply.
Descaling the appliance

- In order to ensure flawless function, the appliance must be descaled regularly.
- Depending on the hardness of tap water, the appliance must be descaled after 30 – 50 litres or after 2 months at the latest. We recommend descaling together with exchanging the filter.
- Observe the following instructions for descaling!
- For descaling we recommend vinegar water at the rate of 1/3 vinegar essence and 2/3 water.
• After descaling, the system must be rinsed thoroughly. - When using decalcifiers observe the manufacturer's information.
- WARNING: Only descale the appliance when cold and without water filter!
natural_image
Exterior view of a modern stainless steel industrial machine with internal components (no visible text or symbols)Step 1: Remove the water tank (previously remove the portafilter if necessary).
natural_image
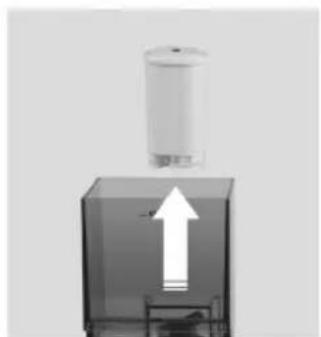
Diagram of a mechanical component with an upward arrow, no visible text or symbolsStep 2: Remove filter cartridge.
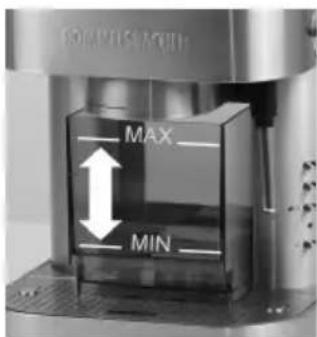
Step 3: Fill decalcifier in the water tank. Observe the "MAX" marking!
natural_image
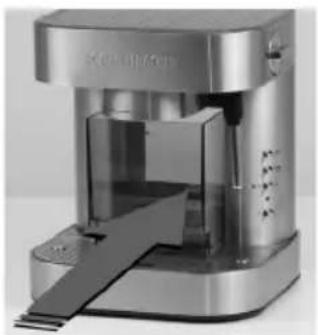
Exterior view of a modern stainless steel coffee maker with open lid and side slippers (no visible text or symbols)Step 4: Insert the water tank. Make sure the water tank is inserted as far as it will go on the gasket.
natural_image
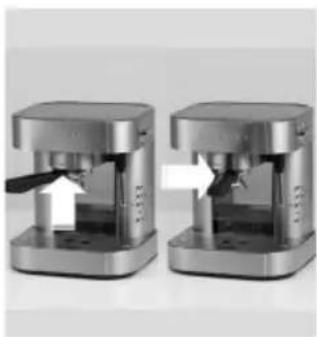
Two identical metallic industrial machines with internal components and directional arrows, no visible text or symbols.Step 5: Position the portafilter without filter insert at the marking of the brew head and lock it by turning it to the right as far as it will go.
natural_image
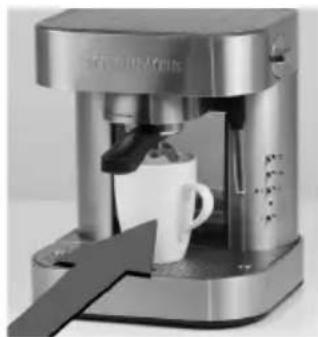
Close-up of a modern espresso machine with a white mug and metallic casing (no visible text or symbols)Step 6: Place a vessel below the outlet of the portafilter.
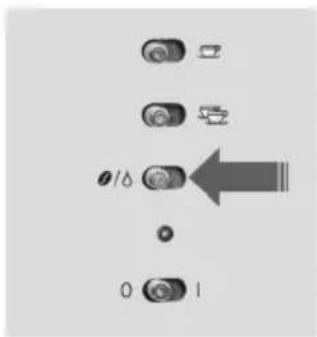
Step 7: Choose the function "espresso/hot water".
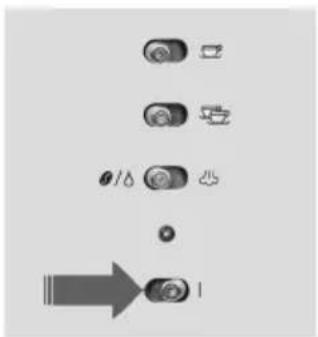
Step 8: Switch the appliance on. The appliance heats up and the pilot lamp blinks. When the lamp glows permanently, the appliance is ready for use.
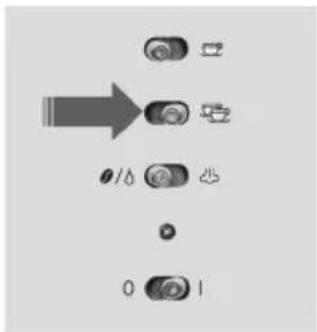
Step 9: Start descaling by tipping the switch for 2 cups shortly. The appliance stops automatically afterwards. Repeat this process several times until ca. 1/3 of the decalcifier has flown through.
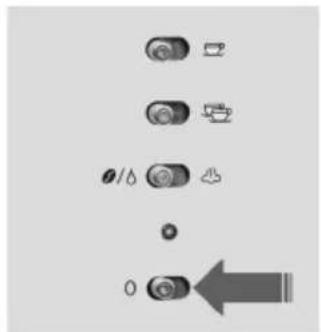
Step 10: Switch the appliance off.

natural_image
Simple icon of an open book with an 'i' inside, no text or symbols presentStep 11: Repeat step 7 – 10 twice.
natural_image
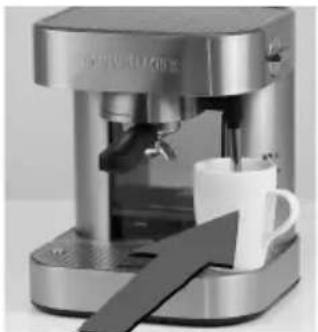
Exterior view of a modern espresso machine with a white mug and black handle (no visible text or symbols)Step 12:
Place a collecting vessel below the outlet of the hot water/steam nozzle.
Wait for 8 – 10 minutes so that the decalcifier can soak.
Check the collecting vessel regularly, empty it if necessary.
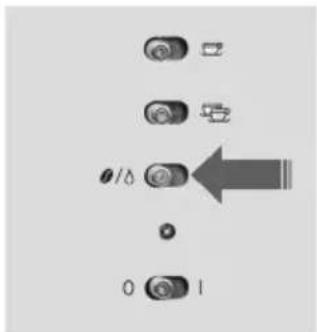
Step 13:
Choose the function
"espresso/hot water".
flowchart
graph TD
    A["Start"] --> B["Process Step 1"]
    B --> C["Process Step 2"]
    C --> D["Process Step 3"]
    D --> E["End"]
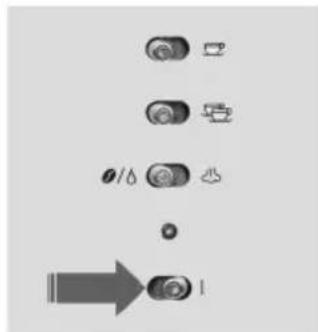
Step 14:
Switch the appliance on again.
The appliance heats up and the pilot lamp blinks. When the lamp glows permanently, the appliance is ready for use.
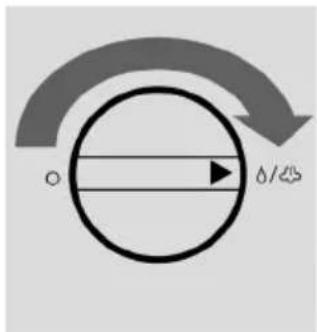
Step 15:
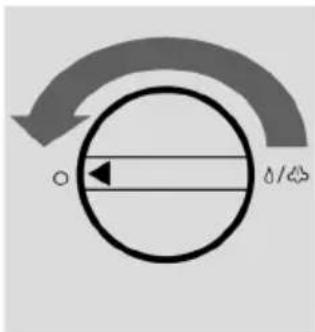
Continue the descaling process by turning the rotary knob to the right. Dispense decalcifier for 15 seconds.
natural_image
Simple circular diagram with arrows and a horizontal line, no text or symbols presentStep 16:
Stop the supply.
Turn the rotary knob to the left.
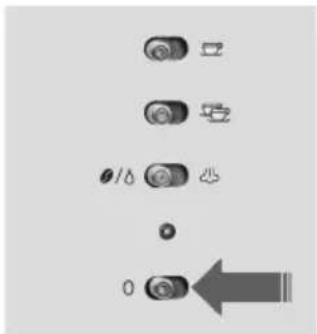
Step 17:
Switch the appliance off.
natural_image
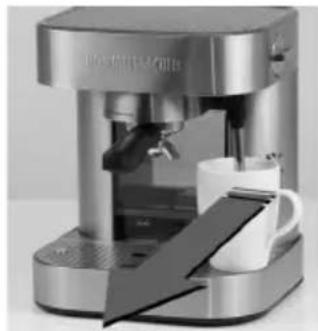
Modern espresso machine with a white mug and metallic frame (no visible text or symbols)Step 18:
Remove the vessel.
natural_image
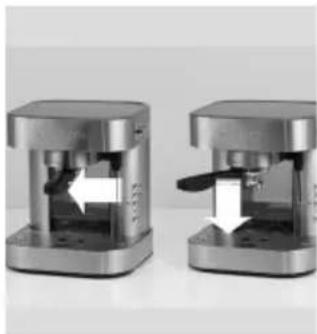
Two identical mechanical press devices with internal components and directional arrows, no visible text or symbols.Step 19:
Remove the portafilter.
Attention, the portafilter drips slightly.
natural_image
Exterior view of a modern stainless steel coffee maker with open lid (no visible text or symbols)Step 20:
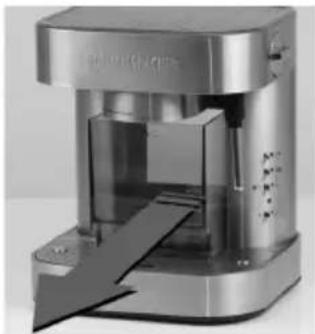
Remove the water tank.
natural_image
Simple icon of an open book with an information symbol inside, no text or labels present.Step 21:
Empty the water tank and clean it thoroughly.
Step 22:
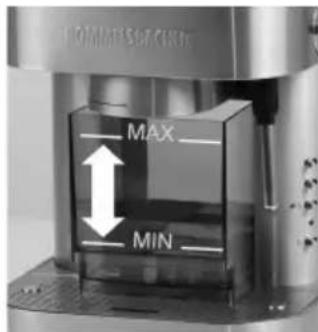
Fill the water tank with fresh tap water.
Observe the "MAX" marking!
natural_image
Exterior view of a modern stainless steel coffee maker with open lid and control panel (no visible text or symbols)Step 23:
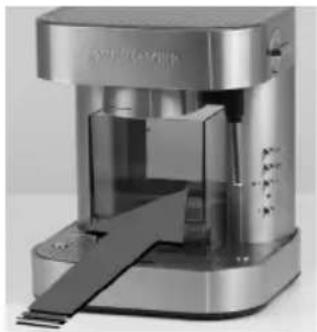
Insert the water tank.
Make sure the water tank is inserted as far as it will go on the gasket.
natural_image
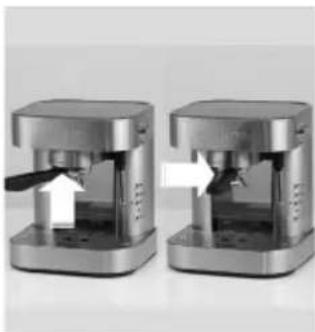
Two identical stainless steel coffee maker machines shown side by side, each with a white arrow indicating a process or operation (no text or symbols visible)Step 24:
Position the portafilter without filter insert at the marking of the brew head and lock it by turning it to the right as far as it will go.
natural_image
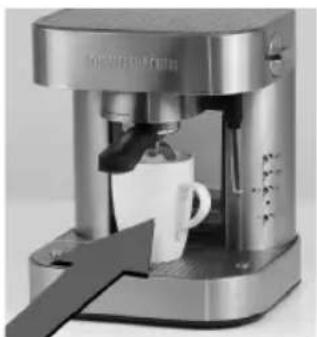
Exterior view of a modern espresso machine with a white mug and black tray (no visible text or symbols)Step 25:
Place a vessel below the outlet of the portafilter.
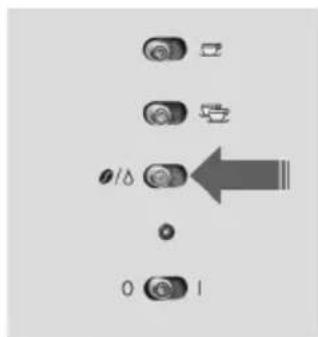
Step 26:
Choose the function "espresso/hot water".
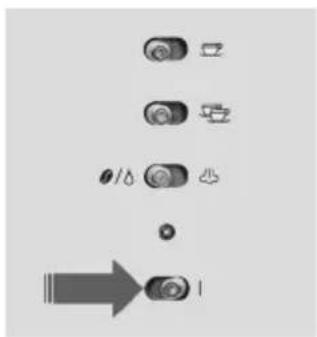
Step 27:
Switch the appliance on.
The appliance heats up and the pilot lamp blinks. When the lamp glows permanently, the appliance is ready for use.
CONTINUED ON NEXT PAGE
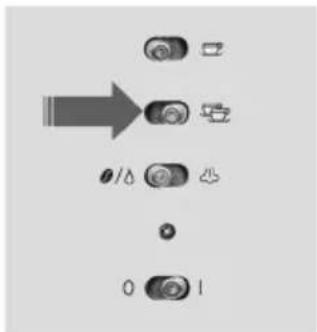
Step 28:
For rinsing the system, tip the switch for 2 cups shortly. The appliance stops automatically afterwards. Repeat this process several times until ca. 2/3 of the water has flown through.
Check the collecting vessel regularly, empty it if necessary.
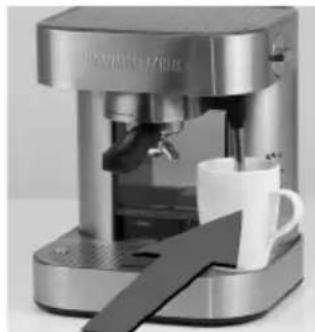
natural_image
Exterior view of a modern espresso machine with a white mug and black tray (no visible text or symbols)Step 29:
Place a vessel below the outlet of the hot water/steam nozzle.
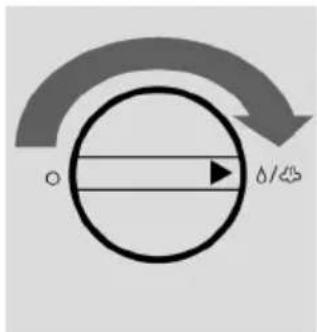
Step 30:
Continue rinsing the system by turning the rotary knob to the right. Dispense ca. 1/3 of the water.
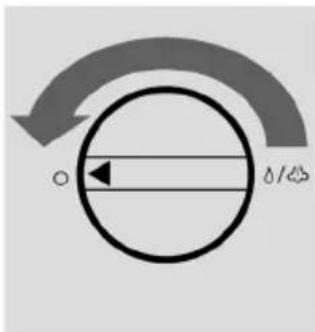
natural_image
Simple diagram with a circular arrow and horizontal line, no text or symbols presentStep 31:
Stop the supply.
Turn the rotary knob to the left.
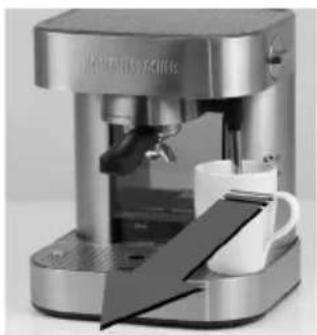
natural_image
Modern espresso machine with a white mug and metallic frame, no visible text or symbolsStep 32:
Remove the collecting vessel.
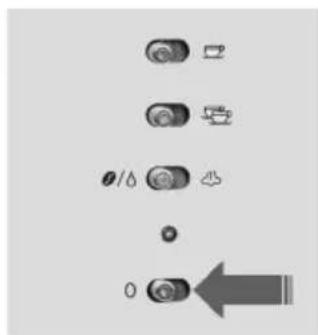
Step 33:
Switch the appliance off and pull the mains plug.

Step 34:
Clean the appliance and the accessories. Insert the filter cartridge again and bleed the system.
Trouble shooting

- The right coarseness of the coffee/espresso bean is important. If the coarseness is finer, more flavour will be extracted. If the setting is too fine, the contact time of hot water will be too long and too many bittern will be extracted. And also the crema clears away again.
- Varying the compacting pressure of the powder in the portafilter shows similar effects as varying the coarseness.
Taste is not okay?
| Finding Possible cause | |
| bitter taste | beans ground too fine, beans compressed too much, percolation is too long, too much powder, too much pressure |
| sour taste | no suitable water, water is too soft, brewing temperature is too low, beans ground too coarse, roasting is too light, percolation is too short, wrong coffee type (coffee roasting instead of espresso roasting) |
| off-flavour | bad bean quality, beans are stored too long, chlorinated water, wrong espresso type |
| not enough flavour | not enough powder, coffee is too old, powder is too coarse, powder is not compressed enough, too much water |
Crema is not perfect?
| Finding Possible cause | |
| not enough crema | powder is too coarse, powder is not compressed enough, beans are too old, cup or machine is dirty |
| crema is too dark beans are too old, | powder is too coarse, powder is not compressed enough |
| crema is too light beans are too old, | powder is too coarse, powder is not compressed enough |
| crema is not firm cup is too cold or too hot, water pressure is too low | |
First aid ...
| Finding Cause and troubleshooting | |
| quickly blinkingtemperature pilot lamp | water tank is emptyRefill the water tank, afterwards bleed the system by dispensing hot water!water tank is not inserted correctlyInsert the water tank as far as it will go on the gasket, afterwards bleed the system by dispensing hot water!air in the systemBleed the system by dispensing hot water!filter cartridge is not soaked enoughLay the filter cartridge in water for at least 15 minutes, afterwards insert it according to instructions!water filter is blockedRemove the water filter from the tank and start dispensing water without filter.If the supply is ok, the filter cartridge must be exchanged.rotary knob is not in correct positionTurn the rotary knob to the right or left as far as it will go! |
| blinkingtemperature pilot lamp | no faultThe appliance heats up!the appliance blinks longer than 3 minutesBleed the system by dispensing hot water! |
| slowly blinkingtemperature pilot lamp | no faultThe appliance is in power save mode without heating function of the thermoblock! Activate the appliance by shortly tipping the "1 cup" or "2 cup" switch |
| permanently glowingtemperature pilot lamp | no faultThe thermoblock is heated up and the appliance is ready for use! |
| pump generates loud pump noise | water tank is empty during hot water/steam supplyRefill the water tank, afterwards bleed the system by dispensing hot water! |
| milk froth is not satisfying | milk is too warmUse refrigerated milk!unsuitable vesselUse a suitable stainless steel pot!nozzle holes are blockedClean the nozzle thoroughly! |
| espresso flows irregularly or not at all out of the portafilter | For finding the fault, remove all components (also portafilter) and check the supply. Assemble the components step by step and check the supply until you find the cause of defect Sexlocked filter insert Clean the filter insert thoroughly, clean sieve and holes carefully with the cleaning pin if necessary! blocked portafilter Clean the portafilter thoroughly, clean the holes carefully with the cleaning pin if necessary! blocked water filter Remove water filter from the tank and start dispensing water without filter. If the supply is ok, the filter cartridge must be exchanged. sieve in tank (below the water filter) is blocked Remove the water filter to clean the sieve! appliance placed aslant (not levelled out) Search for a horizontal space! powder is pressed too firmly or irregular The correct compacting pressure is ca. 15 kg! air in the system Bleed the system by dispensing hot water! appliance is calcified Decalcify the appliance according to instructions! |
| portafilter drips | no fault This is a normal process – place a vessel below when removing the cup! |
Recipes
CAFFÈ LATTE
a double espresso in a large cup of hot milk, covered with less or no froth.
CAPPUCCINO
one third espresso, one third hot milk and one third milk froth.
CAPPUCCINO FREDDO – the cold variant –
one third cold espresso, one third refrigerated milk and one third refrigerated milk froth.
CAFFÈ MOCA
one third espresso, one third hot milk and one third cocoa, served in a high glass; the beverage can also be prepared with 1 – 2 table spoons of chocolate syrup and more milk.
CAFFÈ CORRETTO
the espresso is 'corrected' with a shot of liqueur, usually grappa, brandy or Sambuca.
MACCHIATO
espresso added by a 'dash' of hot milk in a high glass and much milk froth on top.
LATTE MACCHIATO
pour hot milk in a high glass and add espresso and much milk froth on top.
MEXICAN COFFEE SPECIAL
pour 2 cl tequila and 2 cl coffee liqueur in a high glass, add much hot milk froth. Slowly and carefully add a double espresso. Thus, you will get the different layers for this coffee creation's fancy look.
- ROMMELSBACHER
- D – Produktbeschreibung GB – Product description
- Einleitung
- Intended use
- Technical data
- Scope of supply
- Packing material
- For your safety
- General safety advices:
- Safety advices for using the appliance:
- Application possibilities
- Features
- Power save function
- Single circuit system
- bar pump pressure
- Aluminium die-cast thermoblock
- Pre-brew function
- Programmable cup capacity
- Water filter
- Electronic water level control
- Height-adjustable cup tray
- Cup warmer function
- Operating elements
- Status display of the temperature pilot lamp
- Initial use of the appliance
- Bleeding the system
- Inserting the water filter
- Refilling the water tank
- Making espresso/coffee
- Programming the cup capacity
- Frothing milk
- Making hot water
- Cleaning and maintenance
- Emptying the drip pan
- Emptying the system
- Descaling the appliance
- CONTINUED ON NEXT PAGE
- Trouble shooting
- Recipes
- CAFFÈ LATTE
- CAPPUCCINO
- CAPPUCCINO FREDDO – the cold variant –
- CAFFÈ MOCA
- CAFFÈ CORRETTO
- MACCHIATO
- LATTE MACCHIATO
- MEXICAN COFFEE SPECIAL
Brand : Rommelsbacher
Model : EKS 2000
Category : Coffee maker