POCM80G - Coffee maker Point - Free user manual and instructions
Find the device manual for free POCM80G Point in PDF.


| Product Type | Drip Coffee Maker |
| Brand | Point |
| Model | POCM80G |
| Dimensions (Approx.) | 25 x 20 x 35 cm |
| Weight (Approx.) | 1.5 kg |
| Power Supply | 120V / 60Hz or 230V / 50Hz (depending on region) |
| Power Consumption | 1000 W |
| Water Tank Capacity | 1.2 L (approx. 10 cups) |
| Brewing System | Drip filter system with reusable or paper filter |
| Functions | Auto brew, keep warm, programmable timer (if applicable), water level indicator |
| Carafe Type | Glass carafe with marking |
| Filter Basket | Removable, suitable for size #4 paper filters or permanent filter |
| Auto Shut-off | Yes, after 2 hours of inactivity |
| Safety Features | Overheat protection, auto shut-off, non-slip feet |
| Cleaning | Removable parts (carafe, filter basket, water tank) are dishwasher safe; descaling recommended monthly |
| Spare Parts Available | Carafe, filter basket, water tank lid |
| Reparability | Basic user serviceable parts; professional repair for electrical components |
| Other Features | Keep warm plate, anti-drip function, cord storage |
Frequently Asked Questions - POCM80G Point
User questions about POCM80G Point
0 question about this device. Answer the ones you know or ask your own.
Ask a new question about this device
Download the instructions for your Coffee maker in PDF format for free! Find your manual POCM80G - Point and take your electronic device back in hand. On this page are published all the documents necessary for the use of your device. POCM80G by Point.
USER MANUAL POCM80G Point
Coffee Maker With integrated grinder
POCM80G
User Manual
GB
Congratulations on the purchase of your new POINT PRO SERIES Coffee Maker. We recommend that you spend some time reading this instruction manual in order to fully understand all the operational features it offers. Read all the safety instructions carefully before use and keep this instruction manual for future reference.
NO
- Readallinstructions.
-
Donotoperateanyappliancewitha damaged cordor plug or after the appliancemalfunctions, or has been damaged in anymanner. Returnapplianceto anauthorized service facility for examination, repair or adjustment.
-
If the supply cord is damaged, it must be replaced by the manufacturer, its service agents similarly qualified persons in order to avoid a hazard.
-
Toprotectagainstfire,electricshockand injurytopersons,donotimmersecond,plug, or in water or other liquid.
-
This appliances shall not be used by children. Keep the appliance and its cordout of reach of children.
-
Unplugfromoutletwhennotinuse and beforecleaning. Allowtocoolbeforeputting onortakingoffparts, andbeforecleaning theappliance.
-
The use of accessory not recommended by the appliance manufacturer may result in fire, electric shockor injury topersons.
-
Ensure fingersarekeptwellawayfrom movingparts.
- Checkgrindingchamberforpresenceof foreignobjectsbeforeusing.
- Misusemaycausepotentialinjury.
- The appliance must not be immersed in any liquid.
- Donotuseoutdoors.
- Donotletcordhangovertheedgeofa tableorcounter, ortouchhotsurfaces.
- Donotplaceonornearahotgasor electricburner, orinaheatedoven.
- Donotuse appliance other than its intended use.
- Donotsetahotcontaineronahotor coldsurface.
- Donotletthecoffeemakeroperate withoutwater.
- The container is designed for use with this appliance. It must never be used on a rangetop.
- Donotcleancontainerwithcleansers, steelwoolpads, orotherabrasivematerial.
-
Todisconnect, turnanycontrolto "Off", removeplugfromwalloutlet. Alwayshold theplug. Neverpullthecord.
-
Scaldingmayoccurifthewatertanklid isopenedduringthebrewingcycles.Be carefulnottogetburnedbythesteam.
- Some part of appliance are hot when operated, sodonottouchwithhands. Use handles only.
- Neverusetheapplianceifthejugshows anysignsofcracksorhasalooseor weakenedhandle. Onlyusethejugwiththis appliance. Usecarefull y asthe jugisvery fragile.
- Children should be supervised to ensure that they donot play with the appliance.
- The appliance can be used by persons with reduced physical, sensory or mental capabilities or lack of experience and knowledge if they have been given supervision or instruction concerning use of the appliance in a safety and they understand the hazards involved.
- This appliance is intended to be a household and others similar applications such as:
-staffkitchenareasinshops,officesand otherworkingenvironments; -farmhouses;
- byclientsinhotels,motelsandother residentialtypeenvironments;
-bedandbreakfasttypeenvironments.
- This appliance has been incorporated with agrounded plug. Ensure the wall outlet in your house is well earthed.
28.Savetheseinstructions.
PRODUCT OVERVIEW
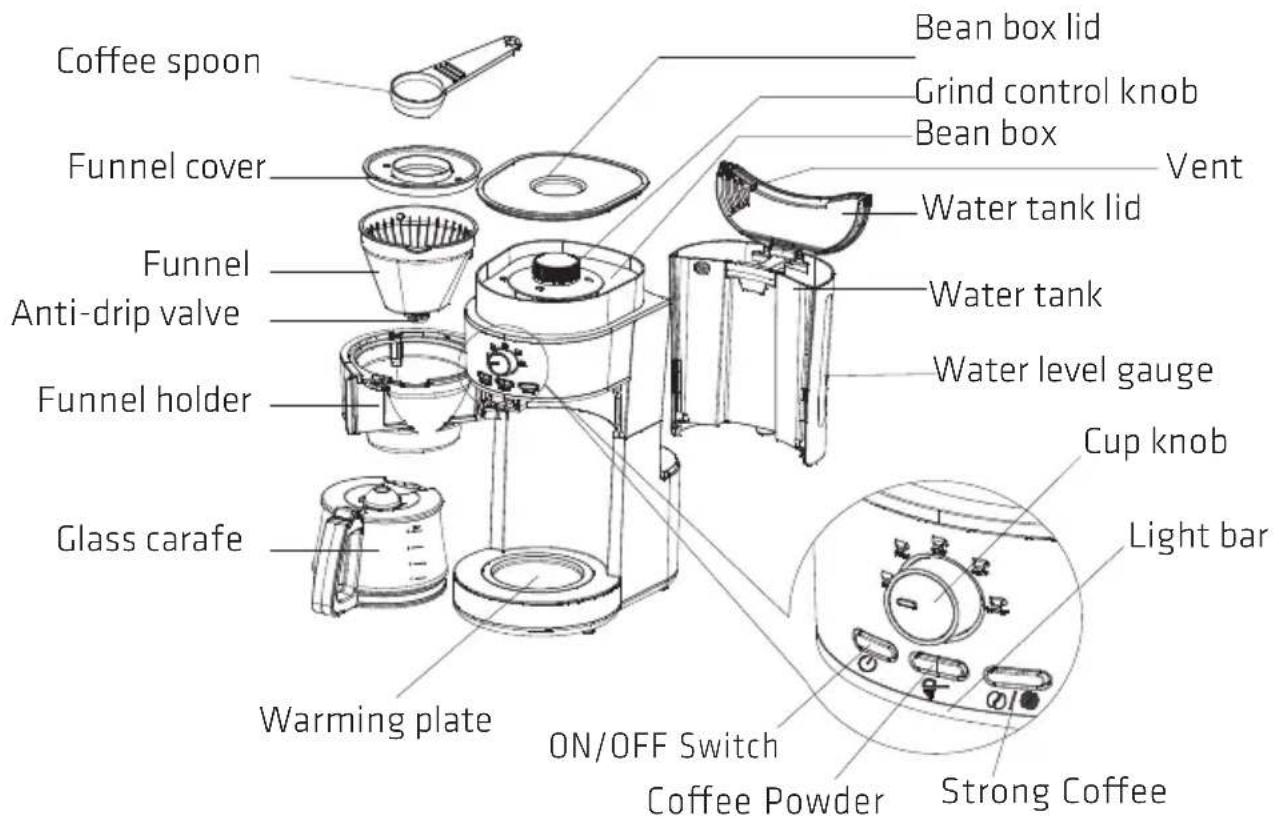
CONTROL PANEL
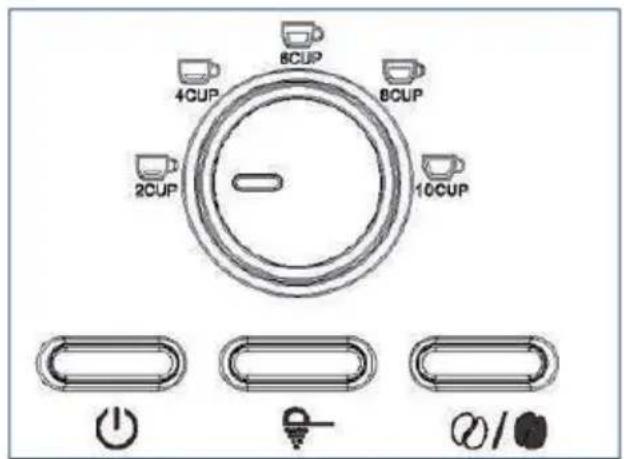
ON/OFF SWITCH
COFFEE POWDER
01 STRONG COFFEE
FIRST TIME USE
Check that all accessories are complete and the appliance is not water into water tank to the max level and brew water for sev without coffee powder, then discard the water. Clean all detachable as funnel cover and funnel etc thoroughly with warm water.
OPERATION
BREWING COFFEE WITH COFFEE POWDER
- Open the water tank lid and fill the water tank with desired water (See Table 1). For example, fill the water tank with water of 2 if you would like to make 2 cups of a coffee water tank lid. NOTE: Do not fill the water tank with water exceeding the max indicated on the water tank. The appliance can brew up to 10 c every brewing cycle.
- Open the funnel holder, then put the funnel, paper filter and into the funnel holder in sequence. Make sure that the funnel, p funnel cover is assembled well in position.
- Add proper coffee powder into the paper filter. Usually a cup of a level spoon of coffee powder, but you may adjust according to and then close the funnel holder.
Table 1. Coffee amount : Coffee powder amount : Water am
| Coffee amount (cup) | Coffee powder amount/A level spoon (spoon) | Water amount/Scale |
| 2 | 2 | 2 |
| 4 | 4 | 4 |
| 6 | 6 | 6 |
| 8 | 8 | 8 |
| 10 10 10 |
Note: A level spoon of coffee powder is about 5-7g.
NOTE: The funnel holder must be closed correctly, or the glass can unable to be put on the warming plate and the coffee-brewing w perform well.
-
Put the glass carafe on the warming plate by aligning the sp glass carafe with the anti-drip valve, then horizontally push the gla forward to make the center line of the glass carafe align with a The glass carafe must be put correctly in position.
-
Connect the appliance to a power source, the indicators of , “/” will flash once, then “the indicator will illuminate and the indicators will turn off. “Press and then “press again to start the appliance, at that time, the indicator will illuminate and the indicator will flash and the light bar illuminates while the other in off.
NOTE: Press again if you need to exit from Grind off mode bef pressing “to activate the appliance, at that time”, the indicator turn off, and the appliance returns to standby mode with the indicator illuminated.
CAUTION: Never open the funnel holder during operation to avoid scalded.
-
After a while, the coffee flows into the glass carafe from the One beep can be heard and the appliance will enter into keep-wa after finish brewing, at that "bile, the" and indicators will turn of while the light bar illuminates. After keeping warm for about 35 three beeps can be heard and all the indicators and the light b
-
Press “Again if you want to make the appliance stop during bre that time, the” indicator illuminates. Press and then press again to make the appliance work again.
CAUTION: Do not touch the vent of water tank during brewing t scalded.
- Remove glass carafe to serve when brewing is finished. For an coffee taste, serve it just after brewing.
NOTE: The coffee you get will be less than the water you have water is absorbed by the coffee powder.
CAUTION: When pouring coffee, the inclined angle of the glass caraf be more than 45 degree from the vertical position. Pour the coffee the glass carafe is empty, otherwise the coffee in the glass carafe bottom of carafe lid, and the coffee will flow out from two edge
- Always turn the coffee maker off and unplug the appliance w
BREWING COFFEE WITH COFFEE BEAN
- Open the water tank lid and fill the water tank with desired (See Table 1). For example, fill the water tank with water up to if you would like to make 2 cup of the coffee tank lid.
NOTE: Do not fill the water tank with water exceeding max level on the water tank. The appliance can brew up to 10 cups of a brewing cycle.
- Open the funnel holder, then put the funnel, paper filter and into the funnel holder in sequence. Make sure that the funnel, p funnel cover be assembled correctly in position.
NOTE: The funnel holder must be closed correctly, or the glass can unable to be put on the warming plate and the coffee-brewing v perform well.
- Add coffee beans into the bean box, and then replace the b NOTE: The bean box can only be loaded with a maximum of 12 beans .
- Put the glass carafe on the warming plate by aligning the sp glass carafe with the anti-drip valve, then horizontally push the gla forward to make the center line of the glass carafe aligns with The glass carafe must be put correctly in position.
- Connect the appliance with a power “source,” the “/” , indicators will flash once, then the “Indicator lights will illuminate w other indicators turn off.
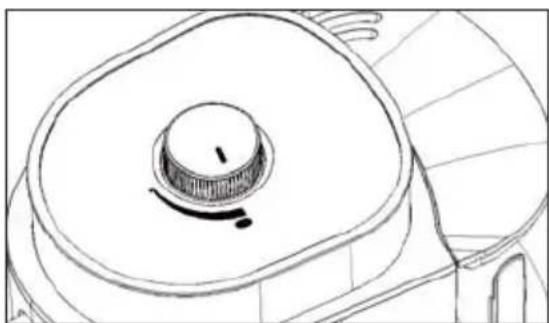
- Select your desired coffee-dispensing amount by the Cup knob Table 1), then adjust the size of the ground coffee with the knob (See Fig.3 & Fig.4), then press once to grind coffee beans, time, the indicator of blinks and the light bar illuminates.
Fine grind Coarse grind
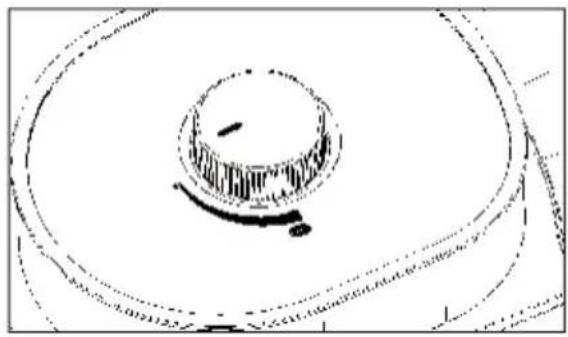
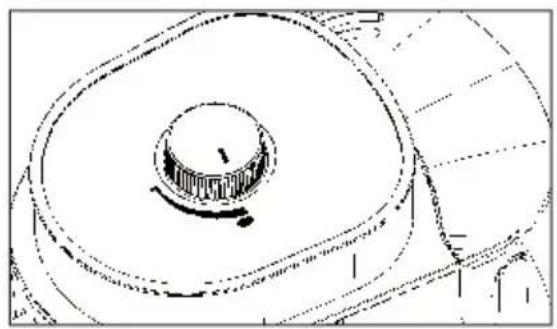
Fig.3 Fig.4
- After grinding, the appliance starts to brew coffee. The coffee the glass carafe from the coffee outlet, and at that time, the
turns off and the light bar illuminates. One beep can be heard an appliance will enter into keep-warm mode after brewing is finished, indicator turns off while the light bar illuminates. After keeping w about 35 minutes, three beeps can be heard and all the indicato light bar turn off.
CAUTION: Never open the funnel holder during operation to avoid scalded.
- Press again if you want to make the appliance stop working brewing, at that time the indicator illuminates. Press and then press again to make the appliance continue to brew again.
CAUTION: Do not touch the vent of water tank during brewing to scalded.
- Remove the glass carafe to serve when brewing is finished. For coffee taste, serve it just after brewing.
NOTE: The coffee you get will be less than the water you have water is absorbed by the coffee powder.
CAUTION: When pouring coffee, incline angle of the glass carafe shows more than 45 degrees from the vertical position, pour the coffee slot glass carafe is empty, otherwise the coffee in the glass carafe will bottom of carafe lid, and the coffee will flow out from two edges
- Always turn the coffee maker off and unplug the appliance use.
BREWING STRONG COFFEE WITH COFFEE BEAN
- Open the water tank lid and fill the water tank with desired (See Table 1). For example, fill the water tank with water up to if you would like to make 2 close of the off-water tank lid.
NOTE: Do not fill the water tank with water exceeding max level on the water tank. The appliance can brew up to 10 cups of coffee brewing cycle.
- Open the funnel holder, then put the funnel, paper filter and into the funnel holder in sequence. Make sure that the funnel, p funnel cover is assembled correctly in position.
NOTE: The funnel holder must be closed correctly, or the glass can unable to be put on the warming plate and the coffee-brewing v perform well.
-
Add coffee beans into the bean box, and then replace the b NOTE: The bean box can only be loaded with a maximum of 12 beans
-
Put the glass carafe on the warming plate by aligning the sp carafe with the anti-drip valve, then horizontally push the glass ca to make the center line of the glass carafe aligns with anti-drip glass carafe must be put correctly in position.
-
Connect the appliance with power source, “the”, “ind will flash once, then the “indicator lights illuminate while the other indicators turn off.
-
Select your desired coffee-dispensing amount by the Cup knob Table 1), then adjust the size of the ground coffee with the knob (See Fig.3 & Fig.4) and press once to grind the coffee bea that time, the indicator lights, the indicator blinks and the light bar illuminates.
NOTE: Press again if you need to exit from Strong mode before pressing “do” activate the appliance, at that time, the indicator of turns off, and the appliance returns to standby “do” with the ir illuminates.
CAUTION: Never open the funnel holder during operation to avoid scalded.
-
After grinding, the appliance starts to brew coffee. The coffee the glass carafe from the coffee outlet, and at that time, the the light bar illuminates while the indicator of blinks. One beep can heard and the appliance will enter into keep-warm mode after break finished, at that time "the "and" indicator turn off while light bar illuminates. After keeping warm for about 35 minutes, three beeps heard and all the indicators and the light bar turn off.
-
Press "again if you want to make the appliance stop working brewing, at that time," the indicator illuminates. And you can firstly press "and then press" again to start the appliance again.
CAUTION: Do not touch the vent of water tank during brewing to scalded.
- Remove the glass carafe to serve when brewing is finished. Fo coffee taste, serve it just after brewing.
NOTE: The coffee you get will be less than the water you have water is absorbed by the coffee powder.
CAUTION: When pouring coffee, incline angle of the glass carafe shows more than 45 degrees from the vertical position, pour the coffee slide glass carafe is empty, otherwise the coffee in the glass carafe will bottom of carafe lid, and the coffee will flow out from two edges.
- Always turn the coffee maker off and unplug the appliance use.
CLEANING AND MAINTENANCE
CAUTION: Be sure to unplug this appliance before cleaning and let appliance cool down completely. To protect against electrical shock, it immerse the cord and plug or the appliance in water or liquid.
- Clea all detachable parts such as funnel cover, funnel, glass ca water tank etc with warm water and the small brush at one er each use.
- Push the anti-drip valve upwards 3-4 times to empty the resin
- Wipe the external surface of the appliance with a soft, damp remove stains.
- Wipe the warming plate with a damp cloth and do not use detergent for cleaning.
- Replace all parts and keep for next use.
REMOVING MINERAL DEPOSITS
To keep your coffee maker operating efficiently, periodically you show away the mineral deposits left by the water according to the way your area and the frequency of use. We recommend removing mir deposits as follows:
- Fill the tank with water and descaler to the max level as in water tank (the ratio of water to descaler is 4:1, for detail refer instructions. Use household descaler), or you can also use citric of the descaler (use a ratio of one hundred parts water to three acid).
- Insert the glass carafe onto the warming plate.
- Make sure the funnel and funnel cover are assembled in place coffee.
- Press and then press to switch on the appliance and allow it brew the descaling solution.
- After brew one-cup of the solution, switch off the appliance.
- Leave the solution to stay for 15 minutes and then repeat s
-
Switch on the appliance and run off the solution until the w completely empty.
-
Rinsby operating the appliance with water at least 3 times.
HINTS FOR GREAT-TASTING COFFEE
- A clean coffee maker is essential for making great-tasting coffee clean the coffee maker as specified in the CLEANING AND MAINTH section. Always use fresh, cold water in the coffee maker.
- Store unused coffee powder in a cool, dry place. After opening coffee powder, reseal it tightly and store it in a refrigerator to freshness.
- For an optimum coffee taste, buy whole coffee beans and find just before brewing.
- Do not reuse coffee powder since this will greatly reduce the Reheating coffee is not recommended as coffee is at its peak fla immediately after brewing.
- Clean the coffee maker when over-extraction causes oiliness. Small droplets on the surface of brewed, black coffee are due to the e from the coffee powder.
- Oiliness may occur more frequently if heavily roasted coffee bea
SPECIFICATIONS
Model : POCM80G
Rated voltage : 220-240V\~ 50Hz
Rated power : 1000W
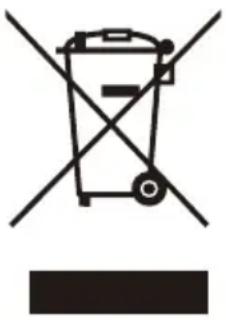
This symbol on the product or in the instructions means that your electrical and electronic equipment should be disposed at the end of its life separately from your household waste. There are separate collection systems for recycling in the EU. For more information, please contact the local authority or your retailer where you purchased the product.
Imported and Exclusively marketed by:
Power International AS,
PO Box 523, N-1471 Lørenskog, Norway
Power Norge:
https://www.power.no/kundeservice/
T: 21 00 40 00
Expert Danmark:
https://www.expert.dk/kundeservice/
T: 70 70 17 07
Power Danmark:
https://www.power.dk/kundeservice/
T: 70 33 80 80
Punkt 1 Dan mark:
https://www.punkt1.dk/kundeservice/
T: 70 70 17 07
Expert Finland:
Fig. 3
Grovmalt
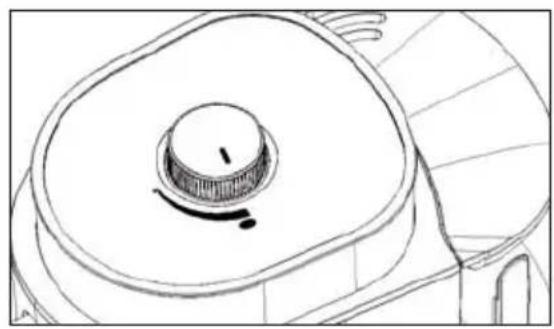
Fig. 4
RREJ∅RING OG VEDLIKEHOLD
K u v a 3
Karkea jauhatu
K u v a 4
Fig. 3
Groft malet
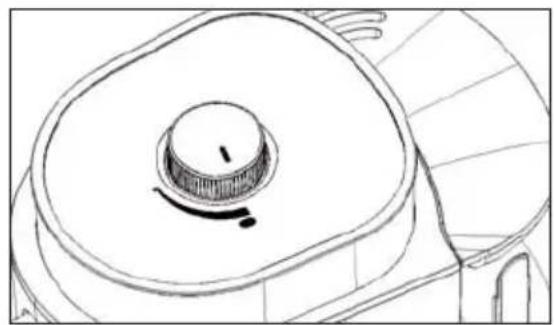
Fig. 4
Bild 3
Grovmalning
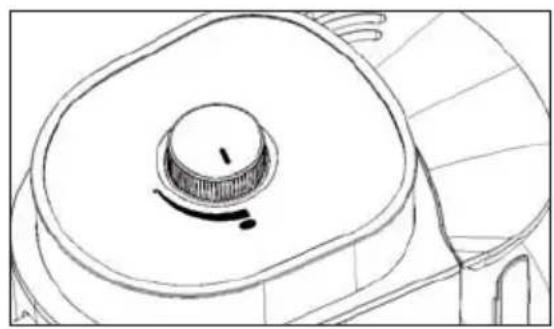
Bild 4
- COFFEE MAKER WITH INTEGRATED GRINDER
- GB
- NO
- PRODUCT OVERVIEW
- CONTROL PANEL
- FIRST TIME USE
- OPERATION
- BREWING COFFEE WITH COFFEE POWDER
- BREWING COFFEE WITH COFFEE BEAN
- BREWING STRONG COFFEE WITH COFFEE BEAN
- CLEANING AND MAINTENANCE
- REMOVING MINERAL DEPOSITS
- HINTS FOR GREAT-TASTING COFFEE
- SPECIFICATIONS
- RREJ∅RING OG VEDLIKEHOLD
Brand : Point
Model : POCM80G
Category : Coffee maker