
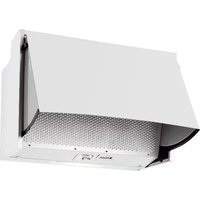
HHVP 62F LT K - Range hood HOTPOINT - Free user manual and instructions
Find the device manual for free HHVP 62F LT K HOTPOINT in PDF.


| Product Type | Range Hood |
| Brand | Hotpoint |
| Model | HHVP 62F LT K |
| Width | 60 cm |
| Height | 70 cm |
| Depth | 50 cm |
| Color | Black / Stainless Steel |
| Installation | Wall-mounted |
| Extraction Rate (Max) | 480 m³/h |
| Noise Level (Max) | 62 dB |
| Lighting | LED, 2 x 3W |
| Number of Speeds | 3 + Intensive |
| Filter Type | Aluminum grease filter, optional carbon filter |
| Controls | Electronic push buttons |
| Duct Diameter | 150 mm |
| Energy Class | C |
| Power Consumption | 200 W |
| Weight | 15 kg |
| Warranty | 2 years |
Frequently Asked Questions - HHVP 62F LT K HOTPOINT
User questions about HHVP 62F LT K HOTPOINT
0 question about this device. Answer the ones you know or ask your own.
Ask a new question about this device
Download the instructions for your Range hood in PDF format for free! Find your manual HHVP 62F LT K - HOTPOINT and take your electronic device back in hand. On this page are published all the documents necessary for the use of your device. HHVP 62F LT K by HOTPOINT.
USER MANUAL HHVP 62F LT K HOTPOINT
EN Instruction for use
EL Οδηγίες χρήσης
natural_image
Architectural diagram showing two building layouts with walls, staircases, and ventilation ducts (no text or labels)


natural_image
Illustration of two hands in a handshake, one open and one closed, with no text or symbols present.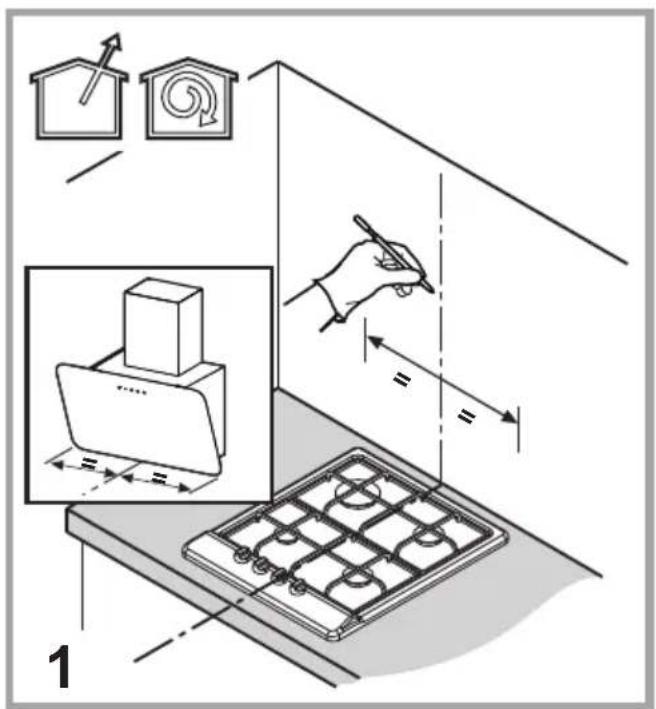
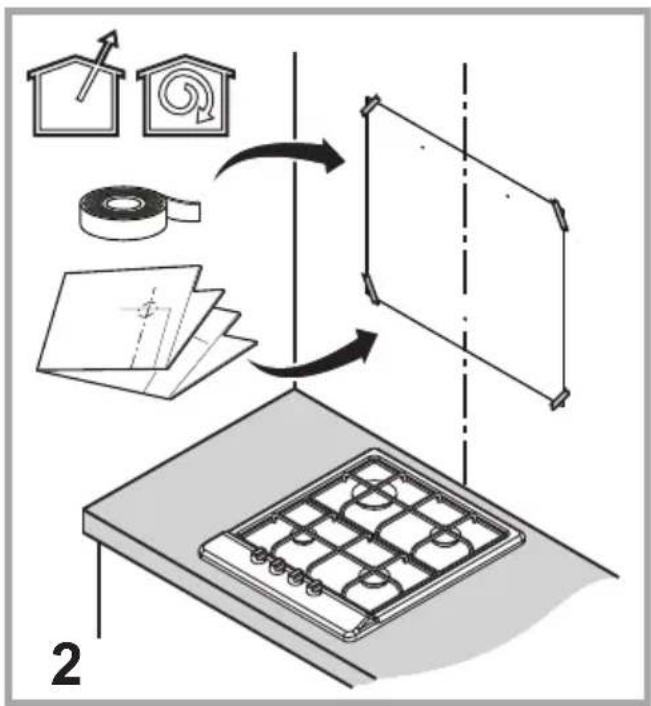
flowchart
graph TD
    A["House renovation with tape roll"] --> B["Roller tape"]
    B --> C["Sheeting sheet"]
    C --> D["Cutting plate"]
    D --> E["Finished product"]

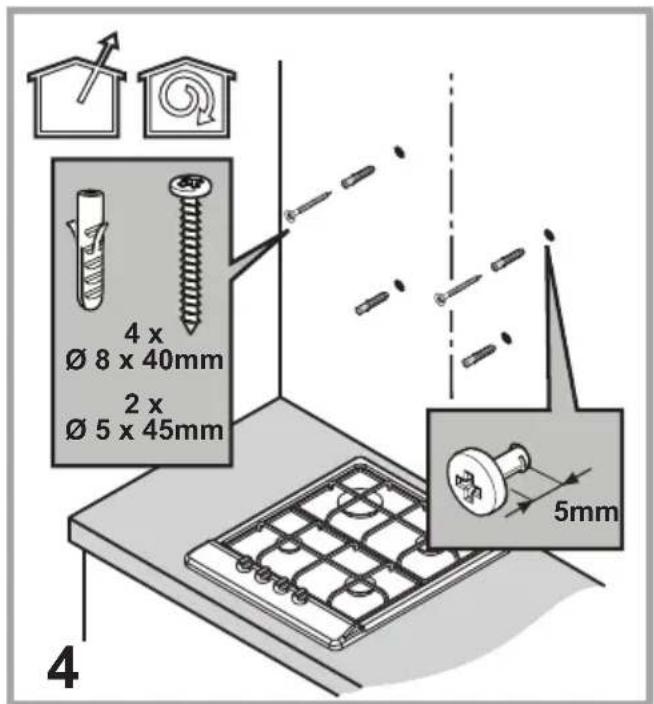


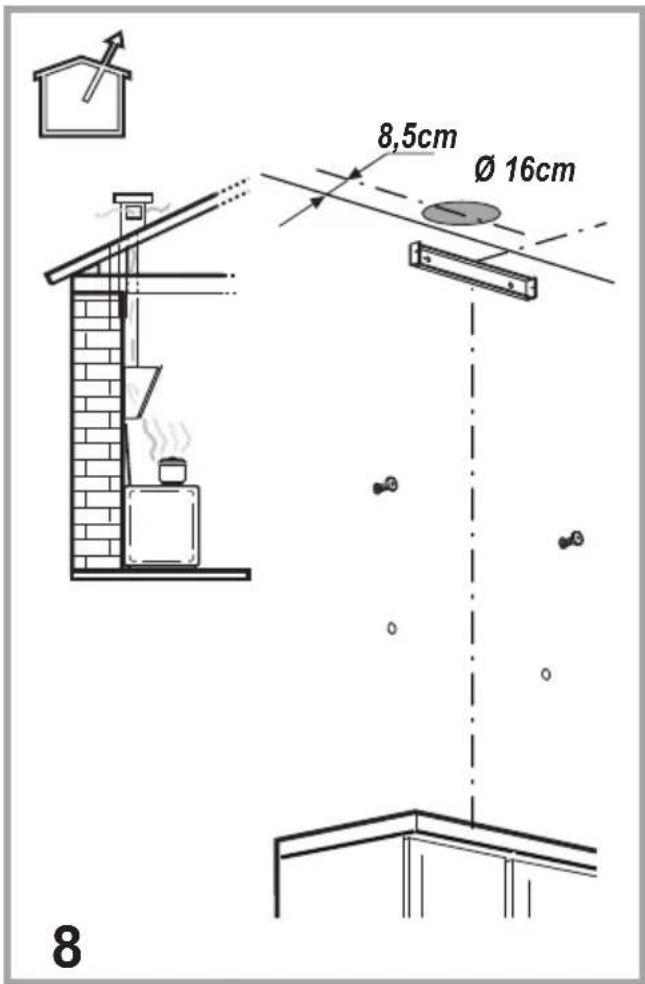
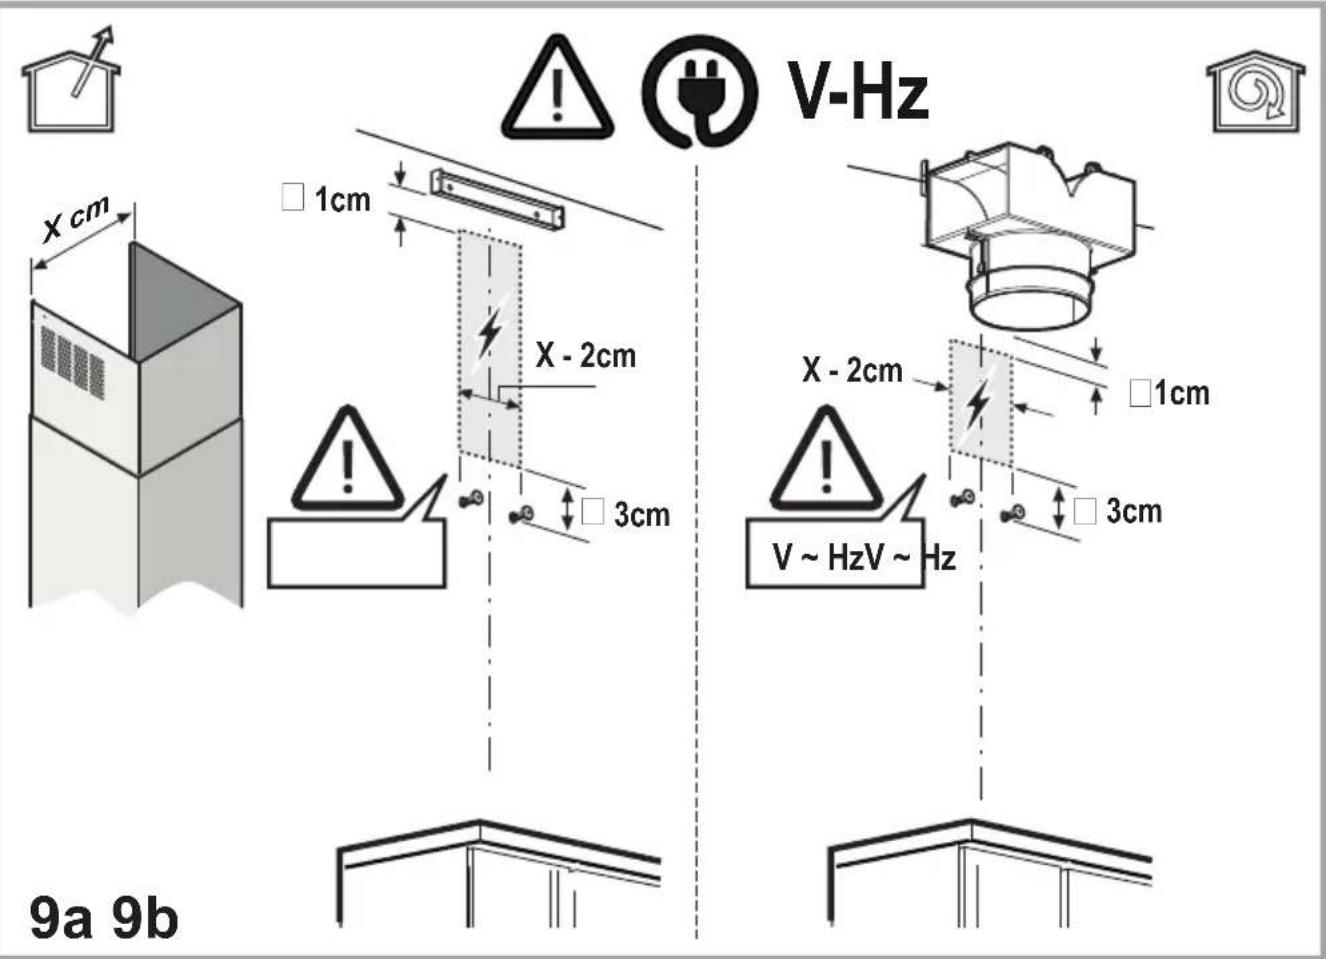
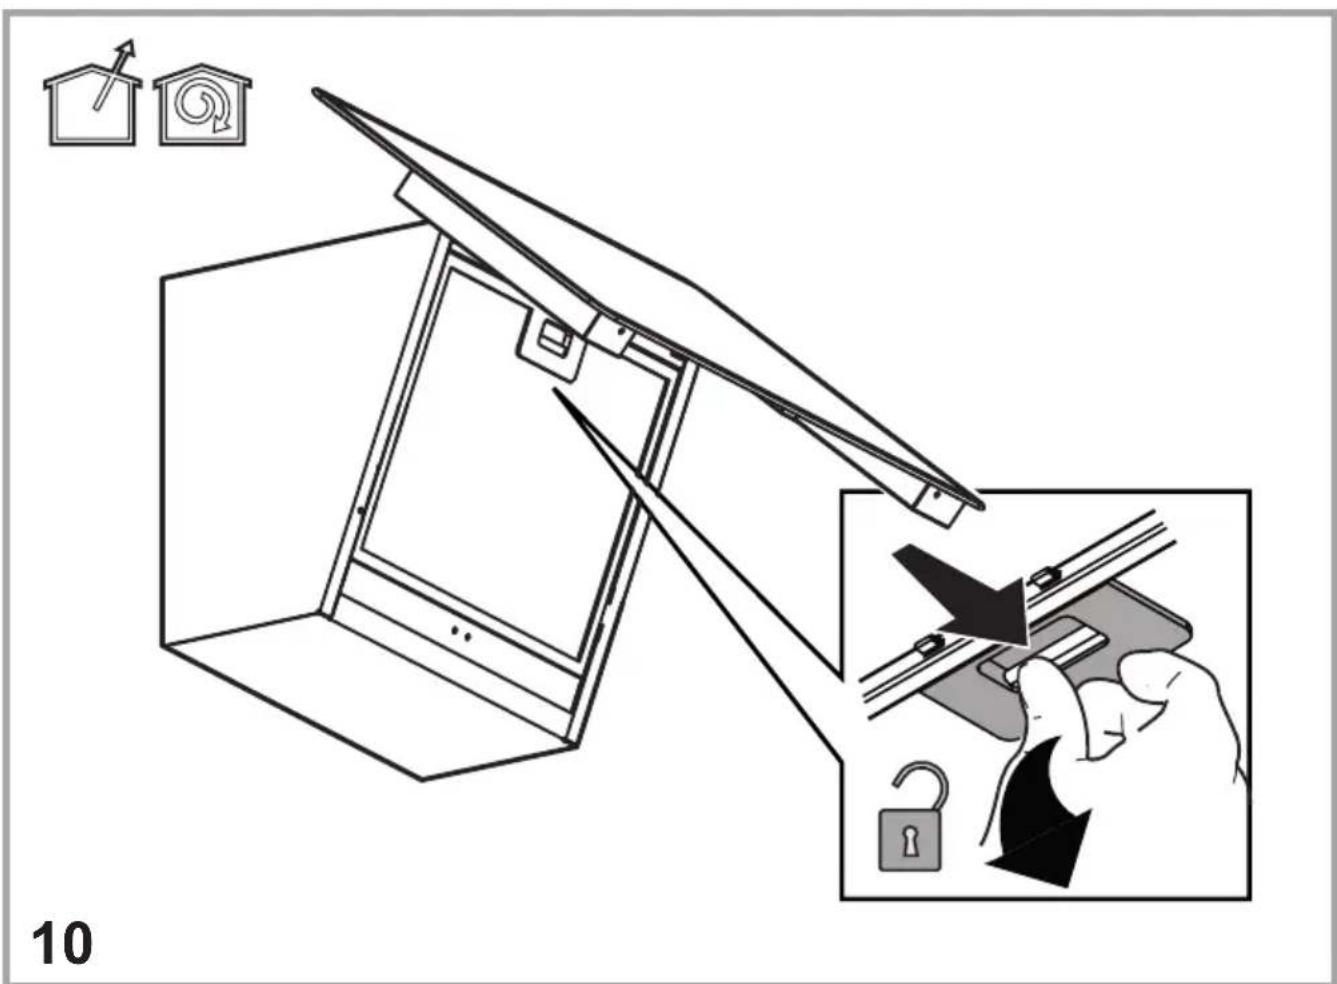


natural_image
Diagram of a mechanical device with rotating components and directional arrows indicating motion (no text or symbols)11
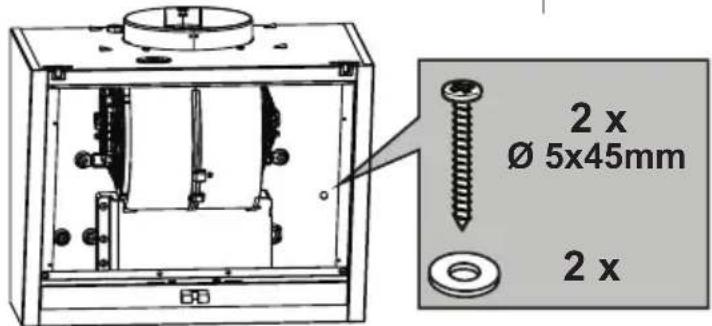


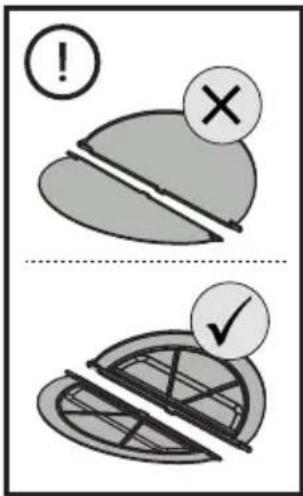
12

13


natural_image
Diagram of a mechanical device with a circular component and downward arrow, no text or symbols present

2 x 3,5x9,5 mm


2 x
3,5x9,5 mm


15a 15b


natural_image
Diagram of a mechanical device with a rotating arrow and component, shown with house symbols and a numbered label '18' (no text or symbols on the diagram itself)EN
GENERAL SAFETY
- Do not make electrical or mechanical changes on the product or on the exhaust pipes. • Before doing any cleaning or maintenance work, disconnect the product from the mains power supply by removing the plug or turning off the mains switch. • For all installation and maintenance operations, always wear work gloves. • The product can be used by children over the age of 8 and by people with reduced physical, sensory or mental capabilities or without experience or the necessary knowledge, as long as they are properly supervised or have been instructed on how to safely use the device and understand the inherent dangers. • Children must be supervised to make sure that they do not play with the product. • Cleaning and maintenance must never be performed by children unless they are properly supervised. • The room must have sufficient ventilation when the product is used at the same time as other appliances burning gas or other fuels. • The product must be cleaned frequently both inside and out (AT LEAST ONCE A MONTH); always follow the instructions given in the maintenance manual. • Failure to comply with the rules indicated for cleaning the product and replacing/cleaning the filters may result in the risk of fire. • It is strictly forbidden to cook food on the flame under the product. • WARNING: • When the hob is on, the accessible parts of the product may become hot. • Do not connect the product to the electrical power supply until the installation is complete. • The regulations laid down by local authorities must be strictly followed with regard to the technical and safety measures to adopt for fume extraction. • The extracted air must not be conveyed through the same ducts used to extract the fumes generated by gas combustion or other types of combustion products. • Do not use or leave the product without appropriately installed lamps, as this may result in the risk of electric shock. • The product must NEVER be used without the grille correctly fitted. • The product must NEVER be used as a support surface unless expressly indicated.
- Range hoods and other cooking fume extractors may adversely affect the safe operation of appliances burning gas or other fuels (including those in other rooms) due to back flow of combustion gases. These gases can potentially result in carbon monoxide poisoning. After installation of a range hood or other cooking fume extractor, the operation of flued gas appliances should be tested by a competent person to ensure that back flow of combustion gases does not occur.
- Use only the fastening screws supplied with the product for its installation, or if not supplied, purchase the correct type of screws. Use screws of the right length, as indicated in the installation guide.
- Please note! Failure to install screws and fasteners in accordance with these instructions may result in electrical hazards.
- To replace the lamp, only use the lamp indicated in the maintenance/lighting system section of this manual. • Using a naked flame may damage the filters and cause a fire hazard, and must therefore be avoided under all circumstances. •
Extra care must be taken when frying to prevent the oil from overheating and catching fire. • In case of doubt, contact the authorised service centre or similar qualified personnel.
Please note! Do not use with a programmer, timer, separate remote control or any other device that activates automatically.
- The minimum distance between the container support surface on the cooker and the lower part of the hood must be at least equal to 45 cm (not less than 65 cm only for Australia and New Zealand) in case of electric cookers and to 65 cm in case of gas or mixed cookers.
If the installation instructions of the gas cooker specify a greater distance, take it into account.
Keep children under the age of 3 away from the appliance. Without the constant supervision of an adult, keep the appliance out of the reach of children under the age of 8.
⚠️ ATTENTION: the appliance is not designed to be operated using an external device or a separate remote control system.
This appliance is not intended for professional use. Do not use the appliance outdoors.
⚠️ To avoid the risk of personal injury, the appliance must be handled and installed by two or more people.
⚠️ Installation operations, including any water supply connections (if any) and the electrical connections, and repairs must be carried out by qualified personnel. When installation is complete, keep the packaging material (plastic parts, polystyrene, etc.) out of the reach of children to avoid the risk of suffocation. Do not use the appliance when barefoot or wet.
Never use steam cleaning appliances - risk of electric shock.
The packaging material is 100% recyclable and is marked by the recycling symbol

The device may have different aesthetic features with respect to the illustrations in this handbook, however the operating, maintenance and installation instructions remain the same.
Strictly observe the instructions in this manual. All liability is declined for any problems, damage or fires caused by failure to comply with the instructions in this manual. The device is intended for domestic use only, to cook food and extract the fumes generated by cooking. No other use is allowed (e.g. heating rooms). The manufacturer declines any liability for inappropriate use or incorrect control settings.
- Read the instructions carefully: they contain important information on installation, operation and safety.
- Do not make electrical changes to the device.
- Before installing the device, make sure that none of the components are damaged. Otherwise, contact the dealer and do not continue with the installation.
- It is important to keep all the manuals accompanying the product so that they can be consulted at all times. If sold, transferred or moved, make sure it remains with the product.
ELECTRICAL CONNECTION
The mains voltage must correspond to the voltage indicated on the rating plate located inside the hood. If equipped with a plug, connect the hood to a wall socket that complies with current standards located in an area that can be accessed even after installation. If it does not feature a plug (direct connection to the mains) or the plug is not located in an accessible area, even after installation, apply a standard double pole switch that ensures complete disconnection from the mains in category III overvoltage conditions, in accordance with the installation rules.
- Please note! Before reconnecting the circuit to the mains power supply and making sure that it is working correctly, always check that the power cable is correctly installed.
Do not use extension cords, power strips or adapters.
Mains voltage and frequency
Refer to the value indicated on the rating plate inside the hood.
Wire connection
↓: yellow/green
N: blue
L: brown
Replacing the power cable
The hood features a special power cable; if the cable is damaged, contact the Service Centre for a replacement.
AIR OUTLET
(for suction versions)
Connect the hood to wall-mounted exhaust pipes and holes with a diameter equivalent to the air outlet (connecting flange).
The use of pipes and outlet holes in the wall with a smaller diameter will reduce the extraction performance and drastically increase the noise level.
All responsibility in this regard is therefore denied.
! Use a ducting pipe with the shortest length necessary.
! Use a ducting pipe with the least number of bends possible (maximum bend angle: 90°).
! Avoid drastic changes in the ducting pipe diameter.
! The company shall not be held responsible if these regulations are not complied with.
FILTRATION OR SUCTION?
! Your hood is read to be used in the suction version.
To use the hood in the filtration version, the special ACCESSORY KIT must be installed.
Check, on the first pages of this manual, whether the ACCESSORY KIT is already supplied or needs to be purchased separately.
Note: If supplied, in some cases, the additional activated carbon filtering system may already be installed on the hood.
Information on how to convert the hood from the suction version to the filtration version is already contained in this manual.
Extraction version
Vapours are evacuated outside through an exhaust pipe attached to the connecting flange.
ATTENTION
The evacuation pipe is not supplied and must be purchased.
The diameter of the exhaust pipe must be equivalent to the diameter of the connecting ring.
If the hood features one or more carbon filters, they must be removed.
Filtration version
The suctioned air will be degreased and deodorised before it is sent back into the room. To use the hood in this version, it is necessary to install an additional activated carbon filter system.
CONTROLS
The hood is equipped with a control panel with a suction speed control and a light control to light up the hob.

First speed (T1)
Press T1 to activate the first speed. When the function is activated, the LED turns on with a fixed light. Press T1 again to turn the hood off.
Second speed (T2)
Press T2 to activate the second speed. When the function is activated, the LED turns on with a fixed light. Press T2 again to turn the hood off.
Third speed and BOOSTER (T3)
When the hood is off or with the first or second speed active, the third speed can be activated by pressing the button T3 and the LED will turn on with a fixed light.
If T3 is pressed again, the booster turns on. The booster can only be activated if the third speed is already active. When the booster is on, the LED T3 starts to flash. While the booster is working, it is possible to switch to the first or second speed by pressing the desired speed button T1 or T2, the booster will turn off and the selected speed will be activated.
When the booster is on, press T3 again to turn the hood off.
After 5' the booster automatically turns off and the third speed is automatically activated.
Timer (T4)
The timer can be activated when the first, second or third speed is active. When the function is activated, both the LED of the Timer (T4) and that of the previously selected speed (T1/T2/T3) turn on with a fixed light.
The duration of the timer depends on the selected speed:
First speed T1 = duration 20'
Second speed T2 = duration 15'.
Third speed T3 = duration 10'.
The timer cannot be activated when the booster is active. When the time expires, the hood turns off. When a speed is timed, it is possible to switch to other speeds by pressing the desired speed button, this operation will turn the timer off. When a speed is timed, the timer can be deactivated by pressing T4, or one of the other two inactive speeds. To turn the hood off, press the speed again to which the timer had previously been linked.
Light (T5)
The light can be activated at any time by pressing key T5. When the function is activated, the LED turns on with a fixed light.
Filter setting
Activation or deactivation of the filter indicators is only possible with the hood off.
To access the configuration menu, hold pressed T2+T3, once inside the menu T1 will start to flash.
The default setting is:
- grease filter indicator (T2) on, therefore active;
- odour filter indicator (T3) off, therefore not activated.
T2 activates/deactivates the grease filter indicator. T3 activates/deactivates the odour filter indicator. To exit the menu, hold pressed
T1 or wait 10"
Filter reset
The hood signals the need for filter maintenance at regular intervals:
- grease filter every 40 hours;
- odour filter every 160 hours.
In this case, with the hood off, when the user touches any button the interface signals two types of needs for a period of 10":
- if T1+T2 flash: grease filter maintenance;
- if T1+T3 flash: odour filter maintenance.
During the 10" it is possible to reset the grease filter by pressing T1+T2 and to reset the odour filter by pressing T1+T3. After the reset, the button combinations will flash rapidly twice. The interface will now work as normal.
Please note:
During the 10", the hood will work normally but without any visual feedback regarding the speed buttons. If during the 10" no operations are carried out, the LEDs will stop flashing and the visual feedback will return to normal.
MAINTENANCE
- Cleaning: For cleaning, simply use a cloth moistened with neutral liquid detergents. Do not use cleaning tools or instruments.
• Anti-Grease Filter: It must be cleaned once a month (or when the filter saturation indication system - if any - indicates the need for it), with non-aggressive detergents, either by hand or in a dishwasher at a low temperature and on a short cycle.
When cleaned in the dishwasher, the metal grease filter may discolour, but its filtering characteristics remain unchanged.
- The Anti-Grease Filter traps the grease particles produced during cooking. When cleaned in the dishwasher, the metal grease filter may discolour, but its filtering characteristics remain unchanged.
- Washable activated carbon filter (for filter version only):
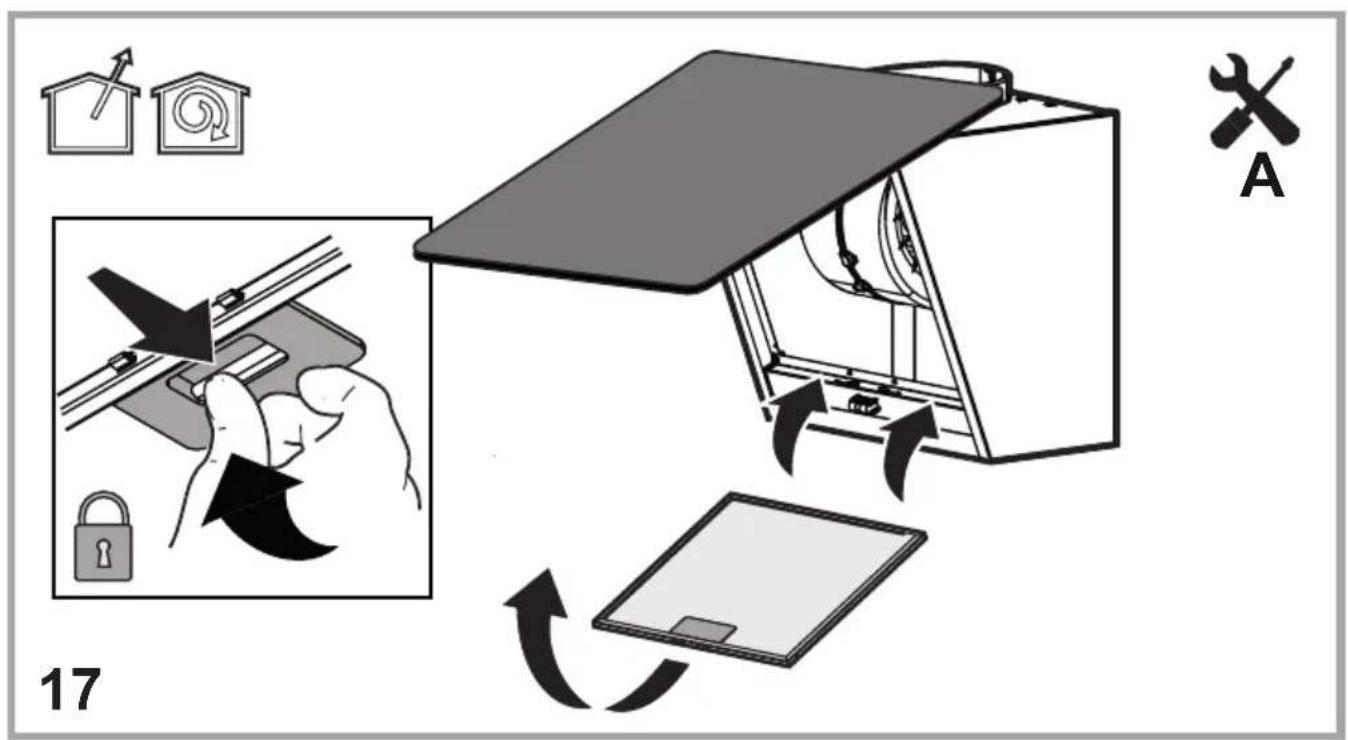
The carbon filter can be washed every two months (or when indicated by the filter saturation system - if included in your model). As indicated in the drawing section: remove the grease filter, remove the carbon filter and wash using hot water and suitable detergents or in a dishwasher at 65°C (if washing in a dishwasher, carry out the complete washing cycle without dishes inside).
Remove any excess water without damaging the filter, then place it in the oven for 10 minutes at 100^ C to dry it out completely. Put the anti-grease filters back in place. Replace the foam layer every 3 years and each time the cloth appears damaged.
• Carbon filter (for filter version only): The
cartridge must be replaced at least every four months. It CANNOT be washed or regenerated. As indicated in the drawings section: remove the anti-grease filters, apply a carbon filter on each side and attach it to the product. Put the anti-grease filters back in place.
Illumination
- The lighting system is based on LED technology. LEDs provide optimal illumination, last up to 10 times longer than conventional lamps and save 90% of electricity.
●Lighting system : The lighting system cannot be replaced by the user, contact Customer Service in case of malfunction.
END-OF-LIFE DISPOSAL

This device is marked in compliance with the European Directive 2012/19/EC - UK SI 2013 No.3113, Waste Electrical and Electronic Equipment (WEEE).
Make sure that this product is disposed of correctly. The user helps prevent potential negative consequences for the environment and for health. The symbol on the product or accompanying documentation indicates that this product should not be treated as household waste but should be handed over at a suitable collection point for the recycling of electrical and electronic equipment. Dispose of it in accordance with local regulations for waste disposal. For further information about the treatment, recovery and recycling of this product, please contact your local authority, the collection service for household waste or the shop from where the product was purchased.
The packaging material is 100% recyclable and is marked by the recycling symbol

REGULATIONS
Equipment designed, tested and manufactured in compliance with safety regulations: EN/IEC 60335-1; EN/IEC 60335-2-31, EN/IEC 62233. Performance: EN/IEC 61591; ISO 5167-1; ISO 5167-3; ISO 5168; EN/IEC 60704-1; EN/IEC 60704-2-13; EN/IEC 60704-3; ISO 3741; EN 50564; IEC 62301. EMC: EN 55014-1; CISPR 14-1; EN 55014-2; CISPR 14-2; EN/IEC 61000-3-2; EN/IEC 61000-3-3.
OPERATING ERRORS
If something does not seem to be working, perform the following simple checks before contacting the Service Centre:
• If the hood is not working:
Check that:
-There is no power failure
-A speed has been selected
• If the hood has poor performance:
Check that:
-The selected motor speed is sufficient for the amount of fumes and steam released.
-The kitchen is sufficiently ventilated to allow an air intake.
-The carbon filter is not worn out (hood in filtration version).
- If the hood has switched off during normal operation:
Check that:
-There is no power failure.
-The safety cut-off device has not tripped.
In the event of any malfunctions, disconnect the appliance from the electrical power supply for at least 5 seconds by unplugging it and then reconnect it, before contacting the Service Centre. If the malfunction persists, contact the Service Centre.
TECHNICAL SPECIFICATIONS
| Height (cm) Width (cm) Depth | (cm) Φ of the exhaust pipe (cm) | |||
 71-104.5 71-104.5 | 59.8-79.8 32.6 15 | |||
 79.5-104.5 79.5-104.5 | ||||

natural_image
Silhouette of a person pushing a shopping cart (no text or symbols)Components not supplied with product

To download the safety instructions, user manual, technical data sheet and energy data:
- Visit the website docs. Hopoint.eu
- Use the QR code
• Alternatively, contact Customer Service (using the phone number indicated on the warranty booklet). When contacting Customer Service, communicate the codes on the product rating plate.

EL
ΓΕΝΙΚΗ ΑΣΦΑΛΕΙΑ
natural_image
Silhouette of a person pushing a shopping cart (no text or symbols)IT
SICUREZZA GENERALE
natural_image
Silhouette of a person pushing a shopping cart (no text or symbols)


- EN
- GENERAL SAFETY
- ELECTRICAL CONNECTION
- Replacing the power cable
- AIR OUTLET
- FILTRATION OR SUCTION?
- Extraction version
- ATTENTION
- Filtration version
- CONTROLS
- First speed (T1)
- Second speed (T2)
- Third speed and BOOSTER (T3)
- Timer (T4)
- Light (T5)
- Filter setting
- Filter reset
- MAINTENANCE
- Illumination
- END-OF-LIFE DISPOSAL
- REGULATIONS
- OPERATING ERRORS
- TECHNICAL SPECIFICATIONS
- EL
- ΓΕΝΙΚΗ ΑΣΦΑΛΕΙΑ
- IT
- SICUREZZA GENERALE
Brand : HOTPOINT
Model : HHVP 62F LT K
Category : Range hood