
Piccolo Pro 42721 - Coffee maker Gastroback - Free user manual and instructions
Find the device manual for free Piccolo Pro 42721 Gastroback in PDF.


| Product Type | Fully Automatic Espresso Machine |
| Brand | Gastroback |
| Model | Piccolo Pro 42721 |
| Dimensions (W x H x D) | 28 x 35 x 25 cm |
| Weight | 5.2 kg |
| Power Supply | 220-240 V ~ 50/60 Hz |
| Power Consumption | 1450 W |
| Water Tank Capacity | 1.5 L |
| Bean Hopper Capacity | 200 g |
| Pump Pressure | 15 bar |
| Functions | Espresso, Cappuccino, Latte Macchiato, Hot Water, Steam |
| Grinder | Stainless steel conical burr grinder, adjustable grind setting |
| Milk System | Integrated steam wand for frothing |
| Cleaning & Maintenance | Automatic descaling program, removable brew group, drip tray |
| Safety Features | Auto shut-off after 30 min, overheat protection, child lock |
| Spare Parts & Repairability | Replacement parts available (brew group, water tank, seals) |
| Included Accessories | Measuring spoon, water filter, cleaning brush |
Frequently Asked Questions - Piccolo Pro 42721 Gastroback
User questions about Piccolo Pro 42721 Gastroback
0 question about this device. Answer the ones you know or ask your own.
Ask a new question about this device
Download the instructions for your Coffee maker in PDF format for free! Find your manual Piccolo Pro 42721 - Gastroback and take your electronic device back in hand. On this page are published all the documents necessary for the use of your device. Piccolo Pro 42721 by Gastroback.
USER MANUAL Piccolo Pro 42721 Gastroback
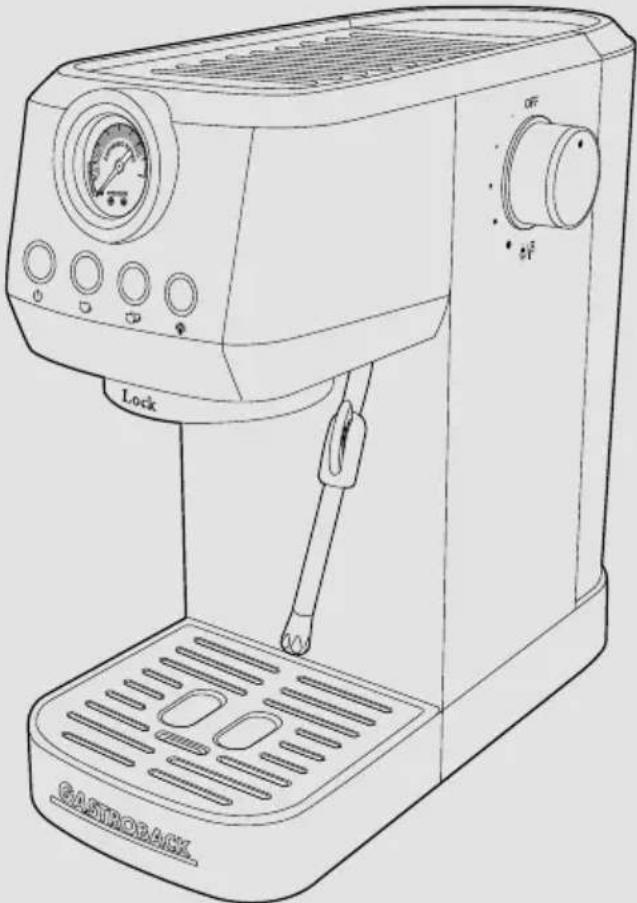
ESPRESSOMASCHINE | ESPRESSO MACHINE
natural_image
Line drawing of a standard espresso machine with control panel and side-mounted gauges (no text or symbols)
DESIGN ESPRESSO PICCOLO PRO
DESIGN ESPRESSO PICCOLO PRO
Art.- Nr. 42721
Item No.42721
All GASTROBACK® products are intended for food processing of food products and groceries. For reasons of health protection and hygiene, products that are used on a daily basis or used only once, are not allowed to be returned. Check the goods just as you would do in a retail store.
You only have to pay for a possible loss in value of the goods, if this loss of value is due to a non-necessary for the examination of the nature, characteristics and function of the goods handling.
An unnecessary way to check the nature, characteristics and function of the goods is the processing of food products or groceries into food and drinks.
If you have any questions about GASTROBACK® products, if your unit is not working properly straight away or if you need any accessories or spare parts for your GASTROBACK® product please contact our customer service before returning.
Monday to friday (except on holidays) from 8am to 4pm
E-Mail: info@gastroback.de



We attach a certain importance to your safety. Thus, we ask you to read all provided instructions and information in this booklet carefully and completely, before you start running the appliance. This will help you to know all functions and properties of your new appliance. We especially ask you to adhere strictly to the safety information mentioned in these instructions.
INHALTSVERZEICHNIS
Beschreibung....6
Electrical safety....29
The Appliance 30
Before first use 31
Initial cleaning....31
Initial use....31
Operation 32
Preparing espresso....32
Relevance of extraction pressure 33
Setting the volume of single and double cup....33
Frothing milk 34
Dispensing hot water 35
After use 36
Cleaning 36
Descaling 37
Storage 37
Troubleshooting....37
Notes for disposal 40
Information and service 40
Warranty....40
BESCHREIBUNG
This appliance is only intended for grinding coffee, preparing coffee specialities and teas, boiling water and frothing milk.
The appliance is intended for private use and not for professional operation.
The appliance is intended for indoor use only. Use the appliance only as described in this manual. Any other use might lead to damage of the appliance, property or personal injury.
No liability will be accepted for damage resulting from improper use or non-compliance with this manual.
SAFETY WARNINGS
IMPORTANT SAFETY INSTRUCTIONS! READ CAREFULLY AND KEEP FOR FUTURE REFERENCE! PAY PARTICULAR ATTENTION TO ALL FIGURES ON THE ILLUSTRATION PAGE!

Read this instruction manual carefully before using the appliance. Familiarise yourself with the operation, adjustments and functions of switches. Internalise and follow the safety and operation instructions in order to avoid possible risks and hazards.

Remove all packaging materials.

WARNING - DANGER OF SUFFOCATION! Packaging materials are not toys. Children should not play with the packaging materials, as they pose a risk of swallowing and suffocation!

WARNING! Switch the appliance off, disconnect it from the power supply and let it cool down completely before replacing attachments, moving the appliance, cleaning work and when not in use.

WARNING - RISK OF ELECTRIC SHOCK! Protect the appliance and its electrical parts against moisture. Do not immerse the appliance and its electrical parts in water or other liquids to avoid electrical shock. Never hold the appliance under running water. Pay attention to the instructions for cleaning and care.

Do not operate the appliance with wet hands or while standing on a wet floor. Do not touch the power plug with wet hands.

WARNING - HOT SURFACE! The surfaces are liable to get hot during use. Especially do not touch the metal surfaces of the filter holder, filter or steam wand or hold your hands under them. Only touch the steam wand by its plastic surfaces.

This appliance is classified as protection class I and must be connected to a protective ground.

Only use in dry indoor rooms.

Dry Damp

- This appliance can be used by children aged from 8 years and above if they have been given supervision or instruction concerning use of the appliance in a safe way and if they understand the hazards involved. Cleaning and user maintenance shall not be made by children unless they are older than 8 and supervised. Keep the appliance and its cord out of reach of children aged less than 8 years.
- Children shall not play with the appliance.
-
This appliance can be used by persons with reduced physical, sensory or mental capabilities or lack of experience and knowledge if they have been given supervision or instruction concerning use of the appliance in a safe way and if they understand the hazards involved.
-
Regularly check the power plug and power cord for damage. If the supply cord is damaged, it must be replaced by the manufacturer, its service agent or similarly qualified persons in order to avoid a hazard.
- This appliance is only intended to be used in household applications.
- Regarding the instructions for cleaning surfaces in contact with food, please refer to chapter "After use".
- Regarding information on operating times for accessories, please refer to chapter "Operation".
- WARNING! Misuse may lead to injury. Use this appliance solely in accordance with these instructions. Do not attempt to modify the appliance in any way. Care shall be taken when handling the sharp cutting blades, emptying the bean hopper and during cleaning.
- ⚠️ WARNING! The heating element surface is subject to residual heat after use.
- Always disconnect the appliance from the supply if it is left unattended and before assembling, disassembling or cleaning.
- Switch off the appliance and disconnect from supply before changing accessories or approaching parts that move in use.
- CAUTION: Never fill the appliance above the maximum level since hot foaming coffee or other liquids (e.g. milk) might overflow during heating.
- ⚠️ DANGER OF ELECTRIC SHOCK! Do not attempt to repair the appliance yourself. In case of malfunction, repairs are to be conducted by qualified personnel only.
- Do not pull the power plug out of the electrical outlet by the power cord and do not wrap the power cord around the appliance.
- Never use accessories which are not recommended by the manufacturer. They could pose a safety risk to the user and might damage the appliance. Only use original parts and accessories.
-
Connect the mains plug to an easily accessible socket, in order to quickly disconnect the appliance from the mains supply in an emergency.
-
If you use an extension cord or a multi-socket unit, it must have an appropriate power rating.
- Always turn the appliance off before disconnecting the power plug.
- Always place and operate the appliance on an even, stable, heat-resistant and dry surface.
- WARNING! The appliance shall not be placed in a cabinet when in use.
- Never fill the water tank with warm or hot water, carbonated water or with other liquids such as milk. Use cold drinking water only.
- Never fill substances other than coffee powder into the filter. This could cause serious damage.
- ⚠️ RISK OF SCALDING! Do not open the cover of the water tank or remove the water tank or filter holder while the appliance is operating.
- Make sure that the appliance has sufficient space around it and does not come in contact with flammable material. The appliance must not be covered.
- RISK OF SCALDING! Do not overfill the appliance.
- Do not operate the appliance without water in the water tank to avoid damaging the pump. Ensure the water level is between MIN and MAX marking.
- RISK OF SCALDING! Beware of escaping hot steam and liquids during operation. When hot water and steam are dispensed, do not direct the water or steam jets towards others or towards yourself.
- RISK OF INJURY! Make sure to turn and lock the filter holder correctly before operation. Otherwise, it may be expelled by the steam pressure.
- Do not leave the appliance unattended during operation.
-
Always turn off the appliance and unplug the power plug from the power outlet before filling the tank with water.
-
Do not try to lift the appliance by grasping the water tank or trip tray. Only lift the appliance by grasping its body.
- Do not expose the appliance to temperatures below 0^ C, as water deposits inside the appliance might freeze and cause damage to the appliance.
- RISK OF SCALDING! If water does not come out of the filter holder, the filter may be clogged. In this case, remove and disconnect the filter slowly because any remaining pressure can cause spillage or splashing. Then clean as explained in this manual.
- Never take the filter holder off while the appliance performs a brewing process or steams milk. The appliance is pressurized!
- Only cups and the tamper may be placed on the cup plate. Do not place any other items on the appliance.
- CAUTION: After prolonged use, the cup plate gets so hot that you might scald yourself by touching it!
- Oils or lubricants must not be used with this appliance.
ELECTRICAL SAFETY
- Ensure the rated voltage shown on the rating label corresponds with the voltage of the power supply.
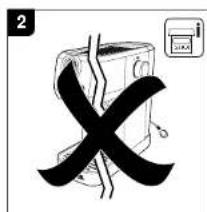
- Do not operate any appliance with a damaged power cord or plug, when the appliance malfunctions or has been damaged in any manner.
- Protect the power cord against damages. Do not let it hang over sharp edges, do not squeeze or bend it. Keep the power cord away from hot surfaces and ensure that nobody can trip over it.
- Do not open the housing under any circumstances. Do not insert fingers or foreign objects in any opening of the appliance and do not obstruct the air vents.
- Protect the appliance against heat. Do not place close to open flames or heat sources such as stoves or heating appliances.
THE APPLIANCE
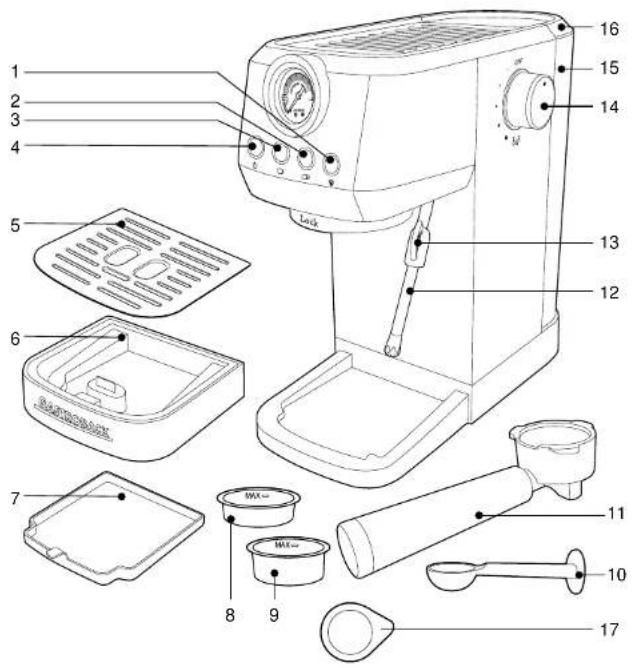
- Steam button
- Double cup button
- Single cup button
- On/off button
- Drip plate
-
Drip tray
-
Internal drip tray
- Single cup filter
- Double cup filter
- Measuring spoon with tamper
- Filter holder
-
Steam wand
-
Steam wand handle
- Steam knob
- Water tank
- Water tank lid
- ESE pod
BEFORE FIRST USE
INITIAL CLEANING
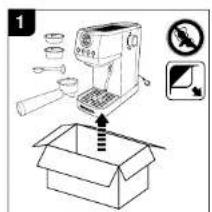
- Carefully remove the appliance from the packaging and remove all packaging materials.
- Remove all accessories from the packaging and from the appliance.
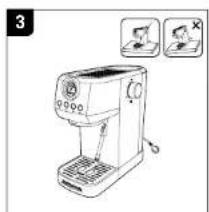
- Remove the water tank.
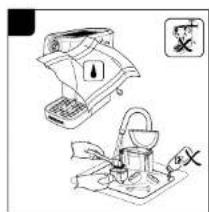
- Clean the water tank and its lid, the measuring spoon and the filters as well as the filter holder with warm water and some mild dish-washing liquid. After that, rinse with clear water and dry with a soft dry cloth.
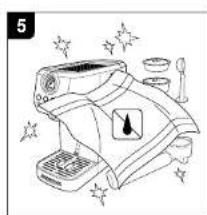
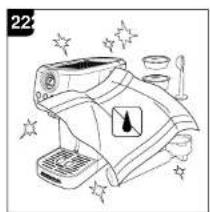
- Wipe the body of the appliance and the drip tray with drip plate using a soft, damp cloth and dry all parts with a soft dry cloth.
- Never clean any of the appliance's parts in the dishwasher.
INITIAL USE
- Fill the water tank with cold water up to the MAX marking
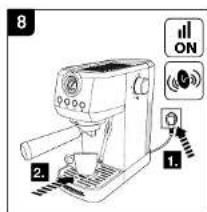
- Connect the power plug to an electrical outlet with suitable voltage.
- Press the on/off button. The operating light lights up and the appliance starts preheating automatically. Once preheating is finished, all the button indicators light up continuously. The preheating process takes approx. 2 minutes.
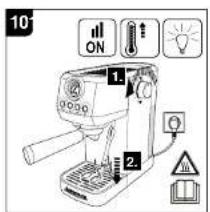
- Place a cup under the steam wand. Turn the steam knob to the steam/hot water setting. Let the hot water flow out of the steam wand for approx. 8 seconds, then turn the steam knob to the OFF setting. This process allows the water to flow into the empty pump for the first use.
NOTE
There will be a loud noise and little shake when the appliance is operating for the first time. It's normal for a 20bar pump. The noise will be weaker during future usage.
- Insert a filter into the filter holder.
NOTE
The filter might be a little tight and hard to take out from filter holder. You can use the other filter to pry it out.
- Insert the filter holder without ground coffee into the brewing head with a 45° movement to the left and turn it to the right to lock it in place. The filter holder must be perpendicular to the appliance or slightly tilted towards the right.
-
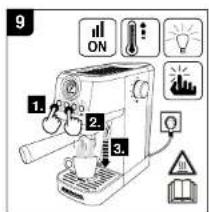
Place an empty cup on the drip plate and press the single or double cup button to start operation.
-
After the brewing cycle has finished, discard the water.
- The appliance is now ready to be used.
OPERATION
NOTE
Always make sure that there is enough water in the water tank and that the water tank is properly attached to the appliance. The water level should be between the MIN and MAX level.
PREPARING ESPRESSO
NOTE
A cold filter holder, filter and cup can reduce the extraction temperature enough to significantly affect the quality of your espresso. We recommend to run a brewing cycle without coffee grounds to preheat all parts before extraction.
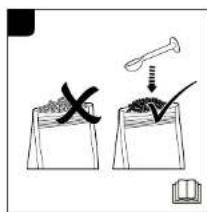
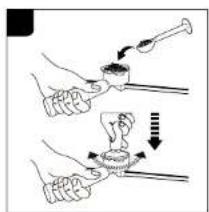
- Place the desired filter in the filer holder and fill the filter with ground coffee using the provided measuring spoon. We recommend 7-9g for a single cup and 13-15g for a double cup. The amount will vary depending on your preferences and the ground coffee you use.
- Tamp the ground coffee with the tamper. The coffee must be pressed evenly to obtain a well-levelled and flat surface. Remove any coffee residue from the edge of the filter holder.
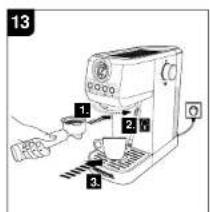
- Insert the filter holder into the brewing head with a 45° movement to the left and turn it to the right to lock it in place. The filter holder must be perpendicular to the appliance or slightly tilted towards the right.
- Make sure the steam knob is in the OFF setting.
- Place pre-warmed cup(s) on the drip plate.
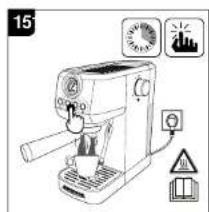
- Press the single or double cup button for the desired amount. The appliance starts operating.
NOTE
- The coffee flavor will depend on many factors, such as the type of coffee beans, degree of roast, freshness, coarseness or fineness of the grind, dose of ground coffee, and tamping pressure. Experiment by adjusting these factors just one at a time to achieve the preferred taste.
• There will be noise during the operating process. This is normal for a 20bar pump.
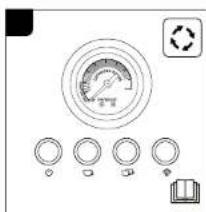
• The gauge needle indicates the extraction pressure.
- A pressure within the 'ESPRESSO RANGE' highlighted in grey on the gauge is ideal.
- When the gauge needle is below the 'ESPRESSO RANGE' during extraction, this indicates the espresso has been extracted with insufficient pressure. This can happen when the water flow through the ground coffee is too fast, resulting in an under-extracted espresso that is watery, cold and lacks crema and flavor. Possible causes for under-extraction include the grind being too coarse, insufficient coffee in the filter, insufficient tamping, or a combination of any of these. To resolve this:
- Select a finer coffee grind and retry.
- Increase the amount of coffee and retry.
- Increase the tamping pressure and retry.
- When the gauge needle is beyond the "ESPRESSO RANGE" during extraction, this indicates the espresso has been extracted with too much pressure. This can happen when the water flow through the ground coffee is too slow, resulting in an over-extracted espresso that is very dark and bitter with a mottled and uneven crema. Possible causes for over-extraction include the grind being too fine, too much ground coffee in the filter, over tamping or a combination of any of these. To resolve this:
- Select a coarser coffee grind and retry.
• Decrease the amount of coffee and retry.
• Decrease the tamping pressure and retry.
SETTING THE VOLUME OF SINGLE AND DOUBLE CUP
- Setting the volume of single cup:
- Keep the single cup button pressed for approx. 3 seconds. An acoustic signal sounds 3 times and the appliance starts the brewing process.
- Press the single cup button again once the desired volume of espresso has been extracted. An acoustic signal sounds 3 times to indicate the new single cup volume has been set.
- Set the volume of double cup:
- Keep the double cup button pressed for approx. 3 seconds. An acoustic signal sounds 3 times and the appliance starts the brewing process.
- Press the double cup button again once the desired volume of espresso has been extracted. An acoustic signal sounds 3 times to indicate the new double cup volume has been set.
NOTE
The selected brewing time must be between 8-60 seconds. Otherwise, the setting fails to work.
- Resetting to default single cup and double cup volumes:
Keep both the single and double cup button pressed for approx. 5 seconds. An acoustic signal sounds 3 times and all button indicators flash 5 times. The appliance is now reset to its original default settings.
FROTHING MILK
NOTE
To prepare a traditional cappuccino or latte, we recommend using cold, fresh whole milk. The density of the frothed milk depends on the milk's fat content. Use a stainless steel, circular, rounded milk jug, narrower at the top, with a spout, in order to make decorations with the frath.
- Before starting to froth milk, slightly move the steam wand outwards in order to be able to insert a jug directly under it and facilitate the movements required to froth the milk correctly.
- Press the steam button. The steam indicator starts flashing if the temperature is not high enough to make steam. Once the preheating is finished, the steam indicator lights up continuously.
- Turn the steam knob slightly counterclockwise to eliminate any condensation from the steam wand, then turn the knob to the OFF setting again.
- Place a jug, half-filled with cold milk, under the steam wand.
- Place the tip of the steam wand just below the surface of the milk. If it is inserted too deep, the milk won't be frothed; if it is not inserted deep enough, big bubbles will be produced and then disappear immediately. It is important to keep the steam wand not at the center but close to the edge of the lug, with an appropriate angle to produce a stronger vortex.
- Turn the steam knob to the steam/hot water setting. Steam is released from the steam wand.
- To froth the milk correctly, the steam wand must always be in contact with the milk and not with the froth. Therefore, as the layer of froth increases, the jug must be slightly raised, albeit without the steam wand touching the bottom of the jug.
- Once the desired frothing has been achieved, the steam wand must be pushed deeper to heat the milk well. Keep a hand on the rounded part of the jug to feel the temperature of the milk.
- Once the desired result has been achieved, turn the steam knob to the OFF setting to stop releasing steam. Press the steam button to quit the steam mode.
NOTE
The entire operation should last no longer than 3 minutes. The appliance automatically stops releasing steam after 3 minutes of continuous operation.
- Remove the jug. To make the froth more compact, lightly tap the jug on a flat surface after frothing. Pour the frothed milk into the coffee.
- Turn the steam knob to the steam/not water setting to eliminate any milk residue from the steam wand. Then turn the knob to the OFF setting again.
NOTE
- The steam wand is very hot during and after use. To avoid bums, move it only by placing your fingers on the steam wand handle.
-
Do not make espresso immediately after frothing milk. The temperature of the appliance is too high, and thus it is under overheating protection. In this state, the single and double cup indicators flash if you press either of the buttons. Either let the appliance cool down completely, or proceed as follows to cool it down quickly:
-
Turn the steam knob to the steam/hot water position to dispense hot water in order to cool down the appliance.
- Once the temperature of the appliance is down, all the button indicators light up continuously.
- Return the knob to the OFF setting. The appliance is now ready for the next brew.
DISPENSING HOT WATER
- Press the on/off button and wait until all button indicators up.
- Place a cup under the steam wand.
- Turn the steam knob to the steam/hot water setting. Hot water is dispensed from the steam wand.
- Once the desired amount of hot water has been dispensed, turn the steam knob to the OFF setting.
NOTE
- The entire operation should last no longer than 40 seconds. The appliance automatically stops dispensing hot water after 40 seconds of continuous operation. If you want more hot water, run the cycle again.
- The steam wand is very hot during and after use. To avoid bums, move it only by placing your fingers on the steam wand handle.
AFTER USE
CLEANING
NOTE
Clean the appliance regularly to keep it in a safe and hygienic working condition and to ensure that the coffee taste is not impaired.
- Before cleaning, unplug the appliance and let it cool down completely. Then empty the water tank and filter holder, if necessary.
- Do not clean the appliance with steel wool, strong chemicals, alkali, abrasive or disinfecting agents as they may damage its surface.
- Do not immerse the appliance in water or other liquids to clean it. Make sure that the electrical parts do not become wet or damp.
- Never clean any of the appliance's parts in the dishwasher.
- Regularly empty the drip tray. When the drip tray's floater is visible from the drip plate, the drip tray is full and needs to be emptied.
- Remove the filter from the filter holder. The filters and the filter holder can be cleaned in warm water, using a soft sponge. Dry with a dry soft cloth. If you notice malfunctions when brewing coffee, immerse the filter in boiling water for 10 minutes and then rinse with running water.
- Immediately after frothing milk, turn the steam knob to the steam/hot water setting to purge out any residual milk from the steam wand.
- Clean the steam wand with a damp cloth. To clean it more thoroughly, you can unscrew it and wash it under running water. If the hole of the steam wand becomes blocked, use a pin to unblock the hole.
- Regularly remove any residual coffee grounds from the brewing head using a brush, and wash with hot water following the steps below:
-
Insert the filter holder into the brewing head without ground coffee.
-
Place an empty cup on the drip plate.
-
Press the double cup button and let the water fill the cup.
-
Remove the filter holder from the brewing head and clean the brewing head with a dry cloth.
WARNING
Do not try to disassemble the brewing head. It will damage the brewing Head and lead to leakage.
- Clean the body of the appliance with a soft damp cloth. Wipe with a dry soft cloth.
• The appliance may only be used again after it is dried completely.
DESCALING
- To make sure the appliance operates efficiently, to clean the internal pipes, and to preserve the flavor of your coffee, the appliance needs to be descaled regularly.
- Additionally, after 500 brewing cycles, a descaling reminder will be displayed (the on/off button flashes 5 times). The descaling reminder will appear every time you turn on the appliance if you do not run a descaling cycle.
• Proceed as follows to descale the appliance: - Fill water with descaling agent (4 parts water to 1 part descaling agent) into the water tank up to the MAX marking.
NOTE
Also refer to the instructions on the descaling agent. Only use a regular household descaling agent or citric acid; in the latter case, use 100 parts water to 3 parts of citric acid.
- Place a cup or other suitable receptacle on the drip plate and keep both the double cup and steam button pressed for approx. 5 seconds. The appliance starts the descaling cycle. The cycle takes approx. 7 minutes and stops automatically.
- Repeat the previous steps until the water with descaling agent/citric acid is used up.
- Repeat the whole process two more times using only clean tap water without any descaling agent.
STORAGE
- Before storage, always make sure that the appliance is completely dry and cooled down.
- Ensure that the water tank and drip tray are empty and clean.
- Store the appliance in a cool, dry place, protected from moisture and out of the reach of children.
- Preferably store the appliance in its original packaging
TROUBLESHOOTING
WARNING
In case of dysfunctions, immediately turn off the appliance and unplug the power cord from the power outlet.
Only perform the steps described in this instruction manual! All further inspection, maintenance and repair work must be performed by an authorized service center or a similarly qualified specialist.
| Problem Possible cause Solution | ||
| No water. | No water in the water tank. Add an appropriate amount of water into the water tank. | |
| Water tank not attached properly. Reassemble the water tank. | ||
| No steam. | Steam wand is blocked. Poke the steam wand with a thin iron wire. | |
| No water in the water tank. Add an appropriate amount of water into the water tank. | ||
| Water tank not attached properly. Reassemble the water tank. | ||
| Too little steam. | Preheating not completed. | Press the steam button and wait until the indicator light changes from flashing into being on continuously. |
| Steam function was started when the appliance was cold. | Operate the double cup coffee brewing function or wait until preheating is finished in steam mode before milk frothing. | |
| Steam knob not set to steam/hot water setting. | Slowly turn the steam knob until the steam is dispensed for milk frothing. Adjust the amount of steam slowly after a few seconds, depending on your preference. | |
| Poor milk froth. | No whole milk used. Use whole milk. | |
| Used milk was not refrigerated. Refrigerate milk to 2-5°C. | ||
| Steam wand is not inserted deep enough into the milk. | Insert the steam wand 1cm into the milk. | |
| Too little crema. | Coffee powder is too coarse. Replace the coffee powder. | |
| Coffee powder is not compacted. | Compact the coffee powder with an appropriate pressure. | |
| Coffee was made right after frothing milk. | Make sure the appliance is completely cooled down before using. | |
| Coffee overflow in the filter holder. | Coffee was made right after frothing milk. | Make sure the appliance is completely cooled down before using. |
| Coffee powder not removed regularly. | Clean the coffee powder on the edge of the filter holder with a brush or by hand after filling it in. | |
| Coffee is brewed slowly or in small quantities. | Too much coffee powder. | The coffee powder should not be too coarse or too fine, should be in standard quality and quantity (1 measuring spoon for one cup and 2 measuring spoons for two cups). |
| Ground coffee is too fine. | Use special coffee powder for espresso machines. Ensure that it is not too fine. | |
| No water in the water tank. | 1. Add an appropriate amount of water into the water tank.2. Turn on the appliance and turn the steam knob to the steam/hot water setting to let water flow out of the steam wand. | |
| Problem Possible cause Solution | ||
| Single or double cup filter stuck in the appliance. | The bump of the filter is not far enough from the filter holder notch. | Insert the filter holder into the appliance and turn it left and right until the filter falls down. Or use the filter holder to push the filter down. Check whether the bump is far enough from the notch each time before inserting the filter holder. |
| Coffee is too cold. | Coffee was brewed in low brewing temperature mode. | Brewing temperature mode selection:1. Press the on/off button, the appliance starts to preheating.2. After preheating is finished, keep the steam button pressed for approx. 6-10 seconds. 3 acoustic signals sound, indicating the appliance has entered the brewing temperature mode selection. One of the below button lights flashes: Single-cup button light = Low brewing temperature modeDouble cup button light = Medium brewing temperature mode (Default mode)Steam button light = High brewing temperature modeDepending on which brewing temperature mode you want to set, keep the corresponding button pressed for approx. 5 seconds. An acoustic signal sounds, indicating that the brewing temperature mode was set successfully. The appliance returns to standby.Note: If there is no operation within approx. 15 seconds, the appliance exits the brewing temperature mode selection and returns to standby. |
| Coffee brewed before preheating while appliance was still cold. | Operate the double cup coffee brewing function (without coffee powder in the filter) or wait until preheating is finished before brewing coffee. | |
| No water in the water tank before preheating. | 1. Add an appropriate amount of water into the water tank.2. Turn on the appliance and turn the steam knob to the steam/hot water setting to let water flow out of the steam wand. | |
NOTES FOR DISPOSAL

Dispose of the appliance and packaging must be effected in accordance with the corresponding local regulations and requirements for electrical appliances and packaging. Please contact your local disposal company.
Do not dispose of electrical appliances as unsorted municipal waste, use separate collection facilities. Contact your local government for information regarding the collection systems available. If electrical appliances are disposed of in landfills, dumps, or refuse incineration, hazardous substances can leak into the groundwater or can be emitted into air, thus getting into the food chain, and damaging your health and well-being as well as poisoning flora and fauna. When replacing old appliances with new once, the vendor is legally obligated to take back your old appliance for disposal at least for free of charge.
INFORMATION AND SERVICE
Please check www.gastroback.de for further information.
For technical support, please contact GASTROBACK® Customer Care Center by phone: +49 (0) 4165/22 25 - 0 or e-mail info@gastroback.de.
Please refer to our home page for a copy of these operating instructions in PDF.
WARRANTY
We guarantee that all our products are free of defects at the time of purchase. Any demonstrable manufacturing or material defects will be to the exclusion of any further claim and within 2 years after purchasing the appliance free of charge repaired or substituted. There is no Warranty claim of the purchaser if the damage or defect of the appliance is caused by inappropriate treatment, over loading or installation mistakes. The Warranty claim expires if there is any technical interference of a third party without a written agreement. The purchaser has to present the sales slip in assertion-of-claim and has to bear all charges of costs and risk of the transport.
NOTE
Customers from Germany and Austria: For repair and service, please send
GASTROBACK® products to the following address:
Customers from other countries: Please contact your dealer.
Please agree that we cannot bear the charge of receipt. Submission of appliances: Please ensure packing the appliance ready for shipment without accessories. Add the sales slip and a short fault description. The processing time after receipt of the
defective appliance will be approx. 2 weeks; we will inform you automatically. After the warranty period, please send defective appliances to the given address. You will get a free quotation and, thereafter, can decide, whether we shall repair the appliance to the costs possibly accrued, send back the defective appliance for free of charge, or dispose of the appliance for free of charge.
The appliance is intended for household use only and NOT suited for commercial usage. Do not attempt to use this appliance in any other way or for any other purpose than the intended use, described in these instructions. Any other use is regarded as unintended use or misuse, and can cause severe injuries or damage. There is no warranty claim of the purchaser if any injuries or damages are caused by unintended use.
natural_image
Line drawing of a coffee machine with two inset photos showing side views (no text or symbols)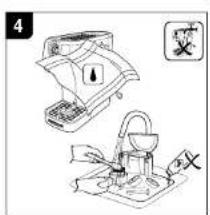
natural_image
Line drawing of a coffee machine with decorative stars and a small arrow on its side (no text or symbols)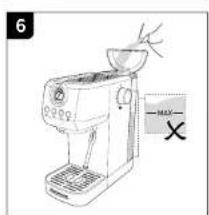
natural_image
Line drawing of a coffee maker with a handle and fan (no text or symbols)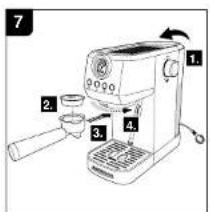
natural_image
Simple line drawing of a hand pouring liquid from a cup into a mug (no text or symbols)
natural_image
Illustration of a coffee machine with decorative stars and sparkles (no text or symbols)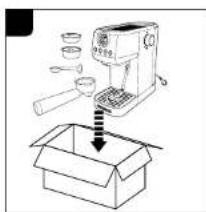
220-240 V\~
50-60 Hz
1350 W IPXO
max. 1.3 L
< 70 dB (A)

GASTROBACK®
GASTROBACK GmbH

- INHALTSVERZEICHNIS
- BESCHREIBUNG
- SAFETY WARNINGS
- ELECTRICAL SAFETY
- BEFORE FIRST USE
- INITIAL CLEANING
- INITIAL USE
- NOTE
- OPERATION
- PREPARING ESPRESSO
- SETTING THE VOLUME OF SINGLE AND DOUBLE CUP
- FROTHING MILK
- DISPENSING HOT WATER
- AFTER USE
- CLEANING
- WARNING
- DESCALING
- STORAGE
- TROUBLESHOOTING
- NOTES FOR DISPOSAL
- INFORMATION AND SERVICE
- WARRANTY
- GASTROBACK®
- GASTROBACK GmbH
Brand : Gastroback
Model : Piccolo Pro 42721
Category : Coffee maker