
Design Advanced Plus 42611 - Coffee maker Gastroback - Free user manual and instructions
Find the device manual for free Design Advanced Plus 42611 Gastroback in PDF.


| Product Type | Coffee Maker |
| Brand | Gastroback |
| Model | Design Advanced Plus 42611 |
| Dimensions (approx.) | 30 x 25 x 35 cm |
| Weight (approx.) | 3.5 kg |
| Power Consumption | 1000 W |
| Capacity | 1.25 L (10 cups) |
| Water Tank | Removable, transparent |
| Filter Type | Permanent or paper filter (size #4) |
| Keep Warm Function | Yes, automatic |
| Auto Shut-off | Yes, after 1 hour |
| Anti-drip System | Yes, allows removing carafe during brewing |
| Brew Strength Selector | Not available |
| Programmable Timer | No |
| Carafe Material | Glass with handle and lid |
| Cleaning | Descaling every 3 months recommended |
| Safety Features | Overheat protection, boil-dry protection |
| Spare Parts Availability | Permanent filter, carafe, water tank available |
| Warranty | 2 years |
| Manual Languages | English (original), other languages via translation request |
Frequently Asked Questions - Design Advanced Plus 42611 Gastroback
User questions about Design Advanced Plus 42611 Gastroback
0 question about this device. Answer the ones you know or ask your own.
Ask a new question about this device
Download the instructions for your Coffee maker in PDF format for free! Find your manual Design Advanced Plus 42611 - Gastroback and take your electronic device back in hand. On this page are published all the documents necessary for the use of your device. Design Advanced Plus 42611 by Gastroback.
USER MANUAL Design Advanced Plus 42611 Gastroback
natural_image
Exterior view of a Gastroback coffee machine (no visible text or symbols on the device body)natural_image
Breakfast scene with ice cream, mint, and sausages on a wooden table (no text or symbols visible)IHRE »DESIGN ESPRESSO ADVANCED PLUS«
KENNENLERNEN
Zubehör:
natural_image
Close-up of a glass mug filled with dark coffee, a heart-shaped cookie shaped like a slice, and scattered coffee beans in the background (no text or symbols visible)Espresso Druck-Manometer
natural_image
Close-up of a pressure gauge dial with needle and two terminals (no visible text or symbols)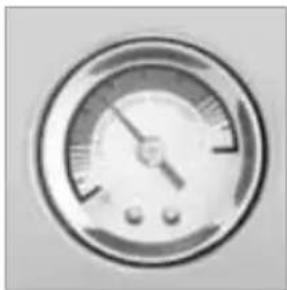
natural_image
Close-up of a pressure gauge dial with needle and gauge (no visible text or symbols)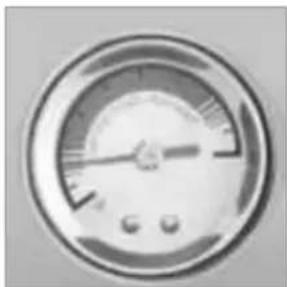
natural_image
Close-up of a pressure gauge dial with needle and scale markings (no readable text or symbols)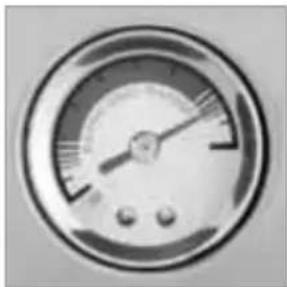
natural_image
Close-up of a circular pressure gauge or dial with needle and gauge (no visible text or symbols)MAHLEN DOSIEREN STOPFEN FLIESSEN
natural_image
Close-up of a mechanical lever mechanism with no visible text or symbols
natural_image
Close-up of a metallic spoon and cup on a surface, with blurred background text (no visible symbols or text)Siebeinsätze
natural_image
Close-up of two metallic circular containers with a grid pattern on the left, one open showing the label 'PICKY MALL' (no other text or symbols visible)natural_image
Two metallic circular samples with grid patterns, no visible text or symbolsEnergiesparfunktion
natural_image
Close-up of a hand operating a mechanical valve or pump component (no visible text or symbols)natural_image
Hand pointing at a circular button with a coffee mug icon below (no text or symbols)natural_image
Hand pointing at a circular button with two coffee cups below (no text or symbols)natural_image
Hand pointing at a circular button with two coffee cups below (no text or symbols)natural_image
Close-up of a hand holding a circular knob on a white surface (no text or symbols visible)natural_image
Person pouring liquid into a metal bowl with a whisk (no visible text or symbols)natural_image
Illustration of a metal pot with a handle and lid, placed on a surface with a document (no visible text or symbols)natural_image
Close-up of a metallic electronic component with textured surface and mounting holes (no visible text or symbols)natural_image
Close-up of a mechanical device with a dial and base (no visible text or symbols)AUFBEWAHRUNG
natural_image
Black and white photo of a cup with tea being poured into it, no visible text or symbolsGroßer Schwarzer
natural_image
Black and white photo of a cup filled with milk, partially covered by a small object (no text or symbols visible)Flacher Weißer
natural_image
Close-up of a white ceramic cup with a glossy white substance, possibly a dessert or cream (no visible text or symbols)Klassischer
Kaffee Latté Macchiato
natural_image
Close-up of a glass of milk with a leaf imprint on top (no text or symbols visible)natural_image
Close-up of a white ceramic bowl with dark contents, possibly a dessert or food item (no visible text or symbols)natural_image
Close-up of a glass of dark liquid with a small object above it, possibly a dessert or beverage (no visible text or symbols)Mocca Frappé
natural_image
Close-up of a cup with a glass and a lid, possibly a dessert or beverage (no visible text or symbols)natural_image
Black and white photo of a dessert with ice cubes and toppings, no visible text or symbolsCon Pannia
natural_image
Close-up of a bowl with a textured, granular substance and handwritten signature below (no legible text or symbols)
natural_image
Close-up of two brown, crumpled coffee beans (no text or symbols visible)Rezepte - Desserts
in
Operating Instructions
DESIGN ESPRESSO ADVANCED PLUS
natural_image
Exterior view of a Gastroback coffee machine (no visible text or symbols on the device body)Read all provided instructions before first usage!
Model and attachments are subject to change!
For household use only!
Carefully read all provided instructions before you start running the appliance and pay attention to the warnings mentioned in these instructions.
Table of Contents
Knowing Your »Design Espresso Advanced Plus« 40
Important Safeguards....42
Important Safeguards for all Electrical Appliances.... 44
High Temperatures—Risk of Burns 45
Technical Specifications 46
Features of Your »Design Espresso Advanced Plus« 46
Before first Use 49
First Use....50
Using Your »Design Espresso Advanced Plus« 52
Pre-programmed Shot Volume – 1 Cup .... 50
Pre-programmed Shot Volume - 2 Cup 51
Programming Single Espresso 51
Programming Double Espresso....51
Resetting Default Volumes.... 51
Manual Shot Volume 51
Advanced Temperature Setting 51
The Art of Texturing Milk.... 52
Espresso Making Tips 54
Care and Cleaning 55
Storage....58
Trouble Shooting Guide 58
Notes for Disposal....60
Information and Service 60
Warranty 60
Recipe Ideas....61
Dear Customer!
Congratulations! A series of new possibilities come with your new Gastroback »Design Espresso Advanced Plus«. At Gastroback, we know that espresso lovers will go to great lengths to refine the art of making espresso. They will experiment with flavors and adjust the grind of the beans and the tamp in search for the perfect espresso. With the Gastroback »Design Espresso Advanced Plus«, making that perfect fresh espresso has never been simpler. With the Gastroback »Design Espresso Advanced Plus« you can be the barista and explore the art of espresso at home.
These instructions for use will inform you about the various functions and features, which make it easy to take pleasure in your new Gastroback »Design Espresso Advanced Plus«.
We hope that you will enjoy your new Gastroback »Design Espresso Advanced Plus«.
Your Gastroback GmbH
natural_image
Breakfast scene with ice cream, chocolate chip, and sauté on a wooden tray (no text or symbols visible)KNOWING YOUR »DESIGN ESPRESSO ADVANCED PLUS«
Accessories:
- Stainless Steel Frothing Jug with >Latte Art< pouring spout
- Coffee Scoop
- Integrated / Removable Tamper
Filters
- Dual Wall Filters x 2
- Single Wall Filters X 2
- Cleaning Disc (holds tablets in place)
- Cleaning Tool (steam wand & filters)
- Allen Key (removes shower head)
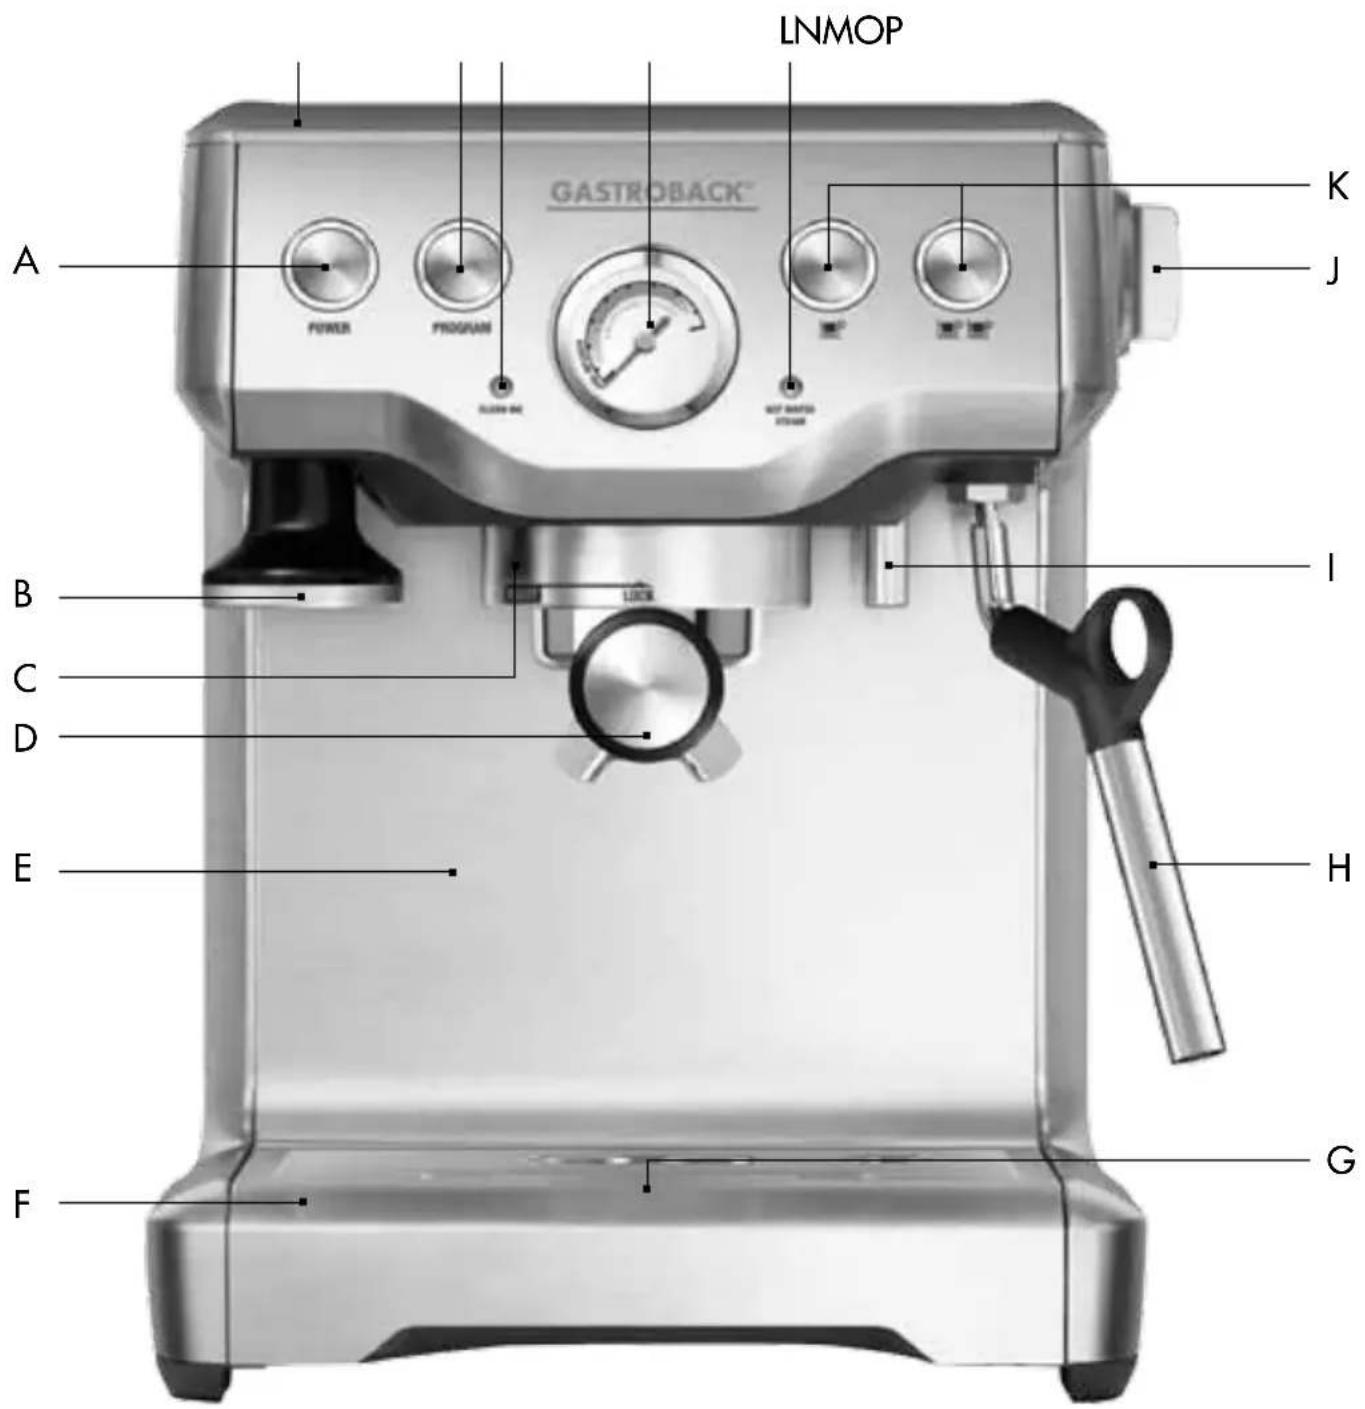
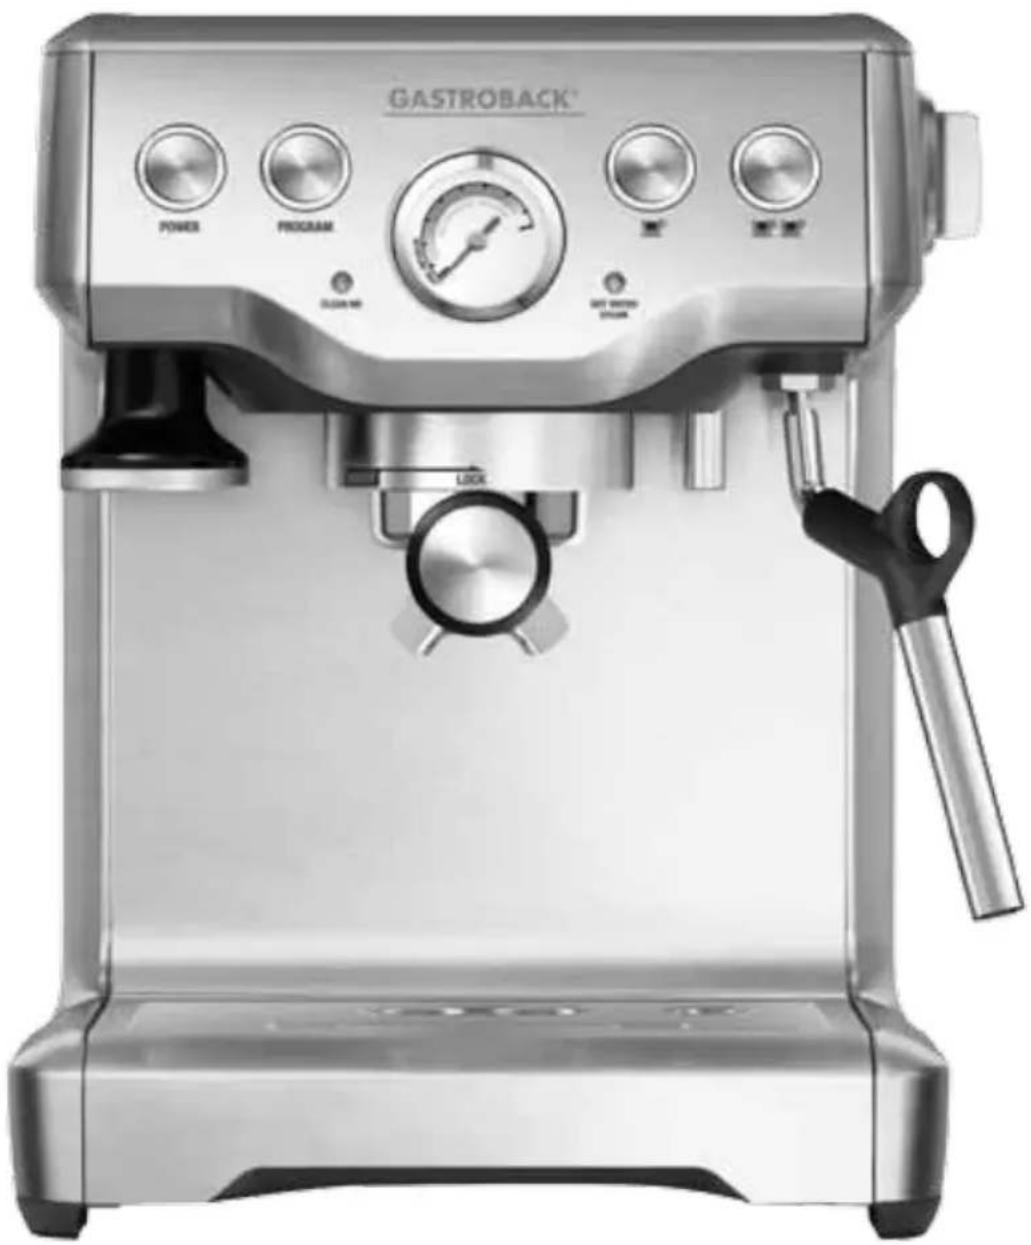
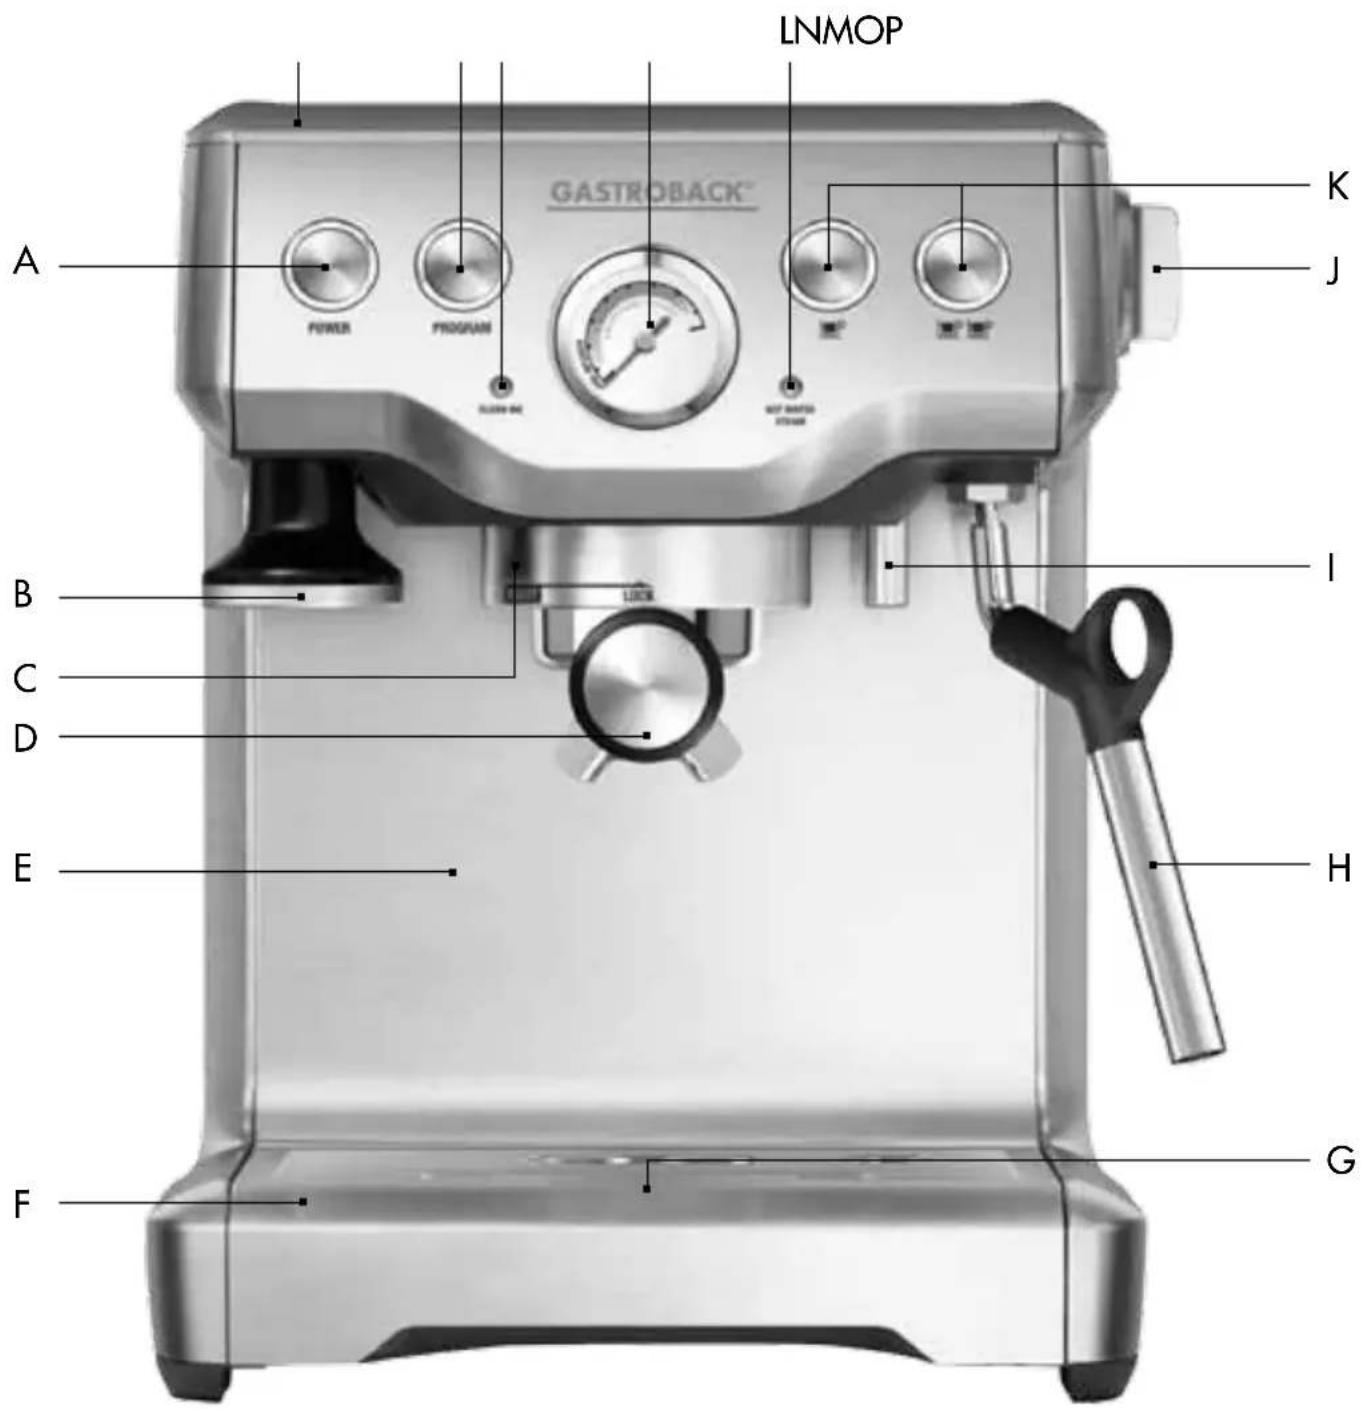
A Power button: Surround illuminates when machine is switched on.
B Integrated removable tamper for tamping control.
C Group head for easy positioning of the portafilter.
D 54mm stainless steel portafilter with commercial style spouts.
E Extra-tall cup height for coffee mugs
F Removable drip tray
G Drip tray full indicator
H 360° swivel action steam wand easily adjusts to perfect position for texturing.
1 Dedicated Hot Water Outlet
J Steam/Hot Water selector control for steam and hot water.
K Programmable 1 CUP and 2 CUP button
L Steam/Hot Water light illuminates to indicate that the steam/hot water function is selected.
M CLEAN ME light indicates when a cleaning cycle is required.
N Espresso pressure gauge monitors espresso extraction pressure.
Program button: Programmable function that can be personalised with your favourite espresso volume.
PCup warming tray
NOT SHOWN:
Removable 1.8 litre water tank filled from the top with integrated water filtration.
Storage tray located behind the drip tray for storage of accessories.

natural_image
Close-up of a glass mug filled with dark beverage, garnished with a heart-shaped pastry and coffee beans on a wooden surface (no text or symbols visible)IMPORTANT SAFEGUARDS
Carefully read all instructions before operating this appliance and save for further reference. Do not attempt to use this appliance for any other than the intended use described in these instructions. Any other use, especially misuse, can cause severe injuries or damage by electric shock, heat or fire.
Any operation, repair and technical maintenance of the appliance or any part of it other than described in these instructions may only be performed at an authorised service centre. Please contact your vendor.
- This appliance is for household use only and not intended for use in moving vehicles. Do not operate or store the appliance in humid or wet areas or outdoors. Any use of accessories, or spare parts not recommended by the manufacturer may result in damage and/or injuries to persons.
- Check the entire appliance regularly for proper operation—especially the power cord. Do not operate the appliance, when liquids are in the housing of the appliance or accumulate under the appliance or overflow. Do not operate the appliance, when the appliance or any part of it is likely to be damaged, to avoid risk of fire, electric shock or any other damage and/or injuries to persons. The appliance is likely to be damaged if the appliance was subject to inadmissible strain (e.g. overheating, mechanical or electric shock), or if there are any cracks, excessively frayed or melted parts, or distortions, or if the appliance is leaking or not working properly. In this case, immediately unplug the appliance and return the entire appliance (including all parts and accessories) to an authorised service centre for examination and repair.
- Always ensure the appliance is properly assembled before connecting to power outlet and operating. Follow the instructions provided in this book.
- During operation keep the appliance in an appropriate distance of at least 15 cm on each side and 1 m above to furniture, walls, boards, curtains, and other objects. Do not operate the appliance beneath or below any heat-sensitive or moisture-sensitive materials, boards, or drop-lights to avoid damage caused by steam, heat, or condensate. Operate the appliance on a well accessible, stable, level, dry, heat-resistant, water-resistant and suitable large table or counter. Do not place the appliance over a power cord, or near the edge of the table or counter, or on wet or inclined surfaces, or where it can fall. Always keep the appliance and the table or counter clean and dry, and wipe off spilled liquids immediately.
- Do not place any clothes or tissue or other objects under or on the appliance during operation, to avoid risk of fire, electric shock and overheating. Before operation, always ensure that there are no foreign objects in or under the pot, and the appliance is assembled properly and not leaking with the lid and upper cover firmly in place. Solely use the appliance for processing edible food. Immediately unplug the appliance, if there is any kind of malfunction or problem (e.g. leaking, overheating).
- This appliance is not intended for use by persons (including children) with reduced physical, sensory or mental capabilities, or lack of experience and knowledge, unless the have been given supervision or instruction concerning use of the appliance by a person responsible for their safety. Children must be supervised to ensure that they do not play with the appliance or any parts of the appliance or the packaging. Do not leave the appliance unattended, when it is in reach of young children. Always keep the appliance where it is dry and clean and where young children cannot reach it. Do not place any hard and/or heavy objects on the appliance or any part of it. Take care that no one will pull the appliance by the power cord.
- This appliance can be used by children aged from 8 years and above if they have been given supervision or instruction concerning use of the appliance in a safe way and if they understand the hazards involved. Cleaning and user maintenance shall not be made by children unless they are older than 8 and supervised. Keep the appliance and ist cord out of reach och children aged less than 8 years.
- Remove and safely discard any packaging material and promotional labels or stickers before using »Design Espresso Advanced Plus« for the first time.
- To eliminate a choking hazard for young children, remove and safely discard the protective cover fitted to the power plug of this appliance.
- Do not place the appliance near the edge of a bench or table during operation. Ensure the surface is level, clean and free of water and other substances. Do not use the appliance on a sink drain board. Do not place the appliance on or near a hot gas or electric burner, or where it could touch a heated oven.
- The appliance is not intended to be operated by means of an external timer or separate remote control system.
- Do not use attachments other than those provided with the appliance. The use of accessory attachments not recommended by Gastroback may result in fire, electric shock or injury to persons.
- Do not attempt to operate the appliance by any method other than those described in this book.
- Use only cold, tap water in the water tank. Do no use any other liquid.
- Never use the appliance without water in the water tank.
- Ensure the portafilter is firmly inserted and secured into the brewing head before using the machine.
- Never remove the portafilter during the brewing operation as the machine is under pressure.
- Do not move the appliance whilst in operation.
- Do not use abrasive cleaners or cleaning pads (e.g. metal scouring pads) for cleaning. Do not clean the appliance with any corrosive chemicals (e.g. bleach). Do not immerse the appliance or power cord in water or any other liquid. Do not spill or drip any liquids on the appliance or on the power cord to avoid risk of fire and electric shock. When liquids are spilled in the appliance, immediately switch off, unplug the power cord and wait for the appliance to cool down. Thereafter, clean and dry the appliance thoroughly (See: >Care and Cleaning<).
- Do not leave the appliance unattended when in use.
- Do not touch hot surfaces. Use handles or knobs. Allow the appliance to cool down before moving or cleaning any parts.
- Do not place anything, other than cups for warming, on top of the appliance.
- Always switch off the appliance by pressing the POWER button to >off< and unplug if appliance is to be left unattended, if not in use, before cleaning, before attempting to move the appliance, disassembling, assembling and when storing the appliance.
- Keep the appliance and accessories clean. Follow the cleaning instructions provided in this book.
- The appliance is heated by built-in electric heating elements. The appliance or power cord may never touch hot surfaces. Do not place the appliance or any part of it on or near hot surfaces (e.g. burner, heater or oven). Do not use any part of the appliance (e.g. pot, steamer) with any other device.
- The appliance is designed for brewing espresso and coffee. Therefore, some components, such as the group head, the portafilter and the steam wand become very hot during operation and hot water or steam escape.
- Do not operate the appliance with a damaged cord or plug or after the appliance malfunctions, or has been damaged in any manner. Immediately cease use and contact an authorised service center for examination, repair or adjustment.
- Do not apply any force during operation to prevent damage to the components.
- DO NOT place the appliance or power cord in an automatic dishwasher.
- Do not leave any food dry on the appliance. Always clean the appliance after each use to prevent a build up of baked-on foods (See: >Care and Cleaning<). Always keep the appliance and the accessories clean.
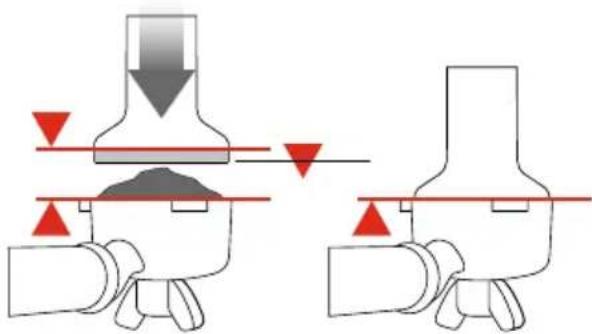
- After you have filled the correct quantity of ground coffee into the porta filter, you should press the ground coffee as evenly as possible. To do this, use the integrated tamper. The ground coffee should not be pressed too hard.
- Wipe carefully the rim of the porta filter of any spilled coffee. The rim should be completely clean so that the porta filter can seal at the brew head pressure-tight. For an optimal results the pressure gauges should be located in the central zone.
- The moisture content of the coffee grounds in the porta filter, which is due to the special brewing technology of the machine, represents not a malfunction of the appliance.
- Make sure that the porta filter is firmly inserted before use in the group head. Never remove the porta filter during operation.
• Store packaging material out of reach of children. - Do not operate with carbonated water, but only in soft water (up to 4^ = German hardness).
- This appliance is intended to be used in household and similar applications such as:
– staff kitchen areas in shops, offices and other working environments; - farm houses;
– by clients in hotels, motels and other residential type environments; - bed and breakfast type environments.
Important Safeguards for all Electrical Appliances
The appliance is heated electrically. Place the appliance near a suitable wall power socket to connect the appliance directly to a protected mains power supply with protective conductor (earth/ground) connected properly. Ensure that the voltage rating of your mains power supply corresponds to the voltage requirements of the appliance (220 - 240 V, 50 Hz, AC, rated for at least 8 A).
The installation of a residual current operated circuit breaker (r.c.c.b.) with a maximum rated residual operating current of 30 mA in the supplying electrical circuit is strongly re-
commended. If in doubt, contact your electrician for further information. In various foreign countries, the specifications for power supplies are subject to incompatible norms. Therefore it is possible that power supplies in foreign countries do not meet the requirements for safe operation of the appliance. Thus, before operating the appliance abroad, ensure that safe operation is possible.
- Do not to use any extension cords or multisocket outlets.
- Always handle the power cord with care. Always completely unwind the power cord before use. Do not place the appliance on a power cord. Power cords may never be knotted, twisted, pulled, strained or squeezed. Do not let the plug or power cord hang over the edge of the table or counter. The power cord may not touch hot surfaces. Ensure that no one will pull the appliance by the power cord. Take care not to entangle in the power cord. Always grasp the plug to disconnect the power cord. Do not touch the power plug with wet hands when the appliance is connected to the power supply.
- Unwind the power cord fully before use.
- To protect against electric shock do not immerse power cord, power plug or appliance in water or any other substance.
- The appliance has a short cord as a safety precaution to prevent personal injury or property damage resulting from pulling, tripping or becoming entangled with the cord. Do not allow children to be near or use this appliance without close adult supervision. If you must use a longer cord or an extension cord when using the appliance, the cord must include a 3-prong grounding plug. It must be arranged so it will not drape or hang over the edge of a countertop, tabletop or surface area where it can be pulled on by young children or tripped over. To prevent electric shock, personal injury or fire, the electrical rating of the extension cord you use must be the same or more than the wattage of the appliance (wattage is marked on the underside of the appliance).
- This appliance is recommended for household use only. Do not use this appliance for anything other than its intended use. Do not use in moving vehicles or boats. Do not use outdoors. Misuse may cause injury.
CAUTION: To ensure continued protection against risk of electric shock, connect to properly earthed outlets only.
High Temperatures – Risk of Burns
- The »Design Espresso Advanced Plus« is designed for brewing espresso and co. Therefore, some components, such as the group head, the portafilter and the steam wand become very hot during operation and hot water or steam escape.
- Do not touch hot parts (eg. group head, porta filter, swivel steam wand) during operation and shortly thereafter. Even after switching off the appliance, the corresponding parts are very hot for some time.
- Hot steam may escape or hot water may drip from the group head and the swivel steam wand. Therefore always ensure that the swivel steam wand points towards the drip tray when not in use. Never hold your hands or other body parts or moisture and heat-sensitive items onto or below the porta filter, group head, swivel steam wand when the appliance is turned on.
- Always make sure that the porta filter inserted correctly into the group head before ope-
rating the appliance. When brewing the espresso high pressure is produced – risk of burns!
- Never remove the porta filter during brewing.
- Always wait until the appliance is cooled down to room temperature and empty the water tank and the drip tray before moving or cleaning the appliance. Grasp the appliance on both sides of the bottom of the appliance base (not the drip tray!) if you want to move the appliance.
TECHNICAL SPECIFICATIONS
| Model: Art. No. 42611 »Design Espresso Advanced Plus« | |
| Power supply: 220 - 240 V, 50 Hz | |
| Power consumption: 1,500 - 1,750 W | |
| Length of power cord: ca. 112 cm | |
| Weight: ca. 7.6 kg | |
| Dimensions: ca. 270 x 315 x 320 mm (width x depth x height) | |
| Capacity of water tank: 1.8 Litre | |
| Certification: |  |
FEATURES OF YOUR »DESIGN ESPRESSO ADVANCED PLUS«
Integrated / Removable Tamper
Tamping is the application of even and consistent pressure to the espresso grinds. The tamper is conveniently located on board the machine and can be used both in the on board position or whilst removed depending on your preference.
Programmable Function
The appliance offers a convenient choice between preset shot sizes (1oz or 2oz), manual function (over-rides preset shot size for one time only) or a programmable function that reprograms the preset shot sizes with the user's preferred shot size.
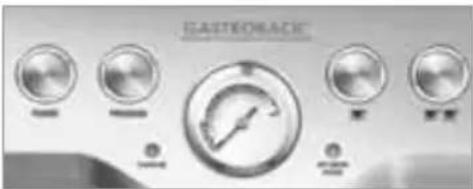
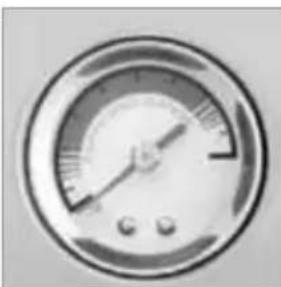
Espresso pressure Gauge
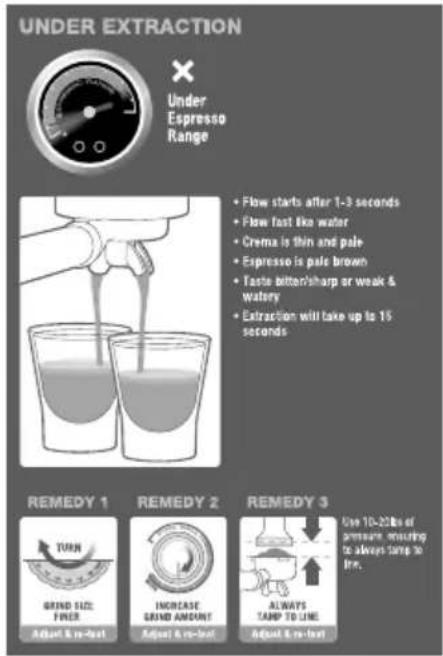
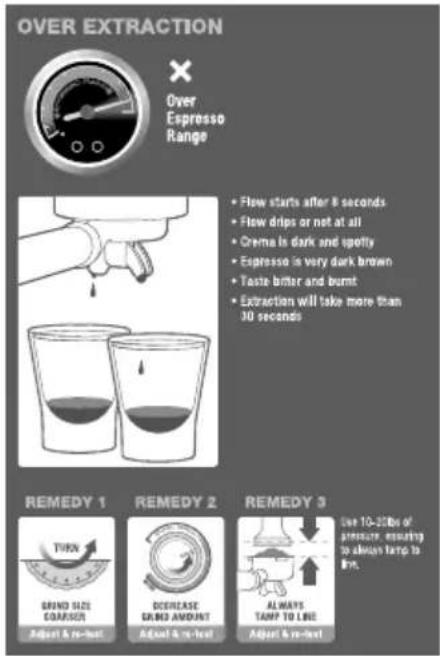
The espresso pressure gauge assists in obtaining the most favorable extraction pressure, guiding the user to create their ideal espresso. This is achieved by measuring the pressure at which the water is being forced through the ground espresso in the portafilter. The ideal position of the gauge needle is anywhere within the ESPRESSO RANGE.
Note: While the Pressure Gauge is a great guide to the quality of the extraction, the best indicator is the look and taste of the espresso.
natural_image
Close-up of a circular pressure gauge with needle and two terminals (no visible text or symbols)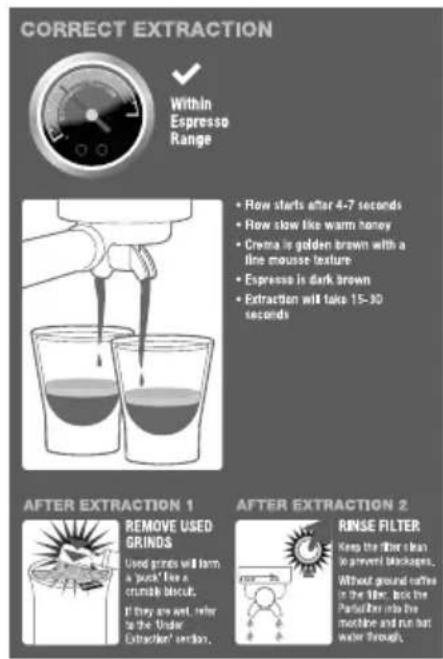
Commercial Style Steam Wand
The swivel-action steam wand easily adjusts to the perfect position for texturing milk. The wand has a commercial style 360° ball joint.
Note for frothing milk: About half of the steam wand must be immersed in the milk.
Note: If steam is already escaping from the steam wand and it is not immersed in the milk, the escaping steam can squirt milk out of the jug.
Important: Make sure that the milk does not run over the edge of the frothing jug.
WARNING: Do not take the steam wand out of the milk, as long as steam escapes. Otherwise hot milk may splash out of the frothing jug. Turn the steam dial always back to the starting position (OFF position) before you remove the frothing jug from the steam wand. About 5 seconds after turning off the steam function a short burst of steam from the steam wand occurs. Be careful not to scald yourself on the hot steam.
natural_image
Close-up of a mechanical lever handle and lever arm (no text or symbols visible)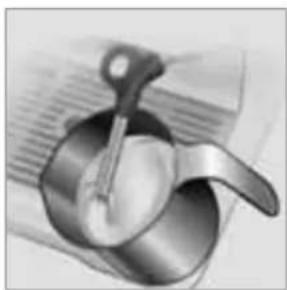
natural_image
Close-up of a metallic spoon handle and lever on a surface (no text or symbols visible)Note: Hot steam may escape or hot water may drip from the group head and the swivel steam wand. Therefore always ensure that the swivel steam wand points towards the drip tray when not in use.
Filter Size
The appliance comes with 4 filters:
- Dual Wall Filters for Beginners 1x single shot 1x double shot
• Single Wall Filters for Aspiring Baristas 1x single shot 1x double shot
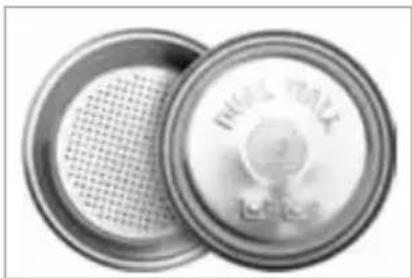
Dual Wall Filters
Dual Wall Filters for Beginners eliminate the guesswork for fast and easy to make espresso. The appliance is supplied with two Dual Wall Filters – 1x single shot and 1x double shot. These filters are designed to intentionally slow the water flow rate during brewing, resulting in an espresso that has been extracted at the correct pressure, leading to a rich, golden crema. These filters are suited to both preground vacuum packed espresso as well as beans ground fresh in the integrated grinder.
natural_image
Close-up of two metallic circular containers with a perforated inner panel and a circular emblem on the outer ring (no visible text or symbols)The Dual Wall Filters have >DUAL WALL< stamped on the underside of the filter.
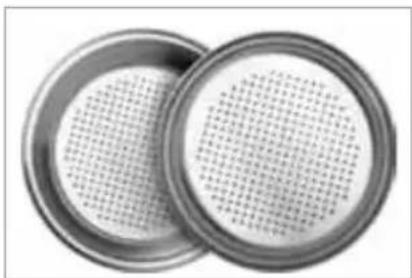
Single Wall Filters
Single Wall Filters for Aspiring Baristas, experiment with grind size, grind amount and tamp. The appliance is supplied with two Single Wall Filters – 1x single shot and 1x double shot. These filters provide no additional slowing of the water flow rate, hence experimentation with the grind size, grind amount and tamp force is required to achieve favorable results. These filters are suited to both pre-ground vacuum packed espresso.
natural_image
Two circular metal grates with a grid pattern on each, no visible text or symbolsThe Single Wall Filters have no markings on the underside of the filter.
Energy Saving Features
The appliance will enter the >Power Save Mode<, if not used for 10 minutes and will automatically switch off, if not used for a further 10 minutes. In the >Power Save Mode< the appliance requires 50% less power than required in >Stand By< Mode. During >Power Save Mode< only the POWER button surround will flash slowly. All other button light surrounds will not be illuminated. To re-activate the machine during >Power Save Mode< simply press any button except POWER. The POWER button surround will then illuminate and flash while the machine quickly reheats to operational temperature. When the correct temperature has been reached, all the button surround on the control panel will illuminate. To switch off the espresso machine whilst it is in >Power Save Mode<, simply press the POWER button once.
Additional Features
PID Temperature Control
Electronic PID temperature control for increased temperature stability.
Auto Purge
Automatically adjusts water temperature after steam for optimal coffee temperature.
Thermocoil Heating System
Integrated stainless steel water coil accurately controls water temperature.
Commercial Style Steam Wand
360° swivel action for effortless milk texturing.
Instant Hot Water Outlet
Dedicated hot water outlet for making long blacks & pre-heating cups.
Low Pressure Pre-infusion
Applies low pressure at the start of the extraction to gently expand grinds for an even extraction.
Dry Puck Feature
Removes excess water from the ground coffee in the filter basket after extraction for easy disposal of the coffee puck.
BEFORE FIRST USE
Machine Preparation
Remove and discard all labeling and packaging materials attached to your espresso machine. Ensure you have removed all parts and accessories before discarding the packaging.
Clean parts and accessories (water tank, portafilter, filter baskets and jug) using warm water and a gentle dish washing liquid and rinse well. Wipe the outer housing and drip tray with a soft damp cloth and dry thoroughly. Do not immerse the outer housing, power cord or power plug in water or any other liquid.
The water filter located inside the water tank will need to be removed before washing the water tank.
Conditioning the Water Filter
- Remove filter from the plastic bag and soak in a cup of water for 5 minutes.
- Rinse filter under cold running water.
- Wash the stainless steel mesh in the plastic filter compartment with cold water.
- Insert the filter into the filter holder.
- Set the dial date 2 months ahead.
• To install filter, push down to lock into place. - Slide the water tank into position and lock into place.
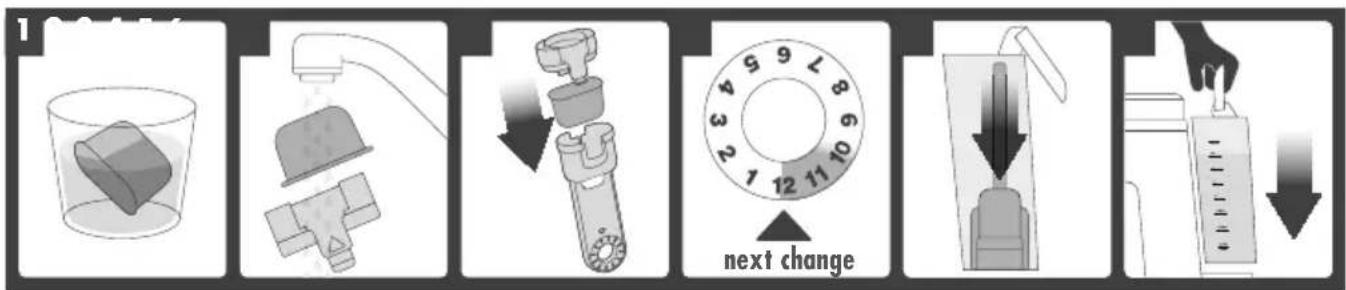
Note: Only use Gastroback filters 97765.
FIRST USE
Initial Start Up
- Fill tank with water
- Press POWER on
- A pumping sound will be heard. The machine will reach operating temperature and go into Standby mode.
Flushing the Machine
It is recommended to complete a water flushing operation, without ground coffee, to ensure the machine has been conditioned. When the machine has reached STANDBY mode, run the following 2 steps.
- Press the 2 CUP button to run hot water through the group head for 30 seconds.
• Activate hot water for 10 seconds. - Repeat this cycle until the water tank is empty.
Note: Do not clean any of the parts or accessories in the dishwasher.
USING YOUR DESIGN ESPRESSO ADVANCED PLUS
Filling the Water Tank
- Ensure the water filter is securely fitted inside the tank.
-
Fill the water tank with cold tap water to the maximum mark on the side of the tank and slide the water tank back into position at the back of the machine.
-
Plug the power cord into power outlet and switch On at power point.
- Press the POWER button to On. The POWER button surround will flash while the machine is heating. When the correct temperature has been reached, all the button surrounds on the control panel will illuminate.
Note: Check the water level before use and replace the water daily. The water tank should be filled with fresh, cold tap water before each use. Do not use mineral or distilled water or any other liquid.
Tamping the Ground Coffee
- Once the grind function has been completed, carefully withdraw the portafilter from the grinding cradle, being careful not to spill any ground coffee, tap down to collapse and using the integrated tamper, tamp down firmly (approx. 15-20 kg of pressure).
natural_image
Diagram showing two mechanical components with red arrows indicating force or movement, no text or symbols presentPRE-PROGRAMMED SHOT VOLUME - 1 CUP
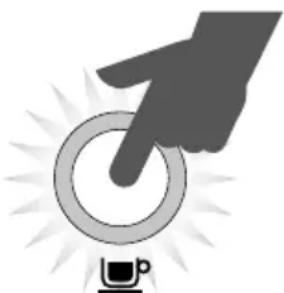
Press the 1 CUP once. A preset volume of approximately 30mls will be extracted. The machine will automatically stop once the preset volume has been extracted.
natural_image
Hand pressing a circular button with a coffee cup icon (no text or symbols)Note: The amount of espresso extracted in the cup will vary depending on your grind size and dose amount.
PRE-PROGRAMMED SHOT VOLUME - 2 CUPS
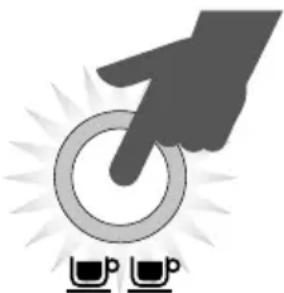
Press the 2 CUP button once. A preset volume of approx. 60mls will be extracted. The machine will automatically stop once the preset volume has been extracted.
natural_image
Hand cursor clicking a circular button with coffee cup icons below (no text or symbols)Note: Pressing the 1 CUP or 2 CUP buttons during a programmed espresso will immediately stop the extraction.
PROGRAMMING SINGLE ESPRESSO
- To begin programming, press the PROGRAM button once. The machine will beep once and the program button will begin to flash. This indicates the machine is in programming mode.
- Press 1 CUP button to start espresso extraction. Press 1 CUP again once desired volume of espresso has been extracted. The machine will beep twice to indicate the new 1 CUP volume has been set.
PROGRAMMING DOUBLE ESPRESSO
- To begin programming, press the PROGRAM button once. The machine will beep once and the program button will begin to flash. This indicates the machine is in programming mode.
- Press 2 CUP button to start espresso extraction. Press 2 CUP again once desired volume of espresso has been extracted. The machine will beep twice to indicate the new 2 CUP volume has been set.
RESETTING DEFAULT VOLUMES
To reset the machine to the default 1 CUP and 2 CUP shot volumes, press and hold the PROGRAM button until the machine beeps three times. Release the PROGRAM button. The machine will return to its original default setting.
Note: Default settings: 1 CUP shot volume is approx. 30ml. 2 CUP is approx. 60ml.
MANUAL SHOT VOLUME
Manually control low pressure pre-infusion time and shot volume without re-programming the pre-set shot volume.
- Press and hold the 1 CUP or 2 CUP button. The extraction will enter low pressure pre-infusion until the button is released.
- When the 1 CUP or 2 CUP button is released, extraction will continue at full pressure.
- Press the 1 CUP or 2 CUP button again once the desired volume of espresso has been extracted
MANUAL ESPRESSO
Press and hold the 1 CUP or 2 CUP button. Release the button once sufficient espresso has been extracted into the cup.
Note: For optimal flavour when using a 1 CUP filter, you should extract approx. 30ml. When using a 2 cup filter, you should extract approx. 60ml.
WARNING: The metal parts of the portafilter will be very hot.
ADVANCED TEMPERATURE SETTING
The water temperature can be increased or decreased by 1^ C or 2^ C if desired. Coffee of different origins or roast profiles may need a different espresso brew water temperature to optimise their flavour. If your espresso is tasting slightly “ashy” decrease the brew water temperature by 1^ C. If your espresso is tasting slightly “sour” increase your brew water temperature by 1^ C.
| DESCRIPTIONINDICATOR | ||
 | DEFAULT TEMPERATURE | |
 | -2°C | |
 | +2°C | |
| _CZG3] | SELECT | |
 | -1°C | |
 | +1°C | |
To amend temperature settings:
- With the machine OFF, press and hold the 1 cup button and then simultaneously press and hold the power button.
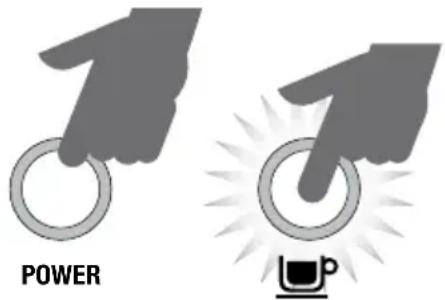
- A beep will sound to indicate that the temperature settings can now be changed.
- The LED of the last saved setting will be illuminated. See table on left.
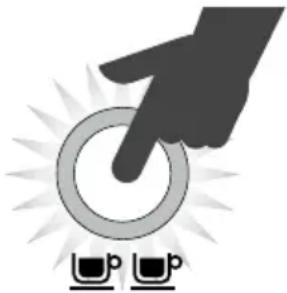
- Pressing the 2 cup button allows you to toggle between the different settings.
natural_image
Hand pointing at a circular target with two coffee cups below (no text or symbols)- Please note that if the 2 cup button is not pressed within 10 seconds, the machine will return to STANDBY mode and the above steps have to be repeated
• After you have made a selection, 2 beeps will sound to indicate that your setting has been saved. - The machine will then return to STANDBY mode.
THE ART OF TEXTURING MILK
The appliance comes complete with a commercial style swivel steam wand.
- Fill the stainless steel frothing jug maximum 12 full with cold, fresh milk.
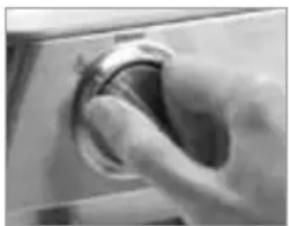
- Turn the steam selector dial to the Steam-position. The red steam light will start to flash indicating that the machine is heating to create steam.
natural_image
Close-up of a hand holding a rotary knob or dial (no visible text or symbols)- When the steam light stops flashing it is ready to use.
- Before inserting the wand into the milk, pause the steam by returning the dial back to the STAND BY-position. This will avoid splashing the milk out of the jug (this pause function lasts for 6 seconds before exiting steam mode).
- Insert the wand into the milk and return the steam dial back to Steam-position.
- To stop, return the steam dial to the STAND BY-position and remove the jug.
Note: When the espresso machine creates steam, a pumping noise can be heard. This is the normal operation of the 15 Bar pump.
Note: After 5 minutes of continuous steaming, the machine will automatically disable the steam function. The steam light will flash. When this occurs return the steam dial to the STAND BY-position.
WARNING: Ensure the steam selector dia is in the STAND BY-position before removing the frothing jug.
There are two phases to texture milk: Stretching the milk to aerate it and swirling the milk to make it silky smooth and the right temperature. In practice these two operations should blend into one.
STEP 1 - STRETCHING THE MILK
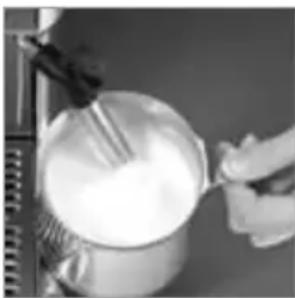
Hold the jug so the tip of the steam wand is just below the surface of the milk and with your free hand engage the steam. Every so often lower the jug so the steam wand just breaks the surface of the milk and makes a hissing sound. Stretching the milk will increase the volume, so lower the jug as the milk rises to ensure the tip remains just above the surface of the milk.
natural_image
Person pouring white liquid from a metal bowl into a container (no text or symbols visible)STEP 2 - SWIRLING THE MILK
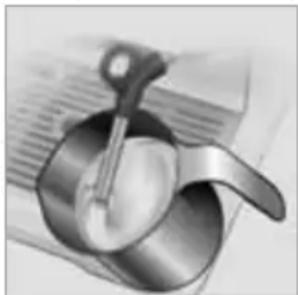
After a short while you will have aerated sufficiently. At this point, adjust the jug so the steam wand is off-center and create a spinning motion in the milk. Compensate for the angle of the steam wand by slightly tilting the jug away from you, or to one side and at the same time lower the nozzle further into the body of the milk. Continue swirling until milk is at desired temperature. Without a thermometer you'll know the milk is ready when the jug base is >just too hot to touch. When you get the balance right the milk should end up forming a >meringue-like> consistency that has a glassy sheen to it. Remove any excess air bubbles by gently knocking the jug against a hard flat surface and pour the milk down the inside of your chosen cup or glass to make your desired espresso variation. Lastly, run the steam function briefly to remove any residual milk in the steam wand tip. Then give the steam wand a good wipe with a damp cloth.
natural_image
Close-up of a metallic bowl with a handle and lid, placed on a surface (no text or symbols visible)Note: If stretching makes a loud screeching sound, this may inidicate that you have lowered the wand into the milk too early.
Note: For best results use cold fresh milk. Always clean the steam wand after every use. Refer to >Care and Cleaning<.
Note: For extracting more espresso immediately after using the steam function, this machine features an auto-purge function. This ensures the ground espresso coffee will not be burnt by the initial water flow from the thermocoil being too hot. Instead this water is automatically released internally into the drip tray ensuring that the internal thermostat is at optimal temperature for extracting espresso. Your espresso will always be extracted at this optimal temperature ensuring only the best flavored espresso is achieved.
HOT WATER
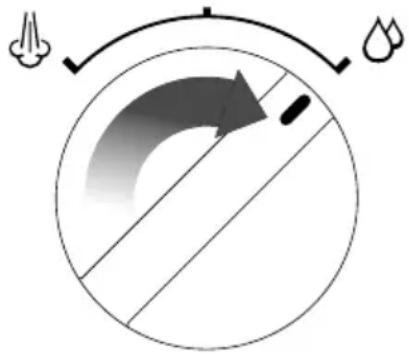
- Turn the STEAM/HOT WATER selector dial to the Hot Water position.
- To stop the hot water, return the STEAM/HOT WATER dial to the STANDBY position.
AUTO PURGE
For extracting espresso immediately after using the steam function, this machine features an auto-purge function.
The auto purge function ensures the ground coffee will not be burnt by the initial water flow from the thermocoil being too hot. The water is automatically released internally into the drip tray ensuring that the thermocoil is at optimal temperature for extracting espresso.
Your espresso will always be extracted the optimal temperature ensuring only the best flavours are extracted.
ESPRESSO MAKING TIPS
WARMING YOUR CUP OR GLASS
A warm cup will help maintain the espresso optimal temperature. Preheat your cup by holding down the one cup button and running hot water into the cups from the group head without the portafilter inserted and place the cups on the warming tray.
WARMING THE PORTAFILTER
A cold portafilter can drop the extraction temperature enough to significantly affect the quality of your espresso. Always ensure the portafilter is preheated by running hot water through it before preparing the espresso.
Note: Always wipe the filter and portafilter dry before preparing the espresso as moisture can encourage drilling - this is when water bypasses the ground espresso coffee during extraction.
USING PRE-GROUND ESPRESSO
If using a pre-ground espresso, ensure an espresso grind suitable for espresso/cappuccino machines is purchased.
THE RIGHT MEASUREMENT
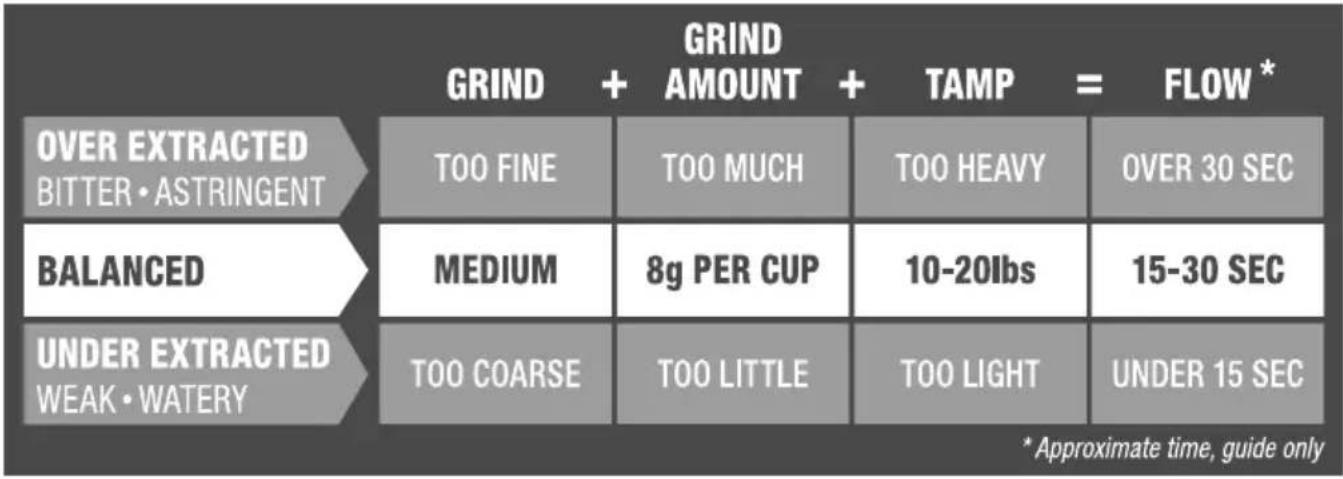
It is important to use the correct filter for the amount of espresso. A single espresso is made with 8 g of ground espresso. A level measure of the coffee scoop is the correct amount of coffee for a single espresso and 2 level measures for a double espresso.
TAMPING CORRECTLY
Level the desired amount of ground espresso by gently tapping the side of the filter holder before pressing down firmly with the tamper. When packing for a double espresso it is important only to tamp after the second measure. Tamping between measures will create a layer in the ground espresso that can impede full extraction.
Note: Make sure to wipe off any excess ground espresso from the rim of the filter to ensure a proper seal is achieved under the group head.
PURGE THE GROUP HEAD
Before inserting the portafilter, run some water through the group head. It will ensure that your machine has a last minute 'clean through' and stabilizes the temperature prior to extracting.
BREWING YOUR ESPRESSO
The most common mistake in brewing is to over extract from your ground espresso. This results in a bitter beverage with visibly bleached crema. Crema is the caramel colored layer that floats on top of the espresso following extraction.
Note: The taste of your espresso will, of course, depend on personal preference and on many other factors such as the type of coffee bean used, the coarseness or fineness of the grind and the tamping pressure. We recommend experimenting by varying these factors to achieve the espresso taste of your preference.
Note: Always properly clean your machine after each use.
CARE & CLEANING
INSTALLING / REPLACING THE FILTER IN THE WATER TANK
The Water Filter provided with the appliance can significantly reduce substances that affect the smell and taste of water such as free chlorine, certain pesticides and organic impurities as well as traces of heavy metals. The Water Filter can be removed from the water tank during operation if not required.
- Remove the charcoal water filter from the plastic bag, and soak in a cup of water for 5 minutes
- Rinse the filter under cold running water for 5 seconds
- Wash the stainless steel mesh in the plastic filter holder with water and assemble
- Set the date dial to 2 months ahead
• To install, push down to lock into place
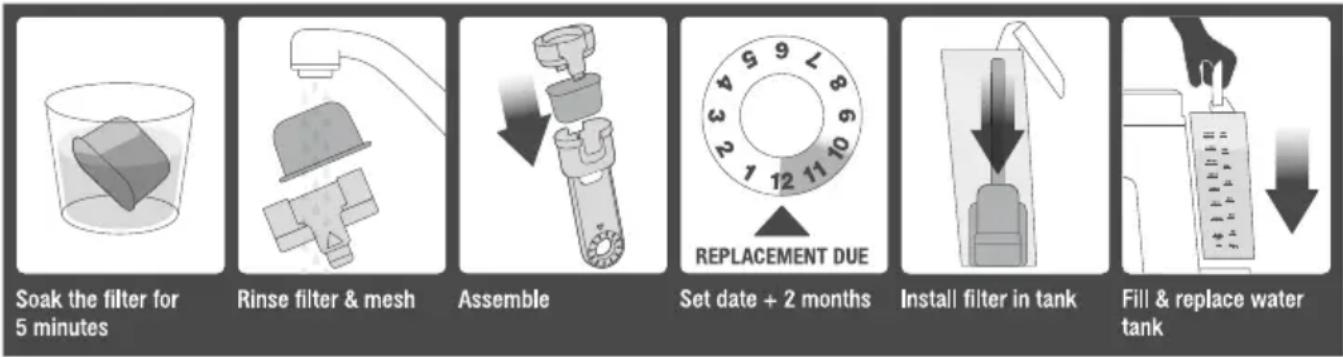
flowchart
graph LR
    A["Soak the filter for 5 minutes"] --> B["Rinse filter & mesh"]
    B --> C["Assemble"]
    C --> D["Set date + 2 months"]
    D --> E["Install filter in tank"]
    E --> F["Fill & replace water tank"]
    style A fill:#f9f,stroke:#333
    style B fill:#ccf,stroke:#333
    style C fill:#cfc,stroke:#333
    style D fill:#fcc,stroke:#333
    style E fill:#cff,stroke:#333
    style F fill:#ffc,stroke:#333
Make sure to use Gastroback Waterfilters 97765.
PORTAFILTER CLEANING
Periodically run water through the machine with the portafilter in place, but without any ground espresso in the filter, to rinse out any residual coffee particles.
CLEANING CYCLE
The appliance features an inbuilt cleaning cycle which should be carried out periodically.
CLEANING CYCLE PROCESS GUIDE
1 Use a cleaning tablet.
2. Insert the cleaning disc into the single or double shot filter.
3. Place the filter into the portafilter.
4. Pop 1 cleaning tablet into the filter.
5. Lock the portafilter into the group head.
- Turn the machine off.
- Simultaneously press and hold the one cup, two cup and the POWER button for 3 seconds.
- The cleaning cycle will commence and last for approximately 5 minutes. Once complete, 3 beeps will sound. Remove the portafilter and ensure the tablet has completely dissolved.
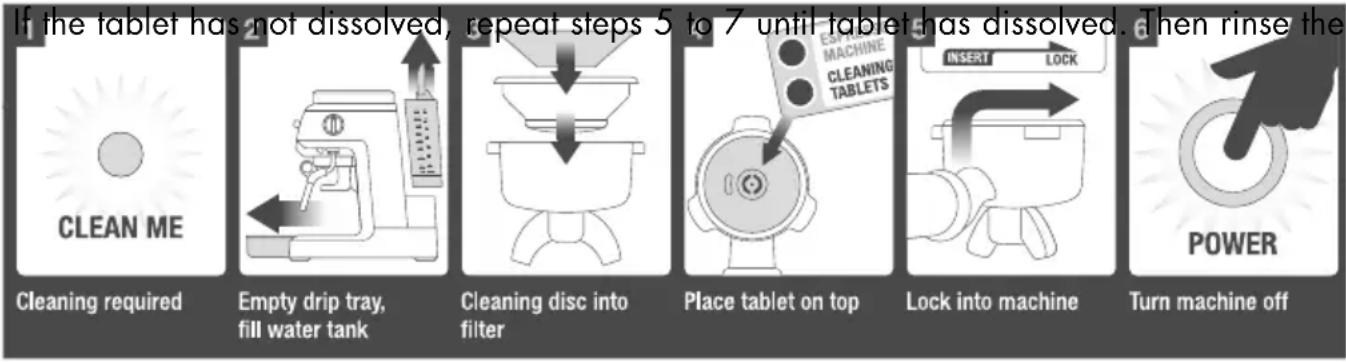
flowchart
graph LR
    A["If the tablet has not dissolved, repeat steps 5 to 7 until tablet has dissolved. Then rinse the"] --> B["Cleaning ME"]
    B --> C["Empty drip tray, fill water tank"]
    C --> D["Cleaning disc into filter"]
    D --> E["Place tablet on top"]
    E --> F["Insert LOCK"]
    F --> G["Lock into machine"]
    G --> H["Turn machine off"]
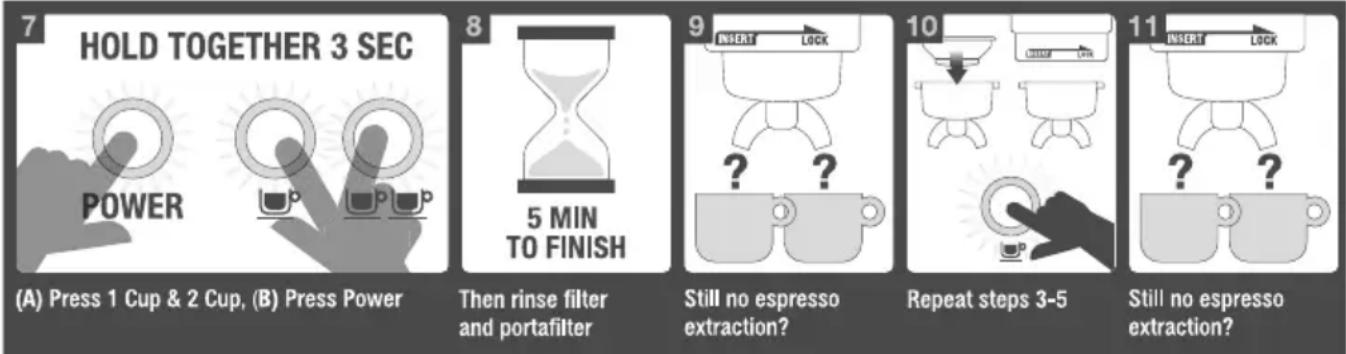
flowchart
graph TD
    A["7 HOLD TOGETHER 3 SEC"] --> B["(A) Press 1 Cup & 2 Cup, (B) Press Power"]
    B --> C["8 5 MIN TO FINISH"]
    C --> D["9 INSERT LOCK"]
    D --> E["10 Repeat steps 3-5"]
    E --> F["11 INSERT LOCK"]
    F --> G["Then rinse filter and portafilter"]
    G --> H["Still no espresso extraction?"]
    H --> I["Repeat steps 3-5"]
    I --> J["Still no espresso extraction?"]
Make sure to use Gastroback Cleaning Tablets 97830.
DECALCIFYING
After regular use, hard water can cause mineral build up in and on many of the inner functioning components, reducing the brewing flow, power of the machine, and affecting the quality of espresso. We advise decalcifying the machine on a regular basis using Gastroback Cleaning Tablets 97830. Follow the instructions provided, or use the following as a guide:
WARNING: Do not immerse power cord, power plug or appliance in water or any other liquid. The water tank should never be removed or completely emptied during decalcifying.
DECALCIFYING THE MACHINE
- Remove the portafilter. Pour the mixture of water and Gastroback Cleaning Tablets 97830 into the water tank.
- Plug the machine into the power outlet.
- Press the POWER button to the on-position.
- Place a large container under the group head and steam wand.
- When the brewing temperature has been reached all the button surrounds on the control panel will illuminate. Press and hold the one cup or two cup button to commence manual pour. Release the button once half the mixture has run through the group head.
- Set the steam dial to the STEAM-position and allow steam to run through the steam wand for approximately 2 minutes. Return the steam dial back to the off-position.
- After decalcifying, remove the water tank and rinse thoroughly then refill with fresh cold water. To rinse the machine, repeat previous steps.
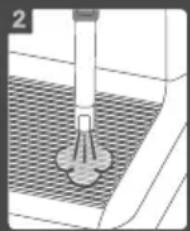
CLEANING THE STEAM WAND
- The steam wand should always be cleaned after frothing milk.
- Wipe the steam wand with a damp cloth, and then with the steam wand directed back into the drip tray, briefly set the steam dial to the STEAM-position. This will clear any remaining milk from inside the steam wand.
- Ensure the steam dial is in the STAND BY-position. Press the POWER button to off and allow the machine to cool.
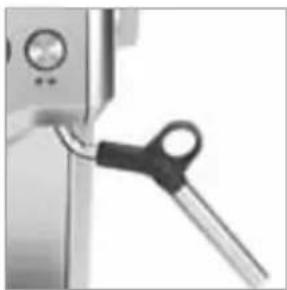
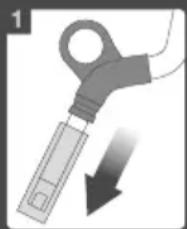
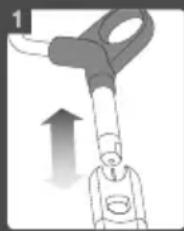
- If the steam wand remains blocked, use the pin on the cleaning tool to clear the opening.
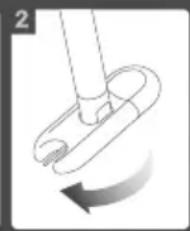
- If the steam wand continues to be blocked, the tip of the steam wand can be removed by using the fitting in the middle of the cleaning tool.
- Unscrew the tip with the cleaning tool.
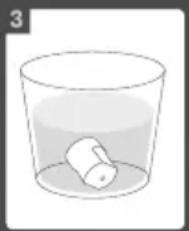
- Soak the tip in hot water before using the pin on the cleaning tool to unblock. Replace the tip back onto the steam wand and secure with the cleaning tool.
Steam
Wand
Maintenance
natural_image
Illustration of a medical or laboratory device with a downward arrow indicating force or direction (no text or symbols)Remove attachment
natural_image
Diagram of a mechanical component with a central pin and textured surface (no text or symbols)Run steam to clear wand
Clogged Steam Wand?
natural_image
Illustration of a hand holding a device with an upward arrow, no text or symbols presentClean hole with pin
natural_image
Diagram of a mechanical component with a curved arrow indicating rotation (no text or symbols)Remove tip
natural_image
Simple line drawing of a cup with liquid and a small object inside (no text or symbols)Soak tip in hot water
CLEANING / UNBLOCKING THE FILTERS, PORTAFILTER AND GROUP HEAD
Periodically run water through the machine with the portafilter in place, but without any ground espresso in the filter, to rinse out any residual coffee particles.
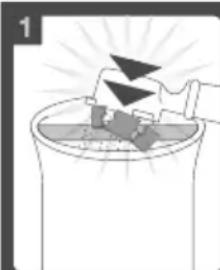
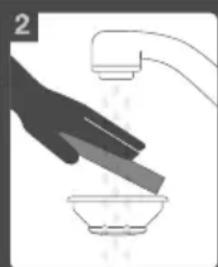
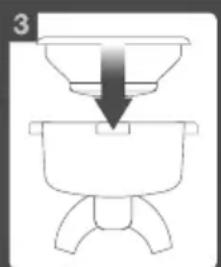
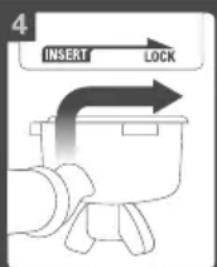
Should the fine holes in the filters become blocked follow the following steps:
- Place the filter into the portafilter. Run water through the machine with the filter and portafilter, without any ground espresso in place.
- The fine pin on the cleaning tool can be used to clear any grinds in the filter holes.
- To clean the single wall filters simply run water through the portafilter using the manual pour function by holding down the one cup button.
- For a thorough clean of the filters, run a cleaning cycle of the machine with the portafilter and filter in place.
Note: Pin on Cleaning Tool is extremely sharp. Use care when using.
natural_image
Simple line drawing of a container with a handle and arrow, no text or symbols presentKnock grinds out
natural_image
Illustration of a hand cleaning a sink with a drain, showing surface texture and water droplets (no text or symbols)Clean filter
natural_image
Simple line drawing of a funnel pouring into a container (no text or symbols)Place into Portafilter
Lock into machine
Flush water
Clean hole with pin
CLEANING THE OUTER HOUSING / CUP WARMING PLATE
The outer housing and cup warming plate can be cleaned with a soft, damp cloth. Then polish with a soft, dry cloth. Do not use abrasive cleansers, pads or cloths which can scratch the surface.
CLEANING THE DRIP TRAY
The drip tray should be removed, emptied and cleaned at regular intervals, particularly when the drip tray full indicator is showing >Empty Me!k.
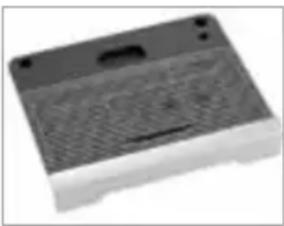
Remove grid, compartments and >Empty Me!< indicator from the drip tray. Dispose of the grounds from the dry compartment into the waste bin. Wash the drip tray with warm soapy water, using a non-abrasive washing liquid, rinse and dry thoroughly. The >Empty Me!< indicator can be removed from the drip tray by pulling upwards to release the side latches. The drip tray base and cover are dishwasher safe.
natural_image
Exterior view of a rectangular electronic device casing with a textured surface and mounting holes (no visible text or symbols)CLEANING THE STORAGE TRAY
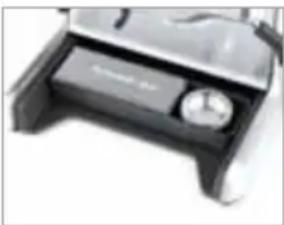
The storage tray can be removed after the drip tray is removed then cleaned with a soft, damp cloth (do not use abrasive cleansers, pads or cloths which can scratch the surface).
natural_image
Close-up of a mechanical device with a dial and base (no visible text or symbols)STORAGE
Before storing, press the POWER-button to off, turn the steam dial to off and unplug. Empty the water tank and the drip tray. Ensure the machine is cool, clean and dry. Insert all accessories into position or into the storage tray. Store upright. Do not place anything on top.
WARNING: Do not immerse power cord, power plug or appliance in water or any other liquid. The water tank should never be removed or completely emptied during decalcifying.
TROUBLE SHOOTING GUIDE
| PROBLEM POSSIBLE CAUSES WHAT TO DO | ||
| When the machine is switched on, the steam and hot water lights are flashing. | Steam dial is not in STAND BY-position Turn | the Steam dial to STAND BY-position. Machine will commence normal heat up procedure. |
| Espresso does not run through. Machine is not turned on or plugged in Ensure the machine is plugged in and the POWER button is pressed to on. | ||
| Espresso runs out too quickly The espresso grind is too coarse Ensure you use a suitable espresso grind. | ||
| Espresso is too cold Cups not preheated Preheat cups. Refer to >Pre-Warming The Cups<, page 54. | ||
| No crema | Espresso is not tamped firmly enough | Refer to >Tamping The Ground Espresso<, page 50. |
| Espresso grind is too coarse Ensure you use a suitable espresso grind | ||
| Ground espresso is not fresh Change old beans with fresh roasted or pre-ground.Ground espresso should not be kept for longer than a week. | ||
| Filter holes are blocked Use the fine pin on the cleaning tool to clear the holes. Refer to >Cleaning The Filters<, page 57. | ||
| Machine is making pulsing/pumping sound while extracting espresso or steaming milk | The machine is carrying out the normal operation of the 15 bar pump | No action required as this is the normal operation of the machine. |
| Espresso runs out around the edge of the filter holder | Filter holder is not inserted in the group head properly | Refer to >Inserting The Portafilter<, page 55. |
| There are espresso grounds around the filter rim | Clean any excess ground espresso from the rim of the filter holder to ensure a proper fit into the brew head. | |
| Ground espresso has been tamped too firmly | Refer to >Tamping The Ground Espresso<, page 50. | |
| Incorrect filter for amount of ground coffee used | Ensure you use the small filter for 1 cup of espresso and the larger filter for 2 cups of espresso. | |
| Espresso extracts as drops from the portafilter | The water tank is empty or low Refer to step 1 — >Filling The Water Tank<, page 50. | |
| Espresso grind is too fine Ensure you use a suitable espresso grind. | ||
| Machine is blocked by mineral deposits | Decalcify the machine. Refer to >Decalcifying<, page 56. | |
| Machine is making a loud and continuous pumping noise | Water tank is empty Refer to step 1 — >Filling The Water Tank<, page 50. | |
| Water tank is not securely in place Refer to step 1 — >Filling The Water Tank<, page 50. | ||
| No steam is generated Machine is not turned on Ensure the machine is plugged in, switched on at the power outlet and the POWER button is pressed to on. | ||
NOTES FOR DISPOSAL
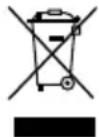
Dispose of the appliance and packaging must be effected in accordance with the corresponding local regulations and requirements for electrical appliances and packaging. Please contact your local disposal company.
Do not dispose of electrical appliances as unsorted municipal waste, use separate collection facilities. Contact your local government for information regarding the collection systems available. If electrical appliances are disposed of in landfills or dumps, hazardous substances can leak into the groundwater and get into the food chain, damaging your health and well-being. When replacing old appliances with new ones, the retailer is legally obligated to take back your old appliance for disposal at least for free of charge.
INFORMATION AND SERVICE
Please check www.gastroback.de for further information. For technical support, please contact Gastroback Customer Care Center by phone: +49 (0)4165/22 25-0 or e-mail: info@gastroback.de.
WARRANTY
We guarantee that all our products are free of defects at the time of purchase. Any demonstrable manufacturing or material defects will be to the exclusion of any further claim and within warranty limits of the law free of charge repaired or substituted. There is no warranty claim of the purchaser if the damage or defect of the appliance is caused by inappropriate treatment, over loading or installation mistakes. The warranty claim expires if there is any technical interference of a third party without an written agreement.
The purchaser has to present the sales slip in assertion-of-claim and has to bear all charges of costs and risk of the transport.
The appliance is intended for household use only and NOT suited for commercial usage. Do not attempt to use this appliance in any other way or for any other purpose than the intended use, described in these instructions. Any other use is regarded as unintended use or misuse, and can cause severe injuries or damage. There is no warranty claim of the purchaser if any injuries or damages are caused by unintended use.
Coffee-Recepies
Espresso
Intense and aromatic, an espresso or short black as it's also known uses about 14 oz of ground espresso. It is served in a small cup or glass to a level of approximately 1 oz.
natural_image
Close-up of a white ceramic cup with dark liquid, possibly tea or broth, with blurred background objects (no visible text or symbols)Americano
A long black is generally a single or double shot of espresso with hot water added to taste.
natural_image
Close-up of a cup filled with tea, placed on a saucer with a small object nearby (no visible text or symbols)Flat White
A single shot of espresso in a cup filled with steamed milk and topped with a skin of silky smooth foam.
natural_image
Close-up of a white ceramic cup with a glossy white substance, possibly a dessert or dessert (no visible text or symbols)Classic Café Latté
Traditionally the morning coffee of Italy and France, taken with pain au chocolate or sweet biscotti. This blend of 13 espresso to 23 milk is made with a single shot of espresso. Top with steamed milk, poured down the inside rim of the glass to give a creamy consistency and perfect layer of froth.
natural_image
Close-up of a glass with a white frosted cake and leaf decoration (no text or symbols visible)Cappuccino
The real thing is served very light and luke warm with 13 espresso to 13 steamed milk and a generous final 13 of creamy froth. For added finesse, hold a piece of card over one half of the cappuccino before dusting with chocolate.
natural_image
Close-up of a white ceramic bowl with visible contents and decorative patterns (no text or symbols)Macchiato
A shot of espresso served short in a 2½ oz demitasse and stained with a dash of finely textured milk.
natural_image
Close-up of a glass of milk with a small object above it (no visible text or symbols)Café Mocha
A glass of textured milk laced with melted cocoa or chocolate syrup and an espresso shot. Top sprinkled with dark chocolate shavings.
natural_image
Close-up of a glass cup with a dessert topped with chocolate sauce (no visible text or symbols)Espresso Affogato
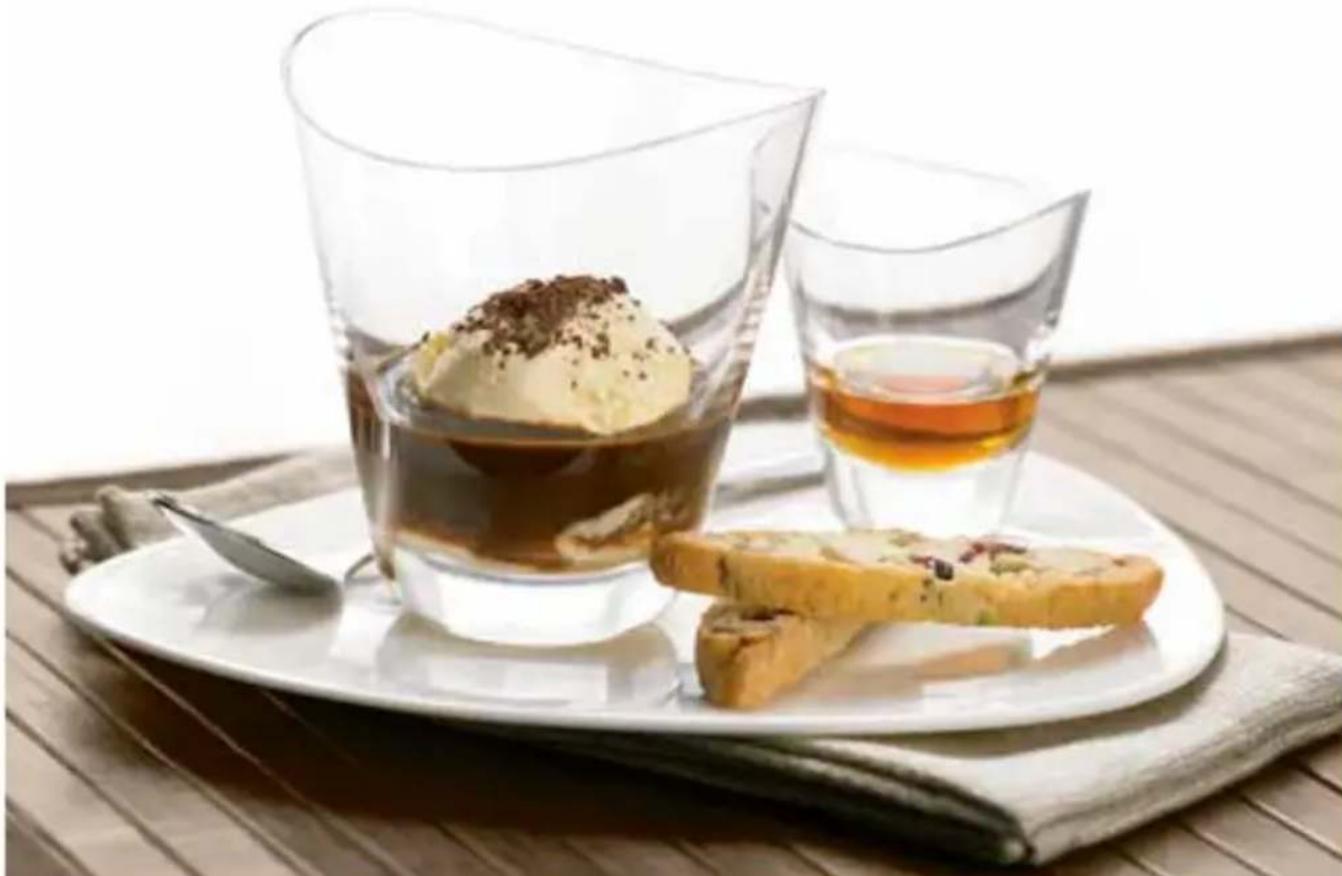
Totally irresistible, this sweet temptation is simply a single scoop of premium vanilla bean ice cream, drenched in espresso and if desired, your favorite liqueur. To create a sense of occasion, serve ice cream in a martini glass with shots on the side.
natural_image
Black and white photo of a martini glass with ice cubes and a chocolate sauce (no visible text or symbols)Con Panna
Meaning >with cream this heart warmer is a chic variation on old-fashioned Vienna Coffee. In a 3-4 oz cup, dress a double shot of espresso with a dollop of fresh cream, whipped until lossy. Dust with cinnamon and serve immediately.
natural_image
Close-up of a bowl with a textured food item and small specks, no visible text or symbols.Baked Custards with Fresh Raspberry and Coffee Float
Serves 6
25 oz (750ml) cream
^3/_4 cup finely granulated sugar
2 vanilla beans, cut lengthways
1 tablespoon gelatine
1 basket of fresh raspberries
1 tablespoon finely granulated sugar, extra
^3/_4 cup strong espresso coffee, cooled
-
Combine the cream, finely granulated sugar and vanilla beans in a saucepan. Stir over medium heat until just boiling. Remove the vanilla beans.
-
Add the gelatine and stir constantly with a wooden spoon until dissolved. Remove from heat. Allow the custard to cool.
-
Pour custard evenly into 5 oz glasses. Refrigerate for a minimum of 3 hours or until set.
-
Place the raspberries into a medium sized bowl, sprinkle with sugar and crush lightly with a fork.
-
Fold the cooled espresso coffee through the crushed raspberries. Cover and chill in the refrigerator.
-
To serve, top the custards, when set, with the raspberries and espresso coffee mixture.
-
Serve immediately with freshly brewed espresso coffee.
Tiramisu
Makes 4
1 ½ cupsmascarpone
1 ¼ cupscream
2½ tablespoons powdered sugar
12 cup strong espresso coffee, cooled
12 cup coffee liqueur
16 sponge fingers
Cocoa powder, for dusting
- Combine mascarpone, cream and powdered sugar in a large bowl. Whisk lightly until soft peaks form. Set aside.
-
Combine espresso coffee and liqueur in bowl. Dip the sponge fingers into the espresso coffee mixture a few at a time. all the espresso coffee mixture is absorbed evenly by the sponge fingers.
-
Layer half the sponge fingers evenly into the base of 4 dessert bowls or glasses. Spread the layered sponge fingers with half of the cream mixture. Repeat the layers with remaining sponge fingers and cream ture.
-
Dust evenly with cocoa powder and refrigerate until required.
-
Serve with fresh fruits and freshly brewed espresso.
Rich Espresso Icing
2 cups powdered sugar, sifted
1 tablespoon butter, softened
14 cup strong espresso coffee, warm
- Combine powdered sugar, butter and half the espresso in a bowl, stir well and gradually add remaining espresso until a spreadable consistency is achieved.
Coffee, Cinnamon and Walnut Muffins
Makes 12
2½ cups (375 g) plain flour
2 teaspoons baking powder
1 teaspoon ground cinnamon
^3/4 cup finely granulated sugar
1 cup sour cream
2 × 60 g eggs
1 teaspoon finely grated lemon rind
^1/3 cup olive oil
^3/_4 cup strong espresso coffee, cooled
1 cup roughly chopped walnuts
- Sift flour, baking powder and cinnamon into a large bowl and stir in sugar.
Ensure
- Place sour cream, eggs, lemon rind, oil and espresso coffee into a medium bowl, stir until well combined.
- Fold creamed mixture and walnuts into the sifted ingredients, do not over mix.
- Spoon the mixture evenly into 12 lightly mixgreased and base lined muffin pans until two-thirds full.
- Place into a preheated oven 350^ F for 12-15 minutes or until cooked when tested.
- Serve warm or cooled and spread with Rich Espresso Icing. Delicious with a Cappuccino or Café Latté.
natural_image
Close-up of three brown, crumpled coffee beans with visible interior (no text or symbols)GASTROBACK GmbH

- Zubehör:
- Espresso Druck-Manometer
- Siebeinsätze
- Energiesparfunktion
- AUFBEWAHRUNG
- Großer Schwarzer
- Flacher Weißer
- Klassischer
- Kaffee Latté Macchiato
- Mocca Frappé
- Con Pannia
- Rezepte - Desserts
- Operating Instructions
- DESIGN ESPRESSO ADVANCED PLUS
- Table of Contents
- Dear Customer!
- KNOWING YOUR »DESIGN ESPRESSO ADVANCED PLUS«
- Accessories:
- Filters
- NOT SHOWN:
- IMPORTANT SAFEGUARDS
- Important Safeguards for all Electrical Appliances
- High Temperatures – Risk of Burns
- TECHNICAL SPECIFICATIONS
- FEATURES OF YOUR »DESIGN ESPRESSO ADVANCED PLUS«
- Integrated / Removable Tamper
- Programmable Function
- Espresso pressure Gauge
- Commercial Style Steam Wand
- Filter Size
- Dual Wall Filters
- Single Wall Filters
- Energy Saving Features
- Additional Features
- PID Temperature Control
- Auto Purge
- Thermocoil Heating System
- Instant Hot Water Outlet
- Low Pressure Pre-infusion
- Dry Puck Feature
- BEFORE FIRST USE
- Machine Preparation
- Conditioning the Water Filter
- FIRST USE
- Initial Start Up
- Flushing the Machine
- USING YOUR DESIGN ESPRESSO ADVANCED PLUS
- Filling the Water Tank
- Tamping the Ground Coffee
- PRE-PROGRAMMED SHOT VOLUME - 1 CUP
- PRE-PROGRAMMED SHOT VOLUME - 2 CUPS
- PROGRAMMING SINGLE ESPRESSO
- PROGRAMMING DOUBLE ESPRESSO
- RESETTING DEFAULT VOLUMES
- MANUAL SHOT VOLUME
- MANUAL ESPRESSO
- ADVANCED TEMPERATURE SETTING
- THE ART OF TEXTURING MILK
- STEP 1 - STRETCHING THE MILK
- STEP 2 - SWIRLING THE MILK
- HOT WATER
- ESPRESSO MAKING TIPS
- WARMING YOUR CUP OR GLASS
- WARMING THE PORTAFILTER
- USING PRE-GROUND ESPRESSO
- THE RIGHT MEASUREMENT
- TAMPING CORRECTLY
- PURGE THE GROUP HEAD
- BREWING YOUR ESPRESSO
- CARE & CLEANING
- INSTALLING / REPLACING THE FILTER IN THE WATER TANK
- PORTAFILTER CLEANING
- CLEANING CYCLE
- CLEANING CYCLE PROCESS GUIDE
- DECALCIFYING
- DECALCIFYING THE MACHINE
- CLEANING THE STEAM WAND
- CLEANING / UNBLOCKING THE FILTERS, PORTAFILTER AND GROUP HEAD
- CLEANING THE OUTER HOUSING / CUP WARMING PLATE
- CLEANING THE DRIP TRAY
- CLEANING THE STORAGE TRAY
- STORAGE
- TROUBLE SHOOTING GUIDE
- NOTES FOR DISPOSAL
- INFORMATION AND SERVICE
- WARRANTY
- Coffee-Recepies
- Espresso
- Americano
- Flat White
- Classic Café Latté
- Cappuccino
- Macchiato
- Café Mocha
- Espresso Affogato
- Con Panna
- Baked Custards with Fresh Raspberry and Coffee Float
- Tiramisu
- Makes 4
- Rich Espresso Icing
- Coffee, Cinnamon and Walnut Muffins
- Makes 12
- Ensure
- GASTROBACK GmbH
Brand : Gastroback
Model : Design Advanced Plus 42611
Category : Coffee maker