
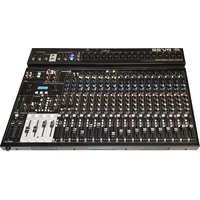
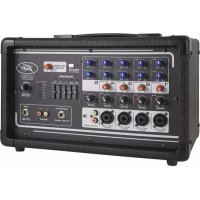
PVi 12 - Mixer PEAVEY - Free user manual and instructions
Find the device manual for free PVi 12 PEAVEY in PDF.


| Product Type | Powered Mixer |
| Number of Channels | 12 |
| Power Output | 500W (250W per channel) |
| Dimensions (H x W x D) | 5.5 x 17.5 x 14.5 inches |
| Weight | 22 lbs |
| Power Supply | AC 100-240V, 50/60Hz |
| Frequency Response | 20 Hz - 20 kHz |
| Equalization | 3-band EQ per channel (High, Mid, Low) |
| Built-in Effects | 16 digital effects (reverb, delay, chorus, etc.) |
| Phantom Power | +48V, globally switchable |
| Inputs | 12 XLR/TRS combo jacks, stereo returns |
| Outputs | Main L/R, monitor send, headphone |
| Construction | Steel chassis with molded corners |
| Cooling | Internal fan, variable speed |
| Protection | Short circuit, over-temperature, DC protection |
| Maintenance | Periodic dust removal; avoid moisture |
| Repairability | Serviceable by qualified technicians; spare parts available |
| Included Accessories | Power cord, user manual, warranty card |
Frequently Asked Questions - PVi 12 PEAVEY
User questions about PVi 12 PEAVEY
0 question about this device. Answer the ones you know or ask your own.
Ask a new question about this device
Download the instructions for your Mixer in PDF format for free! Find your manual PVi 12 - PEAVEY and take your electronic device back in hand. On this page are published all the documents necessary for the use of your device. PVi 12 by PEAVEY.
USER MANUAL PVi 12 PEAVEY
PVi®8/PVi®12
Compact Mixer
Operating
Manual


ENGLISH
PVi 8 /PVi 12
Compact Mixers
Congratulations on purchasing the Peavey PVi8 or PVi12 compact mixer. The PVi series mixer is a studio-quality mixing console designed to meet diverse needs while occupying a small space. This is the perfect console for small venue performances or home recording environments.
Please read this guide carefully to ensure your personal safety as well as the safety of your equipment.
FEATURES (both models):
• 2 XLR inputs with low noise mix preamps (PVi8)
6 XLR inputs with low noise mix preamps (PVi12)
• 2 channels with stereo 1/4" line inputs
• 3-band EQ on all channels
- LED signal presence and clip indicators, channels 1-2 (PVi8) and channels 1-6 (PVi12)
• Pan/balance control per channel
• Control Room outputs (L/R) 1/4" connectors
- Stereo Aux Returns (L/R) 1/4" connectors
• Global +48 Volt phantom power
• Master LED meter bridge
- EFX send bus, with master level control
- Stereo output, 1/4" connectors (L/R)
• Stereo headphone jack, 1/4" (L/R)
• Rugged console design
• Weight: PVi8 : 3.0 lbs. (1.36 kg)
PVi12: 3.6 lbs. (1.63 kg)
• Size: PVi8: 2.5" H x 7.375" W x 10.25" D
(6.35 cm x 18.733 cm x 26.035 cm)
PVi12: 2.5" H x 11.625" W x 10.25" D
(6.35 cm x 29.528 cm x 26.035 cm)

(1) High EQ
This active tone control (shelving type: +/-15dB @ 12kHz) varies the level of the high frequency range.
(2) Mid EQ
This active tone control (peak/dip: +/-15dB @ 400Hz) varies the level of the mid frequency range.
(3) Low EQ
This active tone control (shelving type: +/-15dB @ 80Hz) varies the level of the low frequency range. CAUTION: Excessive low frequency boost causes greater power consumption and increases the possibility of speaker damage.
(4) FX Send
This adjusts the level of the channel signal added to the effects mix. The effects send signal is taken after the channel level controls (7) so that adjustments made to the level control will also affect the send level.
(5) Signal Presence/Clip LED
This LED helps in setting the gain control. Gain (19) should be adjusted so that the green LED flashes in time with the source, and turns red only on the loudest peaks. If adding EQ results in clipping (red LED), compensate here by reducing the gain control (19). The red clipping LED lights when roughly 5dB of headroom remains.
(6) Pan/Balance
This knob controls the placement of the signal in the stereo field. When rotated completely counter-clockwise, the signal is present only in the left channel; when rotated completely clockwise, it is only in the right channel.
(7) Level
This is the channel output level control. The optimum setting is the 12 o'clock (unity gain) position.
(8) Aux Return Level Control
Controls the level of the Stereo Aux Return jacks (20). If only the left jack is connected, the signal is sent to both the L and R. If both jacks are connected, they function as a stereo pair.
(9) FX Master Send
This is the master output level control for the FX mix. The output level sent to the FX Send jack is controlled by the Channel Level Control (7), the channel FX Send control (4), and by this master control. The 12 o'clock position is the recommended setting for this control.
(10) Tape/CD to Control Room
Pressing this switch adds the tape/cd input signal to the control room (23) and headphone outputs (22).
(11) Headphone/Control Room Level
This knob sets the headphone and control room output levels. To avoid damage to your hearing, make sure to turn the dial fully counter-clockwise before using headphones. Slowly turn the knob clockwise until a comfortable listening level is set. Normally, the signal in the headphones is the Left/Right signal. If the Tape/CD to Control Room (10) switch is engaged, the tape/CD signal is also included.
(12) +48V Phantom Power Switch/LED
This switch applies +48 VDC to the XLR input connectors to power microphones that require phantom power. If phantom power is used, do not connect unbalanced dynamic microphones or other device to the XLR inputs that cannot handle this voltage.
The yellow LED labeled +48V will light when the switch is engaged.
(13) Power LED
This LED indicates AC power is being supplied to the unit, the power switch is on and the unit is functioning properly.
(14) LED Meters
Two 4-segment LED arrays are provided to monitor the levels of the Left/Right outputs. These meters range from -20 dB to +19dB. 0 dB on the meter corresponds to +4 dBu at the outputs.
(15) Tape/CD to Master
Pressing this switch routes the signal from the Tape/CD inputs (24) to the Main Outputs (26).
(16) Master Mix Level
The Master Mix Level controls the signal level being sent to the main Left/Right outputs. Best results are obtained when this control is set near 12 o'clock.
Front Panel: Upper

Front Panel: Upper
(17) Mic (XLR) Inputs
XLR balanced inputs optimized for a microphone or other low impedance source. Pin 2 is the positive input. Because of the wide range of gain adjustment, signal levels up to +14 dBu can be accommodated.
(18) Line (1/4") Inputs
1/4" balanced (TRS) 10k Ohm impedance input. The tip is the positive input and should be used for unbalanced inputs. It has 20dB less gain than the XLR input and does not have phantom power available. The Mic and Line inputs should not be used simultaneously. Stereo inputs are available for channels 3-4 and 5-6.
(19) Gain (Channels 1 & 2)
This control establishes the nominal operating level for the channel. The input gain can be adjusted over a wide range to compensate for soft voices or very loud drums. To maximize the signal-to-noise ratio, the gain should be set to the proper level with the channel level control (7) set to 12 o'clock. If the Clip LED (5) comes on, try reducing the level.
(20) Stereo Aux Return Jacks
The Aux Return inputs (Left/Mono, Right) feature two 1/4" TRS jacks. These inputs can be used with Tip, Ring, Sleeve (TRS) balanced or Tip, Sleeve (TS) unbalanced connectors. The Aux Return level is controlled by the Aux Return Level Control (8).
(21) FX Send Jack
The FX Send features a 1/4" TRS Z-balanced jack. This output can be used with a Tip, Ring, Sleeve (TRS) balanced or a Tip, Sleeve (TS) unbalanced connector. the FX send mix is determined by the amount of signal being sent to the FX bus in each channel (4) and the FX Master Level (9) control.
(22) Headphone Jack
The Headphone Output jack is a 1/4" TRS (Tip=Left; Ring=Right; Sleeve=Ground) jack. the signal sent to this output is normally the Left/Right mix. When the Tape/CD to Master button is selected, the Tape/CD input signal is also included.
(23) Control Room Output
The Control Room Outputs feature two 1/4" TRS Z-balanced jacks. These outputs can be used with a Tip, Ring, Sleeve (TRS) balanced or Tip, Sleeve (TS) unbalanced connectors. The Control Room Outputs Level is adjusted with the Headphone Level Control (11).
(24) Tape/CD Inputs 7/8 PVi8, 11/12 PVi12
The Tape/CD input jacks are designed to accommodate tape, CD/MP3 player or computer sound card output levels. The Tape/CD inputs can be used as an additional stereo input by engaging the Tape/CD to Mix switch (15). The Tape/CD input can also be used to monitor the recorder/sound card output without the risk of feedback.
(25) Record Outputs
The Record output jacks can provide a +4dBu output signal to a stereo recording device. The output level is controlled by the combination of channel level controls (7).
(26) Main Stereo Outputs
The Left/Right Outputs feature two 1/4" TRS Z-balanced jacks. These outputs can be used with a Tip, Ring, Sleeve (TRS) balanced or Tip, Sleeve (TS) unbalanced connectors. The outputs level is controlled by the Master Mix Level (16) control.
(27) Power Adapter Input
Use to connect the included power supply. Be sure the power supply is connected to the unit before connecting to a power source.
PVi8 and PVi12 use 18VAC, 300mA adapter only.
(28) Power Switch
Depressing the power switch supplies power to the unit.
Product Specifications
Equivalent Input Noise: -127 dBu (Max gain, input terminated with 150 ohms, bandwidth 20 kHz)
Frequency Response: 20 Hz to 20 kHz +0dB, -3dB Mic input to Main output
Distortion: <0.005% THD
Meters: 4 segment, peak reading (top green LED = +4dBu) Red LED lights 3dB below clipping
EQ: High Shelving +/- 15dB @ 12 kHz Mid Peaking +/- 15dB @ 450 Hz Low Shelving +/- 15dB @ 80 Hz
Global Phantom Power: +48VDC Available on all XLR Inputs
Dimensions: PVi8: 2.5" H x 7.375" W x 10.25" D (6.35 cm x 18.733 cm x 26.035 cm)
PVil2: 2.5" H x 11.625" W x 10.25" D (6.35 cm x 29.528 cm x 26.035 cm)
Weight: PVi8: 3.0 lb. (1.36 kg)
PVil2: 3.6 lbs. (1.63 kg)
Power Supply: 18 VAC, 300mA

www.peavey.com
Warranty registration and information for U.S. customers available online at
www.peavey.com/warranty or use the QR tag below

Features and specifications subject to change without notice.
Peavey Electronics Corporation
5022 Hartley Peavey Drive
Meridian, MS 39305
(601) 483-5365
FAX (601) 486-1278

Logo referenced in Directive 2002/96/EC Annex IV (OJ(L)37/38,13.02.03 and defined in EN 50419: 2005
The bar is the symbol for marking of new waste and is applied only to equipment manufactured after
13 August 2005


- PVI®8/PVI®12
- COMPACT MIXER
- OPERATING
- MANUAL
- ENGLISH
- PVI 8 /PVI 12
- FEATURES (BOTH MODELS)
- HIGH EQ
- MID EQ
- LOW EQ
- FX SEND
- SIGNAL PRESENCE/CLIP LED
- PAN/BALANCE
- LEVEL
- AUX RETURN LEVEL CONTROL
- FX MASTER SEND
- TAPE/CD TO CONTROL ROOM
- HEADPHONE/CONTROL ROOM LEVEL
- 48V PHANTOM POWER SWITCH/LED
- POWER LED
- LED METERS
- TAPE/CD TO MASTER
- MASTER MIX LEVEL
- FRONT PANEL: UPPER
- MIC (XLR) INPUTS
- LINE (1/4") INPUTS
- GAIN (CHANNELS 1 & 2)
- STEREO AUX RETURN JACKS
- FX SEND JACK
- HEADPHONE JACK
- CONTROL ROOM OUTPUT
- TAPE/CD INPUTS 7/8 PVI8, 11/12 PVI12
- RECORD OUTPUTS
- MAIN STEREO OUTPUTS
- POWER ADAPTER INPUT
- POWER SWITCH
- PRODUCT SPECIFICATIONS
Brand : PEAVEY
Model : PVi 12
Category : Mixer