
LM27-P301A - Screen Dahua Technology - Free user manual and instructions
Find the device manual for free LM27-P301A Dahua Technology in PDF.


| Product Type | 27-inch Monitor |
| Screen Size | 27" |
| Resolution | 2560 x 1440 (QHD) |
| Aspect Ratio | 16:9 |
| Refresh Rate | 75 Hz |
| Color Depth | 16.7M colors |
| Contrast Ratio | 1000:1 (TYP) |
| Viewing Angle | 178°(H)/178°(V) |
| Dimensions (with base) | 613.3 x 543.4 x 194.3 mm |
| Dimensions (without base) | 613.3 x 367.3 x 64.9 mm |
| Stand Adjustments | Height: 125 mm, Swivel: ±45°, Pivot: ±90°, Tilt: 5° forward / 20° backward |
| Power Input | AC 100-240V (via adapter or AC IN) |
| Speakers | None |
| Ports | DP, HDMI, Audio Out, Type-C, AC IN, DC |
| Operating Temperature | 0°C to 40°C |
| Operating Humidity | 10%-90% RH (non-condensing) |
| Storage Temperature | -20°C to +60°C |
| Storage Humidity | 5%-95% RH (non-condensing) |
| Special Features | Game modes (RTS, FPS, MOBA), Adaptive-Sync, Shadow Balance, PIP/PBP, Low Blue Light, OSD customization |
| Included Accessories | Display, Stand, Signal cable, Power cord, Mount stud, User's manual, Legal info |
| Safety Certifications | IEC 62368-1 (ES1, PS2) |
Frequently Asked Questions - LM27-P301A Dahua Technology
User questions about LM27-P301A Dahua Technology
0 question about this device. Answer the ones you know or ask your own.
Ask a new question about this device
Download the instructions for your Screen in PDF format for free! Find your manual LM27-P301A - Dahua Technology and take your electronic device back in hand. On this page are published all the documents necessary for the use of your device. LM27-P301A by Dahua Technology.
USER MANUAL LM27-P301A Dahua Technology
P300 Series Displays
User's Manual

natural_image
Abstract geometric composition with gray and red shapes (no text or symbols)Foreword
General
This manual introduces the installation, functions and operations of the P300 Series Display
Devices (hereinafter referred to as "the Device"). Read carefully before using the device, and keep the manual safe for future reference.
Models
This manual applies to Dahua P300 series monitoring models. These include: DHI-LM24-P300, DHI-LM24-P300A, DHI-LM27-P300, DHI-LM27-P300A, DHI-LM32-P300, DHI-LM32-P300A.
Safety Instructions
The following signal words might appear in the manual.
| Signal Words Meaning | |
 DANGER DANGER | Indicates a high potential hazard which, if not avoided, will result in death or serious injury. |
 WARNING WARNING | Indicates a medium or low potential hazard which, if not avoided, could result in slight or moderate injury. |
 CAUTION CAUTION | Indicates a potential risk which, if not avoided, could result in property damage, data loss, reductions in performance, or unpredictable results. |
 IPS IPS | Provides methods to help you solve a problem or save time. |
 OTE OTE | Provides additional information as a supplement to the text. |
Revision History
| Version | Revision Content | Release Time |
| V1.0.0 | First release. | September 2022 |
Privacy Protection Notice
As the device user or data controller, you might collect the personal data of others such as their face, fingerprints, and license plate number. You need to be in compliance with your local privacy protection laws and regulations to protect the legitimate rights and interests of other people by implementing measures which include but are not limited: Providing clear and visible identification to inform people of the existence of the surveillance area and provide required contact information.
About the Manual
- The manual is for reference only. Slight differences might be found between the manual and the product.
- We are not liable for losses incurred due to operating the product in ways that are not in compliance with the manual.
- The manual will be updated according to the latest laws and regulations of related jurisdictions. For detailed information, see the paper user's manual, use our CD-ROM, scan the QR code or visit our official website. The manual is for reference only. Slight differences might be found between the electronic version and the paper version.
- All designs and software are subject to change without prior written notice. Product updates might result in some differences appearing between the actual product and the manual. Please contact customer service for the latest program and supplementary documentation.
- There might be errors in the print or deviations in the description of the functions, operations and technical data. If there is any doubt or dispute, we reserve the right of final explanation.
- Upgrade the reader software or try other mainstream reader software if the manual (in PDF format) cannot be opened.
- All trademarks, registered trademarks and company names in the manual are properties of their respective owners.
- Please visit our website, contact the supplier or customer service if any problems occur while using the device.
- If there is any uncertainty or controversy, we reserve the right of final explanation.
Important Safeguards and Warnings
This section introduces content covering the proper handling of the device, hazard prevention, and prevention of property damage. Read carefully before using the device, and comply with the guidelines when using it.
Operation Requirements

WARNING
- Do not tread on or squeeze the power line, especially the plug or connection point of the power line to the product
- Please firmly grasp the plug of the connecting line when inserting and removing. Pulling the connecting line might cause damage to it.
- Turn off the power when cleaning the product.
- Do not touch any fixed components inside the product. Failure to do so can result in damage to the product or person.

● Make sure that the power supply of the device works properly before use.
- Do not pull out the power cable of the device while it is powered on.
- Only use the device within the rated power range.
● Transport, use and store the device under allowed humidity and temperature conditions.
- Prevent liquids from splashing or dripping on the device. Make sure that there are no objects filled with liquid on top of the device to avoid liquids flowing into it.
- Do not disassemble the device.
- Notice and observe all the warnings and illustrations.
- Make sure the power is turned off and the connecting lines are removed when moving the product.
- Do not use uncertified connecting lines, which might cause equipment failure.
- Avoid collisions with the product. This may cause equipment failure.
- Please turn off power for safety if not using the product for a long time.
Installation Requirements

WARNING
- Connect the device to the adapter before power on.
- Strictly abide by local electrical safety standards, and make sure that the voltage in the area is steady and conforms to the power requirements of the device.
- Do not connect the device to more than one power supply. Otherwise, the device might become damaged.
-
Do not hang or lean on the product. Doing so can cause the product to fall or become damaged. It may also cause injury to people. Pay special attention when children are nearby.
-
If the product is installed on the wall, please make sure the wall's load bearing capacity is sufficient. To avoid falling and injuring people, install according to the included instructions with mounting hardware.
- Do not put the product in flammable or corrosive gaseous environment, which may cause fire or damage the product. Placing the product in proximity to flammable gas can easily result in a dangerous explosion.

- Observe all safety procedures and wear required protective equipment provided for your use while working at heights.
- Do not expose the device to direct sunlight or heat sources.
- Do not install the device in humid, dusty or smoky places.
- Install the device in a well-ventilated place, and do not block the ventilator of the device.
- Use the power adapter or case power supply provided by the device manufacturer.
- The power supply must conform to the requirements of ES1 in IEC 62368-1 standard and be no higher than PS2. Note that the power supply requirements are subject to the device label.
- Connect class I electrical appliances to a power socket with protective earthing.
- Do not block the ventilation opening. Install the product according to this handbook.
- Do not place any items on the product. The product may be damaged if foreign objects enter the internal unit.
- Failure to properly secure all screws during installation can result in a fall of the product. Ensure all mounting hardware and other installation accessories are properly secured during installation.
- Mounted height: < 2m.
- Protective earthing terminal. The apparatus should be connected to a mains socket outlet with a protective earthing connection.
- \~ Alternating Current.
Maintenance Requirements

WARNING
- Cut off power and the connecting line immediately and contact the after-sales service center if the product or the connecting line is damaged for some reason. Continued use without maintenance might cause smoking or off-odor.
- Please turn off power or unplug the power cable immediately if there is smoking, off-odor, or abnormal noise. Contact the after-sales service center for maintenance after confirming there is no more smoke or odor. Further use could result in fire.

- Do not adjust, maintain or modify if you do not have appropriate qualifications.
-
Do not open or remove the rear cover, box or cover board of the product. Please contact the dealer or after-sales service center when in need of adjustment or maintenance.
-
Only qualified service people can maintain. If the product gets any kind of damage, such as damage to the plug, foreign matter or liquid into the unit, exposure to rain or humidity, loss of function, or dropped, please contact dealer or after-sales service center.
- Be careful during maintenance of product even if the power is off. Some components are equipped with UPS, and can continue to supply power which is dangerous to people.
Table of Contents
Foreword.... I
Important Safeguards and Warnings.... III
1 Packing List.... 1
2 Monitor Adjustment....4
3 Button Description 6
4 Cable Connection 8
5 Menu Description 9
6 Brightness and Contrast Adjustment.... 12
7 Operation Menu (OSD) Function Descriptions 13
8 Product Specifications 15
Appendix 1 Troubleshooting.... 17
1 Packing List

The packing list varies depending on the model you purchase. The packing lists in this section are for reference only. The components that come with the Device might be slightly different from those in the figures.
Figure 1-1 Packing list (DHI-LM24-P300/DHI-LM27-P300)
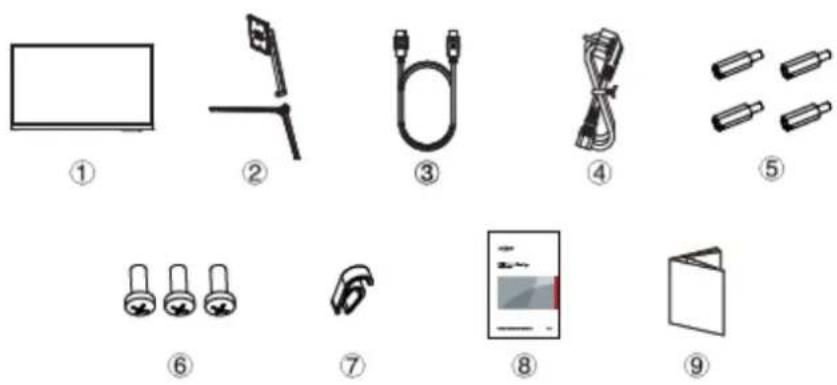
Table 1-1 Packing list description (1)
| No. Name | |
| 1 Display screen | |
| 2 Base/Stand | |
| 3 Signal cable | |
| 4 Power cord | |
| 5 Mount stud | |
| 6 Screws | |
| 7 Harness seat | |
| 8 User's manual | |
| 9 Legal and regulatory information |
Figure 1-2 Packing list (DHI-LM24-P300A/DHI-LM27-P300A)
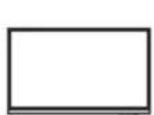
①
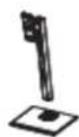
②
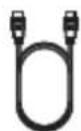
③
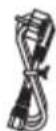
④
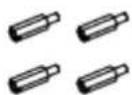
⑤
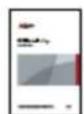
⑥

⑦
Table 1-2 Packing list description (2)
| No. Name | |
| 1 Display screen | |
| 2 Base/Stand | |
| 3 Signal cable | |
| 4 Power cord | |
| 5 Mount stud | |
| 6 User's manual | |
| 7 Legal and regulatory information |
Figure 1-3 Packing list (DHI-LM32-P300)
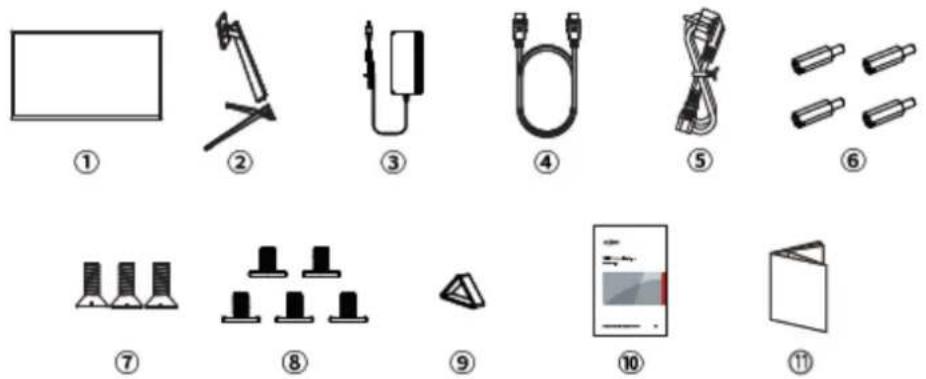
Table 1-3 Packing list description (3)
| No. Name | |
| 1 Display screen | |
| 2 Base/Stand | |
| 3 Power adapter | |
| 4 Signal cable | |
| 5 Power cord | |
| 6 Mount stud | |
| 7 KM 4 × 12 screw bolts | |
| 8 CM 4 × 23 screw bolts | |
| 9 Base decorative cover | |
| 10 User's manual | |
| 11 | Legal and regulatory information |
Figure 1-4 Packing list (DHI-LM32-P300A)
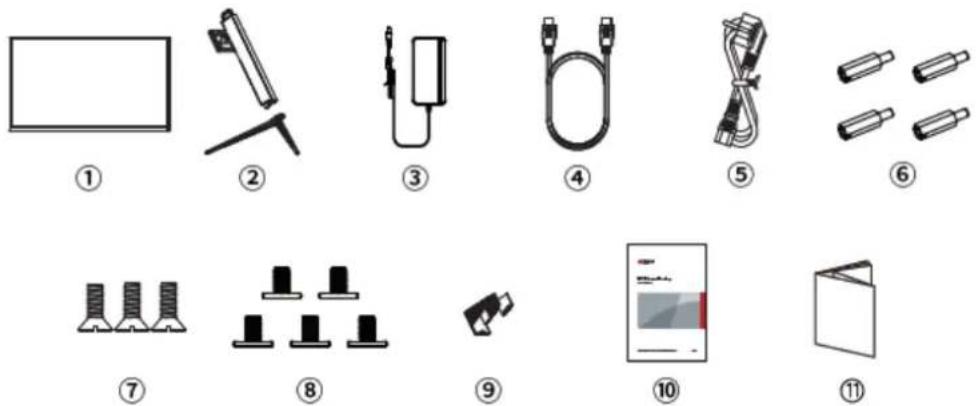
Table 1-4 Packing list description (4)
| No. Name | |
| 1 Display screen | |
| 2 Base/Stand | |
| 3 Power adapter | |
| 4 Signal cable | |
| 5 Power cord | |
| 6 Mount stud | |
| 7 KM 4 × 12 screw bolts | |
| 8 CM 4 × 23 screw bolts | |
| 9 Base decorative cover | |
| 10 User's manual | |
| 11 | Legal and regulatory information |
2 Monitor Adjustment
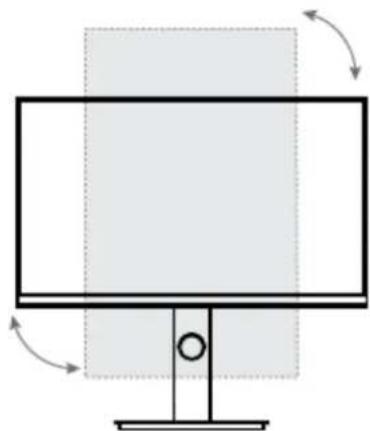
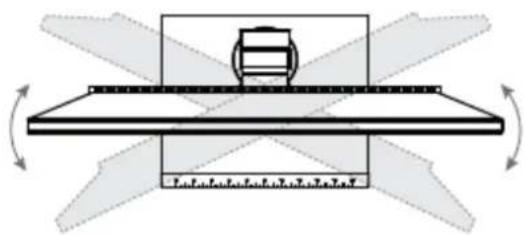
The adjustment functions of the display screen include tilt angle adjustment, screen vertical rotation angle adjustment, left and right rotation angle adjustment and height adjustment, as shown in the following figures.
Different types of displays have different adjustment functions. Some displays have one or more of the adjustment functions, and some displays are not adjustable. The specific adjustment function is subject to the function of the actual model display. The four adjustment functions shown in the following figures are only used to illustrate the adjustment function.
Figure 2-1 Portrait rotation angle adjustment
natural_image
Diagram of a computer monitor with directional arrows indicating rotation or movement (no text or symbols)Figure 2-2 Adjust the angle of rotation left and right
natural_image
Pure mechanical diagram showing a rotating component mounted on a flat base with directional arrows, no text or symbols present.Figure 2-3 Tilt angle adjustment
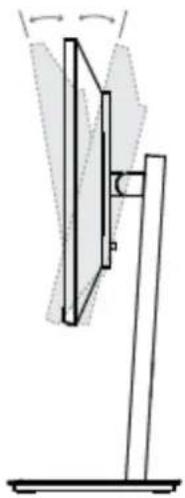
natural_image
Simple line drawing of a mechanical lever or support structure with no text or symbolsFigure 2-4 Height adjustment
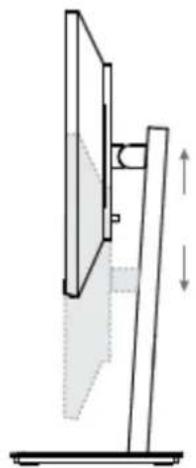
natural_image
Technical line drawing of a mechanical support structure with no visible text or symbols
- When adjusting the angle of the monitor, be sure not to touch or press the area of the screen.
- The above figures are for reference only, and everything is subject to the actual adjustment function.
3 Button Description
Figure 3-1 Indicator and buttons (DHI-LM24-P300/DHI-LM24-P300A/DHI-LM27-P300/DHI-LM27-P300A)

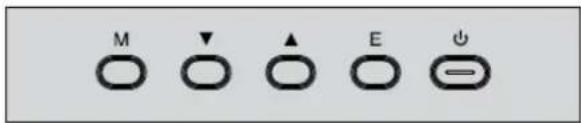
Table 3-1 Button description
| No. Name Description | ||
| 1 LED | indicator light/Power button | A solid white light indicates that the power supply is normal.The light is red when the screen enters energy saving mode.The light is off when the screen is turned off.Press the button to turn on the monitor. |
| 2 | OSD buttons | Operate the OSD menu. |
Table 3-2 OSD buttons
| OSD Button Function | |
| M | Menu button: Press to display OSD menu and enter sub-menus. |
| ▼ | Down button: Move down in the menu/Adjust the brightness. |
| ▲ | Up button: Move up/Adjust the contrast. |
| E | Exit key: Returns to the previous menu/Switch port input signal. |
| ⏻ | Power button: Press to turn monitor on/off. |

The above content is for reference only, and everything is subject to actual conditions.
Figure 3-2 Indicator and buttons (DHI-LM32-P300/DHI-LM32-P300A)
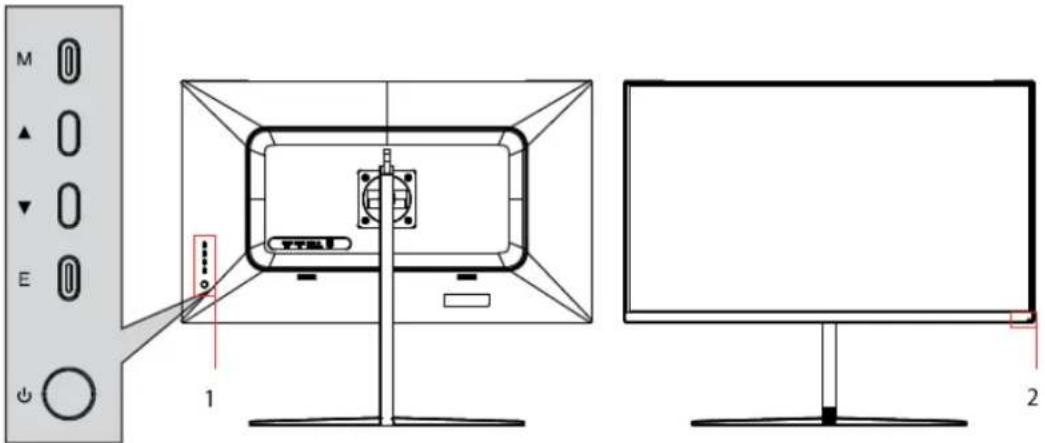
Table 3-3 Button description
| No. Name Description | ||
| 1 | OSD buttons | Operate the OSD menu. |
| 2 | LED indicator light | The blue light indicates that the power supply is normal and the monitor is running normally.Flashing blue light indicates no video source, no horizontal or vertical signals, or too low a voltage.The light is off when the screen is turned off. |
Table 3-4 OSD buttons
| OSD Button Function | |
| M | Menu button: Press to display OSD menu and enter sub-menus. |
| ▼ | Down button: Move down in the menu/Adjust the brightness. |
| ▲ | Up button: Move up/Adjust the contrast. |
| E | Exit key: Returns to the previous menu/Switch port input signal. |
| ⏻ | Power button: Press to turn monitor on/off. |

The above content is for reference only, and everything is subject to actual conditions.
4 Cable Connection
Figure 4-1 Input and output ports
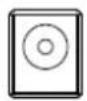
DC
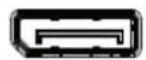
DP
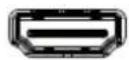
HDMI

AUDIO OUT

TYPE-C
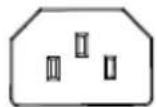
AC IN
Table 4-1 Port description
| Port Function | |
| DC | Used to connect power adopters. |
| DP | Use the DP cable to connect to a desktop PC. |
| HDMI | Use the HDMI cable to connect the HDMI IN interface of the product to the HDMI OUT interface of a PC. |
| AUDIO OUT | Use to connect with external sound output devices such as headphones or earphones. |
| TYPE-C | Type-C line can be used to connect to data ports of machines. and external terminals. |
| AC IN | Insert the power cable to supply power to the monitor. |

The above ports are for reference only, the actual ports of different types of monitors may be slightly different from the ports in the figure, and everything is subject to the ports and functions of the actual product.
5 Menu Description
- The color and shape of the OSD menu of the actual computer may be slightly different from them shown in the figure, and everything that has been actually displayed shall prevail.
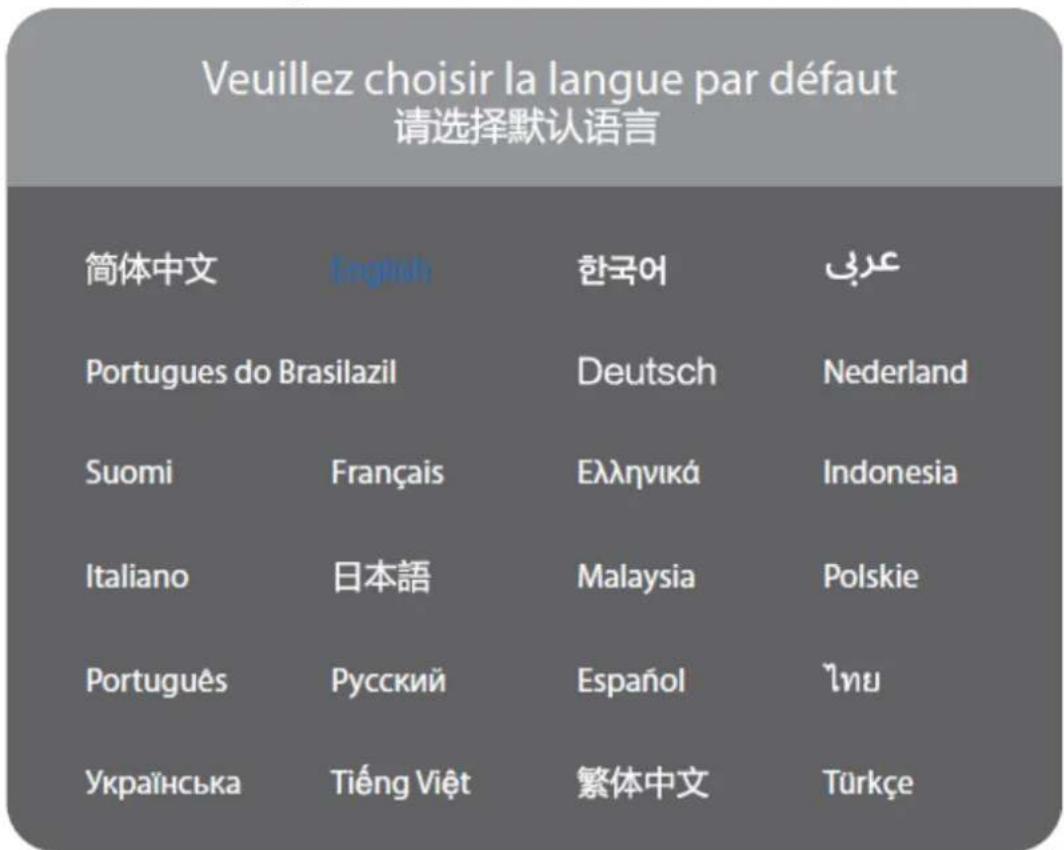
- Specifications of the OSD menu may change with improvements of functions without prior notice. When booting for the first time, you need to set the default language of the monitor menu. Press buttons (▼ or ▲) to select the language to be set, and press the OK button (M) to confirm.
Figure 5-1 Language setting window
The on-screen display (OSD) menu can be used to adjust the settings of the monitor and is displayed
on the screen after turning on the monitor and pressing the button.
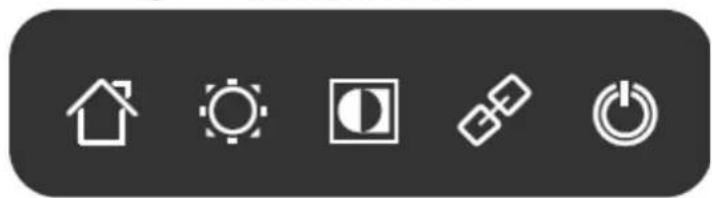
Step 1 Press any one of the buttons (M, ▼, ▲, E, ⏻) to activate the navigation window.
Figure 5-2 Navigation window
natural_image
Five white icons on a dark gray background: house, sun, eye, chain link, and power button (no text or symbols)Table 5-1 Icon function
| Icon Function | |
| Confirm and enter the main menu. | |
| Adjust the brightness | |
| Adjust the contrast. | |
| Switch port input signal. | |
| Power switch. |
Step 2 Press M to enter the OSD screen.
Figure 5-3 OSD screen
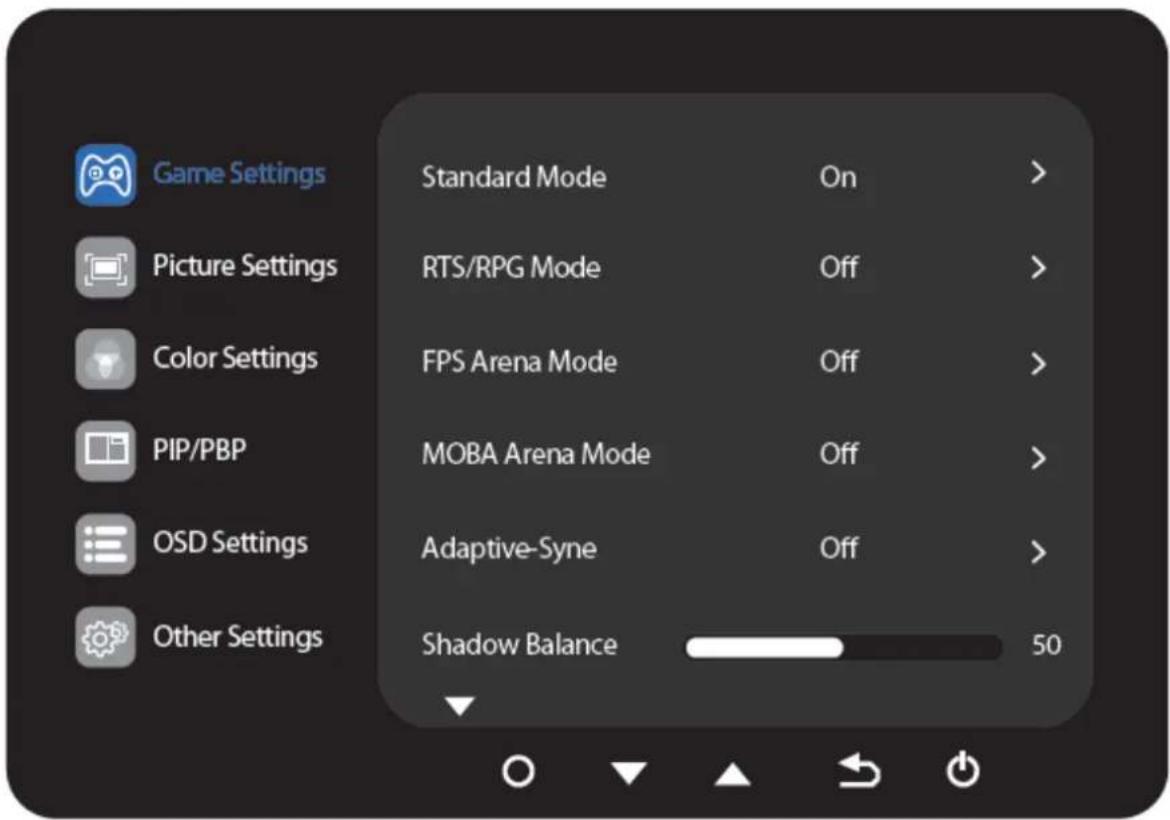
Step 3 Press ▼ or ▲ to browse through the functions.
- Select the desired function, then press M to enter the submenu.
- Press ▼ or ▲ to browse the sub-menus, and then press M to confirm the selection of the desired function.
- Press ▼ or ▲ to select an option, then press M to confirm the setting and exit the current menu.
Step 4 Press E to exit the menu interface.
6 Brightness and Contrast Adjustment
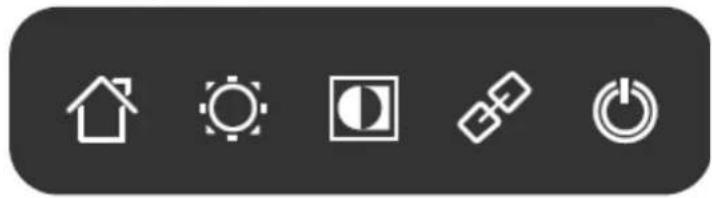
Step 1 Press any one of the buttons (M, ▼, ▲, E, ⏻) to activate the navigation window.
Figure 6-1 Navigation window
natural_image
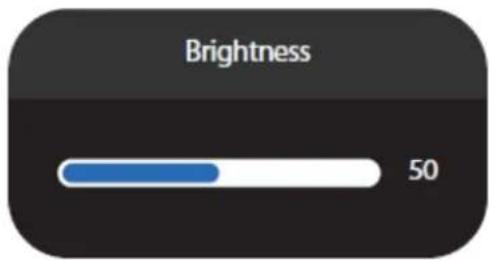
Five simple icons on a dark background: house, sun, eye, chain link, and power button (no text or symbols)Step 2 Press ▼ or select ⚙ to quickly open the Adjust Brightness window and then press the ▼ or ▲ button to adjust the brightness that suits you best.
Figure 6-2 Brightness adjustment window
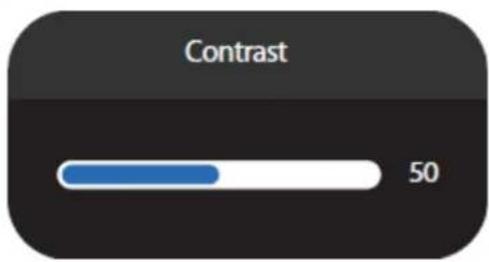
Step 3 Press or select to. quickly open the contrast adjustment window, and then press the ▼ or ▲ button to adjust the contrast that suits you best.
Figure 6-3 Contrast adjustment window
7 Operation Menu (OSD) Function Descriptions
Functions of the monitor vary with models, and the functions in this manual are for reference only.
Table 7-1 Menu description
| Menu | Sub Menu | Value Range |
| Game Settings | Standard Mode | Off/On |
| RTS/RPG Mode | Off/On | |
| FPS Arena Mode | Off/On | |
| MOBA Arena Mode | Off/On | |
| Adaptive-Sync | Off/On | |
| Shadow Balance | 0-100 | |
| Response Time | Off/Normal/Fast/Ultrafast | |
| Refresh Rate | Off/On/Position: Top Right, Top Left, Bottom Right, Bottom Left | |
| Game Crosshair | Off/Crosshair 1/Crosshair 2/Crosshair 3/Crosshair 4/Crosshair 5/Crosshair 6 | |
| Game Time | Off/15 minutes/30 minutes/45 minutes/60 minutes/Position: Top Right, Top Left,Bottom Right, Bottom Left | |
| Dynamic Brightness | Off/Normal/Expert/Elaboration | |
| Physical Super View | Off/On/Position: Top Right, Top Left, Bottom Right, Bottom Left, Center | |
| Picture Settings | Brightness | 0-100 |
| Contrast | 0-100 | |
| DCR | Off/On | |
| Contextual model | Off/Movie Mode/Reading Mode/Night Mode/Care Eyes Mode | |
| Low Blue Light | 0-100 | |
| Sharpness | 0-5 | |
| Gamma | 1.8/2.0/2.2/2.4/2.6/S.curve | |
| Aspect Ratio | Wide Screen/4:3/1:1/Auto | |
| Color Settings | Warm | Off/On |
| Natural | Off/On | |
| Cool | Off/On | |
| User1 | Off/On: R, G, B | |
| User2 | Off/On: R, G, B | |
| User3 | Off/On: R, G, B | |
| Hue | R/G/B/C/M/Y | |
| Saturation | R/G/B/C/M/Y | |
| PIP/PBP | PIP/PBP Mode | Off/PIP Mode/PBP 2Win 1:1/PBP 2Win 2:1/PBP 2Win 1:2 |
| Sub-Signal Source | Type-C/DP/HDMI | |
| Audio Source | Auto/Type-C/DP/HDMI | |
| PIP Position | Top Right/Top Left/Bottom Right/Bottom Left | |
| PIP Size | Small/Medium/Large | |
| Window Swap | — | |
| OSD Settings | Language | 简体中文/ENGLISH /한국어/سرع/Portugues doBrasilazil/Deutsch/Nederland/Suomi/Français/Ελληνικά/Indonesia/Italiano/日本語/Malaysia/Polskie/Português/Rусский/Espanol/ไทย/Українська/Tiéng Việt/繁體中文/Türkçe |
| OSD Time Out | 0-60 | |
| OSD H-Position | 0-100 | |
| OSD V-Position | 0-100 | |
| OSD Transparency | 0-5 | |
| OSD Rotation | Normal/90/180/270 | |
| OSD Lock | Off/On | |
| Hotkey1 setting | Brightness | |
| Hotkey2 setting | Contrast | |
| Hotkey3 setting | Input Signal/Mute/Shadow Balance/GameCrosshair/Refresh Rate/Game Time/Contextual Model/PIP/PBP/Input Signal/DynamicBrightness/Physical Super View | |
| Other Settings | Input Signal | Auto/Type-C/DP/HDMI |
| Volume | 0-100 | |
| Mute | Off/On | |
| Auto power | Off/On | |
| Eyeshield remind | Off/On | |
| Reset | Off/On | |
| Information | Input Source/Resolution/Mode/HDR Ver/SN |

The OSD features in the table above are for reference only and may differ from the actual display, so the OSD features of the actual display shall prevail.
8 Product Specifications
Table 8-1 Product specifications (1)
| Product model | DHI-LM24-P300 | DHI-LM27-P300 | DHI-LM32-P300 | ||
| Screen Size | 24" | 27" | 31.5" | ||
| Aspect Ratio | 16:9 | 16:9 | 16:9 | ||
| Viewing Angle | 178°(H)/178°(V) | 178°(H)/178°(V) | 178°(H)/178°(V) | ||
| Contrast ratio | 1000:1 (TYP) | 1000:1 (TYP) | 1200:1 (TYP) | ||
| Colors | 16.7M | 16.7M | 16.7M | ||
| Resolution | 2560 × 1440 | 2560 × 1440 | 2560 × 1440 | ||
| Maximum refresh rate | 75 Hz | 75 Hz | 75 Hz | ||
| Product Dimensions Lifting base | Without base | 539.6 × 324.5 × 61.0 mm | 613.3 × 367.3 × 64.9 mm | 718.6× 422.1 × 47.4 mm | |
| With base | 539.6 × 419.8 × 199.3 mm | 613.3 × 499.6 × 199.3 mm | 718.6 × 519.2 × 236.1 mm | ||
| Speaker | No | No | No | ||
| Height range | No | No | No | ||
| Rotation angle | No | No | No | ||
| Vertical angle | No | No | No | ||
| Tilting angle | Forward tilting : 5° ± 2°; Backward tilting: 20° ± 2° | ||||
| Environmental conditions | Action | Temperature: 0 °C to 40°C (32°F to 104°F) Humidity: 10%-90% RH (non-condensing) | |||
| Storage | Temperature: -20 °C to +60°C (-4 °F to +140 °F) Humidity: 5%-95% RH (non-condensing) | ||||

The above parameters are for reference only, and the parameters of the actual model shall prevail.
Table 8-2 Product specifications (2)
| Product model | DHI-LM24-P300A | DHI-LM27-P300A | DHI-LM32-P300A | |
| Screen Size | 24" | 27" | 31.5" | |
| Aspect Ratio | 16:9 | 16:9 | 16:9 | |
| Viewing Angle | 178°(H)/178°(V) | 178°(H)/178°(V) | 178°(H)/178°(V) | |
| Contrast ratio | 1000:1 (TYP) | 1000:1 (TYP) | 1200:1 (TYP) | |
| Colors | 16.7M | 16.7M | 16.7M | |
| Resolution | 2560 × 1440 | 2560 × 1440 | 2560 × 1440 | |
| Maximum refresh rate | 75 Hz | 75 Hz | 75 Hz | |
| Product Dimensions Lifting base | Without base | 539.6 × 324.5 × 61.0 mm | 613.3 × 367.3 × 64.9 mm | 718.6× 422.1 × 47.4 mm |
| With base | 539.6 × 513.6 × 149.3 mm | 613.3 × 543.4 × 194.3 mm | 718.6 × 602.0 × 256.1 mm | |
| Speaker | No | No | No | |
| Height range | 125 mm (± 5 mm) | 125 mm (± 5 mm) | 125 mm (± 5 mm) | |
| Rotation angle | -45 °C (±2.0 °C) to +45 °C (±2.0 °C) | -45 °C (±2.0 °C) to +45 °C (±2.0 °C) | -45 °C (±2.0 °C) to +45 °C (±2.0 °C) | |
| Vertical angle | -90 °C (±2.0 °C) to +90 °C (±2.0 °C) | -90 °C (±2.0 °C) to +90 °C (±2.0 °C) | -90 °C (±2.0 °C) to +90 °C (±2.0 °C) | |
| Tilting angle | Forward tilting : 5° ± 2°; Backward tilting: 20° ± 2° | |||
| Environmental conditions | Action | Temperature: 0 °C to 40°C (32°F to 104°F) Humidity: 10%-90% RH (non-condensing) | ||
| Storage | Temperature: -20 °C to +60°C (-4 °F to +140 °F) Humidity: 5%-95% RH (non-condensing) | |||

The above parameters are for reference only, and the parameters of the actual model shall prevail.
Appendix 1 Troubleshooting
Appendix Table 1-1 FAQ
| Faults Occurring | Possible Solutions |
| The power indicator light is not on | Check if the power is on.Check if the power cord is connected. |
| Plug and play failed | Check if the function of plug-and-play of the device is compatible with PC.Check if the display card is compatible with the plug-and-play function. |
| Dimming picture | Adjust brightness and contrast. |
| Flickering picture or picture with ripples | There may be electrical appliances or equipment with electronic disturbance. |
| The power indicator light is on (flickering), but the monitor has no pictures. | Check if the PC power is on.Check if the PC display card is inserted properly.Check if the signal cable of the monitor is correctly connected with the PC.Check the signal cable plug of the monitor and make sure every pin has no bending.Observe the indicator light by pressing the Caps Lock key on the PC keyboard and check if the PC is working. |
| Color shortage (red, green and blue) | Check the signal cable of the monitor and make sure every pin has no bending. |
| The picture is not in the middle, or the size is not right | Hot key(AUTO) |
| Picture with color difference (white looks not white) | Adjust RGB color or reselect color temperature. |
| Screen font blur under VGA signal | Select E to automatically adjust the image. |
| Screen color error under VGA signal | Select Auto color in OSD to correct under the white output screen. |

The above solutions are for reference only. If you have any problems, please contact the after-sales service center or find a professional to help.
ENABLING A SAFER SOCIETY AND SMARTER LIVING
- P300 Series Displays
- User's Manual
- Foreword
- General
- Models
- Safety Instructions
- Revision History
- Privacy Protection Notice
- About the Manual
- Important Safeguards and Warnings
- Operation Requirements
- WARNING
- Installation Requirements
- Maintenance Requirements
- Table of Contents
- Foreword.... I
- Important Safeguards and Warnings.... III
- Packing List
- Monitor Adjustment
- Button Description
- Cable Connection
- Menu Description
- Brightness and Contrast Adjustment
- Operation Menu (OSD) Function Descriptions
- Product Specifications
- Appendix 1 Troubleshooting
- ENABLING A SAFER SOCIETY AND SMARTER LIVING
Brand : Dahua Technology
Model : LM27-P301A
Category : Screen