
SV 1382 B - Wine cellar Scandomestic - Free user manual and instructions
Find the device manual for free SV 1382 B Scandomestic in PDF.


| Product Type | Wine Cellar |
| Brand | Scandomestic |
| Model | SV 1382 B |
| Capacity | 138 wine bottles |
| Temperature Range | 5°C to 18°C |
| Zones | Dual zone (upper and lower compartments) |
| Display | LED display with temperature readout |
| Interior Light | LED, energy class G, replaceable by qualified engineer |
| Shelves | 3 stainless steel shelves (non-adjustable) |
| Door | Reversible, lockable with key |
| Refrigerant | R600a (flammable) |
| Climate Class | N (16°C to 32°C ambient) |
| Installation | Built-in or freestanding; 15 cm clearance above, 15 mm side, 50 mm rear |
| Power Supply | 220-240 V, 50 Hz (standard assumption) |
| Spare Parts Availability | 7 years: handles, hinges, trays, baskets, thermostats, sensors, PCBs, light sources; 10 years: door gaskets |
| Safety Features | Child entrapment prevention, lock, grounded plug, flammable refrigerant warnings |
| Cleaning | Mild detergent and warm water; no abrasive cleaners |
Frequently Asked Questions - SV 1382 B Scandomestic
User questions about SV 1382 B Scandomestic
0 question about this device. Answer the ones you know or ask your own.
Ask a new question about this device
Download the instructions for your Wine cellar in PDF format for free! Find your manual SV 1382 B - Scandomestic and take your electronic device back in hand. On this page are published all the documents necessary for the use of your device. SV 1382 B by Scandomestic.
USER MANUAL SV 1382 B Scandomestic
SKABSLEDNINGEN B∅R HVERKEN SLUTTES TIL NETTET VIA STIKSKIN- NER ELLER MED FORLÆNGERLEDNING.
VIGTIGE SIKKERHEDSREGLER
natural_image
Pure graphical icons including location pin, arrow, square with °C, and directional arrows on black background (no text or symbols)Temperaturindstillingen kan justeres fra 5°C til 18°C.
natural_image
Technical diagram of a mechanical assembly with a magnified inset showing internal components (no text or symbols)Dørvending
natural_image
Simple line drawing of a door with an upward arrow and numbered label (3), no text or symbols present.natural_image
Technical diagram showing a mechanical assembly with directional arrows and a numbered label (5), no readable text or symbols present.
natural_image
Diagram of a mechanical assembly with arrows indicating motion or force direction (no text or symbols)natural_image
Diagram of a mechanical device with an arrow indicating upward motion, labeled with number 6 (no text or symbols on the diagram itself)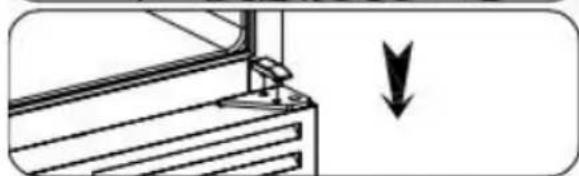
natural_image
Simple line drawing of a window with a downward arrow indicating direction (no text or symbols)Påfyldning for SV 138 B

138 bottles wine capacity
138 bottles wine capacity
natural_image
Grid of identical circular patterns with dots, no text or symbols presentstainless steel shelves(3)
Lokation
- To prevent damaging the door gasket, make sure to have the door all the way opened when pulling shelves out of the rail compartment.
- The appliance must be positioned so that the plug is accessible. Release the electric cord. Move your cabinet to its final location. Do not move your Cabinet while loaded with wine. You might distort the body. The wine cellar should be installed in a suitable place in order to avoid Touching the compressor with the hand.
- The appliance must be positioned so that the plug is accessible. Release the electric
- This appliance can be used by children aged from 8 years and above and persons with reduced physical, sensor and mental capabilities or lack of experience and knowledge if they have been given supervision or instruction concerning use of the appliance in a safe way and understand the hazards involved. Children shall not play with the appliance. Cleaning and user maintenance shall not be made by children without supervision.
- If the supply cord is damaged, it must be replaced by manufacturer of its Service agent or a similarly qualified person in order to avoid a hazard.

PLEASE DON'T TRY TO PLUG INTO OR EXTENSION THE CABLE IN ANY CASE.
SAFETY INSTRUCTIONS
- To reduce the risk of fire, electrical shock, or injury when using your appliance, follow these basic precautions:
- Read all instructions before using the Wine cooler.
• DANGER or WARNING: Risk of child entrapment. - Child entrapment and suffocation are not problems of the past. Junked or abandoned appliances are still dangerous . . . even if they will “just sit in the garage a few days”.
- Before you throw away your old Wine cooler: Take off the door. Leave the shelves in place so that children may not easily climb inside.
- Never allow children to operate, play with, or crawl inside the appliance.
- Never clean appliance parts with flammable fluids. The fumes can create a fire hazard or explosion.
- Do not store or use gasoline or any other flammable vapors and liquids in the vicinity of this or any other appliance. The fumes can create a fire hazard or explosion. Do not store explosive substances such as aerosol cans with a flammable propellant in this appliance.
- WARNING: keep ventilation openings, in the appliance enclosure or in the built-in structure, clear of obstruction;
- Do not use mechanical devices or other means to accelerate the defrosting process, other than those Recommended by the manufacturer;
- WARNING: To avoid a hazard due to instability of the appliance, it must be fixed in accordance with the instructions.
- WARNING: Do not damage the refrigerant circuit;
- WARNING: Do not use electrical appliances inside the food stor-
age compartments of the appliance, unless they are the type recommended by the manufacturer.
- The refrigerant of these appliances are R600a, Flammable and explosive articles should not be put in or near the cabinet, to avoid the fire or explode caused.
Save these instructions for later use.
INSTALLATION INSTRUCTIONS
Before Using Your Wine cooler
- Remove the exterior and interior packing.
- Before connecting the Wine cooler to the power source, let it stand upright for approximately 2 hours. This will reduce the possibility of a malfunction in the cooling system from handling during transportation.
- Clean the interior surface with lukewarm water using a soft cloth.
- This appliance is intended to be used in household and similar applications such as:
- staff kitchen areas in shops, offices and other working environments;
farm houses and by clients in hotels, motels and other residential type environments;
bed and breakfast type environments;
catering and similar non-retail applications. - When disposing your appliance, please choose an authorized disposal site.
Installation of Your Wine Cooler
- This appliance is designed to be for built-in (fully recessed) (Refer to sticker location the back of this appliance).
- This appliance is intended to be used exclusively for the storage
of wine.
- Place your Wine cooler on a floor that is strong enough to support it when it is fully loaded. To level your Wine cooler, adjust the front leveling leg at the bottom of the Wine cooler.
- This appliance is using flammability refrigerant. So never damage the cooling pipe work during the transportation. Locate the Wine cooler away from direct sunlight and sources of heat
- (stove, heater, radiator, etc.). Direct sunlight may affect the acrylic coating and heat sources may increase electrical consumption. Extreme cold ambient temperatures may also cause the unit not to perform properly.
- Avoid locating the unit in moist areas.
- Plug the Wine cooler into an exclusive, properly installed-grounded wall outlet. Do not under any circumstances cut or remove the third (ground) prong from the power cord. Any questions concerning power and/or grounding should be directed toward a certified electrician or an authorized Products service center.
- Door handles, door hinges, trays and baskets for a minimum period of seven years and door gaskets for a minimum period of 10 year, after placing the last unit of the model on the market.
- Thermostats, temperature sensors, printed circuit boards and light sources are available for a minimum period of seven years after placing the last unit of the model on the market.
Attention
• Store wine in sealed bottles;
- Do not overload the cabinet;
- Do not open the door unless necessary;
- Do not cover shelves with aluminum foil or any other shelf
material which may prevent air circulation;
- Should the Wine cooler be stored without use for long periods it is suggested, after a careful cleaning, to leave the door ajar to allow air to circulate inside the cabinet in order to avoid possible formations of condensation, mold or odors.
Ambient Room Temperature Limits
This appliance is designed to operate in ambient temperatures specified by its temperature class marked on the rating plate.
| Class | Symbol | Amb. Temp. range (°C) |
| Extended Temperate | SN | + 10 to + 32°C |
| Temperate | N | + 16 to + 32°C |
| Subtropical | ST | + 16 to + 38°C |
| Tropical | T | + 16 to + 43°C |
Operating your Wine cooler Control Panel
For SV 138 B

The temperature setting can be adjusted from 5irc C to 18irc C.
• To switch the wine cabinet on or off
• To switch on or off the light inside cabinet.
To reduce energy consumption, the wine cellar will automatically switch off the internal light after 10 minutes. If you want the internal light to remain on continuously. Press and hold this button for 5 seconds until display show "LP". To revert to normal mode. Press and hold this button for 5 seconds until display show "LF".
• User to raise(warm) the temperature in 1°C.
• Used to lower(cool) the temperature in 1°C.
Display chamber
Display the set temperature in upper compartment.
Note: Press Upper or Lower button for 3 seconds, the actual temperature Will be display in the zone. It will return to the set temperature by pressing any button.

Upper compartment: The temperature setting can be adjusted from 5 °C to 18°C.
Lower compartment: The temperature setting can be adjusted from 5 °C to 18°C.
Power Button
Control this appliance turn on/off. (Press and hold this buttons for approximately 3 seconds);
Light Button
Control the interior light ON/OFF.
In order to reduce energy consumption. This cabinet will automatically switch off the internal light after 10 minutes. If you want the internal light to remain on continuously. Press and hold this button for 5 seconds until display show "LP". To revert to normal mode. Press and hold this button for 5 seconds until display show "LF"
- "Set Lower" Button: To set the temperature of the lower chamber.
- "Set Upper" Button: To set the temperature of the upper chamber.
• UPPER Temperature Display: Display the set temperature in lower compartment. - UPPER Temperature Display: Display the set temperature in upper compartment.
Note: Press "Set Upper" or "Set Lower" button for 3 seconds, the actual temperature Will be display in the zone. It will return to the set temperature by pressing any button.
Note
- If the unit is unplugged, power lost, or turned off, you must wait 3 to 5 minutes before restarting the unit. If you attempt to restart before this time delay, the Wine Cooler will not start.
- When you use the wine cooler for the first time or restart the wine cooler after having been shut off for a long time, there could be a few degrees variance between the temperature you select and the one indicated on the LED readout. This is normal and it is due to the length of the activation time. Once the wine cooler is running for a few hours everything will be back to normal.
Temperature Memory Function
If the power is suddenly lost, the set temperature will be saved by the unit.
Once the power is back on, the unit will be at the same actual temperature.
Temperature Alarm Function
If the interior temperature is higher than 23irc C, “HI” is shown on the display panel and the buzzer alarm sounds continuously after one hour. This indicates that the inner temperature is too high, please look for the reason. If the inner temperature is lower than 0irc C, “LO” is shown on the display panel; the alarm and the malfunction indicator light turn on after 15 minutes.
Door Lock
Your unit is provided with a lock and key combination.
The keys are located inside the plastic bag that contains the User's Guide. Insert the key into the lock and turn it counterclockwise to unlock the door. To lock the door do the reverse operation making sure metal pin is engaged completely. Remove the key and place it in a secure place for safekeeping.
Note: During periods of high humidity, condensation may appear on outside surfaces of the appliances.
This condensation will disappear once humidity levels drop. To prevent, it is recommended to install the appliance with sufficient ventilation in a dry and/or an air-conditioned room. Please ensure that doors are closing and sealing properly.
Shelves
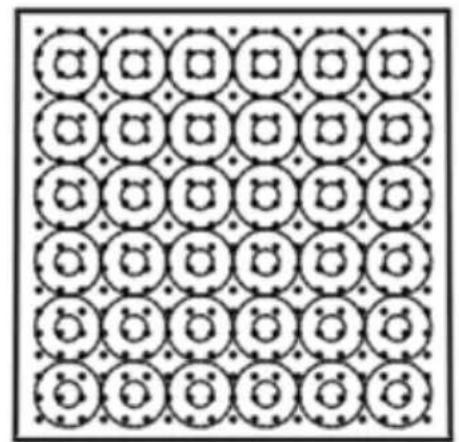
The shelves cannot be adjusted. The inner cabinet is reinforced in the places where the shelves are placed.
If the shelves are moved to another rack, the shelves cannot hold.
How to remove the shelves:
To prevent damaging the door gasket, make sure to open the door before pulling the shelves out of their track.
-
Open the door completely;
-
If necessary, make sure you remove all the contents sitting on the shelf.
-
Remove both of the plastic notches with a screwdriver.
-
To pull out the shelf forward until it is completely removed from the inner compartment.

natural_image
Technical diagram of a mechanical assembly with a magnified inset showing internal components (no text or symbols)How to change the door opening
- Open the door and remove the two screws under the right bottom corner of the door that are used to hold the right lower hinge to the door. Be careful to hold the door with hands from dropping after removing the screws.

- Put down to remove the door and place it on a padded surface to prevent scratching it.

- Remove the decorative nails on the top of the door.

- The door revolves 180 degrees. Install the decorative nails to the top right of
the door.

- Remove the door shaft from the right upper hinge. Install the new left door shaft that from the plastic bag includes the instruction manual and tighten it on the left upper hinge.

- Take out the door body support block at the right lower hinge, and then install it to the left lower hinge.

- Remove the right lower hinge supporter with the adjusting washer. Install the left lower hinge supporter from the plastic bag that includes the instruction manual. Make sure to put the adjusting washers at the designated position.
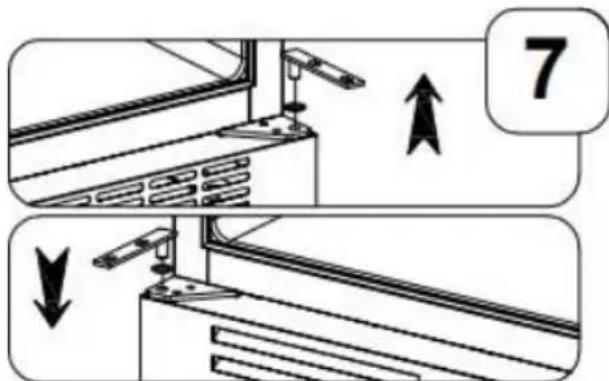
- Locate the door to the designated position making sure that the door shaft enters the door hole at the left upper corner of the door. Install the two screws that are used to connect the left lower hinge with the door and tighten them before the door is leveled. Then remove the handle from the left side and install it on the right side of the door.

Installing the Door Handle
- Open the door and carefully pull the door gasket around the area where the handle is to be installed.
- Insert each Phillips head screw through the gasket side of the door until the screw passes through the door.
- Align the handle with the screws and tighten the screws using a Phillips head screwdriver until the handle is flush against the door frame.
Caution: Do not over-tighten the screws as this may cause damage to the handle or to the stainless-steel door.
- Carefully press the door gasket into its original position.

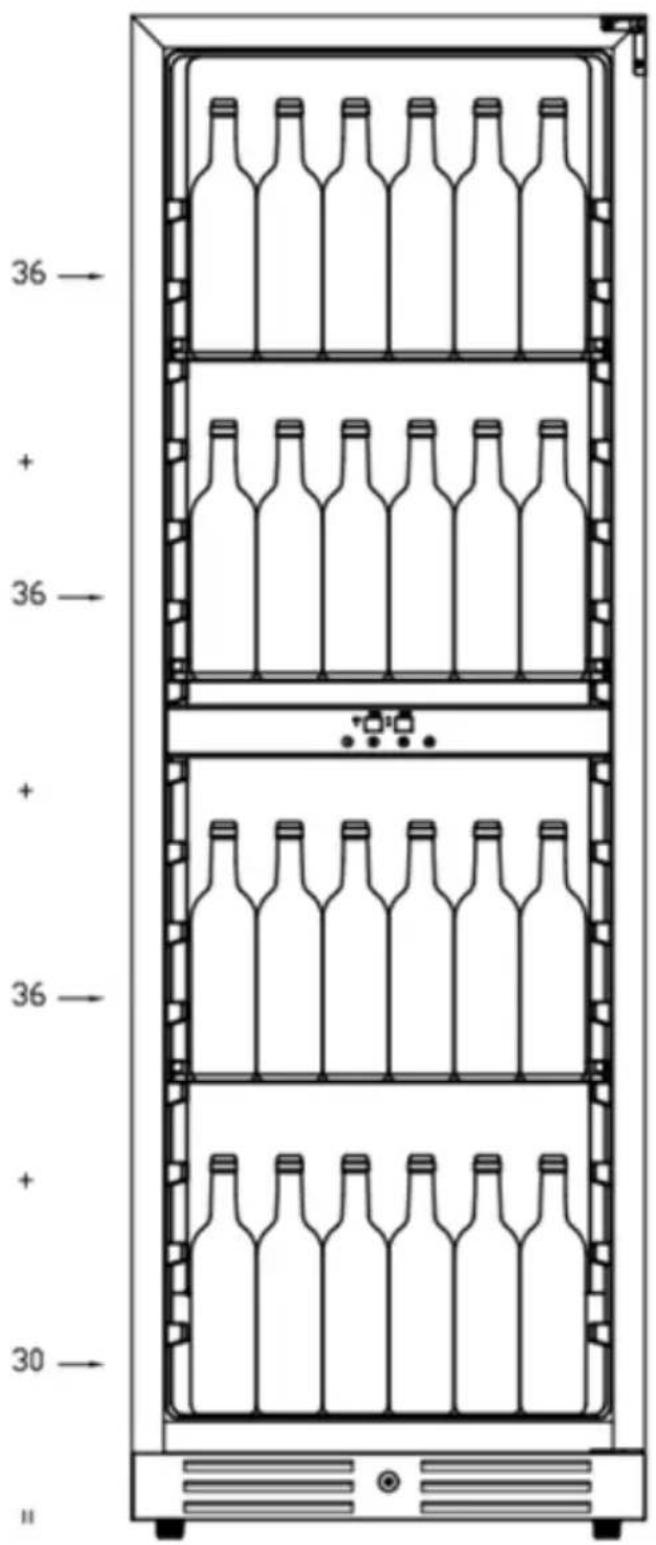
LOADING
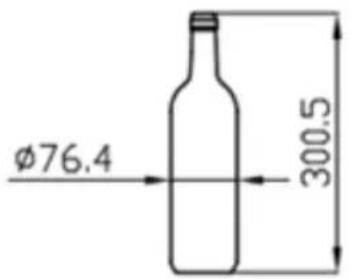
The maximum number of bottles that can be loaded into the cabinet are for information only; this information is not contractual; it provides a means for rapidly estimating the size of the device.
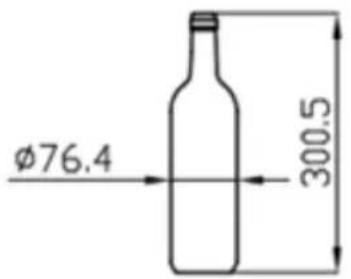
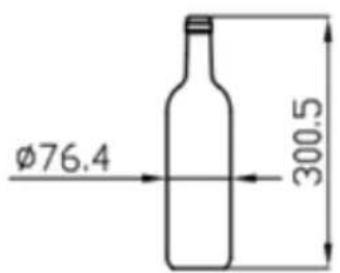
Loading for SV 138 B

other
| Level | Container | |-------|-----------| | 30 | Bottle | | 36 | Bottle | | 36 | Tank | | 36 | Tank | | 36 | Tank | | 36 | Tank | | 36 | Tank | | 36 | Tank | | 36 | Tank | | 36 | Tank | | 36 | Tank | | 36 | Tank | | 36 | Tank | | 36 | Tank |
138 bottles wine capacity

natural_image
Grid of identical circular patterns with dots, no text or symbols presentstainless steel shelves(3)
Location
Place your cabinet well away from heat sources (heater, cooker, direct sunlight). For proper operation of the device, the ambient room temperature should be between +16°C and +32°C (class N). Outside these limits, the device will not operate properly.
Ensure that air can circulate freely behind the device: do not place it too close to a wall, in order to avoid noise from vibration. Ensure that air can circulate freely all around the device. Insufficient ventilation will lead to poor operation and increased energy consumption.
Leave at least 15mm between the walls and the wine cabinet and 50mm minimum between the rear of the wine cabinet and the wall. Leave at least 15 cm free space above the device.
The device must be installed in such a way that the electric plug is accessible. After installing the cabinet, make sure that it is not resting on the power cord.
Built-in installing
Below the built-in dimensions to use before installing in the best condition this appliance.

Recommended temperature settings
| Type | Temperature (°C) |
| Champagne NV, Sparkling | 6 |
| Champagne Vintage | 10 |
| Dry White Semillon, Sauvignon Blanc | 8 |
| Dry White Gewurstraminer, Riesling | 10 |
| Dry White Chardonnay | 10 |
| Vintage chardonnay | 14 |
| Sweet White Sauternes Mon-bazillac, Late Harvest ice wine | 10 |
| Sweet whites vintage Sauternes | 14 |
| Beaujolais | 13 |
| Red Pinot Noir | 16 |
| Vintage Pinot noir red | 20 |
| Red Cabernet, Merlot, French, Australian, New Zealand, Chilean, Argentinean, Italian, Spanish, Californian | 20 |
| Red Grenache, Syrah | 16 |
Light source energy class
This product contains a light source of energy efficiency class G.
Light source in this product is replaceable only by qualified engineers.

flowchart
graph LR
    A["LED"] <--> B["LED"]
CARE AND MAINTENANCE
Cleaning your Wine Cooler
- Turn off the power, unplug the appliance, and remove all items including shelves and rack.
- Wash the inside surfaces with a warm water and diluted mild detergent.
- Wash the shelves with a mild detergent solution.
- Wring excess water out of the sponge or cloth when cleaning area of the controls, or any electrical parts.
- Wash the outside cabinet with warm water and mild liquid detergent.
- Rinse well and wipe dry with a clean, soft cloth.
Power Failure
- Most power failures are corrected within a few hours and should not affect the temperature of your appliance if you minimize the number of times the door is opened. If the power is going to be off for a longer period of time, you need to take the proper steps to protect your contents.
Vacation Time
- Short vacations: Leave the Wine Cooler operating during vacations of less than three weeks.
- Long vacations: If the appliance will not be used for several months, remove all items and turn off the appliance. Clean and dry the interior thoroughly. To prevent odor and mold growth, leave the door open slightly: blocking it open if necessary.
• Make sure there will be no children and animals climb into the appliance.
Moving Your Wine Cooler
- Remove all items.
- Securely tape down all loose items (shelves) inside your appli- ance.
- Turn the adjustable leg up to the base to avoid damage.
- Tape the door shut.
- Be sure the appliance stays secure in the upright position during transportation. Also protect outside of appliance with a blanket, or similar item.
Energy Saving Tips
- The Wine Cooler should be located in the coolest area of the room, away from heat producing appliances, and out of the direct sunlight.
- Set temperature according to the characteristics of your wine to maximize energy saving.
PROBLEMS WITH YOUR WINE
COOLER?
You can solve many common Wine Cooler problems easily, saving you the cost of a possible service call. Try the suggestions below to see if you can solve the problem before calling the servicer.
TROUBLESHOOTING GUIDE
Wine Cooler does not operate.
- Not plugged in.
The appliance is turned off.
The circuit breaker tripped or a blown fuse.
Wine Cooler is not cold enough.
- Check the temperature control
setting.
- External environment may require a higher setting.
- The door is opened too often.
- The door is not closed completely.
The door gasket does not seal properly.
Turns on and off frequently.
The room temperature is hotter than normal.
A large amount of contents has been added to the wine cooler.
- The door is opened too often.
The door is not closed completely.
The temperature control is not set correctly.
- The door gasket does not seal properly.
The light does not work.
- Not plugged in.
- The circuit breaker tripped or a blown fuse.
The bulb has burned out.
The light button is "OFF".
Vibrations.
- Check to assure that the Wine Cooler is level.
The Wine Cooler seems to make too much noise.
The rattling noise may come from the flow of the refrigerant, which is normal.
As each cycle ends, you may hear gurgling sounds caused by the flow of refrigerant in your Wine Cooler.
- Contraction and expansion of the inside walls may cause pop-ping and crackling noises.
- The Wine Cooler is not level.
The door will not close properly.
The Wine Cooler is not level.
The door was reversed and not properly installed.
The gasket is dirty.
The shelves are out of position.
Disposal of Old Appliance
Dispose of your appliance packaging properly.
Refrigeration equipment must be properly disposed of in a way which protects the environment. This applies to your old appliance and to your new unit once it has reached the end of its service life.
Warning
Please ensure that old, worn appliances are rendered unusable be- fore disposal by removing the plug, cutting the network cable, and removing or destroying any snap fastenings or bolts. You will thus prevent children from locking themselves in the appliance during play (risk of suffocation) or endangering their lives in any other way.
Disposal instructions:
The appliance must not be disposed of in the dustbin or with normal household rubbish.
The coolant circuit, particularly the heat exchanger at the back/ bottom of the unit, must not be damaged.
The symbol on the product or its packaging indicates that this product is not to be
handled as normal household waste but is to be taken to a recycling collection point for electrical and electronic goods. By correctly disposing of this product, you are contributing to the protection of the environment and to the health of your fellow human beings. Improper disposal endangers health and the environment. Further information about the recycling of the product may be obtained from your town hall, refuse collection department or the store where you purchased the product.
natural_image
Technical diagram of a mechanical assembly with a magnified inset showing a component detail (no text or symbols present)natural_image
Technical diagram showing a mechanical assembly with directional arrows and a numbered label (5), no readable text or symbols present.
natural_image
Diagram of a mechanical assembly with arrows indicating motion or force direction (no text or symbols)natural_image
Diagram of a mechanical device with an arrow indicating upward motion and a numbered label '6' (no text or symbols on the diagram itself)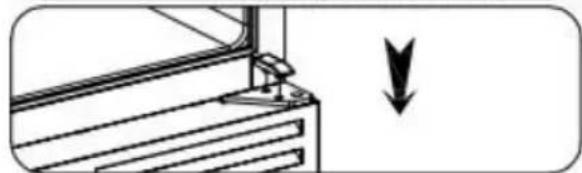
natural_image
Simple line drawing of a window with a downward arrow indicating direction (no text or symbols)138 bottles wine capacity

natural_image
Grid of identical circular patterns with dots and dots, no text or symbols presentstainless steel shelves(3)

Standort
FÖRSÖK INTE ATT KOPPLA IN ELLER FÖRLÄNGA KABELN I NÅGOT FALL.
SÄKERHETSANVISNINGAR
natural_image
Technical diagram of a mechanical assembly with a magnified inset showing a component detail (no text or symbols present)natural_image
Grid pattern of circular and square icons with dots, no text or symbols presentstainless steel shelves(3)
138 bottles wine capacity

138 bottles wine capacity

natural_image
Grid pattern of circular and square icons with dots, no text or symbols presentstainless steel shelves(3)
Plats
Access to professional repair, such as internet webpages, addresses, contact details.
Model no: SV 138 B
Aftersales service station list:
| Address | Scandomestic A/S |
| Contact Number | 7242 5571 |
| Website | Scandomestic.dk |
| QR code | 1325369 |
| Relevant information for ordering spare parts, directly or through other channels provided by the manufacturer, importer or authorised representative; | Scandomestic A/S |
| The minimum period during which spare parts, necessary for the repair of the appliance, are available; | 7 years |
| Instruction on how to find the model information in the product database, as defined in Regulation (EU) 2019/2019 by means of a weblink that links to the model information as stored in the product database or a link to the product database and information on how to find the model identifier on the product.) | www.scandomestic.dk |
Note: The address or contact phone number of the service site is subject to change without prior notice. Please confirm whether the service station is a directly affiliated one of our company when requiring services.
DE
Access to professional repair, such as internet webpages, addresses, contact details.
Model no: SV 1382 B
Aftersales service station list:
| Address | Scandomestic A/S |
| Contact Number | 7242 5571 |
| Website | Scandomestic.dk |
| QR code | 1325376 |
| Relevant information for ordering spare parts, directly or through other channels provided by the manufacturer, importer or authorised representative; | Scandomestic A/S |
| The minimum period during which spare parts, necessary for the repair of the appliance, are available; | 7 years |
| Instruction on how to find the model information in the product database, as defined in Regulation (EU) 2019/2019 by means of a weblink that links to the model information as stored in the product database or a link to the product database and information on how to find the model identifier on the product.) | www.scandomestic.dk |
Note: The address or contact phone number of the service site is subject to change without prior notice. Please confirm whether the service station is a directly affiliated one of our company when requiring services.
DE


- VIGTIGE SIKKERHEDSREGLER
- Dørvending
- Lokation
- SAFETY INSTRUCTIONS
- INSTALLATION INSTRUCTIONS
- Installation of Your Wine Cooler
- Attention
- Ambient Room Temperature Limits
- Operating your Wine cooler Control Panel
- Display chamber
- Power Button
- Light Button
- Note
- Temperature Memory Function
- Temperature Alarm Function
- Door Lock
- Shelves
- How to remove the shelves:
- How to change the door opening
- Installing the Door Handle
- LOADING
- Location
- Built-in installing
- Recommended temperature settings
- Light source energy class
- CARE AND MAINTENANCE
- Cleaning your Wine Cooler
- Power Failure
- Vacation Time
- Moving Your Wine Cooler
- Energy Saving Tips
- PROBLEMS WITH YOUR WINE
- COOLER?
- TROUBLESHOOTING GUIDE
- Turns on and off frequently.
- The light does not work.
- Vibrations.
- The Wine Cooler seems to make too much noise.
- The door will not close properly.
- Disposal of Old Appliance
- Dispose of your appliance packaging properly.
- Warning
- Disposal instructions:
- Standort
- SÄKERHETSANVISNINGAR
- Plats
- DE
Brand : Scandomestic
Model : SV 1382 B
Category : Wine cellar