
OptiGrill+ GO712DS0 - Grill OBH NORDICA - Free user manual and instructions
Find the device manual for free OptiGrill+ GO712DS0 OBH NORDICA in PDF.


| Product Type | Indoor Electric Grill |
| Brand | OBH Nordica |
| Model | OptiGrill+ GO712DS0 |
| Dimensions (L x W x H) | Approx. 40 x 30 x 15 cm |
| Weight | Approx. 4.5 kg |
| Power | 2000 W |
| Voltage | 220-240 V / 50-60 Hz |
| Cooking Surface | Non-stick coated ribbed plates |
| Automatic Programs | 8 preset programs (e.g., burgers, chicken, fish, vegetables) |
| Temperature Control | Automatic with smart sensor; manual override available |
| Indicator Lights | Power on and ready to cook |
| Drip Tray | Removable, dishwasher safe |
| Safety Features | Auto shut-off, cool-touch handles, non-slip feet |
| Cleaning | Plates removable and dishwasher safe; drip tray dishwasher safe; wipe exterior with damp cloth |
| Cable Length | Approx. 1.2 m |
| Warranty | 2 years |
| Included Accessories | Instruction manual, quick start guide |
Frequently Asked Questions - OptiGrill+ GO712DS0 OBH NORDICA
User questions about OptiGrill+ GO712DS0 OBH NORDICA
0 question about this device. Answer the ones you know or ask your own.
Ask a new question about this device
Download the instructions for your Grill in PDF format for free! Find your manual OptiGrill+ GO712DS0 - OBH NORDICA and take your electronic device back in hand. On this page are published all the documents necessary for the use of your device. OptiGrill+ GO712DS0 by OBH NORDICA.
USER MANUAL OptiGrill+ GO712DS0 OBH NORDICA

DESIGNING
GOOD LIFE
1

2
3

4
2 Förvärmning
1
5
6

7

8
5
9

10
9
11

12

13
11
14 15


17
16


18
14-15
21
19-20
22

23

24

25
22-23-24

28

29

30
26
31
32

33

34
35
31-32
1

2
3

4
2 Opvarmning
1
5

6
7
8

5
9

10
9
11
12
13
11
14 15
17

16

18
14-15
21
19-20
22
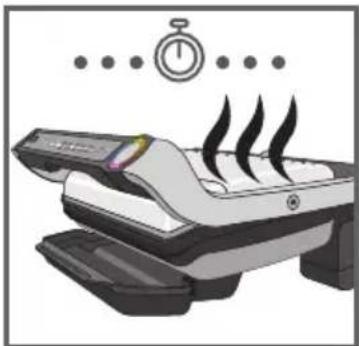
23
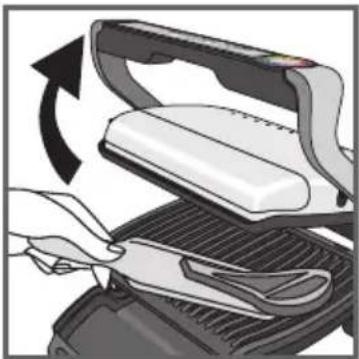
24
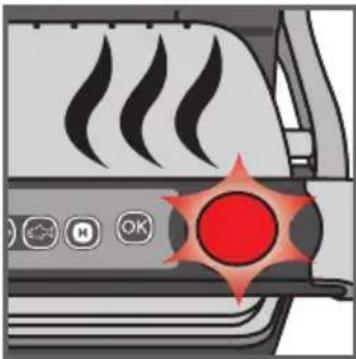
25
22-23-24
26 27

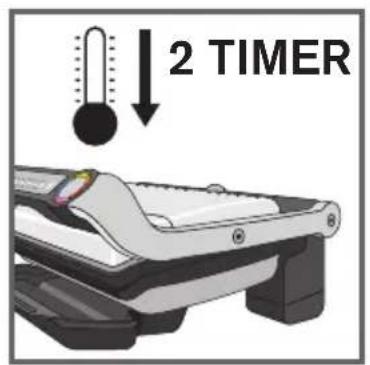
28
29

30
26
31-32
OBH Nordica Denmark A/S
Delta Park 37
2665 Vallensbæk Strand
Tlf.: 43 350 350
www.obhnordica.dk
Tekniske data
OBH Nordica GO702DS0
230 Volt \~ 50-60 Hz
2000 Watt
CE
1
2

3
4
2 Forvarming
1 All emballasje, klistremerker eller diverse tilbehør i og utenpå apparatet, må fjernes. Den fargede klistrelappen på stekeindikatoren kan endres for språk. Du kan bytte den med klistrelappen på innsiden av pakken.
5
6

7
8

9

10
9
11

12
13
11
Trykk på knappen "OK": Apparatet begynner forvarmingen, og stekegradsindikatoren blinker fiolett.
14 15
16

17


18
14-15
21
19-20
22
23

24
25
22-23-24
28

29
30
26
31
32
33
34
35
31-32
BEGRENSET GARANTI for OBH Nordica
Garantien
OBH Nordica Norway AS
Maridalsveien 15 E
0178 Oslo
Tlf: 22 96 39 30
www.obhnordica.no
Tekniske data
OBH Nordica GO702DS0
230 Volt \~ 50-60 Hz
2000 Watt
CE
VILKKUVA
VIOLETTI
Esilämmitys.
SININEN
Paiston alku.
1

2

3

4
2 Esilämmitys
5

6

7
8
5
9
10
11

13
11
14 15

16
17
21
19-20
22
23

24
25
22-23-24
26 27

28
29

30
26
27
28

29

30
26
Safety instructions - important safeguards
-
Use, maintenance and product installation guidelines: for your own safety, please read through all paragraphs of the instruction manual including the associated pictograms.
-
This appliance is intended for indoor, domestic household use only. It is not intended to be used in the following applications, and the guarantee will not apply for:
-
staff kitchen areas in shops, offices and other working environments;
- farm houses;
- by clients in hotels, motels and other residential type environments;
-
bed and breakfast type environments.
-
Before first use remove all packaging materials, stickers and accessories from the inside and the outside of the appliance.
-
This appliance is not intended for use by persons (including children) with reduced physical, sensory or mental capabilities, or lack of experience and knowledge, unless they have been given supervision or instruction concerning use of the appliance by an adult responsible for their safety.
-
Children should be supervised to ensure that they do not play with the appliance.
-
This appliance can be used by children aged from 8 years and above and persons with reduced physical, sensory or mental capabilities or lack of experience and knowledge if they have been given supervision or instruction concerning use of the appliance in a safe way and understand the hazards involved. Cleaning and user maintenance
shall not be made by children unless they are older than 8 and supervised.
- Keep the appliance and its cord out of reach of children less than 8 years.
- Never leave the appliance unattended when in use.
- Accessible surface temperatures can be high when the appliance is operating. Never touch the hot surfaces of the appliance.
- This appliance is not intended to be operated by means of an external timer or separate remote-control system.
- Fully unwind the power cord before plugging in the appliance.
- If the power supply cord is damaged, it must be replaced by the manufacturer or its after sales service in order to avoid any danger.
- Do not use an extension lead. If you accept liability for doing so, only use an extension lead which is in good condition, has a plug with an earth connection and is suited to the power rating of the appliance. Take all necessary precautions to prevent anyone tripping over an extension cord.
- Always plug the appliance into an earthed socket.
- Make sure that the electric power supply is compatible with the power rating and voltage indicated on the bottom of the appliance.
- Use a sponge, hot water and washing up liquid to clean the cooking plates.
- Never immerse the appliance, its power cord or plug in water or any other liquid.
Do
- Read the instructions carefully, common to different versions depending on the accessories supplied with your appliance, and keep them within reach.
- If an accident occurs, rinse the burn immediately with cold water and call a doctor if necessary.
- Before first use, wash the plates (see paragraph 5), pour a little cooking oil onto the plates and wipe with a soft cloth or paper kitchen towel.
- Position the power cord carefully, whether an extension is used or not, so that guests can move freely around the table without tripping over it.
- Cooking fumes may be dangerous for animals which have a particularly sensitive respiratory system, such as birds. We advise bird owners to keep them away from the cooking area.
• Always keep the appliance out of the reach of children. - Check that both faces of the plate are clean before use.
- To prevent damage to the plates, only use them on the appliance for which they were designed (e.g., do not place in an oven, on the gas ring or electric hot-plate, etc.).
- Ensure that the plates are stable, well positioned and correctly clipped to the appliance. Only use the plates provided with the appliance or bought from an Approved Service Centre.
• Always use a wooden or plastic spatula to avoid damaging the cooking plates. - Only use parts or accessories provided with the appliance or bought from an Approved Service Centre. Do not use them for other appliances or intention.
Do not
- Do not use the appliance outside.
- Never leave the appliance unattended when plugged in or in use.
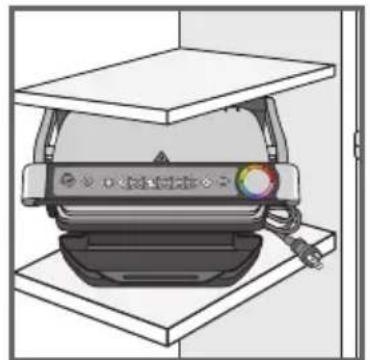
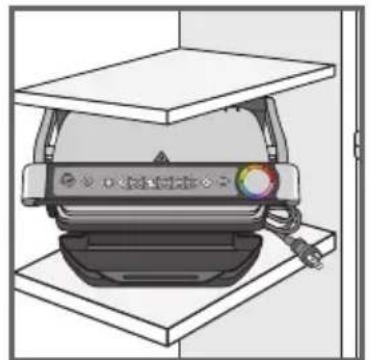
- To prevent the appliance from overheating, do not place it in a corner or below a wall cupboard.
- Never place the appliance directly on a fragile surface (glass table, tablecloth, varnished furniture, etc.) or on a soft surface such as a tea-towel.
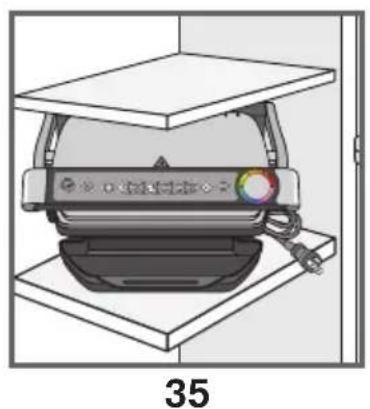
- Never place the appliance under a cupboard attached to a wall or a shelf or next to inflammable materials such as blinds, curtains or wall hangings.
- Never place the appliance on or near hot or slippery surfaces; the power cord must never be close to or in contact with hot parts of the appliance, close to a source of heat or resting on sharp edges.
- Do not place cooking utensils on the cooking surfaces of the appliance.
- Never cut food directly on the plates,
- Do not use metal scouring pads, abrasive wire wool or harsh scouring powder as this may damage the non-stick coating.
- Do not move the appliance when in use.
- Do not carry the appliance by the handle or metallic wires.
- Never run the appliance empty.
- Do not use aluminium foil or other objects between the plate and the food being cooked.
- Do not remove the grease collection tray while cooking. If the grease
collection tray becomes full when cooking: let the appliance cool down before emptying.
- Do not place the hot plate on a fragile surface or under water.
- To preserve the non-stick properties of the coating, avoid excessive pre-heating with the appliance empty.
- The plates should never be handled when hot.
- Do not cook food in aluminium foil.
- To avoid spoiling your appliance, do not use flambé recipes in connection with it at any time.
- Do not place a sheet of aluminum or any other object between the plates and the heating element.
- Never heat or cook whilst the grill is open.
- Never heat up the appliance without the cooking plates.
Tips/information
- Thank you for buying this appliance, which is intended for domestic use only.
- For your safety, this appliance complies with the applicable standards and regulations - Low voltage directive - Electromagnetic compatibility - The environment - Materials in contact with food.
- On first use, there may be a slight odour and a little smoke during the first few minutes.
- Our company has an ongoing policy of research and development and may modify these products without prior notice.
- Do not consume foodstuff that comes into contact with the parts marked with ✗logo.
- If the food is too thick, the safety system will stop the appliance from working.
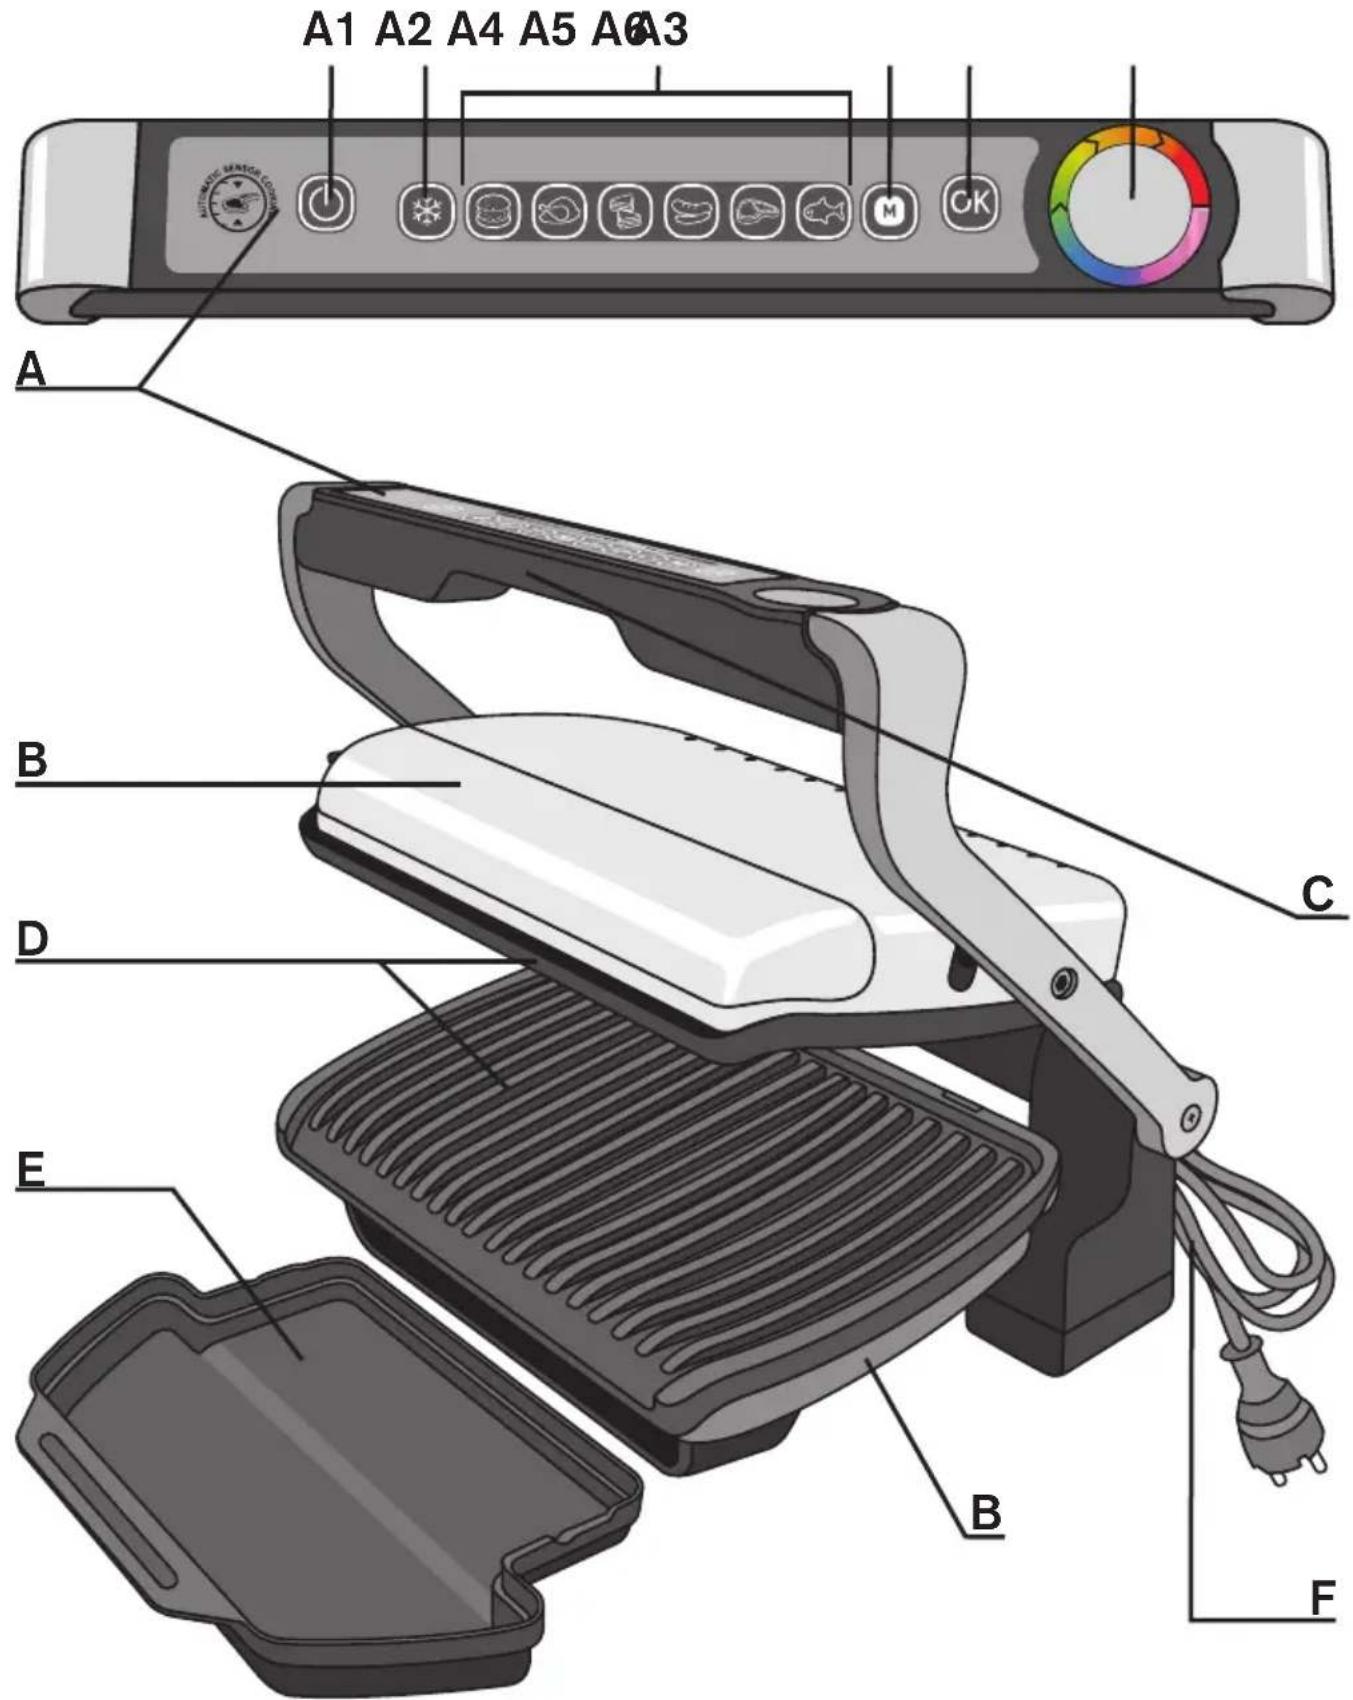
Description
A Control panel
A1 On/off button
A2 Frozen food mode
A3 Cooking programs
A4 Manual mode
A5 OK button
A6 Cooking level indicator
B Body
C Handle
D Cooking plates
E Juice collection tray
F Power cord
"Guide to LED colours"
PREHEATING

COOKING STARTS
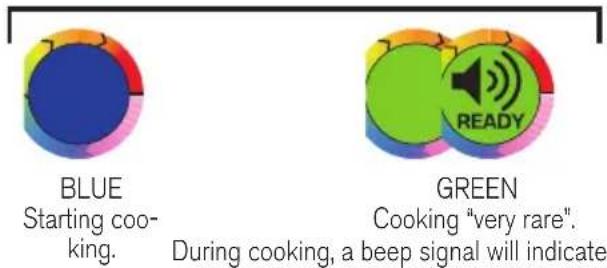
COOKING
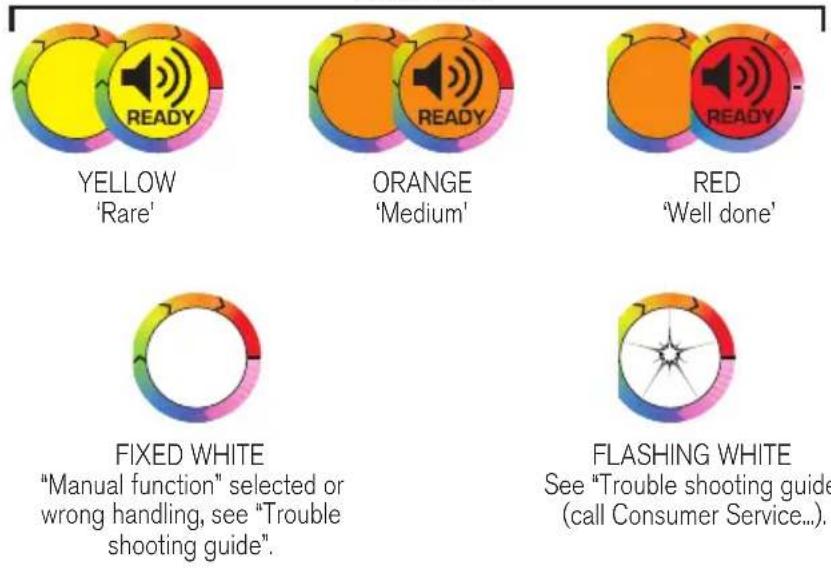
KEEP WARM (30' approximately)

FLASHING RED
End of cooking
"well done".

Guide to cooking programs

Burger

Panini

Manual mode: Traditional grill for manual operation

Poultry: breast or thigh (off the bone)

Fish: salmon fillet

Red meat (off the bone)

Sausage
NOTE: Maximum thickness of food 4 cm and minimum thickness of food 4mm for all cooking programs and manual mode.
1 Setting up
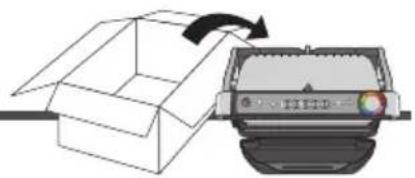
1
2
3

4
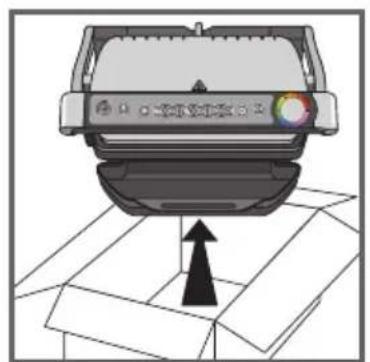
1
Remove all packaging materials, stickers and accessories from the inside and the outside of the appliance.
The colour sticker on the cooking level indicator can be changed, according to the language. You can replace it with the one on the inside of the packaging.
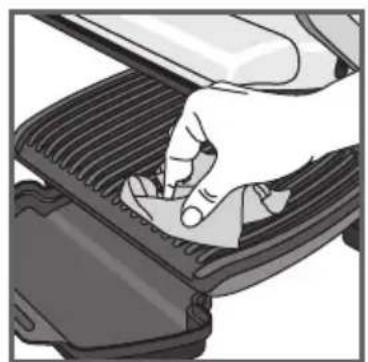
2
Before using for the first time, thoroughly clean the plates with warm water and a little washing-up liquid, rinse and dry thoroughly.
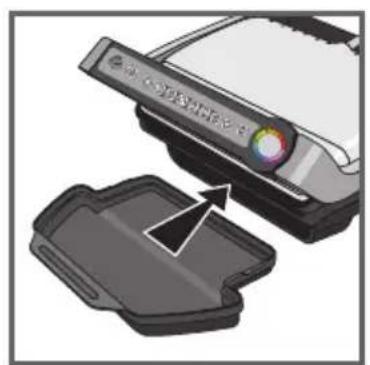
3-4
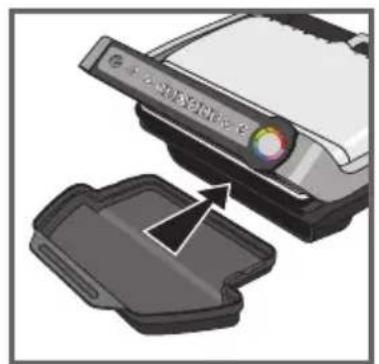
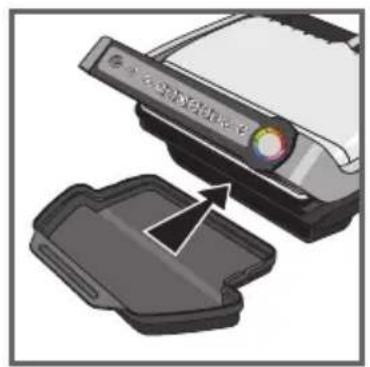
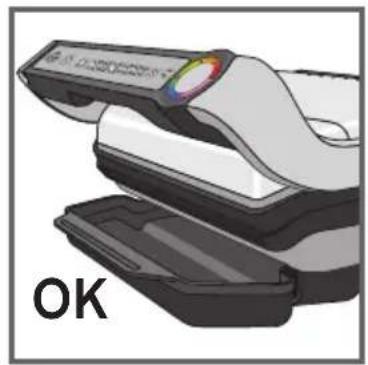
Position the removable juice collection tray at the front of the appliance.
2 Pre-heating

5
6
7
8
9

10
5
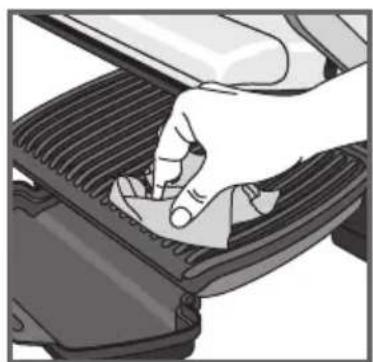
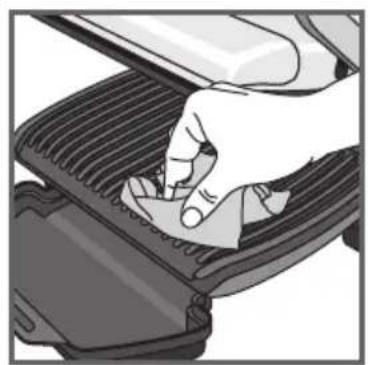
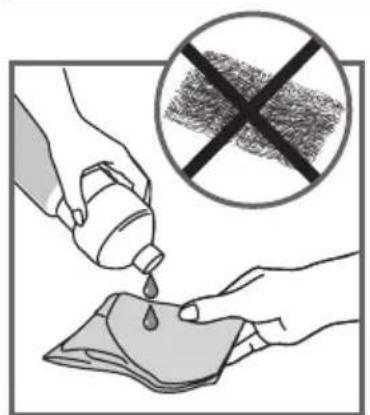
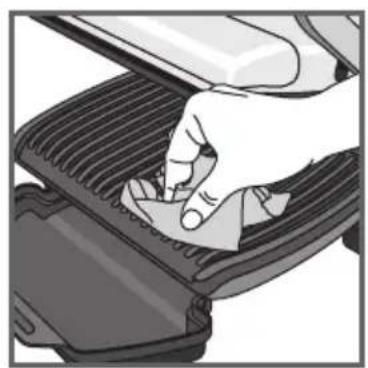
If desired for the best results you may wipe the cooking plates using a paper towel dipped in a little cooking oil, to improve the non-stick release.
6
Remove any surplus oil using a clean kitchen paper towel.
7
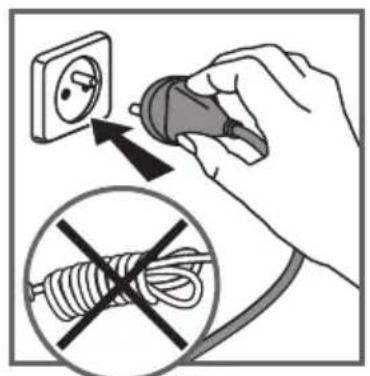
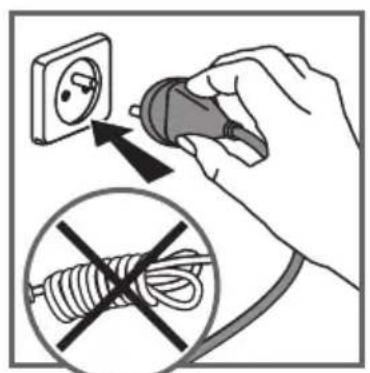
Connect the appliance to the mains (note the cord should be fully unwound). Close the grill.
8
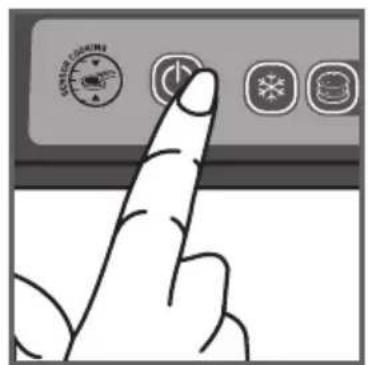
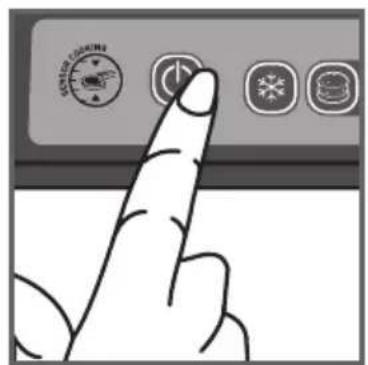
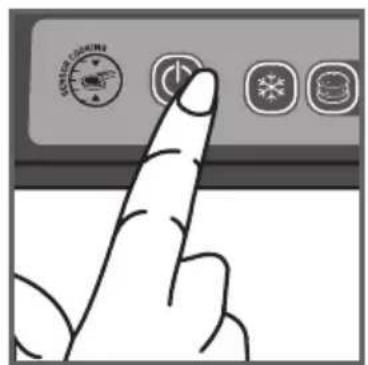
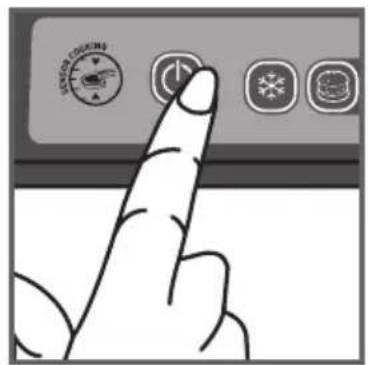
Press the On/Off button.
Note: It is normal for the program lights to illuminate in succession until a program has been selected.
9
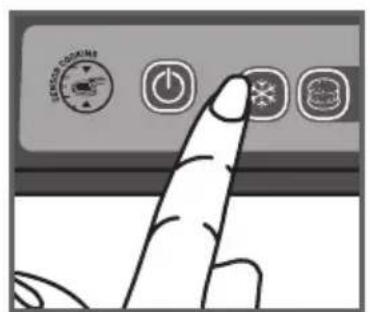
If the food that you wish to cook is frozen, press the button "frozen food".
The cooking time will then be adjusted automatically to allow for this.
10
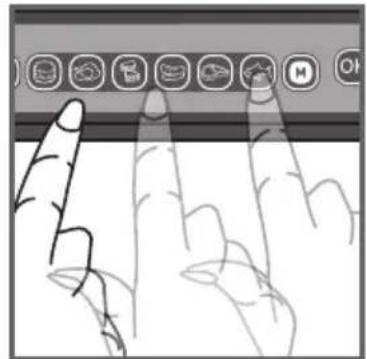
Select the appropriate cooking mode according to what type of food you wish to cook.
6 cooking programs and a manual
 | Select this cooking program if you want to cook burgers. |  | Select this cooking program if you want to cook red meat: steak (off the bone) |
 | Select this cooking program if you want to cook poultry (off the bone): thigh, breast, escalope |  | Select this cooking program if you want to cook fish: salmon steak |
 | Select this cooking program if you want to cook paninis* | ||
 | Select this cooking program if you want to cook sausage |  | If you select Manual Mode, after the pre-heating phase and once the food is added, the indicator light is a fixed white after closing the lid. You must then control the cooking time manually.Note: With Manual mode there are no audible beeps and the cooking level indicator does not change colour. |
*For meat less than 4 mm thickness, after preheating the grill and closing the lid, press OK to ensure the appliance recognises the food and that the cooking cycle starts. If you are uncertain about what cooking mode to use for other foods because it is not listed above, please refer to the “Cooking table for out of program food” page 86.

11 12
13
11
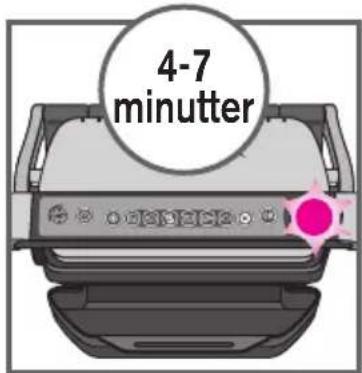
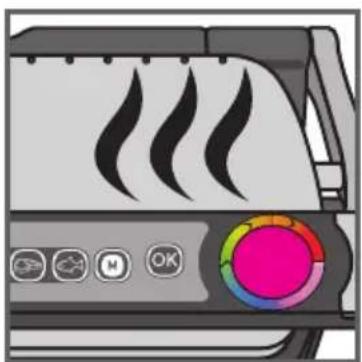
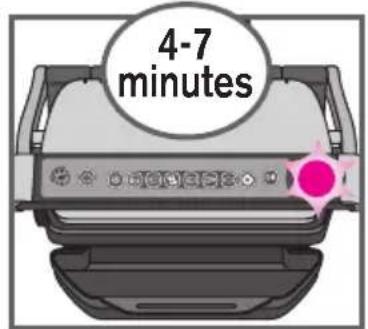
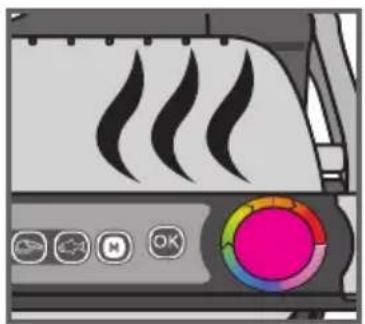
Press the "OK" button: the appliance starts pre-heating and the cooking level indicator flashes purple. NB: If you have selected the wrong program, return to stage 8.
12
Wait for 4-7 minutes.
13
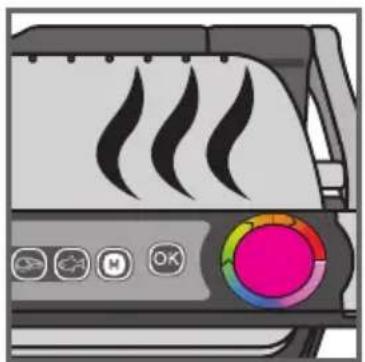
An audible tone is heard and the cooking level indicator stops flashing purple when the pre-heating mode is complete. Comments: At the end of pre-heating, if the appliance remains closed, the safety system will turn off the product.
3 Cooking using Dedicated Programs
14
15
16

17

18
14-15
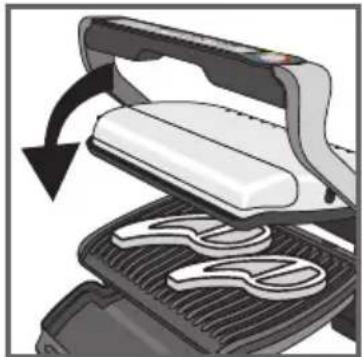
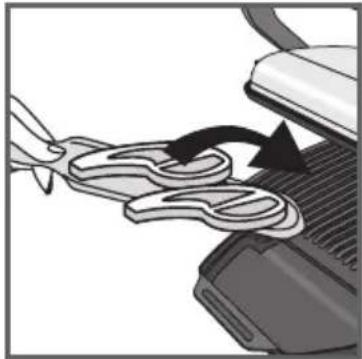
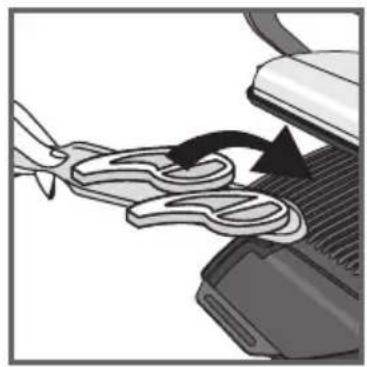
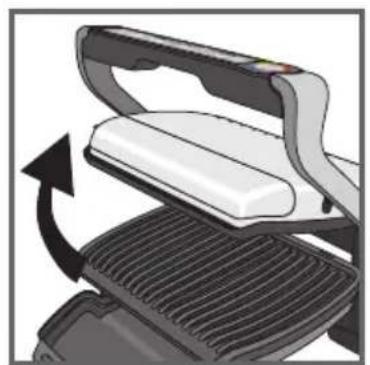
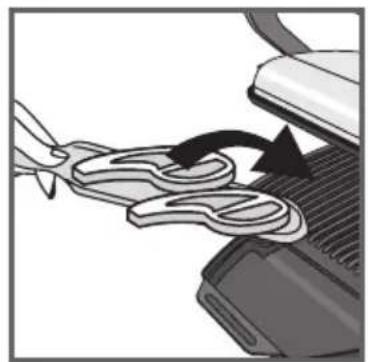
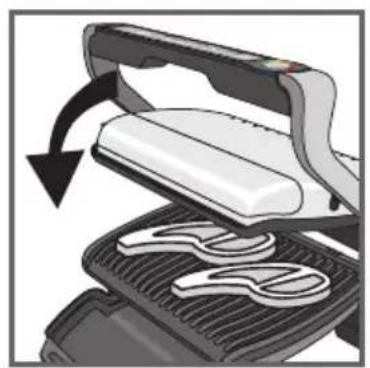
After pre-heating, the appliance is ready for use. Open the grill and place the food on the cooking plate.
Note: To ensure correct operation of the automatic sensor you must open the lid fully. Comments: If the appliance remains open for too long, the safety system will turn off the appliance automatically.
16-17
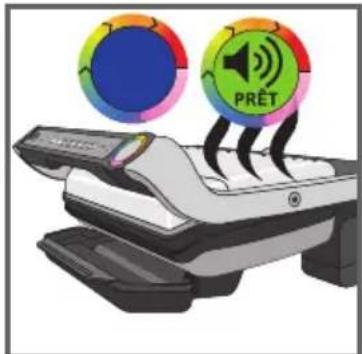
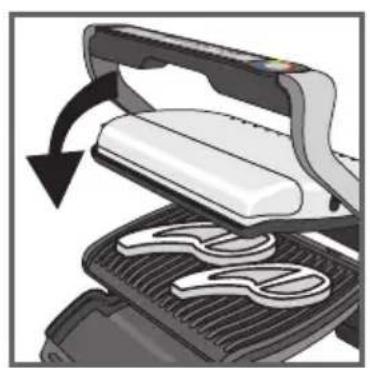
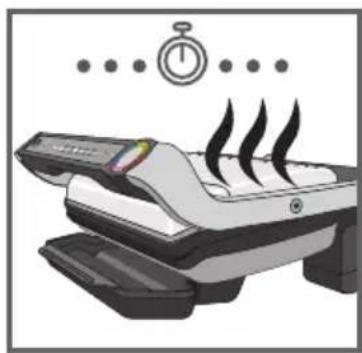
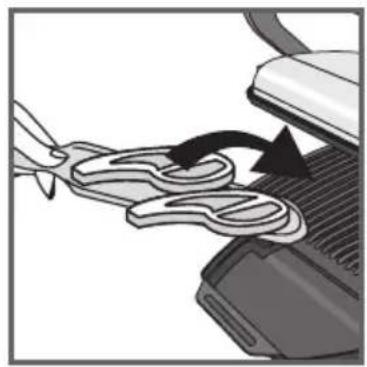
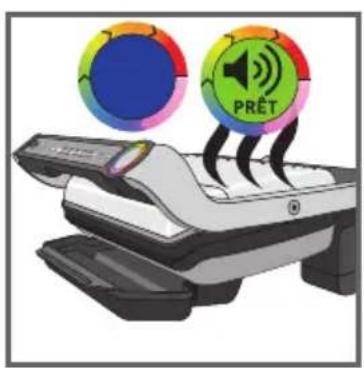
The appliance automatically adjusts the cooking cycle (time and temperature) according to the food thickness and quantity. Close the appliance to start the cooking cycle. The cooking level indicator turns blue and then becomes green to indicate the cooking is in progress (for the best results do not open or move your food during the cooking process).
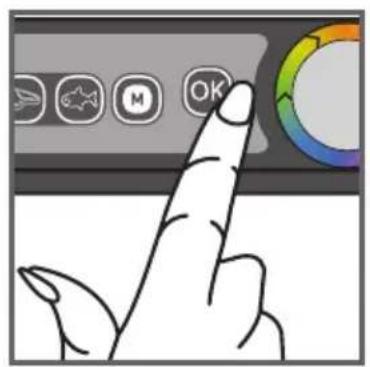
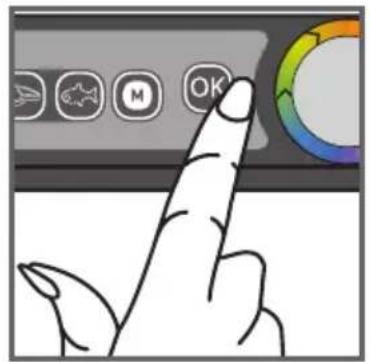
During the cooking in progress stage, a beep sounds at each stage of cooking to warn the user that a cooking level (eg rare/yellow) has been reached. Note for very thin pieces of food: close the appliance, the button OK will flashing and the indicator will stay "fixed purple", press OK to ensure the appliance recognises the food and that the cooking cycle starts.
18
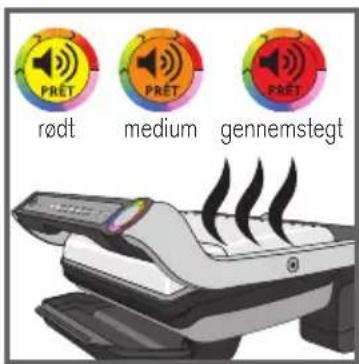
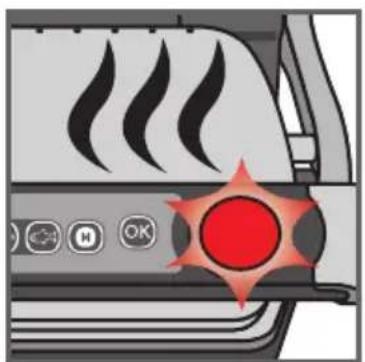
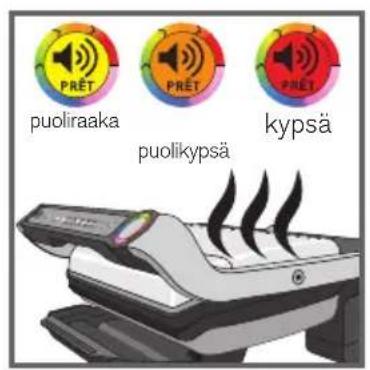
According to the degree of cooking, the indicator light changes colour. When the indicator light is yellow with a beep, your food is rare, when the indicator light is orange with a beep, your food is medium and when the indicator light is red, your food is well done. N.B.: if you like your meat very rare, remove the meat when the cooking level indicator turns green. Please note, especially for meat, it is normal that cooking results may vary depending on type, quality and origin of food.

19

20
19-20
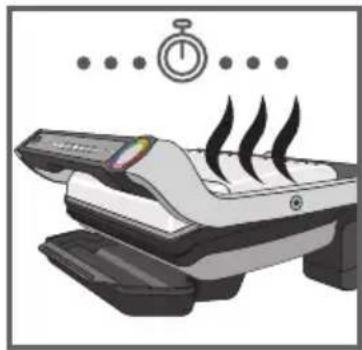
When the colour of the cooking level indicator (A6) corresponds to the degree of cooking you require, open the appliance and remove the food.
4 Comments

21
21
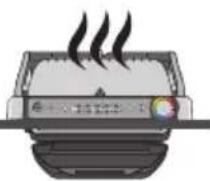
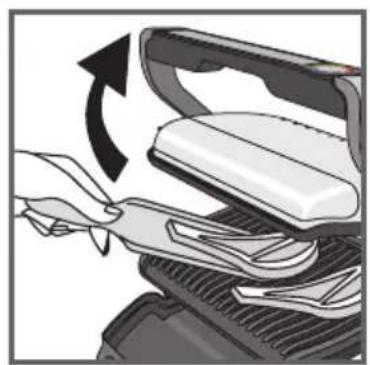
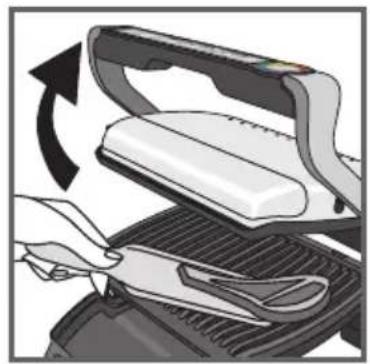
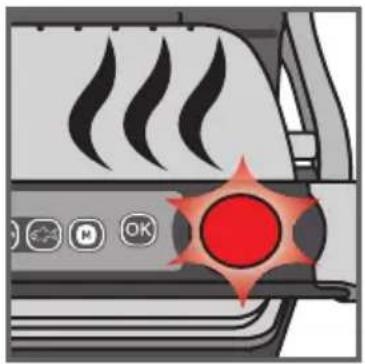
Close the appliance. The control panel will light up and set itself to 'choice of program' mode. Comment: the security system will turn off automatically if no program selection is made. How to cook another batch of food: After finishing your first batch of food:
- Make sure the appliance is closed with no food inside.
- Select the appropriate cooking mode/program (this step is necessary even if you decide to pick the same cooking mode than for the previous batch of food).
- Press the "OK" button: the appliance starts pre-heating. The pre-heating is symbolized by the cooking level indicator that flashes purple.
- The pre-heating is complete when an audible beep is heard and the cooking level indicator stops flashing purple.
- After the pre-heating, the appliance is ready for use. Open the grill and place the food inside the appliance.
Important: - Please note that any new batch of food, the pre-heating phase is mandatory. Remember to always have the grill closed and no food inside in order for the pre-heating to effectively function.
22

23
24
25
- Then wait for the pre-heating to be complete before opening the grill and place the food inside.
N.B.: if the new pre-heating cycle is carried out immediately after the end of the preceding cycle, the pre-heating time will be reduced.
22-23-24
Cook the food according to your personal taste (except for cooking food under 4 mm thick where the cooking cycle has been started by pressing 'OK')
If you want to cook food to different personal tastes, once you have placed it on the grill, open the lid and remove the food when it has reached the desired level and then close the grill and continue cooking the other food. The program will continue its cooking cycle until it reaches the 'well done' level.
25 Keeping warm function
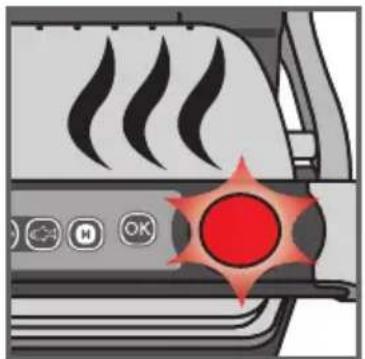
When the cooking process has finished, the appliance will start the keep warm function; the indicator will switch to flashing red and will emit a beep signal every 20 seconds. If the food is left on the grill, it will continue cooking while the cooking plates cool down and during the keeping warm function. You can turn of the beep signal by pressing the 'OK' button.
Comment: the safety system will turn the appliance off automatically after a certain amount of time.
5 Cleaning and maintenance

26 27

28
29 30

26
Press the ON/OFF button.
27
Unplug grill from wall outlet
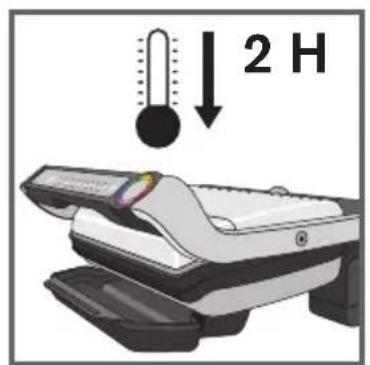
28
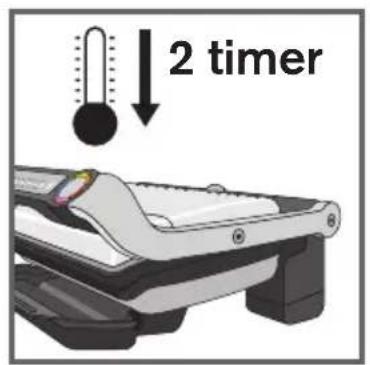
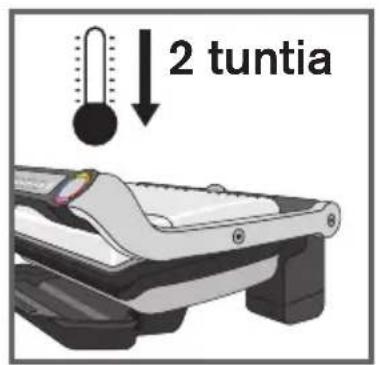
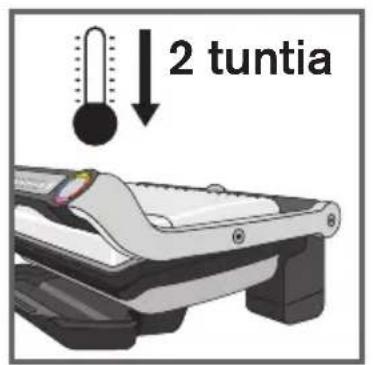
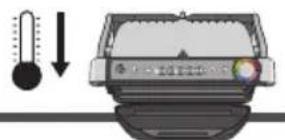
Allow to cool for at least 2 hours with the lid closed. To avoid accidental burns, allow grill to cool thor oughly before cleaning.
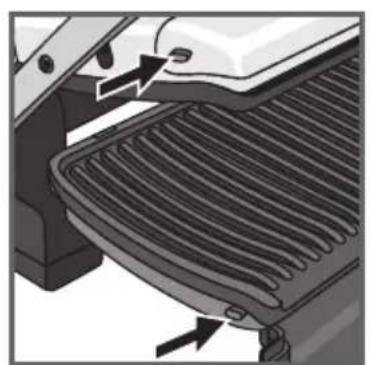
29
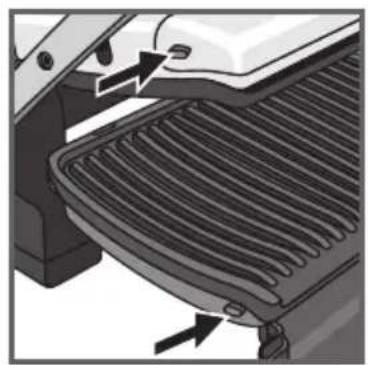
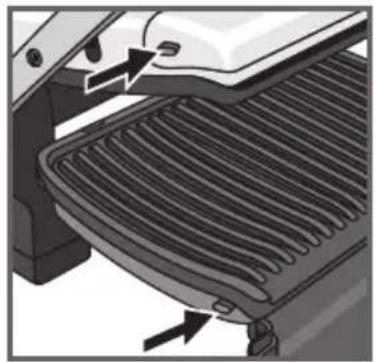
Before cleaning, unlock and remove the plates to avoid damaging the cooking surface.
30
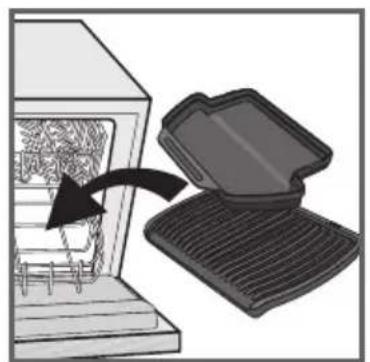
The juice collection tray and the cooking plates are dishwasher safe. The appliance and its cord cannot be placed in the dishwasher. The heating elements, visible and accessible parts, should not be cleaned after removing the plates. If they are very dirty, wait until the appliance has completely cooled down and clean them with a dry cloth.
Note: After cleaning the upper and lower plates should be re-fitted in their original positions and are not interchangeable.

31
32

33 34
35
31-32
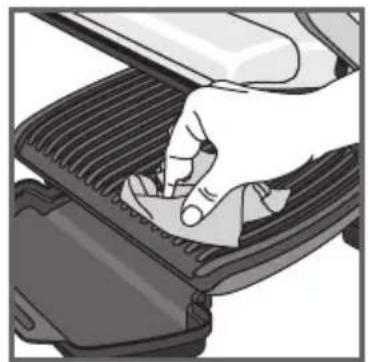
If you do not use a dishwasher, you can use warm water and a little washing-up liquid to clean the cooking plates, then rinse thoroughly to remove any residue. Dry carefully with a paper towel or dry soft cloth. Do not use metallic scouring pads, steel wool or any abrasive cleaners to clean any part of the grill, only use nylon or non-metallic cleaning sponges.
Empty the juice collection tray and wash in warm water and a little washing-up liquid, then dry it carefully with a paper towel or dry soft cloth.
33
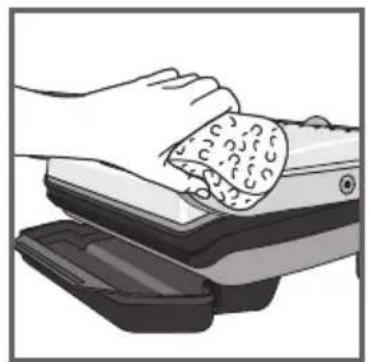
To clean the outside of the grill, wipe with a warm, wet sponge and dry with a soft, dry cloth.
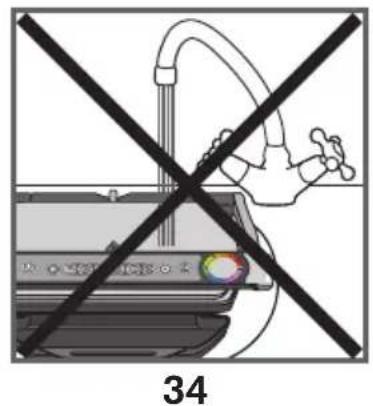
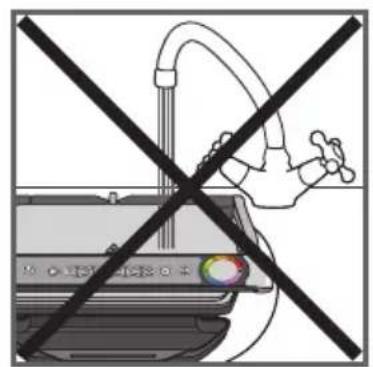
34
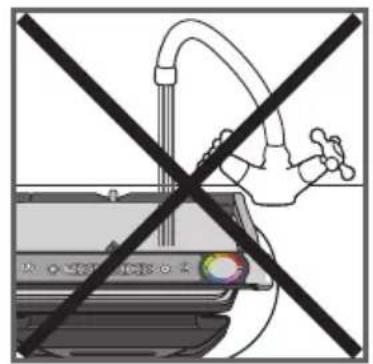
Do not immerse the body of the grill in water or any other liquid.
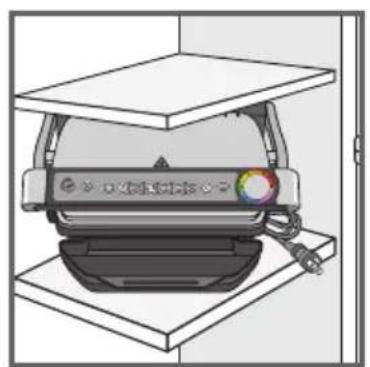
35
Always make sure the grill is clean and dry before storing.
36
Any repairs must be carried out by an approved service representative.
Trouble shooting guide
| Problem Cause Solution | ||
| The appliance switches to manual mode when starting a cooking cycle. | Starting a cooking cycle without preheating. | 2 possible options:allow to cook, but you must monitor the cooking (white LED = manual mode)stop the appliance, remove the food, close the appliance properly, reprogram the appliance and wait until end of preheating. |
| The appliance switches to manual mode when starting a cooking cycle. | Appliance failure. Contact your local Tefal Customer Service. | |
| The appliance stops during the pre-heating or cooking cycle. | The appliance has been kept open for too long while preheating or cooking.The appliance has been idle too long after the end of warm up or keep warm. | Disconnect the appliance from the mains leave for 2-3 mins, restart the process. The next time you use the appliance, make sure you open and close it briefly for best cooking results. If the problem continues, contact your local Tefal Customer Service. |
| Indicator flashing after placing the food on the cooking plates. | Not sensing the food. Meat thickness too thin. | You must confirm the start of the cooking by pressing the button OK. |
| Flashing white indicator light.+ button flashingor button flashing | Appliance failure.Appliance stored or used in a room that is too cold. | Disconnect and reconnect your appliance and immediately restart a preheat cycle.If the problem persists, contact your Customer Service. |
| The appliance no longer beeps. | ||
| I have put in my food and closed the appliance but cooking has not started. | Your food has a depth thicker than 4 cm.Your food is under 4 mm thick.You have not waited for the appliance to pre-heat. | Food must not be thicker than 4cm.You must confirm the start of the cooking by pressing the button OK.Wait for the audible beep and the cooking level indicator to flash purple before adding food. |
| I have put in my food but the indicator stays on PURPLE | You have not completely opened the grill when putting on the food. | Completely open the grill then close it. |
| Not sensing the food. Meat thickness too thin. Minimum thickness = 4mm | Confirm the start of the cooking by pressing the button OK. | |
| The appliance turns itself off during cooking in manual mode. | The cooking time has exceeded 30 minutes. | Press the on/off button and re-start the manual mode. |
Tip, especially for meat: the cooking results on the preset programmes may vary depending on origin, cut and quality of the food being cooked, the programmes have been set and tested for good quality food. Similarly, the thickness of the meat has to be taken into account during cooking; you may not cook food that is thicker than 4 cm.
Program table
| Dedicated program | Cooking level colour indicator | |||
 |  |  | ||
 | Red meat Rare Medium | Well-done | ||
 | Burger | Rare Medium Well-done | ||
 | Panini Lightly cooked Well-done Crispy | |||
 | Fish Lightly cooked Medium Well-done | |||
 | Chicken* Fully cooked | |||
 | Sausage* Fully cooked | |||
* Chicken and sausages must only be cooked well-done.
Tips: if you like your meat blue rare, you can use

Cooking table for out of program food
| Food | Cooking program | Cooking levelrare medium well-done | |
| Bread slices | of bread, toasted sandwiches |  | |
| burger: (after pre-cooking the meat) | |||
| Meat & Poultry | Pork fillet (boneless), pork belly |  | |
| Lamb (boneless) | |||
| Frozen chicken nuggets |  | ||
| Gammon steak |  | ||
| Marinated chicken breast |  | ||
| Vegetables | Potatoes (3 mm slices) Leeks (7-8 mm slices) Courgettes (7-8 mm slices) Peppers |  | |
| Fish | Whole trout |  | |
| Shelled prawns | |||
| King prawns (with and without shells on) | |||
| Tuna steak | |||
| Manual mode | Toasted sandwiches, panini... (thin slices of similar thickness) |  | Fixed temp |
For frozen food, press before selecting your program.
Disposal of the appliance
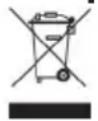
Legislation requires that all electrical and electronic equipment must be collected for reuse and recycling. Electrical and electronic equipment marked with the symbol indicating separate collection of such equipment must be returned to a municipal waste collection point.
OBH Nordica LIMITED GUARANTEE
The Guarantee
OBH Nordica guarantees this product against any manufacturing defect in materials or workmanship during 2 years within Sweden, Norway, Denmark and Finland, starting from the initial date of purchase or delivery date.
This manufacturer's commercial guarantee covers all costs related to restoring the proven defective product so that it conforms to its original specifications, through the repair or replacement of any defective part and the necessary labour. At OBH Nordicas choice, a replacement product may be provided instead of repairing a defective product. OBH Nordicas sole obligation and your exclusive resolution under this guarantee are limited to such repair or replacement.
Conditions & Exclusions
OBH Nordica shall not be obliged to repair or replace any product which is not accompanied by a valid proof of purchase. The defective product may be returned to the store of purchase.
This guarantee applies only for products purchased and used for domestic purposes and will not cover any damage which occurs as a result of misuse, negligence, failure to follow OBH Nordica instructions, or a modification or unauthorised repair of the product, faulty packaging by the owner or mishandling by any carrier. It also does not cover normal wear and tear, maintenance or replacement of consumable parts, or the following:
- using the wrong type of water or consumable
- mechanical damages, overloading
- damages or poor results specifically due to wrong voltage or frequency as stamped on the product ID or specification
- ingress of water, dust or insects into the product
- scaling (any de-scaling must be carried out according to the instructions for use)
- damage as a result of lightning or power surges
- damage to any glass or porcelain ware in the product
- accidents including fire, flood, etc
- professional or commercial use
Consumer Statutory Rights
OBH Nordica's commercial guarantee does not affect the Statutory Rights a consumer may have or those rights that cannot be excluded or limited, nor
rights against the retailer from which the consumer purchased the product. This guarantee gives a consumer specific legal rights, and the consumer may also have other legal rights which vary from Country to Country. The consumer may assert any such rights at his sole discretion.
These instructions are also available on our website www.obhnordica.com.
OBH Nordica AB
Löfströms Allé 5
These instructions are subject to alterations or improvements.



- 2 FÖRVÄRMNING
- 1
- 5
- 9
- 11
- 14-15
- 19-20
- 22-23-24
- 26
- 31-32
- 2 OPVARMNING
- OBH NORDICA DENMARK A/S
- TEKNISKE DATA
- CE
- 2 FORVARMING
- BEGRENSET GARANTI FOR OBH NORDICA
- GARANTIEN
- OBH NORDICA NORWAY AS
- 2 ESILÄMMITYS
- SAFETY INSTRUCTIONS - IMPORTANT SAFEGUARDS
- DO
- DO NOT
- TIPS/INFORMATION
- DESCRIPTION
- GUIDE TO LED COLOURS
- GUIDE TO COOKING PROGRAMS
- 1 SETTING UP
- 2
- 3-4
- 2 PRE-HEATING
- 6
- 7
- 8
- 10
- 6 COOKING PROGRAMS AND A MANUAL
- 12
- 13
- 3 COOKING USING DEDICATED PROGRAMS
- 16-17
- 18
- 4 COMMENTS
- 21
- 25 KEEPING WARM FUNCTION
- 5 CLEANING AND MAINTENANCE
- 27
- 28
- 29
- 30
- 33
- 34
- 35
- 36
- TROUBLE SHOOTING GUIDE
- PROGRAM TABLE
- COOKING TABLE FOR OUT OF PROGRAM FOOD
- DISPOSAL OF THE APPLIANCE
- OBH NORDICA LIMITED GUARANTEE
- THE GUARANTEE
- CONDITIONS & EXCLUSIONS
- CONSUMER STATUTORY RIGHTS
- OBH NORDICA AB
Brand : OBH NORDICA
Model : OptiGrill+ GO712DS0
Category : Grill