
DA 320 X - Refrigerator Scancool - Free user manual and instructions
Find the device manual for free DA 320 X Scancool in PDF.


| Product Type | Commercial Dry-Aging Refrigerator with Glass Door |
| Brand | Scancool |
| Model | DA 320 X |
| Intended Use | Dry-aging, cooling, and displaying meat in commercial kitchens |
| Climate Class | 4 (Max 30°C, Max 55% RH) |
| Refrigerant | R290 (Flammable) |
| Temperature Range | 0°C to 25°C |
| Humidity Range | 30% to 90% |
| Default Temperature/Humidity | 1.5°C / 82% |
| Max Shelf Loading | 30 kg per shelf |
| Max Hanger Loading | 60 kg |
| Lighting | LED, Energy Class G, Replaceable only by professional |
| UVC Disinfection | Photocatalyst UVC lamp, 15 months lifespan |
| Defrost | Automatic every 4 hours, manual optional |
| Control Panel | Digital with temperature and humidity adjustment, button lock |
| Electrical Protection Class | Class I (requires protective ground) |
| Sound Pressure Level | Below 70 dB(A) |
| Cleaning | Mild detergent and soft cloth; avoid abrasives; clean condenser annually |
| Spare Parts Availability | Minimum 8 years (by Scandomestic A/S) |
| Warranty | Statutory warranty; excludes misuse |
Frequently Asked Questions - DA 320 X Scancool
User questions about DA 320 X Scancool
0 question about this device. Answer the ones you know or ask your own.
Ask a new question about this device
Download the instructions for your Refrigerator in PDF format for free! Find your manual DA 320 X - Scancool and take your electronic device back in hand. On this page are published all the documents necessary for the use of your device. DA 320 X by Scancool.
USER MANUAL DA 320 X Scancool
Original user manual
Original instructions
Please take a few minutes before starting operation of the appliance and read the following operating instructions
1. Description
This appliance is designed for dry-aging, cooling, and displaying meat in restaurants, canteens, and similar catering establishments.
The appliance is not intended to cool hot meat down. Previously heated meat must be cooled down to room temperature prior to placement in the appliance.
The appliance is intended for commercial and indoor use by trained and skilled personnel familiar with these instructions.
Do not use the appliance for other purposes. Any other use might lead to damage of the appliance, property, or personal injury.
The manufacturer will accept no liability for damage or injuries resulting from improper use or non-compliance with this manual.
2. Safety Warnings
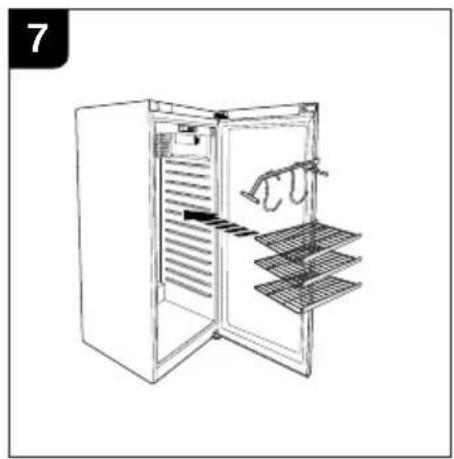
IMPORTANT SAFETY INSTRUCTIONS READ CAREFULLY AND KEEP FOR FUTURE REFERENCE! PAY PARTICULAR ATTENTION TO ALL FIGURES ON ILLUSTRATION PAGE!
- Read this instruction manual carefully before using the appliance. Familiarize yourself with the operation, adjustments, and functions of switches. Internalize and follow the safety and operation instructions in order to avoid possible risks and hazards Remove all packaging materials.
- Remove all packaging materials.
- WARNING - DANGER OF SUFFOCATION! Packaging materials are not toys. Children should not play with the packaging materials, as they pose a risk of swallowing and suffocation!
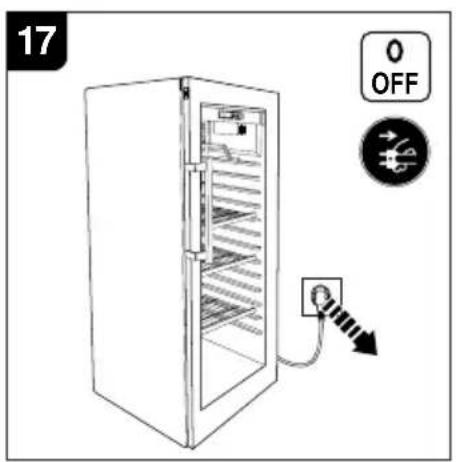
- WARNING! Switch the appliance off and disconnect it from the power supply before replacing attachments, cleaning work and when not in use.
- WARNING - RISK OF ELECTRIC SHOCK! Protect the appliance and its electrical parts against moisture. Do not immerse the appliance and its electrical parts in water or other liquids to avoid electrical shock. Never hold the appliance under running water. Pay attention to the instructions for cleaning and care.
- Do not operate the appliance with wet hands or while standing on a wet floor. Do not touch the power plug with wet hands.
- WARNING - RISK OF FIRE! This appliance contains flammable refrigerant.
- This appliance is classified as protection class I and must be connected to a protective ground.
• Only use in dry indoor rooms. - This appliance is classified as climate class 4 and is suitable for the following dry bulb temperature (°C) and relative humidity (%RH): Class 4. Max 30°C. Max. % RH 55
- This appliance can be used by children aged from 8 years and above and persons with reduced physical, sensory, or mental capabilities or lack of experience and knowledge if they have been given supervision or instruction concerning use of the appliance in a safe way and understand the hazards involved.
- Children shall not play with the appliance.
- Cleaning and user maintenance shall not be made by children without supervision.
- CAUTION! Risk of fire / flammable materials.
- CAUTION! Risk of fire and explosion with
flammable refrigerant R290.
-
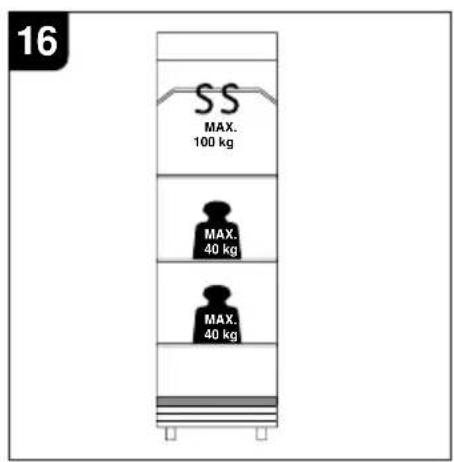
WARNING! The maximum loading of the shelves (30kg) and the hanger (60kg) must not be exceeded.
-
WARNING: Do not store explosive substances such as aerosol cans with a flammable propellant in this appliance.
-
Make sure to follow the information pertaining to the handling, servicing, and disposal of the appliance, especially with respect to the flammable refrigerant and flammable insulation blowing gas used in the appliance.
-
WARNING: Keep clear of obstruction all ventilation openings in the appliance enclosure or in the structure for building-in.
-
WARNING: Do not use mechanical devices or other means to accelerate the defrost-ing process, other than those recommended by the manufacturer.
-
WARNING: Do not damage the refrigerant circuit.
-
WARNING: Do not use electrical appliances inside the food storage compartments of the appliance, unless they are of the type recommended by the manufacturer.
-
Lamp type: LED light. Energy efficiency level : G. Light source in this product is replaceable only by a professional.
-
WARNING: In order to reduce flammability hazards the installation of this appliance must only be carried out by a suitably qualified person.
-
Regularly check the power plug and power cord for damage. If the supply cord is damaged, it must be replaced by the manufacturer, its service agent, or similarly qualified persons in order to avoid a hazard.
-
In the event of an accident or breakdown, immediately disconnect the appliance from the power supply.
-
WARNING! Misuse may lead to injury! Only use the appliance for its intended purpose and in accordance with this manual.
-
To guarantee the safe operation of the appliance, it shall undergo regular inspection and maintenance, including preventive maintenance measures, in accordance with this manual.
-
The A-weighted emission sound pressure level is below 70 dB(A).
-
WARNING! Disconnect the appliance from its power source during cleaning or maintenance and when replacing parts. The removal of the plug must be such that an operator can check from any of the points to which he has access that the plug remains removed. If this is not possible, due to the construction of the appliance or its installation, a disconnection with a locking system in the isolated position shall be provided.
-
Never use accessories other than those provided with the appliance or recommended by the manufacturer. They could pose a safety risk to the user and might damage the appliance. Only use original parts and accessories.
-
Regarding the instructions for cleaning surfaces coming into contact with food, please refer to chapter "After use".
-
The appliance must be installed, operated, cleaned, and maintained only by trained and skilled personnel familiar with these instructions.
-
Regularly have the electrical parts of the appliance checked by a qualified professional.
-
Danger of electric shock! Do not attempt to repair the appliance yourself. In case of malfunction, repairs are to be conducted by qualified personnel only.
-
WARNING! Do not disassemble or modify the appliance in any way. Resulting fire or malfunctions may lead to injury.
-
Always turn the appliance off before disconnecting the power plug.
-
Place the appliance on a wide, even, stable, and dry surface able to support the combined weight of the appliance and its contents.
-
Do not pull the power plug out of the electrical outlet by the power cord.
- The appliance is not intended to be operated by means of an external timer or separate remote-control system.
- Connect the mains plug to an easily accessible socket, in order to quickly disconnect the appliance from the mains supply in an emergency.
- The appliance is not intended to be used with a multi- socket unit or an extension cable. The appliance's power plug should have its own independent and properly grounded socket.
- Using adapters may cause overheating or fire.
- Do not store medical supplies in the appliance.
- Do not place the appliance in direct sunlight or close to any heat sources, as this will hinder the cooling process.
- The refrigerant and insulation blowing gas used in the appliance require special disposal procedures. When disposing of them, please consult your service agent or a similarly qualified person.
- Do not place heavy objects or objects filled with water, e.g., vases, on the appliance.
- Keep a minimum distance of 10cm between all sides of the appliance and walls or other objects. If the distance is too small, the cooling capacity may be impacted.
- Do not use excessive force to open the glass door and do not apply pressure to the glass to prevent it from breaking.
- After turning the appliance off, always wait at least 5 minutes before turning it on again. Otherwise, the compressor may be damaged. The appliance is very heavy. It is recommended to push or roll the appliance for transport whenever possible. To roll the appliance, hold the door handle and tilt the appliance back at slightly more than 10^ . If the appliance must be lifted, please only do so with specialized
equipment or have it lifted by qualified professionals. This applies to the packed as well as the unpacked appliance.
- Never tilt the appliance more than 45^ or turn the appliance on its side or upside down to avoid damaging the refrigerant circuit.
- Important! Allow the appliance to stand upright for at least 2 hours before connecting it to a mains outlet for the first time, so that the refrigerant can settle. The same applies if the appliance is moved later.
- To avoid explosion or fire, do not use the appliance near explosive or flammable vapors or near ignition sources.
- Never use aerosol cans with a flammable propellant near the appliance or place flammable substances near it.
- If gas flows out of the appliance, do not pull the power plug from the outlet as this can cause sparks and fire.
- Never touch the compressor to avoid scalding.
- The cabinet's temperature range is 0-25°C. When dry aging beef, we suggest to set the temperature between 1-4°C for best results.
- The cabinet's humidity range is 30-90%. When dry aging beef We suggest to set it between 60-90% for best results.
Electrical safety
- Ensure the rated voltage shown on the rating label corresponds with the voltage of the power supply.
- Do not operate any appliance with a damaged power cord or plug when the appliance malfunctions or has been damaged in any manner.
- Protect the power cord against damages. Do not let it hang over sharp edges, do not squeeze or bend it. Keep the power cord away from hot surfaces and open flames and ensure that nobody can trip over it.
- Do not open the housing under any circumstances. Do not insert fingers or foreign objects in any opening of the appliance and do not obstruct the air vents.
- Protect the appliance against heat. Do not place close to open flames or heat sources such as stoves or heating appliances.
3. Operations
Operating elements
 | Press to increase temperature and humidity. Keep pressed for approx. 5 seconds to turn UVC (ultraviolet light) on and off. | Keep both buttons pressed for approx.3 seconds to activate/deactivate the button lock. With button lock activated, only LED light and UVC can be turned on and off. |
 | Press to reduce temperature and humidity. Keep pressed for approx. 2 seconds to defrost manually (After use). | |
 | Press to display temperature setting. Press to confirm temperature setting after selecting with up and down buttons. | |
 | Press to display humidity setting. Press to confirm humidity setting after selecting with up and down buttons. | |
 | Press to turn LED light on and off. | |
 | Press to turn appliance on.Keep pressed for approx. 5 seconds to turn appliance off. | |
Display elements
 | On: Cooling activeFlashing: Delayed cooling | |
 | Heating active | |
 | Fan is running | |
 | LED light on | |
 | Dehumidification in progress | |
 | Humidification in progress | |
 | On: UVC-disinfection activeFlashing: UVC alarm | |
 | On: Defrost in progressFlashing: Defrost | |
 | Alarm active |
Notes:
- Temperature and humidity of the appliance are already set to 1.5°C and 82% respectively, which is the perfect setting for dry-aging beef and pork. If necessary, the appliance can be reset to factory settings by keeping the “UVC-button” and “set temp.” button pressed for approx. 3 seconds. Before placing meat inside the appliance, remove all packaging, foils, etc. from it.
- Meat for dry aging must be fresh (ideally max. 5 days after slaughtering). Vacuum-matured meat can also be used, but only for a maximum of 14 days.
• Always wear protective gloves when contacting meat. - The perfect maturing time is between 25 and 28 days, but more than 4 weeks is also possible.
Description of working principle of UVC photocatalyst




- RTB-480L Controller on/off UVC function
a. On: Hold down "key, five seconds later, the UVC function is enabled, "UVC" is displayed on the LED, indicating that the work is started.
b. Off: Hold down “UVC” key, five seconds later, the UVC function is disabled, “UVC” is displayed off the LED, Stop working。
c. UVC replacement reminder: the default debugging will be UVC enabled state. The system will have power off memory function, users do not need to operate after the UVC is started, the system starts timing. After 15 months (455 days), the system will remind to replace the UVC when its working life expires when displayed. The alarm icon will light up, and the "UVC" character
will flash, while the buzzer will keep beeping. UVC replacement reminder reset operation: in the alert state, hold down the "▲" button for 5 seconds to cancel the alert and restart the timing.
-
How photocatalyst work
-
The panel controls
- The 12v constant voltage
– High frequency high voltage drive - Photocatalytic
Photocatalyst operation instructions
- After the power supply of the beef cabinet is turned on, if the word UVC is not displayed on the screen, please turn on the Photocatalyst
- Hold down the UVC button for about 5 seconds, turn on the UVC light, and the word UVC appears on the screen.
- The UVC motor rotates when the UVC lamp is turned on.
UVC REPLACEMENT INSTRUCTION
- Remove the screws and take away the UVC box cover.
- Loose the red and blue wire connector and take away the UVC lamp.
- Take a new UVC lamp and connect the wire through the mounting hole.
- Push the UVC lamp in the box.
- Cover the UVC lamp box and fix with screws.
NOTE:
- Do not knock against the UVC lamp shell during replacement and installation.
- The effective service life of UVC lamp is 15 months, and it will be replaced after reaching the service life.
4. After use
Cleaning
- Switch off and unplug the appliance before cleaning or maintenance.
- Remove all items from the appliance. Display elements
- Do not clean the appliance with steel wool, strong chemicals, alkali, abrasive, or toxic agents, as they may damage the surface of the appliance and pose a health hazard.
- During cleaning, do not approach sharp elements (evaporator, condenser, etc.) that could cause cutting injuries bare-handed. Always use protective gloves.
- Use little or no water during cleaning. Make sure that no water enters the appliance while cleaning it.
- Regularly wipe the inside and outside surfaces of the appliance with a soft damp cloth and a little mild detergent. Dry with a soft dry cloth.
- Regularly remove the shelves and Shooks and clean them with warm water, a soft sponge, and a mild detergent. Dry with a soft dry cloth.
- Disinfect the inside of the appliance with a mild disinfectant after cleaning.
- Regularly clean the ventilation openings with a soft brush or the crevice nozzle of a vacuum cleaner.
- To ensure a trouble-free performance and to avoid excessive electricity consumption, clean the condenser at the back of the appliance at least once a year with the crevice nozzle of a vacuum cleaner.
- If the condenser coil is not cleaned at least 3 times per year, the efficiency of the appliance will decrease significantly.
- The appliance may only be used again or stored after it is dried completely.
Defrosting
- The appliance defrosts itself automatically every 4 hours. Note: During the defrost process, the appliance slightly raises the temperature inside the cooling compartment, so that the developed ice can melt. This process is not harmful to the products stored in the appliance and only takes approx. 20 minutes
- You can also start a manual defrost process by keeping the button pressed for approx. 2 seconds. The defrost symbol lights up. Note: The next automatic defrost process starts 4 hours after the manual defrost process.
- To cancel an ongoing defrost process, press the On/Off button.
Storage
- Before storing or when the appliance is not in use, remove all contents from the appliance, disconnect it from the power supply and clean the appliance and its accessories thoroughly.
- Store the appliance in a dry, protected environment at room temperature and out of the reach of children.
- Keep the appliance's door open to avoid smell or mold.
- To protect the appliance from dust, cover it with a cloth that allows air circulation inside the appliance.
5. Troubleshooting
Warning!
- In case of failures or malfunctions, always unplug the appliance immediately.
- Only perform the steps described in this instruction manual! All further inspection, maintenance and repair work must be performed by an authorized service center or a similarly qualified specialist.
• Should you require spare parts, always
obtain them from an authorized seller. Do not use spare parts that are not recommended by the manufacturer!
| Problem | Possible cause | Solution |
| Appliance does not operate. | Power plug not connected to electrical outlet. | Connect power plug tightly with a suitable electrical outlet. |
| Supply cord is damaged. | Have supply cord replaced by the manufacturer, its service agent, or similarly qualified persons. |
| Problem | Possible cause | Solution |
| Appliance does not achieve required temperature. | Control panel is not set correctly. | Set temperature with control panel as described in this manual. |
| Appliance is located near heat sources. | Move appliance well away from heat sources. | |
| Stored items prevent proper closing of door. | Reorder contents of cooling compartment or remove several items to allow doorto close. | |
| Appliance is placed too near to the wall or to other objects. | Keep a minimum distance of 10cm to wall or other objects on all sides. | |
| Cooling compartment overloaded, filled with hot items, filled in a way that prevents proper air circulation, or items in cooling compartment block the air inlet or outlet. | Remove several items, remove hot items, reorder contents of cooling compartment to allow air circulation, or remove items which block the air inlet or outlet. | |
| Door opened and closed too often. | Keep door closed for a while. | |
| Door seal deformed or damaged. | Obtain a new door seal from an authorized seller and have it installed by a qualified professional. | |
| Appliance is very noisy. | Appliance is placed too near to the wall or to other objects. | Keep a minimum distance of 10cm to wall or other objects on all sides. |
| Appliance not in a stable position. | Bring appliance into a stable position. Make sure that all feet/wheels are firmly on the ground. | |
| Loose part inside the appliance. | Have appliance checked and repaired by a qualified professional. | |
| Condensation on outside of appliance. | Normal phenomenon in hot and humid environments. | Wipe appliance with a dry and soft cloth. |
| Murmur of water is heard when the appliance is working | Normal phenomenon as the coolant is circulating in the system. | |
| Error code P1, P2 or P3. | Temperature probe failure, defrost probe failure or humidity probe failure. | Wait until the error code vanishes automatically. |
| Error code HA. | High temperature alarm (Temperature higher than 27°C) | Adjust the setting temperature |
| Error code LA. | Low temperature alarm (Temperature lower than -2°C) | Adjust the setting temperature |
| Error code HAA. | High Humidity alarm (Humidity higher than 95% | Adjust the setting humidity |
| Error code HLA. | Low Humidity alarm (Humidity lower than 25%) | Adjust the setting humidity |
| Error code dA. | Door open. | Close the door. |
| Alarm sounds. | Error code is displayed | Press the On/Off button. |
For the circuit diagram, please see illustration at the end of this manual.
a. Digital temperature controller
b. Ambient temperature probe
c. Thermostat probe
d. Defrost probe
e. Humidity probe
f. Door switch
g. Compressor
h. Heating element
i. Fan motor
j. Ballast
k. 12 V Power switch
I. LED driver
m. Heating glass
n. LED lamp
o. Ultraviolet light
p. PTC
6. Disposal
Environmental Protection

Discarded electric appliances are recyclable and should not be discarded in the domestic waste! Please actively support us in conserving resources and protecting the environment by returning this appliance to the collection centers.
Refrigerants must be evacuated and disposed of by a qualified specialist in accordance with federal and local regulations before the appliance is scraped.
Caution: Please keep the appliance away from fire or similar glowing substances before you dispose of it. Please remove the door before you dispose of the appliance.
7. Warranty
A statutory warranty applies for this product.
Damages caused by wrong treatment or operation, by false placement or storage, improper connection, or installation, as well as force or other external influences are not covered by this warranty. We recommend careful reading of the operating instructions as it contains important information.
Note:
- In case this product does not function correctly, please firstly check if there are other reasons, e.g., for electrical appliances interruption of the power supply, or generally incorrect handling are the cause.
- Please note that, where possible, the following documents or rather information should be provided together with your faulty product:
– Purchase receipt
– Model description/Type/Brand
– Describe the fault and problem as detailed as possible
In the case of a claim for guarantee or defects, please contact the seller.
Light
- Lamp type: LED light. Energy efficiency level : G.
- Light source in this product is replaceable only by a professional.

DRY AGING KÜHLSCHRANK MIT GLASTÜR
natural_image
Illustration of an open refrigerator with a rack and a side view showing a steaming machine (no text or symbols)
natural_image
Line drawing of an open refrigerator with a rack and hanging clothes (no text or symbols)


natural_image
Line drawing of an open refrigerator with cooling system indicators (no text or symbols)




natural_image
Illustration of an open refrigerator with a hanging rack and a smaller rack, accompanied by decorative stars (no text or symbols)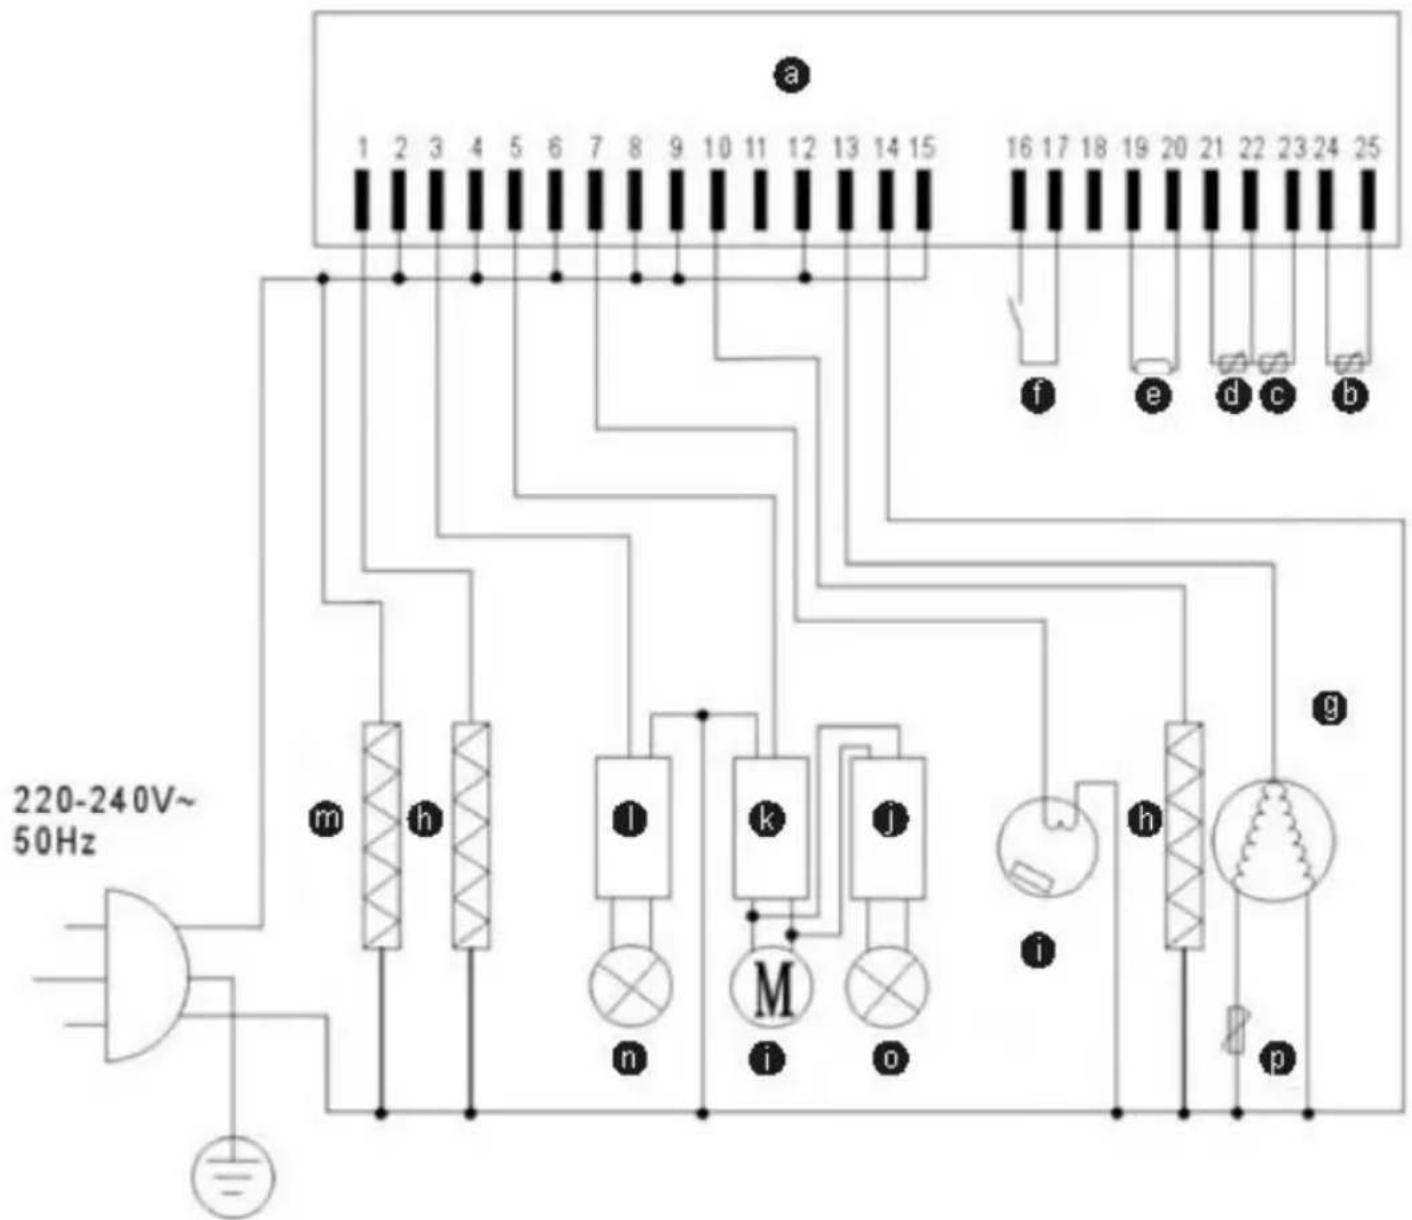


DK
Adgang til professionel reparation, såsom internetsider, adresser, kontaktoplysninger
Model nr: DA 320 X
Access to professional repair, such as internet webpages, addresses, contact details.
Model no: DA 320 X
Aftersales service station list:
| Address | Scandomestic A/S |
| Contact Number | 7242 5571 |
| Website | Scandomestic.dk |
| QR code | |
| Relevant information for ordering spare parts, directly or through other channels provided by the manufacturer, importer or authorised representative; | Scandomestic A/S |
| The minimum period during which spare parts, necessary for the repair of the appliance, are available; | 8 years |
| Instruction on how to find the model information in the product database, as defined in Regulation (EU) 2019/2019 by means of a weblink that links to the model information as stored in the product database or a link to the product database and information on how to find the model identifier on the product.) | www.scandomestic.dk |
Note: The address or contact phone number of the service site is subject to change without prior notice. Please confirm whether the service station is a directly affiliated one of our company when requiring services.
DE
Access to professional repair, such as internet webpages, addresses, contact details.
Model no: DA 480 X
Aftersales service station list:
| Address | Scandomestic A/S |
| Contact Number | 7242 5571 |
| Website | Scandomestic.dk |
| QR code | |
| Relevant information for ordering spare parts, directly or through other channels provided by the manufacturer, importer or authorised representative; | Scandomestic A/S |
| The minimum period during which spare parts, necessary for the repair of the appliance, are available; | 8 years |
| Instruction on how to find the model information in the product database, as defined in Regulation (EU) 2019/2019 by means of a weblink that links to the model information as stored in the product database or a link to the product database and information on how to find the model identifier on the product.) | www.scandomestic.dk |
Note: The address or contact phone number of the service site is subject to change without prior notice. Please confirm whether the service station is a directly affiliated one of our company when requiring services.
DE
EU DECLARATION OF CONFORMITY
Ref. Ares In accordance with EN ISO 17050-1:2004
| Model number (unique identification of the product): | DA 320 X |
| Name and address of the manufacturer or his authorised representative: | Scandomestic A/SLinåvej 208600 SilkeborgDenmark |
| This declaration of conformity is issued under the sole responsibility of the manufacturer (or installer): | Scandomestic A/SLinåvej 208600 SilkeborgDenmark |
| Object of the declaration (identification of product allowing traceability. It may include a colour image of sufficient clarity to enable the identification of the product)Product: Dry Aging RefrigeratorBrand: ScancoolColour: Stainless Steel | 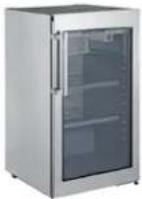 |
| The object of the declaration described in point 4 is in conformity with the relevant Union harmonisation legislation: | EN 60335-2-89:2010+A1:2016+A2:2017, EN 60335-1:2012+A11:2014+A13:2017+A1:2019+A14:2019+A2:2019, EN 62233:2008, MD 2006/42/EC, IEC 60335-2-89:2010+A1:2012+A2:2015, IEC 60335-1:2010+A1:2013, 2017/1369, 2019/2024, ISO 23953-1:2015, ISO 23953-2:2015, 2019/2018, 1907/2006, 2011/65/EU, 2015/863. RoHS 2011/65/EU, 2015/863, EN 61000-3-2, EN 60335-2-89:2010+A1:2016+A2:2017, EN 60335-1:2012+A11:2014+A13:2017+A1:2019+A14:2019+A2:2019EN 62233:2008, IEC 60335-2-89:2010+A1:2012+A2:2015 with IEC 60335-1:2010+A1:2013, ISO 23953-1/-2:2015, 1060/2010, DIN 10955:2004, 10/2011 with EN 1186-1-1-3-8-9-14, REACH 1907/2006, Rohs 2011/65/EU, IEC 62321-2:2013 with, IEC 62321-3-1:2013, IEC 62321-5:2013, IEC 62321-4:2013, IEC 62321-6:2015, IEC 62321-7-2:2017 |
| References to the relevant harmonised standards used, or references to the specifications in relation to which conformity is declared: | EN 61000-3-2 |
| Additional information: | The appliance is intended exclusively for food storage |

EU DECLARATION OF CONFORMITY
Ref. Ares In accordance with EN ISO 17050-1:2004
| Model number (unique identification of the product): | DA 480 X |
| Name and address of the manufacturer or his authorised representative: | Scandomestic A/SLinåvej 208600 SilkeborgDenmark |
| This declaration of conformity is issued under the sole responsibility of the manufacturer (or installer): | Scandomestic A/SLinåvej 208600 SilkeborgDenmark |
| Object of the declaration (identification of product allowing traceability. It may include a colour image of sufficient clarity to enable the identification of the product)Product: Dry Aging RefrigeratorBrand: ScancoolColour: Stainless Steel |  |
| The object of the declaration described in point 4 is in conformity with the relevant Union harmonisation legislation: | EN 60335-2-89:2010+A1:2016+A2:2017, EN 60335-1:2012+A11:2014+A13:2017+A1:2019+A14:2019+A2:2019, EN 62233:2008, MD 2006/42/EC, IEC 60335-2-89:2010+A1:2012+A2:2015, IEC 60335-1:2010+A1:2013, 2017/1369, 2019/2024, ISO 23953-1:2015, ISO 23953-2:2015, 2019/2018, 1907/2006, 2011/65/EU, 2015/863. RoHS 2011/65/EU, 2015/863, EN 61000-3-2, EN 60335-2-89:2010+A1:2016+A2:2017, EN 60335-1:2012+A11:2014+A13:2017+A1:2019+A14:2019+A2:2019EN 62233:2008, IEC 60335-2-89:2010+A1:2012+A2:2015 with IEC 60335-1:2010+A1:2013, ISO 23953-1/-2:2015, 1060/2010, DIN 10955:2004, 10/2011 with EN 1186-1-1-3-8-9-14, REACH 1907/2006, Rohs 2011/65/EU, IEC 62321-2:2013 with, IEC 62321-3-1:2013, IEC 62321-5:2013, IEC 62321-4:2013, IEC 62321-6:2015, IEC 62321-7-2:2017 |
| References to the relevant harmonised standards used, or references to the specifications in relation to which conformity is declared: | EN 61000-3-2 |
| Additional information: | The appliance is intended exclusively for food storage |


- Original instructions
- Description
- Safety Warnings
- IMPORTANT SAFETY INSTRUCTIONS READ CAREFULLY AND KEEP FOR FUTURE REFERENCE! PAY PARTICULAR ATTENTION TO ALL FIGURES ON ILLUSTRATION PAGE!
- Electrical safety
- Operations
- Display elements
- Notes:
- Description of working principle of UVC photocatalyst
- Photocatalyst operation instructions
- UVC REPLACEMENT INSTRUCTION
- NOTE:
- After use
- Cleaning
- Defrosting
- Storage
- Troubleshooting
- Warning!
- Disposal
- Environmental Protection
- Warranty
- Light
- DRY AGING KÜHLSCHRANK MIT GLASTÜR
- DK
- DE
- EU DECLARATION OF CONFORMITY
Brand : Scancool
Model : DA 320 X
Category : Refrigerator